|
|
| Sammio Builds and discussions Sammio bodied car builds and specials |

15th August 2014, 18:22
|
 |
Senior Member
|
|
Join Date: Feb 2012
Location: Wembley, London
Posts: 5,056
|
|

Scottie - Cheers mate. 
Whilst no kit currently on offer from Ribble/Sammio, Tribute or Miglia will ever require this much fabrication work.
I do hope that potential builders realised that someone with no previous experience of welding or fibreglass can learn.
I can only laugh at myself for thinking the work required to modify the original Spyder kit might be beyond me.  Mr T
Mr T - You have no idea how much I want to have a photo of me in my car parked next to something "modern". 
Your pragmatic approach to what actually matters when you have got the car on the road is also a big help to me.
Even if the body shell isn't perfect, it will still stand out from the crowd on that initial viewing and that is what counts.
Swifty - Thanks for the feedback, I'll keep an eye out for a photo of the back of your car for comparision.
I have now fixed quite a few of the original MkI problems and can live with the knock on impact of those fixes.
- - - - - - - - - - - - - - - - - - - - - - - - - - - - - - -
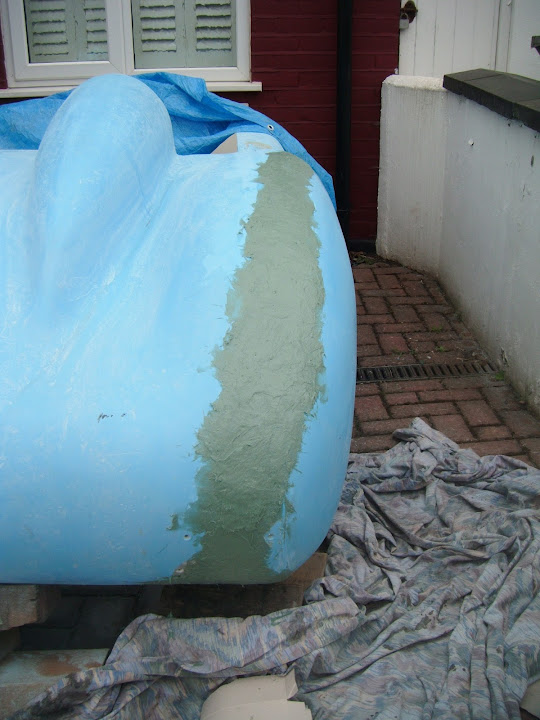
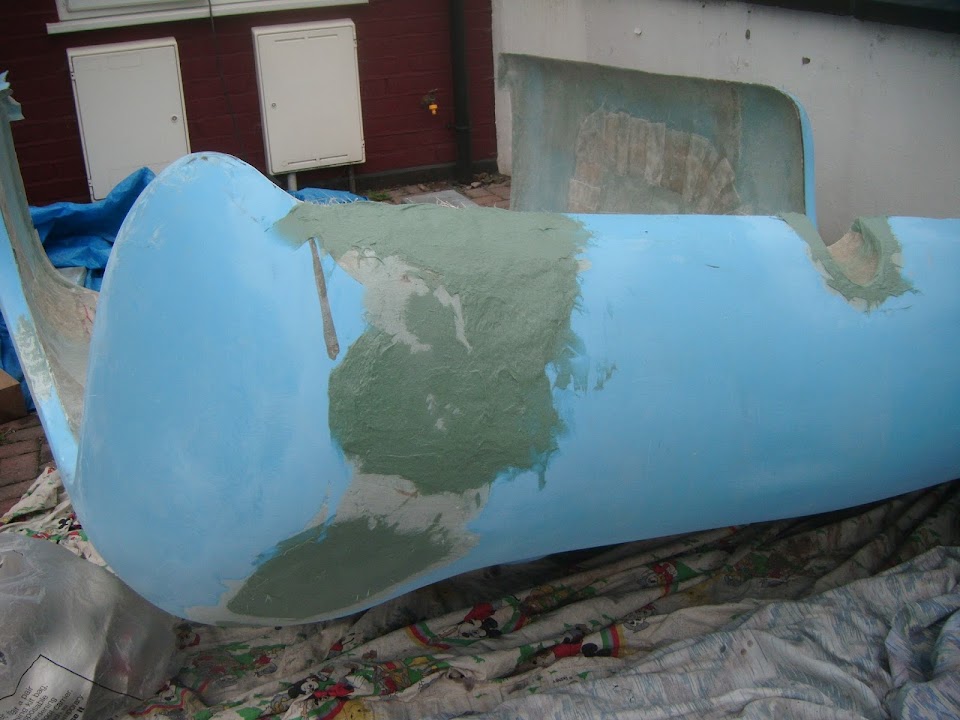
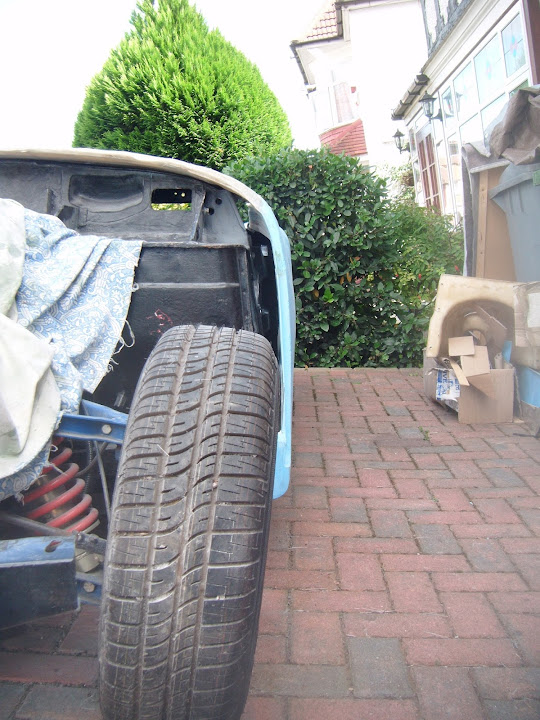
Taking Shape - Part 1
After cleaning up the bracket screw holes and the surrounding areas, I started 'Round 1' of the applying fibreglass filler.


This covered the holes and lower section of the original gaping wound.
Filler Round 2


This was actually the last of the filler in the tin, so I just made a start on the latest gash.
Then it was time to open a fresh tin and move on to Round 3 to finish the job.
Note:
I had to leave the three holes that had supported the mesh former until I 'glassed the inside edge.
This time I remembered Mac's advice about starting to sand the filler before it is fully hardened.


While I had the long board and sanding block out, I tackled the flash lines at the bottom of the arches.


So after my first session on the car, things were slowly taking shape.


End of Part 1...

|
15th August 2014, 18:23
|
|
Senior Member
|
|
Join Date: Feb 2012
Location: Wembley, London
Posts: 5,056
|
|
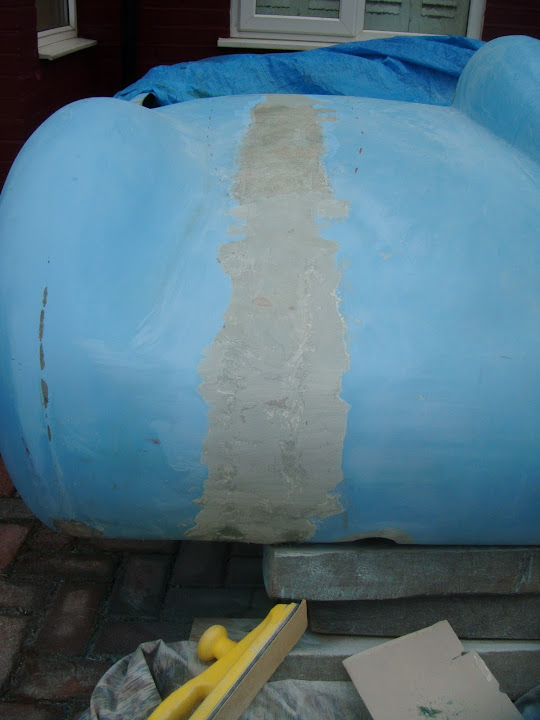
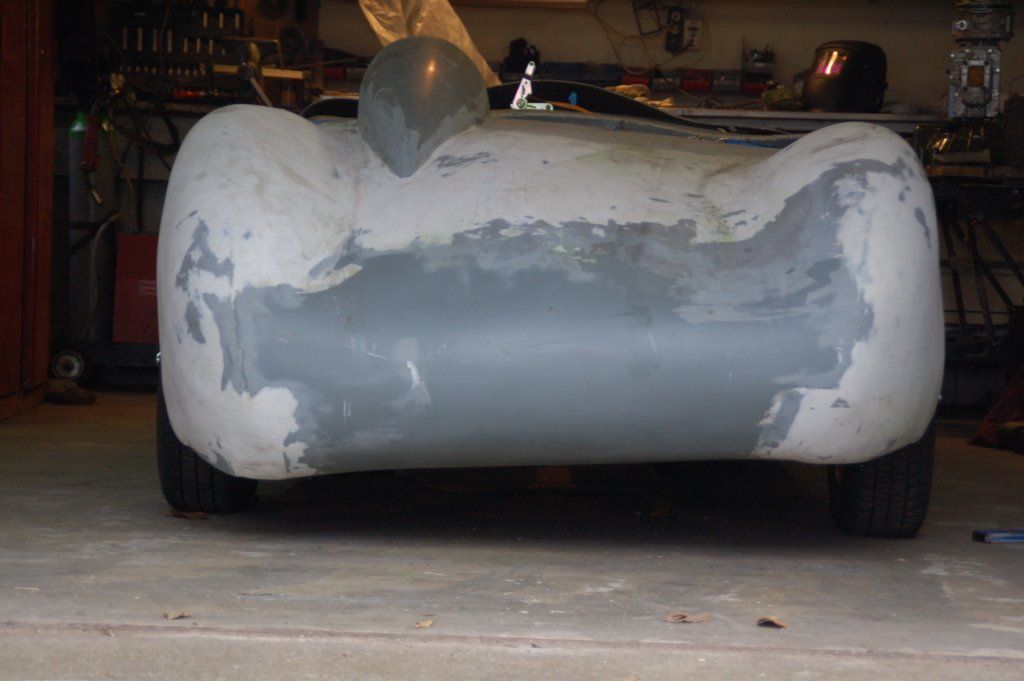
Taking Shape - Part 2
It was a while before I could get back outside to do some more work.
I started by trimming the corner that I had build back up with fibreglass yesterday.


Which left the back edge looking like this.

Then it was time for a round of fibre glassing to seal up the last 3 holes and re-enforce some areas.

Then it was time for Filler Round 4.

Again, once that had set sufficiently, it was also sanded down.

Which had left the rear end looking like this.


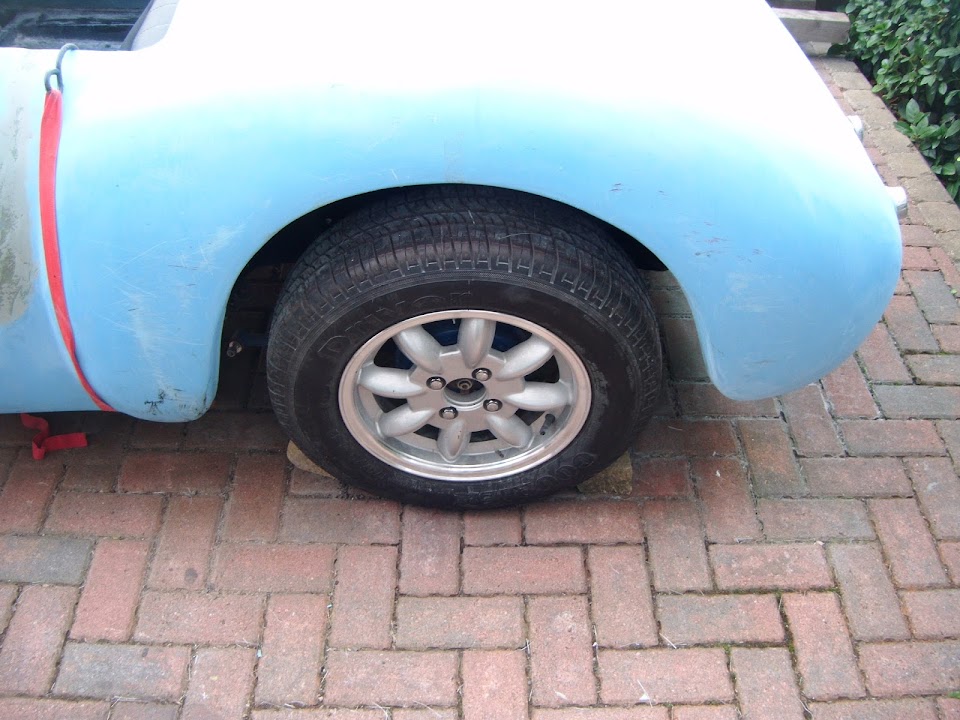
Propping the body up in the middle exaggerates the "droop" at the ends a little bit & the angle of my sloping drive doesn't help.
But this is as close as I am going to get, without doing a lot of extra work, for what is really a marginal gain.
So following on from the replies at the start of this post, I can live with this and move on to the next problem to fix.
( I will come back to finish the body work when the shell is finally moved into the back garden. )
Until next time, take care, Paul. 
PS
All these photos of the back of my car did remind me of the way Michiel's car (#47) left the factory...

|
15th August 2014, 18:48
|
|
Senior Member
|
|
Join Date: Dec 2013
Location: thurcroft, Rotherham South Yorkshire
Posts: 196
|
|
your work looks excellent, you must have been brave to chop your body up as you did. looks from the photos like it will work out very well for you......well done. you must feel a lot happier with it now. it's a vast improvement.
|
15th August 2014, 20:09
|
 |
Senior Member
|
|
Join Date: Dec 2013
Posts: 839
|
|
Paul the back end looks 100% better, great work, you must be proud of the way it has turned out and another skill in the hat. It looks very neat and symmetrical, i hope i have as much success as you.
|
16th August 2014, 07:46
|
 |
Senior Member
Enthusiast
|
|
Join Date: Dec 2006
Posts: 1,130
|
|
Looking good and again, well done  |
16th August 2014, 16:12
|
|
Senior Member
|
|
Join Date: Feb 2012
Location: Wembley, London
Posts: 5,056
|
|
Thurcroft Flyer, Swifty & Micky1Mo - Thanks chaps.
I do take pride in all the positive feedback, as it does feel like I have improved the back end of the car.
However, if you look closely, the distance from each tail pipe recess to the outside of the corresponding arch is different.
With the driver's side a bit wider than the equivalent distance on the passenger side.
In my defence, I keep coming back to this photo, which has haunted me since the day Mac first posted it.
The only way to create real symmetry would be to cut one arch off completely.
Then build a mirror image of the remaining arch from scratch, which is simply beyond my limited skills.
Which is why I have just made a few simple cuts, although one was quite major, and stitched things back together as best I could.
The cold reality was that I couldn't fix one problem, without creating another, so it was really a damage limitation exercise.
Still, I can certainly live with the fact it is not perfect, as it should still pass the "supermarket car park test".
- - - - - - - - - - - - - - - - - - - - - - - - - - - - - - -
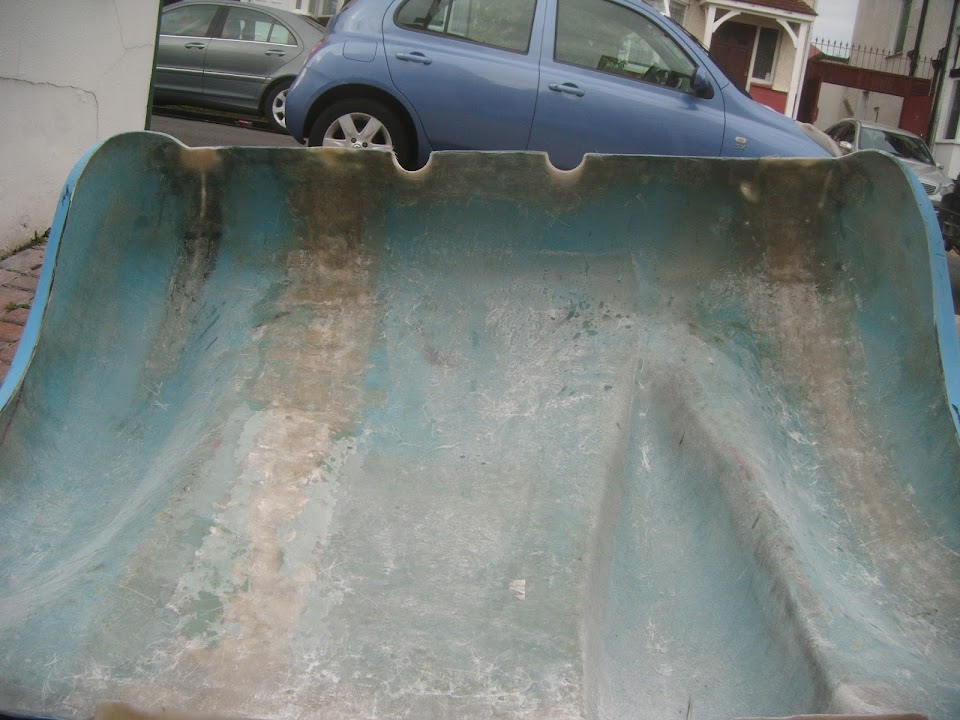
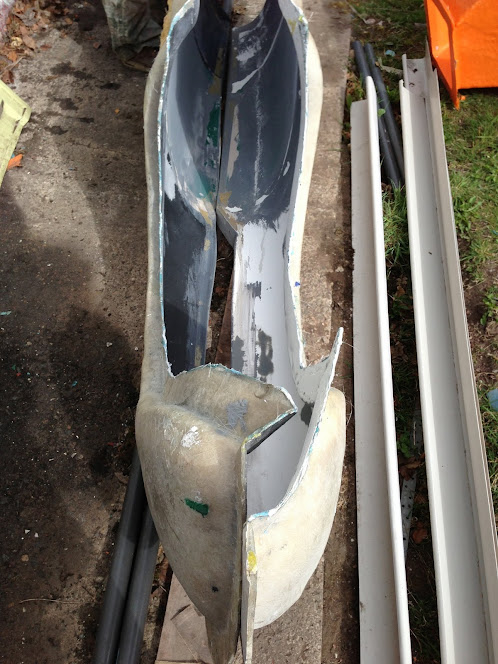
Consolidation - Part 1:
I spent most of the day tidying up the house, garden & driveway.
But I did manage a bit of mock up work after my wife helped me put the body shell back into place.
Then I put some plasticine on the front & rear of the frame work to represent the bonding paste.


And some cardboard on top of the tail pipes to level up the rear of the body shell.

Next I used some straps to hold the sides of the body shell into place, as they tend to push outwards.


With one corner of the scuttle weighed down, this was a pretty good match for the final body shell position.
Thankfully the sides of the bodywork do not "stick out" when viewed from the front.


Here is the view of the "back & sides"


Plus the rear arch openings as they currently stand.

End of Part 1...
|
16th August 2014, 16:13
|
|
Senior Member
|
|
Join Date: Feb 2012
Location: Wembley, London
Posts: 5,056
|
|
Consolidation - Part 2:
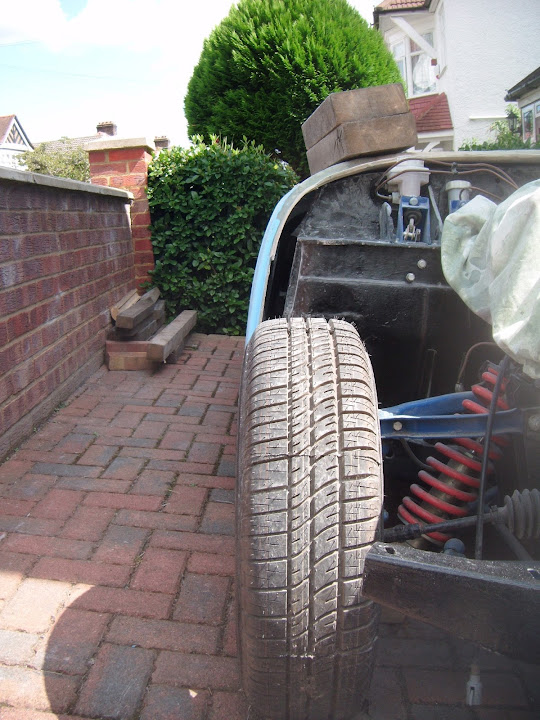
I have also been testing out the driving position and the sides of the cockpit touch my shoulder / upper arm.
So I have now marked out the next round of trimming to give me the widest possible cockpit opening.


Note:
On the driver's side, I may need to fit the plywood panels inside the framework to give me enough room.
Thankfully taking the cockpit sides out further will also remove some of the problem areas I had left to deal with after the doors were sealed.

Although I may build up the depth of the scuttle area before I trim off the cockpit sides.
With everything tidied up and the drive washed down, the driveway was at least looking a bit more respectable.

- - - - - - - - - - - - - - - - - - - - - - - - - - - - - - -
DVLA Update
IanA has just got his V5C back for his Tribute Z300S Barchetta without the need for a re-body inspection.
So it appears a description of the work, some photos & relevant invoices are the key in the current DVLA approach.
( Although I am still waiting for that to be confirmed in writing before I start counting my chickens. )
- - - - - - - - - - - - - - - - - - - - - - - - - - - - - - -
Next Steps:
It looks like I may be diverted onto other chores for a few days. 
But I am actually feeling pretty good about the body shell as I can now see a way forward.
There is still a lot of work to do to construct the rest of the scuttle & wrap around wind deflector.
However, the fact that filler does such a good job of hiding the butchery is very reassuring.
Although the thought of just how much preparation work will be required for paint is quite scary.
So until next time, take care, Paul.
|
16th August 2014, 17:30
|
|
Senior Member
|
|
Join Date: May 2013
Posts: 2,161
|
|
Hey Paul, I would not worry too much about minor symmetry defects, My body shell looks pretty good from most angles, but if you take a tape measure to it!!! Whoooaaa!!!
Inch out here, inch higher there, this arch wider than the other, bonnet not central, the list goes on.
But I don't care, because it looks right!
You have done a superb job with that shell, and providing it does not crab along at 45 degrees, or rub any of the tyres, its gonna look a million bucks worth!
|
16th August 2014, 19:42
|
|
Senior Member
|
|
Join Date: Jun 2011
Location: birchington, kent
Posts: 1,769
|
|
Evening paul, i think the work you have done to the body has sorted out the major discrepancies and it now looks fine - nothing stands out, sorted.
|
17th August 2014, 07:12
|
|
Senior Member
|
|
Join Date: Feb 2012
Location: Wembley, London
Posts: 5,056
|
|
Scottie & Gary – Cheers gents.
The fact the overall impression looks “about right” will certainly do for me.
Especially after Swifty posted a photo of the rear end of his Navigator (Cordite MkII).
http://www.madabout-kitcars.com/foru...&postcount=161
Sometimes it is hard to see the wood for the trees when you are in the middle of a build.
But as Mister Towed wisely says, the general public will not notice the detail things that we see.
Cheers, Paul.
|
18th August 2014, 17:56
|
|
Senior Member
|
|
Join Date: Feb 2012
Location: Wembley, London
Posts: 5,056
|
|
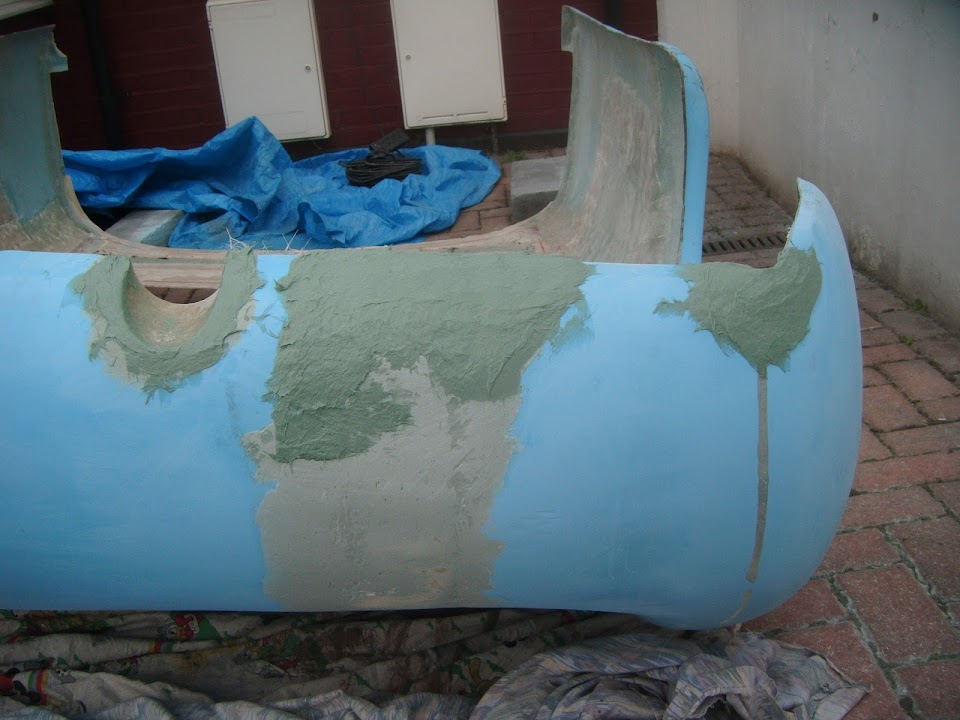
Starting to get the hump...
The weather appears to be slowly turning away from summer, so I have decided to press ahead with more of the body shell work.
As when the temperature outside seriously starts to drop, it will be harder for me to work with fibreglass.
So I dug out the spare hump as it is clear that the body shell will need some very minor surgery before I can fit this.
The angle of these photos don't really help, but basically the driver's corner is pretty much flat.
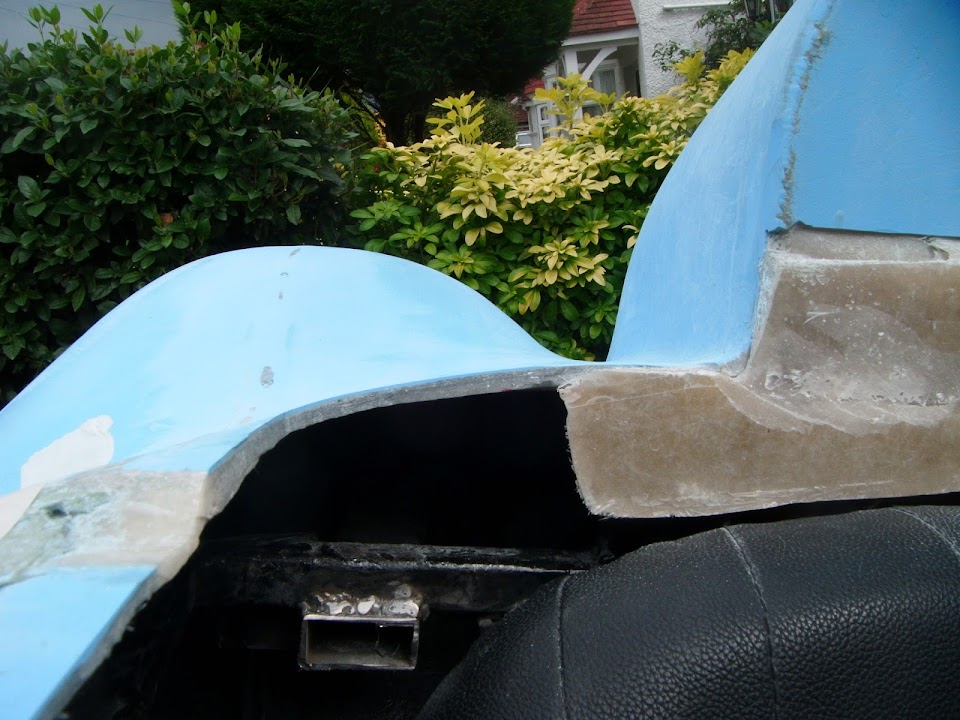
Whereas the passenger side corner rises up from the outside inwards.

In addition, if I take a straight line (I know, what was I thinking  ) across the driver's hump.

The height difference between the start of the hump on the outside and the end of the hump on the inside is about the depth of the ruler.
Extending that line across to where the passenger hump will go gives me this.

The right hand edge of the ruler is where the hump will start and the body is about half an inch higher at this point.

If you look down the rear of the body shell, you can see this difference in profile continuing.
So there are a number of things I need to do to make the passenger hump fit and be a half decent match for the driver's side.
I tried to add a slit in the body shell so I could bend the area around outside corner down to a level similar to the driver's side.

But I think I will simply cut this section out completely and re-attach it, as the slit would need to be miles bigger to get the flex I need.
Given the two sides of the body shell do not have the same profile it was a real pain to work out how to make the hump fit.
I decided to take my time and do lots of small trimming, rather than make any big cuts and mess it all up completely.
But this was a seriously time consuming process and in the end I ran out of both time and weather.
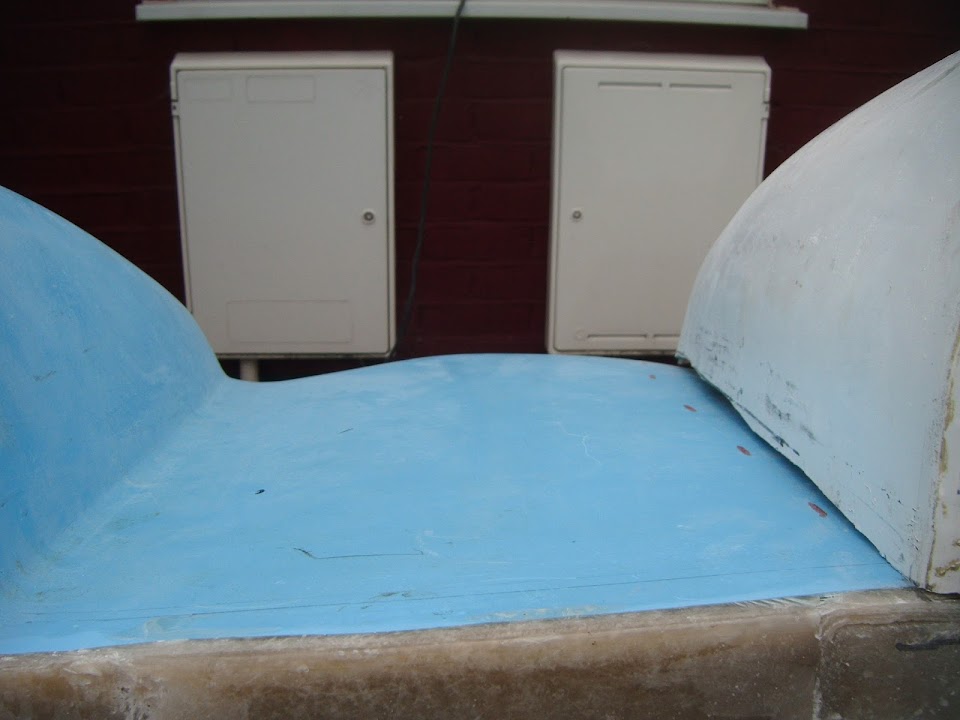
So I have only managed to go from this...


To this...


So there is still a bit of trimming to do on outside edge of the hump.
But that will allow the face of the hump to rotate clockwise and "drop" into position.

Note:
The flat edge along the bottom of the hump face should sit on the top of the body shell.
At which point it will be there, or thereabouts, and I can start making the brackets to hold it in place.
Until next time, take care, Paul.
|
18th August 2014, 19:02
|
 |
Senior Member
|
|
Join Date: Jul 2011
Posts: 5,328
|
|
I'd just stick with the one hump Paul.
The body shells aren't symmetrical, full stop. The single hump hides the asymmetry by emphasising it, if that makes sense. If you look at the horseshoe trim around my cockpit edge you'll see that it's not even, but swells up towards the passenger side then narrows down into the cockpit corner -
Doesn't look too shabby on the car though... |
18th August 2014, 21:56
|
|
Senior Member
|
|
Join Date: May 2013
Posts: 2,161
|
|
I'd go with that one Paul, another hump may draw attention to the asymmetry, as Mr Towed wisely says!
|
19th August 2014, 07:56
|
|
Senior Member
|
|
Join Date: Feb 2012
Location: Wembley, London
Posts: 5,056
|
|
Mr T & Scottie – I know what you mean about the positive visual impact of the single hump.
I only highlighted the variations between the two sides in the context of fitting the spare hump.
In other words, I couldn’t simply measure the driver’s hump & cut the passenger one to match.
You are also right to say that the second hump will make some symmetry issues more obvious.
But at this point in the build I can’t worry about this anymore, or the car will never be finished.
Here are my main reasons for wanting to fit the second hump:
- Passenger comfort
- Hiding a chunk of the “cut & shut” repair work
- Adding a bit of balance to the boot access panel (I hope)
Mr T – Your cockpit trim does confirm that many of these issues “disappear” in real life.
I also remember how your body shell mods were transformed by a single coat of primer.
So I will put my faith in the healing power of paint and see what I end up with.
Cheers, Paul.
|
19th August 2014, 15:26
|
|
Senior Member
|
|
Join Date: Feb 2012
Location: Wembley, London
Posts: 5,056
|
|
Mr T & Scottie - Re-reading my reply above, I hope it doesn't come across as ungrateful in any way.
As you two, together with Mac, have been the biggest supporters of my build and I really appreciate it.
- - - - - - - - - - - - - - - - - - - - - - - - - - - - - - -
Really getting the hump now...

Mr Miyagi say... "Hump on, hump off".
Today's effort was a very slow and methodical trim / grind exercise as I tried to fit the spare hump.
Although I had to take a break when a delivery of fence panels arrived.
( To replace the old ones that didn't get blown over during last year's storm. )

I had to brush the panels down before my wife & I could carry them through the house into the back garden,
Which meant I added sawdust and wood splinters to the pile of fibreglass dust & splinters already on the drive.
Eventually I had pretty good fit when viewed from the front.

But the back of the hump was sitting a little too high and required some more work.

I found a good use for some of the splinters as I propped up the body shell until it was level (ish).

This made it a little easier to judge the hump by eye, but my sloping drive really doesn't help.
After yet more testing & trimming I reached a position I was happy with.
Although the front view will improve when I sort out this small section so it is level with the bottom of the hump.

But I will not start cutting this, without the body shell back on the frame to check for any clearance issues.
So for now, this is what it looks like.

And this view will also improve when I have completed and trimmed the rear cockpit lip.


The good news is the spare hump retains the 'deeper on one side, compared to other' look of the driver's hump.

But the really good news is that I think the overall impression of the rear end looks pretty good.

It may not pass a close inspection with a tape measure, but it is certainly good enough for me.
Also this is the area of repair that the hump will cover.

That was as far as I managed to get as by now the storm clouds were back.

Thankfully I had everything everything away before the rain arrived.
Cheers, Paul.
|
19th August 2014, 15:34
|
|
Senior Member
|
|
Join Date: Jul 2011
Posts: 5,328
|
|
Quote:
Originally Posted by Paul L

Mr T & Scottie - Re-reading my reply above, I hope it doesn't come across as ungrateful in any way.
|
Absolutely not Paul - it's your car you have it your way, I just like to chip in with my two new pennies worth occasionally.
You're actually getting to that scary part where it'll all suddenly come together and you'll have a finished car before you know it. What the hell will you do with your time then? |
20th August 2014, 06:55
|
|
Senior Member
|
|
Join Date: Apr 2012
Posts: 1,163
|
|
Paul,
As always good work, are you planning to change careers from bean counter to fibreglass and bog artist?
A suggestion if I may? the cut out on the rear deck that the side of the hump drops into will need some substantial reinforcement to avoid cracking in later life.
Other than that you've got this lark cracked mate!
TTFN
Mac
|
20th August 2014, 08:46
|
|
Senior Member
|
|
Join Date: Feb 2012
Location: Wembley, London
Posts: 5,056
|
|
Mr T - Feel free to chip in any time, your comments are always welcome.
Despite a "To Do" list that stretches across several pages, I do feel I have really broken the back of this project.
Although, given how long the simple "trim spare hump" task actually took, I still have a long way to go.
But once I get the bulkhead & rear frame / arches off for the last time, I will actually be assembling the car.
Then all the prep / mock up work on things like the dash, heater, wiring, etc. should really start to pay off.
Mac - Thanks for the support, I am trying hard to learn from your build thread.
Unfortunately, I need to return to bean counting shortly, which will slow my build progress down.
Your suggestions are always welcome and I will definitely be reinforce the area around the "slot".
I just need to get the body shell back on the frame so I can check for any clearance issues before I start.
Right I've got to start painting fence panels before I can play on the car....
Last edited by Paul L; 20th August 2014 at 20:11..
Reason: Typo
|
20th August 2014, 18:04
|
|
Senior Member
|
|
Join Date: Feb 2012
Location: Wembley, London
Posts: 5,056
|
|
Slow Progress - Part 1:
My wife & I actually started painting some fence panels last night & by lunch time we had made good progress.
So when my wife had to go out, I was given time off for good behaviour.
She also helped me put the body shell back into position & this highlighted a problem with the hump.


Yes, my OTT seat belt anchor plate mounting was completely in the way. 
This was Mac's equivalent...

So I decided to simply cut off some of the excess box section.


I will tidy the cuts up when I take the frame off, but there is nothing in the way of the hump now.

Note: There was yet another round of tedious testing and trimming before the hump finally sat nicely. 
I also remove the excess box section on the other side.
You might remember this bracket was also in the way, resulting in a notch in the fibreglass.

Next I trimmed the cockpit edge on the passenger side.


This allowed me to mark up where I am going to cut and re-attach a section of the body shell.
( This takes account of the curves of the rear arch. )

I also roughly laid out where the filler cap needs to go and an option for my boot opening.

I will need to make a final decision on where this is going before I fix the hump in place.
As I will be cutting across the two humps and don't want to hit a fixing bracket when I do.
And the hump fixing brackets were the next job....
End of Part 1...
|
20th August 2014, 18:05
|
|
Senior Member
|
|
Join Date: Feb 2012
Location: Wembley, London
Posts: 5,056
|
|
Slow Progress - Part 2:
I recycled some of the last off cuts from the lowered floor pans.


Then I laid them out on the body shell to get a rough idea of where they would go.

When I finalise the line for the boot opening, I can space the brackets either side of the cut to match.

Then it was simply a case of clamping the metal and hitting it with a hammer.


Obviously the final shaping of the brackets will take place once they are fixed to the body shell.
I put some etch primer on the inside faces of the brackets.

But I won't go the outside faces until I've drilled the holes for the rivets to hold them to the body shell.
( That way I wont mix up which way round they go. )
I had one bracket left over as there isn't enough room at the very end of the hump for a bracket on each side.
So I used that to test rivet the bracket to a section of fibreglass.

Unfortunately, due to the extra matting I used inside the spare hump, it is a bit thicker than this.
So I need to get some longer rivets for the job.
As it happened, by now, the dark clouds had gathered, so I started to pack up.
At which point I realised that I need to modify my wooden cover for twin humps.

I had to nip to Halfords for an indicator bulb for my wife's car & picked up this box of rivets while I was there.

Not use I will ever use all 750 rivets, but I didn't want to waste any more time looking for them.
At least they have plenty that are longer than the ones I have already got.

I will do another test with some thicker fibreglass just to make sure these are OK to use.
Now I just need to agree where the boot opening is going and take it from there.
So until next time, take care, Paul.
|
|
Currently Active Users Viewing This Thread: 5 (0 members and 5 guests)
|
|
|
 Posting Rules
|
You may not post new threads
You may not post replies
You may not post attachments
You may not edit your posts
HTML code is Off
|
|
|
All times are GMT +0. The time now is 02:36.
|


 Linear Mode

