|
|
| Sammio Builds and discussions Sammio bodied car builds and specials |

17th September 2014, 06:15
|
 |
Senior Member
|
|
Join Date: Sep 2011
Posts: 1,446
|
|
Quote:
Originally Posted by Alpha

Not to give you a panic attack, Paul, but I'm quite curious to learn how you're going to mate the bonnet to your new scuttle!
Baz
|
didnt he have a template??? |
17th September 2014, 07:17
|
 |
Senior Member
|
|
Join Date: Feb 2012
Location: Wembley, London
Posts: 5,056
|
|

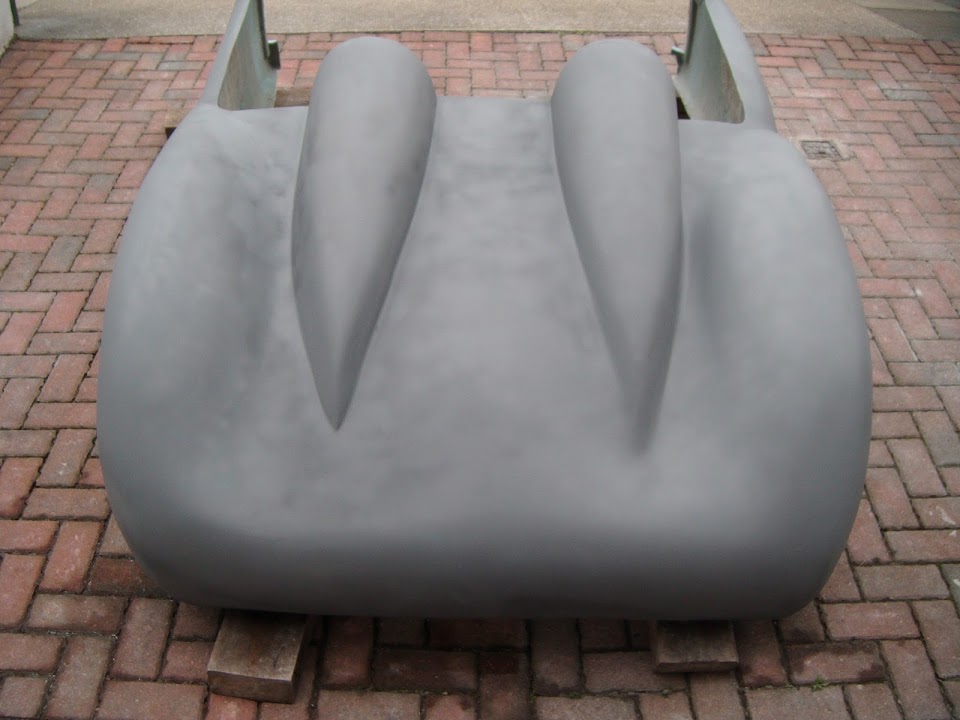
Gary - Smooth - Yes, Perfectly Straight - No.  Mr T
Mr T - Fingers crossed that most of the body shell will be in one colour later today. 
And it is good to see your avatar photo now has a finished car in it.  RedRatBike
 - I hope to tackle all the detail "prepping for paint" work at a later stage.
At this point I just want to get a better idea of what I am up against in the quest for a half decent looking car.
Finally the template was for the old scuttle shape, which I just couldn't make work, so see answer below.
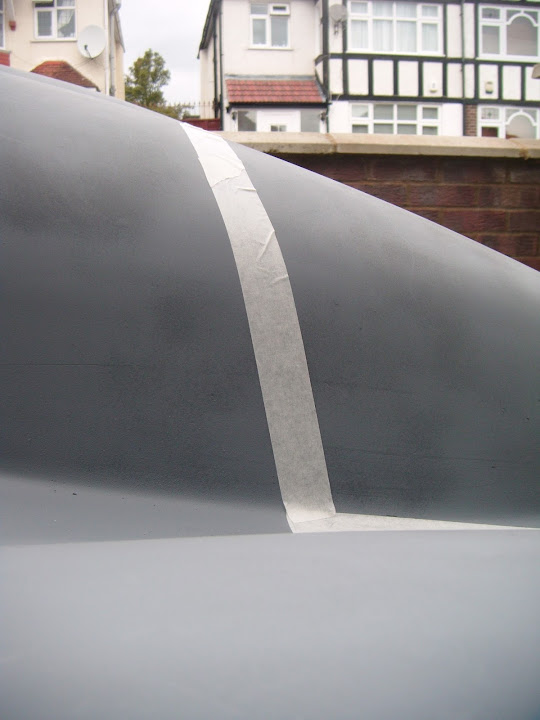
Alpha - Don't worry Baz, I've done enough worrying about the bonnet for the both of us. 
The basic plan is to cut a lot of slits in the back end of the bonnet is the same way that Micky1Mo did.
( Although I will not be adding the section of Spitfire bonnet in his photo, because I've extended the scuttle forward. )
So something like this...

However, all this depends on how Mac's bonnet hinge works and what I have to do to copy it.
As I may end up extending the body shell in the same way that Mac did.

In which case, I would cut the slightly curved bonnet lip in the scuttle to give me a straight edge.
( The 'curve' was required to join up the mis-matched sides of the body work. )
And let's not forget I still need to slice the bonnet in two, again like Mac.
( This ensures the driver's front wheel is covered by the bonnet arch. )

So clearly there is still a lot of work ahead of me, but at least I will enter that phase feeling good about the body shell work.
Anyway, hopefully I will be back later with some etch primer on...

|
17th September 2014, 12:41
|
|
Senior Member
|
|
Join Date: Feb 2012
Location: Wembley, London
Posts: 5,056
|
|
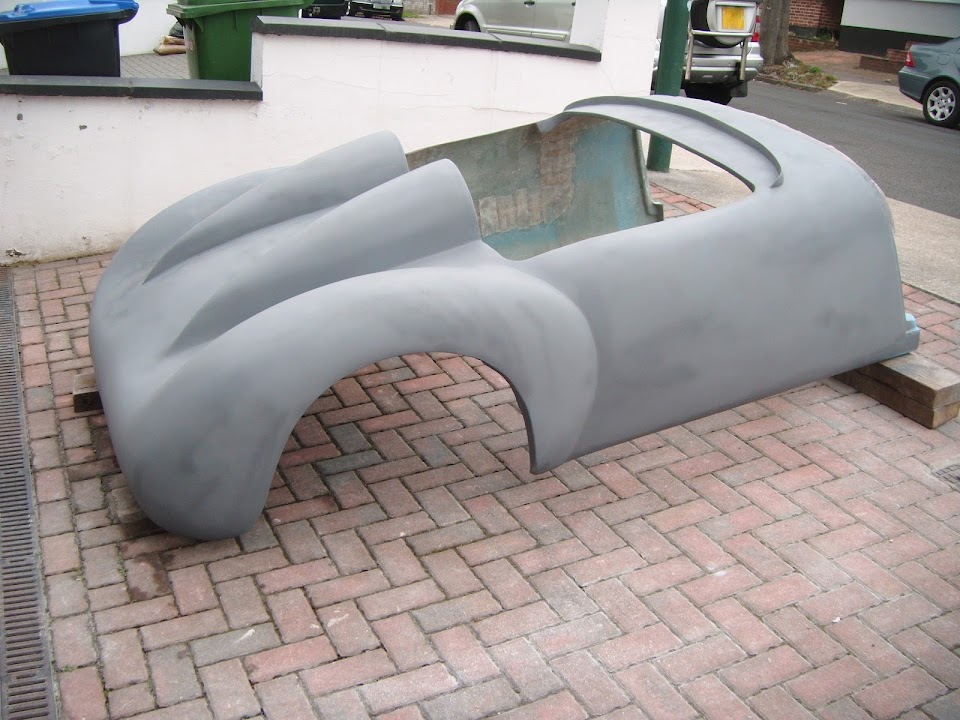
Then, as if by magic,
.. the shop keeper appeared.
Sorry, wrong programme.
No, today's magic trick is the power of paint.
Any part of the body shell that hadn't not been worked on (and there wasn't much ) was given a light sanding.
Then the whole shell was cleaned with acetone and left to dry before I started spraying the etch primer on.
So without any further ado, allow me to present my body shell as she looks now...


Unfortunately, all the "Before" photos are now on a different page, so here is a copy of one for comparison.
Although I was particularly pleased with this transformation.


Overall, I am amazed at how well the primer was able to "heal the wounds".
To "borrow" an expression I read on another forum, the body work has a good 50/50 finish...
" Good at 50 feet, or 50 mph!"

I've watched all the work Swifty has to do in order to put some symmetry into his body shell. 
But I'll live with all the symmetry issues that remain on my body shell in order to finish the car at all.
Especially as the primer has highlighted all the detail work I will still need to do before paint.
It might be a few days before I can do any more work on the car, but I am still a happy bunny. 
Until next time, take care, Paul. 
|
17th September 2014, 12:55
|
 |
Senior Member
|
|
Join Date: Jul 2011
Posts: 5,328
|
|
That's looking much better Paul. Top coat on by Saturday then?
|
17th September 2014, 13:06
|
|
Senior Member
|
|
Join Date: Jun 2011
Location: birchington, kent
Posts: 1,769
|
|
Looks lovely, all one piece now.
|
17th September 2014, 18:20
|
 |
Member
|
|
Join Date: Dec 2013
Posts: 37
|
|
what the feck
|
17th September 2014, 19:58
|
 |
Senior Member
|
|
Join Date: Dec 2013
Posts: 839
|
|
Paul that body looks totally different now, a lick of paint is a great moral booster and i am looking forward to putting the first coat of undercoat on.
Keep up the hard work, the light at the end of the tunnel is beginning to shine a little brighter.  |
18th September 2014, 07:27
|
|
Senior Member
|
|
Join Date: Feb 2012
Location: Wembley, London
Posts: 5,056
|
|
Mr T - Thanks, although I might just leave the car in primer & claim it is a rolling restoration. 
Despite the amount of work required before painting, I am looking forward to some real colour.
Gary - Cheers, I can hardly believe the transformation myself.
It really supports what Mr T often says about people seeing the car on the road...
They see what the car has ended up looking like, not the trials & tribulations to get there.
UFO - Thanks, but will you behave, you are making me blush.
At one point I did consider handing the whole project over to a professional to finish.
As I really did not think I would be capable of tackling the major problems I faced.
So I love the fact that, against all odds, I have managed to get to this stage by myself.
( Although I couldn't have done it without the help & support of this Forum. )
Swifty - Cheers, I must confess, the boost in morale was just what I needed.
Although some areas need some more detail work, other areas as effectively done.
I'm also looking forward to seeing the first coat of paint on your shell.
As I can now appreciate the extra work you are putting in to reach such a high standard.
- - - - - - - - - - - - - - - - - - - - - - - - - - - - - - -
Early Start:
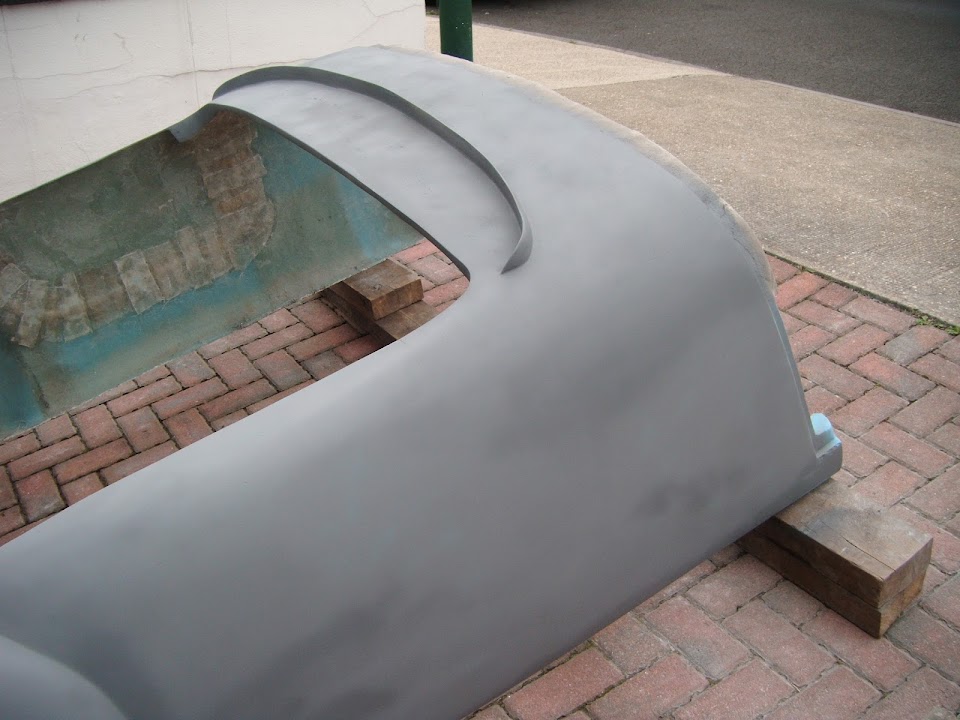
With my wife's help, I lifted the body shell back into place first thing this morning.


Note:
The leading edge of the driver's side rear wheel arch will be "tucked in" when the body shell is bonded on.
Overall, I am still very happy with how this has turned out, as it retains the essence of a '50s racer.
I really admire the high standards that Swifty & Mac are working to on their Navigator (Cordite Mk II) builds.
But I am still happy with my previous decision to pick my battles, in order to win the war.
The next major job on the body shell will be to cut out a boot lid / access panel.
Because I have the longer, MkI, humps, this will present a bit of a challenge.
However, these days I do feel a lot more confident about taking this sort of task on.
Even if I am not 100% sure how it is all going to work when I start.
Unfortunately, a ton of other chores and hosting another Bar-B-Q this weekend have to come first.
So until next time, take care, Paul.
|
18th September 2014, 07:55
|
 |
Senior Member
|
|
Join Date: Dec 2011
Location: Devon
Posts: 550
|
|
What an amazing transformation you have made to the tub. You are definitely not letting this build get the better of you! I think you have a lot of followers like me that tune in every day to see how you are getting on. Enjoy your Bar-B Q and look forward to the next instalment.
|
19th September 2014, 07:10
|
|
Senior Member
|
|
Join Date: Feb 2012
Location: Wembley, London
Posts: 5,056
|
|
Froggyman - Thanks, I really do appreciate the interest / support my build has.
The way I look at it, if an accountant with no previous welding / fibre glassing experience can do this, any one can.
Especially if they try to build any kit that isn't an original, Mark 1, Sammio Cordite!
Following Scottie's build "next door" it is clear that prepping for paint is going to be a complete nightmare.
But I'll cross that bridge when I come to it, as there is plenty of other work to do before then.
Cheers, Paul.
|
19th September 2014, 08:13
|
|
Senior Member
|
|
Join Date: Jun 2011
Location: birchington, kent
Posts: 1,769
|
|
Paul, how much fibreglass matting have you used? Metre squared...
|
19th September 2014, 09:44
|
|
Senior Member
|
|
Join Date: Feb 2012
Location: Wembley, London
Posts: 5,056
|
|
Gary - I use the 600g weight of CSM (Chopped Strand Matting) and initially got a 5kg roll, which works out to be approx. 8.3m squared.
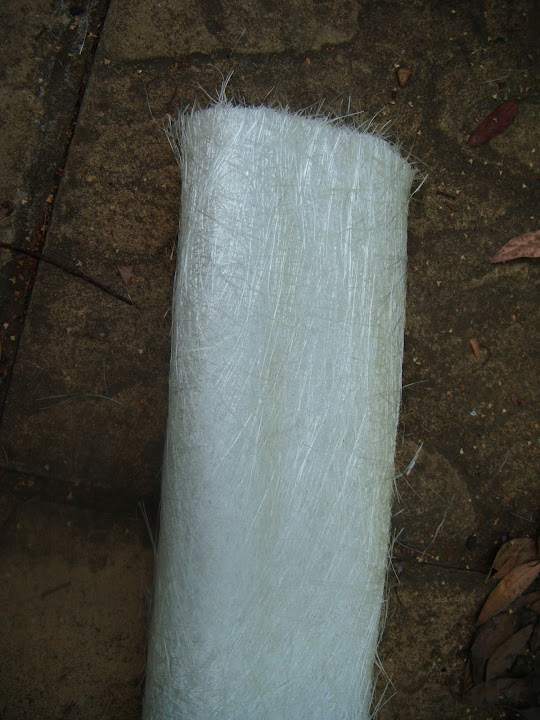
Although I had quite a bit of wastage along the bottom edge of the first roll due to me storing it vertically for over a year before using it.
I'm now on my second 5kg roll, with the following work still to do:
- Boot lid drainage channel (+ re-enforcement of area & sealing off hump cuts)
- Cockpit interior
- Bonnet cut & shut
So by the time I've finished I doubt there will be much of the second roll left.
Having said that, clearly I have done quite a bit of fibre glassing work on this project.
Hope that helps, Paul.
|
20th September 2014, 20:03
|
|
Senior Member
|
|
Join Date: Dec 2013
Posts: 839
|
|
Paul can you tell me where you bought the mini door latch from that you mention in a miglia thread Door Locks/Catches?
|
20th September 2014, 20:32
|
|
Senior Member
|
|
Join Date: Feb 2012
Location: Wembley, London
Posts: 5,056
|
|
Swifty - The door catch came from the Stoneleigh Kit Car Show a few years ago.
AndyP57 picked them up for me, as he had the same set for his Cordite.
So I'm afraid I don't know the supplier. 
|
22nd September 2014, 18:44
|
|
Senior Member
|
|
Join Date: Feb 2012
Location: Wembley, London
Posts: 5,056
|
|
Dave - Nice bit of detective work.
- - - - - - - - - - - - - - - - - - - - - - - - - - - - - - -
Whilst I haven't had the chance to work on the car recently, I have been able to put a bit more thought into a few areas...
Boot Lid / Access Panel:
I have been following the work Swifty has been doing on his Navigator boot lid.
I also liked the way Andreas used DZUS fasteners on his boot lid "next door".
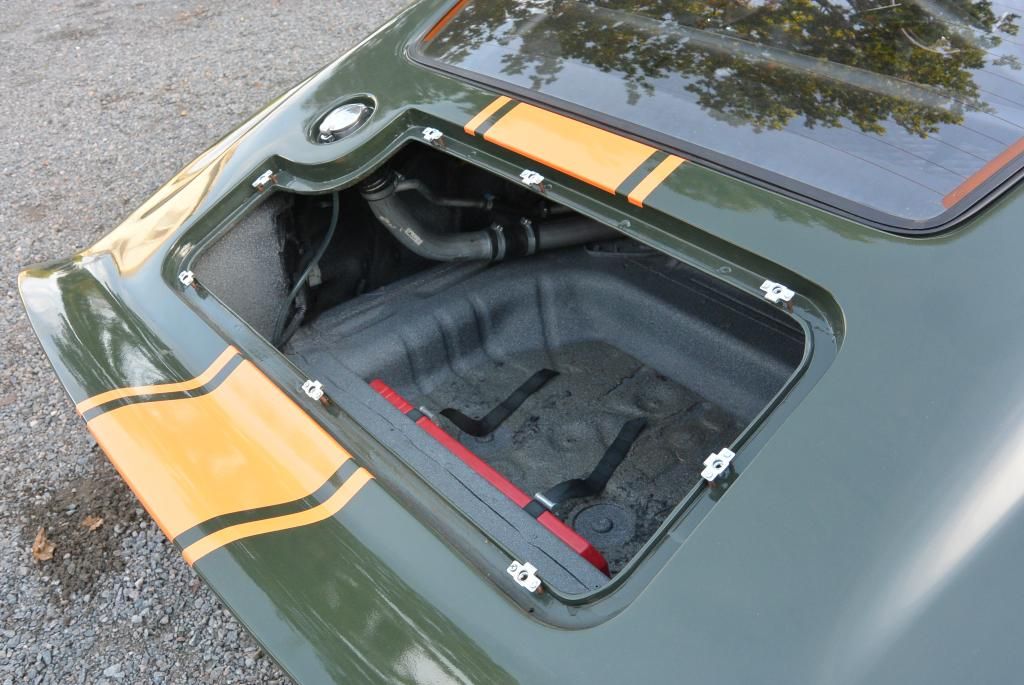
Due to the fact that I have the longer "MkI" humps, my boot lid needs to cut through them.
In my head there are two ways of doing this:
- Attempt to make a straight vertical cut across the humps
- Make the cut at an angle "going forwards"
I've tried to draw these two options below...

I think the angle works best, as depending on how the car sits, the vertical line might be a bit out.
Whereas, a deliberate angle would always look like it was meant to be that way.
While looking for more images of how this sort of thing had been done on other cars I found this.

So if that approach is good enough for the Jaguar Project 7, it is good enough for me.
- - - - - - - - - - - - - - - - - - - - - - - - - - - - - - -
Prepping For Paint:
Lots of good advice on Scottie's build "next door" about painting and I had a real "deja-vu" moment.
Because I had just re-read Mister Towed's build thread to see how he had prepared his car for paint.
Then shortly afterwards, Mr T posted a summary of what I had just read on Scottie's thread, spooky.
Clearly there is no such thing as a short cut if you want to get a decent finish.
Allow me to summarise one of his posts here...
Quote:
Originally Posted by Mister Towed
My word, prep for paint is a laborious process.
It's like painting the ruddy Forth Road Bridge
every time I go round sanding down the primer I find more dints and scrapes to fill that I hadn't noticed before.
It's now taken almost a whole tube of knifing putty and it's still not completely smooth.
After spending eighteen hours sanding over the last two days I'm absolutely knackered.
 |
So clearly I need to take my time and do the best job that I can.
After all, the body shell has so many symmetry issues that a "professional" paint job would be a waste of money.
- - - - - - - - - - - - - - - - - - - - - - - - - - - - - - -
Question - "Knifing Putty" :
What do people use / recommend as knifing putty / stop filler?
There seems to be various options, dolphin glaze, liquid gold, etc.
Or are they all pretty much the same?
- - - - - - - - - - - - - - - - - - - - - - - - - - - - - - -
Anyway, that's all for now, take care, Paul.
|
22nd September 2014, 20:03
|
|
Senior Member
|
|
Join Date: Jun 2011
Location: birchington, kent
Posts: 1,769
|
|
You've been on Rods n' sods again... i recognise the lingo!
|
23rd September 2014, 05:59
|
|
Senior Member
|
|
Join Date: Feb 2012
Location: Wembley, London
Posts: 5,056
|
|
Guilty as charged. |
25th September 2014, 17:33
|
|
Senior Member
|
|
Join Date: Feb 2012
Location: Wembley, London
Posts: 5,056
|
|
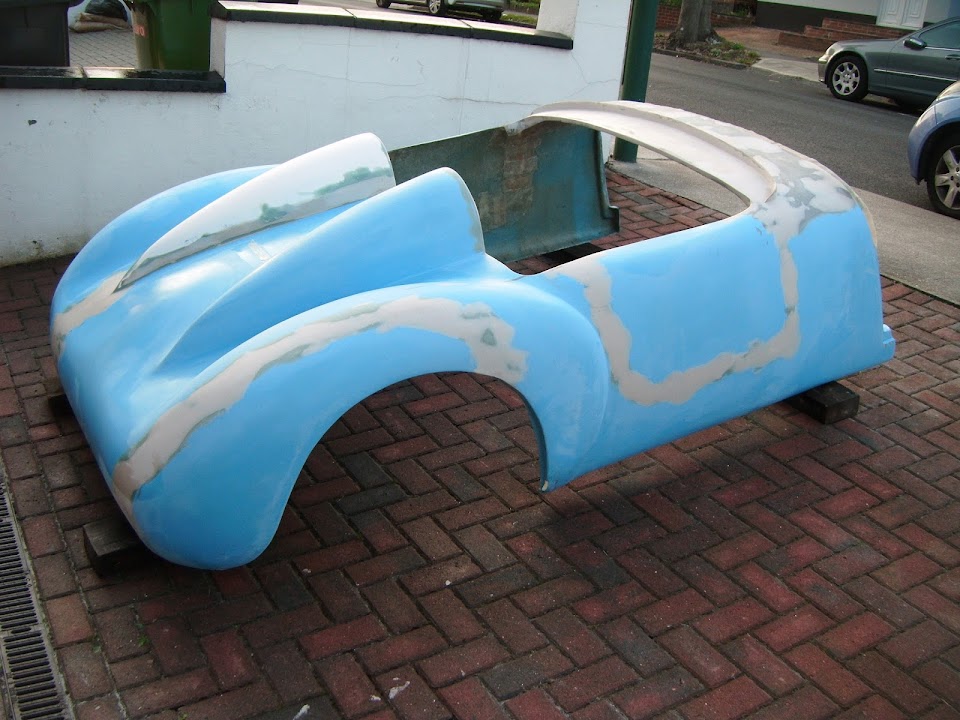
Odds & Ends - Part 1:
Well for the first time in what seems like ages, the covers came off the car.
Following up on the pointlessness of getting a professional paint job on a lopsided car theme...
I saw Swifty marking up the positions of the his arches vs. the cockpit corners.
Whereas, this is one of the many mis-matched areas that I am just leaving as they are.
Passenger Side:

Driver's Side:
( Unfortunately, the primer makes it a bit harder to see the position of the arch clearly. )

- - - - - - - - - - - - - - - - - - - - - - - - - - - - - - -
The last time I mocked up the rear lighting, the body shell hadn't been chopped about.
I am going to line the number plate up with the middle of the twin tail pipes.

But I need build up a flat mounting surface with some filler at some point.

Originally I bought some LED number plate light bolts, but I also picked up some "normal" lights too.

These give me the option of fixing the lights either side of the number plate like so.

I was planning to use the 4 LED bolts to mount the plate and light it at the same time.
However, this Spyder passed an MOT with just two LEDs fitted like this.

Note:
I'm normally pretty good at finding things on this forum, but it took me absolutely ages to track that photo down. 
So I will also just use two, but fixed a fraction closer to the edge of the number plate than the example above.

I may extend the number plate mounting plinth to include these LEDs.
Next it was the turn of the rear lights and I found one of my indicator's fixing points was broken.
( And it was in too many pieces to glue back together. )

This was always the layout I intended to use.

But I fear this layout may highlight the fact the body shell had different widths either sides of the tail pipes.
( Due to the different "sweep" angles of the two rear wheel arches. )
I saw how Swifty mocked up his rear lighting.

Note:
The Spyder LED photo above finally gave me the coding required to include Swifty's attachments on my thread.
I've also seen a similar rear lighting layout on this Spyder.
So I tried it out on my car....

I think this layout will draw the eye to the lights at the edges & the number plate / exhaust pipes in the "middle".
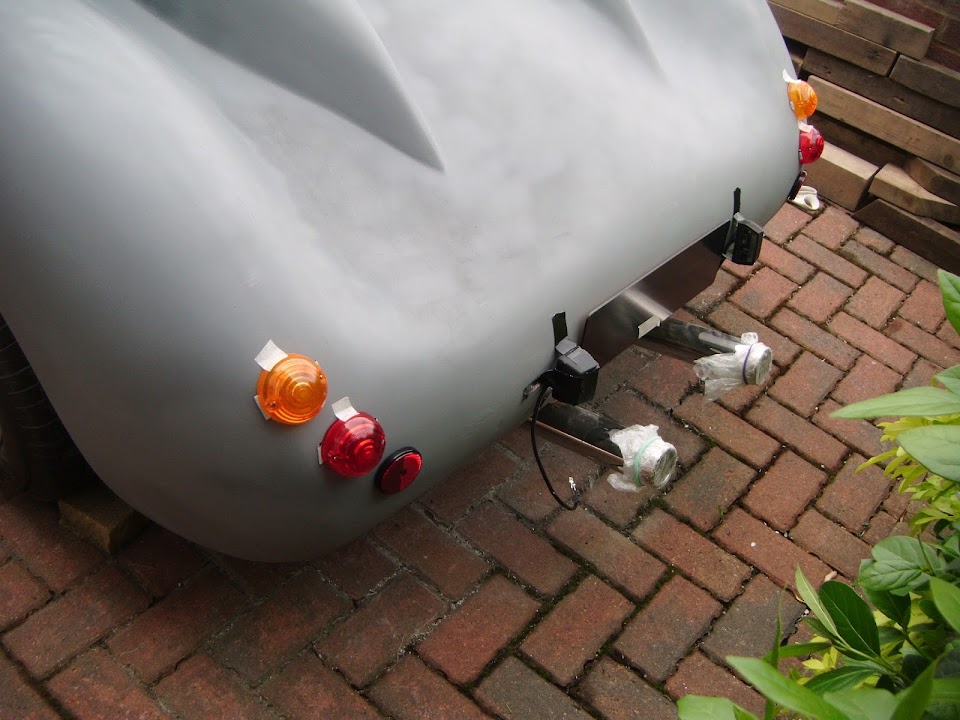
So hopefully, some of the symmetry issues will not jump out during a "first impression".
I also tried stacking them vertically, but that didn't really work for me.

End of Part 1...
|
25th September 2014, 17:34
|
|
Senior Member
|
|
Join Date: Feb 2012
Location: Wembley, London
Posts: 5,056
|
|
Odds & Ends - Part 2:
The other big job I need to tackle at the back of the car is the boot lid, which I roughly taped out.

The big advantage of mocking this up with tape was that I got a better idea of what I need to do to cut the humps.
Again, this is just a rough tape line at the moment, but if I make a cut on the hump from the "inside".

It will actually extend further down on the "outside".
Which means the "top" (nearest the cockpit) of the boot lid will not be a "straight" line that joins up across the humps.
But it does mean that the lines cutting across the hump should line up.
( Assuming I can cut them properly! )
- - - - - - - - - - - - - - - - - - - - - - - - - - - - - - -
Next, I turned my attention to the front, which is going to be a complete nightmare.
The more I look at it, the more I think I need to extend the body shell with the bottom edges of the bonnet.
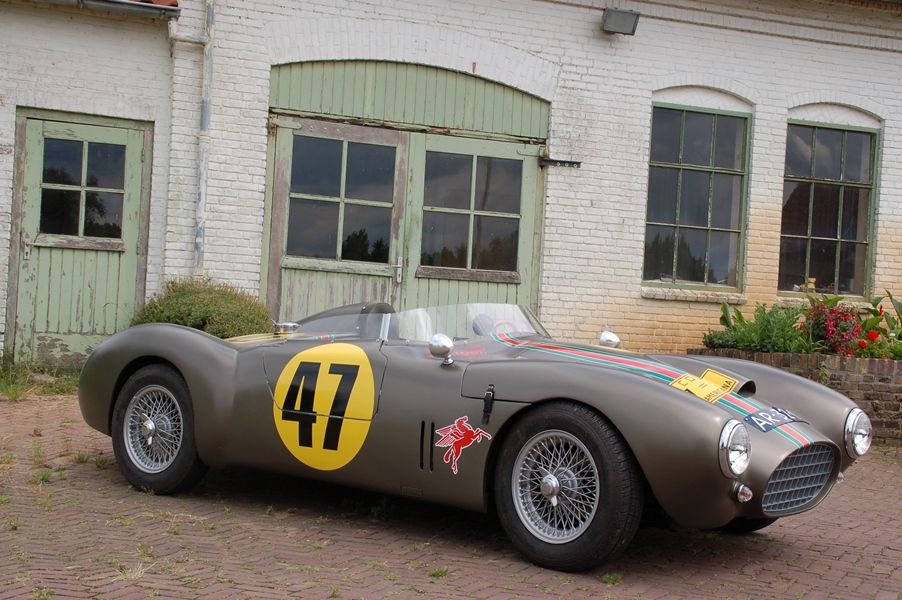
It looks like this approach has worked for Mac and any excuse to include a photo of Michiel car.
But this may turn out to be my most challenging project yet, as the distances from the body shell to the front wheels are different on both sides.


But it I can fix this issue, I will be able to sort out the bonnet shut line once and for all.
Plus I still need to copy Mac's cut & shut of the bonnet to cover the driver's side wheel and improve the gap between the nose and the headlight.
Then, depending on how the bonnet hinge works, the hose of the bonnet may be sitting up quite high at the front.

Which will leave gaping holes between my tyres and the wheel arches.

So there needs to be some wholesale butchery and major re-constructive surgery before the front end of the car looks halfway decent.
The only good news is there is an obvious place to extend the Spitfire bulkhead horizontally to meet the side of the body shell.


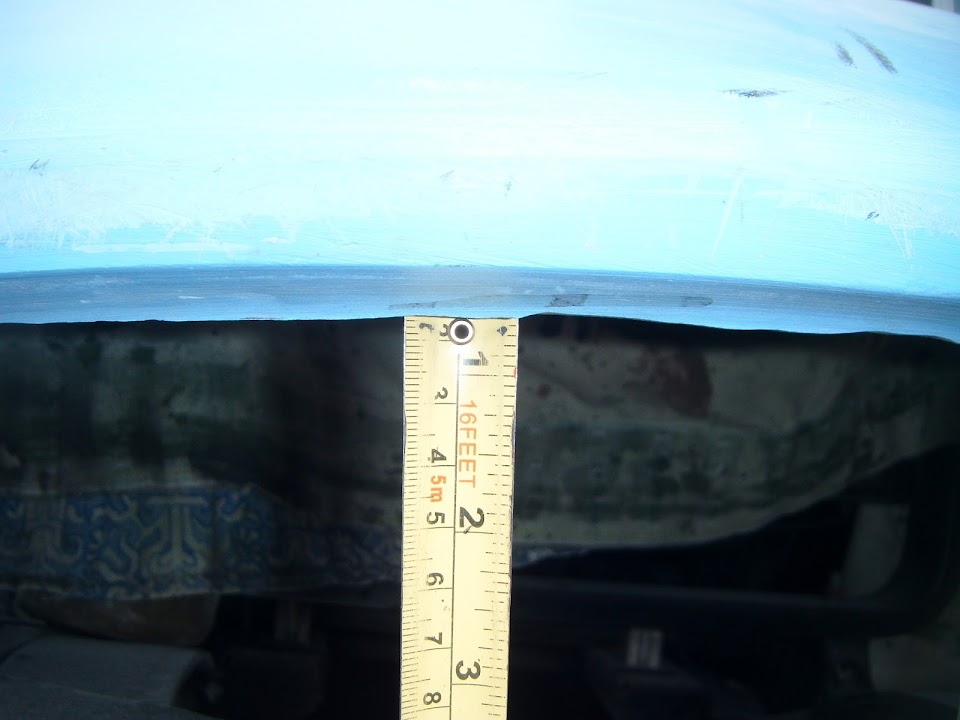
The final problem area on the bonnet is the nose, which Mac fixed by shortening it.

But I am hoping to get away with extending one side to match the other with some fibreglass filler.
At the moment, the top edge of the nose is a lot thicker than the bottom edge.


Which corresponds with the different depth behind the lip for the grille to sit against.
Again, much deeper at the top compared to the bottom.

This cardboard template for the grille I prepared earlier also highlights this.

So I try to improve the inside for the grille when I am playing around with the nose itself..
Overall, this was one of those days when the "To Do" list stretching out in front of me became a little bit overwhelming.
So I simply will start looking at the boot lid first and worry about everything else another day.
Until next time, take care, Paul.
|
|
Currently Active Users Viewing This Thread: 1 (0 members and 1 guests)
|
|
|
 Posting Rules
|
You may not post new threads
You may not post replies
You may not post attachments
You may not edit your posts
HTML code is Off
|
|
|
All times are GMT +0. The time now is 18:25.
|


 what the feck wow wow wow I,m gonna say it again WOW. You must be as scottie says as happy as a dog with 2 d**ks. It really doesn't look like the same car, this is how the Sammio always should have been. well done that man.

 Linear Mode

