|
|
| Vintage and Classic Roadster Kit Car Builds For Vintage and Classic era kit cars. Post your build reports, problems and progress here |

9th February 2017, 11:07
|
|
Senior Member
|
|
Join Date: Nov 2012
Posts: 845
|
|
 Bingo!
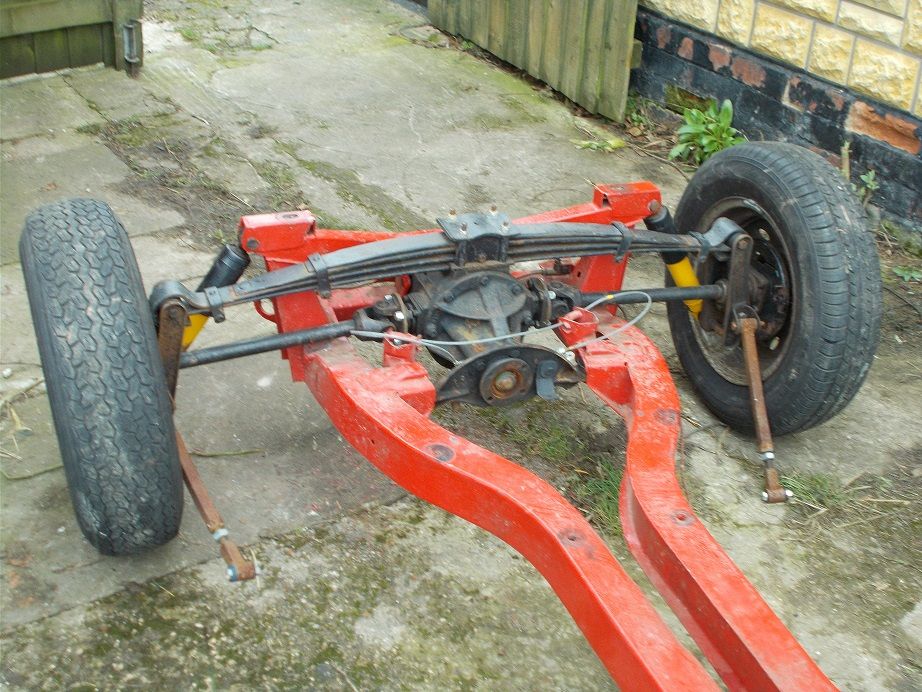
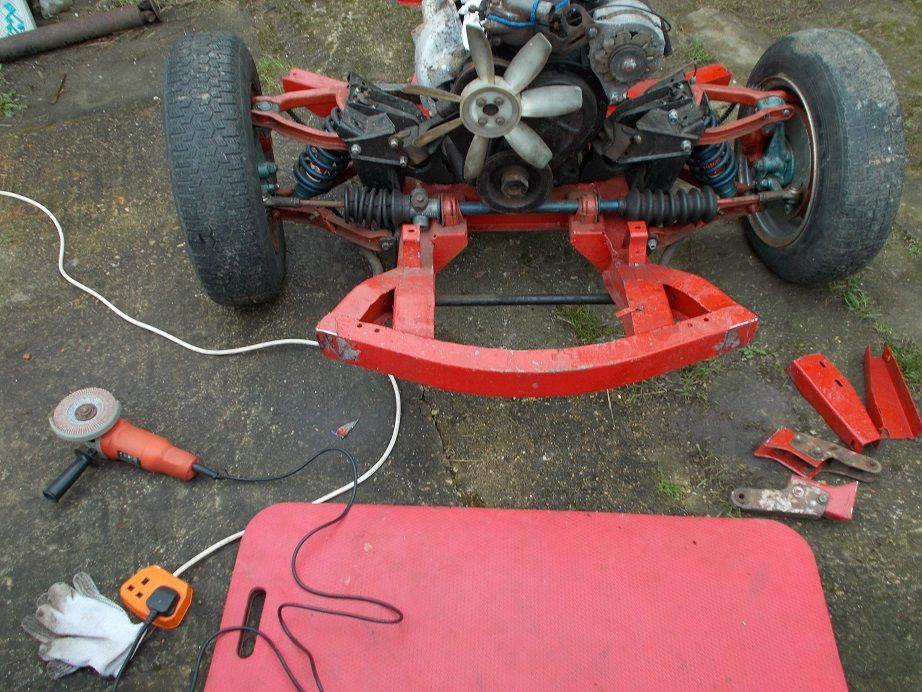
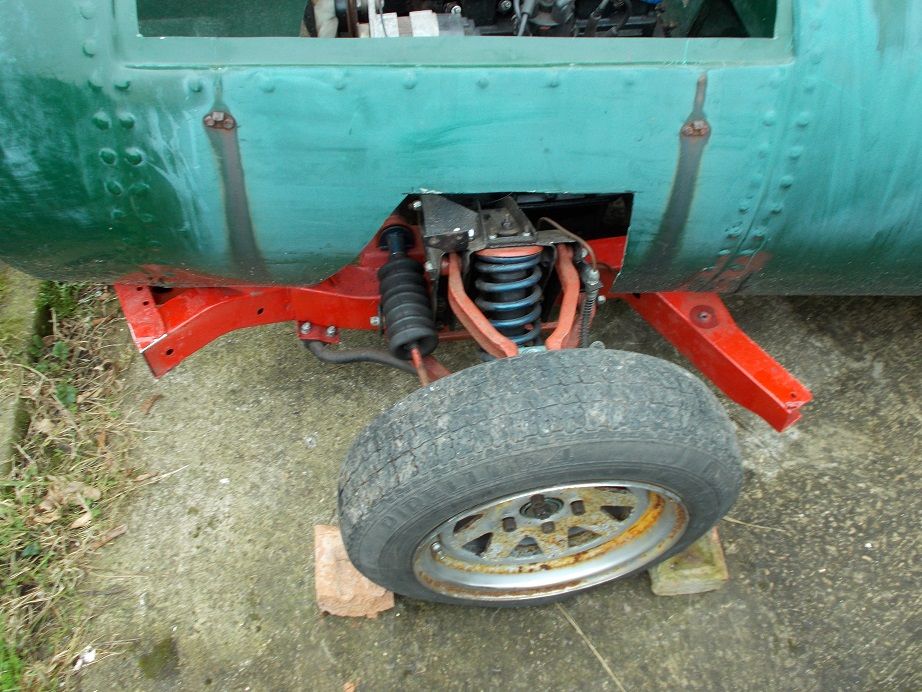
Pitched in again this morning and managed to fit the final drive and rear suspension from the original chassis into the new one without much difficulty.
I now have a swing spring with fewer leaves, wider track and lower final drive ratio. The next jobs in that area are to fit the M12 Range Rover studs to suit my MGF 'Minilite' 15" wheels (which just arrived whilst I'm typing  ), transfer the brake cylinders, shoes, springs, drums etc. and connect the hydraulic lines and handbrake cable. I will need to transfer the larger rear drive flange from one prop. shaft to the other to suit the diff. flange. ), transfer the brake cylinders, shoes, springs, drums etc. and connect the hydraulic lines and handbrake cable. I will need to transfer the larger rear drive flange from one prop. shaft to the other to suit the diff. flange.
Also, the radius arms will need to be considerably lengthened and located onto the centre outriggers, as Micky1Mo has done.
Regards, Mick
|
9th February 2017, 14:12
|
|
Senior Member
|
|
Join Date: Mar 2015
Posts: 395
|
|
 super two
found it my super two many years ago at the Cotswold wild life park (Fairthorpe club meet) The most exciting car I have driven without braking the speed limit (30)

 |
13th February 2017, 10:46
|
|
Senior Member
|
|
Join Date: Nov 2012
Posts: 845
|
|
At Last - Sunshine
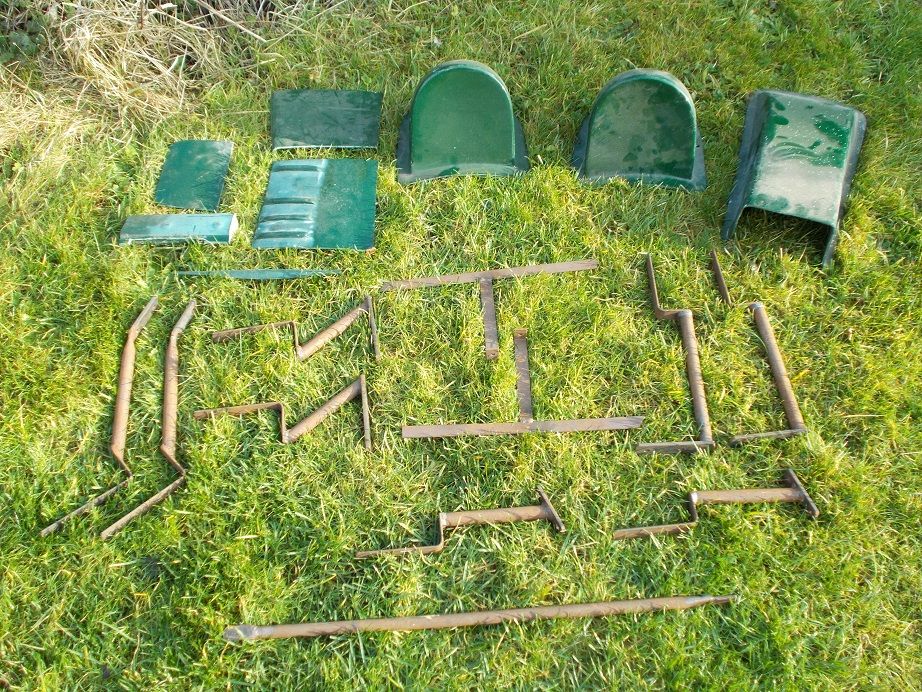
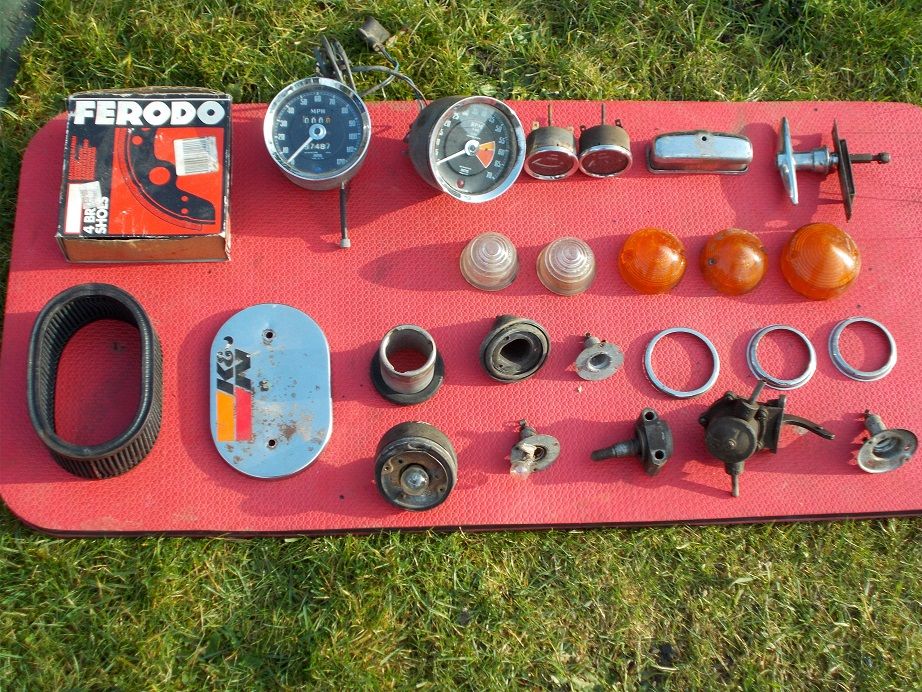
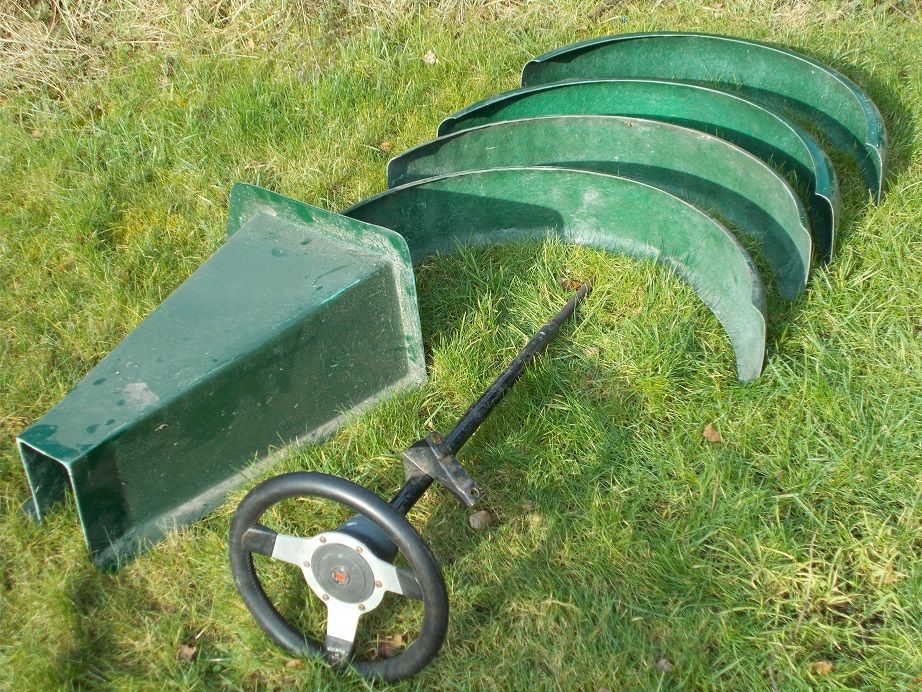
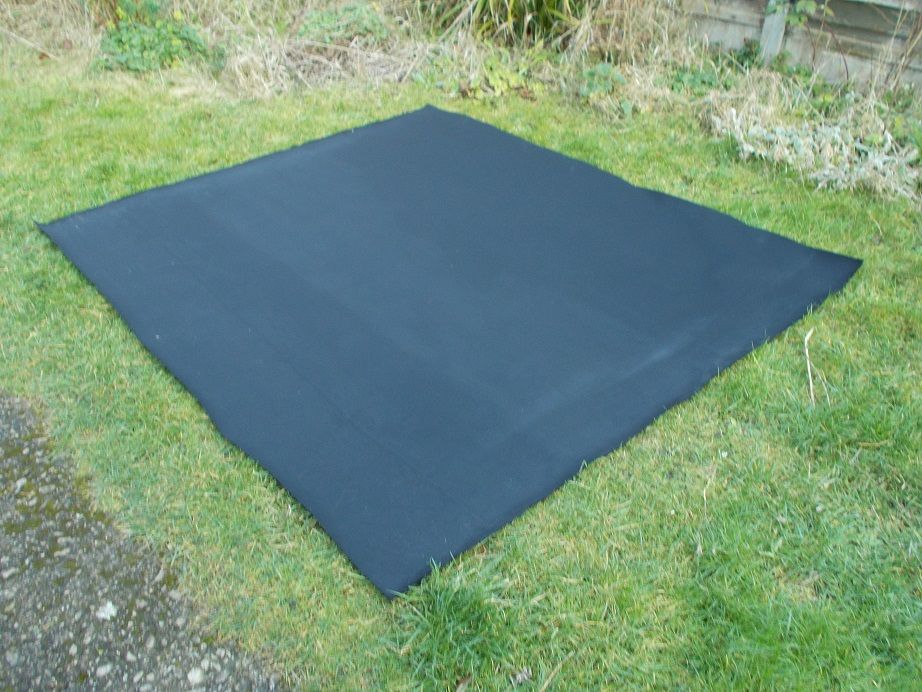
I finally got the chance to lay out and photograph the other bits and pieces that came with the project as previously promised.
Just as I finished taking pictures the nice man from TNT delivered my double duck tonneau cover fabric.
I carefully removed the black plastic in which it was wrapped and was delighted to find that it was the end of a roll, and I'd been sent 170cm when I'd only paid for 1m. Result! It's 72" wide and a quick check with the tape measure confirmed that I (or rather my seamstress friend) can make two tonneau covers from it, one of which will be offered to another Monaco owner.
I also found time to photograph the spare chassis, rear suspension, diff. etc. and list them on Ebay. Time to reduce the clutter!
Regards, Mick
p.s. Deggsy, did you see my Super Two post on the previous page?
Last edited by Mick O'Malley; 13th February 2017 at 10:55..
|
13th February 2017, 10:54
|
|
Senior Member
|
|
Join Date: Mar 2015
Posts: 395
|
|
Yep brilliant photos taken at the Cotswolds wild life park if I am not mistaken?
|
13th February 2017, 17:28
|
 |
Senior Member
|
|
Join Date: Sep 2011
Posts: 1,446
|
|
Quote:
Originally Posted by Mick O'Malley

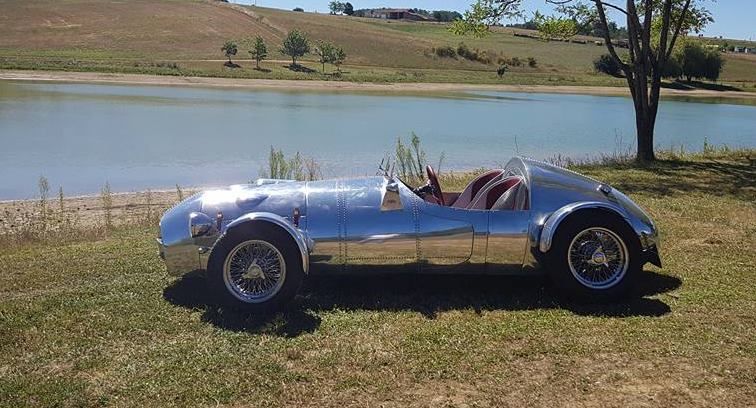
This popped up on the Moss Owners' Facebook page. Beautiful but expensive!
 Regards, Mick
|
Wow how good does that look |
14th February 2017, 04:42
|
|
Senior Member
|
|
Join Date: Nov 2012
Posts: 845
|
|
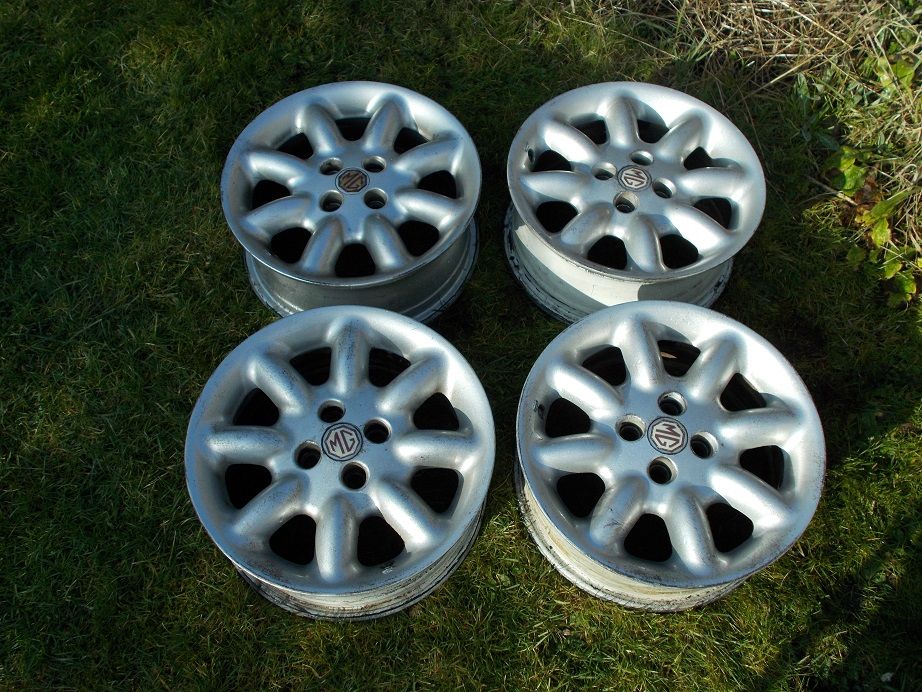
 MGF Wheels & A352 Brakes
After re-stowing all the so far unused bits for the Monaco, I turned my attention to my MGF 15" wheels. The other day I'd browsed the interweb for professional wheel refurbishment and powder coating factors. Having seen the prices  I decided to spruce them up myself. I decided to spruce them up myself.
I found a handy guide on a forum that Goggle threw up. The stages were: 1) A good clean with hot water and washing up liquid; 2) A light rub down with emery paper to remove any nasty areas; 3) Spray with primer and 4) Top coat.
As the sun was shining I set to with the banister brush and removed the accumulated crud, rinsed with the watering can and left them to dry.
They're a bit grotty but I'm sure that with some elbow grease they'll come up fine. I've decided on black wheels and grille as that Alfa in the picture on page one looks so good .
I'm still waiting for the two C clips that I ordered on line for the rear O/S wheel cylinder on the A352. Their absence was the reason for the brake imbalance which was one of the reasons she failed her test. The other, corrosion within 30cm of a seat belt mounting, has been addressed. I decided to take the clips off the Monaco chassis and use them so that I could get her MOT ready. This I did.
Today, weather permitting, I'll fit the new pads to the front of the A352 once I've popped the pistons a little and cleaned them with strips of emery paper. Key learning point: make sure the piston you're not working on is securely clamped as you gently prod the brake pedal with a long stick to expose the other one. Otherwise, disaster awaits.
Regards, Mick

|
20th February 2017, 08:53
|
|
Senior Member
|
|
Join Date: Nov 2012
Posts: 845
|
|
 Ebay Success
I put the spare chassis & V5C, front and rear suspension etc. on five day auction last Monday. They were all won by the same bidder who came and collected them with a car trailer yesterday. I threw in a spare Spitfire gearbox for good measure.
He's using them in a MkI Marlin Roadster, an example of which I sold only a few weeks ago. More synchronicity!
Regards, Mick
|
20th February 2017, 10:04
|
|
Senior Member
|
|
Join Date: Nov 2012
Posts: 845
|
|
 Diff is locked?
Quote:
|
Originally Posted by Mick O'Malley
Pitched in again this morning and managed to fit the final drive and rear suspension from the original chassis into the new one without much difficulty.
I now have a swing spring with fewer leaves, wider track and lower final drive ratio.
Regards, Mick
|
When this diff. and suspension were on the other chassis frame, it all rolled perfectly. Now, it's locked. Jacked up, one wheel turns in the opposite direction when the other is rotated. The input flange doesn't move. There's a tiny amount of movement when I twist the input flange, but the wheels don't even twitch.
Is it possible that inverting the diff as I was swapping it over has affected it internally? I certainly wouldn't have thought so, but I'm willing to be corrected.
Do any of you mechanical gurus out there have any ideas please?
Regards Mick |
20th February 2017, 10:38
|
|
Member
|
|
Join Date: Dec 2016
Location: halifax
Posts: 85
|
|
diff
sounds to me that something has got in between the crown wheel +pinion gears when it was inverted it wouldnt take much debris to lock it up i take it its not a lsd by the fact you say the wheels turn in opposite directions when input flange is turned might be worth removing the cover for a look inside regards mick
|
20th February 2017, 14:50
|
|
Senior Member
|
|
Join Date: Mar 2015
Posts: 395
|
|
Probably a silly question but one of your flange bolts may be fouling the diff bearing bolts??
|
21st February 2017, 08:37
|
|
Senior Member
|
|
Join Date: Nov 2012
Posts: 845
|
|
Quote:
|
Originally Posted by retro200
Sounds to me that something has got in between the crown wheel + pinion gears when it was inverted, it wouldn't take much debris to lock it up. I take it its not a lsd by the fact you say the wheels turn in opposite directions when input flange is turned might be worth removing the cover for a look inside regards mick
|
This was my second thought (see below!) that maybe something alien was floating around inside. I'll take a look.
Quote:
|
Originally Posted by deggsy
Probably a silly question but one of your flange bolts may be fouling the diff bearing bolts?
|
This was my first thought, but I'd done that part of the job properly!
Regards, Mick
|
21st February 2017, 14:55
|
|
Senior Member
|
|
Join Date: Nov 2012
Posts: 845
|
|
Freeeedom
I had a look at the diff. section in the Haynes Manual and thought "what a fag". I knelt at the back of the chassis and started working the nose flange back and forth. At first it only moved a couple of degrees but with perseverance, huffing, puffing and cursing, it gradually worked loose until, after only two or three minutes it was completely free. Result!
Retro200 was therefore correct in his assessment . Whilst it was hanging inverted from the crane overnight, the crud from the bottom must have settled around the crown wheel, jamming it.
I decided to take the plunge with the angle grinder and chopped off the bonnet hinge extensions and the 'wings' which seem redundant anyway. I then smoothed the cut edges with a 40 grit flap wheel.
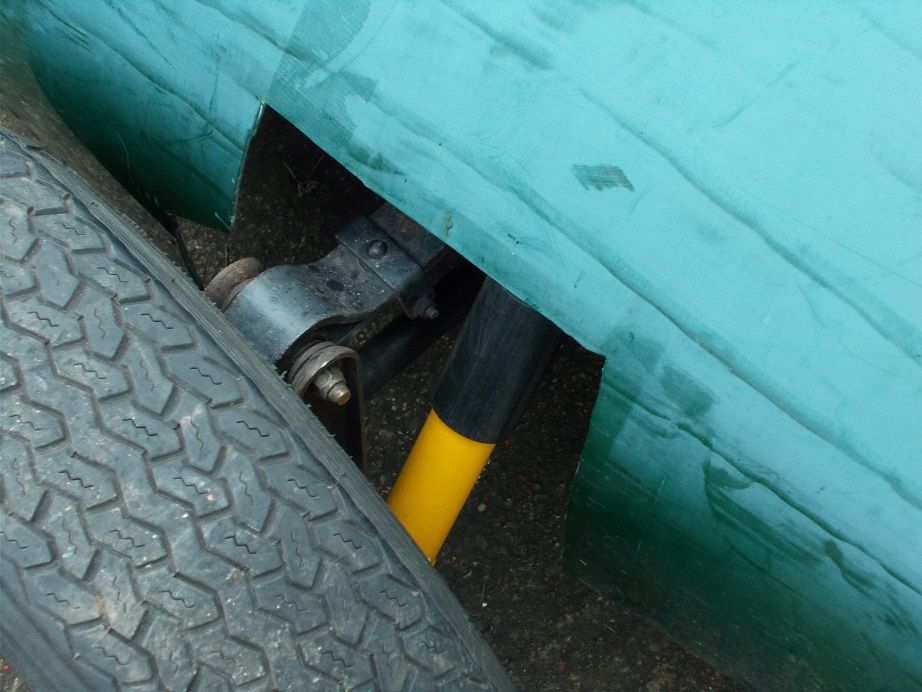
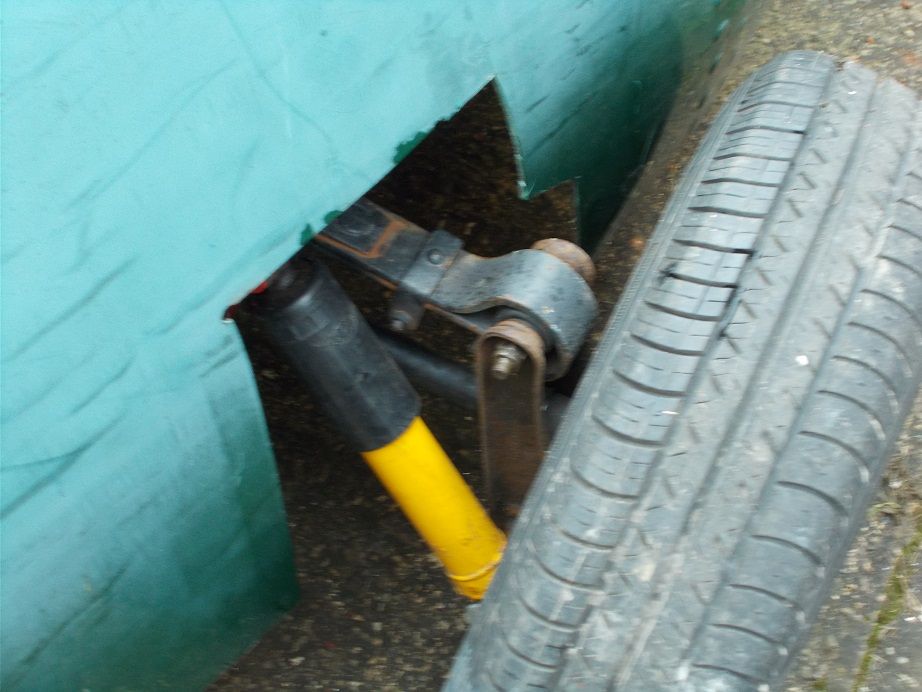
Having got rid of the original frame I was now able to manoeuvre the new slightly shorter chassis into a better position, having moved my stack of bagged logs yet again  . I then recruited my son and plonked the body on top, using the existing suspension cut-outs for alignment. . I then recruited my son and plonked the body on top, using the existing suspension cut-outs for alignment.
I next chopped out the transverse brace come mounting in the nose cone with my jigsaw and carefully marked where the body will have to have slots cut to fit over the front frame and outriggers. This will be the next job, I imagine it'll involve a few body ons and offs with more measuring and ever smaller amounts removed until it sits nicely.
Regards, Mick
|
21st February 2017, 15:18
|
|
Member
|
|
Join Date: Dec 2016
Location: halifax
Posts: 85
|
|
stuck diff
glad you sorted it ,happened to me once on a sierra diff, time for a oil change though.
|
25th February 2017, 08:41
|
|
Senior Member
|
|
Join Date: Nov 2012
Posts: 845
|
|
Quote:
|
Originally Posted by retro200
Glad you sorted it, happened to me once on a sierra diff. time for a oil change though.
|
I've taken your advice regarding the ancient hypoy, and purchased this handy item.
Why did my thoughts immediately turn to Austin Powers ?
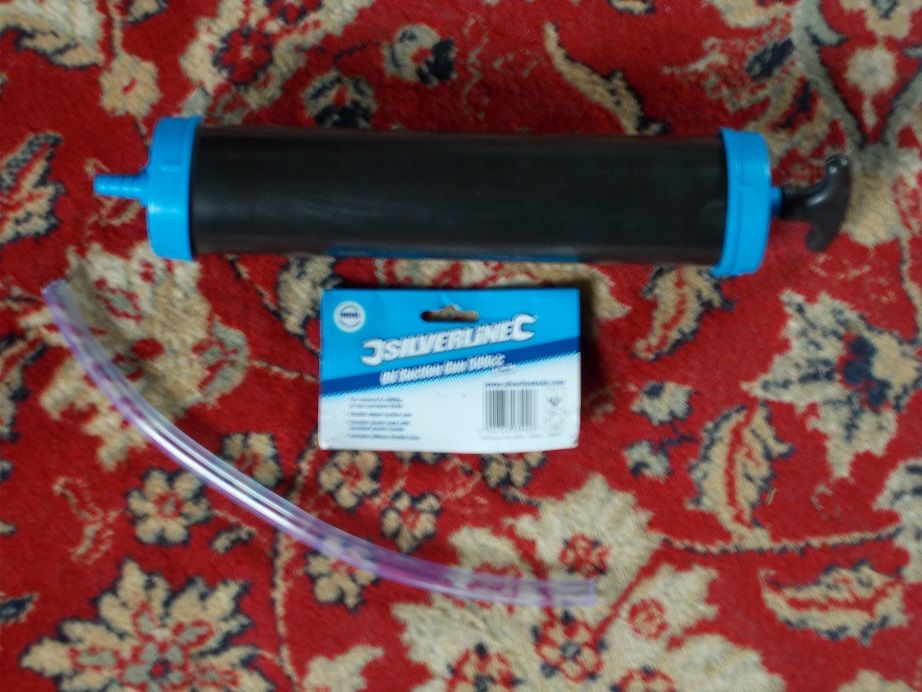
Regards, Mick |
25th February 2017, 09:03
|
|
Member
|
|
Join Date: Dec 2016
Location: halifax
Posts: 85
|
|
diff
"yeah baby" that should sort it, lol.
|
25th February 2017, 10:39
|
|
Senior Member
|
|
Join Date: Nov 2012
Posts: 845
|
|
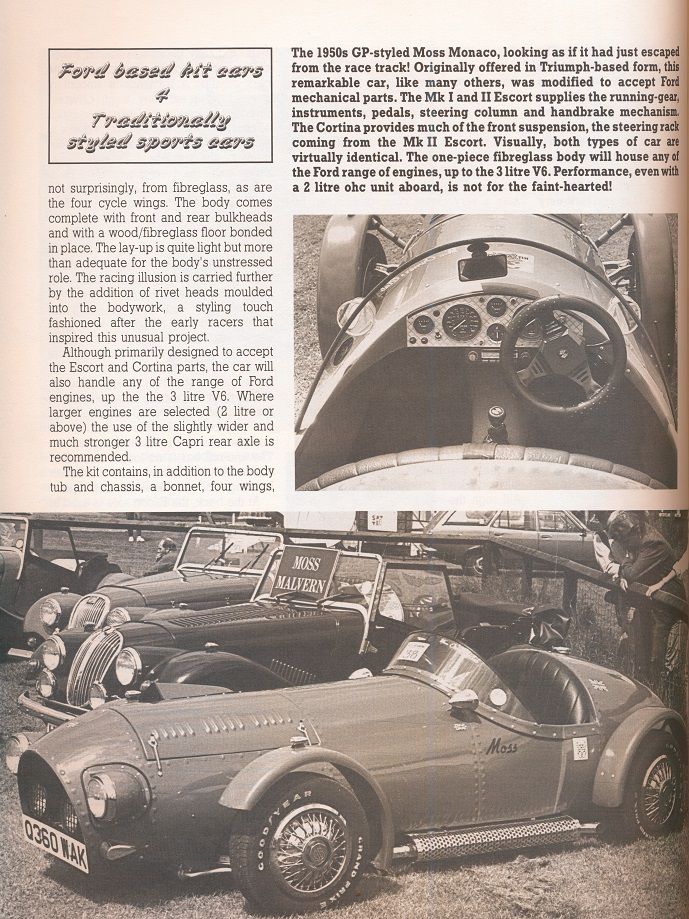
'Ford' Based Kit Cars
My 1988 copy of this hardback contains a write up of the Moss Monaco, complete with pictures taken at a show. These clearly depict a Triumph based example Those faux wire wheels look awful IMO, the rest isn't bad at all, especially the dash.
Regards, Mick
|
26th February 2017, 12:46
|
 |
Senior Member
|
|
Join Date: Feb 2012
Location: Wembley, London
Posts: 5,056
|
|
Mick - Looks like you are making rapid progress on this. 
Good luck, Paul.
Last edited by Paul L; 26th February 2017 at 12:46..
Reason: Typo
|
27th February 2017, 16:21
|
|
Senior Member
|
|
Join Date: Nov 2012
Posts: 845
|
|
Some Progress
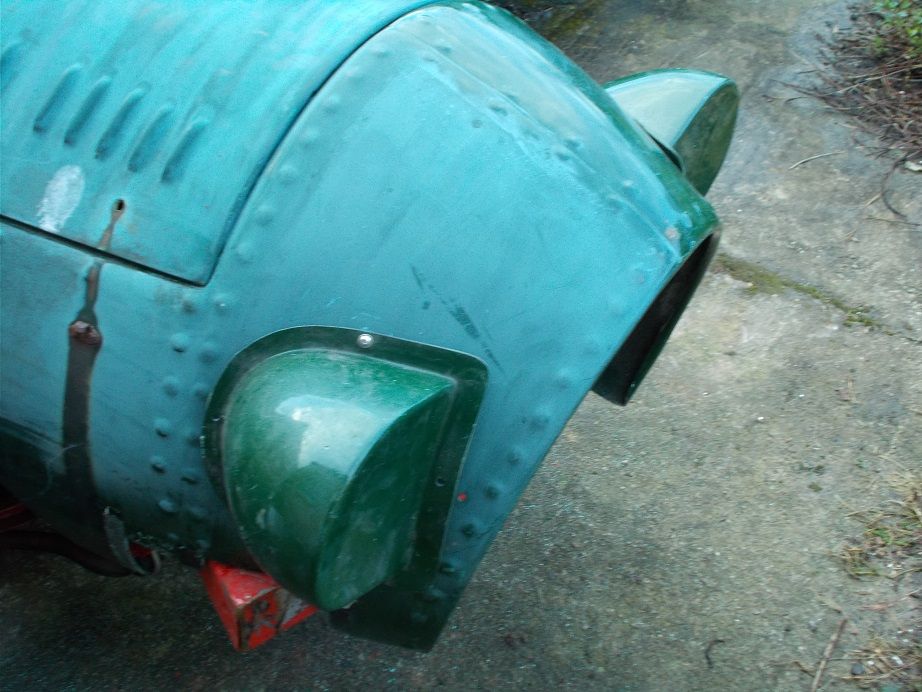
Today, between showers, I loosely fitted the headlamp pods making sure that the front faces were vertical, using a small spirit level. I'd earlier bought the 7" plastic buckets which will eventually hold Lucas P700 copies .
Postie delivered my 5m roll of 75mm x 3mm self adhesive rubber strip, so I finished off the cut outs for the chassis rails. This needed a couple of fine cuts and the body now sits perfectly, something I'm glad I checked, as it wasn't quite as good as I'd previously thought.
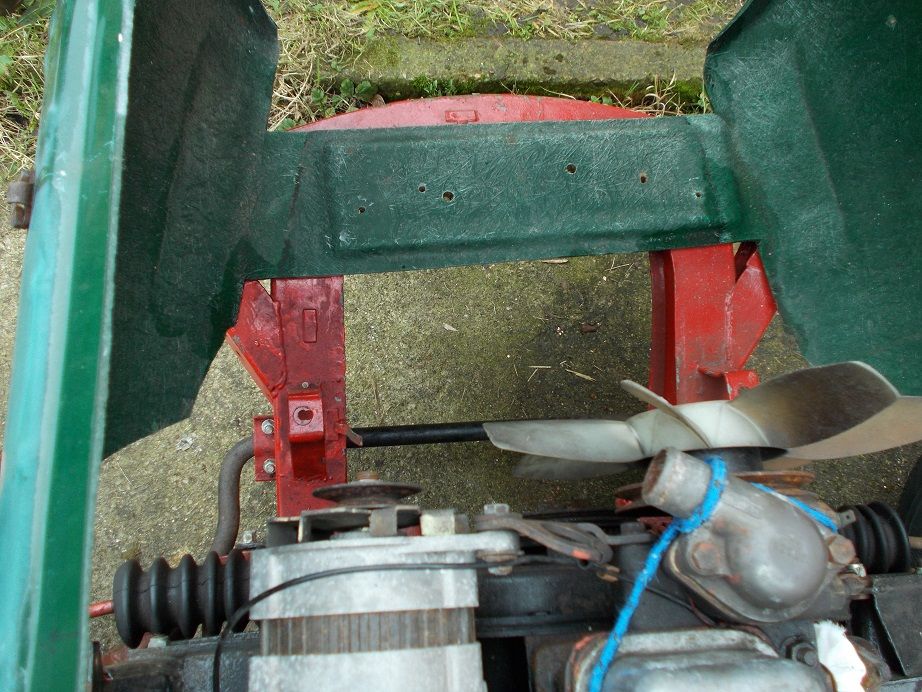
I next decided to make some angled sleeve washers/spacers for the centre outrigger body fixings. I made a template of the required angle and cut them from some mild steel tube about 15mm in diameter. The bolts through the centre outriggers and the floor will now sit perpendicular with decent mating areas. I'll try and get a picture of this when (if?) the sun comes out.
The rain started again so I came in and browsed Ebay for something to fill the grille hole and came up with this. Once trimmed, painted and fitted with small angled locating flanges it'll set the front end off nicely.
Regards, Mick
|
28th February 2017, 11:12
|
|
Senior Member
|
|
Join Date: Nov 2012
Posts: 845
|
|
Centre Body Mounting
Quote:
|
Originally Posted by Mick O'Malley
I'll try and get a picture of this.
|
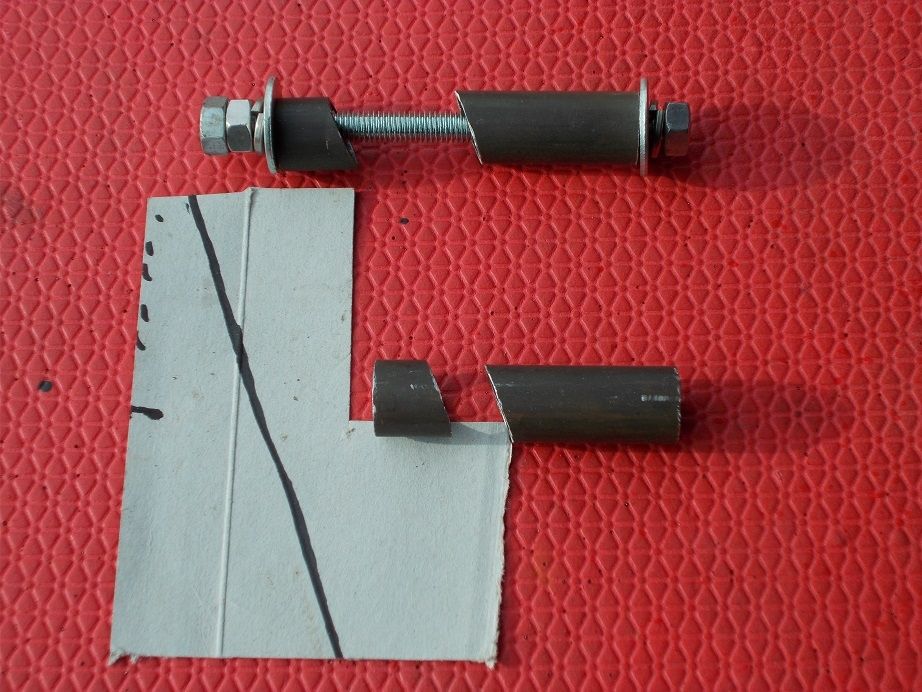 The longer half of each pair of sleeves will be between the underfloor of the body and the angled outrigger, the shorter half will be beneath the outrigger. I'll use proper bolts rather than studding.
Regards, Mick |
|
Currently Active Users Viewing This Thread: 6 (0 members and 6 guests)
|
|
|
 Posting Rules
|
You may not post new threads
You may not post replies
You may not post attachments
You may not edit your posts
HTML code is Off
|
|
|
All times are GMT +0. The time now is 09:19.
|


 Linear Mode

