|
|
| Sammio Builds and discussions Sammio bodied car builds and specials |

13th June 2012, 10:06
|
|
Senior Member
|
|
Join Date: Jun 2011
Location: birchington, kent
Posts: 1,769
|
|
Does your Clarke have switches for amperage?
|
13th June 2012, 10:16
|
|
Senior Member
|
|
Join Date: Mar 2012
Posts: 1,152
|
|
It has the daft 1 & 2, and Min & Max switches, plus the speed controller.
|
13th June 2012, 11:26
|
 |
Senior Member
|
|
Join Date: Jun 2012
Location: Luton
Posts: 133
|
|
With MIG the switches control the voltage rather than the current. The current is more controlled by the wire speed.
I'm spoiled these days by having an Inverter based MIG which has continuously variable voltage.
The larger Clarke MIGs are some of the better budget machines.
Once you're up to about a 120 amp machine you'll get much prettier welds by going to an Argon/CO2 mix. CO2 gas is reactive and adds to the weld heat helping out small welders. Technically it's not MIG (Metal INERT Gas) when using CO2, but it's more properly called GMAW (Gas Metal Arc Welding) anyway.
|
13th June 2012, 11:36
|
|
Senior Member
|
|
Join Date: Jun 2011
Location: birchington, kent
Posts: 1,769
|
|
I'm using gasless, should i use gas?  |
13th June 2012, 19:27
|
 |
Senior Member
|
|
Join Date: May 2011
Location: Somerset
Posts: 1,671
|
|
I've got a Clarke 161 (150 amp same as yours!) but i use Gas and even with that i find it needs quite a bit of "fettling" to get it right, although switching from CO2 to CO2/Argon mix really did help.
I dread to think how much harder gasless makes it?
|
13th June 2012, 20:12
|
 |
Senior Member
|
|
Join Date: Jul 2011
Posts: 5,328
|
|
MMA 'stick' welding is the way ahead. It does what it says on the tin.  |
1st July 2012, 16:48
|
|
Senior Member
|
|
Join Date: Jun 2011
Location: birchington, kent
Posts: 1,769
|
|
 Patchwork quilt!

All holes filled, almost time to start putting brackets and outrigers back on.  http://garyssammiospyderbuild.blogspot.co.uk/
Last edited by garyh; 1st July 2012 at 16:52..
|
2nd July 2012, 05:43
|
 |
Senior Member
|
|
Join Date: Feb 2012
Location: Wembley, London
Posts: 5,056
|
|
That looks good to me Gary and also like a lot of hard work has gone into it too.
Good luck with putting the rest of the chassis back together.
Cheers, Paul.  |
2nd July 2012, 07:46
|
|
Senior Member
|
|
Join Date: Jul 2011
Posts: 5,328
|
|
Looks good but you're going to have to christen your car 'Iron Man'.
Keep up the good work. |
2nd July 2012, 07:52
|
|
Senior Member
|
|
Join Date: Jun 2011
Location: birchington, kent
Posts: 1,769
|
|
Thanks for comments, always gratefully received. T, when I look at it I want to sing Jarusalem... Green and pleasant land... And nice fields!
|
2nd July 2012, 08:19
|
|
Senior Member
|
|
Join Date: Jul 2011
Posts: 5,328
|
|
Yes, I suppose it does look like Britain from the air. Your welding looks mighty impressive compared to mine. I've hidden my repairs behind the lowered floorpans though.  |
2nd July 2012, 08:37
|
|
Senior Member
|
|
Join Date: Jun 2011
Location: birchington, kent
Posts: 1,769
|
|
T, it works but i still can't go in a continuous line without burning through. New metal is easier, and i am getting better  but its not profesional looking. |
21st July 2012, 18:24
|
|
Senior Member
|
|
Join Date: Jul 2011
Posts: 5,328
|
|
All gone a bit quiet lately, anything to show us?
|
22nd July 2012, 12:56
|
|
Senior Member
|
|
Join Date: Jun 2011
Location: birchington, kent
Posts: 1,769
|
|
I must admit the weather doesn't inspire me. All the welding is done on the chassis, just need to put these mounts on and fit outriggers, once that is done the wife will free up some money.
|
30th July 2012, 13:33
|
|
Senior Member
|
|
Join Date: Jun 2011
Location: birchington, kent
Posts: 1,769
|
|
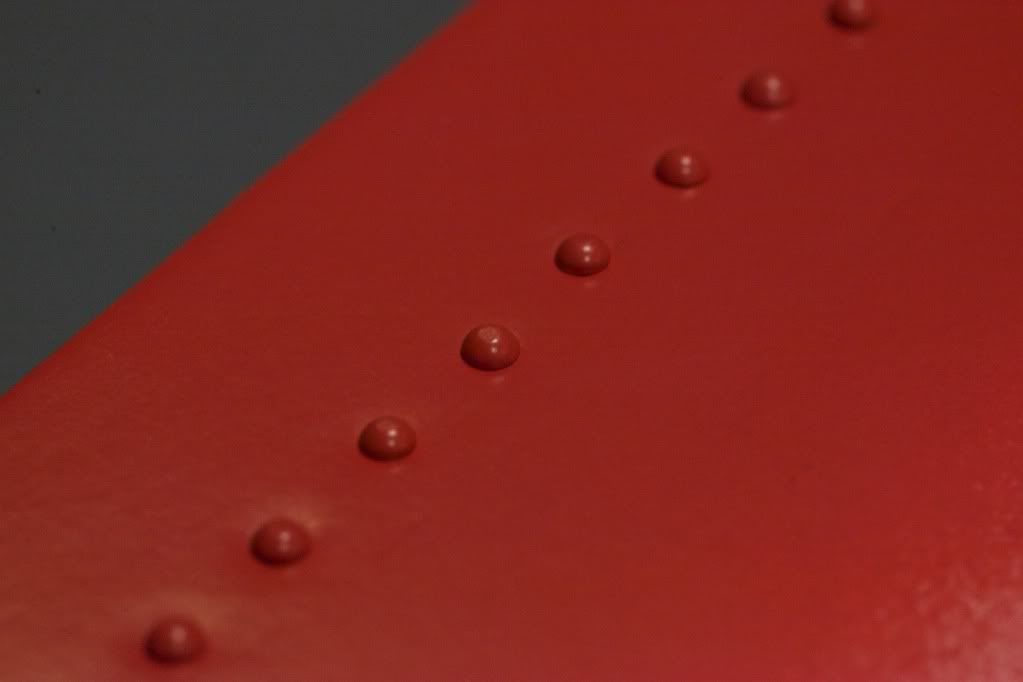
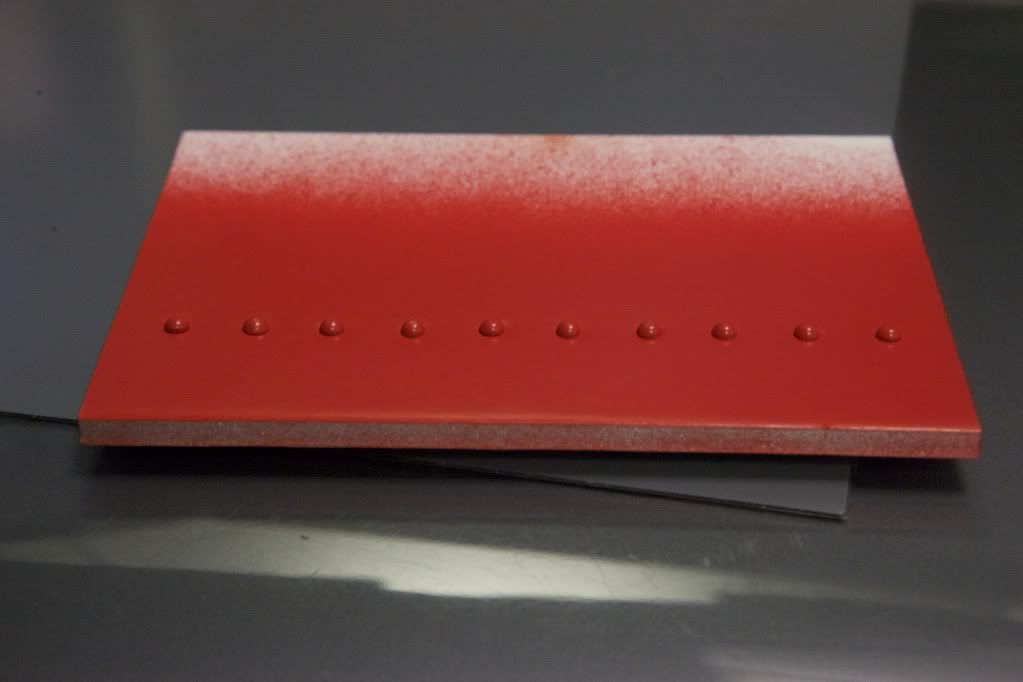
This week coming, i have 2 whole days on car... It will be nice to get something done. In the meantime i bought some Rivets that Andy saw on ebay. I have taken some shots to see what they might look like, 1/2" spacing, looking at them i can afford to open spacing a bit.
 |
30th July 2012, 13:37
|
|
Senior Member
|
|
Join Date: Mar 2012
Posts: 1,152
|
|
Very nice. Did you flatten the heads with a sander or grinder? Or is that just a trick of the light in the photo?
|
30th July 2012, 13:49
|
 |
Senior Member
|
|
Join Date: Dec 2011
Posts: 656
|
|
Generally recommended spacing is 6 - 8 times the rivet diameter with a maximum of 12 times diameter. Rivet centre to edge of material is at least 2 times diameter and recommended maximum of 4 times diameter....
Sorry, that's the Halton 'Brat' in me coming out  |
30th July 2012, 14:39
|
|
Senior Member
|
|
Join Date: Jun 2011
Location: birchington, kent
Posts: 1,769
|
|
Just over 3mm in Dia. No sanding, just a few coats of spray.
|
30th July 2012, 14:46
|
|
Senior Member
|
|
Join Date: Jun 2011
Location: birchington, kent
Posts: 1,769
|
|
Also looking at colours, i like RAL 3003 Ruby Red and RAL 3002 Carmine Red.
|
30th July 2012, 15:17
|
|
Senior Member
|
|
Join Date: Jul 2011
Posts: 5,328
|
|
I have a feeling Gary J used Carmine red on '66 which looked fantastic. |
|
Currently Active Users Viewing This Thread: 1 (0 members and 1 guests)
|
|
|
 Posting Rules
|
You may not post new threads
You may not post replies
You may not post attachments
You may not edit your posts
HTML code is Off
|
|
|
All times are GMT +0. The time now is 04:52.
|


 Linear Mode

