|
|
| Sammio Builds and discussions Sammio bodied car builds and specials |

12th July 2014, 12:47
|
|
Senior Member
|
|
Join Date: Apr 2012
Posts: 1,163
|
|

slight change of tack, thinking about it a bit more I really want the passenger side totally immoveable before I tackle the drivers side so I can take reasonably accurate measurements. So out with CAD V1.2

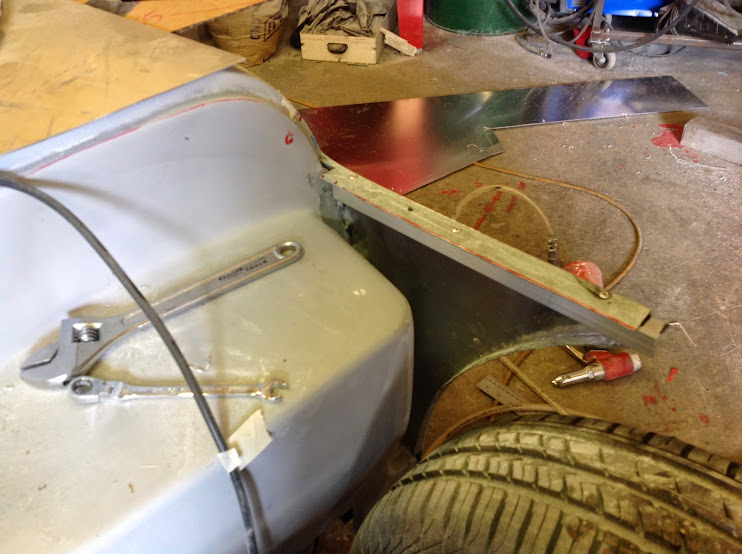
Forgot to take a pic of the finished closing panel but did decide I couldn't get a good enough bend on the top so have bonded and riveted a piece of 2mm thick angle to the top rail, this will give me a good vertical surface to rivet the closing panel to. In addition it gave me a good surface to trim the top flat of the extension panel to so it was a nice straight line and a consistent width.
Next I bonded and riveted the closing panel in place, started on the top then worked from the bottom of the arch working my way up dressing the outer panel as I went to get a good close join, that said the air riveter can pull panels together that are a good few mm away as long as your using a long enough rivet. End result is:


Very pleased with it so far as it gives a nice finished look to what was just an add on to the body. Now going to concentrate on joining the inner panel to the firewall which should make it totally rigid. Right quick coffee then back to it.
TTFN
Mac

|
12th July 2014, 14:26
|
|
Senior Member
|
|
Join Date: Apr 2012
Posts: 1,163
|
|
Probably (depending on how knackered I am after doing this update) the last update for today.
Would have liked to have made the rear of the front wing to body joining panel in one piece but I don't have the luxury of a folder so all bending is done in a relatively small vice using block of wood angle iron etc so the risk of scrapping a panl part way through is high. with this in mind I decided to split the panel into 3 pieces and rather than try and hide the fact they exist make a feature of them. As you can see from my interior I like the rivet look, good job really!
With more CAD the results so far are:

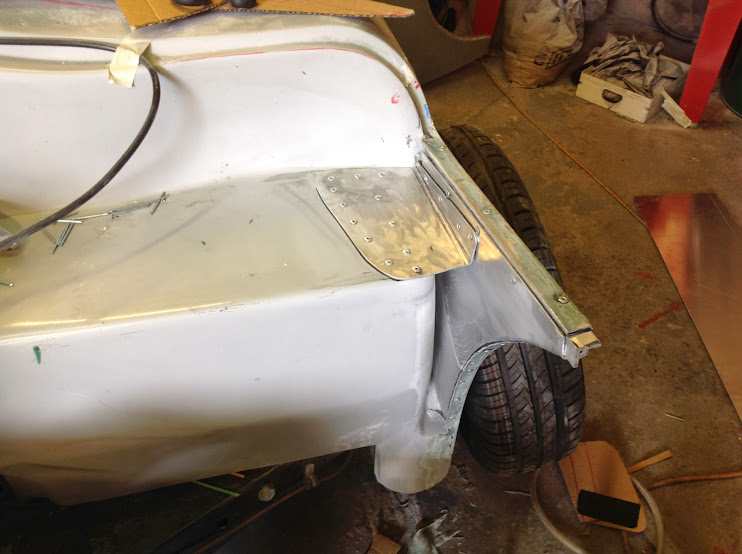
With this panel in place the position of the front wing rear is now cast in stone, no going back now!

Will fill the slight gap you can see in the top left of this pic before I go tonight.
This panel was actually harder than the first as it actually has 2 bends in it the one that isn't obvious is just to the right of the vertical lines of the rivets, it was necessary to make sure I have 100% panel to panel contact for bonding and riveting.


TTFN
Mac
|
13th July 2014, 07:38
|
 |
Senior Member
|
|
Join Date: Feb 2012
Location: Wembley, London
Posts: 5,058
|
|
Mac - As always, very impressive construction work. 
|
15th July 2014, 21:13
|
|
Senior Member
|
|
Join Date: Apr 2012
Posts: 1,163
|
|
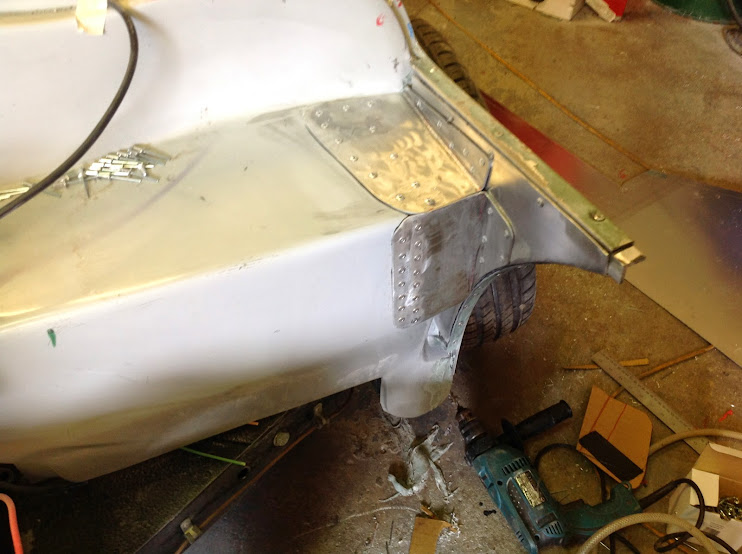
Well its a been a couple of days with no updates but that's because I've been busy. Duplicating the front winglet I did on the passenger side has been a trial to says the least, remade the panel twice and spend yonks making up an alignment tool to try and get both sides as similar dimensionally as possible. Today finally saw the back of it done though. They are not millimetre identical but close enough and at least the rear of the front drivers side wing now covers the wheel.

The filler work looks much worse than it is as I had just wiped it down with thinners which tends to make it look very patchy.
Better shot here of how it actually looks after giving the thinners 5 minutes to flash off:

The angle makes it look its pointing skywards but its not.
Still a couple of hours of final fibreglass filling and profiling then a quick finish skim but hopefully will have it looking done by this time tomorrow if I manage to get a few hours in tomorrow night.
Comparison side to side, bit more of a dip on the passenger side but I think I'm going to leave it as is:
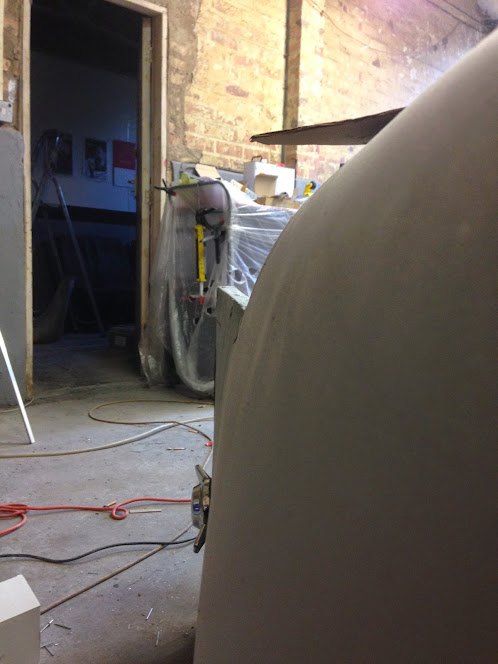
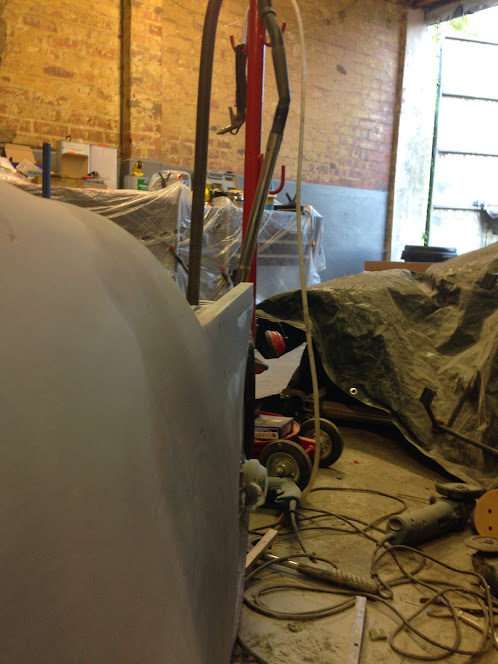


Overall I was very happy, then just before I left I looked behind the car.....

just highlights how out of whack the nose is, that said I have just had a peek at a couple of Miglia threads and all the Sammio faults are present there as well !
TTFN
Mac
|
15th July 2014, 21:19
|
|
Senior Member
|
|
Join Date: Apr 2012
Posts: 1,163
|
|
If you think the newer Ribble Navigator body still has a few....eccentricities then check out this thread on the new Miglia offering, looks ;like someone took the mould before realising the issue with one side being out of alignment with the other!
http://www.madabout-kitcars.com/foru...ead.php?t=4806 |
16th July 2014, 09:10
|
 |
Senior Member
|
|
Join Date: May 2011
Location: Somerset
Posts: 1,671
|
|
It's weird all this talk of rear end issues as i know i had bonnet alignment problems on my Sammio, but i can't remember any rear end alignment problems?
I may have to have a delve through my photo archives at some point now as you've piqued my interest  |
16th July 2014, 10:06
|
|
Senior Member
|
|
Join Date: Apr 2012
Posts: 1,163
|
|
Dave bear in mind were talking about the cordite body was this what you built?
Mac
|
16th July 2014, 10:17
|
|
Senior Member
|
|
Join Date: May 2011
Location: Somerset
Posts: 1,671
|
|
Hey Mac,
You're right in that i built a Spyder, but i didn't think the rear ends were greatly different? I just thought that the main body tub differed at the front?
Although obviously the mods to that could have thrown the back out..
I'm still going to have a nosy through my pics tho as it'll be interesting comparing those to my Miglia kit when it turns up.
Although, as with my Sammio, i fully accept what I'm getting for the price I'm paying and I'm willing to 'fettle' as required |
16th July 2014, 10:22
|
|
Senior Member
|
|
Join Date: Apr 2012
Posts: 1,163
|
|
think these pics of the Cordite moulds as bought from Sammio tell the story Gary:
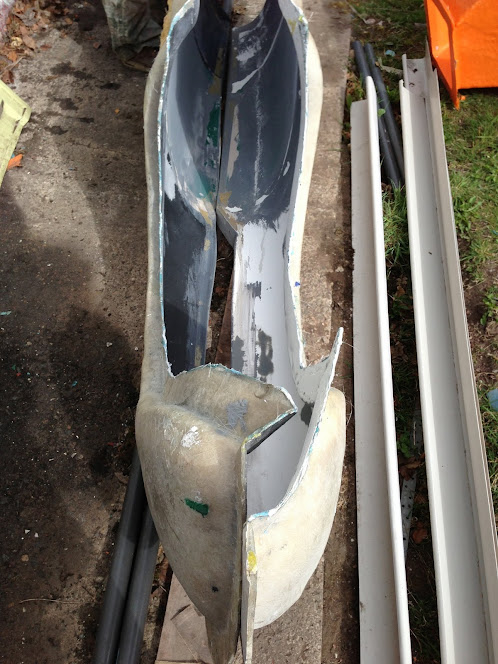
believe it or not these are the 2 halves of the same body...
Mac |
16th July 2014, 12:48
|
 |
Senior Member
|
|
Join Date: Dec 2013
Posts: 839
|
|
It beggars belief that the simple acid test of putting the two halves together was not done at the beginning and to be that far out is crazy regardless of the final kit cost.
Your build is coming along nicely viatron and I look forward to working on my tub when it arrives which should be very soon.
|
16th July 2014, 13:02
|
|
Senior Member
|
|
Join Date: Apr 2012
Posts: 1,163
|
|
ill see it before you as Ribbles laminator is my next door neighbour up the man cave, ill keep any eye out for it :-)
As for the Sammio moulds well as I have said before I'm not surprised they were sold off when they were as it would only have been a matter of time until a lynch mob arrived in Poole!
Shame Mike didn't think to do any basic measuring when he used them as the basis for his Miglia offering!
|
16th July 2014, 14:37
|
|
Senior Member
|
|
Join Date: Dec 2013
Posts: 839
|
|
Cheers Viatron, it should be just about out of the mould as its been two weeks now so hopefully it will arrive soon.
|
16th July 2014, 15:09
|
|
Senior Member
|
|
Join Date: Mar 2012
Posts: 745
|
|
bodys are all over the place ....like in some of you bit and bobs on car think it s going to look a1 ...keep up good work mac.
|
16th July 2014, 15:38
|
|
Senior Member
|
|
Join Date: Apr 2012
Posts: 1,163
|
|
Cheers Phil, high praise from a founder builder!
Mac
|
17th July 2014, 17:09
|
|
Senior Member
|
|
Join Date: Dec 2013
Posts: 839
|
|
Hi Viatron did you get a chance to see if there is a complete navigator shell next door?
I see you have R Tech welders, is one of them a tig by any chance and if so is it any good?
Last edited by swifty; 17th July 2014 at 17:12..
|
17th July 2014, 17:46
|
|
Senior Member
|
|
Join Date: Apr 2012
Posts: 1,163
|
|
I'm not up again until tomorrow afternoon mate or if not then I'll be up all day Saturday, I'll have a look and let you know :-)
Both my Tig and Mig are R-Tech, there not Esab or Miller but for the price they are both excellent bits of kit and their service and warranty are very good. Keep an eye on their ebay shop as they often have xe display units going for a discount.
Mac
|
17th July 2014, 21:15
|
|
Senior Member
|
|
Join Date: Dec 2013
Posts: 839
|
|
I did consider the R Tech tig welder a couple of years ago for my garage but decided at the time to buy a mig instead being put off by the cheap price.
I do use a Esab tig at work and can say they are excellent but they should as they cost a couple of grand and as they say you only get what you pay for.
|
19th July 2014, 16:37
|
|
Senior Member
|
|
Join Date: Apr 2012
Posts: 1,163
|
|
Spent the day at the workshop today, first job though was non car related, bought a tatty old box off the bay of e to use as a Toy box as at the moment the poor little tots toy collection is housed in our front room in an old Laser Printer box!
10 minutes with the Da and some 240 grit had it ready and I then gave it 3 coats of epoxy primer that was way past its sell by so didn't want to use it on the car. It gave me a chance to break out the spray guns and get some practise in now that the priming of the car draws near, the primed article ready for top coat.

 |
19th July 2014, 16:48
|
|
Senior Member
|
|
Join Date: Apr 2012
Posts: 1,163
|
|
Anyway back onto car stuff.
Got the closing / strengthening panels done on the drivers side:
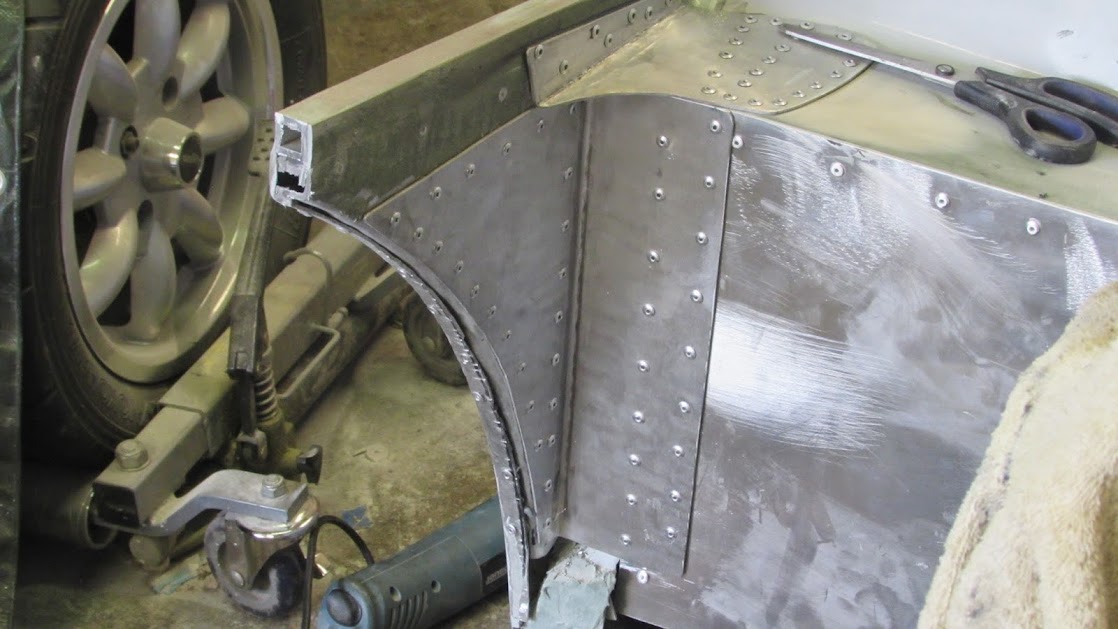
Rivets rivets and more rivets:

The small gap left at the bottom got filled with fibreglass filler before I left for the day.
Next job was to make a start on the tubular frame that the bonnet will attach to. Started by making bolt on steel brackets:

Then drilled and bolted them to the front bumper chassis member.

These are the M6 rod ends I will be using
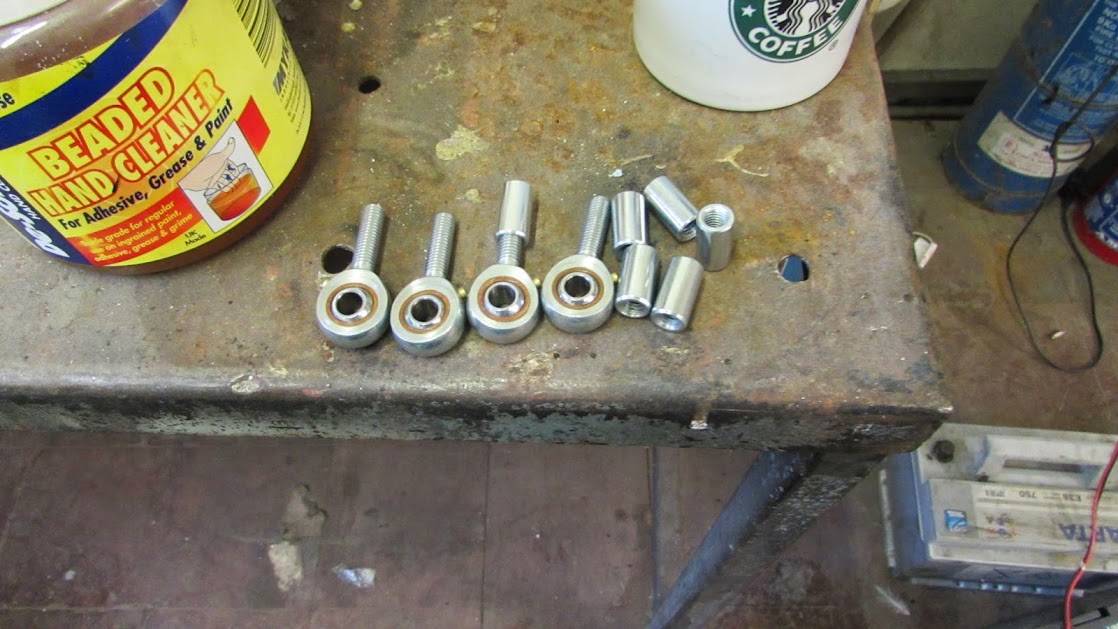
2 will attach to the frame on the car and another pair will attach to a separate frame bonded to the inside of the bonnet. By screwing the rod ends in and out and using different sized spacers between them the whole bonnet can be moved backwards, forwards up down and side to side which will hopefully allow me the adjustment I need to get a good close fit along with a smooth opening and closing motion.
Unfortunately I ran out of time to start on the frame itself but at least next time I'm up I can get started straight away tacking tube to the brackets.
TTFN
Mac
|
19th July 2014, 18:16
|
|
Senior Member
|
|
Join Date: Jun 2011
Location: birchington, kent
Posts: 1,769
|
|
Sounds like a great idea, looking forward to seeing it work.
|
|
Currently Active Users Viewing This Thread: 1 (0 members and 1 guests)
|
|
|
 Posting Rules
|
You may not post new threads
You may not post replies
You may not post attachments
You may not edit your posts
HTML code is Off
|
|
|
All times are GMT +0. The time now is 06:56.
|


 Hybrid Mode
