|
|
| Sammio Builds and discussions Sammio bodied car builds and specials |

3rd August 2015, 08:21
|
|
Senior Member
|
|
Join Date: Jun 2011
Location: birchington, kent
Posts: 1,769
|
|
Paul, hows the new 'nose'.
|
4th August 2015, 05:37
|
 |
Senior Member
|
|
Join Date: Feb 2012
Location: Wembley, London
Posts: 5,056
|
|
Ed – Cheers, it is certainly good to be finally fitting parts back on. 
Just to be clear, I know the radiator could be lowered, as I’ve seen others do it.
It is just a question of which solution is the least time consuming for me to do.
So I will spend some time looking more closely at the options and then make a decision.
- - - - - - - - - - - - - - - - - - - - - - - - - - - - - - -
Gary – Good spot, I’ll leave the typo there for comic effect. 
|
4th August 2015, 08:22
|
|
Senior Member
|
|
Join Date: Apr 2014
Posts: 198
|
|
No worries Paul, it was just an immediate solution I saw when looking at one of your pictures, I thought it would take about 20mins for me to do it that way where as it would be many many hours for me to fabricate a bulge and bodywork it to an unacceptable level. Ed.
|
5th August 2015, 19:03
|
|
Senior Member
|
|
Join Date: Feb 2012
Location: Wembley, London
Posts: 5,056
|
|
Ed - I guess the lowering of the radiator bracket doesn't worry me that much, as you say it is straight forward enough.
However, it is the knock on impact on the cooling system itself & the original Spitfire fan that would require more work for me to fix.
So I've been having another read of Mister Towed & Swifty's threads to remind myself how they built their scoops (see below).
But I'll make a final decision once I've had a much closer look at the bonnet work required to get the clearance I need.
Cheers,
Paul.  Mister Towed
 Swifty


|
5th August 2015, 19:58
|
|
Senior Member
|
|
Join Date: Mar 2012
Location: Doncaster
Posts: 116
|
|
Hi Paul,
I lowered the rad on mine to get it under the bonnet and fitted an electric fan instead of the mechanical one that couldn't stay as it became the highest point!
Wasn't that difficult to do, pictures on the ebay ad if you look at the engine bay
|
6th August 2015, 18:43
|
|
Senior Member
|
|
Join Date: Feb 2012
Location: Wembley, London
Posts: 5,056
|
|

Simon - I'd already re-read your build thread recently just to see how you had done it.
( Otherwise, I might have forgotten about the fan getting in the way.  )
- - - - - - - - - - - - - - - - - - - - - - - - - - - - - - -
Wembley Scoop - Mock Up:
I did squeeze in a bit of car time this evening which allowed me to have another look at the bonnet.
For me, I think the KISS solution would be to leave the engine set up exactly the same way as Triumph intended.
Which means I should modify the bonnet to fix around the new wider (& unfortunately taller) radiator.
However, I wanted to get a rough idea of the size of scoop required first, so I decided to make a cardboard template.
One thing you can notice in both of the scoops featured in my previous post is that there is an "overhang" at the front edge.
This means that it is not the front edge of the scoop that needs to clear, but the back edge of the opening (if that makes sense).
To roughly work out where that was for now, I just put some masking tape on the edge of the radiator cap.
Then closed the bonnet & re-opened it and the masking tape was now stuck to the inside.

Then I had to work out where the next high points would be when the cap was cleared.
Taking a photo with the bonnet closed (through the wheel arch) actually gives a mis-leading impression/angle.

As there isn't much difference in height between the cap, top of the fan blade (with masking tape on it) & engine hose.
( And the bonnet is curving up at this point too. )

So I cut out a rough shape which would easily cover all of these the high points.
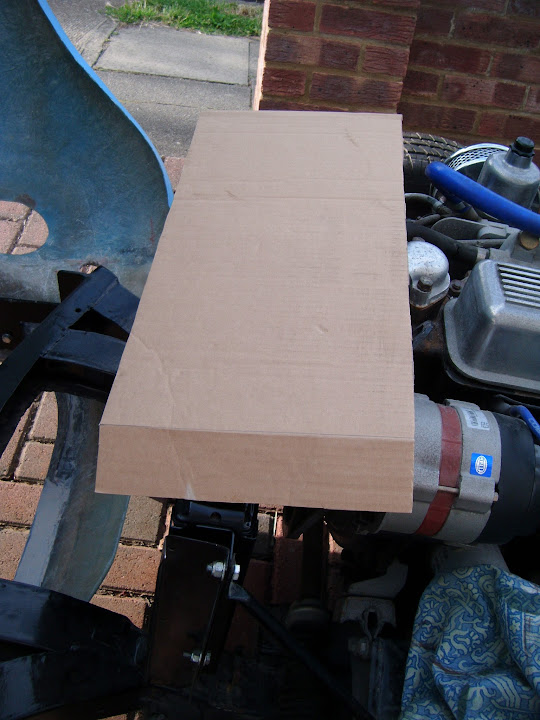
Then some yoga mat off cuts helped me set the height at the front.
Note:
I will only know the required height when the bonnet is cut and then "drops" around the cap, etc.
As time was short, I went with two simple designs...
Option #1 - Straight vertical sides


Option #2 - "Spread out" sides


Note:
In both options, the scoop will re-use the "hole" cut in the bonnet as the starting point.
So the top of the scoop will actually have a curve in it, compared to the straight cardboard in the mock up.
I have some time to think about this, as it will be a few days before I can get back to the car.
So I am open to feedback if anyone has a particular preference.
Until then, take care, Paul.
Last edited by Paul L; 7th August 2015 at 05:52..
Reason: Fixing Photo Link
|
6th August 2015, 18:55
|
 |
Senior Member
Enthusiast
|
|
Join Date: Dec 2006
Posts: 1,130
|
|
Why not just put a teardrop hump in the bonnet GT6 style  |
6th August 2015, 19:52
|
|
Senior Member
|
|
Join Date: Jan 2015
Posts: 168
|
|
Quote:
Originally Posted by micky1mo

Why not just put a teardrop hump in the bonnet GT6 style |
Just my idea too.........
It will look much better as a scoop.........everybody has one already.
Scoops are ment for air intake originally. |
6th August 2015, 20:20
|
|
Senior Member
|
|
Join Date: Jun 2011
Location: birchington, kent
Posts: 1,769
|
|
|
6th August 2015, 21:29
|
 |
Senior Member
|
|
Join Date: Dec 2013
Posts: 839
|
|
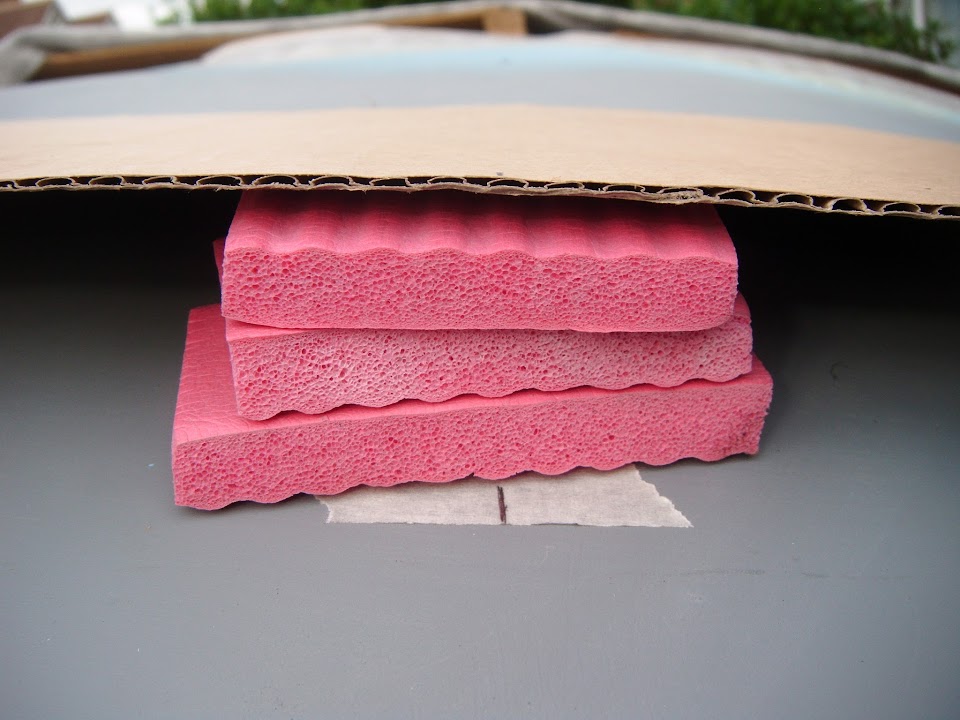
Paul if you go down the route of a bonnet bulge try ebay for model foam which is what i used for a mould, easy to shape with sand paper and gives good rounded edges etc.
|
6th August 2015, 22:15
|
 |
Senior Member
|
|
Join Date: Sep 2011
Posts: 1,446
|
|
|
7th August 2015, 06:00
|
|
Senior Member
|
|
Join Date: Feb 2012
Location: Wembley, London
Posts: 5,056
|
|
Micky1Mo & ReneAnglia - Funny you should mention a tear drop...
As I did wonder if just clearing the radiator cap itself would be enough to fix the problem (see below).
- - - - - - - - - - - - - - - - - - - - - - - - - - - - - - -
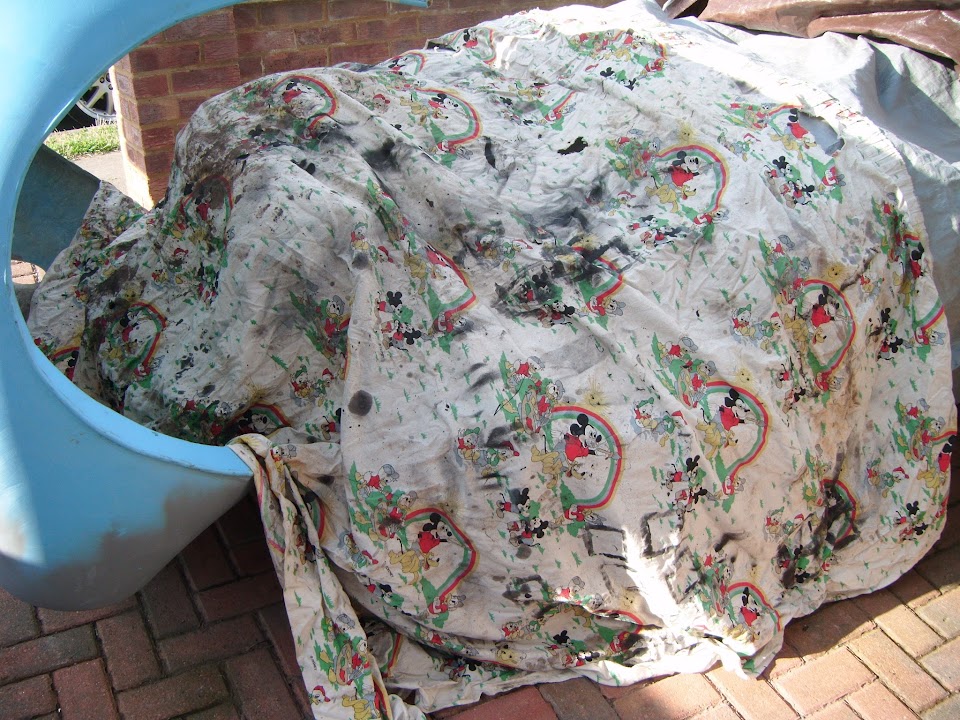
Gary & RedRatBike - Thanks for the links, although I'd want to continue my Blue Peter / home made tradition.
Especially as the "lumpy" nature of the rest of my body work would make professional parts stand out.
- - - - - - - - - - - - - - - - - - - - - - - - - - - - - - -
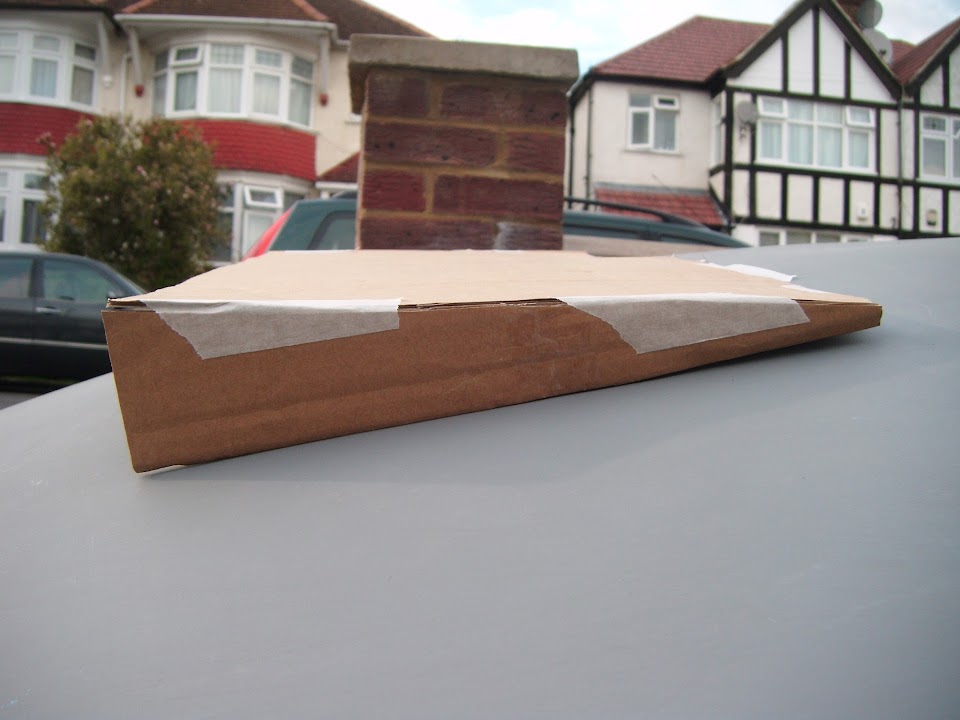
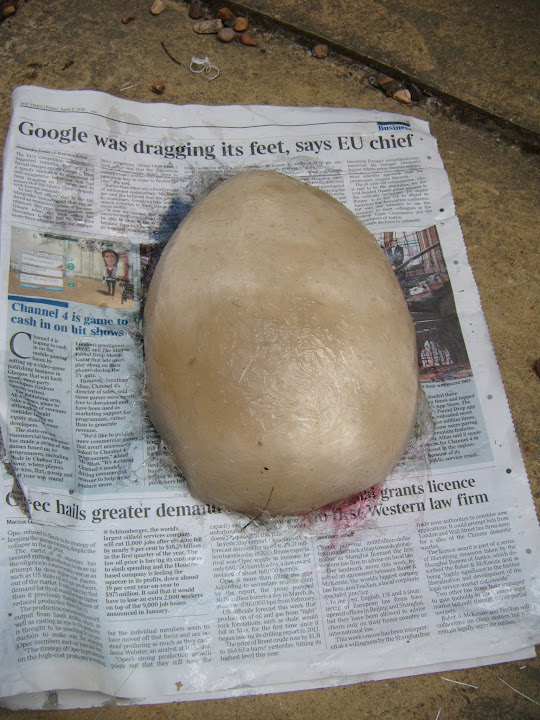
Swifty - I now have a stock pile of solid insulation foam which I could use to make a tear drop shape.
In addition to the scoops that you and Mr T made, I also read through how you both added bonnet bulges too.


- - - - - - - - - - - - - - - - - - - - - - - - - - - - - - -
General - Thanks for all the feedback gentlemen.
If I am going to stick to a KISS approach, then a tear drop is definitely easier to make than a scoop.
So I may start by cutting out a suitable hole to clear the radiator cap hope the general curve of the bonnet will clear everything else. 
Which leads me to my final question, what is the minimum clearance required between the engine and the bonnet?
Thanks, Paul.
Last edited by Paul L; 7th August 2015 at 08:40..
Reason: Correction
|
15th August 2015, 18:51
|
|
Senior Member
|
|
Join Date: Feb 2012
Location: Wembley, London
Posts: 5,056
|
|
Holiday Report:
We just got back from a family holiday in Derbyshire.
I think that 'Snake Pass' would make a good location for an "in car" home movie to the sounds of "On days like these."

Unlike the "video nasty" that was getting stuck on the M56 due to this propane gas tanker fire turned out to be.

Although this was our view a bit further back in the queue.

I honestly believe that taking over 3 hours to travel less than 3 miles is a new traffic jam record for me. 
Part of the reason for heading "Up North" was so the rest of my family could make a "pilgrimage" here...

I hate to be the bearer of bad news for any Corrie fans, but the houses on the right of this photo...

Are not really houses at all! 

Whilst I'd rather stick pins in my eyes than watch a traditional soap, I do find TV shows of interest on Quest.
Anything that Mark Evan's built, plus US shows like American Hot Rod, Sin City Motors, Overhaulin' and finally Salvage Hunters.
So we also squeezed in a trip to Drew Pritchard's place as part of a trip to LLandudno.

Note: This was by appointment, as casual visitors are not encouraged.
So I now have a cast iron pee. 

Anyway back to car news, post holiday chores mean I only got a bit done today, but it all helps...

|
15th August 2015, 18:51
|
|
Senior Member
|
|
Join Date: Feb 2012
Location: Wembley, London
Posts: 5,056
|
|
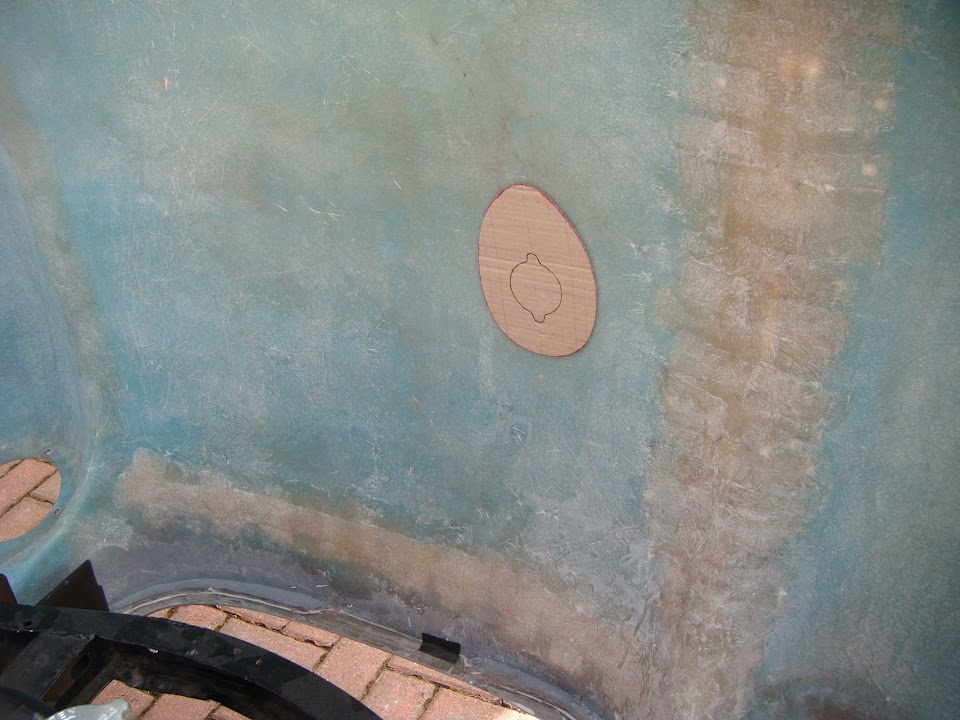
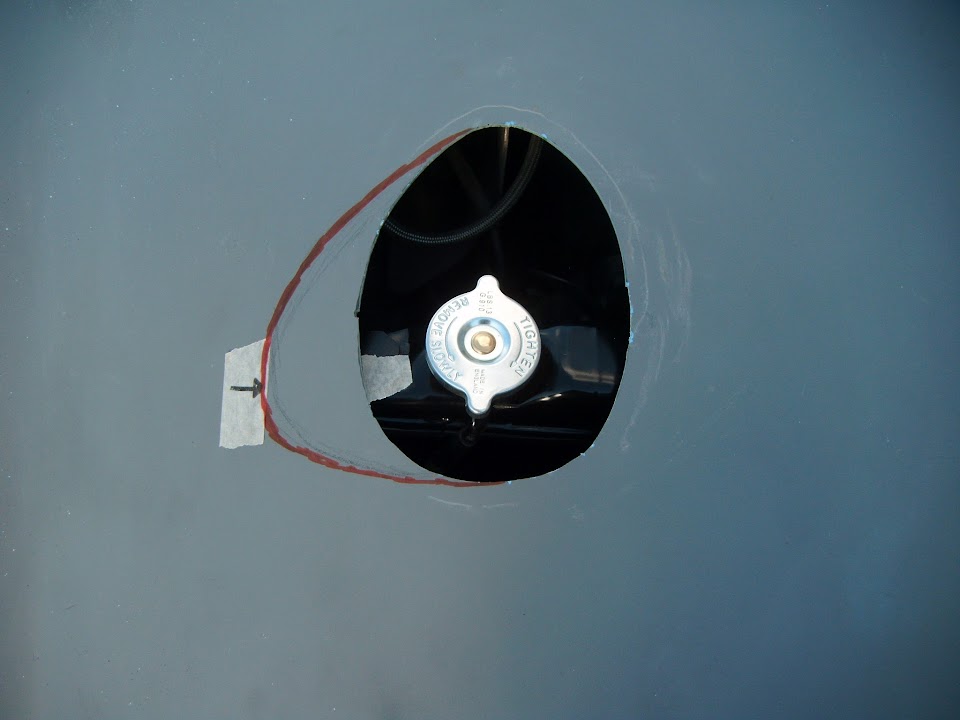
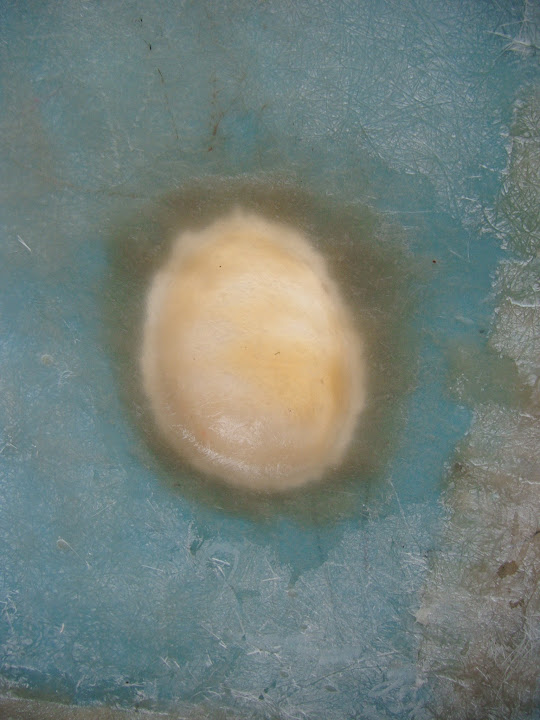
Bonnet Work - Part 1:
In a vain attempt to reduce the amount of extra work required, I've decided to cut out a tear drop shape in the bonnet and see what happens.
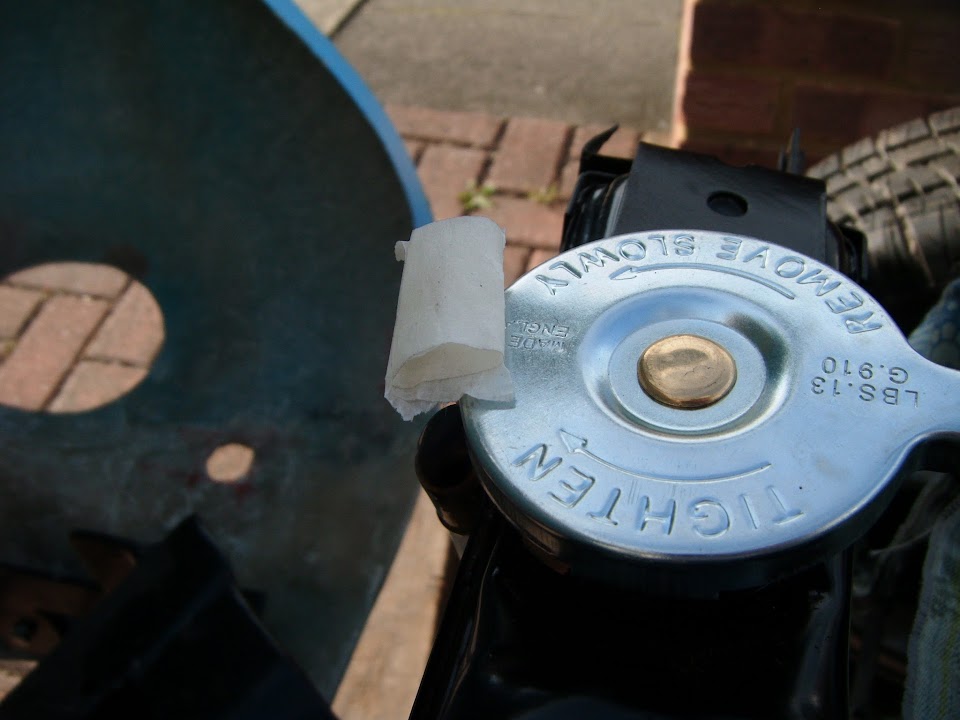
So I used my old radiator cap as a starting point.

Then I drew a couple of design options and settled on the red one.

Which should still give me a clear gap around the cap itself.
The shape was cut out and positioned on the cap, with some masking tape on top ready to stick to the bonnet.

Although I ended up holding it in position when the bonnet was closing to avoid it being knocked out of position.
With the bonnet re-opened, I had the shape in position and could mark it up.

It occurred to me that it would be a good idea to cut the hole from the sunny side.
So I covered everything up.
Before drilling some pilot holes from the inside.

Which allowed me to position the template and mark it up on the top side.

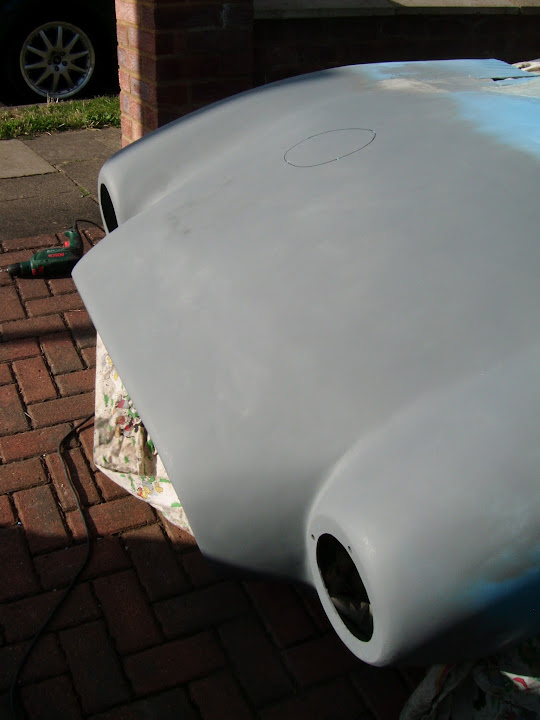
I needed to drill a larger hole for the jigsaw blade to fit in and cut the hole out.


Then came the moment of truth, as I gently lowered the bonnet back down to see if this actually worked.
Looking at the sunny side, it was clear that I had at least cut the hole in roughly the right place.


End of Part 1...
|
15th August 2015, 18:53
|
|
Senior Member
|
|
Join Date: Feb 2012
Location: Wembley, London
Posts: 5,056
|
|
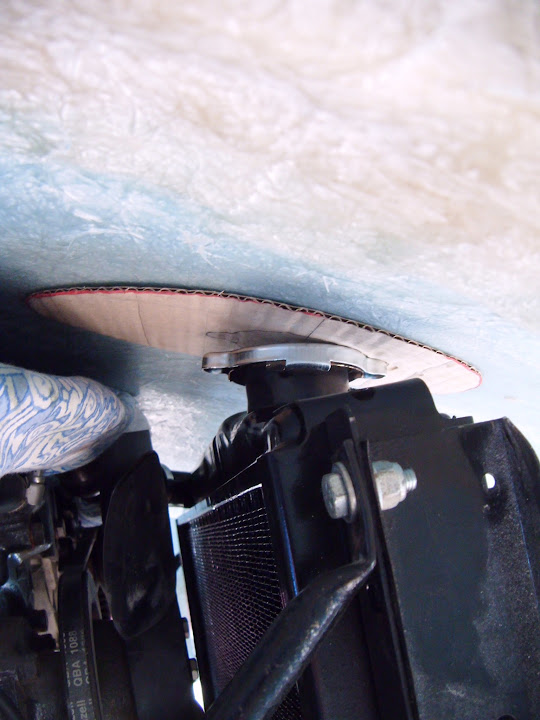
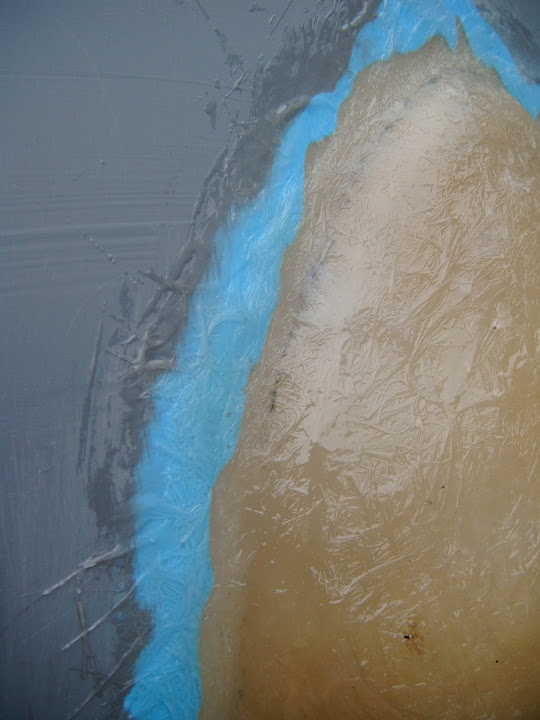
Bonnet Work - Part 2:
Then it was time to bite the bullet and take a look underneath so see if I had created any other clearance issues.
Thankfully nothing else now touches the bonnet on either side.
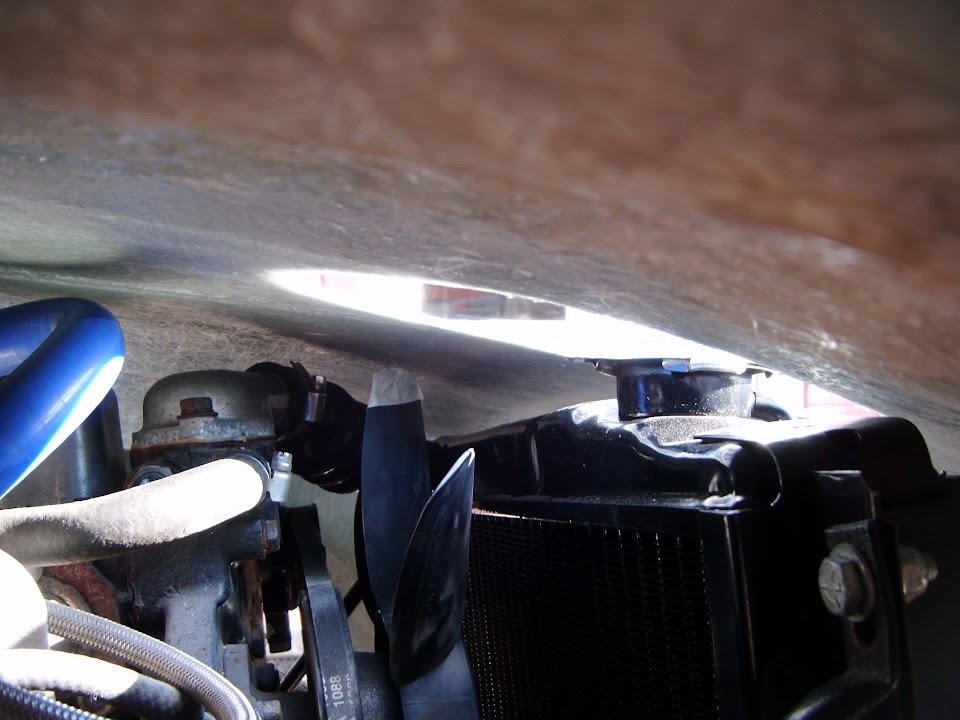

Although this corner is very tight.

Which leaves me with two options to consider.
#1 - Ensure the bonnet is set a little higher than it is at the moment when I fix the rear edge profile.
Note:
This temporary edge was where/how the bonnet was resting before I fitted the wider radiator.
So this gives me a consistent reference point regarding the position of the new radiator cap.
#2 - Widen the bulge to clear the corner, although I think this might look a bit odd / ugly.
In an ideal world, Option #1 will take care the clearance & I'll have a standard tear drop shape.
Although, I still don't know what the minimum clearance between the bonnet and engine should be.
So for now, I have not started any work on making the tear drop mould.
But at least it looks like I will be able to get away without the need for a scoop, which would be harder to make.
Until next time, take care, Paul.
|
17th August 2015, 16:10
|
|
Senior Member
|
|
Join Date: Feb 2012
Location: Wembley, London
Posts: 5,056
|
|
I am off work this week, so really want to make some decent progress on the car.
Unfortunately, a pile of other chores also need to be tackled, so not as much to report today as I'd hoped...
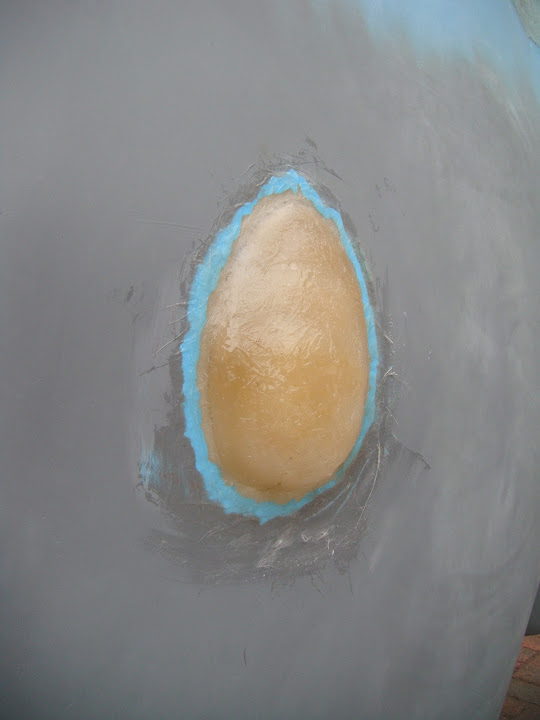
Bonnet Bulge:
I spent a bit of time double checking the rear edge of the bonnet & the tight gap around the corner of the radiator.
Thankfully, I am now pretty confident that there will not be a clearance issue once I've sorted out the rear edge profile.
So I decided to start making the bulge and dug out a section of insulation foam.
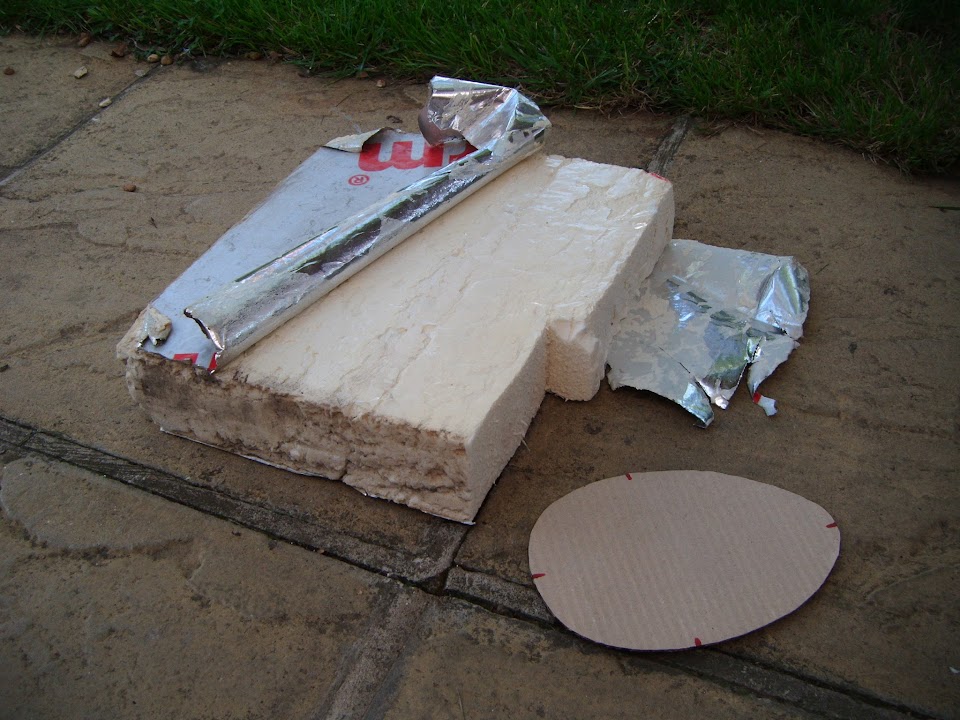
Which was then roughly cut into shape.

The curve/slope of the bonnet means that the hole doesn't have a matching gap on each side.

So I just needed to make sure the top of the foam was flat (ish) before I started.

I also had to hollow out the other side so that it would sit over the radiator and the cap.

After a bit of work I had the rough shape I wanted.


I plan to do the final shaping of the bulge with filler when I have this basic shape in fibreglass fixed into position.
At this point I had to re-cover the car and get on with other things, but I was able to start the first round of fibre glassing later on.
By doing the work near the garden shed at least I didn't need to carry everything out to the front drive.
I wrapped the mould in some cling film, a trick I'd seen Swifty & others do.

I them proceeded to make a complete pig's ear of putting some matting on.
But after a particularly messy session, at least I finally had a decent starting point.
I then left that to set while I got on with other stuff.
When that had set hard enough I gave a rough trim to the bottom edge to make it easier to remove from the mould.
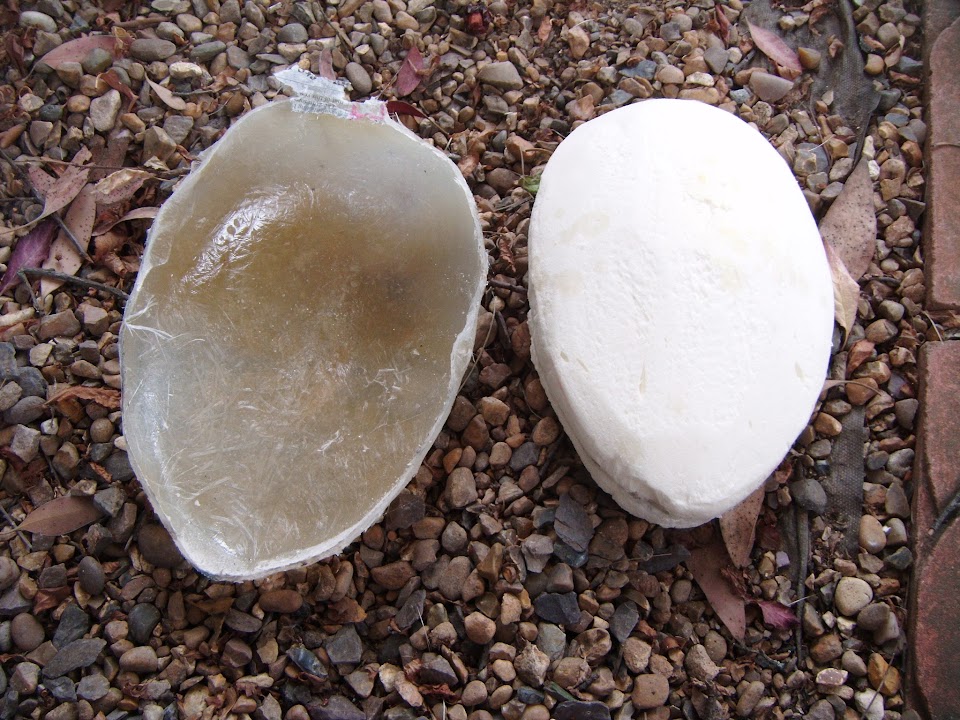
Then I marked the bottom edge of the bulge on both the mould and then the fibreglass before the next round of trimming.


Then I took the covers off the bonnet to see the bulge in position.
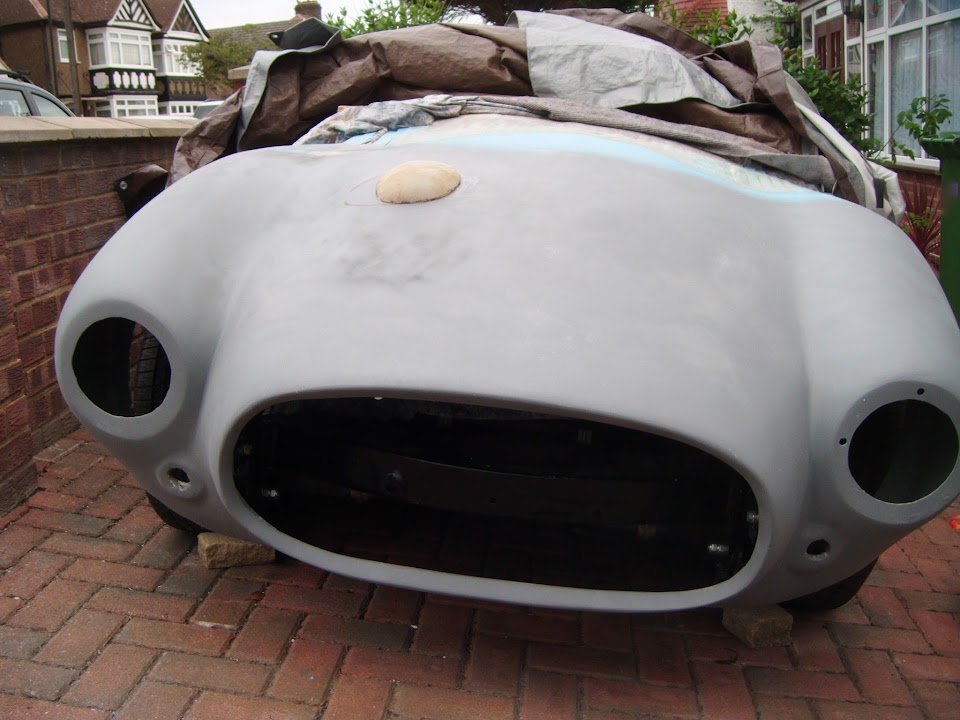

I still need to give the bottom edge a final trim so they match the contours of the hole in the bonnet, but for now I just taped it into position.
I will also trim the edges of the hole to match the bulge so I can get a good join when I add matting to the inside edges of the hole/bulge.

I had several attempts at taking a decent photo showing the gap around the radiator cap & this was the best I could do.
Overall, I am very happy that this will be enough to sort out the clearance problem without any further work.
Right I'm just waiting for my wife to get home, so I can take her for a well deserved meal out.
( Our girls are at my mum's for the night. )
So until next time, take care, Paul.
|
17th August 2015, 21:35
|
|
Senior Member
|
|
Join Date: Dec 2013
Posts: 839
|
|
Neat work on the bonnet bump Paul.
|
18th August 2015, 15:17
|
|
Senior Member
|
|
Join Date: Feb 2012
Location: Wembley, London
Posts: 5,056
|
|
Swifty - Cheers.
- - - - - - - - - - - - - - - - - - - - - - - - - - - - - - -
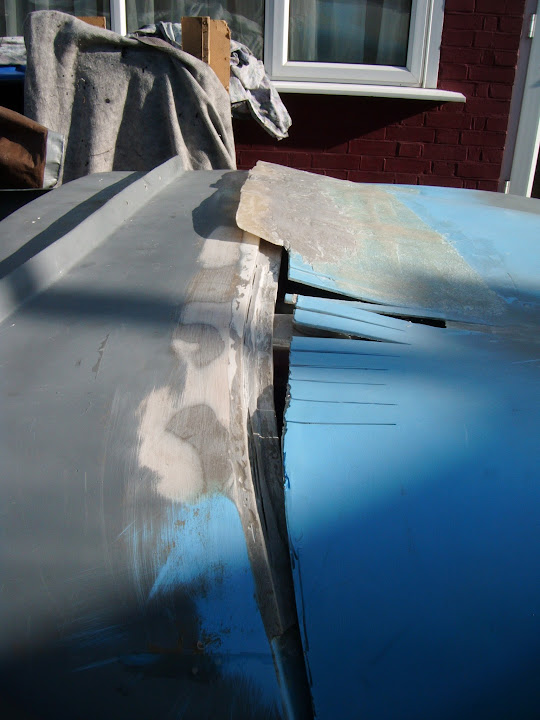
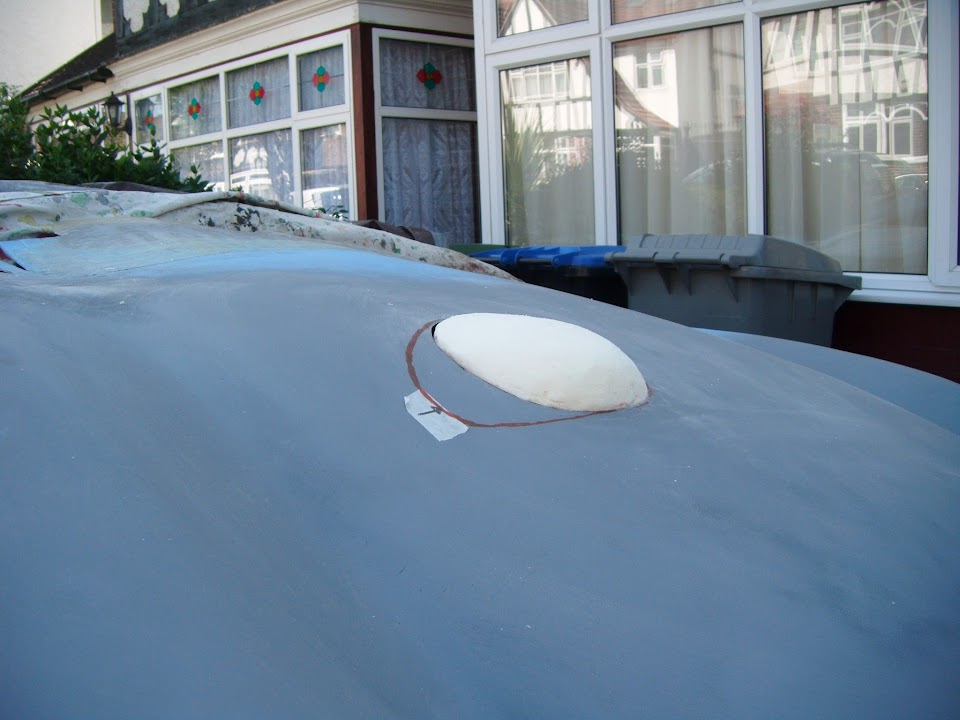
Bonnet Bulge Continued:
I had a short amount of time available in the morning, before I went to pick my girls up from my mum's.
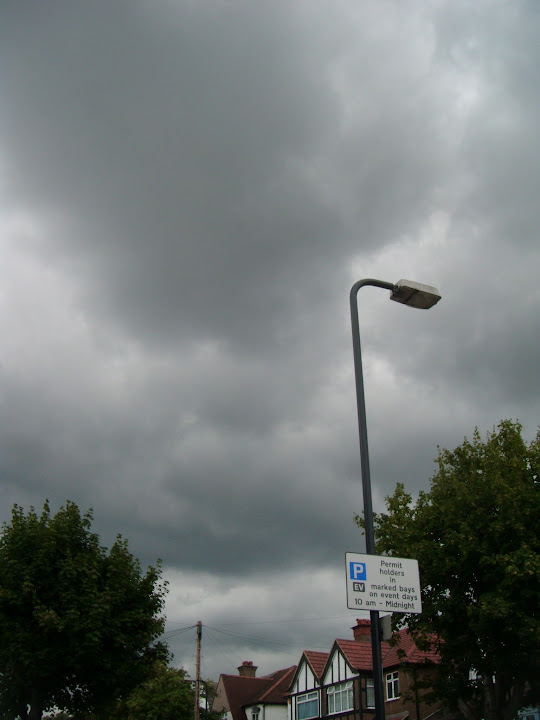
So despite the sky looking like this...
I had to take a chance to 'glass the bonnet bulge into place.
I removed the gel coat layer from around the "sunny side" of the hole.
( As I plan to add a layer of matting along the join on this side. )
Shaped the bottom edges of the bulge to match the contours of the bonnet.
Before:

After:

Widened some sections of the hole itself from the inside, so it met the bulge nicely.

There was just one small section where the two pieces didn't meet up properly.
So I will add some extra matting into this gap before I cover the edges.
By this time the bulge was firmly taped into position on the sunny side.
It doesn't look like much, but there is two layers (thin + thick) of matting added over the inside edge here.

Unfortunately, I lost count of the number of times I caught my back on the bottom edge of the bonnet.

So I will be glad when I finally get the chance to add that section to the body shell.
Anyway, for now, I left the matting to dry while I tidied everything away and cleaned myself up.
Thankfully it was set hard enough for me to lower the bonnet and cover everything up before I headed off.
- - - - - - - - - - - - - - - - - - - - - - - - - - - - - - -
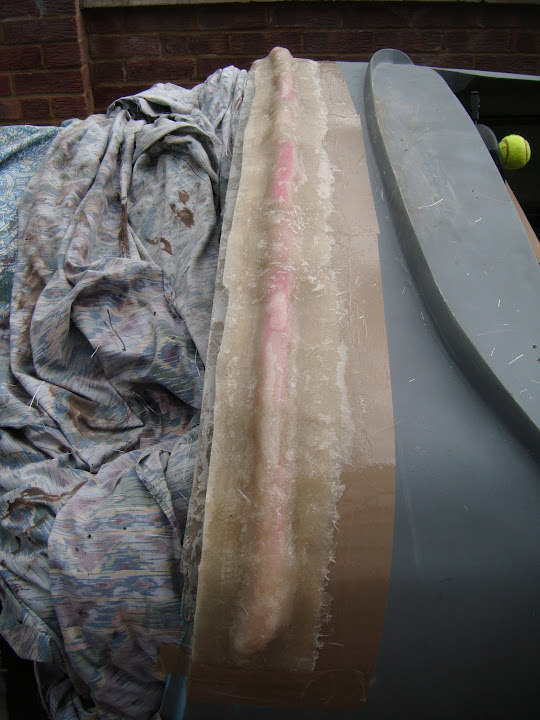
During my second shift on the car I put the final layer of matting around the inside edge of the bulge.
I also used some "pulled apart" matting strands to seal off the join on the sunny side.
Where I also added some "patches" to bulge itself to even out the mess I made yesterday.
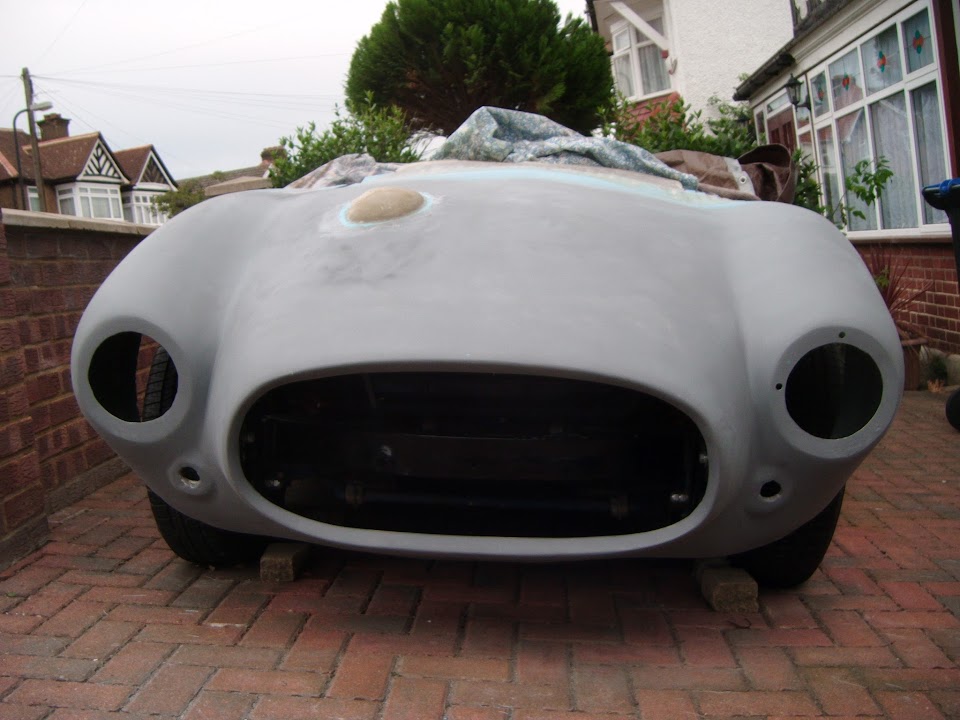
I also fitted my new "nose" before leaving the fibreglass work to set.
- - - - - - - - - - - - - - - - - - - - - - - - - - - - - - -
My final shift on the car was basically just tidying up, but at least the matting was set solid enough to close the bonnet for the night.
I'll leave this to fully harden before I sand down the stray matting strands on the bonnet around the base of the bulge.
I will also sand the bulge itself into a neater shape before adding some filler over the top.
( As you can see the top edge is currently a bit lumpy. )

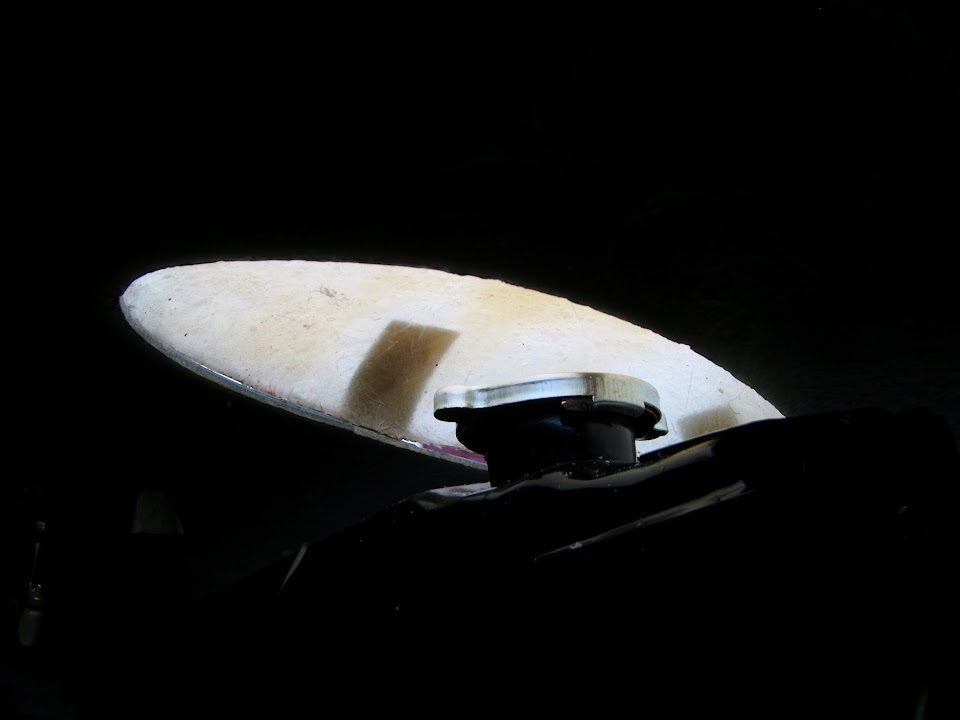
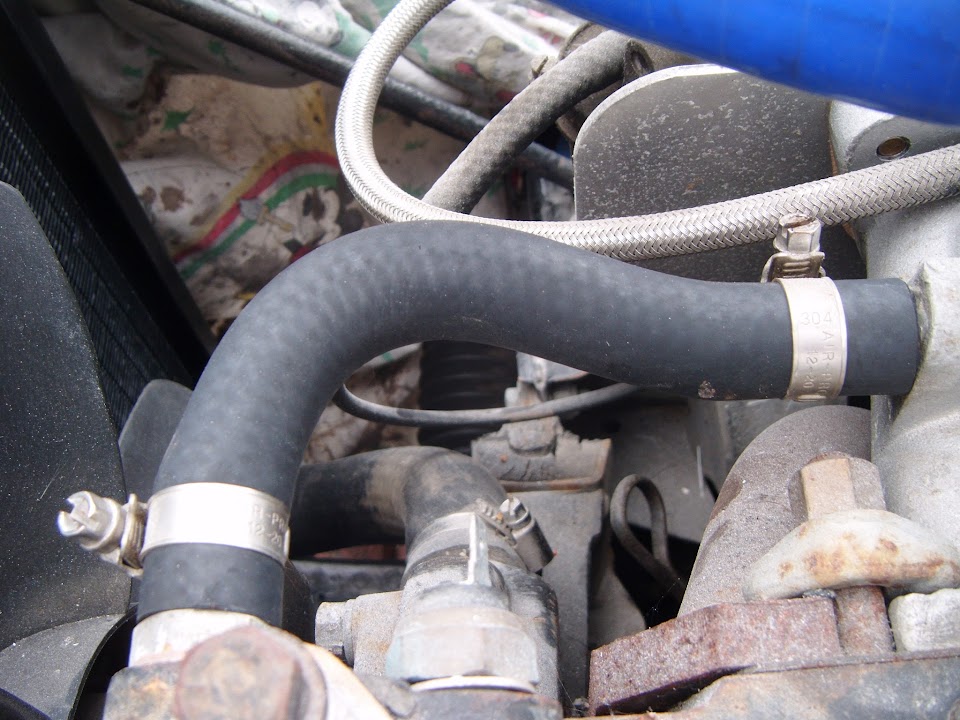
This view underneath the bonnet, taken from the front, gives you a good idea of the clearance available.

Even though my time is not my own at the moment, at least making something provides a bit of visual progress.
Until next time, take care, Paul.
|
19th August 2015, 15:12
|
|
Senior Member
|
|
Join Date: Feb 2012
Location: Wembley, London
Posts: 5,056
|
|
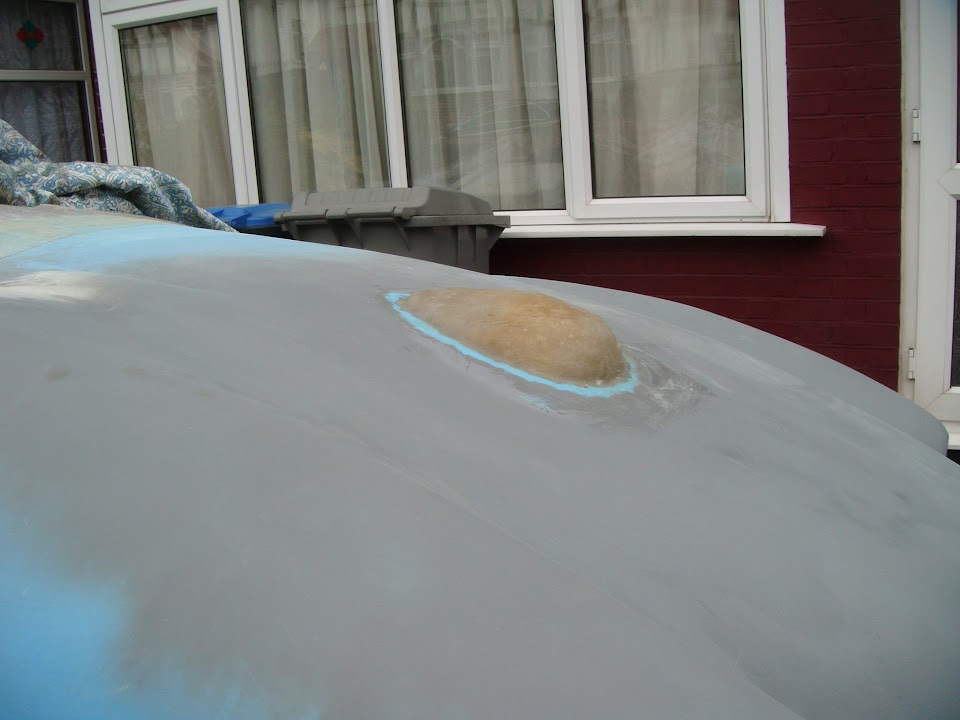
Bonnet Bulge:
Started off by sanding down the fibreglass on the sunny side.

Which left it a lot smoother than when I started, but not perfect by any means.

Then I smothered it with a layer of fibreglass filler.

When the filler had gone off sufficiently, I sanded it down.

You can see it has a bit more of a tear drop shape forming now.
But I will leave this to set over night before giving it a skim of normal body filler.

- - - - - - - - - - - - - - - - - - - - - - - - - - - - - - -
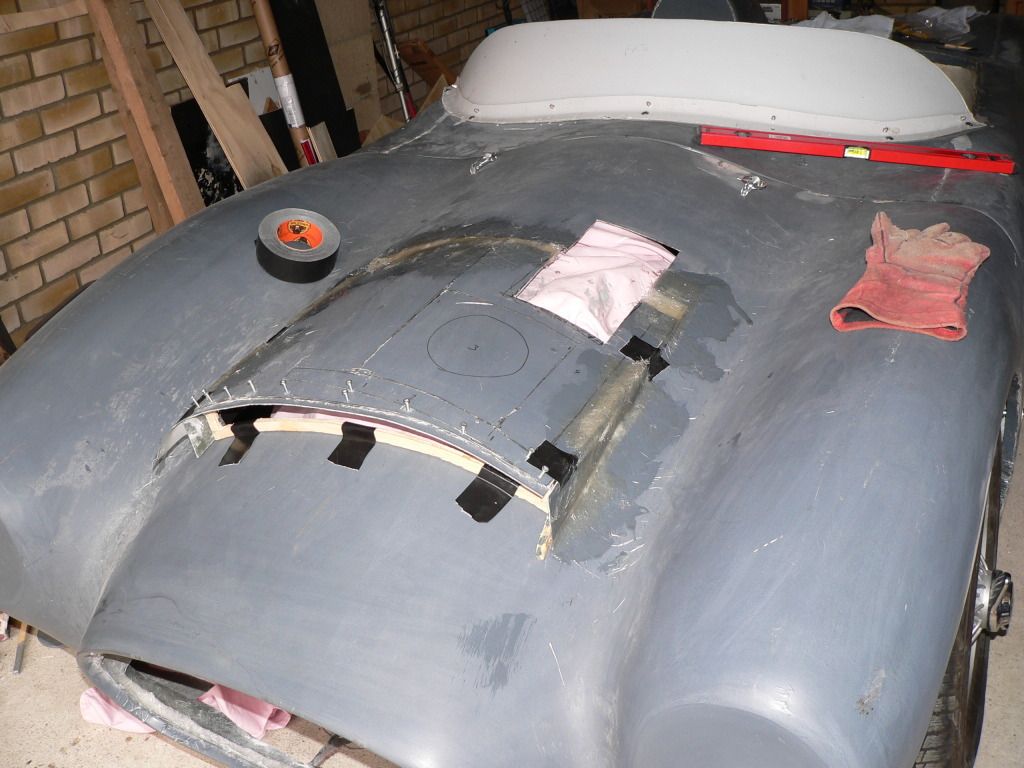
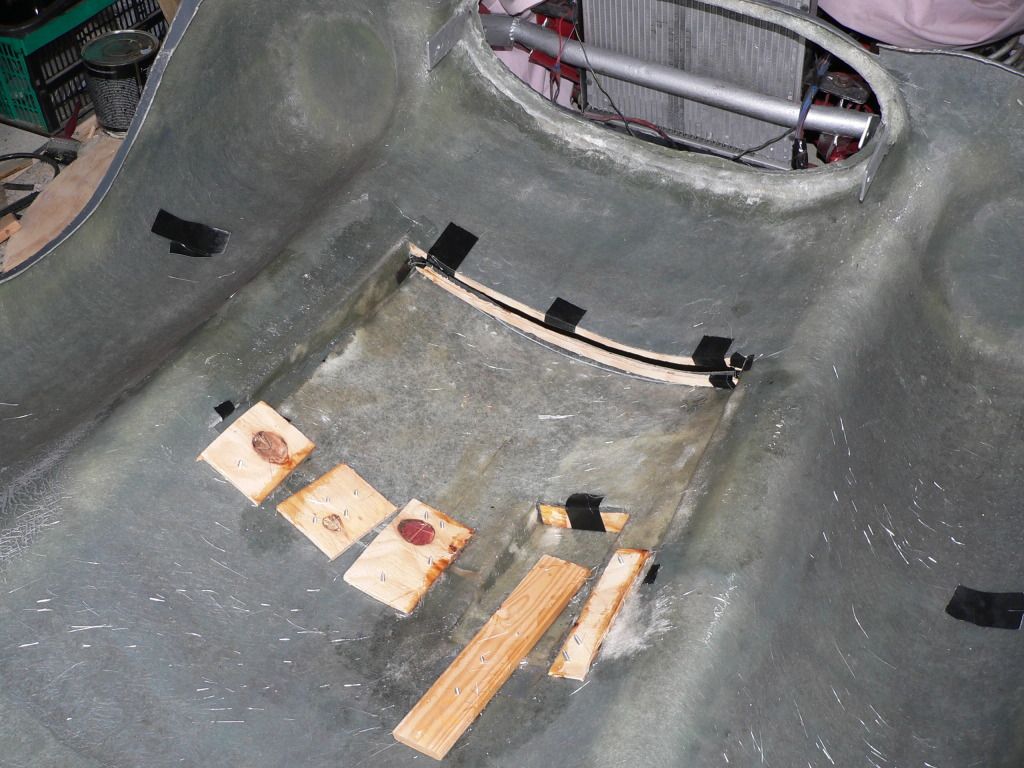
Bonnet Rear Edge:
I have a mould for the scuttle profile.

The only problem is that the sections of foam bracing I added don't go the whole way across.
Because there is too much flexibility in the mould when it is lifted off the scuttle.
I had a brief look at making an external brace with wood the other day, but figured it would be easier to add more foam to the mould.
So while I was waiting for the filler on the bulge to set I added some parcel tape to protect the scuttle.

Then I cut out some lengths of yoga mat to fill in the gaps.

After two fibreglass sessions, the mould now looked like this.
Unfortunately, the sky looked like this.
So rather than risk adding more matting and getting caught out by the rain I stopped at this point.
I then left the fibreglass to set, but with everything prepared for a quick cover up if required.

- - - - - - - - - - - - - - - - - - - - - - - - - - - - - - -
Garage Wall:
While the matting was setting I could tick off another domestic chore and prune my "garage wall".

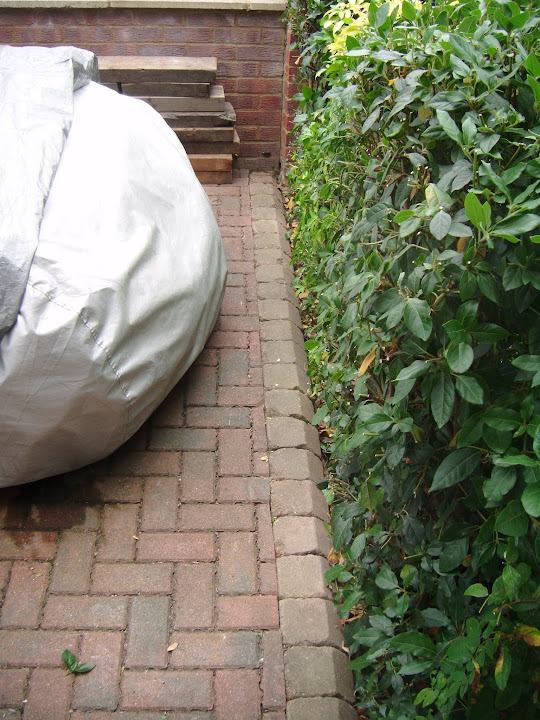
I had just finished sweeping this area up when I felt the first drop of rain.
So the car has been covered up for the night and I hope to do a bit more tomorrow.
Until then, take care, Paul.
|
19th August 2015, 22:58
|
|
Senior Member
|
|
Join Date: Apr 2014
Location: Midlands
Posts: 405
|
|
Great work Paul - solid progress
|
|
Currently Active Users Viewing This Thread: 1 (0 members and 1 guests)
|
|
|
| Thread Tools |
|
|
| Display Modes |
 Linear Mode Linear Mode
|
 Posting Rules
|
You may not post new threads
You may not post replies
You may not post attachments
You may not edit your posts
HTML code is Off
|
|
|
All times are GMT +0. The time now is 23:26.
|


