|
|
| Sammio Builds and discussions Sammio bodied car builds and specials |

10th September 2014, 19:32
|
 |
Senior Member
|
|
Join Date: Jul 2011
Posts: 5,328
|
|
|
10th September 2014, 19:40
|
|
Senior Member
|
|
Join Date: Jul 2011
Location: Hampshire
Posts: 146
|
|
Just got in from the garage having started to rebuild the lip on my Sammio shell.
Paul, just like you I have spent ages and ages thinking about the rolled edge solution and agree that it looks great on Swifty's car. But I just couldn't work how I could make it look that good and was waiting, with 'baited breath' to see how you were going to do it. I have to say that I enjoy your thread and think that you have been very bold in the way you have done things.
Anyway, tonight I decided that 'enough was enough, to KISS or I would never make any progress and have started to fabricate a lip. What a coincidence that I see that you have made the same decision.
Chris
|
11th September 2014, 06:51
|
 |
Senior Member
|
|
Join Date: Feb 2012
Location: Wembley, London
Posts: 5,056
|
|

Mr T - Your build is always good motivation for me, as your perseverance really paid off. 
Even just seeing your dash reminds me that you had to modify the frame & reposition the gauges.
Finally, your previous advice of "Just Do It!" has certainly reduced the amount of chasing my tail I do these days.
- - - - - - - - - - - - - - - - - - - - - - - - - - - - - - -
Chris - I was reasonably confident that I could get the rolled edge itself to work pretty well.
But I'd already build the rear cockpit lip & linked all the hump work to it, so I wanted to keep that.
( I know I could have cut it all out and started again, but I really just couldn't face doing that.  )
However, blending in a vertical lip on one corner into a horizontal rolled edge on the side requires too much skill for me.
I've also come to the same conclusion that to get the car finished I just have to get on with it as best I can.
As I've said before, I'll be happy if my car is just the dirt poor, inbred, hillbilly cousin of the Sammio family.
( Provided it is on the road.  )
Finally, it would be great if you got the chance to update your build thread with your progress.
Just knowing that others are working / struggling away with their builds helps to keep me going.
- - - - - - - - - - - - - - - - - - - - - - - - - - - - - - -
Right lots to do today, so I'd better get on with it, Paul. 

|
11th September 2014, 16:53
|
|
Senior Member
|
|
Join Date: Feb 2012
Location: Wembley, London
Posts: 5,056
|
|
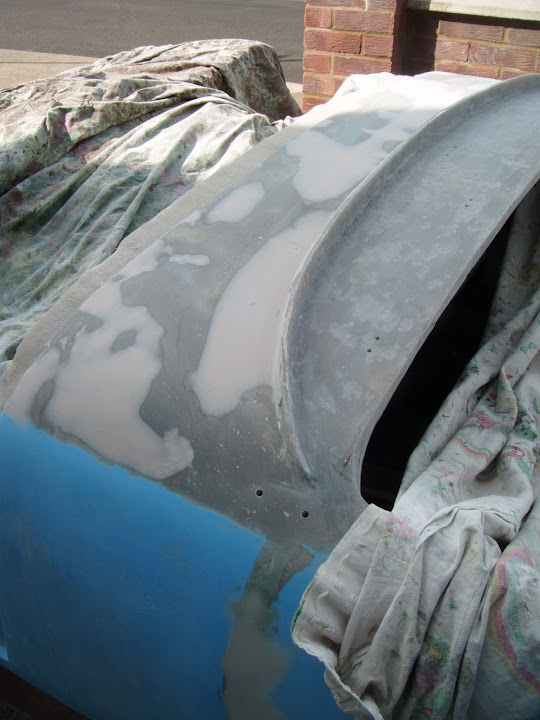
It's Filler Time:
Started the day by applying fibreglass filler to the scuttle area inside of the wind break lip.


Then I switched to "normal" body filler to cover the low spots on the other side of the scuttle & make a start on the lip.


Note: I really must learn to put less filler on when I'm supposed to be just giving it a skim. 
While I had the normal filler on the go I also covered the "sealed" door gaps.


When the filler had gone off sufficiently, I started to sand it into shape.
This took two sessions, was hard work and extremely messy.
When I was done, I had to carry the body shell onto the road.

This gave me the space to tidy up the mess.
Note:
I also had to move the body while I was sanding, as the wind was blowing the dust onto next door's drive. 
So I had to hose their drive down too while I was as it.
Anyway, this is what the various areas look like now.


End of Part 1...
|
11th September 2014, 16:54
|
|
Senior Member
|
|
Join Date: Feb 2012
Location: Wembley, London
Posts: 5,056
|
|
Part 2:
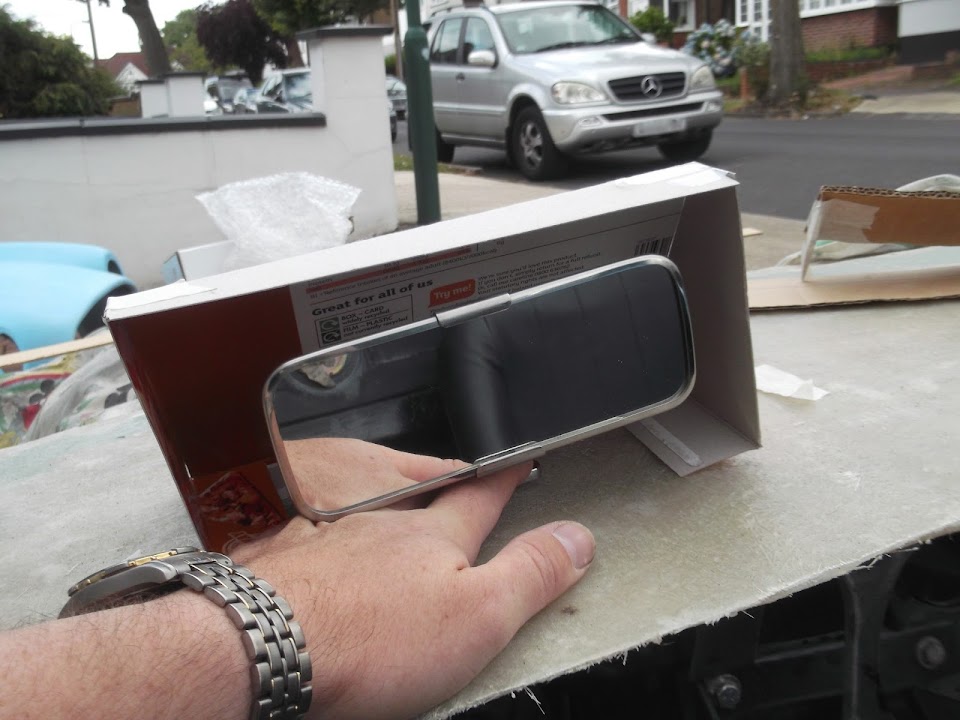
I had re-drilled all the mounting holes from below so I could re-fit the aero screens and mirrors.
I made a temporary rubber spacer from a bit of inner tube for the rear view mirror.

The penny washers worked well on the rear view mirror.

Not so well on the aero screen bolts.

Until I cut the new longer bolts to size, I just used extra nuts to hold the side mirrors in place.

So here are all the shiny bits fitted.

The next steps will be to trim the wind deflector lip & scuttle lip, but I ran out of time today.
As I want to take my time and get this right, so I also want to test fit the dash to ensure the scuttle lip isn't in the way.
My wife helped me lift the body shell back into place so I could clear up for the night.
At some point I need to modify my wooden tonneau cover to accommodate the screens.

At the moment this is just sitting on the straps holding the bonnet in place.
We have some friends coming round on Saturday, so I will be removing all evidence of car building from the house.
So it might be a few days before I make any more progress.
Until then, take care, Paul.
|
11th September 2014, 20:32
|
|
Senior Member
|
|
Join Date: Feb 2012
Location: Wembley, London
Posts: 5,056
|
|
PS
Forgot to add this cartoon strip that was sent to me today and made me smile.
 |
12th September 2014, 10:12
|
|
Senior Member
|
|
Join Date: Mar 2012
Posts: 1,152
|
|
That is looking decidedly like a pretty 1950s sports car.
There are elements of your scuttle that I shall....er.....borrow.
Well done, Paul.
|
14th September 2014, 18:39
|
|
Senior Member
|
|
Join Date: Feb 2012
Location: Wembley, London
Posts: 5,056
|
|
Oxford - I'm really glad you like the way my build is finally turning out.
As it is sometimes hard for me to get an objective view of progress when I'm stuck in fire fighting mode.
I just hope you are not planning to "borrow" the slightly lob-sided nature of my scuttle. 
- - - - - - - - - - - - - - - - - - - - - - - - - - - - - - -
Old Screen, New Home:
Its been a hectic few days, with no car work to report.
However, I did meet Duncan ( Slip Hazard) and his other half today so they could pick up these items.

He is building a V8 powered Cordite that sounds very interesting.
- - - - - - - - - - - - - - - - - - - - - - - - - - - - - - -
I hope to get the chance to trim the wind break lip tomorrow and get some more filler on the scuttle.
Until then, take care, Paul.
|
15th September 2014, 16:52
|
|
Senior Member
|
|
Join Date: Feb 2012
Location: Wembley, London
Posts: 5,056
|
|
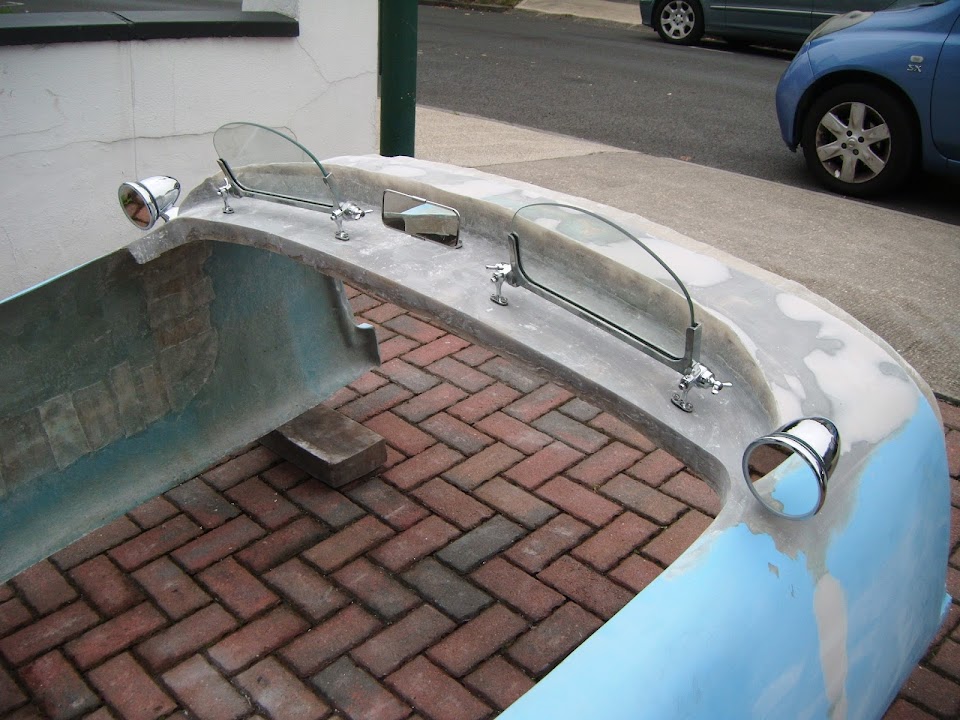
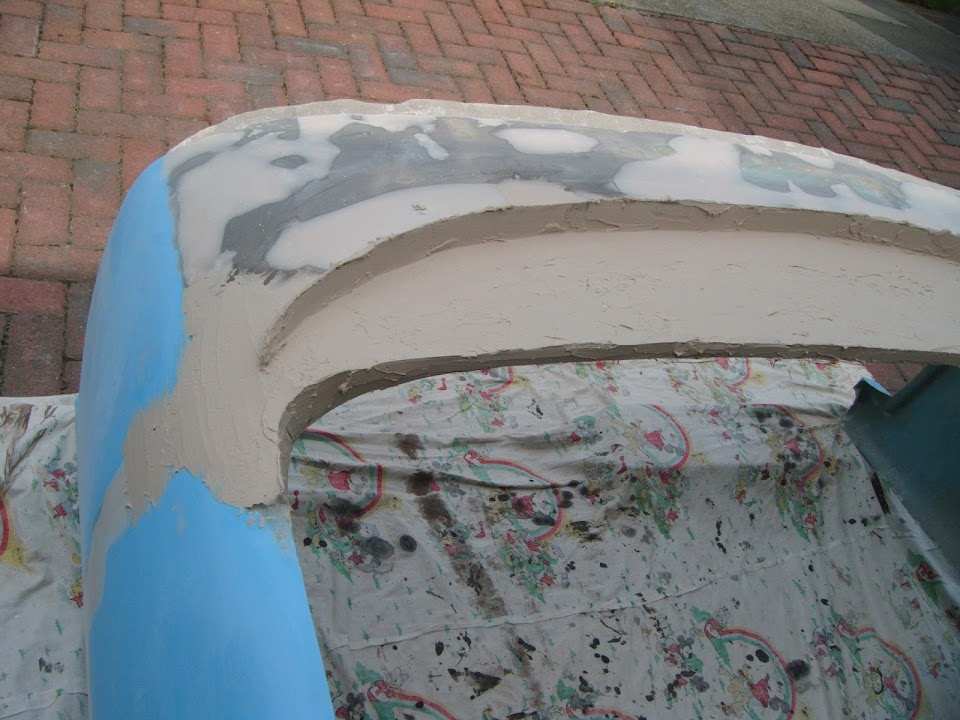
There Is A Light...
... at the end of the tunnel and, for a refreshing change, this time, it is not an oncoming train!
My "final" version of the wind break lip design looked like this.

However, now I was about to trim the lip into shape, I wanted to try a "Final Version MkII" design first.
Rather than have a drop / cut away in the lip for the rear view mirror screen, I kept the whole lip the same height.
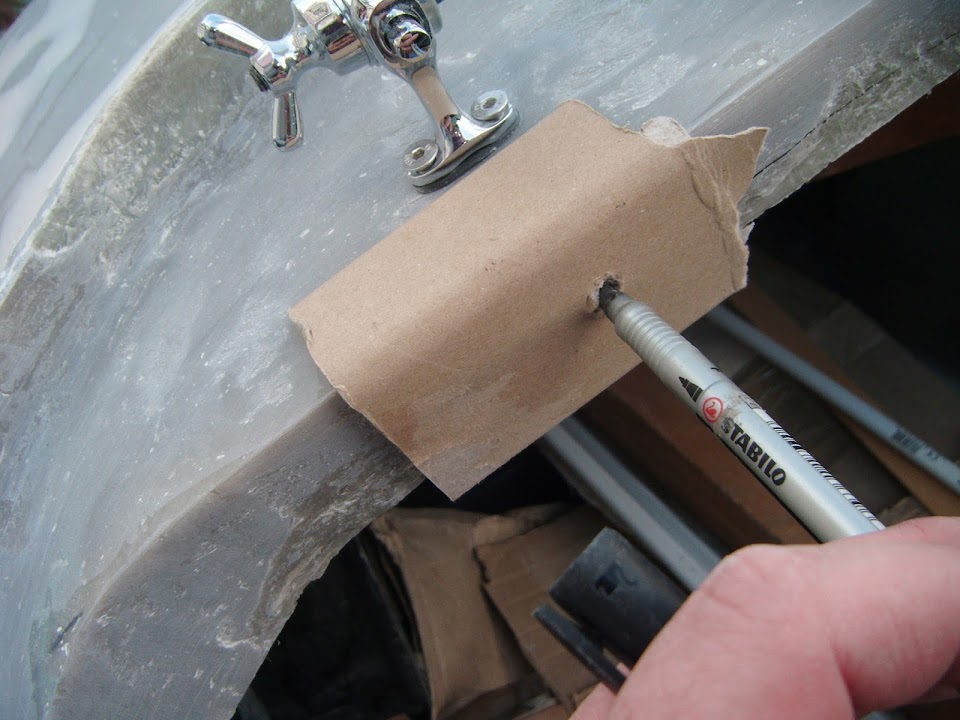
I made a low tech version of a marker guide I'd seen Mac use to mark the top lip position relative to the scuttle.
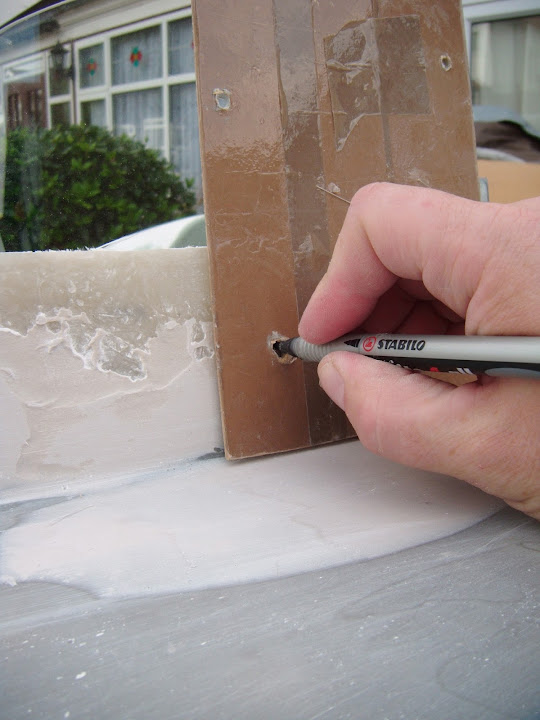

As it turned out, the bottom edge of the jigsaw gave a very similar height, so I just used that instead.

It still needs a final tidy up, but this is what I ended up with.


Then I used some plywood off cuts to prop up the driver's seat.
( To add the height provided by the spacers used when bolting the seat down. )


This way I could double check the view from the driving position and thankfully the lip is not in the way.
- - - - - - - - - - - - - - - - - - - - - - - - - - - - - - -
The next job was to cut out the rear view mirror screen some fresh perspex.

Then I clamped the screen temporarily into position as I don't want to start drilling the fixing holes until the filler work is complete.
( I will also shape the bottom edge of the perspex to match the scuttle contour. )

My theory is that by keeping the lip a constant height, this helps to disguise the different gaps between the mirror & the screens.

- - - - - - - - - - - - - - - - - - - - - - - - - - - - - - -
My next trimming job was on the scuttle lip, so I temporarily fitted the dash into position.

It was clear I needed to take a bit off the lip, so I made another low tech marker pen guide.

I left the lip a constant depth until it reached the corners, where I let it expand to blend into the cockpit sides.
( Depending on how deep the sides end up being I might come back and trim some more off. )
End of Part 1...
|
15th September 2014, 16:54
|
|
Senior Member
|
|
Join Date: Feb 2012
Location: Wembley, London
Posts: 5,056
|
|
Part 2:
Then the jig saw was put back into action.

As with the wind break lip, there is still a bit of final tidying up of this edge to do.
But with the steering wheel back on, you can now get a pretty good idea of what the cockpit / scuttle will look like...


The other day Oxford used the phrase "... a pretty 1950s sports car ...".
Well it has taken me a very long time to reach this point, but I am very happy that I seem to have pulled this off.
Especially when I really didn't know what I was doing when I started cutting the old scuttle out back in June.
( I ended up removing even more from each side compared to this photo. )

Although at this point in time I am planning to put just the passenger mirror on a plinth.
My theory is that by making the two sides obviously different, some of the other symmetry issues may not jump out at you.
- - - - - - - - - - - - - - - - - - - - - - - - - - - - - - -
The next job required me to remove all the nice and shiny things from the cockpit area.
That way I could do the first round of tidying up of the wind break lip with my angle grinder.

Unfortunately, I couldn't go any further at this point until my wife came home to help me lift the body shell.
Still, at least it is now sitting on the drive ready for me to start slapping on some body filler tomorrow.
( Weather and other chores permitting. )

So until then, take care, Paul.
|
15th September 2014, 20:36
|
|
Senior Member
|
|
Join Date: Jun 2011
Location: birchington, kent
Posts: 1,769
|
|
Its really turned out well, but why do you need the bit of plastic in the middle? will it sit upright or on a slant?
|
15th September 2014, 20:55
|
|
Senior Member
|
|
Join Date: Feb 2012
Location: Wembley, London
Posts: 5,056
|
|
Gary - Unfortunately the perspex still has some white protective film on both sides.
Once peeled off, it will look something like this.

The basic idea is to stop the rear view mirror being blown about when driving along.
Although initially I was looking at building a fixed cover something like this.
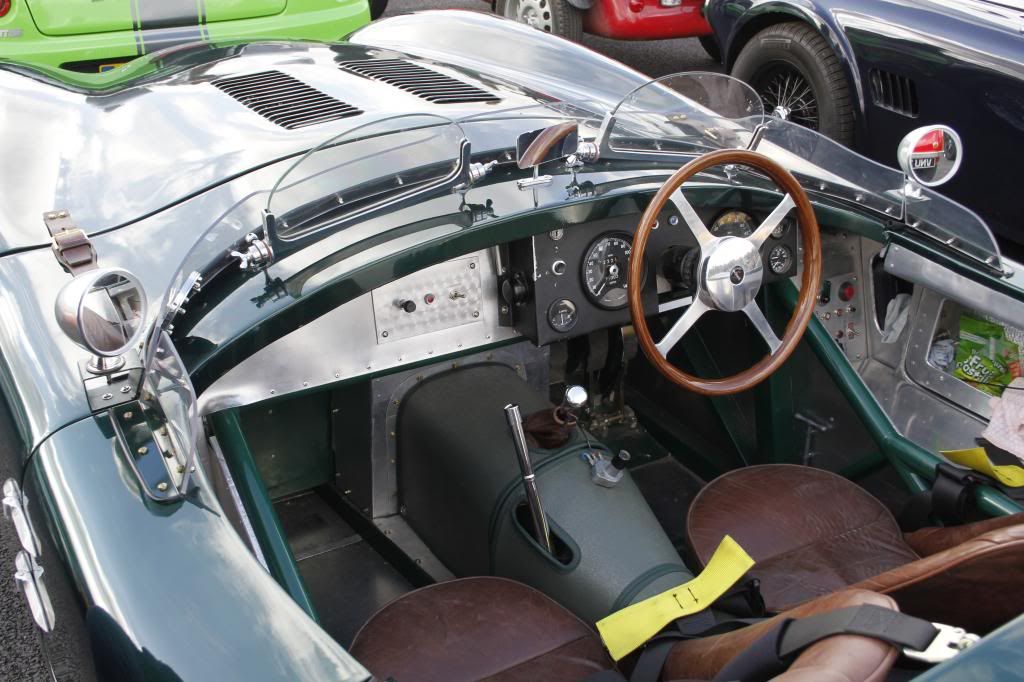
But I took a lot of inspiration from this photo of a C-Type Jag.
The perspex will follow the gentle angle of the lip on the vertical plane, plus a slight bend on the horizontal one, again to match the lip.
Hope that makes sense, Paul.
|
15th September 2014, 20:56
|
 |
Senior Member
|
|
Join Date: Dec 2013
Posts: 839
|
|
Paul i think you must be very pleased with how it has turned out, it looks the part.
I think that when you reach a stage like this it's very satisfying as all those small tasks come together so you can see something major happening with the build, although some of the things you have tackled are not on the small scale.
Keep it up and you will be on the road in no time.
|
15th September 2014, 22:00
|
|
Senior Member
|
|
Join Date: Dec 2013
Location: thurcroft, Rotherham South Yorkshire
Posts: 196
|
|
Paul well done it's been a lot of hard work for you but it's paid off it looks the business now, absolutely great
|
15th September 2014, 22:07
|
 |
Senior Member
|
|
Join Date: Sep 2011
Posts: 1,446
|
|
Wow I'd say you should be feeling pleased with yourself
From a gaping hole to a nigh on finished scuttle
|
16th September 2014, 18:13
|
|
Senior Member
|
|
Join Date: Feb 2012
Location: Wembley, London
Posts: 5,056
|
|
Swifty, Thurcroft Flyer & RedRatBike - Thanks for all the positive comments gentlemen.
I have had quite a few low / dark points during this build, but yesterday was a really good day.
It made all the extra work required for my Frankenstein build finally seem worth while.
- - - - - - - - - - - - - - - - - - - - - - - - - - - - - - -
"Filler On"
When I trimmed the wind break lip, it left a horizontal cut across a thick build up of fibreglass.
So today, I "softened" the top of the lip by using my grinder to put an angle at the top of the front face.


Then I mixed up and applied some "normal" body filler, but make a real mess of it.
I either mixed up too much filler, added too much hardener, took too long to apply it, or a combination of all three!
It is not some much the mess, but the fact that tidying it up requires some serious effort.
Anyway, enough of the excuses, I covered the inside of the scuttle and the wind break lip.

Plus the remaining parts of the front wind break lip.


Then while I was at it, I also covered the areas I'd been previously working on at the rear of the body shell.

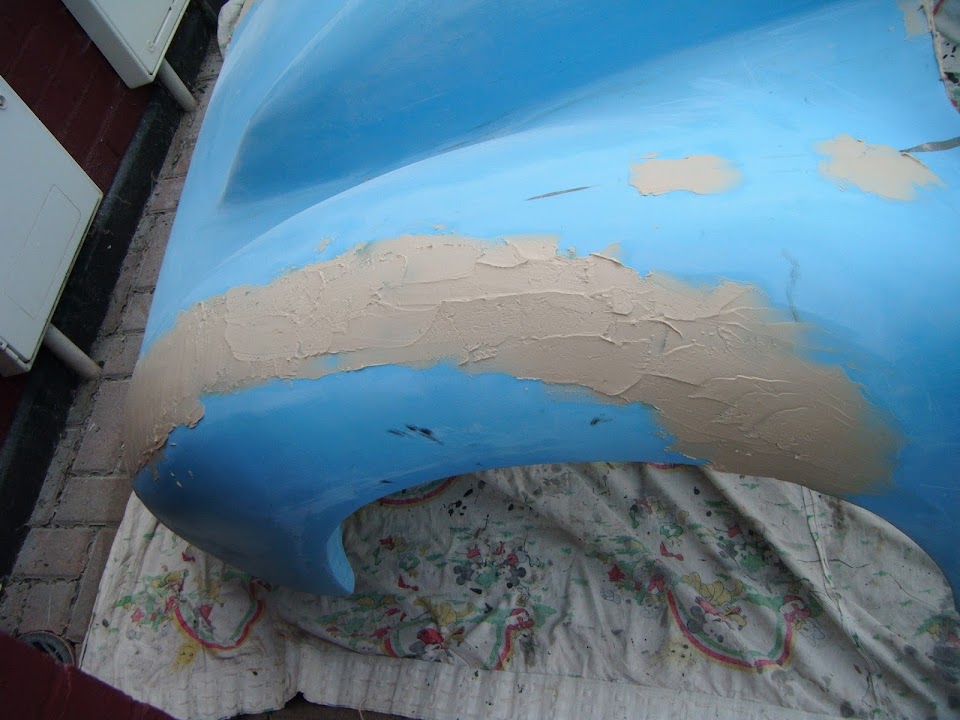


That was now I left it until the filler had gone off sufficiently...
- - - - - - - - - - - - - - - - - - - - - - - - - - - - - - -
"Filler Off"
I spend hours trying to put some sort of decent shape back into the areas I'd applied filler to.
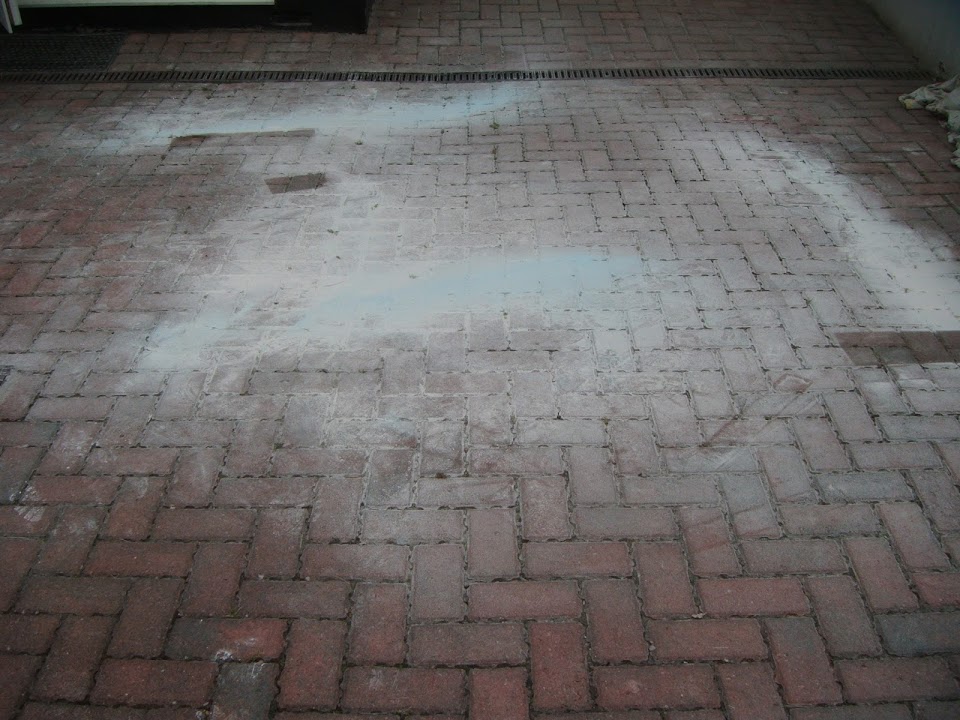
There was filler dust everywhere and I ended up hosing down the body shell along with the drive at the end of the day.
At least it now looks a lot better than when I started...


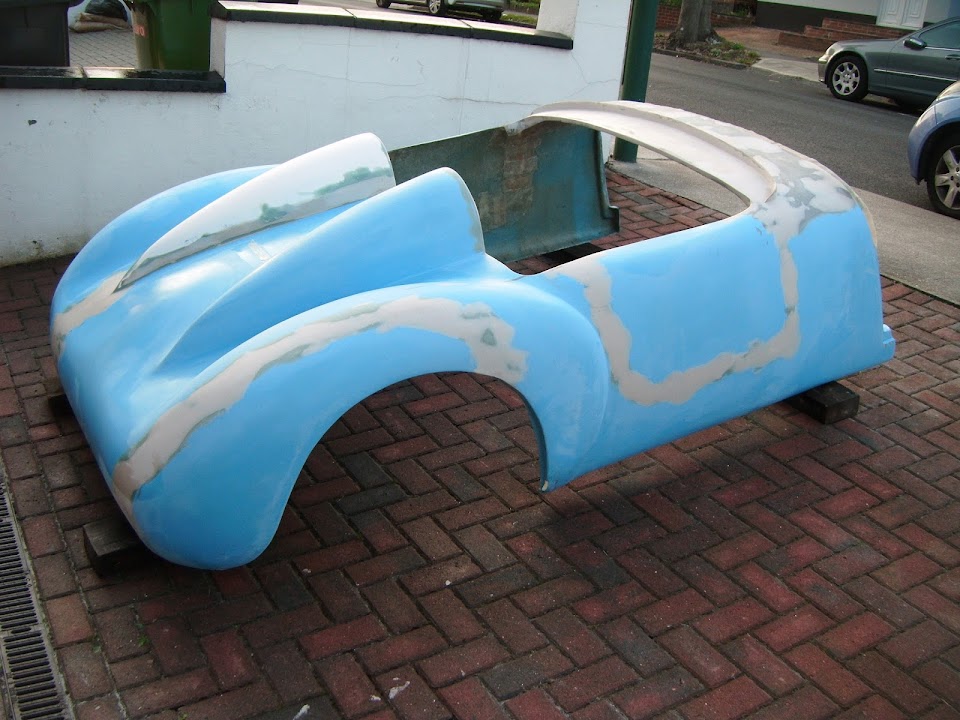


I'm finding it hard to see the "wood for the trees" during this sanding down process.
Whilst some small areas are now pretty smooth, I think the overall effect is still slightly undulating across larger areas.
So the plan is to give the work I have done so far a light dusting with etch primer.
Hopefully, that will give me a better idea of what amount of body work I still have to do.
So until next time, Paul.
|
16th September 2014, 19:50
|
|
Senior Member
|
|
Join Date: Jun 2011
Location: birchington, kent
Posts: 1,769
|
|
Smoooooooothe...
|
16th September 2014, 20:09
|
|
Senior Member
|
|
Join Date: Jul 2011
Posts: 5,328
|
|
Looking forward to seeing it all one colour Paul. I think it's going to look mighty fine. |
16th September 2014, 21:47
|
|
Senior Member
|
|
Join Date: Sep 2011
Posts: 1,446
|
|
Guide coat required to see the high and low spots when you sand again I'd say
|
17th September 2014, 04:55
|
|
Senior Member
|
|
Join Date: Jul 2011
Location: Belgium
Posts: 103
|
|
Not to give you a panic attack, Paul, but I'm quite curious to learn how you're going to mate the bonnet to your new scuttle!
Baz
|
|
Currently Active Users Viewing This Thread: 3 (0 members and 3 guests)
|
|
|
 Posting Rules
|
You may not post new threads
You may not post replies
You may not post attachments
You may not edit your posts
HTML code is Off
|
|
|
All times are GMT +0. The time now is 09:01.
|


 Linear Mode

