|
|
| Tribute Automotive Builds Discuss your Tribute kit build |

30th May 2016, 11:19
|
 |
Senior Member
|
|
Join Date: Dec 2011
Location: Devon
Posts: 550
|
|
Quote:
Originally Posted by Jaguartvr

I am going to give it the ultimate trial, I'm going to let the wife open it, when I say open it I do of course mean fling it open as hard as possible.
|
I'll send the grandkids round, they are good at finding the the breaking point of things.LOL. |
30th May 2016, 12:18
|
 |
Senior Member
|
|
Join Date: Jan 2014
Location: Egham, Surrey
Posts: 1,780
|
|
 Success on the door gap/opening problem
First picture shows how much I have had to build up the leading edge of the door 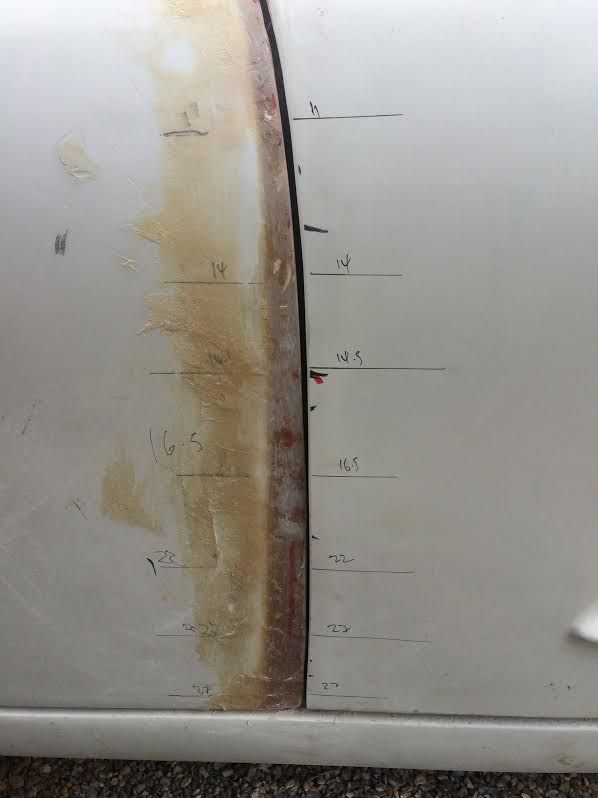
I have just run a thick felt tipped pen along the trailing edge of the wing, this marked the front of the door, I then used this line to sand back to give me a pretty even door gap, obviously needs to be filled and neatened up.
Gap against inner wing with door fully open and a bit of pressure against it. 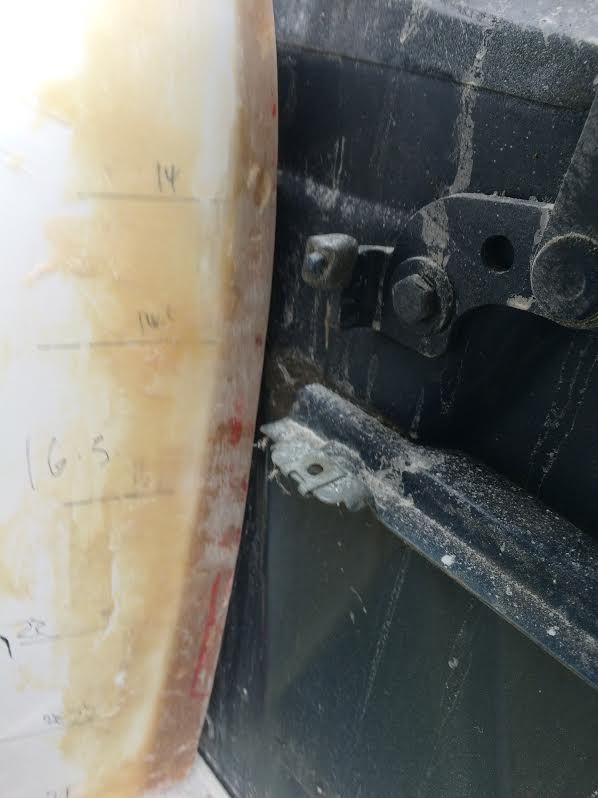
small section of old wing mount removed
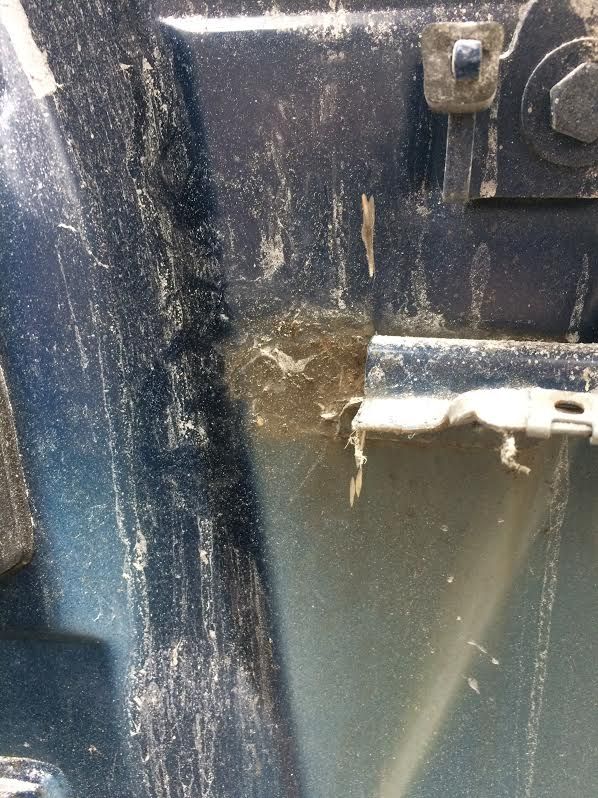
Door fully open with extra pressure applied, plenty of gap and no need to shorten the check straps.
Even passed the wife test.  |
23rd June 2016, 19:11
|
|
Senior Member
|
|
Join Date: Jan 2014
Location: Egham, Surrey
Posts: 1,780
|
|
Small update, I finished the passenger door in the same way. I didn't need to sand away so much of the wing this time so it was much easier. Probably helped as it was a known problem and solution the second time around.
Not much more to report as I have been busy on a custom cafe racer build for a customer, thats finished and i'm off for a month to Spain so not much will be started until August.
I expect the rest of to keep hard at it and think of me laying on my lil for the next month. Might not help you but it will make me feel a lot happier.  |
23rd June 2016, 20:16
|
 |
Senior Member
|
|
Join Date: May 2009
Location: POOLE , DORSET
Posts: 2,200
|
|
Lucky Lil ....
|
23rd June 2016, 20:30
|
|
Senior Member
|
|
Join Date: Jul 2012
Posts: 119
|
|
Whats the Cafe Racer........? Just about to start mine...BMW R80....
|
23rd June 2016, 21:00
|
|
Senior Member
|
|
Join Date: Jan 2014
Location: Egham, Surrey
Posts: 1,780
|
|
Triumph Thunderbird 900
|
24th June 2016, 19:20
|
|
Member
|
|
Join Date: Dec 2013
Posts: 84
|
|
Quote:
Originally Posted by Ollie
Whats the Cafe Racer........? Just about to start mine...BMW R80....
|
Sounds good, have you got any pictures? |
24th June 2016, 19:38
|
 |
Senior Member
|
|
Join Date: Feb 2012
Location: Wembley, London
Posts: 5,058
|
|
Jag - Enjoy Spain. 
Just wanted to say that after seeing your bonnet mod, I bought some builders' band.
Using it has made my 'cut & shut' work much easier to do, so thanks for sharing.
Good luck, Paul. 
|
24th June 2016, 20:34
|
|
Senior Member
|
|
Join Date: Jul 2012
Posts: 119
|
|
obr....might post a pic when its done.....if i learn how to post pics...!
|
25th June 2016, 19:45
|
|
Member
|
|
Join Date: Dec 2013
Posts: 84
|
|
Quote:
Originally Posted by Ollie
obr....might post a pic when its done.....if i learn how to post pics...!
|
Fair play, those engines seem to look great in cafe racers or choppers. |
30th June 2016, 16:13
|
|
Senior Member
|
|
Join Date: Jan 2014
Location: Egham, Surrey
Posts: 1,780
|
|
Thunderbird Cafe Racer
Sorry for the delay but It's been boxed in by other bikes. Owner collected it today.
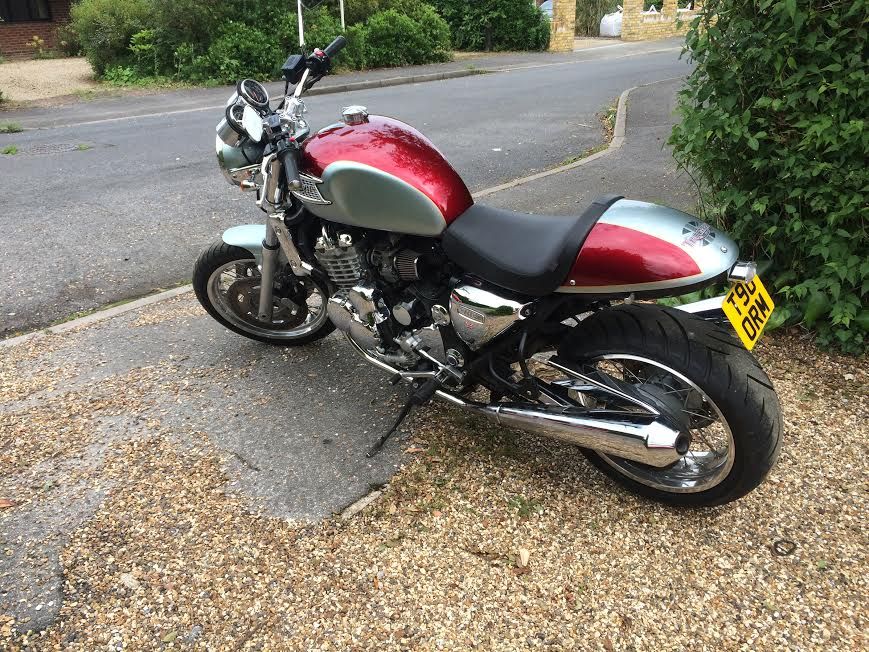
I make the seats, fender eliminators and mudguards as a paying hobby.
This one is a standard Thunderbird that has been fitted with a Thunderbird Sport front end, down pipes and exhaust. 5.5 alloy rear rim with front to match. Pods with K&N filters. rear cowl had a custom airbrushed paint job.  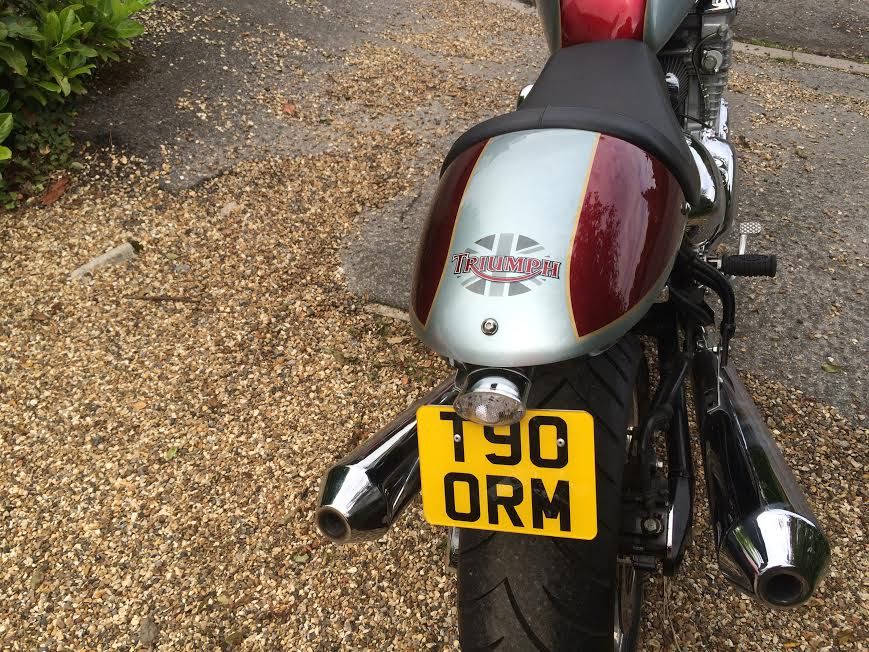
Last edited by Jaguartvr; 30th June 2016 at 16:18..
|
30th June 2016, 16:20
|
|
Senior Member
|
|
Join Date: Jul 2012
Posts: 119
|
|
Lovely...
|
11th August 2016, 19:34
|
|
Senior Member
|
|
Join Date: Jan 2014
Location: Egham, Surrey
Posts: 1,780
|
|
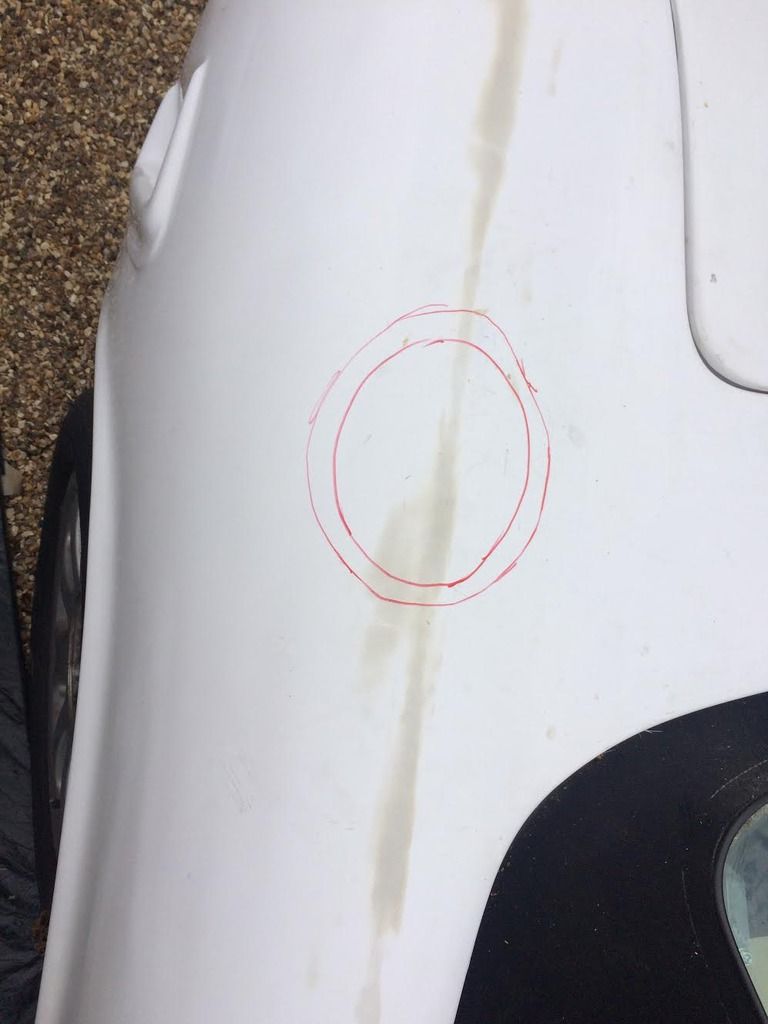
Monza Fuel Cap
Sorry but posted the first part on a separate post, should have kept it all in one place.
Roughly marked position and shape of petrol cap well.
Cut out with a 1mm disc on an angle grinder. Glued in place with resin. 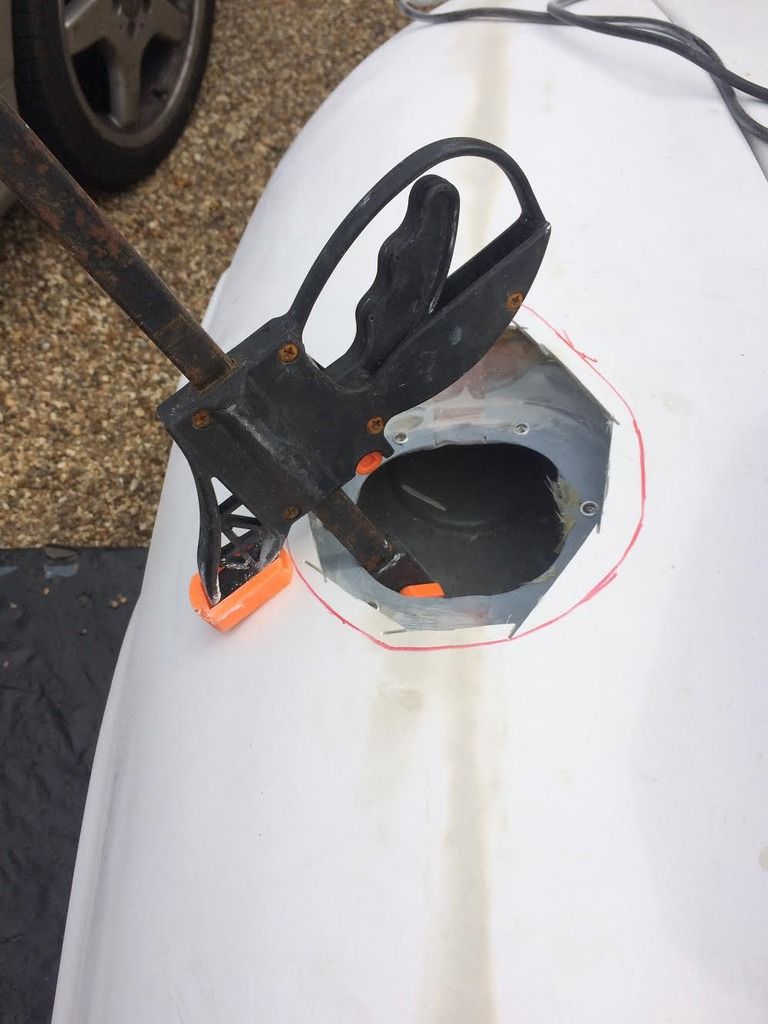
The cap is held in place with M5 countersunk screws and nylock nuts. Problem is that it is almost impossible to get a spanner on the nylocks so I used 6mm rivnuts that you can just see in the picture. This makes attaching and removing very easy.

just need final finishing for paint. It is large but i like it.
There is very little room underneath for the pipe, I think I can trim 15mm from the underside of the petrol cap mounting tube but it still will be tight. I may have to cut a relief in the top of the boot to allow it to flow properly. Waiting for some pipe.
Chris gave me some flange clips to attach the door skin to the door but I cannot see anyway to fix them satisfactory, must be missing something.
I have drilled holes through the door and into the skin. I then removed the gap outer skin and attached some M5 rivnuts. Reattached the skin and it bolts up really easily and is much tighter than using self tapping screws. Forgot to take pictures so you will all just have to wait till the skin comes off again.
That was all the good progress, the bad progress was that I found the new front edge of the door id fouling the bonnet hinge when fully open. I missed it as I had the bonnet open when I was checking for gap with the bonnet open which puts the hinge in a different place. I will have to grind it back a bit and build up the trailing edge of the wing as Jeff has done.

|
11th August 2016, 19:49
|
|
Senior Member
|
|
Join Date: Nov 2015
Posts: 278
|
|
Looks great in my opinion. With Aston caps, the bigger the better I think
|
3rd September 2016, 13:41
|
|
Senior Member
|
|
Join Date: Jan 2014
Location: Egham, Surrey
Posts: 1,780
|
|
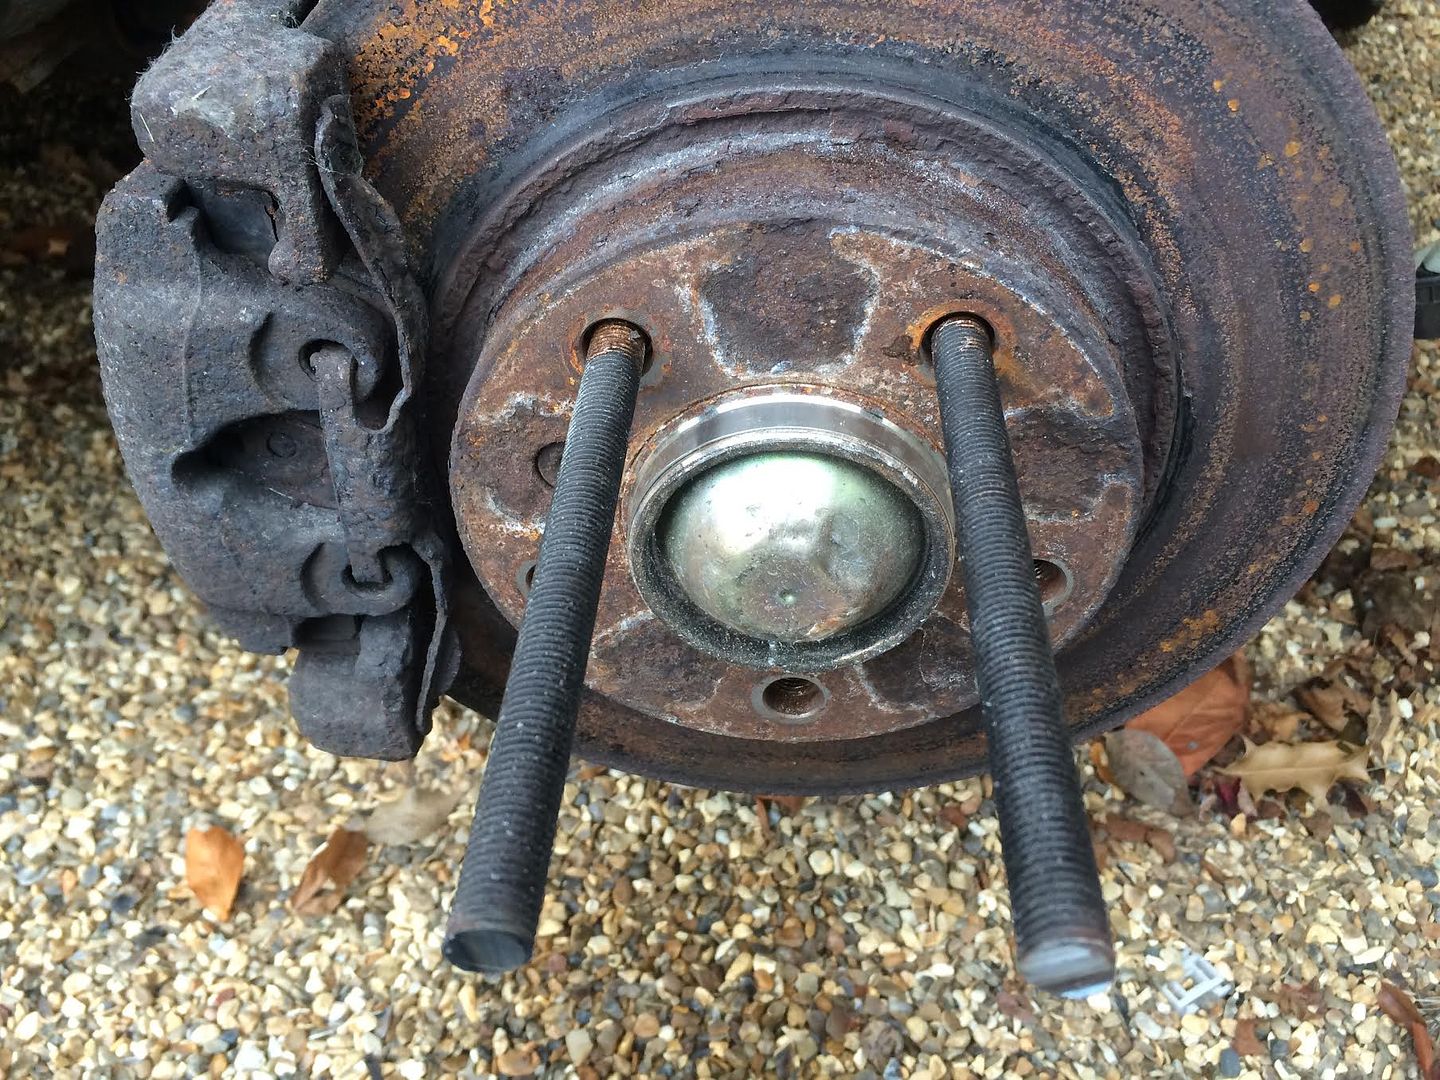
Wheel Fitment
Fitted the bolt on wire wheels today. They are monsters and weigh a ton, I struggled to lift the wheels onto the hubs do I fitted two studs to help align the holes. Worked a treat but I will put some electrical heat shrink on them so they don't catch the powder coat. I will keep them in the boot along with some standard bolts to fit the spare wheel.The standard studs are too short.
 [URL=http://s803.photobucket.com/user/jaguartvr/media/z3gto/wheel2.jpg.html]
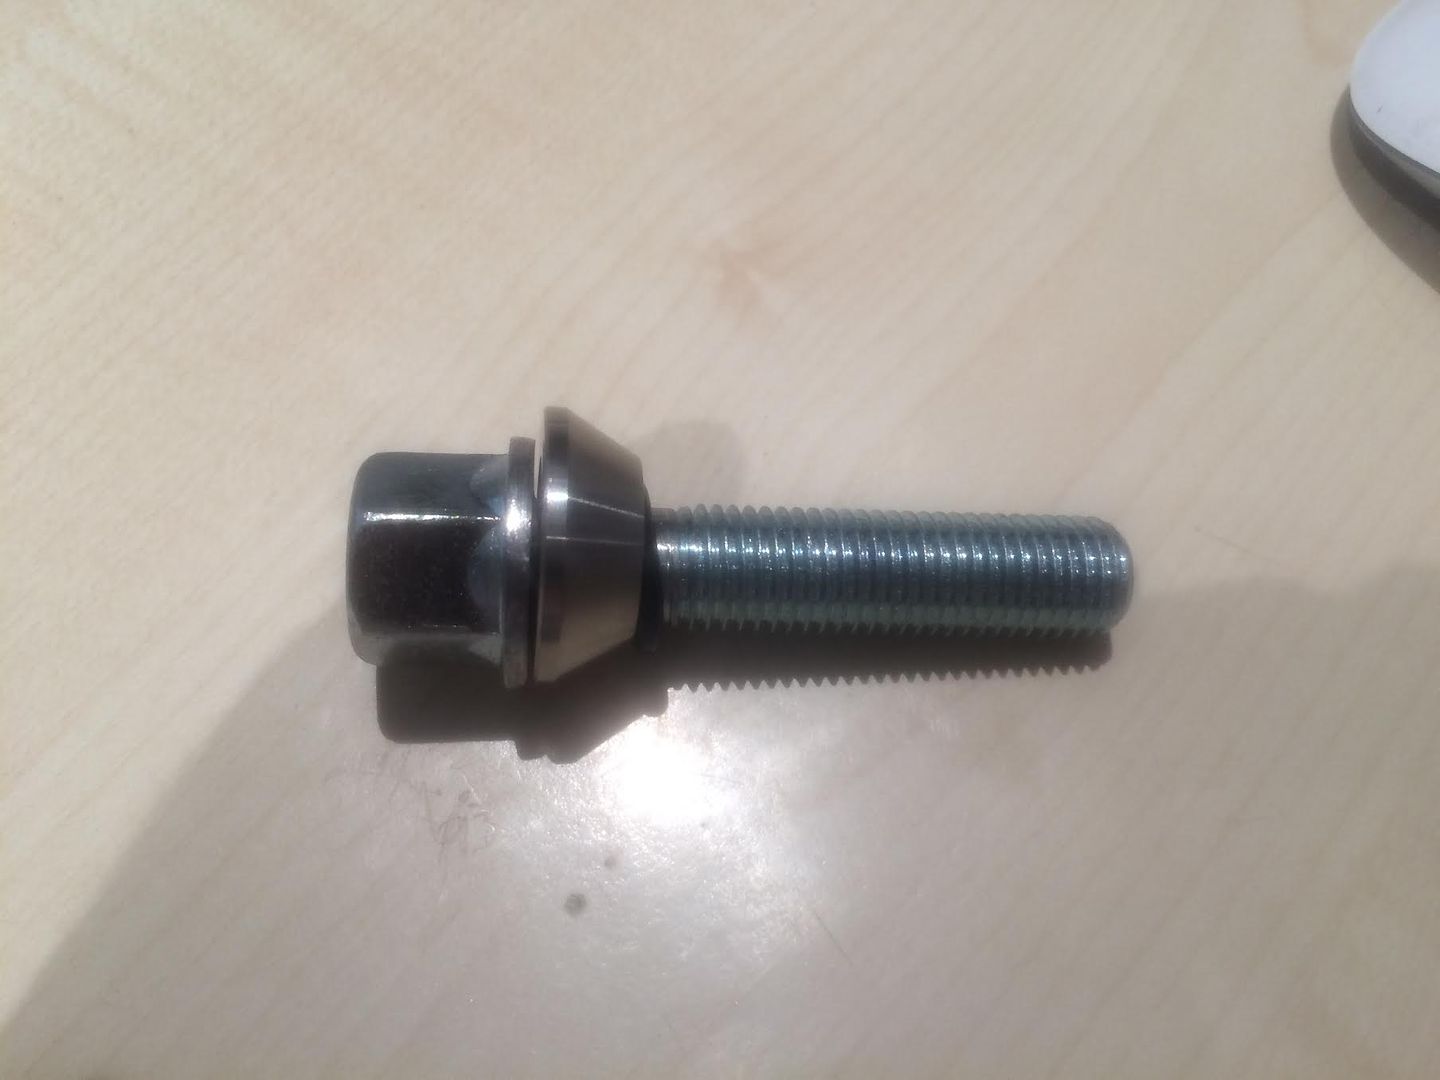
The new studs have a 45long thread + 10 collar so are 55 in total not including the head. They are wobble bolts. I also fitted collars to the hub to give the right diameter.
Before 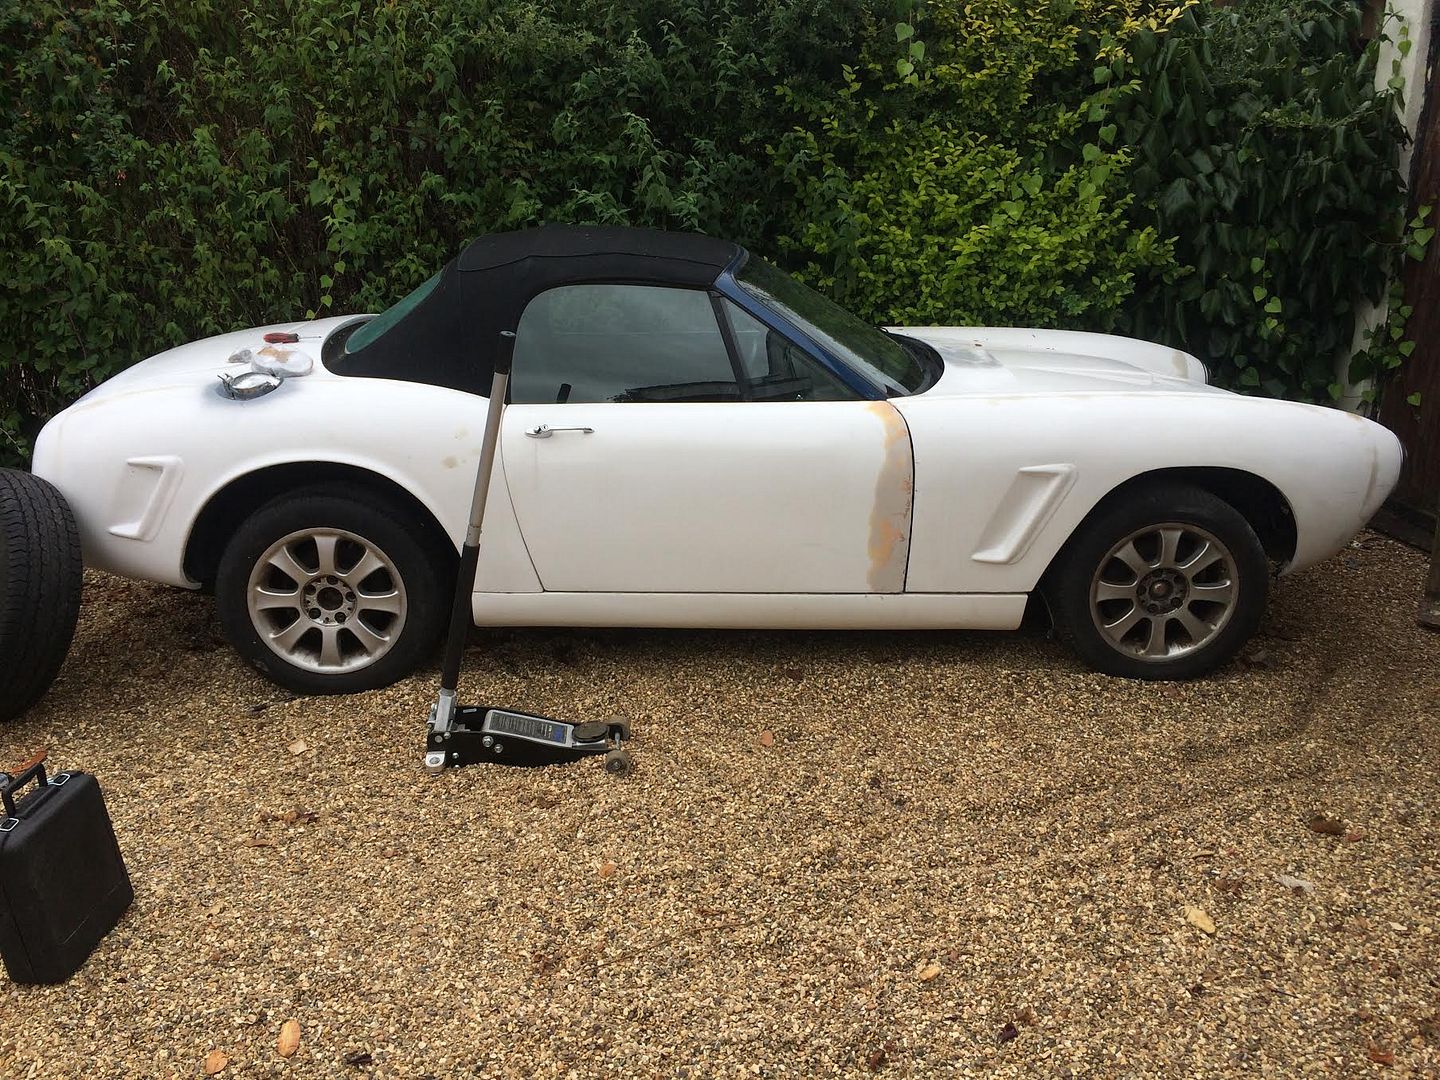
After 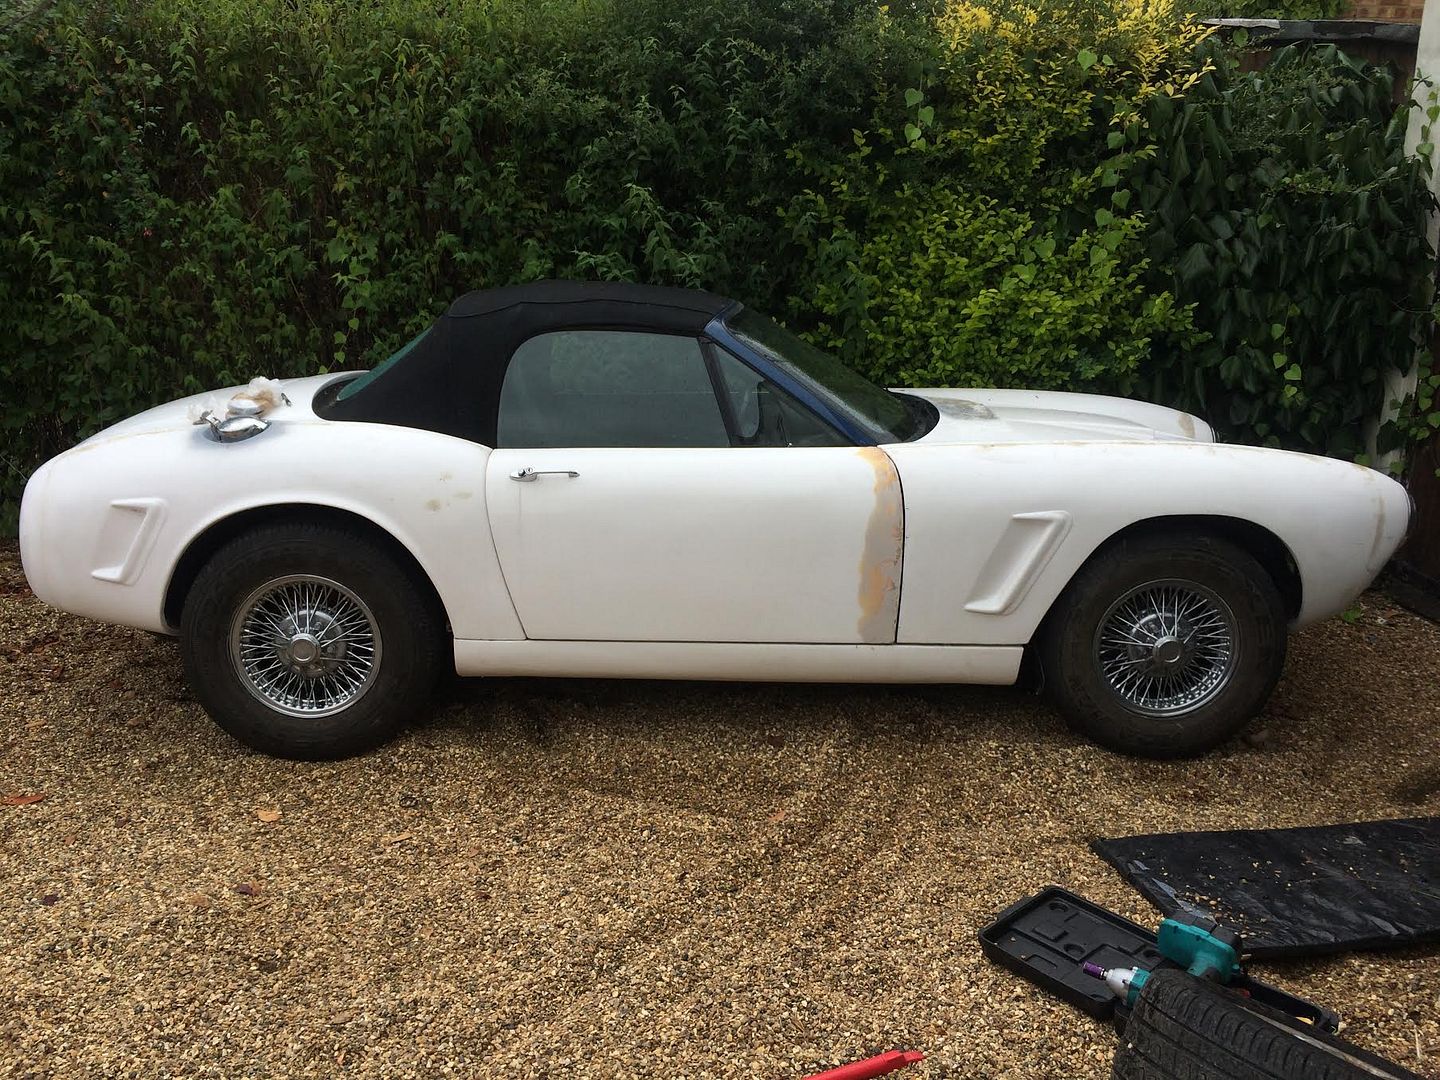
I think the tyres may be a little too big but will do for now as I won them on Ebay for 99p |
3rd September 2016, 15:26
|
|
Senior Member
|
|
Join Date: Apr 2013
Location: Alicante Spain
Posts: 880
|
|
Wheels look well. Love seing wires on these cars.
|
3rd September 2016, 15:46
|
|
Senior Member
|
|
Join Date: Jan 2014
Location: Egham, Surrey
Posts: 1,780
|
|
Just gone to move it as it's pouring and it feels as if all the brakes are locked on. I suspect that the wheel bolts may be fractionally too long. Will try and have another go tomorrow.
I also drilled some 5.5mm holes through the doorskin, then removed the gap skin and enlarged the holes to 7mm to fit rivnuts. I can now fit the doorskin very tightly and precisely. I have used M5 countersunk screws, the heads are almost invisible.Will take some pictures when I do the other side.
Last edited by Jaguartvr; 3rd September 2016 at 15:50..
|
3rd September 2016, 17:15
|
 |
Senior Member
|
|
Join Date: Apr 2016
Location: Camberley
Posts: 972
|
|
Quote:
Originally Posted by Jaguartvr
Wheel Fitment
[/URL]
I think the tyres may be a little too big but will do for now as I won them on Ebay for 99p |
I would wait until you paint the car before deciding on the tyres, I think they look more prominent because of the whiteness. |
3rd September 2016, 20:45
|
 |
Senior Member
|
|
Join Date: Jun 2015
Location: MK
Posts: 435
|
|
Quote:
Originally Posted by Jaguartvr
Wheel Fitment
I think the tyres may be a little too big but will do for now as I won them on Ebay for 99p |
Its great seeing your progress. The Gap from the edge of the door to the front section looks great. I tried lots of tyre sizes before settling on what I have now and love you can get them on ebay so cheaply. I found the fronts were where the most work was needed to get the turning circle right and height, ended up using some small spacers and adjustable suspension to get it right.
All the best!
Andy |
3rd September 2016, 23:09
|
|
Member
|
|
Join Date: May 2015
Location: Lincolnshire
Posts: 85
|
|
Thanks for the rivnut tip!
|
|
Currently Active Users Viewing This Thread: 1 (0 members and 1 guests)
|
|
|
 Posting Rules
|
You may not post new threads
You may not post replies
You may not post attachments
You may not edit your posts
HTML code is Off
|
|
|
All times are GMT +0. The time now is 17:38.
|


 Linear Mode

