|
|
| Vintage and Classic Roadster Kit Car Builds For Vintage and Classic era kit cars. Post your build reports, problems and progress here |

6th April 2022, 18:46
|
|
Senior Member
|
|
Join Date: Oct 2013
Location: norfolk
Posts: 692
|
|
Years ago... It must have been about 1985 I attended a Classic car show in London (Earl's court?). Anyway, there were lots of gadgets there. I recall an automatic battery (2 xAA ) dipping mirror, and more pertinently a liquid chrome that could be applied with a cloth! I was (as you'd expect) highly sceptical - I offered the guy a 2p coin, and he coated half of one side. It looked good and 'chromey' to my eyes at the time, maybe it was more like nickel? but it looked good. I kept the coin in my pocket for several months, and it still looked good, never tarnished. I put water on it etc, and it stayed good. The liquid (which I don't recall being a ridiculous price at the time) could now prove useful. Brass or copper bumpers on a DIY basis, and coated with 'chrome'. Did the product disappeared?
|
19th May 2022, 18:30
|
 |
Senior Member
Enthusiast
|
|
Join Date: Mar 2005
Posts: 3,079
|
|
 Here's a clue....
Here's a clue why there has been no updates lately.......... 
 My other project My other project by Sabrebuilder, on Flickr
New art studio for my wife. |
20th May 2022, 08:03
|
|
Senior Member
|
|
Join Date: Nov 2017
Posts: 109
|
|
you got stuck on the roof? that's rough, the weather's been miserable. glad to see they keep bringing you tea at least  |
20th May 2022, 18:28
|
|
Senior Member
Enthusiast
|
|
Join Date: Mar 2005
Posts: 3,079
|
|
|
20th May 2022, 18:54
|
 |
Senior Member
|
|
Join Date: Nov 2011
Location: Exeter
Posts: 187
|
|
That’s a smart bit of (wooden) kit you have built there! Looks like the same high quality of construction that you demonstrate on the Sabre build! A man cave and now a wife cave! The ultimate bliss! Looking forward to the next car update! Peter.
|
24th May 2022, 20:36
|
|
Senior Member
|
|
Join Date: Mar 2012
Posts: 1,152
|
|
That looks like a Dunster House.
|
25th May 2022, 10:19
|
|
Senior Member
Enthusiast
|
|
Join Date: Mar 2005
Posts: 3,079
|
|
Quote:
Originally Posted by oxford1360

That looks like a Dunster House.
|
It is indeed! |
18th August 2022, 20:11
|
|
Senior Member
Enthusiast
|
|
Join Date: Mar 2005
Posts: 3,079
|
|
Time for an update?
Well, I guess it's time for an update.......
First up is a bit of corrective rework of something of a bit of a cock-up I made a while ago when I developed my brake system.  
I've never really been happy with the 'feel' of my brakes despite numerous bleed sessions. After a brief discussion with Robin he suggested I check the bore size of my master cylinder. The master cylinder I initially fitted has a bore diameter of 17.8mmm and the standard Sierra master cylinder has a diameter of 22mm. It doesn't seem much difference at first sight until you remember the volume of fluid displaced is proportional to the square of the radius. It immediately became clear that this was a big mistake so I embarked on changing the master cylinder to one for a Sierra.
 New Brake Master Cylinder New Brake Master Cylinder by Sabrebuilder, on Flickr
The next problem was to find a suitable push rod but ebay came to my rescue with this one the perfect length.
 New Brake Master Cylinder New Brake Master Cylinder by Sabrebuilder, on Flickr
The mushroom shaped end of the new pushrod was too large for the Sierra master cylinder so I had to reprofile it like this.
 New Brake Master Cylinder New Brake Master Cylinder by Sabrebuilder, on Flickr
I also made up this 10mm thick spacer. Two reasons, one was that the hole in my mounting plate was too small for the new master cylinder and I didn't fancy making it bigger. Secondly, the output ports are spaced 10mm nearer the bulkhead and i didn't fancy trying to shorten the brake lines and re-flaring the ends in situ. I made the spacer with a hole-saw, a hacksaw and a file. You can see how close one of the mounting screws is to the mounting screw for the Sierra master.
 New Brake Master Cylinder New Brake Master Cylinder by Sabrebuilder, on Flickr
New master cylinder being trial fitted to set the correct length of the pushrod.
 New Brake Master Cylinder New Brake Master Cylinder by Sabrebuilder, on Flickr
The next challenge was to find a Sierra reservoir which are like hens teeth. This one came all he way from Lithuania and was filthy dirty inside and out when it arrived. Lots of brake cleaner and it came up okay. Also, the fluid level switch was corroded inside but I took it apart and cleaned up the contacts and it now works fine.
 New Brake Master Cylinder New Brake Master Cylinder by Sabrebuilder, on Flickr
Now all plumbed in and system filled with fresh Dot 4.
 New Brake Master Cylinder New Brake Master Cylinder by Sabrebuilder, on Flickr
All finished and brakes bled and feeling much better.
 New Brake Master Cylinder New Brake Master Cylinder by Sabrebuilder, on Flickr
I'm now working on lining the interior with sound proofing before tackling the carpets.....
......peter

|
19th August 2022, 08:51
|
|
Member
|
|
Join Date: Jul 2014
Location: Ealing London
Posts: 54
|
|
Brakes
Your attention to details never ceases to amaze me. Every step you have taken in the build of this wonderful car has been brilliant. You sims to be fully conversant with woodwork too. Good luck with everything Peter.
|
29th November 2022, 08:50
|
|
Member
|
|
Join Date: Jul 2014
Location: Ealing London
Posts: 54
|
|
As always, job done perfect.
|
29th November 2022, 16:32
|
|
Senior Member
Enthusiast
|
|
Join Date: Mar 2005
Posts: 3,079
|
|
Quote:
Originally Posted by Amir Manzoori
As always, job done perfect.
|
Thanks, it came out better than I had expected so I'm pretty pleased. |
20th December 2022, 19:26
|
|
Senior Member
Enthusiast
|
|
Join Date: Mar 2005
Posts: 3,079
|
|
The Christmas preparations and the sub-zero temperatures in my gargae caused progress to slow to zero over the last couple of weeks.
But a surprise break in the weather today allowed me to finish the carpeting of the gearbox tunnel.
 Gearbox tunnel carpeting Gearbox tunnel carpeting by Sabrebuilder, on Flickr
Including finishing the gearstick surround and new gear knob.
 Gearstick surround Gearstick surround by Sabrebuilder, on Flickr
That's probably the last update this year so I'll just wish everybody a Happy Christmas!
........peter |
21st December 2022, 08:46
|
|
Senior Member
|
|
Join Date: Nov 2017
Posts: 109
|
|
Nice work, Peter, that looks very tidy.
Happy Christmas to you too |
21st December 2022, 11:47
|
|
Member
|
|
Join Date: Jul 2014
Location: Ealing London
Posts: 54
|
|
Dear Peter, I, like all readers who have been following your build so far, have enjoyed every post about your work and been envious of your capability. I believe we would enjoy it right up to the finish of the project. Well done, Wish you, family and those who read this post, a happy Christmas and may you be blessed with a new year filled with good health, happiness and joy.
|
31st December 2022, 22:03
|
|
Senior Member
Enthusiast
|
|
Join Date: Mar 2005
Posts: 3,079
|
|
Happy New Year!!
Just about time left for one more post of 2022......
But first thanks to Kon and Amir for your best wishes and a Happy New Year to you and all my readers,
I managed to find the time to re-fit the passenger door this week. (Only about 10 years after I removed it  )
Firstly, I fitted the door wiring loom grommet.
 Passenger door fitting Passenger door fitting by Sabrebuilder, on Flickr
I then positioned the door which is surprisingly heavy with glass, winder mechanism and locks, etc. A couple of old scrap tyres and my workshop floor mat made just about the right height to slide it on to the hinges.
 Passenger door fitting Passenger door fitting by Sabrebuilder, on Flickr
And after fitting the four bolts and a bit of fettling the door was on and clicked closed on the door catch striker.
 Passenger door fitting Passenger door fitting by Sabrebuilder, on Flickr
 Passenger door fitting Passenger door fitting by Sabrebuilder, on Flickr
 Passenger door fitting Passenger door fitting by Sabrebuilder, on Flickr
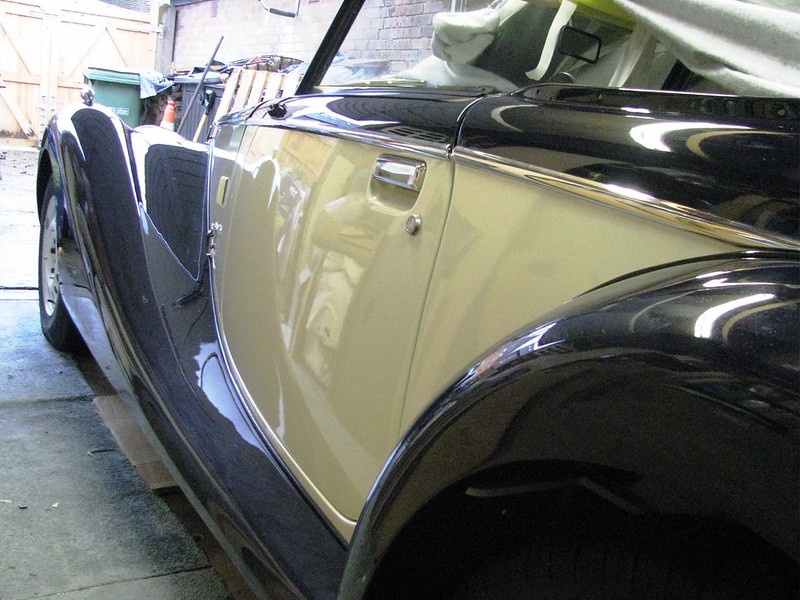
Now just showing off the beautiful lines of the Sabre.
 Passenger door fitting Passenger door fitting by Sabrebuilder, on Flickr
Here's to 2023 
|
31st December 2022, 22:53
|
 |
Senior Member
|
|
Join Date: Dec 2011
Location: Devon
Posts: 550
|
|
Well I can't believe I have been following your build for over 10 years.!! Your attention to detail and tenacity is off the scale. Looking forward to future updates. Best wishes for the New Year.
|
2nd January 2023, 07:24
|
|
Senior Member
Enthusiast
|
|
Join Date: Jun 2015
Location: Reading, Berkshire
Posts: 688
|
|
Great updates. Thanks for sharing the techie details.
Lovely car too
Dave
|
6th January 2023, 10:08
|
|
Junior Member
|
|
Join Date: Mar 2018
Posts: 29
|
|
Thirded, it's going to be drop dead gorgeous this one!
|
12th January 2023, 18:59
|
|
Senior Member
Enthusiast
|
|
Join Date: Mar 2005
Posts: 3,079
|
|
New year - same car :-)
Thanks froggyman, DaveP and Biggles for your kind words of encouragement. 
--------------------------------------------------------------
My wife bought me this nice picnic set for Christmas so I better crack on and get this car finished for Summer 
 Picnic Basket Picnic Basket by Sabrebuilder, on Flickr
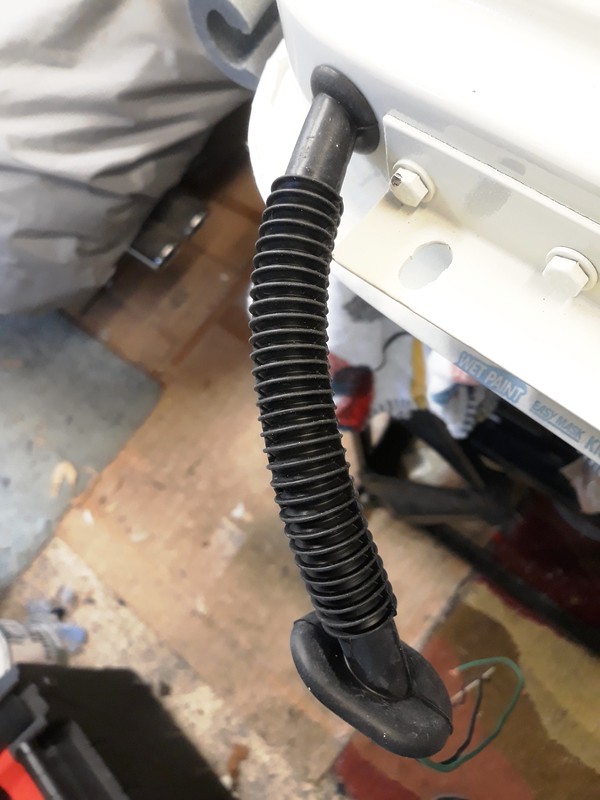
Firstly, I finished fitting the door wiring grommet, the restraining strap and the interior lighting switch. I then connected up the door wiring to the cars loom and tested the door window and door lock.
 Door fitting Door fitting by Sabrebuilder, on Flickr
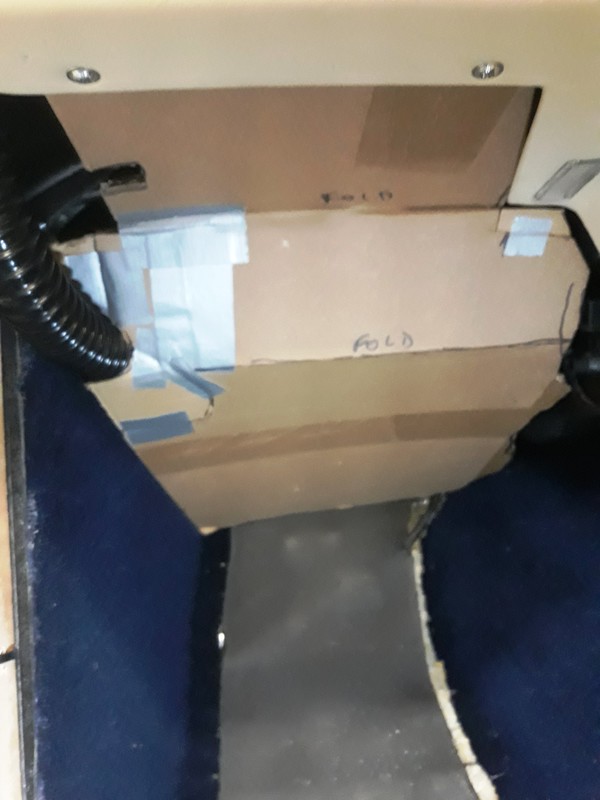
Then I could do some more interior trimming. I decided to make a panel that encloses the space above the passenger footwell. I started by templating the under dash cover on the passenger side.
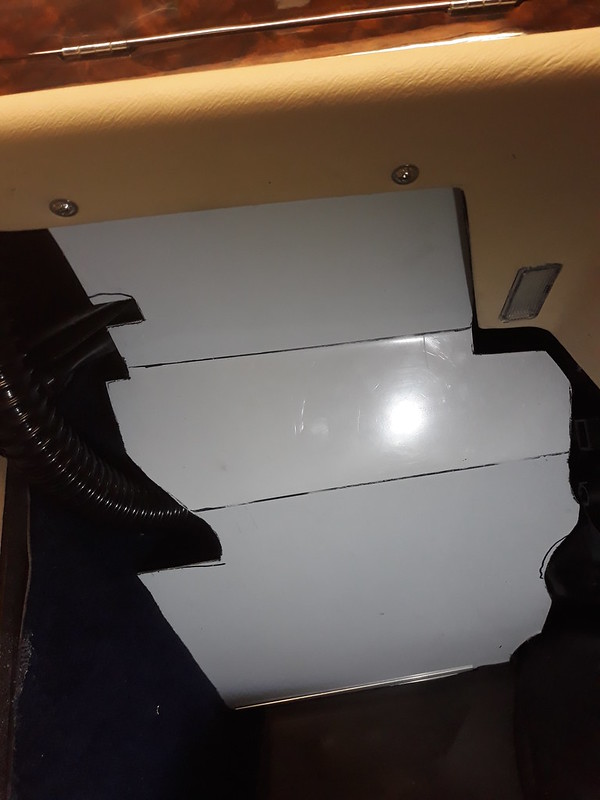
I then cut a sheet of aluminium to fit. It fits into a slot I made at the base by gluing a strip of angle ali to the bulkhead and is fixed to a bracket bolted to the underside of the dashboard.
I then covered the ali sheet with carpet and glued soundproof mat to the rear side to stop any chance of vibration.
 Carpeting Carpeting by Sabrebuilder, on Flickr
 Carpeting Carpeting by Sabrebuilder, on Flickr
 Carpeting Carpeting by Sabrebuilder, on Flickr
 Carpeting Carpeting by Sabrebuilder, on Flickr
I have also been recovering the rear quarter panels. These panels are made of GRP and were supplied as part of the kit. I first cleaned up the panels by removing the old glue. I then covered them in scrim foam using spray adhesive. And then covered them in some navy vinyl.
 Rear quarter panel Rear quarter panel by Sabrebuilder, on Flickr
 Rear quarter panel Rear quarter panel by Sabrebuilder, on Flickr
Hopefully, the weather will stay mild enough to carry on with the trimming....
....peter
Last edited by peterux; 12th January 2023 at 19:01..
Reason: typo
|
27th January 2023, 19:20
|
|
Senior Member
Enthusiast
|
|
Join Date: Mar 2005
Posts: 3,079
|
|
Quote:
Originally Posted by peterux
Hopefully, the weather will stay mild enough to carry on with the trimming....
|
Of course, the weather immediately plunged back below zero in my garage and combined with a nasty head cold has slowed my progress over the last two weeks. But I have managed to (almost) complete three more panels.
Firstly, the passenger side 'a' post cover had to be modified to fit because I mounted the ECU behind the side bar. I then covered it in a piece of carpet and fixed it to the 'a' post with some plywood packing pieces. (the cover is to the left in this photo)
 'A' post cover 'A' post cover by Sabrebuilder, on Flickr
Next I tackled the door sill panel. The original sill cover panels were made of thin plywood covered in carpet but these had rotted due to the years of damp storage conditions. So, I remade them out of 2mm thick aluminium and then covered them in scrim foam and navy vinyl.
 Sill cover Sill cover by Sabrebuilder, on Flickr
Then on to the passenger door card...
The door cards on the Sabre are brilliantly designed GRP mouldings. First I had to clean off the old adhesive and repaire a broken corner. I also found that I needed to trim about 5mm off the bottom edge of the card to clear the door seal.
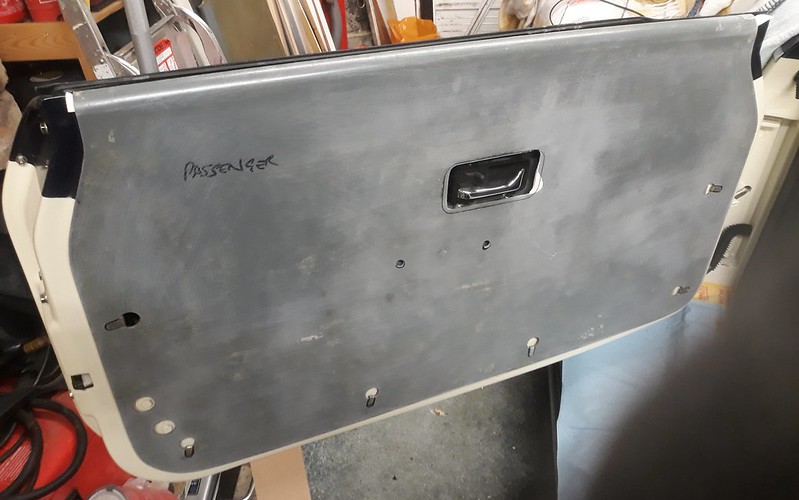 Passenger Door Card Passenger Door Card by Sabrebuilder, on Flickr
I then covered the card in scrim foam and cream vinyl. The inner window draught seal still to be fitted as I needed to order some tiny screws to fix it to the door card.
 Passenger Door Card Passenger Door Card by Sabrebuilder, on Flickr
A little plain atm but I plan to have some professionally trimmed door cards made post IVA and registration to match the seats.
More trimming next week........
..................peter
Last edited by peterux; 6th February 2023 at 20:17..
Reason: typo
|
|
Currently Active Users Viewing This Thread: 2216 (0 members and 2216 guests)
|
|
|
 Posting Rules
|
You may not post new threads
You may not post replies
You may not post attachments
You may not edit your posts
HTML code is Off
|
|
|
All times are GMT +0. The time now is 07:54.
|


 Hybrid Mode
