|
|
| Sammio Builds and discussions Sammio bodied car builds and specials |

22nd November 2014, 10:12
|
 |
Senior Member
|
|
Join Date: Feb 2012
Location: Wembley, London
Posts: 5,056
|
|
Really looking forward to seeing some colour. 
Good luck, Paul.  |
22nd November 2014, 10:45
|
|
Senior Member
|
|
Join Date: Apr 2012
Posts: 1,163
|
|
Well coat 1 is down!

a bit orange peely but I can live with that as I planned to take it back with 600 then 1200 anyway. 2 bloody multi legged beasties but have managed to resist touching them so will have to wait until it goes off properly before I yank them out.
TTFN
Mac |
22nd November 2014, 11:37
|
|
Senior Member
|
|
Join Date: Apr 2012
Posts: 1,163
|
|
60 minutes after laying down the first coat its touch dry, managed to flick out the 2 beasties and they didn't leave a mark so very happy. Giving it another 30 minutes then I will lay down the second coat. Only problem with painting is that I dared not do anything else to the tub for fear of stirring up a dust cloud. So lots of coffee and watching paint dry for me today :-)
TTFN
Mac
|
22nd November 2014, 11:44
|
|
Senior Member
|
|
Join Date: Feb 2012
Location: Wembley, London
Posts: 5,056
|
|
Mac - In my head I was sure you were going for a very light "power" blue.
But it looks like you are going to have the "missing link" in Bugatti's racing history. 

Keep up the great work (& all the tips), Paul.
|
22nd November 2014, 11:57
|
|
Senior Member
|
|
Join Date: Apr 2012
Posts: 1,163
|
|
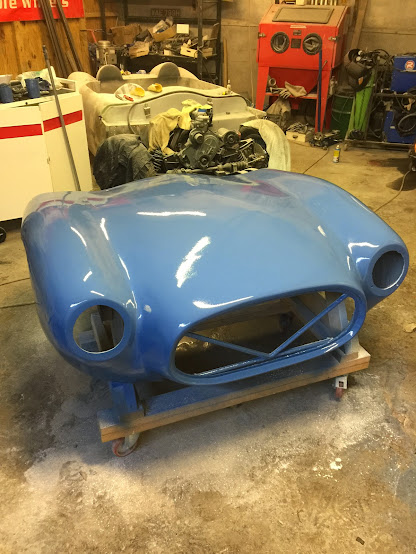
Paul, its actually a bit darker than it looks on the screen. Its a actually a variant of Triumph French Blue.
Just laid down the second coat and will give it a third in about 30 minutes, at that stage I think the most sensible option will be to go home!
TTFN
Mac
|
22nd November 2014, 11:58
|
|
Senior Member
|
|
Join Date: Apr 2012
Posts: 1,163
|
|
this is the actual colour:
 |
22nd November 2014, 12:16
|
|
Senior Member
|
|
Join Date: Apr 2012
Posts: 1,163
|
|
Found 4 small areas that need attention but am going to stick with plan a and lay down a last coat, mainly because its already mixed so if I don't use it then its for the bin. I will then leave it for today and be back in the morning. I will then use some stopper to fill the 3 small dings and will have to sand back the lump. after that it will get 2 more coats and that should be enough to allow me to wet sand it to get rid of the orange peel.
2 small dents

One good sized dent

One small dent

a small lump!

To be honest I knew that the bonnet would be a challenge compared to the body because of the amount of changes that I made to it, bearing in mind that the biggest of these defects is probably no more than a mm in diameter I'm not that upset.
TTFN
Mac |
22nd November 2014, 18:39
|
|
Senior Member
|
|
Join Date: May 2013
Posts: 2,161
|
|
Nice work Mac, you've more patience than me! I just cannot resist having a go to remove beasties instantly!!
|
23rd November 2014, 09:53
|
|
Senior Member
|
|
Join Date: Mar 2012
Posts: 745
|
|
nice ... been looking forward to this bit of your build ....top job
|
23rd November 2014, 10:50
|
|
Senior Member
|
|
Join Date: Apr 2012
Posts: 1,163
|
|
Scottie, if I could give one piece of advise with regard to painting it would be to learn when to walk away!
Phil, Cheers Phil, not as much as I have!
So today we are mostly wet sanding!
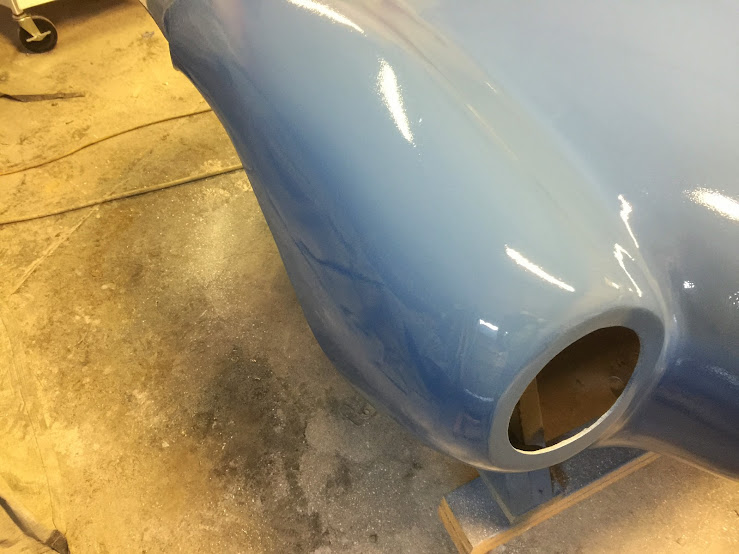
The orange peel is quite noticeable and is one of the down sides to using what I would refer to generically as "truck Coat" but I think is officially known as 2K Urethane topcoat. It goes on quite thick and does cover a multitude of sins but as it goes on thick it does by its nature leave an orange peel finish.
This shot gives you an idea of what I ended up with out of the gun:

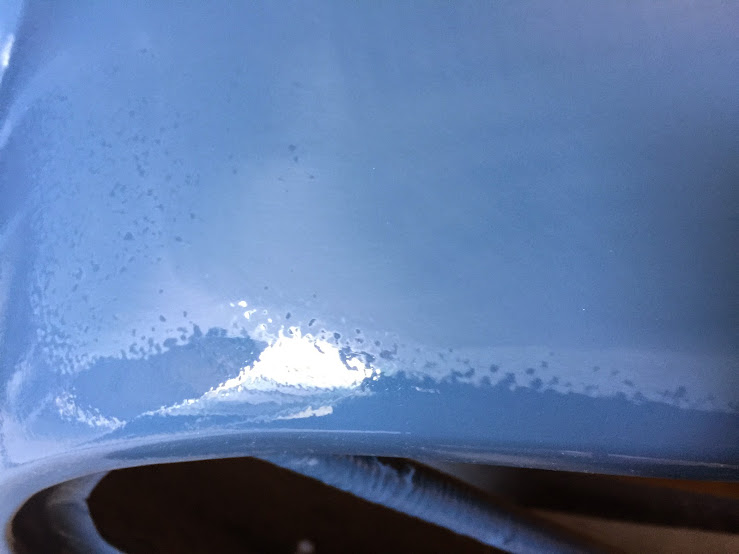
After about a minute using 600 grit with water with a dash of cheep washing up liquid as the lubricant. You can see the tops of the highs has been removed but you can still see the lows as shiny areas.

The same spot a couple of minutes later and were pretty much down to a flat dull surface which is what were looking for:

A shot of the edge of the area so you can see the difference in stages.
More in a bit
TTFN
Mac |
23rd November 2014, 12:12
|
|
Senior Member
|
|
Join Date: Apr 2012
Posts: 1,163
|
|
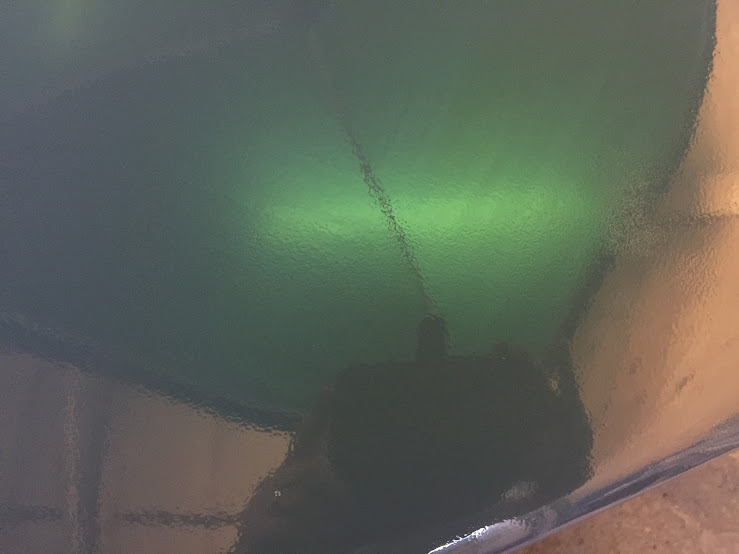
Fist round of sanding done (600 grit):


now going to go again with 1200.
Looks like I should practise what I preach as I ruched going to colour and missed out the guide coat that I used on the body :-)
TTFN
Mac |
23rd November 2014, 12:48
|
|
Senior Member
|
|
Join Date: Apr 2012
Posts: 1,163
|
|
Another round of sanding with 1200


TTFN
Mac |
23rd November 2014, 13:06
|
|
Senior Member
|
|
Join Date: Apr 2012
Posts: 1,163
|
|
Ladies and Gentlemen I give you, the Leopard...
|
23rd November 2014, 13:12
|
|
Senior Member
|
|
Join Date: Apr 2012
Posts: 1,163
|
|
My OCD will not let me just bang another coat on, learn from my mistakes! I really shouldn't have missed out guide coating the bonnet.
Luckily I have a full tube of finishing stopper and although it looks a mess I've used less than 10% of the tube. It goes of quick and have fired up the heater to help so hopefully It will set quick enough for me to still get it flatted back and a couple of coats on this afternoon.


Back in a bit :-(
Mac |
23rd November 2014, 14:27
|
|
Senior Member
|
|
Join Date: Apr 2012
Posts: 1,163
|
|
ok so 1200 grit wet saw the stopper off right quick!


Its just drying off now and I will then wipe it down with pre prep and mix up some paint.....
TTFN
Mac |
23rd November 2014, 14:55
|
|
Senior Member
|
|
Join Date: Apr 2012
Posts: 1,163
|
|
well that went well! Thinned it down a little more this time, the official ratios by volume are 4 parts paint, 1 part activator, 1 part thinners. Have upped the thinners to about 1.5 and a lot less orange peel. I'm very happy I went the extra mile with wet sanding and stopper as the finish is noticeably better.


You can still see the orange peel but its much reduced. Another coat or maybe 2 depending on how I go through the litre I have mixed. and that will be the bonnet done. It will be put to one side and will only be finish sanded once its back in place.
TTFN
Mac |
23rd November 2014, 16:59
|
 |
Senior Member
|
|
Join Date: Dec 2013
Posts: 839
|
|
What a difference a little bit of colour makes Mac and the colour blue will set the car off, i'm not looking forward to blocking all my body as i remember it being hard and tedious work.
Keep up the good work.
|
23rd November 2014, 17:37
|
|
Senior Member
|
|
Join Date: Apr 2012
Posts: 1,163
|
|
Cheers Swifty,
The blocking wouldn't have been too bad but I have bad hands anyway and spending the day dunking them in and out of cold water hasn't helped :-(
To be honest it isn't my favourite job but it didn't take as I feared it would and the improvement of the finish has made it worth while.
Onto the tub tomorrow!
Mac
|
24th November 2014, 07:15
|
|
Senior Member
|
|
Join Date: Mar 2012
Posts: 745
|
|
looking great nice colour ..going to be a very nice car .....
|
24th November 2014, 14:22
|
|
Senior Member
|
|
Join Date: Feb 2012
Location: Wembley, London
Posts: 5,056
|
|
Mac - Great progress and that is a lovely blue.
Good luck with the body tub, Paul.
|
|
Currently Active Users Viewing This Thread: 2 (0 members and 2 guests)
|
|
|
 Posting Rules
|
You may not post new threads
You may not post replies
You may not post attachments
You may not edit your posts
HTML code is Off
|
|
|
All times are GMT +0. The time now is 00:47.
|


 Linear Mode

