|
|
| Sammio Builds and discussions Sammio bodied car builds and specials |

28th November 2014, 17:26
|
 |
Senior Member
|
|
Join Date: Feb 2012
Location: Wembley, London
Posts: 5,056
|
|

Part 2:
I mocked up a very rough scissor hinge out of some cardboard and tested it with the bonnet both closed and open.


It looks to be there, or thereabouts, so I have ordered some 50mm x 5mm flat bar to play with.
At this point, the bonnet looks like this.
I will have a think about the best way to re-attach (& re-shape) the section I removed.
If I keep the original length it would give me a very deep front profile. 

Or I can create the same front view as it originally had by cutting this down to size based on the new angle required.
I may do the Mac "cut & shut" along the length of the bonnet before I attempt to sort out the hinges.
- - - - - - - - - - - - - - - - - - - - - - - - - - - - - - - -
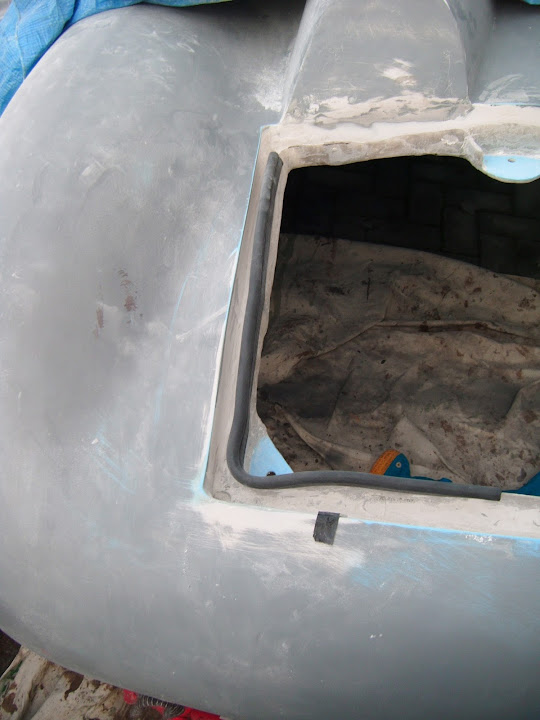
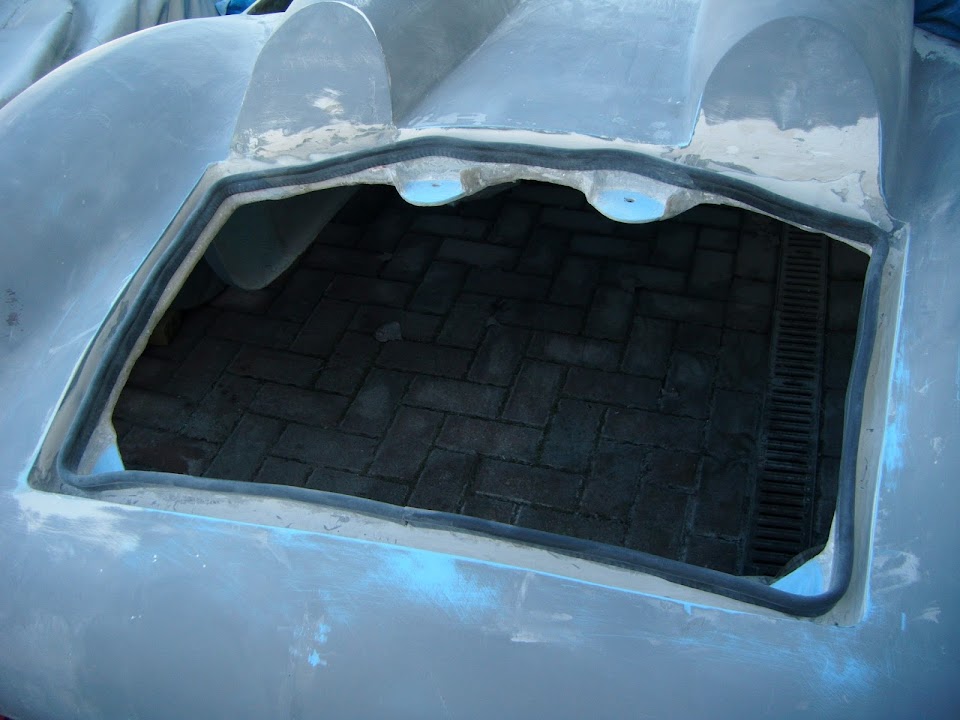
By now the rain channel was dry enough for me to get some filler on it.
I started with some fibreglass filler along the rubber seal edges.

Then I added some normal body filler along the other side and along the bottom of the channel.

It was dark by the time I'd finished the first round of sanding, so excuse the flash.

After I finish the sanding, I'll need at least another round of filler before all the insides of the rain channel are smooth.
Plus I need to finish off the trimming of the rubber seal edge too.
So until next time, take care, Paul. 

|
29th November 2014, 16:30
|
|
Senior Member
|
|
Join Date: Feb 2012
Location: Wembley, London
Posts: 5,056
|
|
Busy Going Nowhere...
Wasted a bit of time in the morning waiting for the family to get ready so we could go Christmas shopping.
( Really hard to believe it is December on Monday, and we have already received our first Christmas card! )
Back at the car, I did a bit more sanding of the filler in the rain channel.
Then decided to finish trimming the rubber seal edge before I added some more filler.
Despite using axle stands, I should have set them farther apart to avoid the risk of me clipping them with my shoulders while crawling underneath.

I lost count of the number of times I checked, marked, trimmed. 
Part of the problem is the lid is not the same thickness all the way round.

With hindsight, it would have been quicker to build up the lid edges to the same depth, rather than mess about the way I did.
I tried cutting a length off the rubber seal to see if it would be easier to check one sections at a time.

But that was a complete waste of time. 
So it was back to the painfully slow, check, mark, trim, repeat routine.
Eventually I was able to cut the seal to the correct length for a final test.

I also cleaned up the treads on the locking pin bolts and "borrowed" a bolt from the bonnet set.
This allowed me to "pull" the boot lid down by tightening the bolts into position.
The good news is that the bottom edge is now pretty close.

Unfortunately, the top edge is still sitting a little proud and needs more work.


This is the view of the seal in action from the inside.

At this point I felt that I was at least making progress, even if it was very slow progress.
But then it all seems to turn to dust when I unlocked the bolts...
My first school boy error was that I'd forgotten to tighten the nuts above the mounting plates.
So once the lid was removed, the bolts dropped and when I re-tightened them the lid wouldn't fit back on. 
It seems that getting the slots in the bolts to be 100% perpendicular to the locking pins is a black art.
( Or at least making the bolts stay in the correct position is. )
I think the source of the problem is mounting plates are at a slight angle, so the nuts don't sit flush.
In the end it was getting dark, cold & damp and I was having a major sense of humour failure so I called it a day.
As despite hours of work today, I have very little to show for it.
However, to end on a more positive note, I am pretty sure that the problem can be fixed.
( It may just required a thin layer of fibreglass filler to fine tune the surface angle of the mounting plates. )
But first I will finished trimming the rubber seal edge until the boot lid finally sits nicely.
I know it will be worth it in the end, but the boot access panel has been a serious pain in the  !
Until next time, take care, Paul.
|
30th November 2014, 13:46
|
|
Senior Member
|
|
Join Date: Feb 2012
Location: Wembley, London
Posts: 5,056
|
|
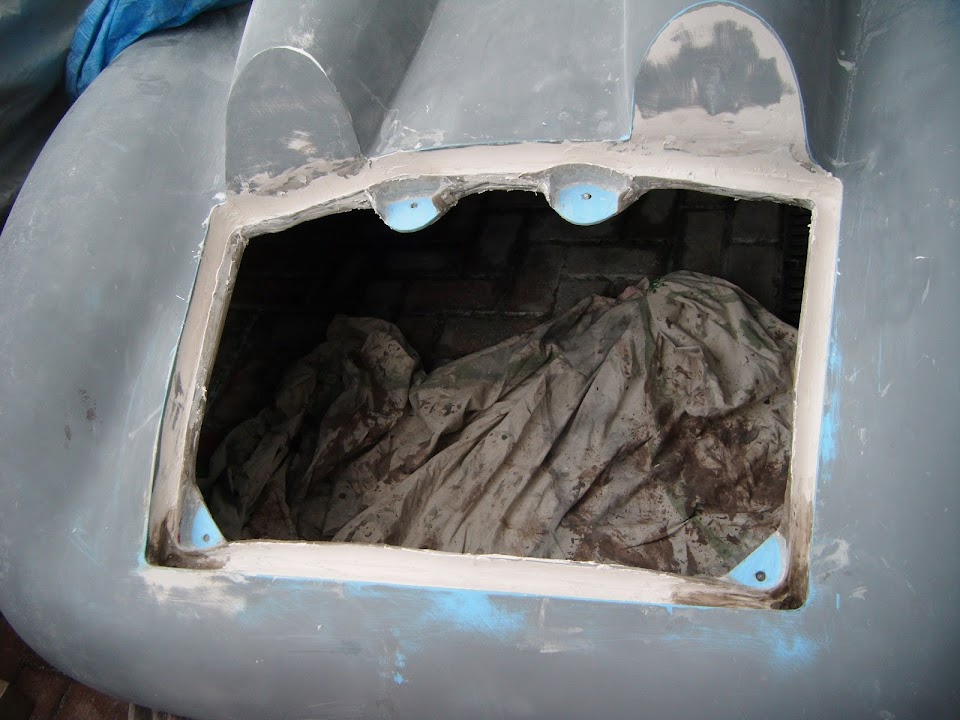
Crawling Along (Both Physically & Metaphorically):
Once again I was back to the old routine of crawling under the body shell, checking, marking & trimming.
Eventually the edge for the rubber seal looked like this.

Which now looks a lot more like Swifty's rain channel, which has to be a good thing.
With the rubber seal back in place it looked like this.
The boot lid now sits just a little proud of the body shell, but "squashes" down easily with only light pressure required.
That the good news when viewed from above, but there is a slight problem underneath...
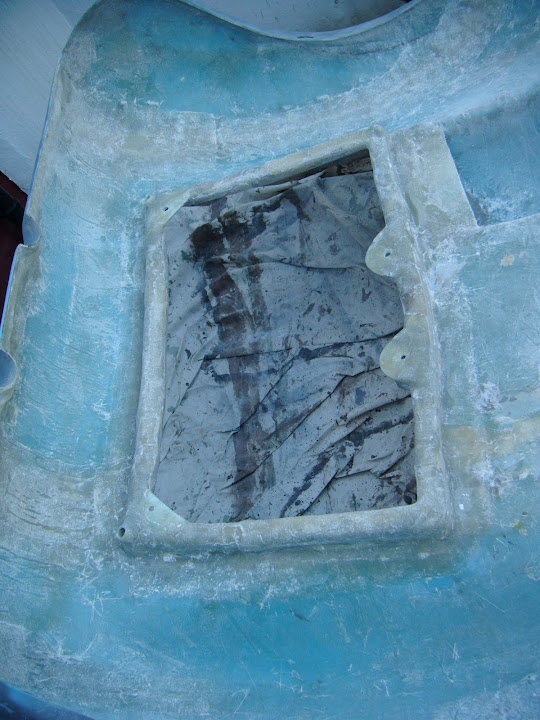
As the rain channel got lower, it exposed a gap along the inside edge of the driver's hump.
( Sorry the photo is a bit blurred. )

So I will need to add some filler to build this section up a bit so that water doesn't simply pour in.
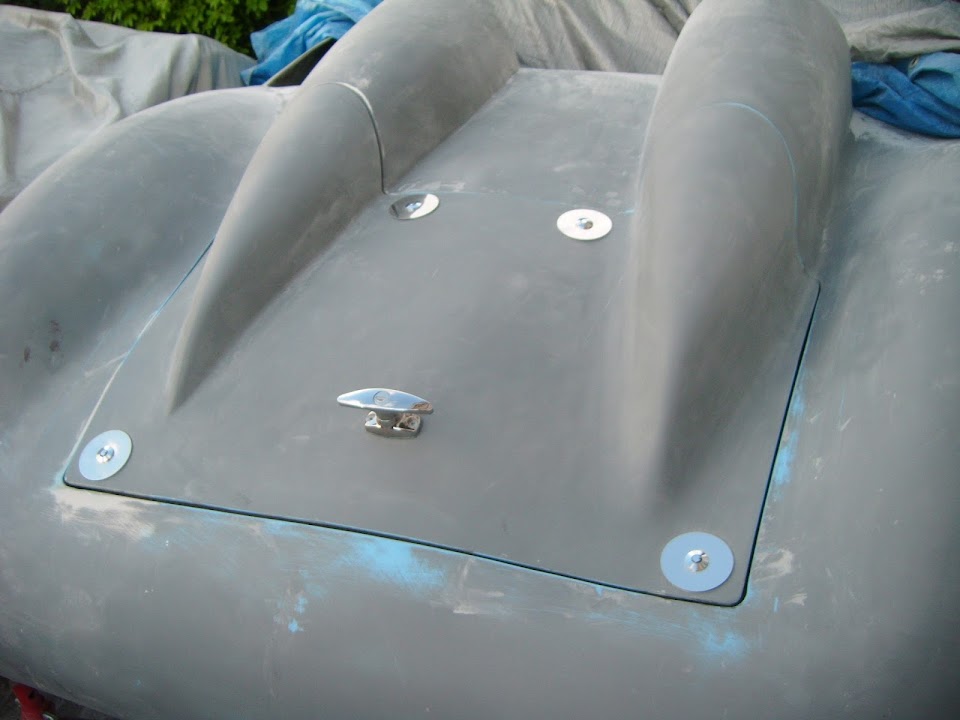
The next job will be to adjust the mounting bolts for the locking pins.
I've dug out some washers and the plan is to apply a blob of fibreglass filler on the mounting plate.
Hopefully when I tighten the bolt into position, the washer will move the filler into the correct "square" angle for the nut.

Well that is today's theory anyway.
However, by now, the sky looked like this and I decided not to risk the rain and called it a day.

To be honest I am not feeling 100% and the damp conditions outside are not helping.
So another day where the hours worked don't seem to have generated much forward progress.
But at least the progress is forward!
Until next time, take care, Paul.
|
30th November 2014, 14:04
|
 |
Senior Member
|
|
Join Date: Dec 2013
Posts: 839
|
|
Paul your just about there with the rain channel and it looks good, yet another way to add a boot lid.
I must admit these shells lend them selves to the diy experimenter due to the initial cost you can't be frightened to cut the body up.
Looking forward to your next installment Paul.
|
30th November 2014, 14:05
|
|
Senior Member
|
|
Join Date: Apr 2012
Posts: 1,163
|
|
Paul, your making great progress mate, keep at it. I'm now bolting on "the good stuff" and the rate your going you wont be far behind.
|
30th November 2014, 17:09
|
 |
Senior Member
|
|
Join Date: May 2011
Location: Somerset
Posts: 1,671
|
|
Looking good matey! I look fwd to a Miglia / Sammio run-out at some point next year |
1st December 2014, 14:16
|
|
Senior Member
|
|
Join Date: Feb 2012
Location: Wembley, London
Posts: 5,056
|
|
Swifty, Mac & Dave - Thanks for the encouragement chaps. 
I know the path to getting the car finished will not always run smoothly ( see below ).
But I firmly believe that the day will eventually come when I am finally on the road.
- - - - - - - - - - - - - - - - - - - - - - - - - - - - - - - -
Square Peg & Round Hole:
I spent some more time on my back earlier trying to work out what is the matter with my locking pin arrangement.
As I just can't seem to find a position for the bolts that will allow the locking pins to fit & engage properly.
I've now come to the conclusion that the curves of the boot lid mean some pins are working against each other.
Setting this up now is a major pain and I am effectively able to put my head inside the boot to see what is going on.
My biggest fear is that if any fine tuning is required in the future, it would be nigh on impossible for me to do.
So I have just ordered four conventional bonnet pins and I will have a play around with them when they arrive.
I might be able to get away with 2 x quick releases + 2 x locking pins, or I might have to use 4 x quick releases.
This was meant to be a simple access panel, so I really need to make opening & closing it a lot simpler than it is at the moment.
Cheers, Paul.
|
1st December 2014, 14:26
|
 |
Senior Member
|
|
Join Date: Jul 2011
Posts: 5,328
|
|
I have a pair of those locking pins holding the sides of my bonnet in, Paul.
Very chic and secure, but probably should have mentioned that they can be a right pain in the you-know-where to line up and lock every now and then... |
2nd December 2014, 16:07
|
|
Senior Member
|
|
Join Date: Feb 2012
Location: Wembley, London
Posts: 5,056
|
|
Mr T - It's good to know it is not 100% operator error on my part. 
So I wont give up hope of getting two of the locking pins to work properly just yet.
- - - - - - - - - - - - - - - - - - - - - - - - - - - - - - - -
Holding Pattern:
Wet & very windy today, so I switched into "Santa's Little Helper" mode instead.
( No harm in earning a few brownie points for writing Christmas cards & wrapping pressies. )
However, I did go back and have another look at how Chris had set up his boot panel.
Quote:
Originally Posted by Tribute Automotive

The bottom pushes onto the 2 pins first and then you "hinge" the lid down onto the other pair of pins.
|


With a bit of luck I will be able get this to work if I stop trying to engage all four pins at the same time. 
- - - - - - - - - - - - - - - - - - - - - - - - - - - - - - - -
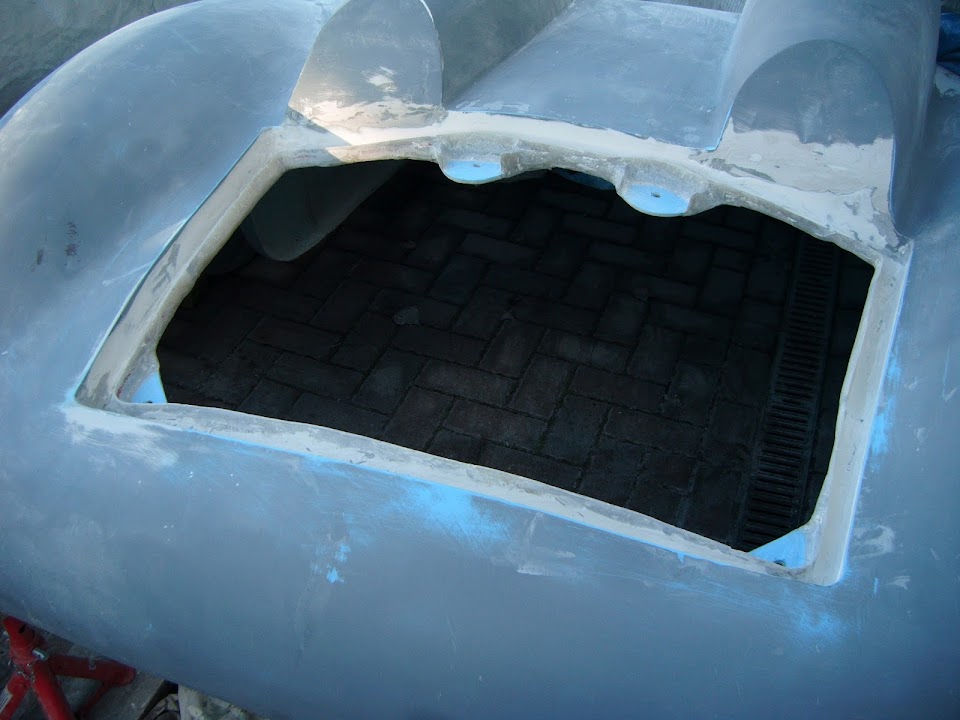
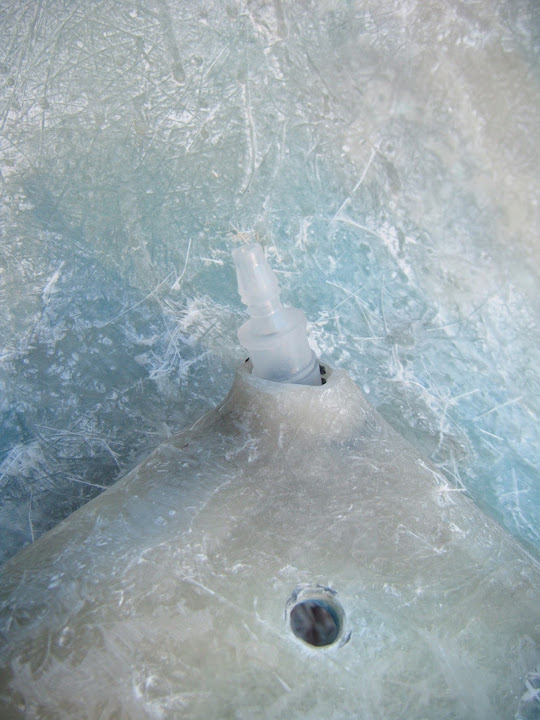
I've also been working out the best way to connect the rain channel drain to some tubing.
I had a few things lying around that might have worked, but then bought this to use instead.

It steps down from 12mm to 8mm (the size of the tubing) and I will set that into the fibreglass funnel I built.
Then I will shape some more filler so that the internal size of the funnel reduces to the connector's 12mm hole.
As always, that is today's theory anyway.
Until next time, take care, Paul.
|
3rd December 2014, 10:57
|
|
Senior Member
|
|
Join Date: May 2013
Posts: 2,161
|
|
Looking good Paul, I'm sure you'll sort the pins out eventually!
I can sympathise with you, as I have, and continue to have problems that are similar.
But as you once said, when hand building a one off car, it will take time, as its all trial and error. Seems to be the only way to get it right! Keep it up.
|
3rd December 2014, 12:22
|
|
Senior Member
|
|
Join Date: Feb 2012
Location: Wembley, London
Posts: 5,056
|
|
Scottie - Cheers.
Whilst my progress has slowed down lately, at least the bulk of the boot lid work is done.
I'd be happy if I have got the lid sorted and made a start on the bonnet before Christmas.
Then I've have the Christmas break to recharge my batteries and carry on.
- - - - - - - - - - - - - - - - - - - - - - - - - - - - - - - -
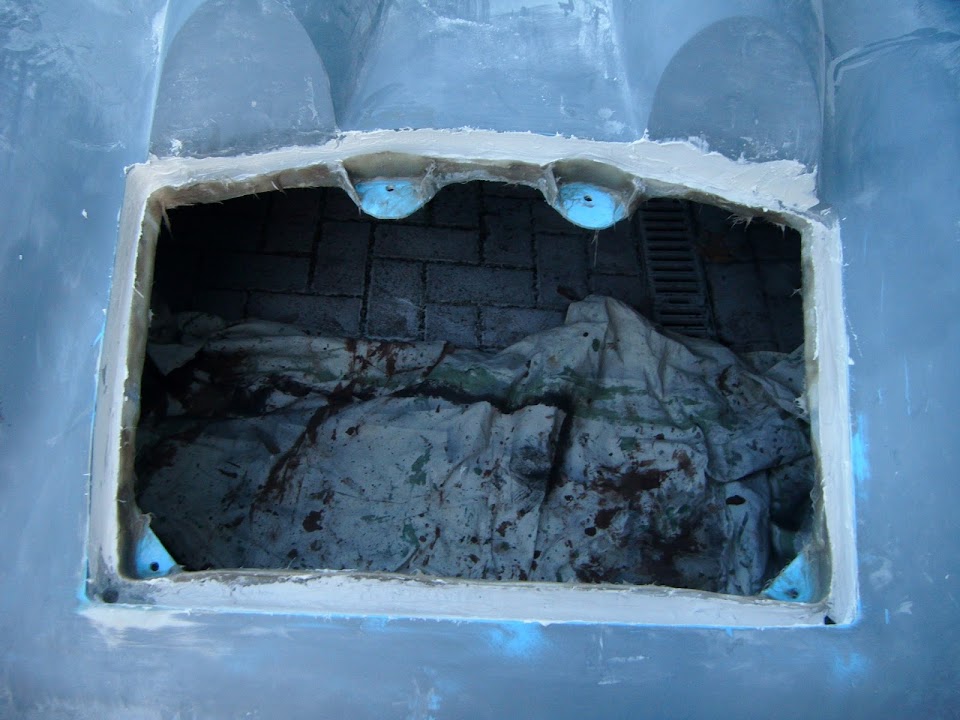
Drain Holes:
I turned the body shell over, and then realised I should have done the next job first.
Rather than turn it back over, I simply did the work while lying on my back instead.
I opened out the inside of the rain channel hole so that it "joined up" with the fibreglass funnel I'd built around the bottom corners.

Note:
I was happy with the rough finish, as I will be using filler around the pipe. + Obviously the photo was taken upside down too.
Then I tidied up the other side of the holes.

I also tidied up all the other edges of the rain channel while I was at it.
A blob of plastercine was enough to temporarily hold the plastic pipe in place.
Then some fibreglass filler was used to set the position a bit more permanently .

I also used the same filler to tidy up more of the rain channel edges.

Note:
Although I have covered the bolt holes with filler, the holes are "intact" on the other side, so easy to re-drill.
As it was so cold outside, I had to leave it a bit longer than normal before giving it a rough sanding down.


I will now leave this to set fully overnight before giving it a skim of normal body filler.
With rain due later, I've tucked the body shell away and will now be returning to my Christmas duties.
Not a great photo, but I hope you can see that the wide end of the tube is below the level of the rain channel.

Once I remove the plasticine, I will be able to add some fibreglass filler around the tube to hold it in place.
I will also use the filler to form an internal funnel from the outside edges of the drain hole to the tube.
Until next time, take care, Paul.
PS
Did I mention it was cold outside?
As despite typing this post up indoors, my nose is running and my fingers and toes are still cold!
|
4th December 2014, 07:57
|
|
Senior Member
|
|
Join Date: May 2011
Location: Somerset
Posts: 1,671
|
|
Quote:
Originally Posted by Paul L
PS
Did I mention it was cold outside?
As despite typing this post up indoors, my nose is running and my fingers and toes are still cold! |
You're a braver man than me i had loads planned for the car last night but when i got home it was freezing in the garage so i just applied a bit of filler and called it a night!
Time to dig out the thick jumpers and electric heaters i think.... |
4th December 2014, 15:26
|
|
Senior Member
|
|
Join Date: Feb 2012
Location: Wembley, London
Posts: 5,056
|
|
Dave - Whilst the cold is bad, it is the constant drizzle at the moment that is a real pain.
Having said that, I have also dug out my thermals just in case it gets much colder.
- - - - - - - - - - - - - - - - - - - - - - - - - - - - - - - -
Fog Lights
Well the slow boat from China finally arrived with my Reflector / LED Fog Lights.

Thanks to Ed for the link, as I am very happy with them.
They are normal reflectors until you connect then to power, at which point they become very bright lights.
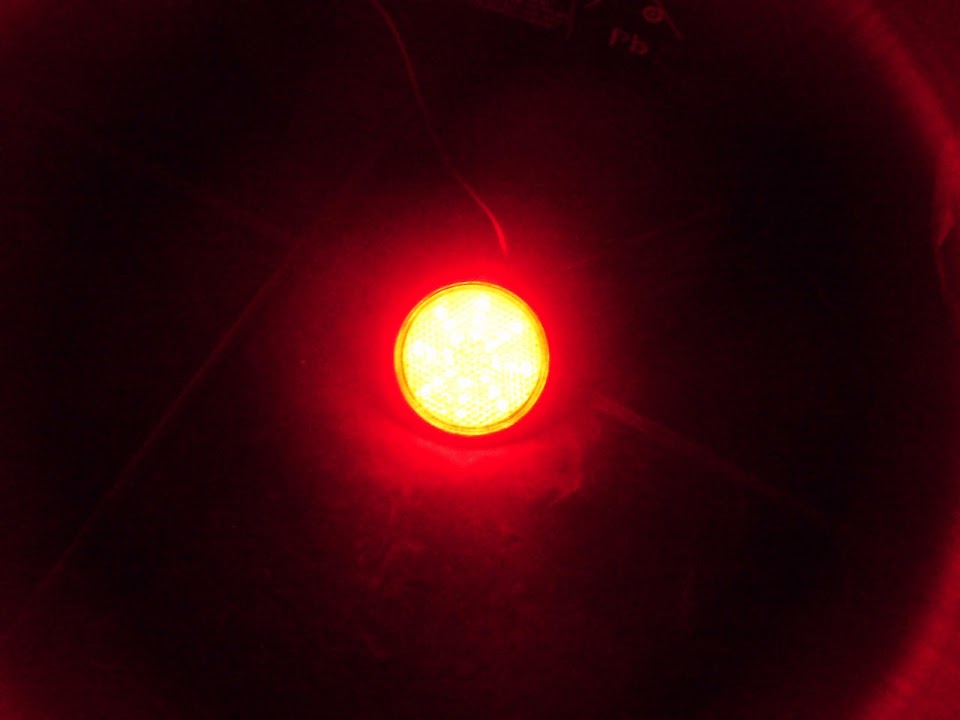

Simple, yet brilliant.
Cheers, Paul.
|
4th December 2014, 15:49
|
|
Senior Member
|
|
Join Date: Apr 2012
Posts: 1,163
|
|
Nice touch Paul. you'll be bolting stuff on before you know it!
Mac
|
4th December 2014, 18:17
|
|
Senior Member
|
|
Join Date: Apr 2014
Posts: 198
|
|
Your most welcome Paul, thanks for the recognition it made me smile, I enjoy the anticipation of will it come today and checking the post when ordering bits and bobs from China. Did you also order the little eagle eye bolt LEDs to use as number plate bolts and reverse lights? Ed.
|
4th December 2014, 18:58
|
|
Senior Member
|
|
Join Date: Dec 2013
Posts: 839
|
|
The drain hole is a simple but effective solution Paul it's great to see how others approach a problem and the rear reflectors/lights again are a simple solution which look good.
Keep up the great work and i hope the weather turns warmer for you down in the big smoke, its freezing where i am so the work in the garage has virtually stopped for now, may be have to look at a calor gas heater but i am little concerned about the amount of moisture they produce.
|
5th December 2014, 11:38
|
|
Senior Member
|
|
Join Date: Feb 2012
Location: Wembley, London
Posts: 5,056
|
|
Mac - With all of the rain lately, bolting things on still seems a very long way off at the moment.
However, seeing you bolting things on is still a great motivation for me to keep chipping away.
Ed - Fair play, these were a great find.
Obviously fog lights are not a requirement for most Sammio\Ribble\Miglia owners, as their donors are pre 01/04/80.
I am not planning to fit reversing lights and I already have some LED number plate lights.
Swifty - Cheers, thankfully some of the problem solving required on this build has been more straight forward than others.
I do find the winter a frustrating time, as it becomes harder to co-ordinate my available time with decent building weather.
- - - - - - - - - - - - - - - - - - - - - - - - - - - - - - - -
Still working on the drain holes:
Having learnt my lesson from the other day, I started work with the body shell the right way up this time.
First job was to remove all the plastercine that I used to hold the plastic tubes in place and tidy up the hole a bit.

Then I blanked off the tubes with some rolled up kitchen towel / masking tape, before adding some fibreglass filler.

There is a bit more work required to smooth out this area, but this first batch of filler will ensure the plastic tube is held in place on both sides.
Before the filler had set, I pushed the "bung" out from the underside.


I also applied some more normal body filler to the inside edges of the rain channel that I didn't get to last time.
I left that for a while before starting to sand the filler down.
Unfortunately, I hadn't finished this before the rain started.

So it was time to pack everything away, again!

So I'm off to do some more Christmas stuff.
Take care, Paul.
Last edited by Paul L; 5th December 2014 at 20:56..
Reason: Typo
|
6th December 2014, 13:51
|
|
Senior Member
|
|
Join Date: Feb 2012
Location: Wembley, London
Posts: 5,056
|
|
It's beginning to look at lot like Christmas...
Spend the morning with my daughters putting up the Christmas tree and decorations.
The low winter sun leaves my North facing driveway in the shade, which means this was the scene at midday!

I figured this meant it was probably too cold to start mixing and applying filler.
So I finished sanding the rain channel and at least this helped keep me warm.

The passenger side drain hole is pretty much there.

But the driver's side will need a little bit more filler as it is set slightly deeper.

In an attempt to create the illusion of progress I gave everything a quick dusting of etch primer.


Even though this did highlight all the areas I need to come back to and finish off, it does look better.
- - - - - - - - - - - - - - - - - - - - - - - - - - - - - - - -
The alternative quick release pins have arrived.

And so has the flat bar to play around with bonnet hinge options.

- - - - - - - - - - - - - - - - - - - - - - - - - - - - - - - -
But that is for another day, which will hopefully be a bit warmer.
Take care, Paul.
|
7th December 2014, 07:16
|
|
Senior Member
|
|
Join Date: May 2013
Posts: 2,161
|
|
All the hard work that you've done on the rain channels and drain holes, makes me smile Paul!
I have done just the same sort of stuff on my car, yet neither of us has the slightest intention of EVER driving in the rain, or parking the roofless car out in the rain!
Strange world we live in, but I guess we must plan for the worst case scenario. Good stuff.
|
7th December 2014, 07:17
|
|
Senior Member
|
|
Join Date: May 2013
Posts: 2,161
|
|
PS. do you have the link for those reflector/ led things please?
|
|
Currently Active Users Viewing This Thread: 2 (0 members and 2 guests)
|
|
|
| Thread Tools |
|
|
| Display Modes |
 Linear Mode Linear Mode
|
 Posting Rules
|
You may not post new threads
You may not post replies
You may not post attachments
You may not edit your posts
HTML code is Off
|
|
|
All times are GMT +0. The time now is 01:56.
|


