|
|
| Sammio Builds and discussions Sammio bodied car builds and specials |

1st October 2015, 09:05
|
 |
Senior Member
Enthusiast
|
|
Join Date: Dec 2006
Posts: 1,130
|
|
Unique numbers to match your unique car.
Personally I like them.  |
2nd October 2015, 06:33
|
 |
Senior Member
|
|
Join Date: Feb 2012
Location: Wembley, London
Posts: 5,056
|
|

Micky1Mo - Cheers. 
I know I am still a long way from actually fitting these numbers, but they do help me think positively about the future.
- - - - - - - - - - - - - - - - - - - - - - - - - - - - - - -
A bit late, but here is yesterday's report...
Testing Times - Part 1:
First job of the day was trimming off the excess material around the roundels, for two reasons:
- This makes them easier to store "flat".
- I could have a play with possible fitting locations on the bonnet...
I did have another look at other Sammios and vintage racing cars to see where the bonnet number usually goes.
Many are at the front, but I think this would take away from the yellow nose band I am planning around the grille opening.

Another alternative is right at the back, but this seems a bit too far away to me.
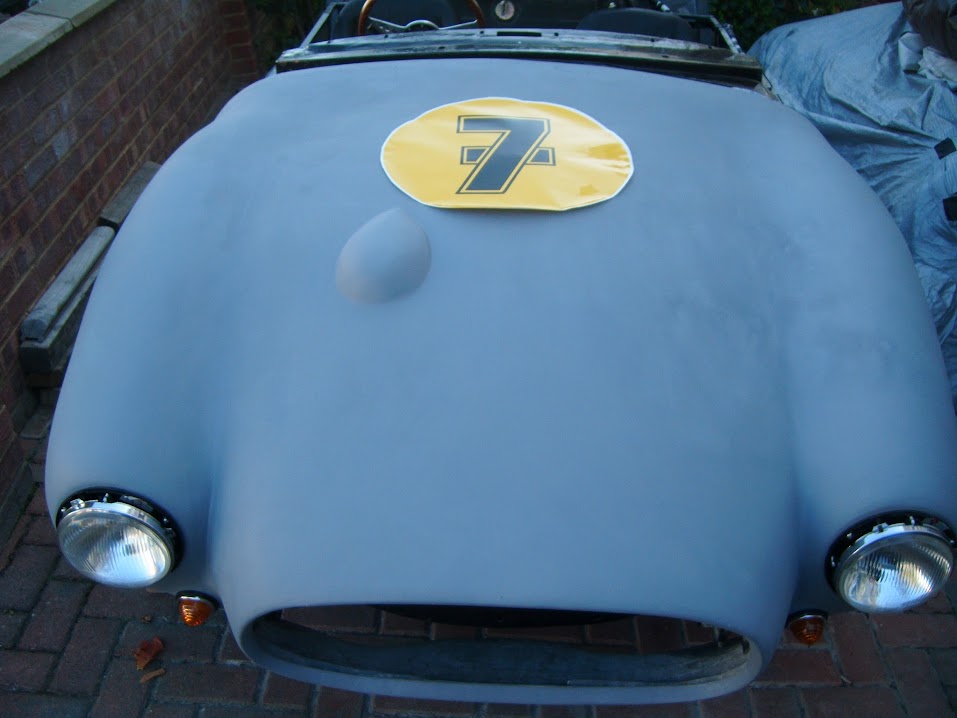
So I'll probably opt for somewhere in the middle and maybe at an angle.
Note:
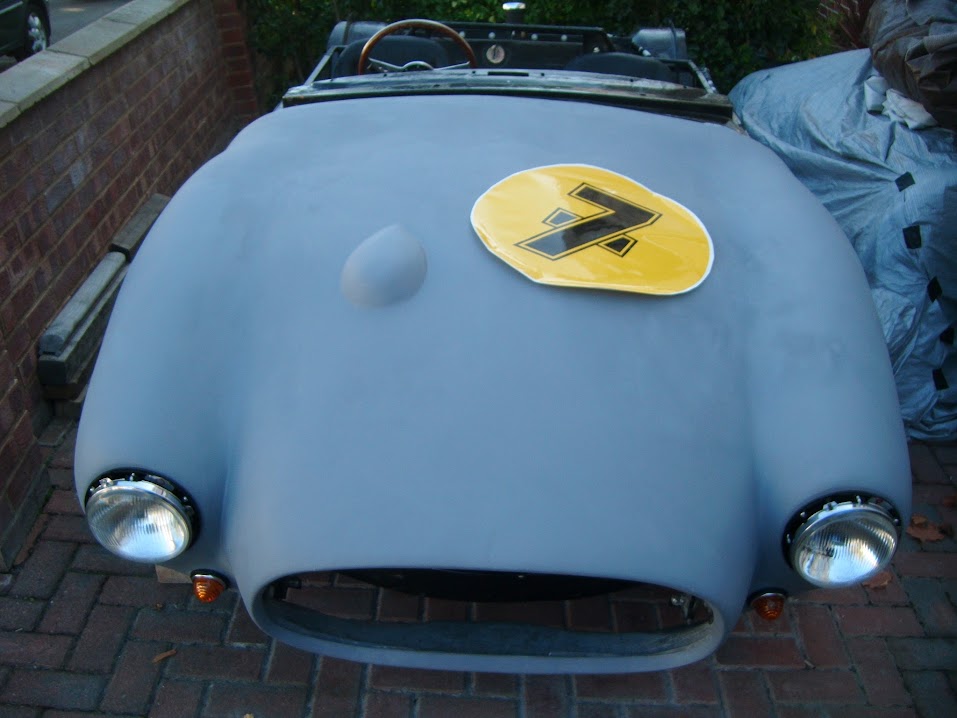
Based on the above, I think the number needs to be "evened up" vertically compared to the bonnet bulge & kept "square" rather than set at an angle.
- - - - - - - - - - - - - - - - - - - - - - - - - - - - - - -
After a little bit of fun, I then spent a long time getting increasingly frustrated with my wiring gremlins. 
I had noticed the bonnet was shaking a little when the engine was running.
So thought it might have something to do with why the side lights are no longer working.
I removed the passenger headlight and tested the bulb on my old Mondeo battery and clearly the bulb is OK.

Then I connected the old battery to the ends of the wires coming out of the headlight shell and again the bulb came on.

I then worked my way through the connections on the front wiring loom and found one loose wire.

However, each time I fixed one loose connection, another one would appear and it seemed like my "fixes" were making things worse. 
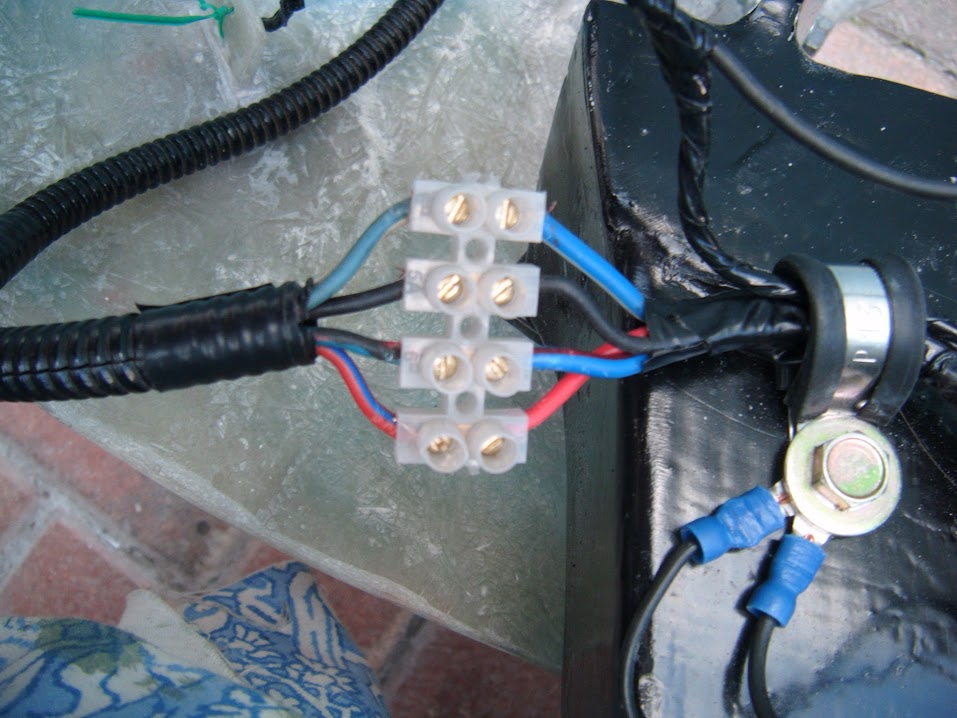
So in a desperate attempt to isolate the problem I removed the headlight quick release connectors from both sides and temporarily replaced them with block connectors.
Yet the side lights would still not come on. 
You may remember that I had gone to great lengths to test the lighting indoors before wrapping the front loom.

But clearly something has gone wrong in the last few days, as these side lights came on when I first started testing the lighting in situ.
Next I unwrapped the joins where the wiring is split between the passenger and driver's sides and replaced them with connection blocks too.

When the side lights still refused to come on, I decided to walk away from the front wiring loom before I sank into despair.
Note:
I've now ordered a multimeter so that I can be a bit more scientific in my approach to trouble shooting this.
Then I turned my attention to the rear loom, where the number plate light had now stopped working for some reason.
I traced that to a blown bulb and as I had a spare, that was an easy fix and I've also ordered some spare bulbs.
Wired in the new stop/tail light, so everything on the lighting board is working as it should.
So this is rear lights, hazard lights and fog lights all on at the same time.

Initially, I thought I'd mixed up the wiring for the stop/tail light, but it turns out it was just the viewing angle.
When you look at the lights "square on" you can see the rear lights are the same intensity.

Note:
I know the brake lights are working, even if I don't have a switch that works as it should at the moment.
Also in a slight OCD relapse, I then refitted the lens from my old stop/tail light & indicator to the new replacement bodies.
( So everything will now be a perfect match when finally fitted.  )
End of Part 1...

|
2nd October 2015, 06:36
|
|
Senior Member
|
|
Join Date: Feb 2012
Location: Wembley, London
Posts: 5,056
|
|
Testing Times - Part 2:
After a bit of research it seems there is a "flash to pass" option for my headlight switch.
The lever needs to move back towards the driver to operate, but the plastic column cover currently prevents this happening.
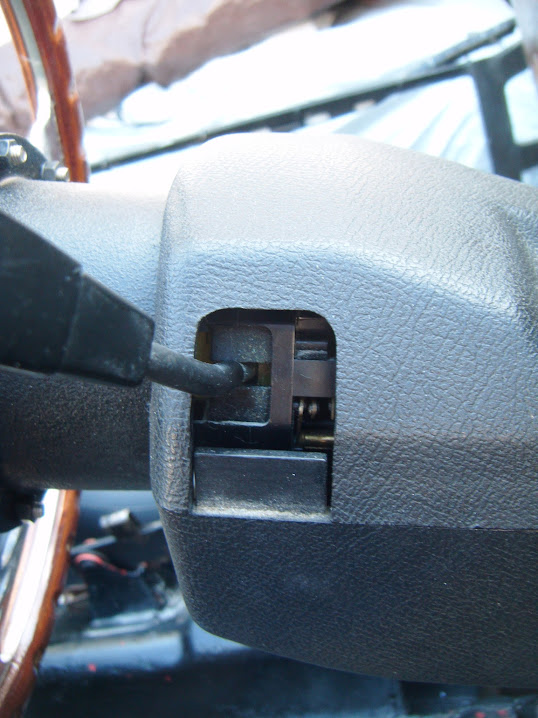
So the cover came off again and I tested the switch without it and the "flash" worked with the headlights switched off.

So I simply "pushed" the whole lever assembly forward a tad and re-fixed it into position & put the cover back on.
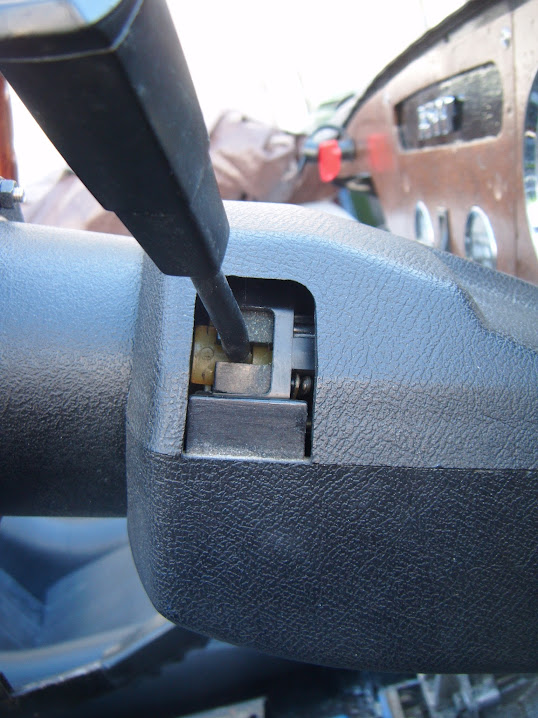
Thankfully it now works as it should, including when the headlights are on low beam, so another tick on the electrical testing.
Next I had a look at the heater fan switch and quickly realised there was a problem.
Although this is not a very clear "before" photo, you can see the two coils of wire are connected to the switch "base".
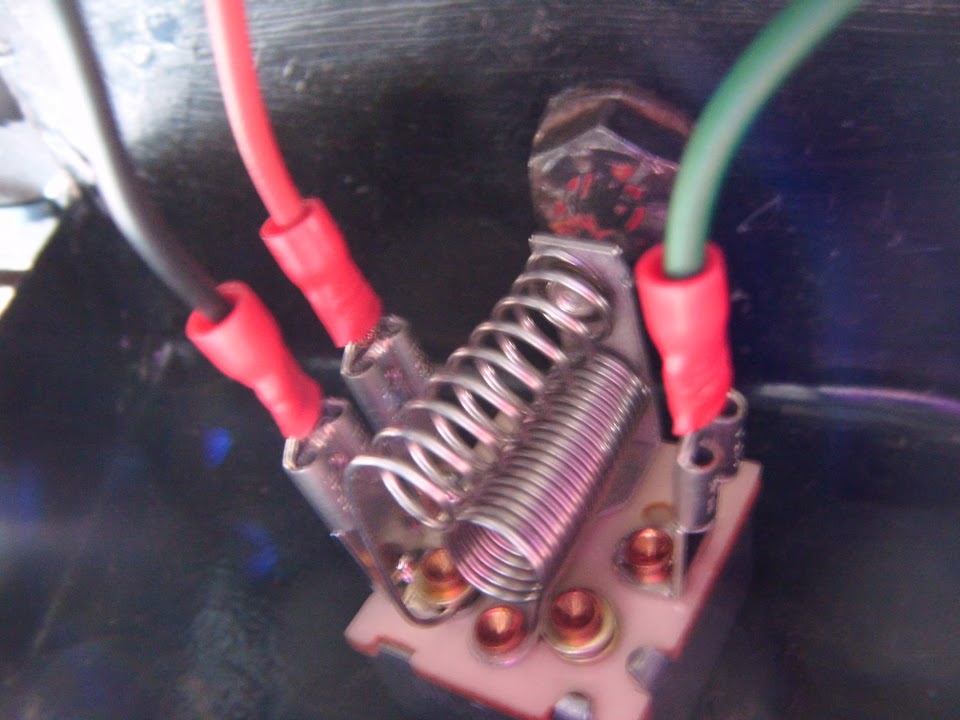
But now the wires connecting these coils are both broken.

So I've removed this part of the switch completely.
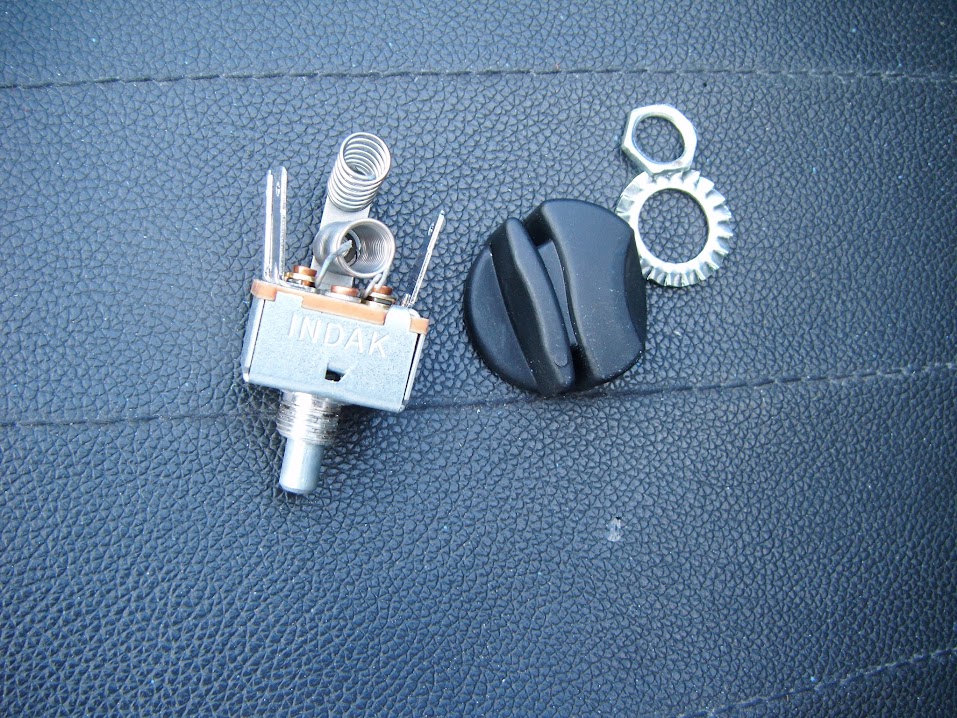
I've also ordered a replacement that does not have this external coiled wires arrangement.
Then I moved the old battery into the passenger floor pan and connected up the fan directly.
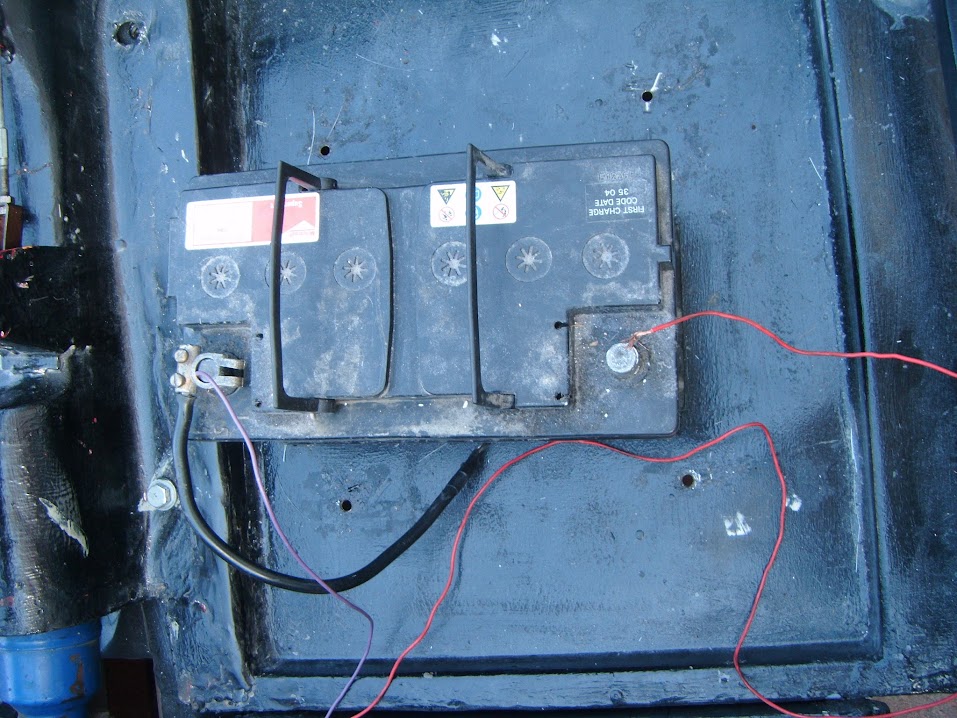
The good news is that the fan definitely blows air through the vents.
I've no idea what the fan is meant to sound like, so I made another short video of it in action.
https://youtu.be/vhYR8VaovJQ
I guess I am more aware of the fan noise because the engine in not running.
Unfortunately, my attempts to put this theory to the test failed, when I couldn't get the engine to start.
At which point, I decided to walk away from the Moon Rover and turn my attention to the body shell...
- - - - - - - - - - - - - - - - - - - - - - - - - - - - - - -
As I need to sort out the drainage for the boot lid before the body shell is bonded on.
At one point I was going to fit a "Y" piece and have both boot lid drain holes exit through a single pipe.
But now I think I will use two exit pipes and a straight(ish) exit route on either side.
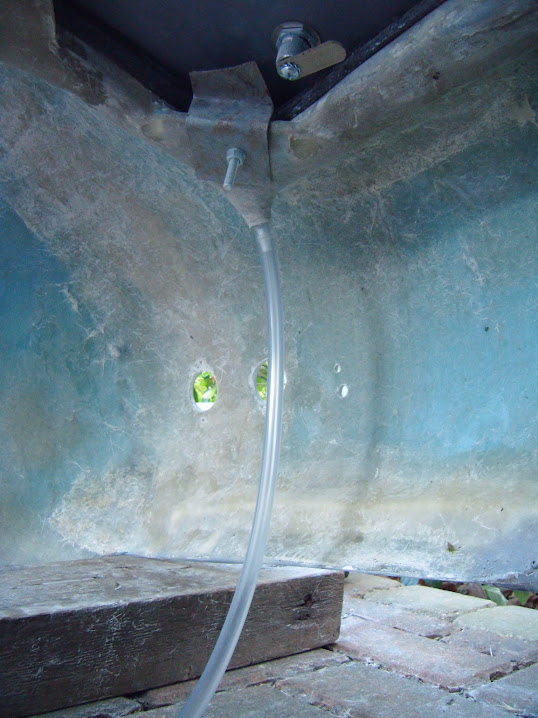
I just need to double check the space between the boot floor and the body shell before I drill a hole and fix this pipe in place.
I might add some brackets, similar to the ones I used for the front wiring loom, to help keep the hose out of the way.

- - - - - - - - - - - - - - - - - - - - - - - - - - - - - - -
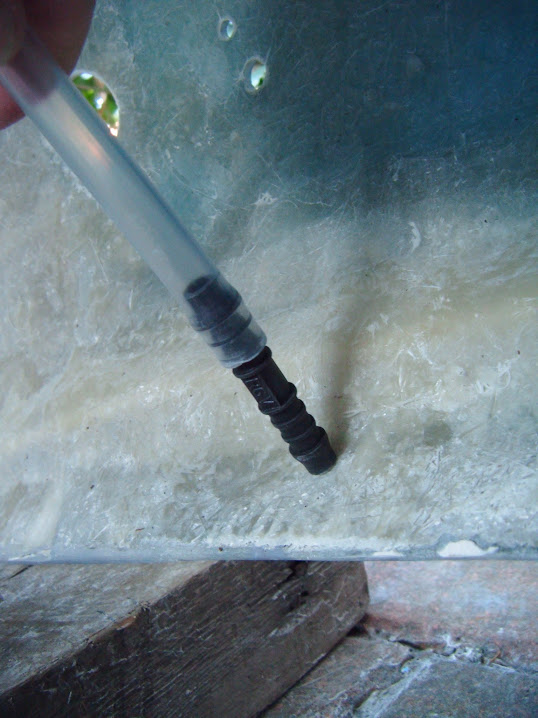
The only other thing I did today was play with my bonding paste "experiment".
I ground down the excess paste, which still felt a bit "tacky" to me.
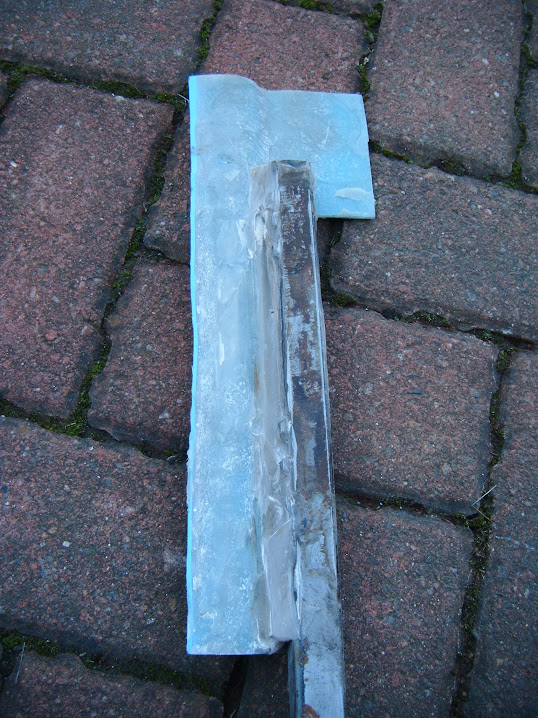
Thankfully this left a "dry" solid surface below and these two pieces are seriously stuck together.
- - - - - - - - - - - - - - - - - - - - - - - - - - - - - - -
Whilst it is a pain to re-do electrical work I thought I'd finished, I know it has to be done.
But I will be very happy when I get to the bottom of what is causes the side lights problem.
Until next time, take care, Paul. 
|
2nd October 2015, 07:31
|
 |
Senior Member
|
|
Join Date: Jun 2011
Posts: 935
|
|
I can't wait to see you get it into paint Paul
I think the yellow decals will look "period" with the car in its green and yellow livery.
My thoughts on the roundel location is inspired by these connaughts which used white nose bands.
Centre of the bonnet but at 45 degree

 |
2nd October 2015, 17:54
|
|
Senior Member
|
|
Join Date: Feb 2012
Location: Wembley, London
Posts: 5,056
|
|
Roadster - Cheers.
Whilst paint is still a long way off, the grey primer improved the car looks, so BRG should really transform it.
Thanks for posting those photos, as I had forgotten about leaving room for the "stick on" front number plate.
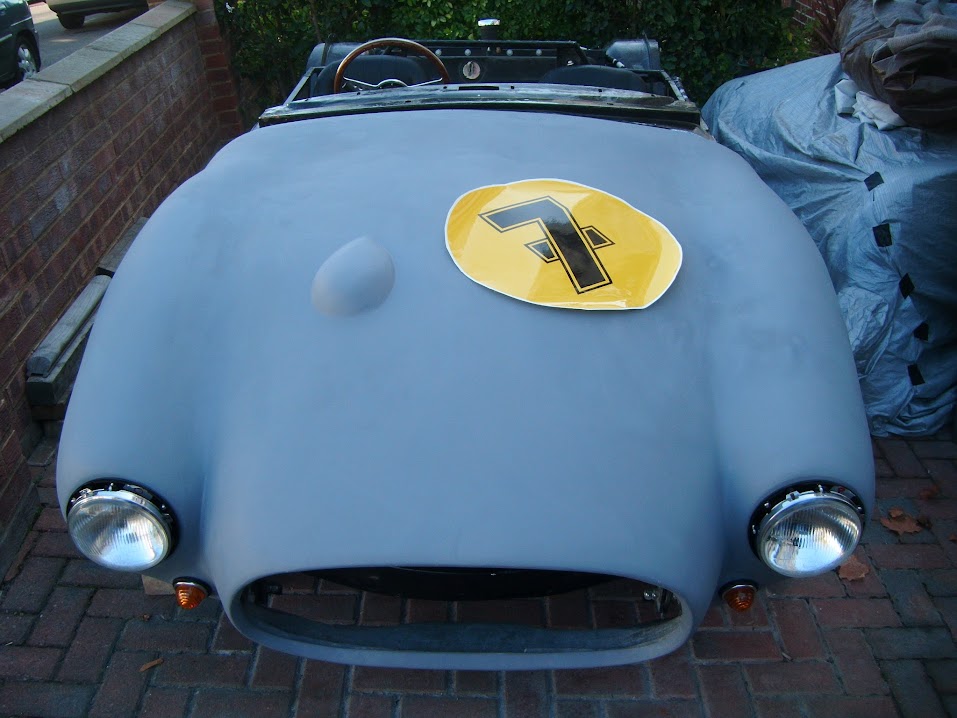
I think the bulge will prevent me from putting the number in the centre, so perhaps something like this?
( Yellow tape representing the nose band, plus the stick on number plate and racing number. )


Or the yellow band could be a bit thicker / deeper.

Clearly there are various options, but I am not going to play with this for a while now, see below..
- - - - - - - - - - - - - - - - - - - - - - - - - - - - - - -
Critical Path - Part 1:
I have been trying to work out what are the jobs that have to be done before the body can be bonded on.
So things like problems with the front wiring loom can wait, as the rear loom is working fine.
Even the drain pipe exit for the boot lid rain channel can wait, after it dawned on me there is an easier way to do this.
As there will be a gap to fill between the end of the boot floor and the rear of the body shell.
So I can fit the black pipe into this "fill panel", rather than drill holes in the body shell itself.
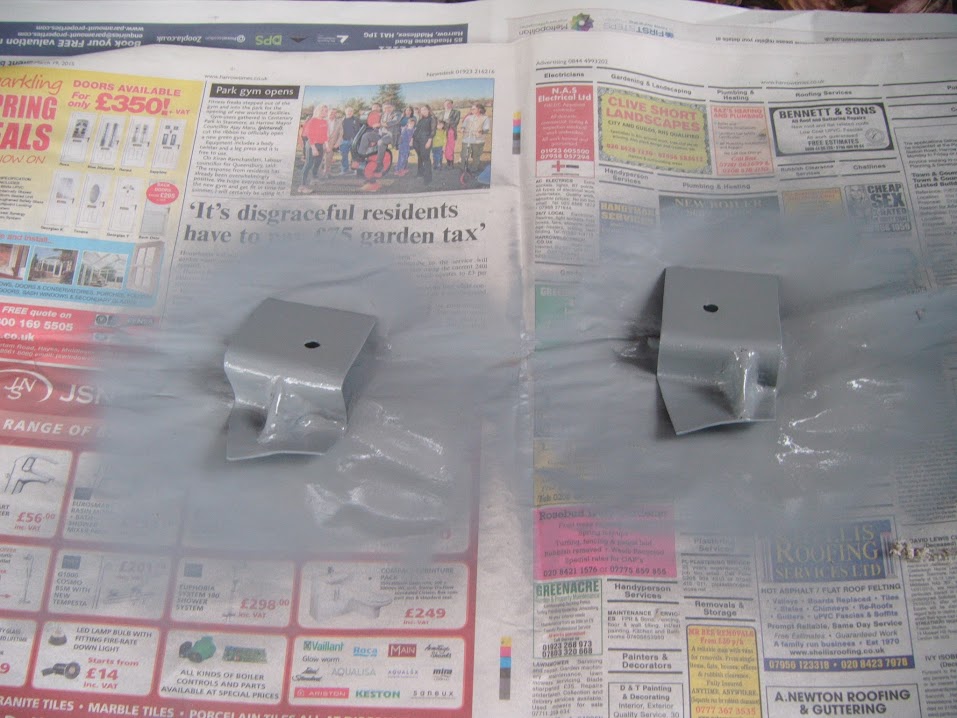
However, now would be a good time to add the brackets required to zip tie the hose out of the way.
So I made another two of these.

But before I fitted them, there was a bit of general tidying up to do on the body shell.
There are a few points on the underside of the scuttle that "catch" the bulkhead below.

So I've now cleaned up all of the underside, in preparation for bonding it to the bulkhead.
Using fibreglass filler to fix the brackets in place was miles easier than using fibreglass matting.

I also added some fibreglass filler to various other small holes that needed filling, plus behind the dash edge.

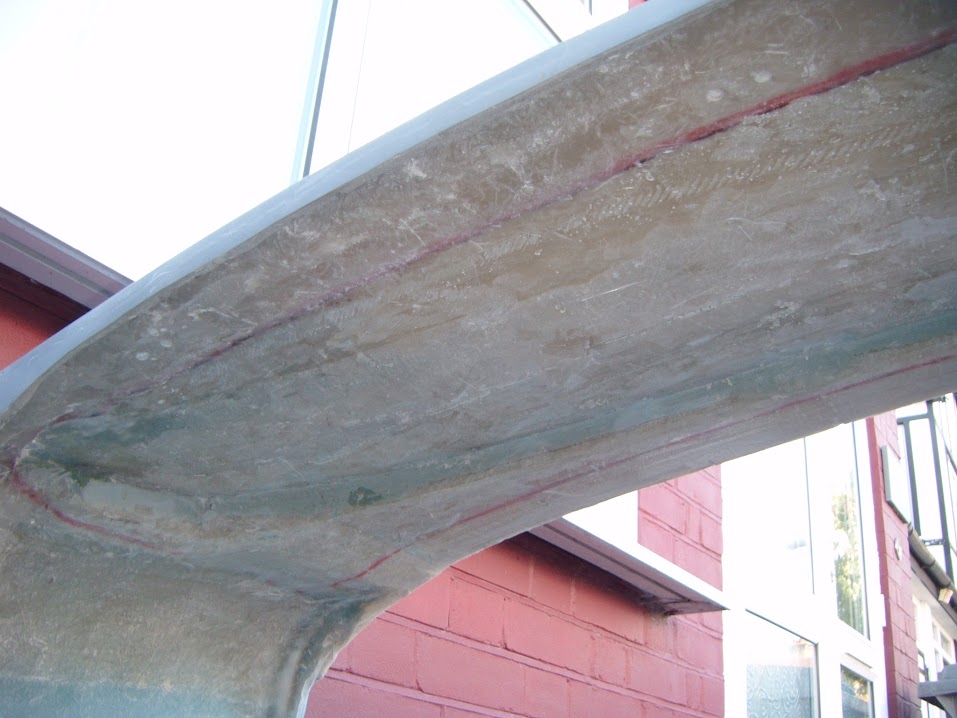
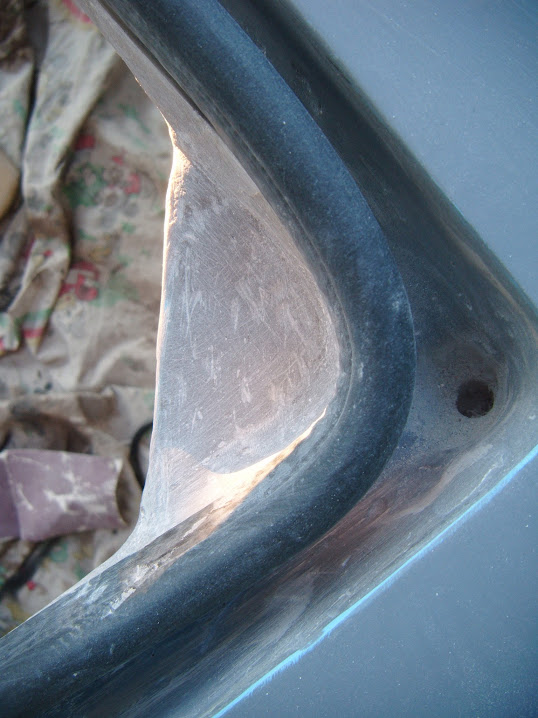
It is not easy to see in this photo, but this lip has rough fibreglass underneath/behind it.

So I've added a layer of filler to form a "wedge" from the lip back to the scuttle.
( The line is where the Spitfire bulkhead starts. )

That way anyone, including me, who runs their fingers along the edge of the dash "overhang" will not pick up any splinters.
When the filler was set, all the various areas were then sanded down.

The next area I wanted to play with was the boot lid locks, which meant I needed the keys.
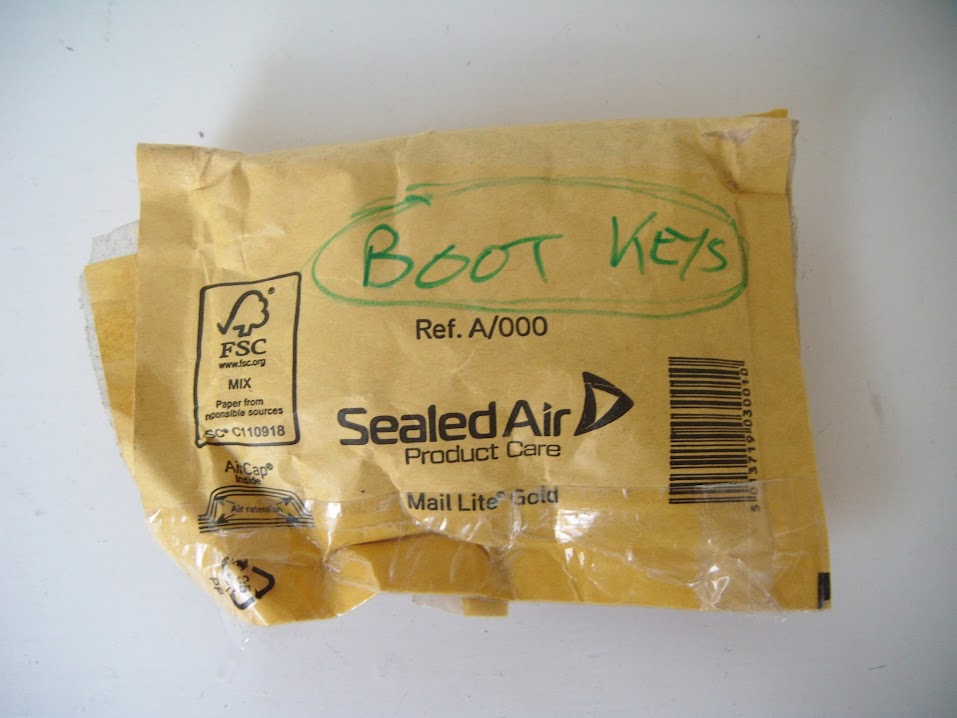
Note:
There is no point in marking the outside of the envelope, if you can't remember which box you put the envelope in.
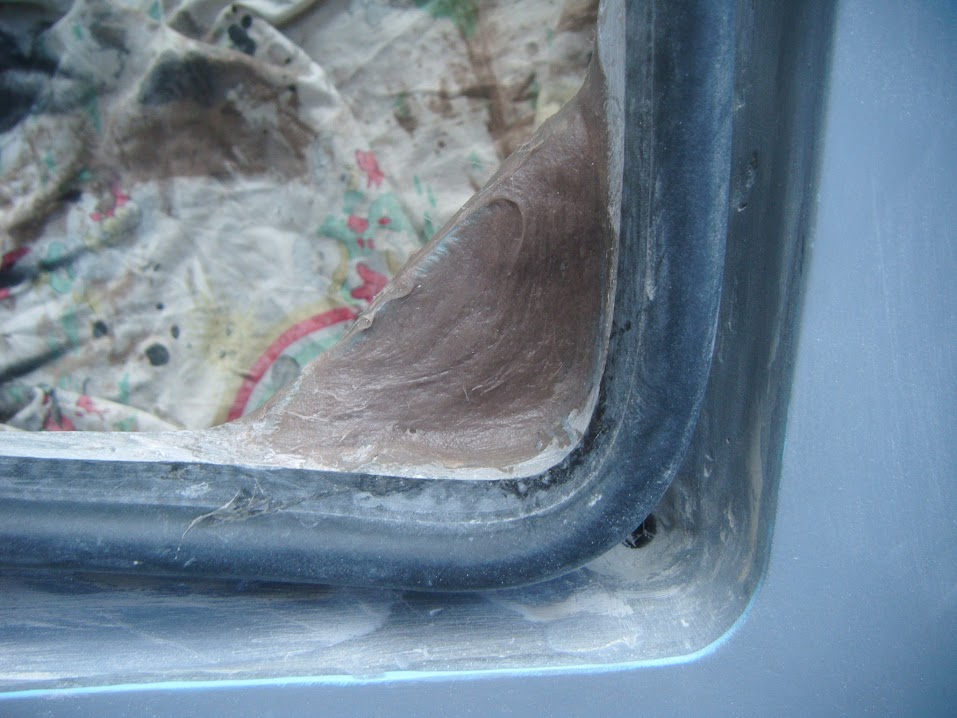
Then I trimmed down the oversized bolts.

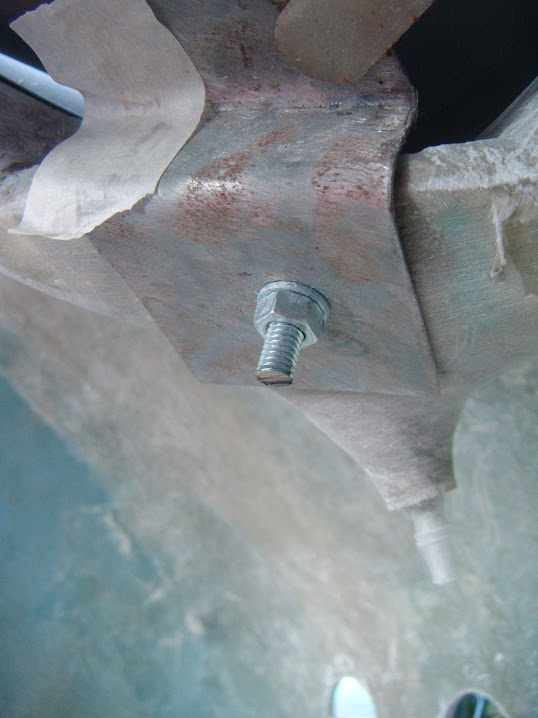
Note:
The "daylight" you can see is because I moved the rubber seal when doing the filler work earlier.
It was only when I removed the newly shortened bolts that I remembered the mounting plate was a mess.
( Following my numerous attempts to make the boot lid work. )

So there was another round of fibreglass filler work on both bottom corners.
End of Part 1...
|
2nd October 2015, 17:56
|
|
Senior Member
|
|
Join Date: Feb 2012
Location: Wembley, London
Posts: 5,056
|
|
Critical Path - Part 2:
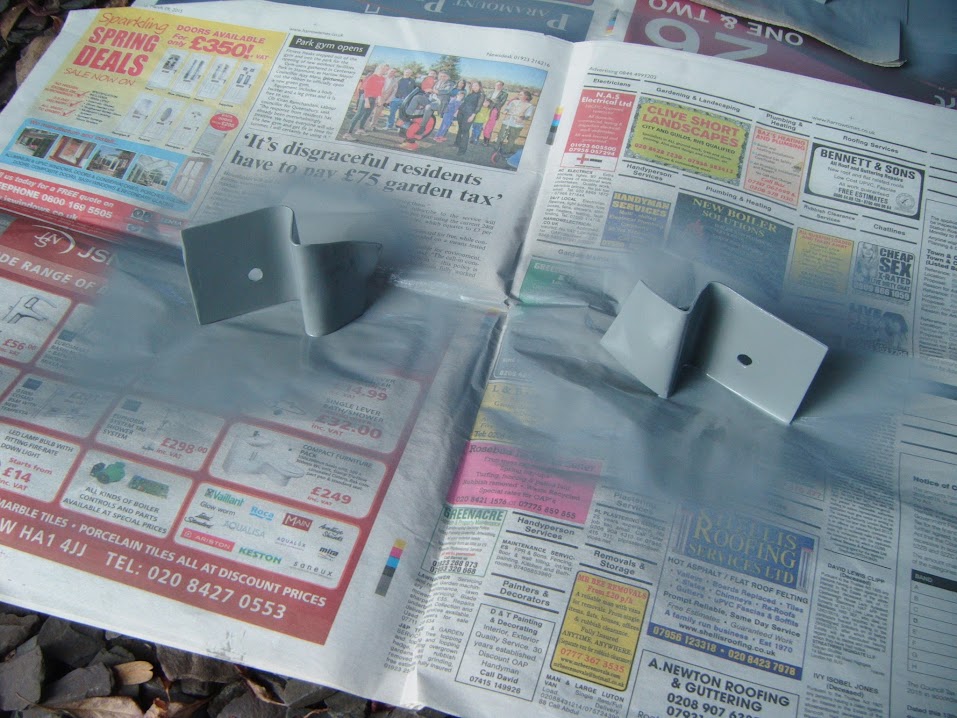
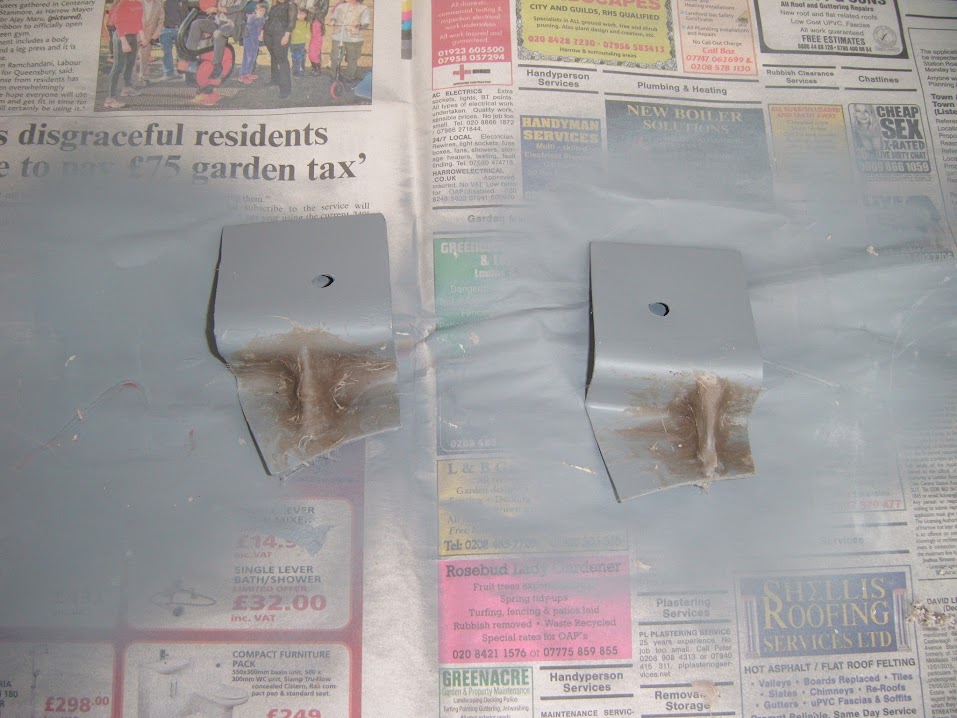
The top brackets just needed to be sanded down before getting a coat of etch primer.

But I wanted to strengthen the bottom brackets, so cut small sections of metal out for both.

Not my neatest bit of welding, but it will do the job and thankfully will not be seen.

Some more sanding later and these were in primer too.
The final job of the day was to sand down the bottom mounting plates in the boot.
Now I just need to used the brackets to mark up where to re-drill the bolt holes.
Unfortunately, I seem to have run out of etch primer, so I'll get some more tomorrow.
Then I can do the final preparations on the boot rain channel before starting to paint it.
- The mounting plates & rain channel inside edges will be black and done now.
- But the edges next to the body work will be BRG and they will be done later.
Overall, some steady progress towards finishing the last few jobs on the body shell.
So until next time, take care, Paul.
|
3rd October 2015, 16:11
|
|
Senior Member
|
|
Join Date: Feb 2012
Location: Wembley, London
Posts: 5,056
|
|
Body Shell Prep - Part 1:
Ended up adding a little bit of fibreglass filler around the welding I did yesterday.
So once that was set and sanded down I could put some etch primer on.
I painted the top brackets.
Used the bottom brackets to mark out where to drill holes for the fixing bolts.

Then spend ages tidying up both the underside and sunny side of the area around the boot opening.

So I could get some etch primer on.

Added a layer of normal body filler to the "wedge" behind the dash board lip.

Sanding this down was a major pain, as I had to work underneath it to see what I was doing.
But no matter where I was, the dust still rained, or should that be snowed, down on me.
At least I got a smooth finish eventually.

Then that got a coat of etch primer too.

Whilst the primer on the underside of the lower brackets hadn't cured long enough, I could paint the other side.

End of Part 1...
|
3rd October 2015, 16:12
|
|
Senior Member
|
|
Join Date: Feb 2012
Location: Wembley, London
Posts: 5,056
|
|
Body Shell Prep - Part 2:
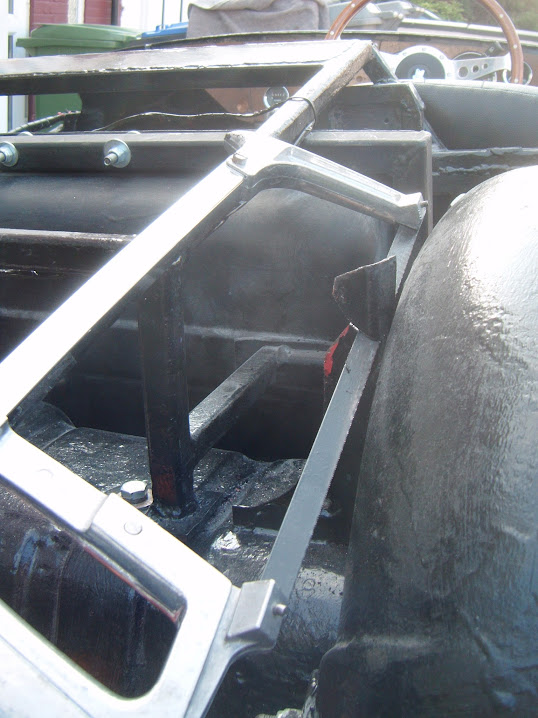
I have put a lot of thought into how I can keep the back of the body shell "level" when I bond it into place.
( The front of the body shell "slots" over the Spitfire bulkhead, so that is less of an issue for me. )
Part of my problem is that the rear body shell itself doesn't have much in the way of genuinely horizontal surfaces on it.
I remembered that this caused a lot of beard scratching when I tried to work out where to fit the rear lighting.

However, the good news is that the holes for the rear lighting can now be used to provide me with a "straight line" to work with.
So I whittled down the ends of four pieces of wood so they would fit into the rear light template.


Then I marked their positions on another length of wood.
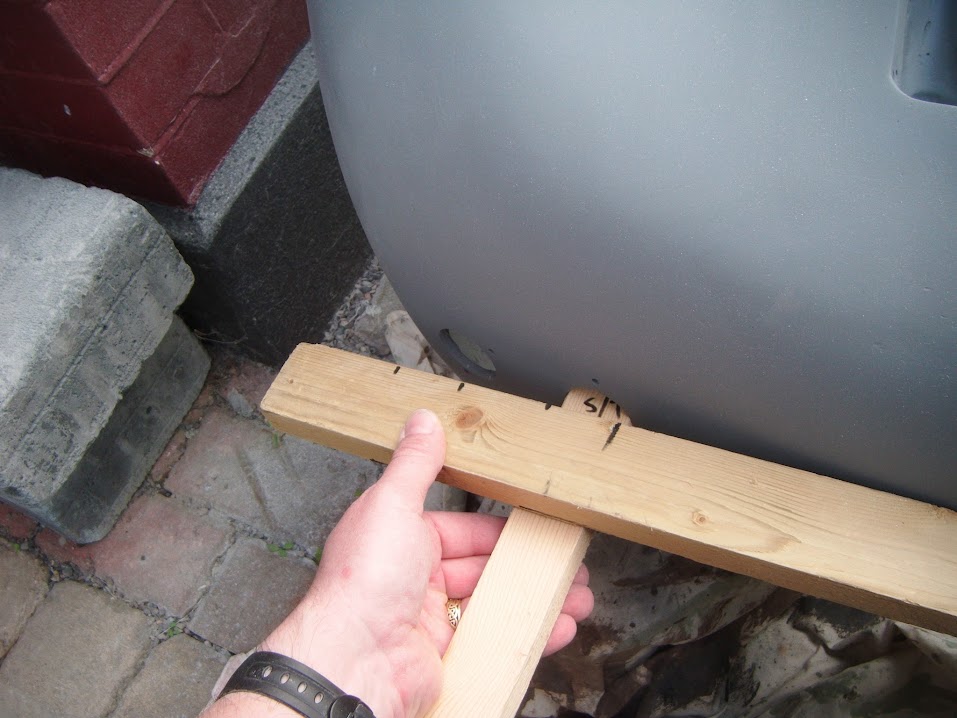
Before fixing them into position like so.
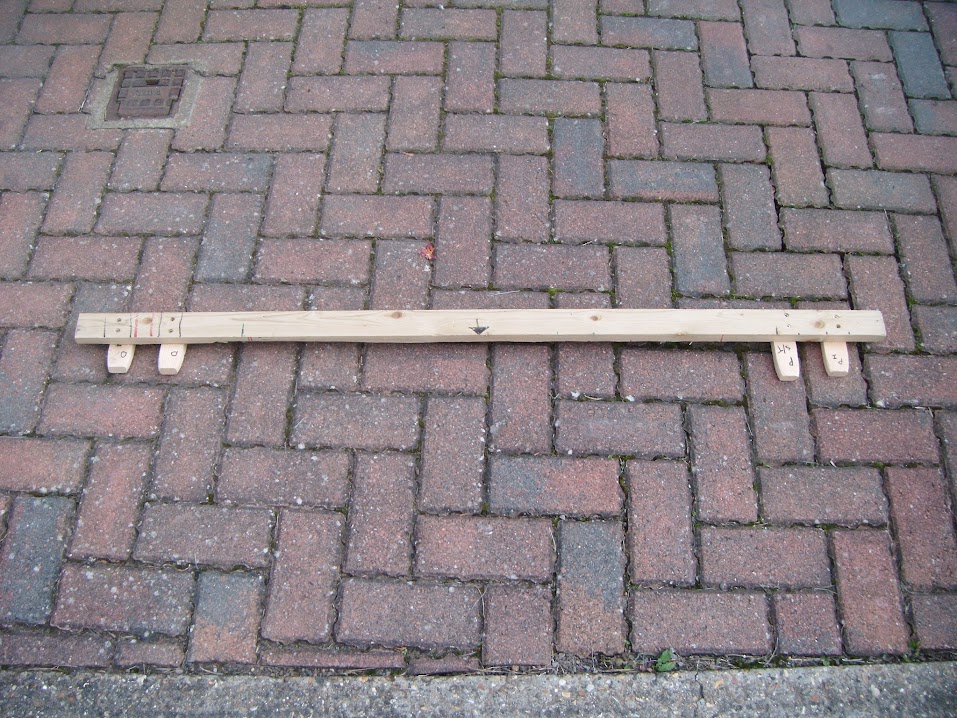
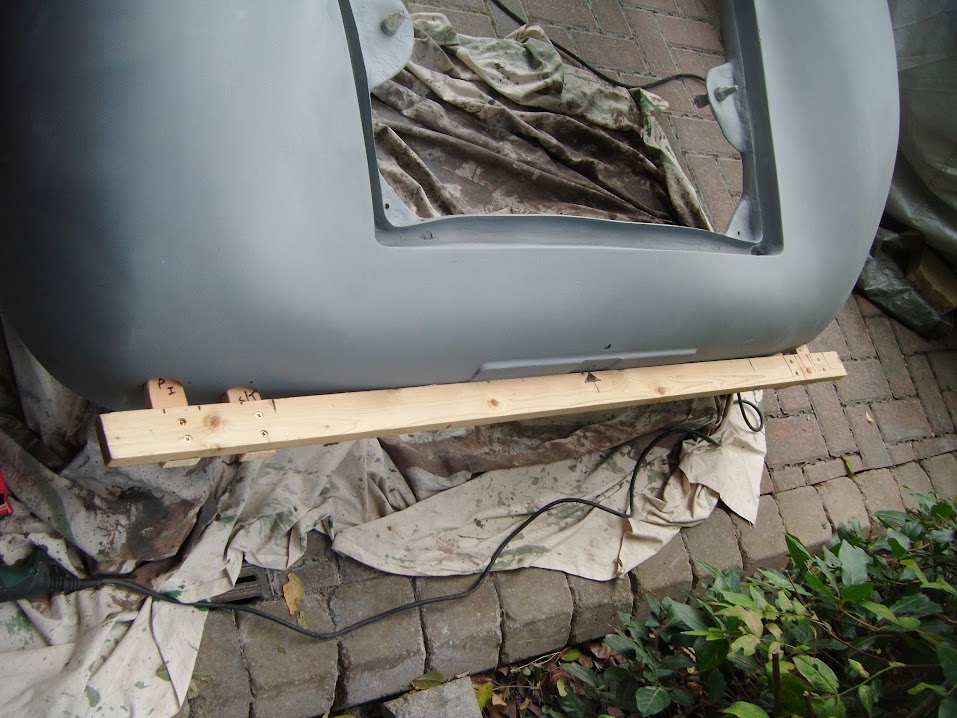
The small lengths of wood slot into the rear lighting holes like so.

Giving me a straight(ish) line to work with across the rear of the car.
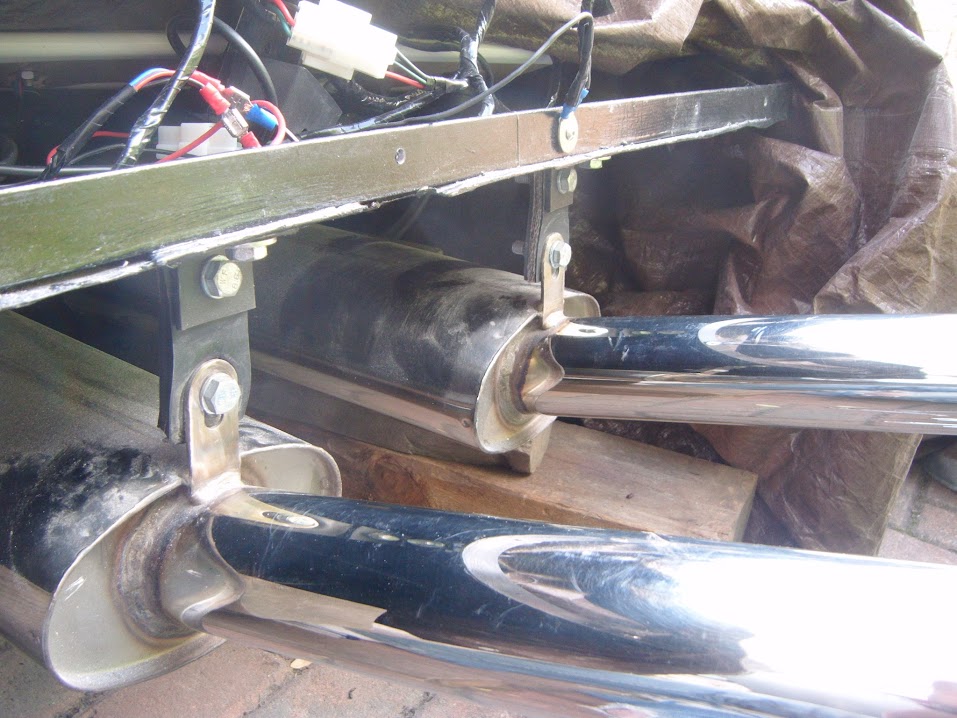
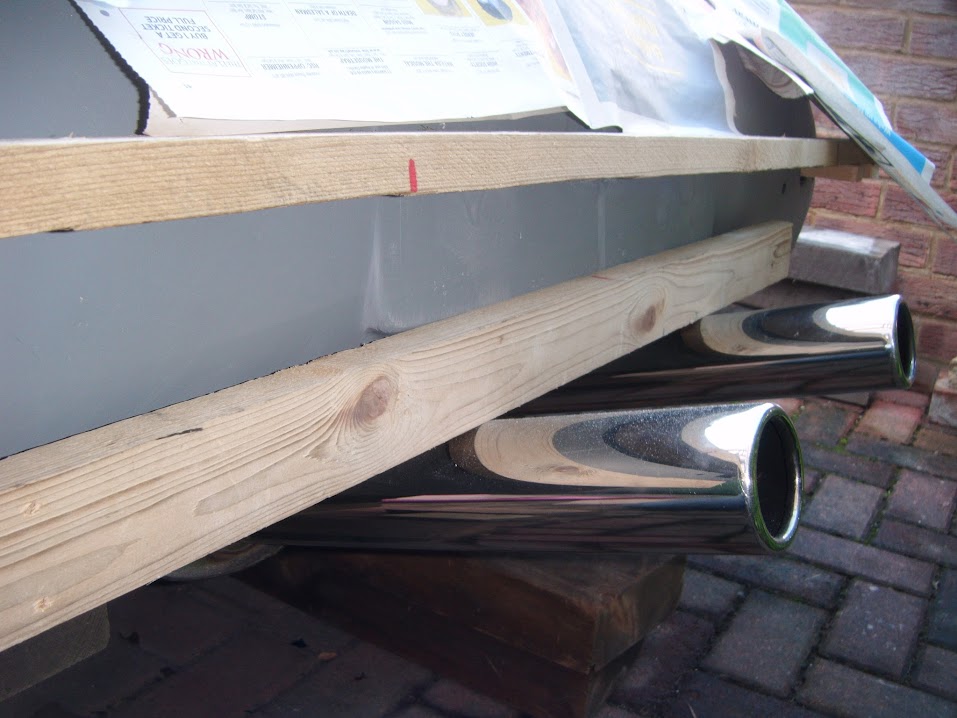
Then I double checked that my twin tail pipes were both the same distance from the boot floor.
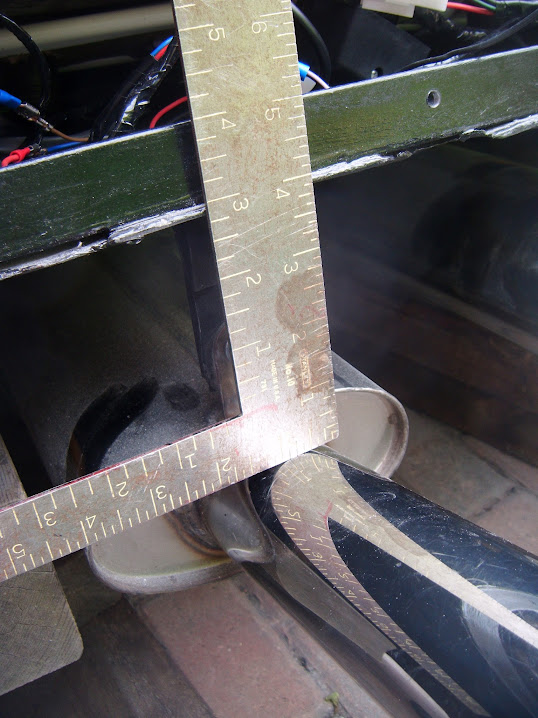
After a small adjustment to one, they will now be my reference point for a "horizontal" level on the Moon Rover.
Even though I am now waiting for the primer to fully set, I am at least another step closer to bonding the body shell into place.
Until next time, take care, Paul.
|
4th October 2015, 15:51
|
|
Senior Member
|
|
Join Date: Feb 2012
Location: Wembley, London
Posts: 5,056
|
|
Close, but no Cigar - Part 1:
I knew my recent run of time available for car work, combined with decent weather outside, was coming to an end.
So I really wanted to have reached the stage of bonding the body shell to the framework by today, but it was not to be.
However, I actually decided yesterday, that I'd rather miss this target, than take short cuts to achieve it, especially with the boot lid.
( E.g. Any fine tuning of the locking brackets is much easier to do with the body shell off. )
This was the right decision to make for my build quality & thankfully it also removed a lot of the pressure I was putting myself under.
- - - - - - - - - - - - - - - - - - - - - - - - - - - - - - -
Anyway, that is enough about what I didn't do today, instead here is what I did do...
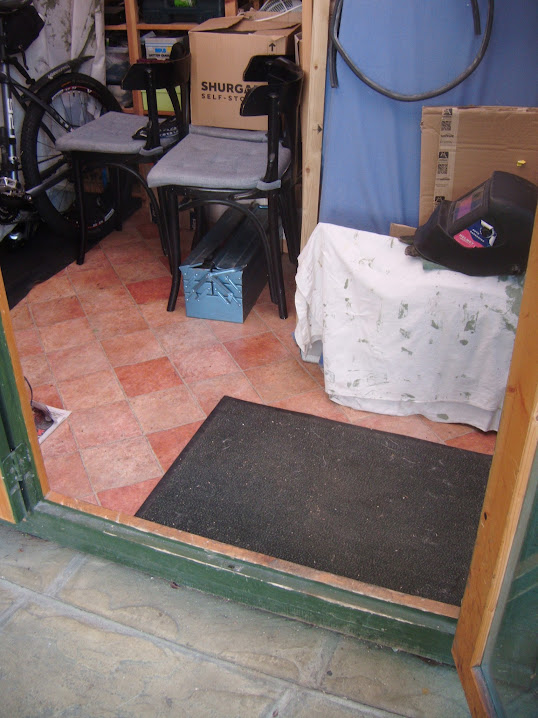
Started the morning with the all too regular task of tidying up the summer house.

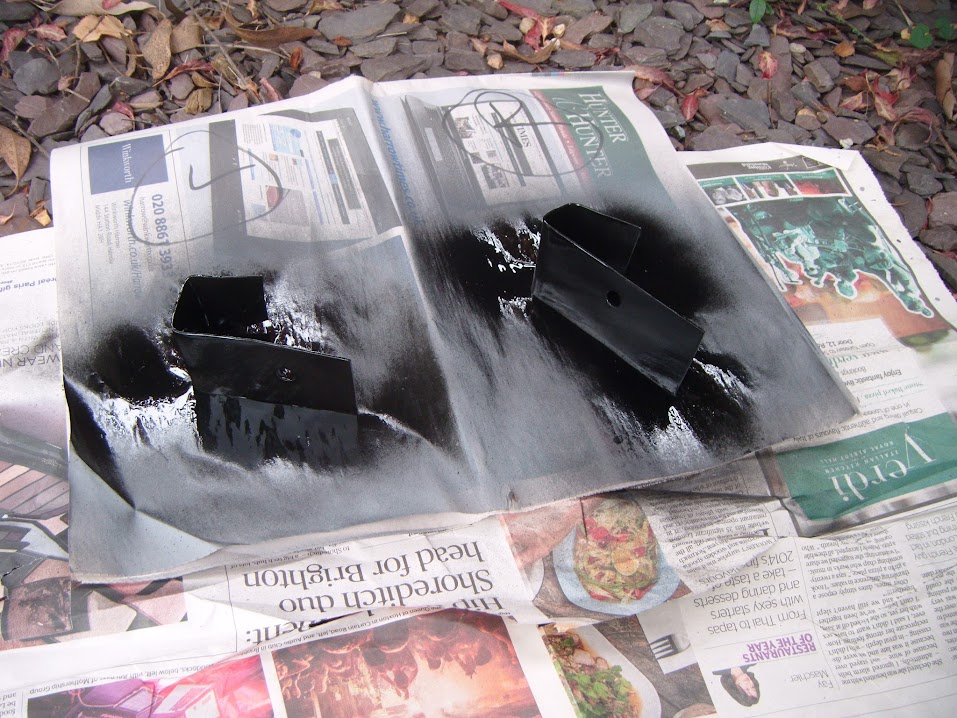
Put the final coat of paint on the boot lid brackets.

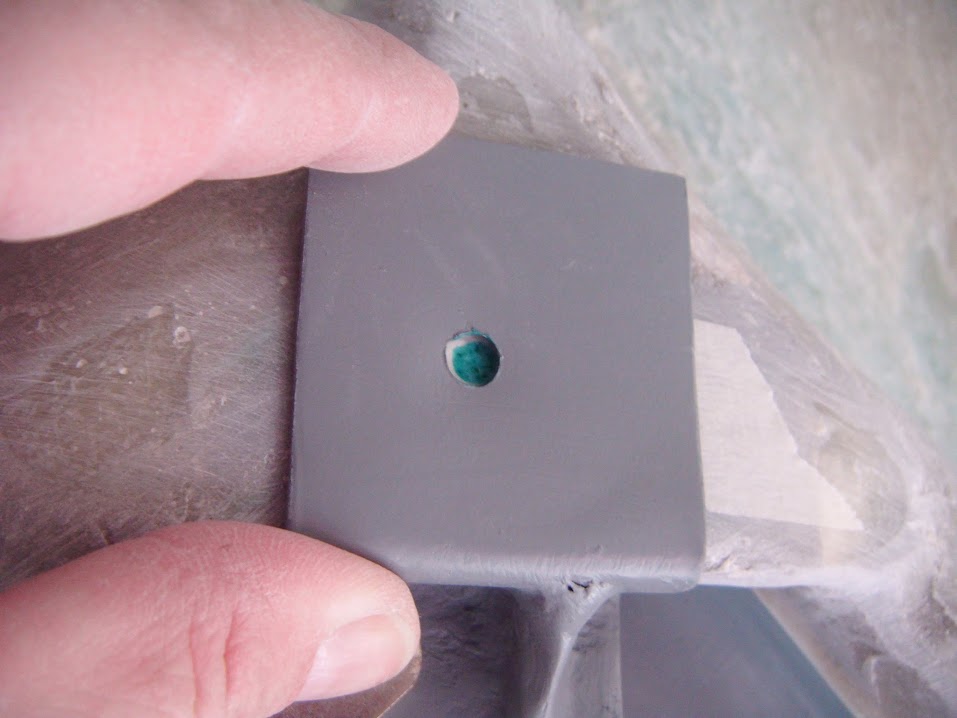
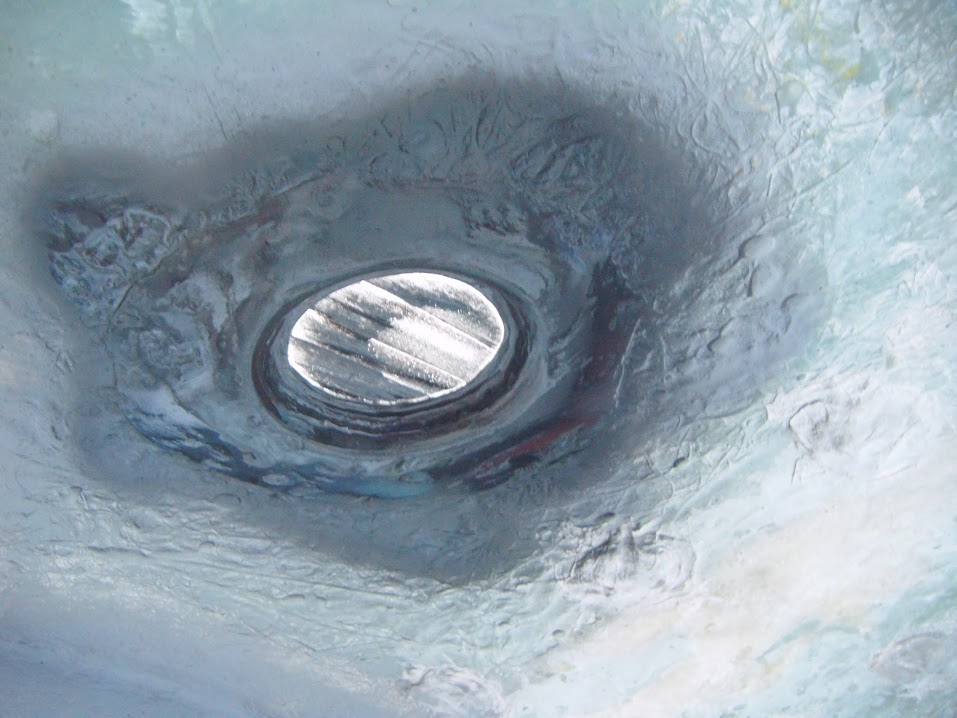
Then turned my attention to this small "blemish" in the boot lid rain channel.

Part of me was prepared to simply ignore it on the basis that it would not normally be on display.
But given how long I have spend getting this boot lid to work, this seemed pointless not to spend a bit more time on it.
( Hence the decision to scrap my original plans to bond the body shell on today. )
Unfortunately, there then followed a bit of body filler "mission creep".

While I was waiting for that to set, I masked off various "holes" on the sunny side of the body shell.


So I could get some paint on the corresponding areas on the underside.

Although, it was only after I started on the rear section that I remembered that I still had some sanding to do above this section.
So I'll come to finish off painting that area later on, instead, after sanding down the filler, the boot area looked like this.

I know the rain channel still isn't great, but at least it is a bit better than before, so it got another coat of etch primer.

I removed the top bit of this section of metal from the wheel arches, as it was getting in the way of fitting the body shell.

Although it was somewhat hard to reach with my saw, as I didn't want to risk my angle grinder near the framework.
After filing away the "point" I'd made, I gave it a quick lick of paint.
Then I removed the filler cap and taped up the tank opening so I could put the body shell back on.

End of Part 1...
|
4th October 2015, 15:52
|
|
Senior Member
|
|
Join Date: Feb 2012
Location: Wembley, London
Posts: 5,056
|
|
Close, but no Cigar - Part 2:
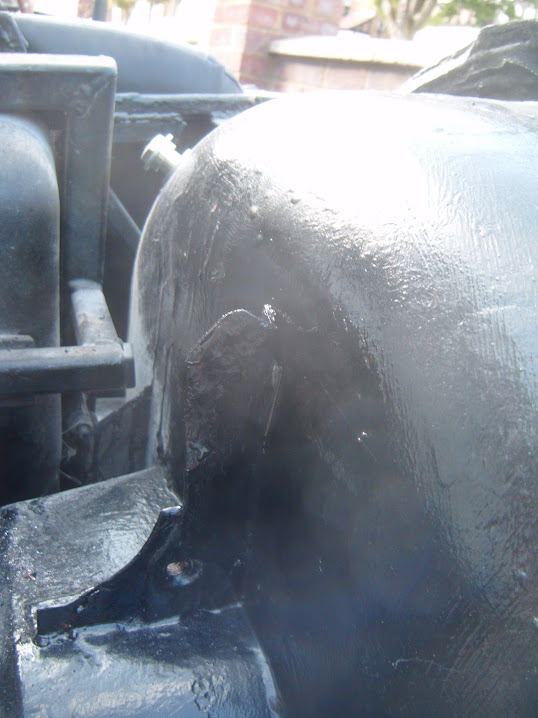
My wife was very pleased to hear that the body shell will only need to be lifted off (& then back on again) one more time after this. 

Note:
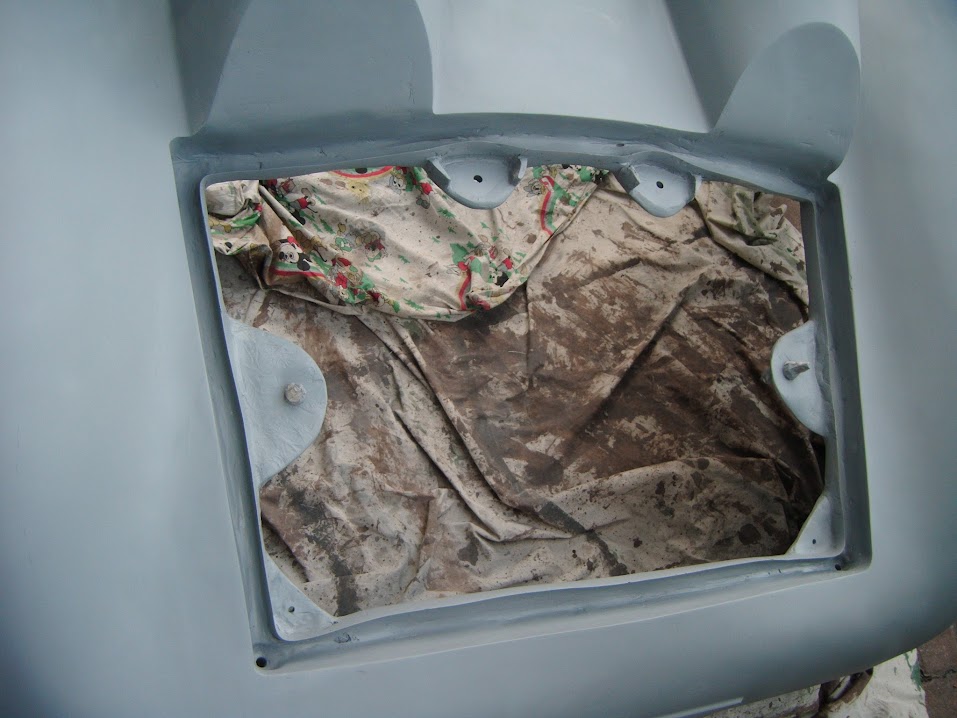
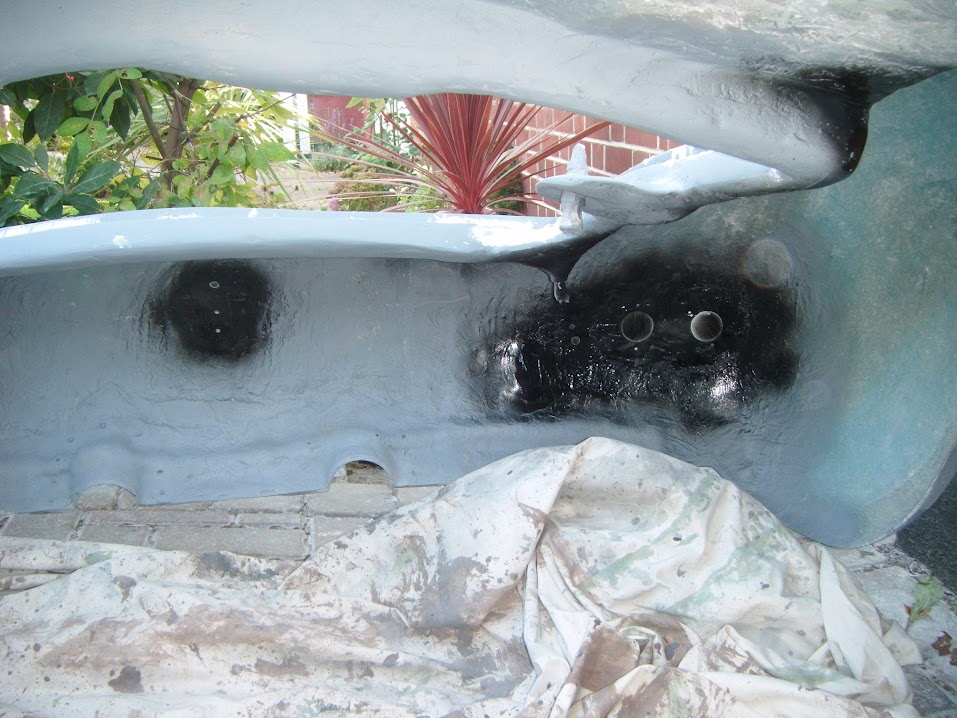
Remember the back of the car is on blocks, so the back wheels are hanging down.
There is good contact between the body and the bulkhead, plus the support panel I added to the framework between the humps.
So these are the areas where the bonding paste will be applied.
Previously I mentioned there is a gap between the boot floor and the rear of the body shell.
Although the angles of theses photos (& the fact I had to use the flash) do not make it easy to see.

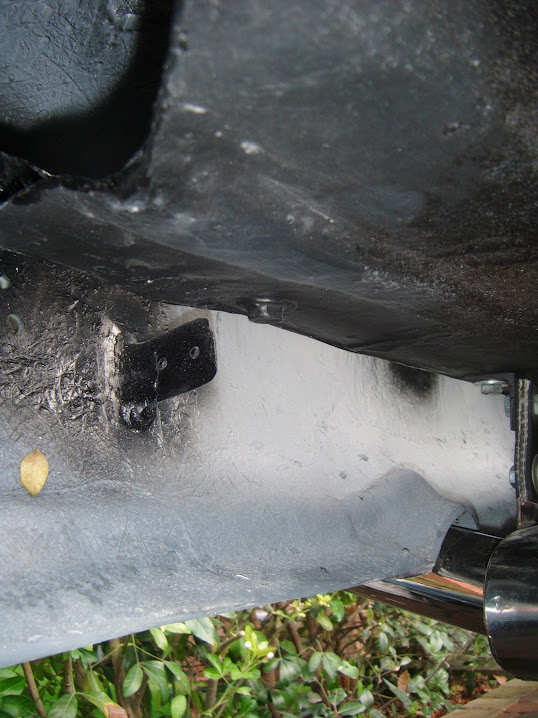
So the final levelling up of the rear of the shell will have to take place after the other sections have been secured.
( Using a similar approach to the cockpit sides, where sections are fibreglassed into position to add strength. )
For now, this is what it looks like.
Once the body shell is bonded into place, I can then finish off the front wheel arches and bonnet work.
But for at least the next week, maybe more, this is how I will have to leave the car.
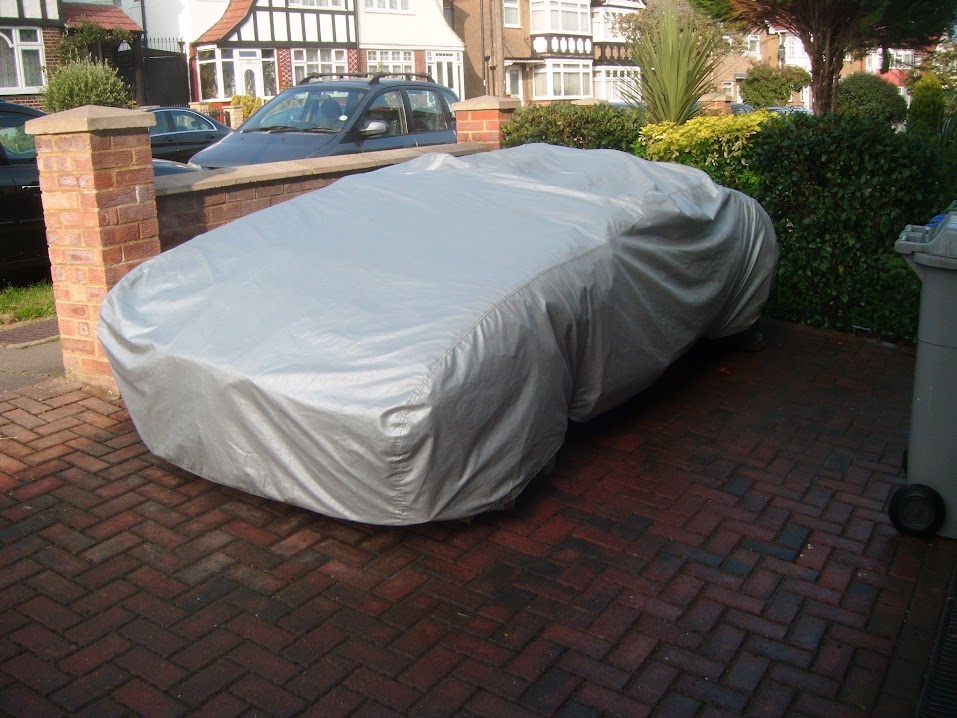
At least it is all under one cover, unlike the last time I took a break.
Cheers, Paul.
|
5th October 2015, 07:11
|
|
Senior Member
|
|
Join Date: Jun 2011
Posts: 935
|
|
Looks great Paul
The biggest compliment I can give is no one would ever know how many hours and heartache have gone into making this look like this
|
5th October 2015, 19:02
|
 |
Senior Member
|
|
Join Date: Dec 2013
Posts: 839
|
|
Paul Great to see that you are very close to a major hurdle and finally getting the shell bonded on to the sub frame which is a big boost to the moral.
Good luck.
|
6th October 2015, 05:17
|
|
Senior Member
|
|
Join Date: Feb 2012
Location: Wembley, London
Posts: 5,056
|
|
Roadster & Swifty - Thanks gentlemen.
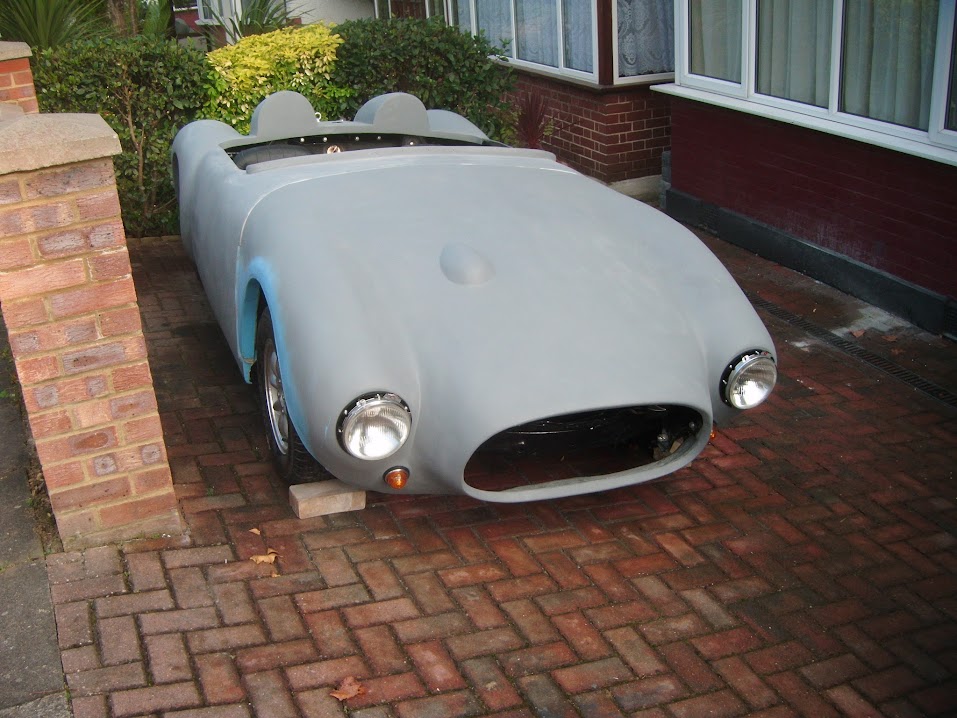
It is nice to see how complete the car looks now, especially as going down the Frankenstein build route was such a big leap of faith.
I also take comfort from the fact that I know I can finish the remaining bodywork jobs, which will improve the final look still further.
So I'll try not to worry about various symmetry issues, as the overall impression now out weighs the sum of its parts (if that makes sense).
Similarly, I will also try to avoid thinking about deadlines and just accept there is still a long way to go, but I will get there "one day".
Cheers, Paul.
|
6th October 2015, 05:53
|
|
Member
|
|
Join Date: May 2013
Location: St Didier de formans FRANCE (Dept 01)
Posts: 76
|
|
Great job Paul !
|
7th October 2015, 07:31
|
|
Senior Member
|
|
Join Date: Feb 2012
Location: Wembley, London
Posts: 5,056
|
|
Zebra69 - Cheers.
If you ever get the chance, it would be nice to see an update on your own build thread one day.
( I saw you posted a message on the latest 2CV Sammio build. )
Take care, Paul.
|
9th October 2015, 18:04
|
|
Senior Member
|
|
Join Date: Feb 2012
Location: Wembley, London
Posts: 5,056
|
|
Bonus Day:
I've actually been feeling rough all week, so no real progress on all the "non car" stuff I'm meant to be doing.
I actually felt pretty good today, so decided to spend some time outside in the fresh air to aid my recovery. 
I'd been re-reading how Mister Towed bonded/fibreglassed his body shell into place before adding the plywood panels.
This reminded me that it would be a good idea to treat all the plywood I have while the weather forecast was for a dry day.
( I actually bought a lot more plywood than I will need, but I might as well do it now all while I'm at it. )
Unfortunately, there was a lot of drew on the lawn first thing this morning.
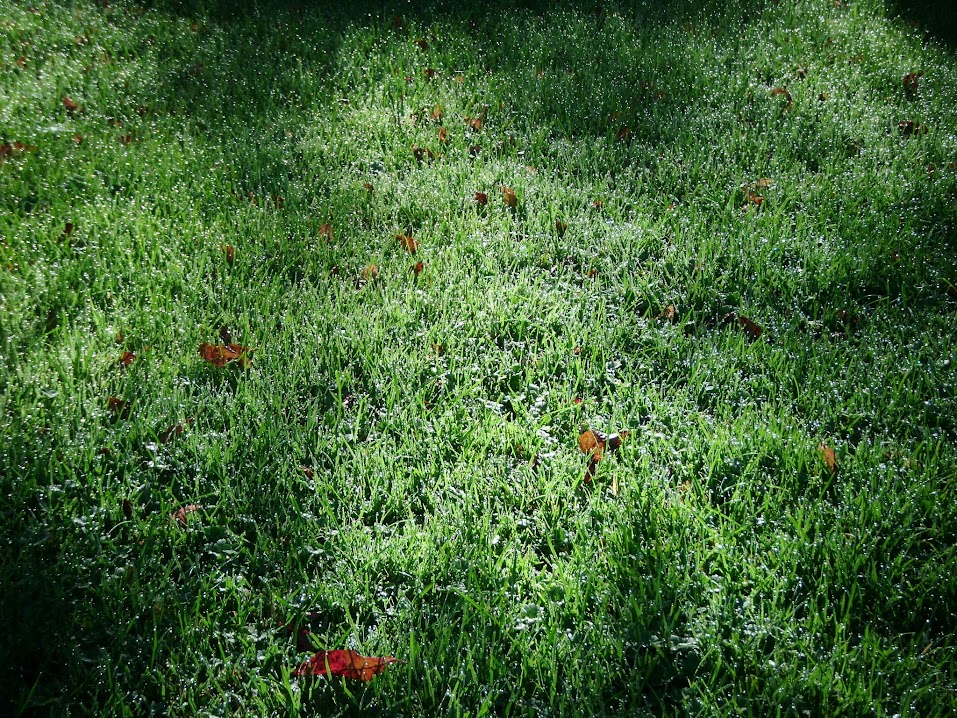
So I laid out some dust sheets on various other bits of "dry land" around the garden and patio.

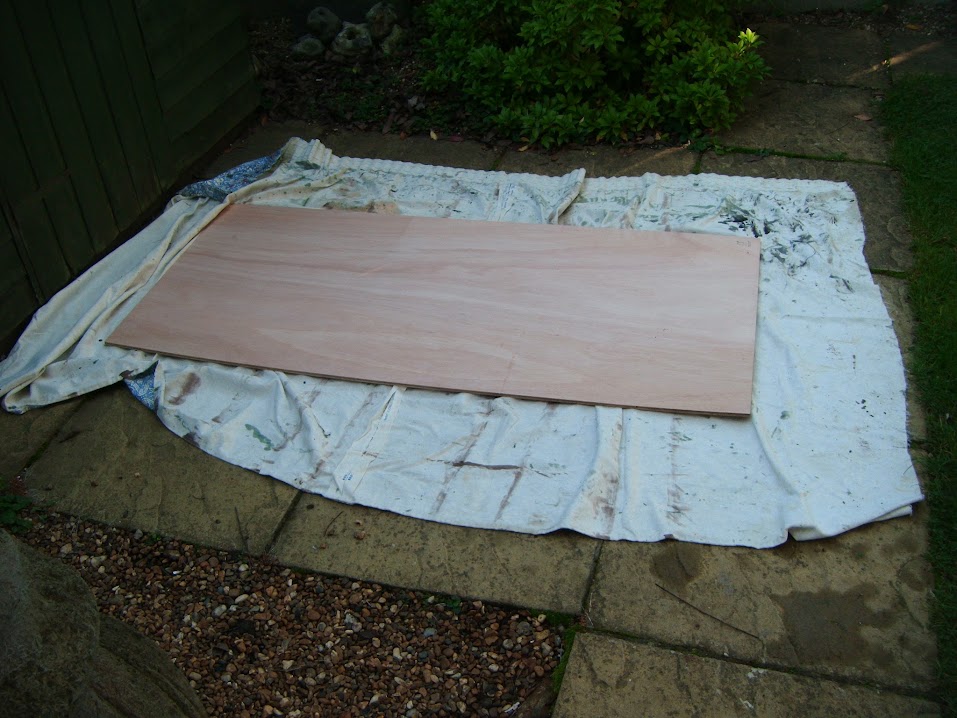
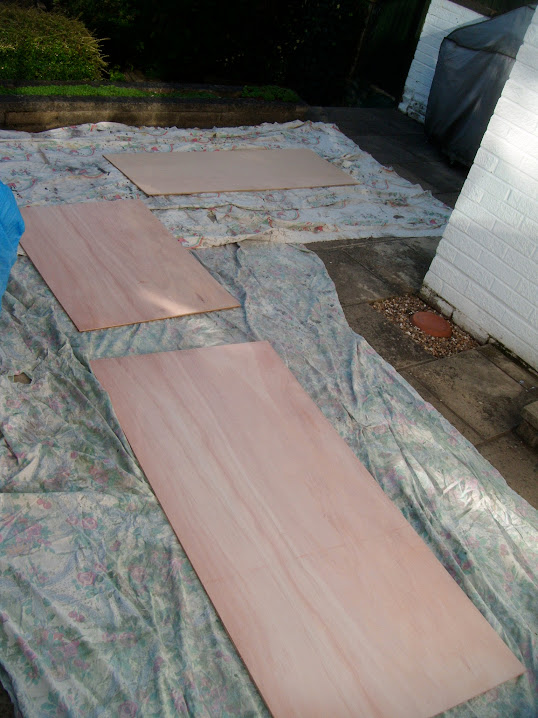
I gave the plywood two coats of the same paint/preservative that I used on some of our fence panels, which should help to protect it.
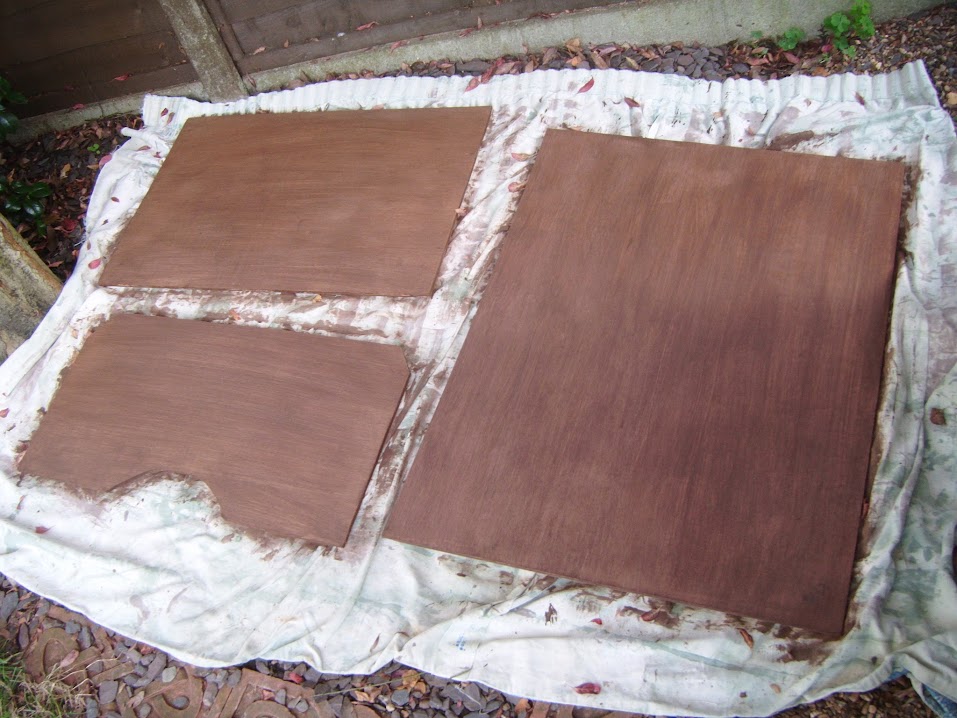

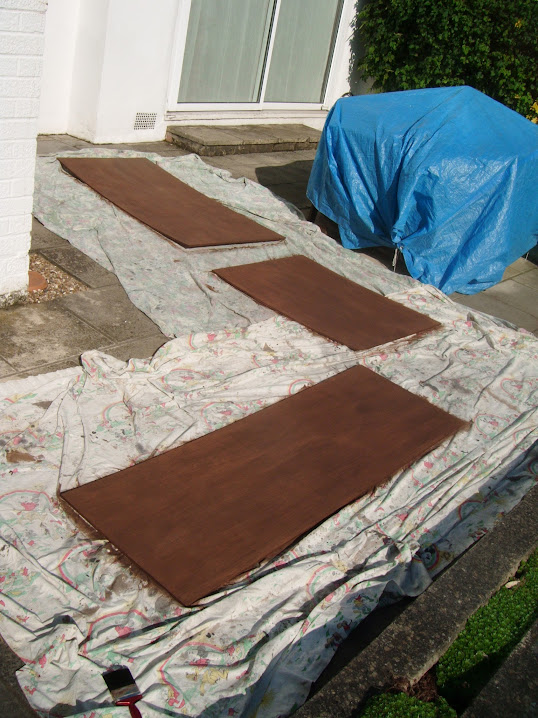
By the time I could turn the panels over and do the other side, the grass was dry enough to use.

- - - - - - - - - - - - - - - - - - - - - - - - - - - - - - -
In between the coats of paint on the plywood I also sneaked in a bit of painting on the body shell too.
Masked off the area around the boot lid rain channel.

Then painted the sunny side black.

I'll do the underside of this when the body shell is back off again.
- - - - - - - - - - - - - - - - - - - - - - - - - - - - - - -
The only other thing I did today was have another look at how I might line up the rear end of the car.
Before making a cardboard template for a simple level to sit between the exhaust pipes.

As it currently stands, the driver's side needs to come up a bit and the passenger side needs to drop a bit.
( Although I will re-check that the pipes are level next time the body shell is off, just to be sure. )
Unfortunately, when I tried to cut this shape out of some plywood, my jigsaw completely packed up.
- - - - - - - - - - - - - - - - - - - - - - - - - - - - - - -
The plywood is now stacked in the Summer House so it can fully dry overnight.
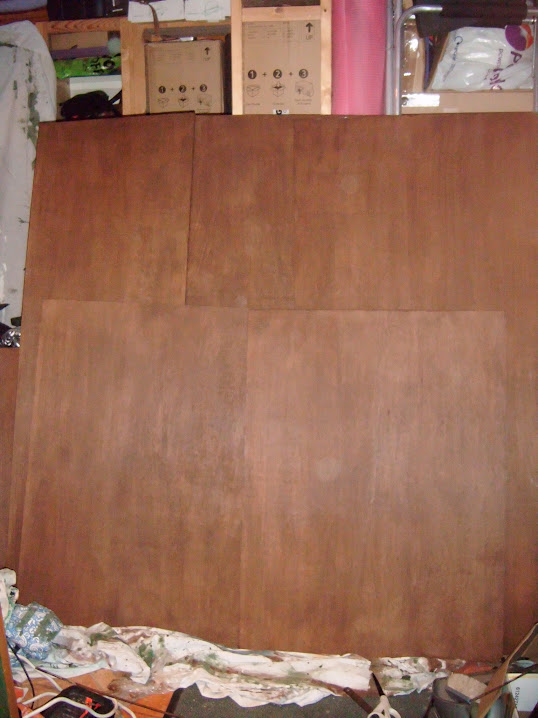
Unfortunately, it now looks like I'm trying to build a wood panelled library, rather than a cockpit interior!
Or perhaps I should swap my car seats for something more appropriate.
Until next time, take care, Paul.
|
11th October 2015, 07:13
|
|
Senior Member
|
|
Join Date: Feb 2012
Location: Wembley, London
Posts: 5,056
|
|
Psycho Pops - Cheers, I also found those early Spyder build threads inspiring, as they lead me to join this forum and buy a Cordite.
Without a doubt, I certainly would not have over come the challenges I've faced without the help and support of the people on this forum.
I know there is a lot to be said for not setting a specific finishing date, but I do intend to be on the road sometime in 2016, see below.
( Edit: I wrote this reply yesterday, to a post that is no longer there, honest. )
- - - - - - - - - - - - - - - - - - - - - - - - - - - - - - -
"On The Road" vs. "Finished":
Whilst I have enjoyed following Swifty preparing and painting his car over the last few months.

The HUGE amount of time & effort this sort of super smooooth finish requires is really quite scary. 
( I also remember all the effort put in by Mac, Mr T, DaveCymru, Scottie, etc. on their builds too. )
So I have finally decided to stick with the basic plan of aiming for an MOT before final paint & associated prep work.
Micky1Mo successfully used this approach on his BMW Sammio...
June 2015 - MOT'd & On the road.

October 2015 - Painted.

Notes:
- I still intend to complete the wheel arches & body shell extension work, so I can finalise securing the bonnet.
- As most of my car is already covered in etch primer, I will ensure it is at least grey all over before the MOT.
- This approach means that things like the headlights and front indicators can stay where they are for now.
- I will then add the rear lights, aero screens, mirrors, etc. once the body shell is bonded on.
( Getting the car on the road will make up for any extra time required to remove all these items again for paint. )
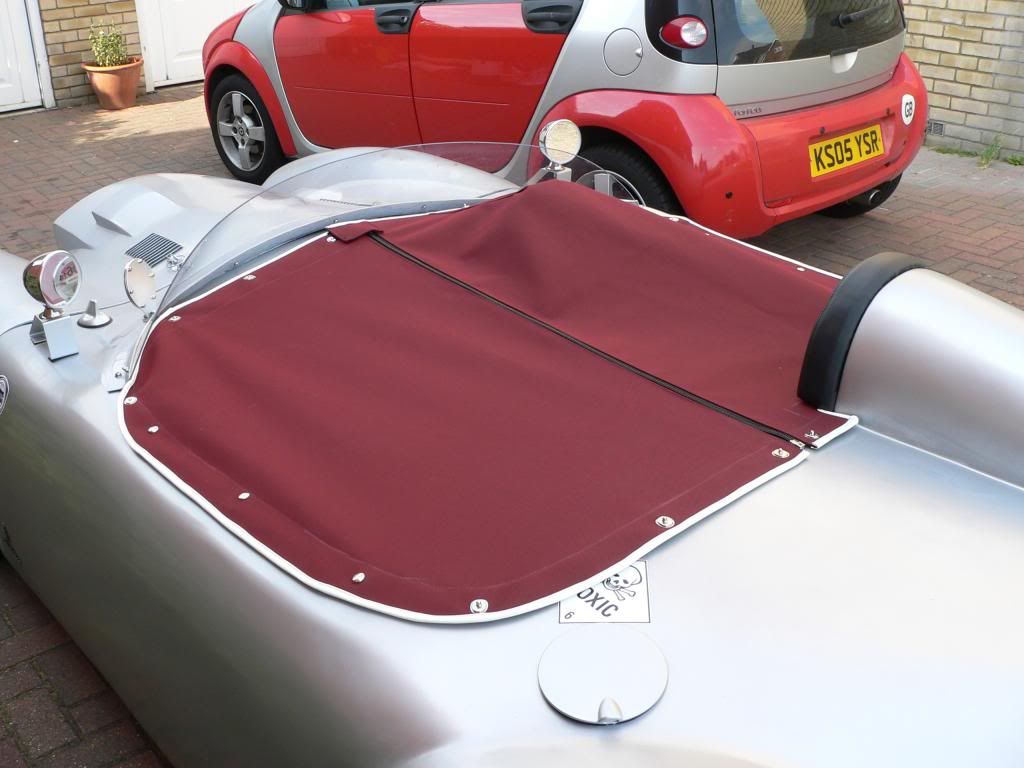
- Some "finishing off" jobs like padded head rests and a tonneau cover (similar to Mr T's) were always due after paint.
- I will get some professional help to sort out my clutch problem and service/set up my engine properly.
- My "To Do" list just to reach an MOT currently stretches out beyond the curvature of the earth.
That last point means that I will not be driving the car anytime soon.
However, I do hope that it means I can have a separate "Post MOT" list for jobs that can genuinely wait.
- - - - - - - - - - - - - - - - - - - - - - - - - - - - - - -
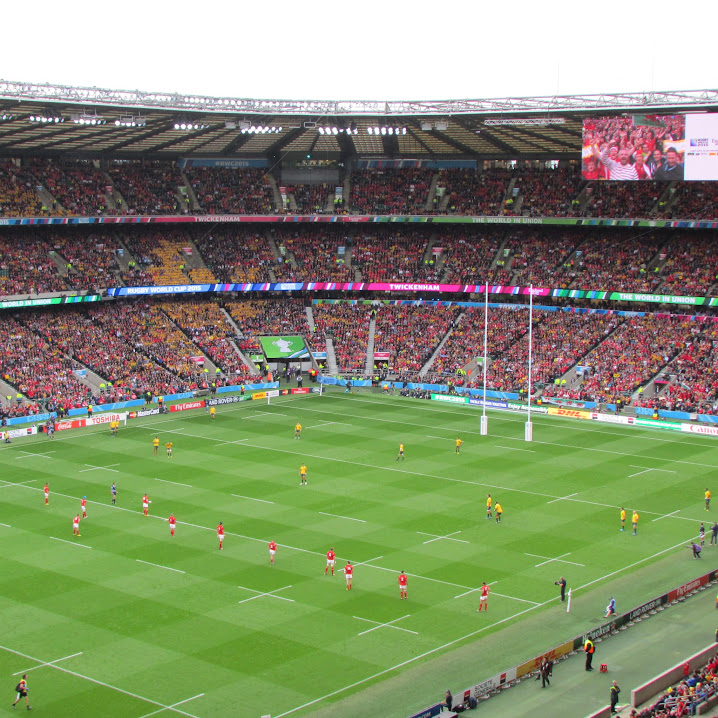
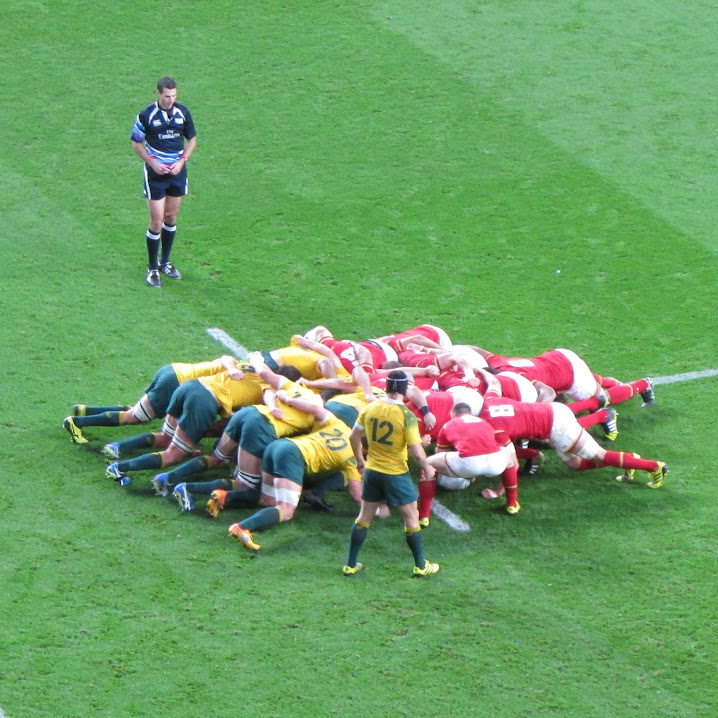
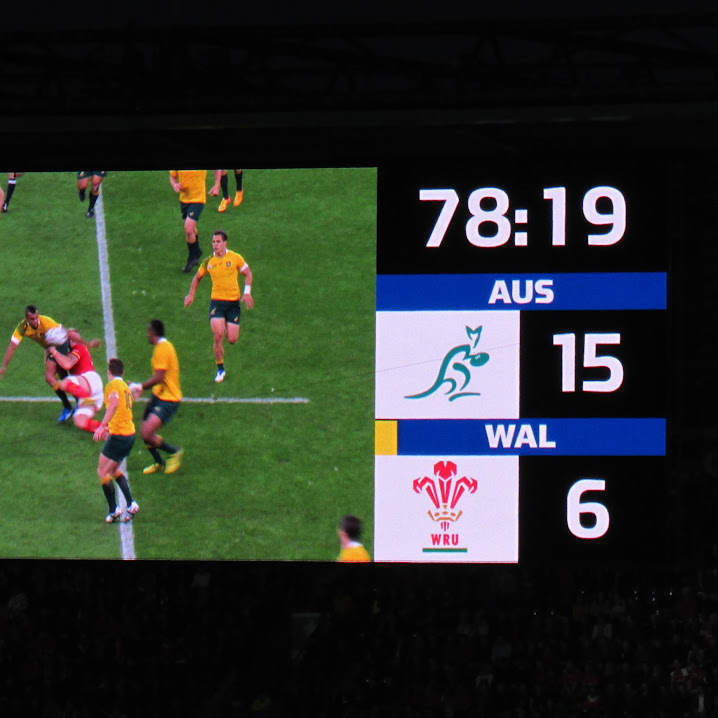
More World Cup Rugby:
Another family trip out yesterday for our first visit to Twickenham to see Wales vs. Australia.
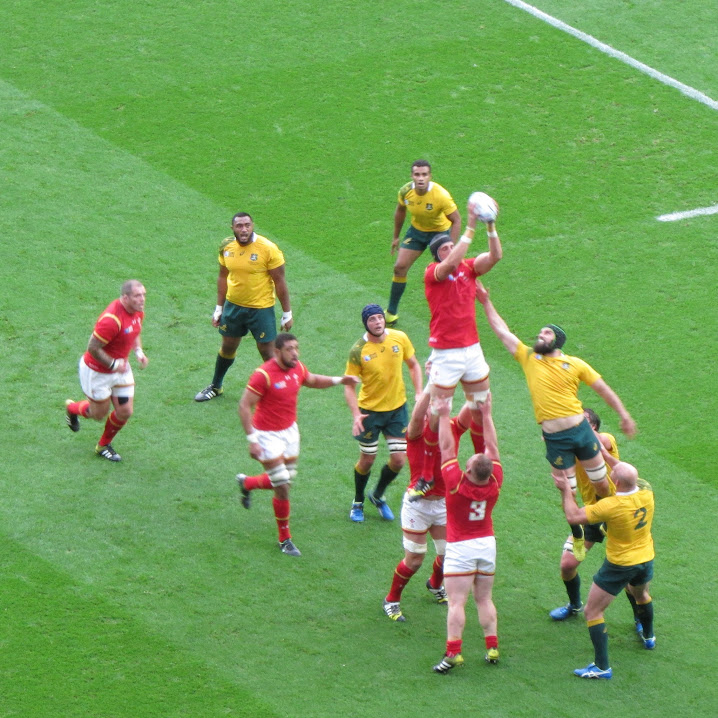
I spent 3 years living in The Valleys, but "Land of my further education" doesn't have quite the same ring to it.
Jokes aside, gutted that Wales couldn't make any of their numerous try attempts count.
- - - - - - - - - - - - - - - - - - - - - - - - - - - - - - -
Until next time, take care, Paul.
|
11th October 2015, 09:08
|
 |
Senior Member
|
|
Join Date: Jul 2011
Location: Marmande 47200
Posts: 501
|
|
Yes there was a post, you didn't imagine it, but little fingers managed to delete it when left open..
|
11th October 2015, 10:30
|
|
Senior Member
|
|
Join Date: Apr 2014
Posts: 198
|
|
Hi Paul I recommend something similar to this...... http://pages.ebay.com/link/?nav=item...000822&alt=web Aldi had them last week about £29.99 I bought one from lidl about 3 years ago for a one off job for a customer I think I had to cut some rot out of huge barn doors and I thought if I can get in with that it will save taking the doors off which it did. Since then it has become one of my most used tools I even run it off an inverter in my van to slice ply up from the merchants so it will fit it saving taking a trailer or tying on the roof.its also the most borrowed tool by my father and brother tool. Perfect for your paneling jobs (the straight cuts anyway)you can use the side fence if close the edge or free hand or clamp a straight edge on the ply and run down that. Mine cuts ply upto an inch with a very neat finish well worth £30 if they have any left you can adjust the blade depth to cut a groove too. I have a 6" and 9" circ saw and rarely use them now. Once your cars on the road I thoroughly recommend getting yourself a sewing machine and having a stab at the tonneu cover and trim parts yourself my sewing machine is now my favourite hobby in fact I been sewing since 6am today which is odd when I used to do off road trail events on Sundays. My heavy sewing machine was a £23 eBay Christmas bargain thread is £5 for a big spool of rot proof bonded nylon and I pay £75 for a full cow hide or £10 a meter for 1.5m width of a 40% leather faux leather material which is really good I may do my van seats. Most canvas or waterproof heavy materials are under £10 a meter and I think you would really enjoy it and you would also of done everything on the car I learnt everything off you tube. Keep it up looking good Ed.
Last edited by a big scary monster; 11th October 2015 at 10:33..
|
12th October 2015, 12:50
|
|
Senior Member
|
|
Join Date: Feb 2012
Location: Wembley, London
Posts: 5,056
|
|
Psycho Pops - Glad to hear I am not going completely mad.
- - - - - - - - - - - - - - - - - - - - - - - - - - - - - - -
Ed - Thanks for the mini circular saw link, but I'd already picked up a cheap jigsaw by the time I saw your message.
I am sure I could "have a go" at making a tonneau cover, but think a professional one would make a nice "finishing touch".
- - - - - - - - - - - - - - - - - - - - - - - - - - - - - - -
I've only had the chance to cut out my plywood "alignment tool" to fit around the twin tail pipes.

I just need to do a bit of sanding/filing to ensure that it all sits "square" and double check the position of the pipes relative to the boot floor.
But I really need to sort a few other things out before I resume work on the car.
Cheers, Paul.
|
|
Currently Active Users Viewing This Thread: 1 (0 members and 1 guests)
|
|
|
| Thread Tools |
|
|
| Display Modes |
 Linear Mode Linear Mode
|
 Posting Rules
|
You may not post new threads
You may not post replies
You may not post attachments
You may not edit your posts
HTML code is Off
|
|
|
All times are GMT +0. The time now is 09:21.
|


