Dave & Mr T - Thanks for feedback chaps.

I have a long way to go before I make a final decision, but I need a lot of thinking time in the run up.
Mac - Thanks again, obviously I will be following your bonnet work very closely.
The good thing for me, is that I have someone who knows what they are doing to follow and learn from.

Also the body work set you sorted out for me has really lifted my spirits (see below).
- - - - - - - - - - - - - - - - - - - - - - - - - - - - - - -
Too many other things going on at the moment to get a decent, uninterrupted, run at the car.
So I tried to make the most of the two short sessions I did get...
Odd Jobs - Part 1
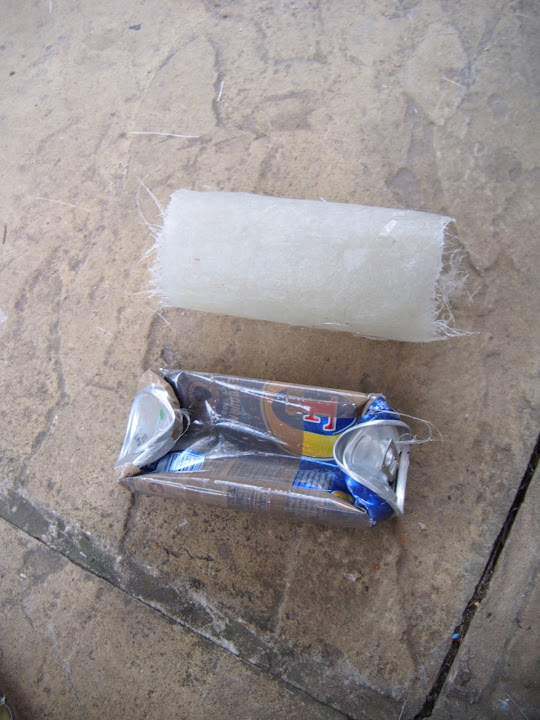
I separated this fibreglass from its mould by crushing a beer can with my bare hands.

OK, technically, I was wearing thick gloves to avoid fibreglass splinters, but that doesn't sound quite as "manly".

Jokes aside, after trimming the edges I now have two sections that will eventually be joined to the body shell.

After removing the screws, the hardboard peeled away nicely from the spare hump.


Most of this new "extension" will need to be trimmed off to fit the profile of the body shell.
But I want to add some more fibreglass on the inside before I start cutting anything off.
So for now, I just gave it a light trim to reduce the number of splinters I have to dig out on a daily basis.

I did managed to build quite a seamless join in some places.

But I will still be adding a layer of matting, followed by filler, over the top of this edge.
At this stage I am not going to lose any sleep if the profiles of two humps are not identical.

Then I took the spare hump and a seat to do some more testing.

So much for my theory of centralising the passenger side hump, as there is no room to do this.
At best, I can move it about an inch to the right of the line that which marks the equivalent location of the driver's side hump.

At least the hump will cover more of the "wound" in this position.


So I roughly marked out the shape of the hump so I could tell what body shell repairs work would be hidden.

However, before I started making more of a mess sanding, I had a bit of tidying up to do from the last time...
I had to hoover the gel coat dust out of the
inside of my twin tail pipes.

Before:
( And this was after using a hand brush on the worst of it. )

After:

Then I could seal the pipes off before the next round of dust arrived.

End of Part 1...