|
|
| Tribute Automotive Builds Discuss your Tribute kit build |

9th February 2014, 20:48
|
|
Senior Member
|
|
Join Date: Feb 2014
Location: Sweden
Posts: 140
|
|
 Andreas Mx250 Coupe build
Well, its done... Another Project. 
About me, i live in sweden, my name is Andreas. 35 years... so this will be the first one in sweden, (if someone else in sweden doesnt buy one and build it faster  )
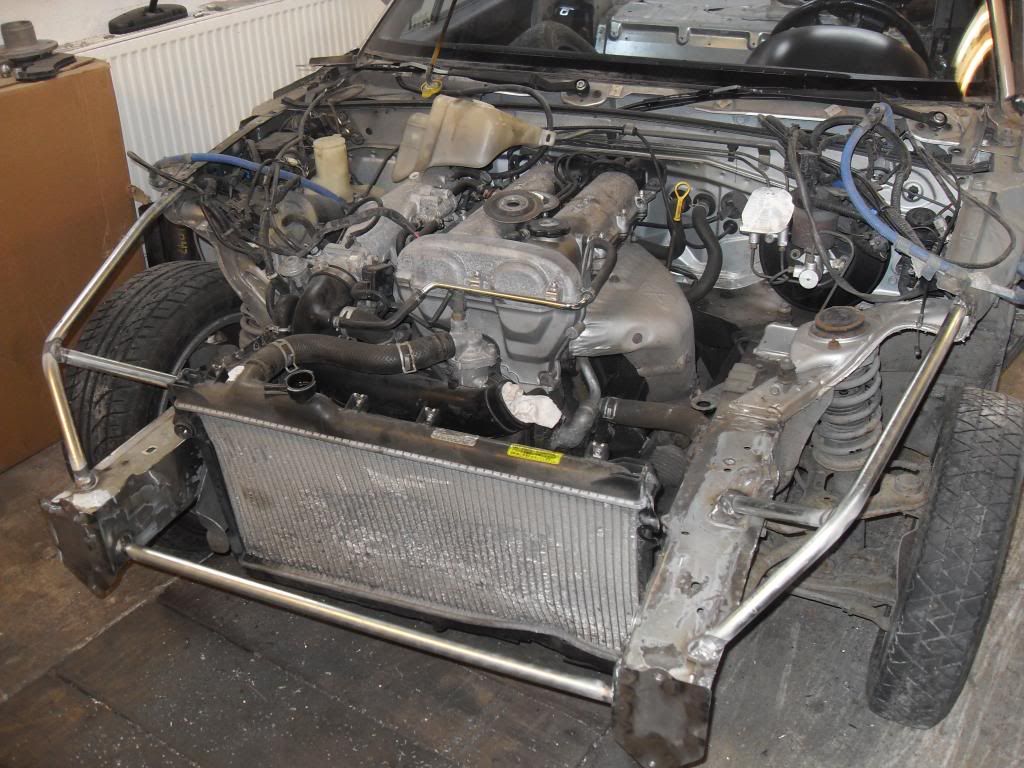
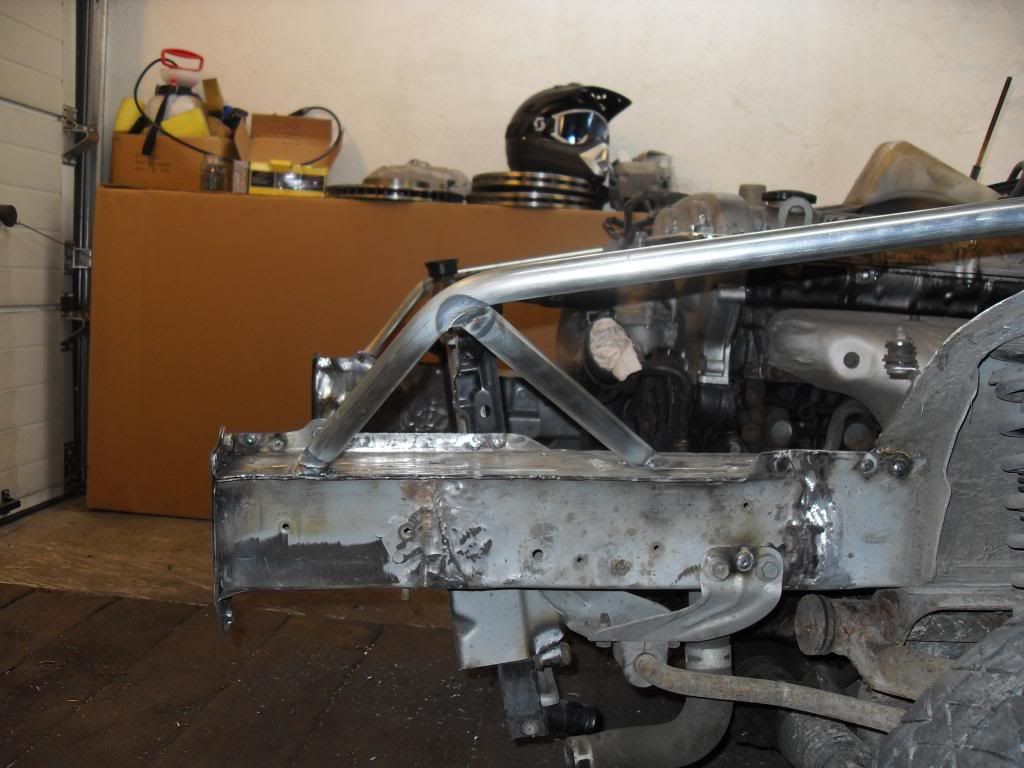
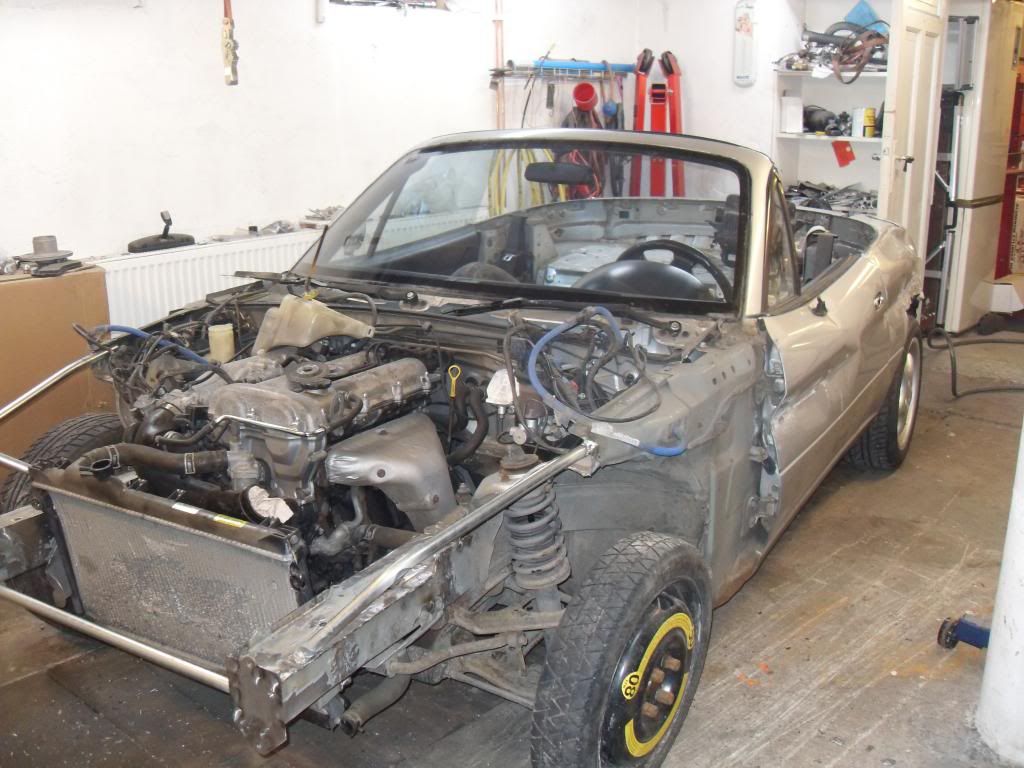
Payed Chris the doposit a couple of Days ago. Found a -91 Miata 1.6 that was pretty low milage (110000km) cheap. But it was used as a test car for some kind of new roadfence, so i started out this weekend bending out the front frames, and fabricating some bars for ridgety. Hope it will work with the body... 
Last edited by slangenracing; 9th February 2014 at 22:04..
|
10th February 2014, 08:34
|
|
Senior Member
|
|
Join Date: Jan 2013
Posts: 429
|
|
Good luck Andreas, that poor Miata looks like it has seen some action so I wish you well.
|
11th February 2014, 19:39
|
|
Senior Member
|
|
Join Date: Feb 2014
Location: Sweden
Posts: 140
|
|
Last edited by slangenracing; 12th February 2014 at 08:08..
|
12th February 2014, 07:43
|
 |
Member
|
|
Join Date: Nov 2013
Location: Poland
Posts: 34
|
|
a nice v8 I see there, what is this?
|
12th February 2014, 08:30
|
|
Senior Member
|
|
Join Date: Feb 2014
Location: Sweden
Posts: 140
|
|
It is a customers Engine. He ran a rod threw it and made a big hole! I´m aranging someone to weld it for him as speaking...
Regards Andreas
|
12th February 2014, 21:12
|
|
Senior Member
|
|
Join Date: Feb 2014
Location: Sweden
Posts: 140
|
|
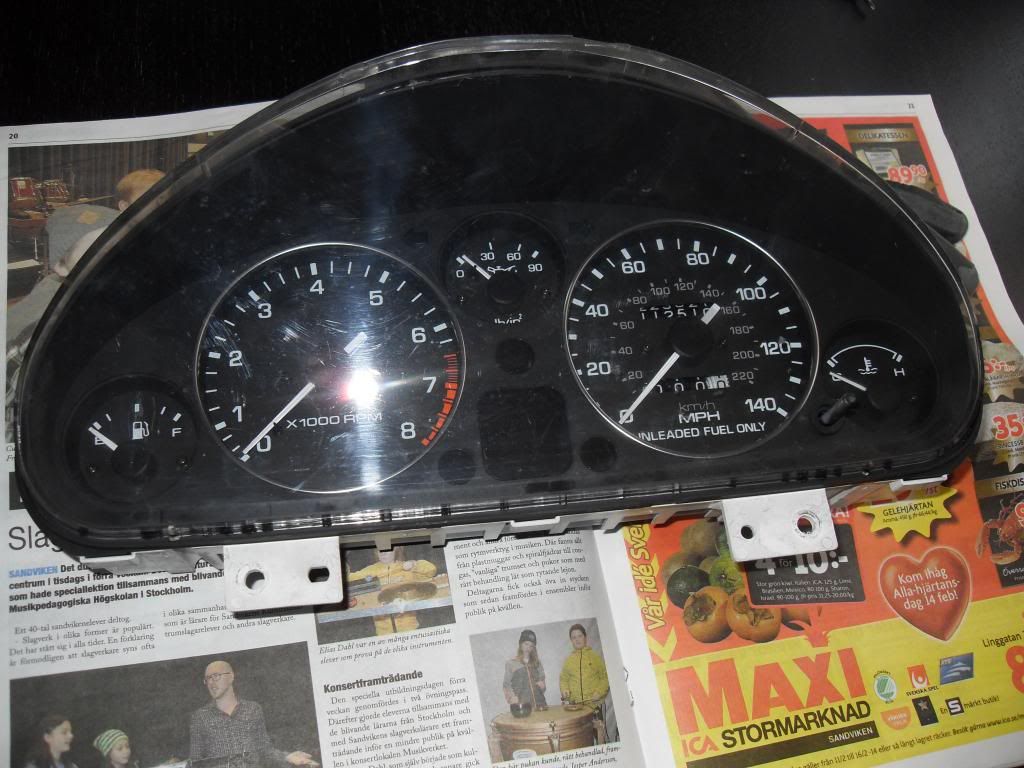
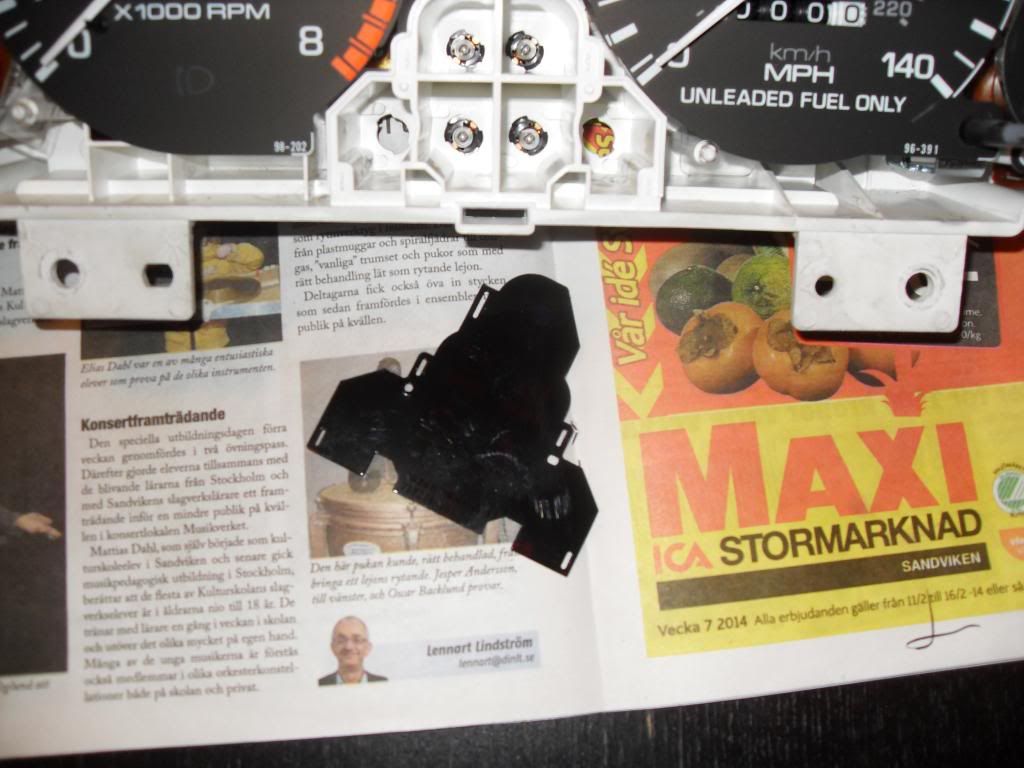
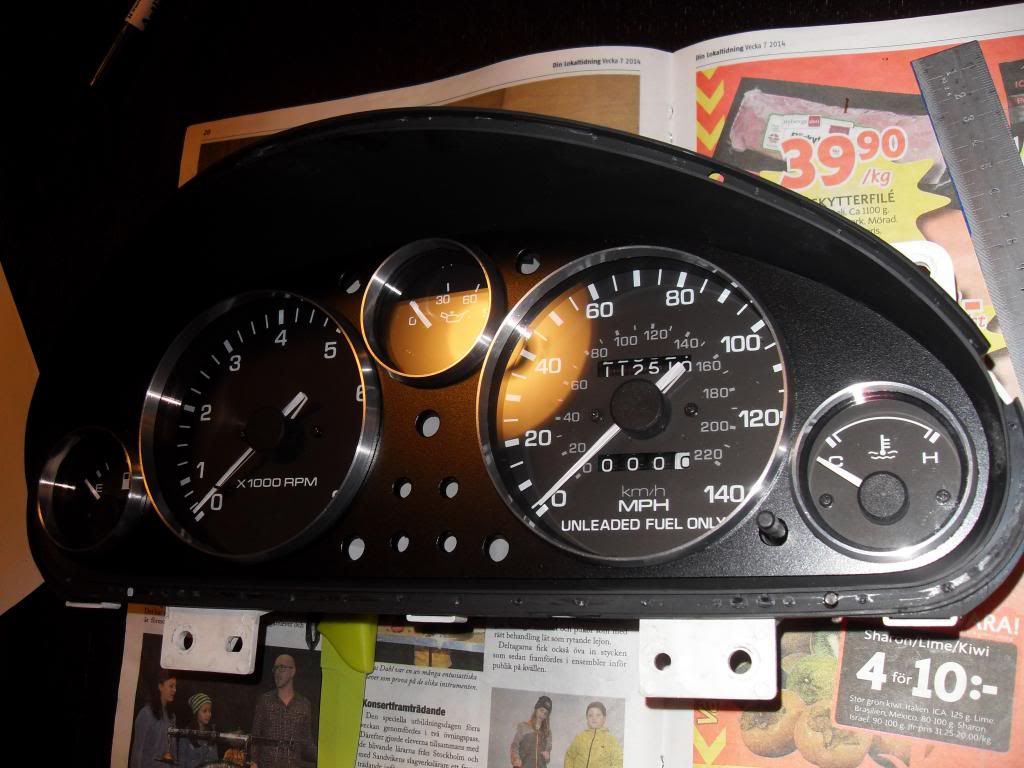
Pulled the guage cluster yesterday. Somehow it doesn´t look 60´s to me. I just want the feel of a 60´s car, and the look of separate guages, not a cluster. So i started working a bit with it.
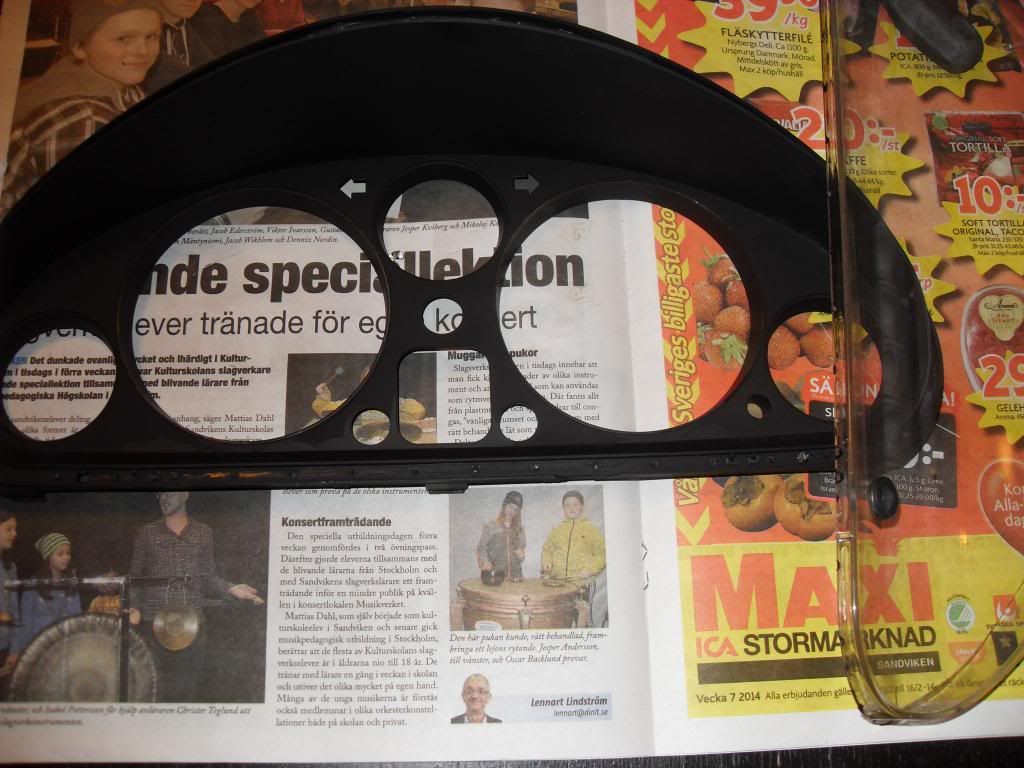
The standard (pretty ok) cluster
Pulled it apart...

Bended of these from surrounding
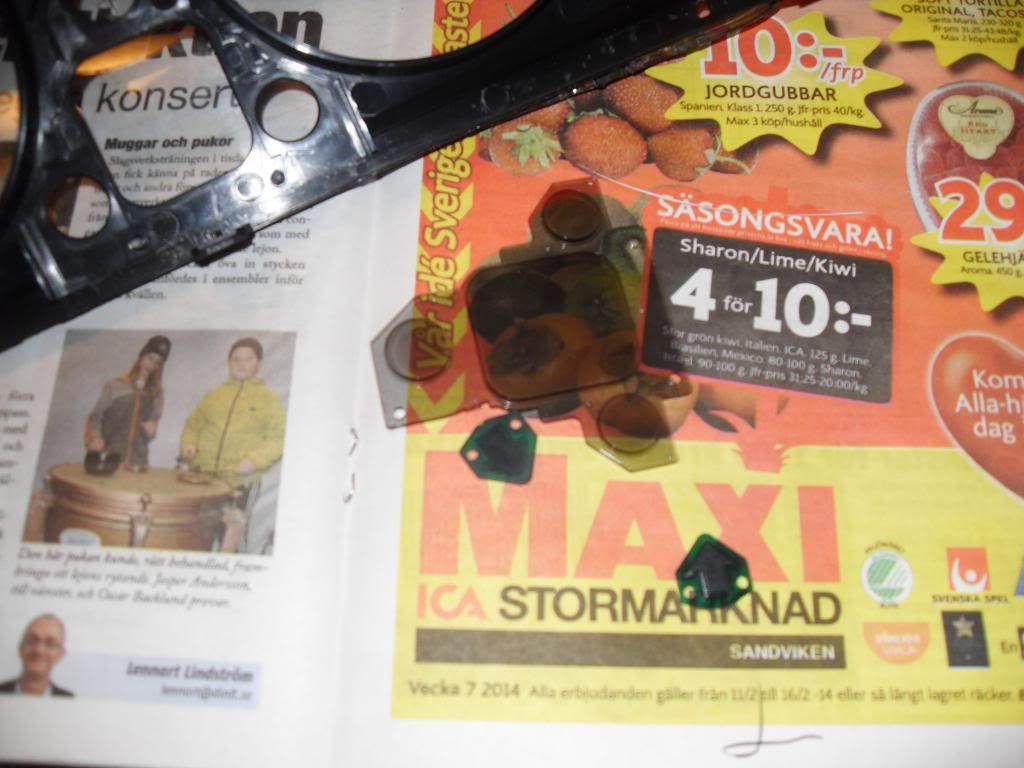
Gently bended glass of
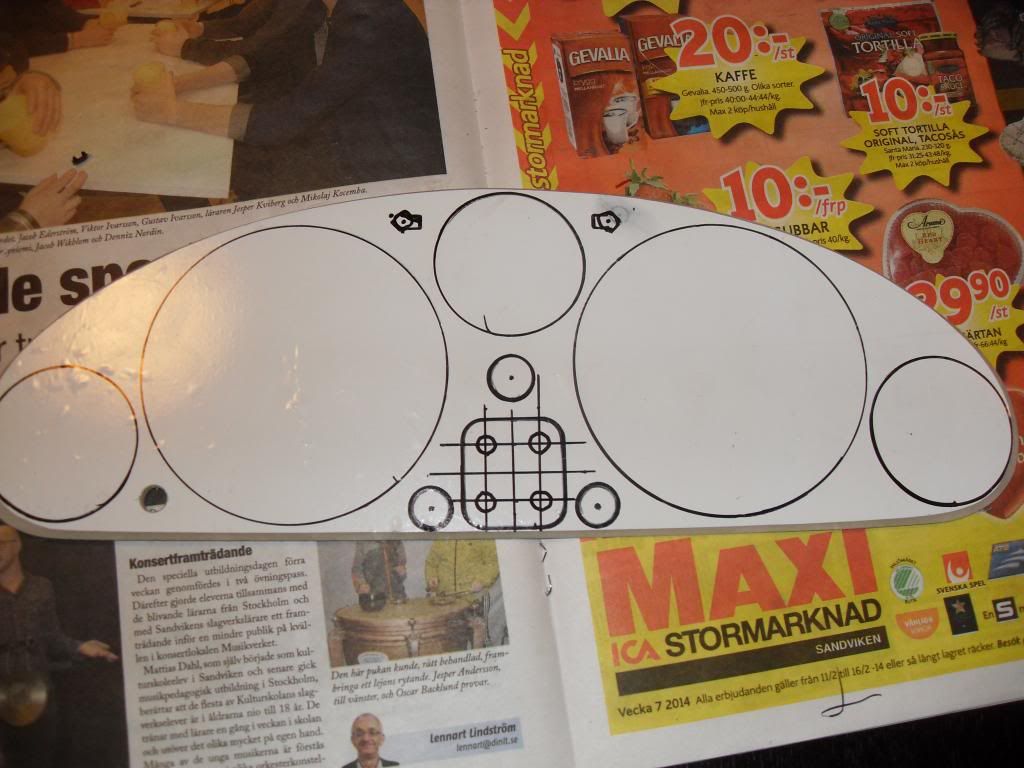
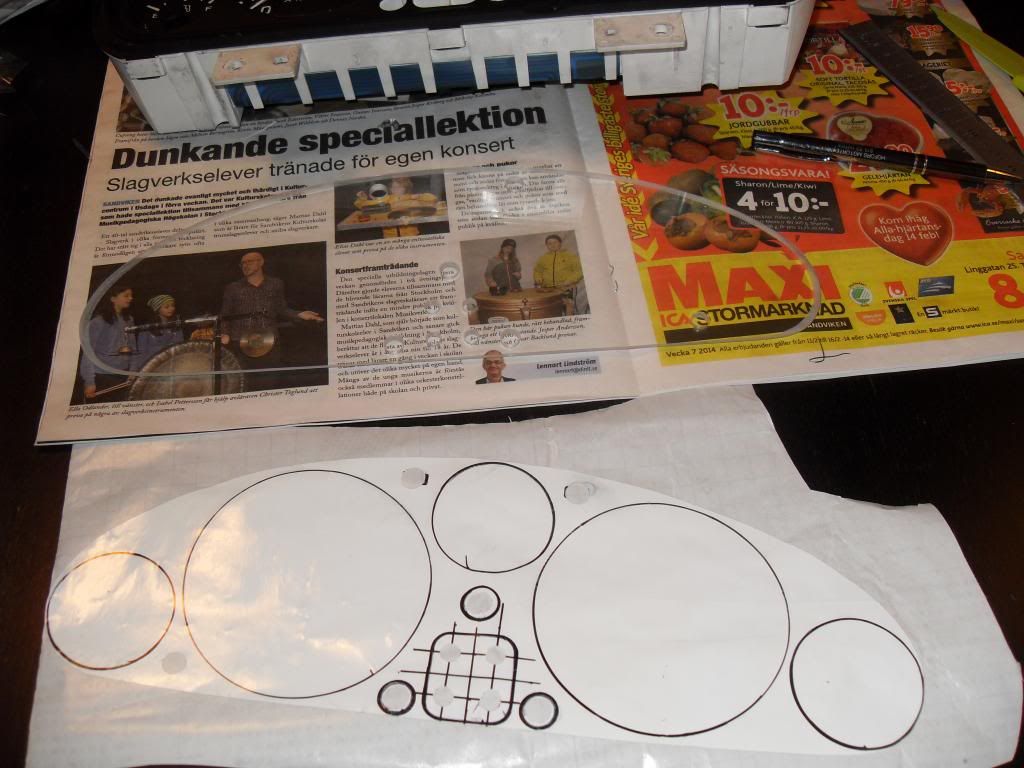
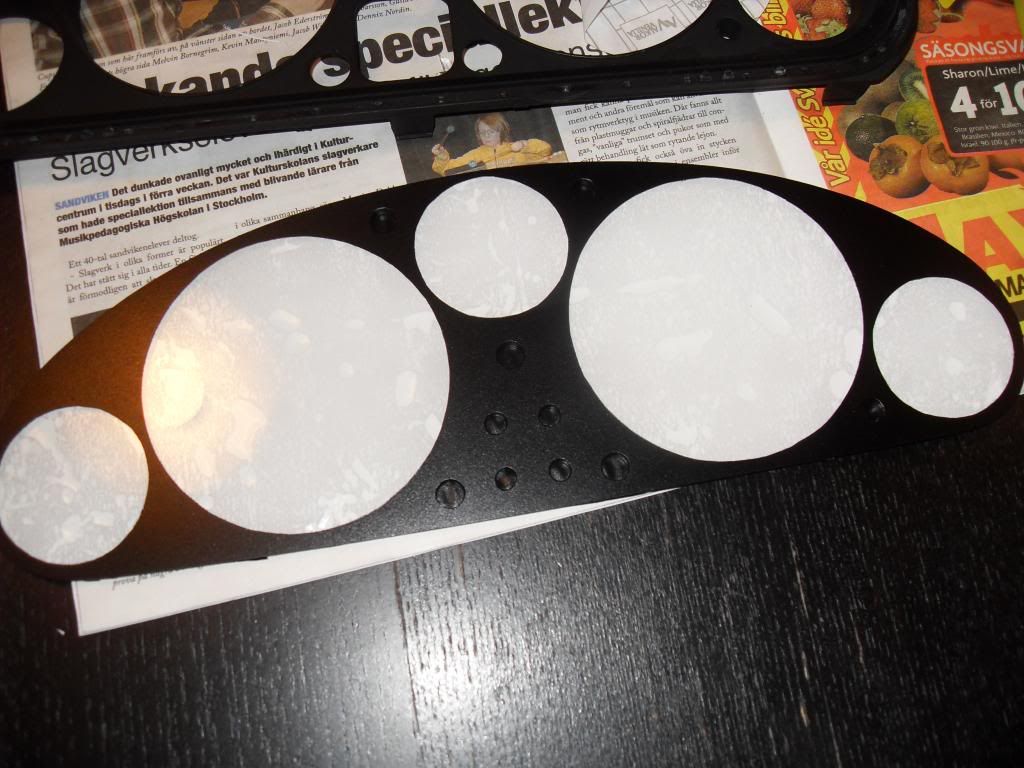
Made a template of thick paper. Also marked and punched a hole for reset button
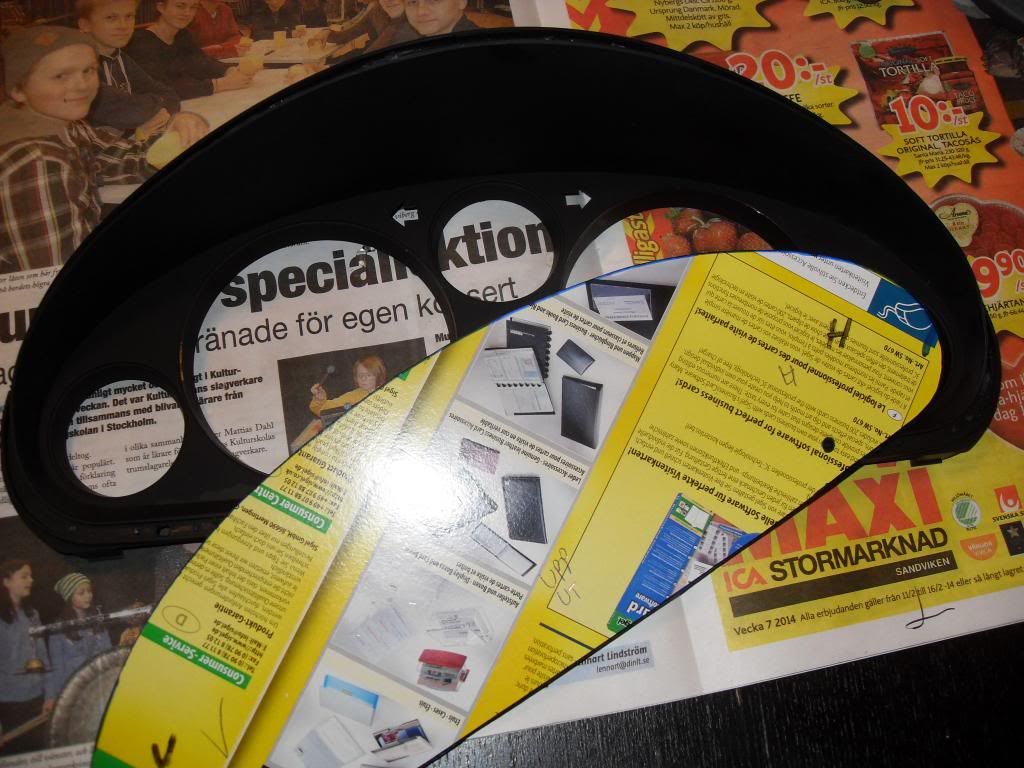
Made a plexi piece after the template(White protective on it). Used a bandsaw
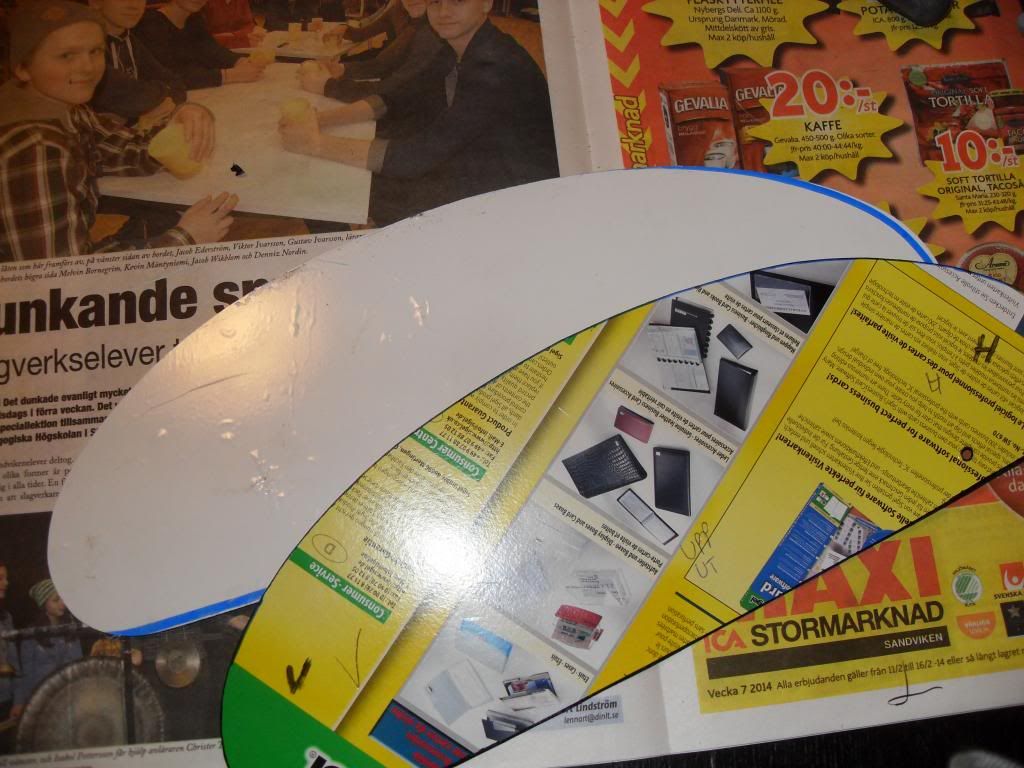
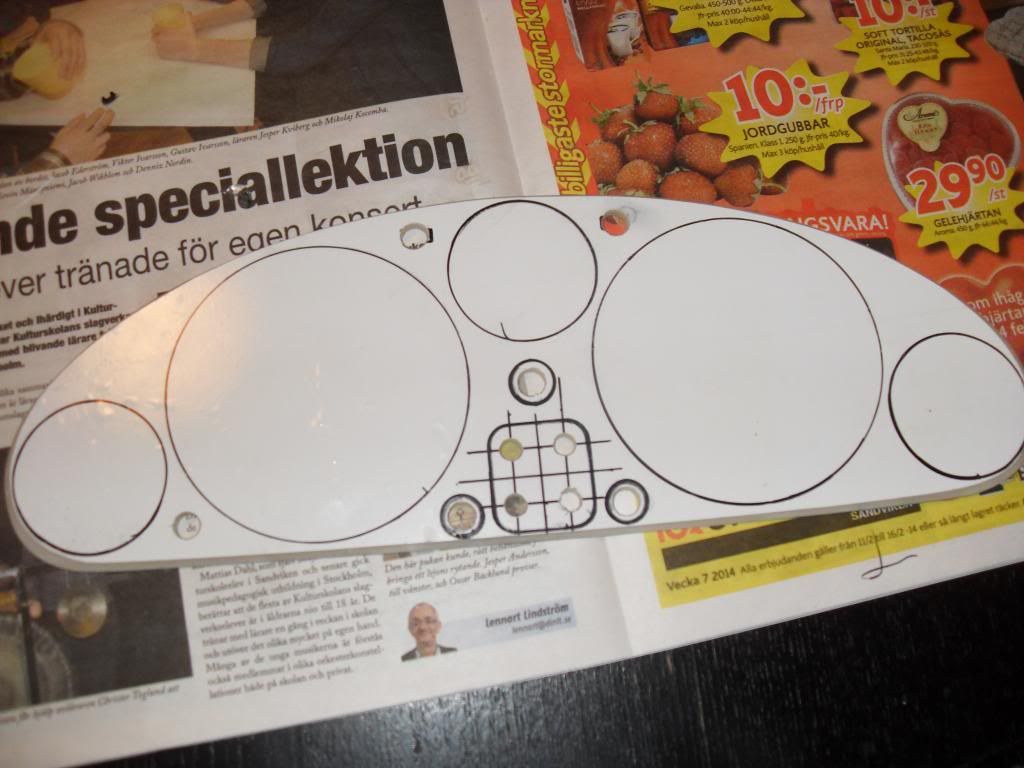
Bended this of as well
Marked out on the plexi using the surrounding where to drill holes for Control lamps
 ¨
Drilled
Pulled protective of finished plexi. Put it back on where it came from, to be used again
Cut out the circles from protective an put em back on glass

Paint! Used very thin (almost dry) layers to prevent from sipping under protective vinyl
Machined aluminium rings, polished and clearcoated them. Glued them with blach RTV silicone(used for Engines etc). The White protective is on backside only(for scratches). Used very small amount of Silicon. Some sipped out, but can be removed later.
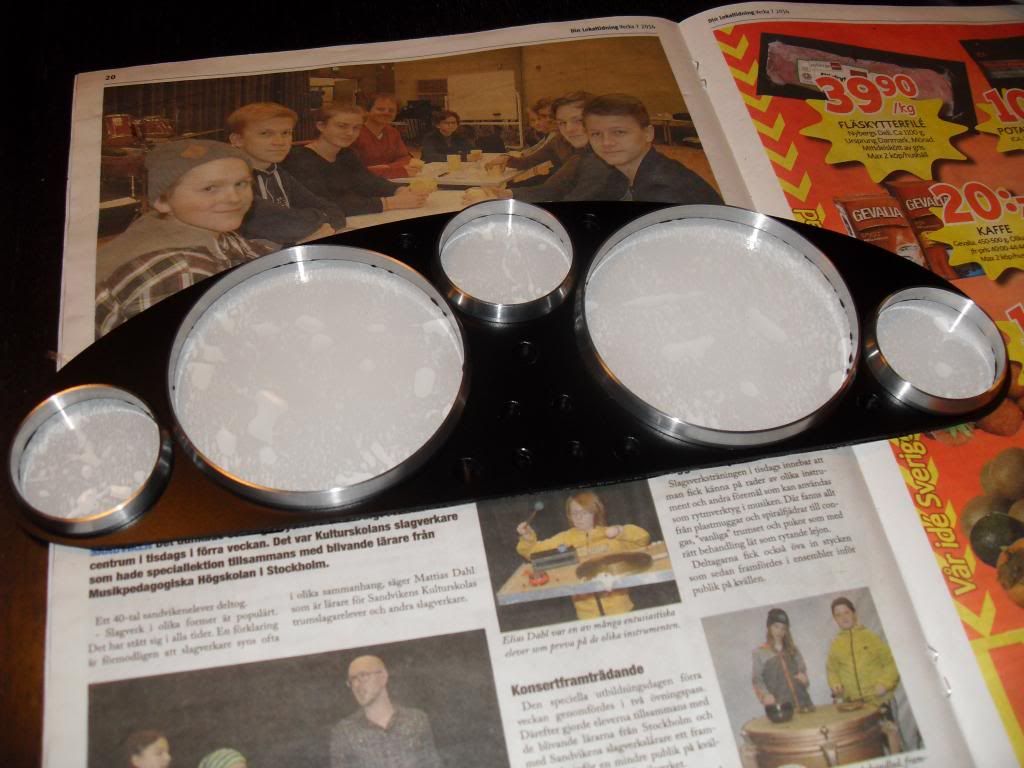
So. Rings on the glass! Just have to wait for lenses to the conrol lamps, ordered them on ebay.
Another... Thats it for today! Cheers
Last edited by slangenracing; 12th February 2014 at 21:15..
|
12th February 2014, 22:30
|
|
Junior Member
|
|
Join Date: Sep 2013
Posts: 10
|
|
Wow I really like you're attention to detail.
Looking forward to seeing the lenses from eBay as well.
Well done!
|
12th February 2014, 22:49
|
|
Member
|
|
Join Date: Nov 2003
Location: Brisbane OZ
Posts: 48
|
|
Dash Pod
The results are great!, tell us more about the rings, are they an offcut of alloy tube , were you able to machine them yourself (yes I had considered cookie cutters to try to get the same type of result!).
|
13th February 2014, 07:48
|
|
Senior Member
|
|
Join Date: Feb 2014
Location: Sweden
Posts: 140
|
|
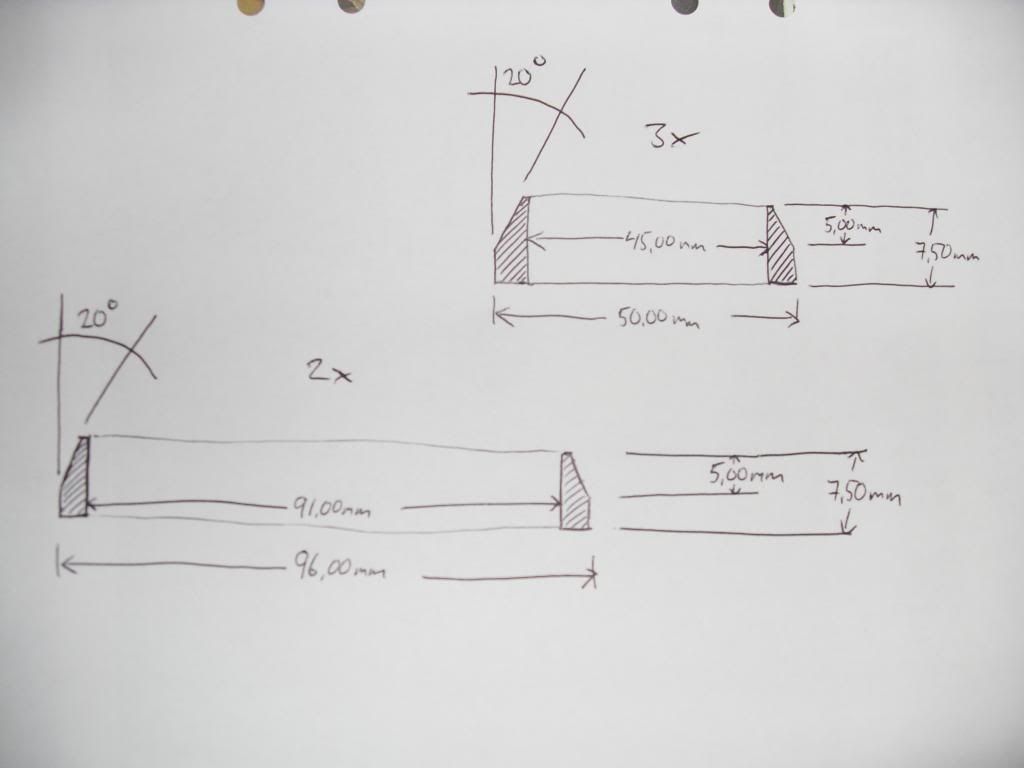
Thanks for the comments!
I machined the rings from alloy tube and bar, then just polished and clearcoated. Se my amateur drawing!
Best regards Andreas!
 |
13th February 2014, 08:15
|
|
Senior Member
|
|
Join Date: May 2013
Posts: 2,161
|
|
Lovely dash, really well done. Car should look quite special with attention to detail like you have!
|
13th February 2014, 18:57
|
 |
Senior Member
|
|
Join Date: Oct 2010
Posts: 1,622
|
|
Agree with Scottie on that, dash is looking a whole lot more retro.
Andreas, I have found you a replacement door locally for a very good price. We will be making a start on your kit and the modification at the end of next week. I will post some pictures up of the progress.
|
13th February 2014, 19:42
|
|
Senior Member
|
|
Join Date: Mar 2012
Posts: 1,152
|
|
Hi Andreas,
I love what you have done. I am planning tu use the MX5 instrument cluster on my Sammio and am looking to do something similar. Did you need to put a small spacer between your black plexi and the original black plastic? On mine, the centre of the instrument needles sits slightly above the black plastic, so I cant just put a piece of flat plexi across the face of the gauges.
I hope this makes sense!
|
13th February 2014, 22:56
|
|
Senior Member
|
|
Join Date: Feb 2014
Location: Sweden
Posts: 140
|
|
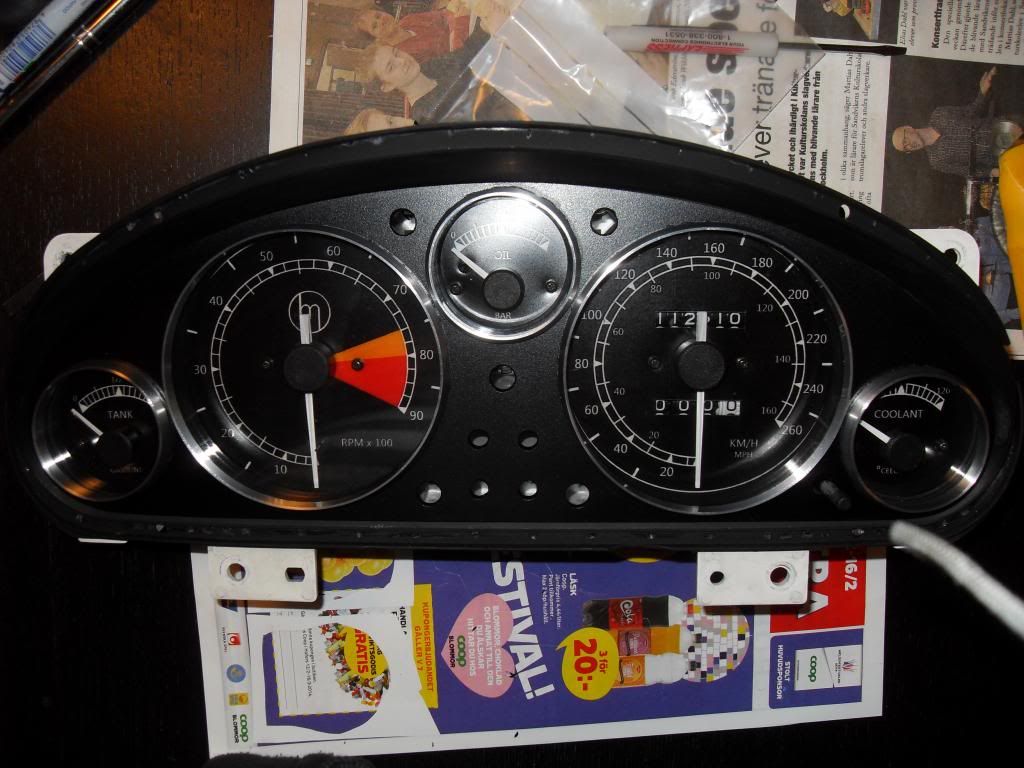
Glad you like them!
Thats terrific Chris i´ll cal u tomorrow!
No i didn´t need spacers, but just put some there and your ready to go!
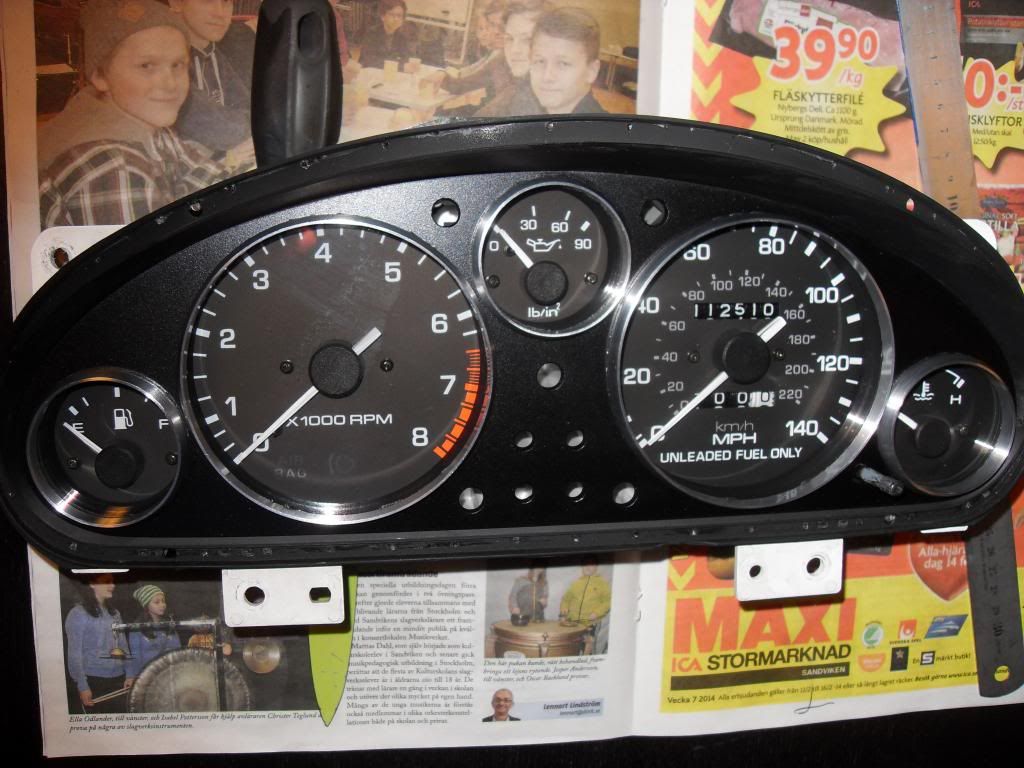
Looked at guages and yes, new more 60´s needed!
So started making new faces, scanned stock ones and modified them in paint.
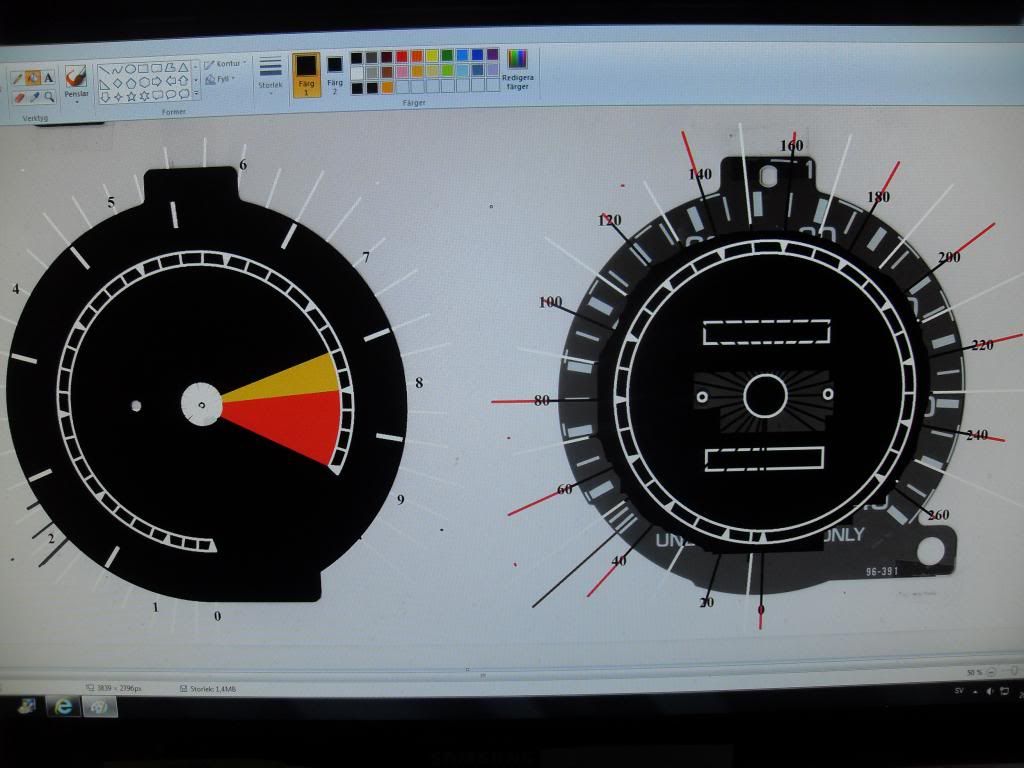
New faces!
 |
13th February 2014, 22:57
|
|
Junior Member
|
|
Join Date: Sep 2013
Posts: 10
|
|
Wow....
|
14th February 2014, 01:00
|
|
Junior Member
|
|
Join Date: Dec 2012
Posts: 9
|
|
|
14th February 2014, 09:00
|
|
Senior Member
|
|
Join Date: Feb 2014
Location: Sweden
Posts: 140
|
|
I guess for me it´s more the satisfaction of doing it yourself it´s all about! 
Thanks for the link! It might be very useful for someone else. But is not theese for NB´s?
Regards Andreas
Last edited by slangenracing; 15th February 2014 at 13:55..
|
14th February 2014, 11:13
|
|
Senior Member
|
|
Join Date: Feb 2014
Location: Sweden
Posts: 140
|
|
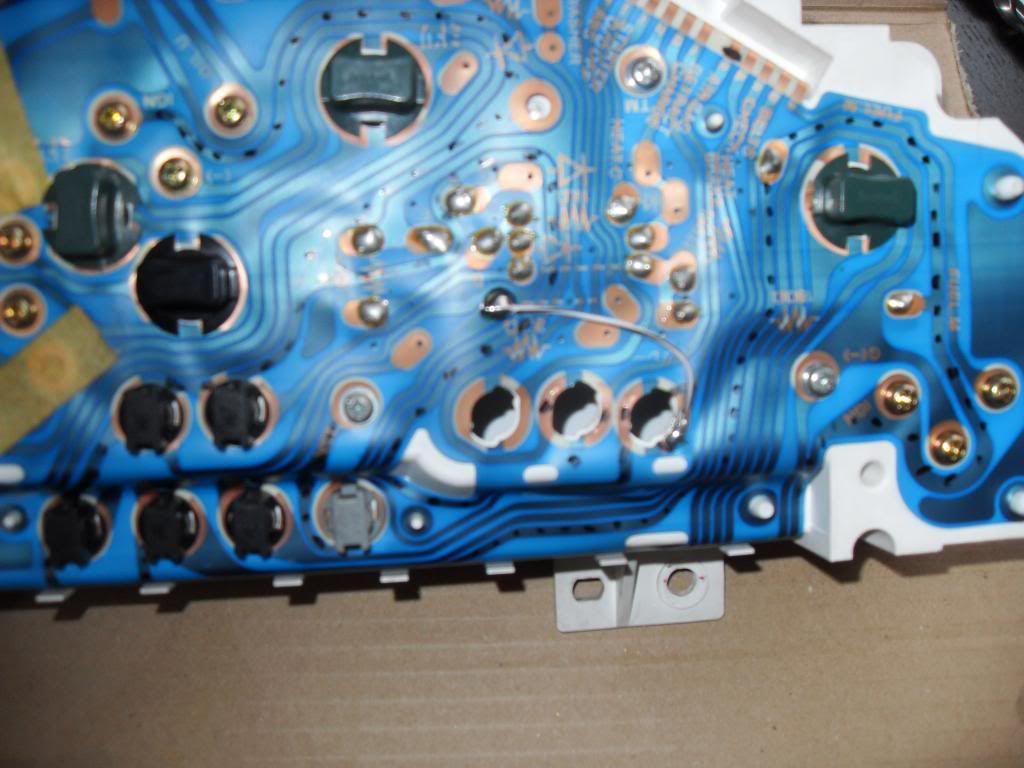
Had to reroute a wire on the back of cluster. It is the airbag lights. This is not possible this way if you got abs as i think it uses this blank light that i used on mine. Got a no ABS car. Reason why i did this is because of the hanging needle on tacho. The Airbag light is on the bottom of Tacho face.
 |
14th February 2014, 11:15
|
|
Senior Member
|
|
Join Date: Feb 2014
Location: Sweden
Posts: 140
|
|
This is how it looks in the dark. Guagefaces are made of 4 layers transparent overhead film, and a White addhesive vinyl on the back. So it lids up as the originals...
 |
14th February 2014, 16:31
|
|
Senior Member
|
|
Join Date: Mar 2013
Location: Coventry and the Limousin
Posts: 549
|
|
I think Andreas needs some advice on "proper" modification skills from WCA!
On a more sensible note, fabulous attention to detail here.
|
22nd February 2014, 23:27
|
|
Senior Member
|
|
Join Date: Feb 2014
Location: Sweden
Posts: 140
|
|
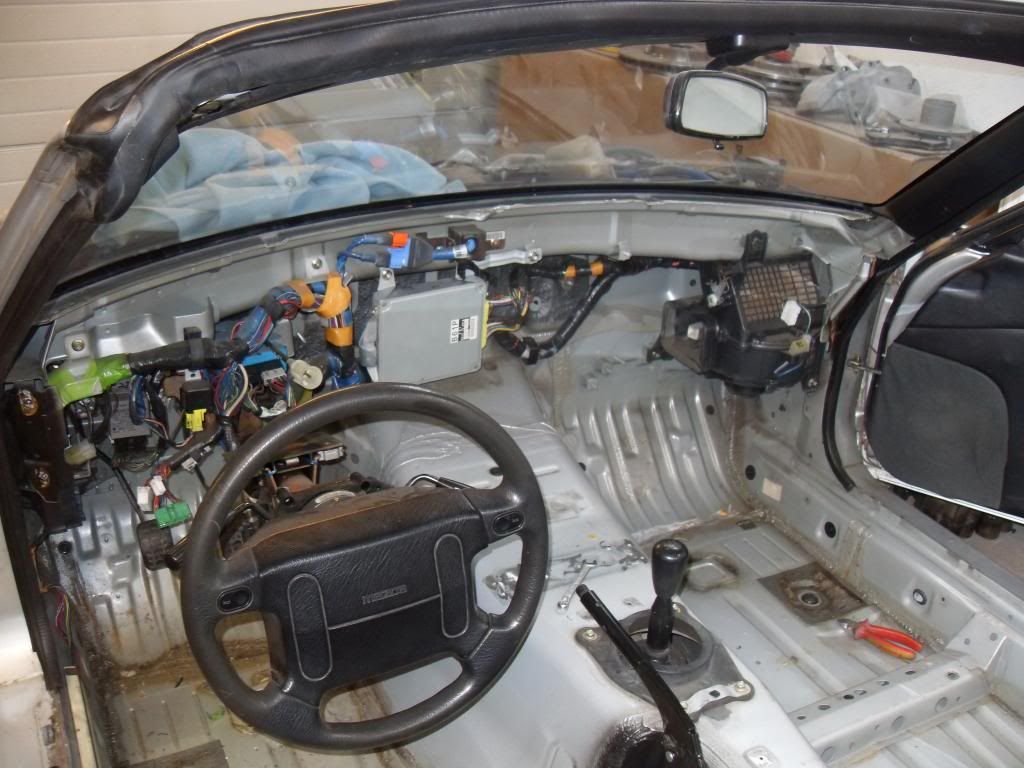
The mx5 is pretty light as it is in standard form, but my intention is to take it to track events, so i want it lighter. Pulled out the heater, a lot of sound deadening, cut away half of the dashpanel, relocated the ecu and pulled out the kick panel and bracket for that, center console and misc. deleted, floor carpets out of it, will add some very light carpet/felt in it, but only where visible. All this was 31kg! 940kg car minus 31kg makes a difference just over 3%! Kept the fan function, and pulled aluminium hoses to the vents from the fan.
 |
|
Currently Active Users Viewing This Thread: 1 (0 members and 1 guests)
|
|
|
 Posting Rules
|
You may not post new threads
You may not post replies
You may not post attachments
You may not edit your posts
HTML code is Off
|
|
|
All times are GMT +0. The time now is 06:37.
|


 Hybrid Mode
