|
|
| Sammio Builds and discussions Sammio bodied car builds and specials |

9th July 2014, 08:32
|
 |
Senior Member
|
|
Join Date: Jul 2011
Posts: 5,328
|
|

I'm having a radiator made by the chap in Boston, and it should be ready for collection tomorrow.
Having spoken to him about the problem - he makes traditional copper cored rads up to four rows thick and also does alloy ones - he confirmed that alloy isn't as efficient at transferring heat from the water to the air as copper. The advantage of using alloy on modern vehicles is that they're much lighter, while modern motors are far more thermally efficient to start with, so they can cope with the demands place on them even though they're not as efficient.
As for the airflow, there's nothing to stop the air coming in at the front from exiting through the front wheelarches. There's a possibility that my main bonnet scoop is creating positive pressure behind the radiator, stopping air from flowing through from the front at speed, but there isn't much room under that scoop for the air to pass down and forwards due to the engine/carbs/airbox being in the way, and once the temperature has risen, slowing down doesn't cool the engine down, which it should if that's the problem.
Should have the new rad plumbed in Friday morning, so will test drive and post results then...

|
9th July 2014, 21:00
|
|
Senior Member
|
|
Join Date: May 2013
Posts: 2,161
|
|
Looking forward to it Towed, really hope it sorts the problem out.
Good luck!
|
12th July 2014, 15:26
|
|
Senior Member
|
|
Join Date: Jul 2011
Posts: 5,328
|
|
Picked up the new radiator on Thursday, made to measure while I waited.
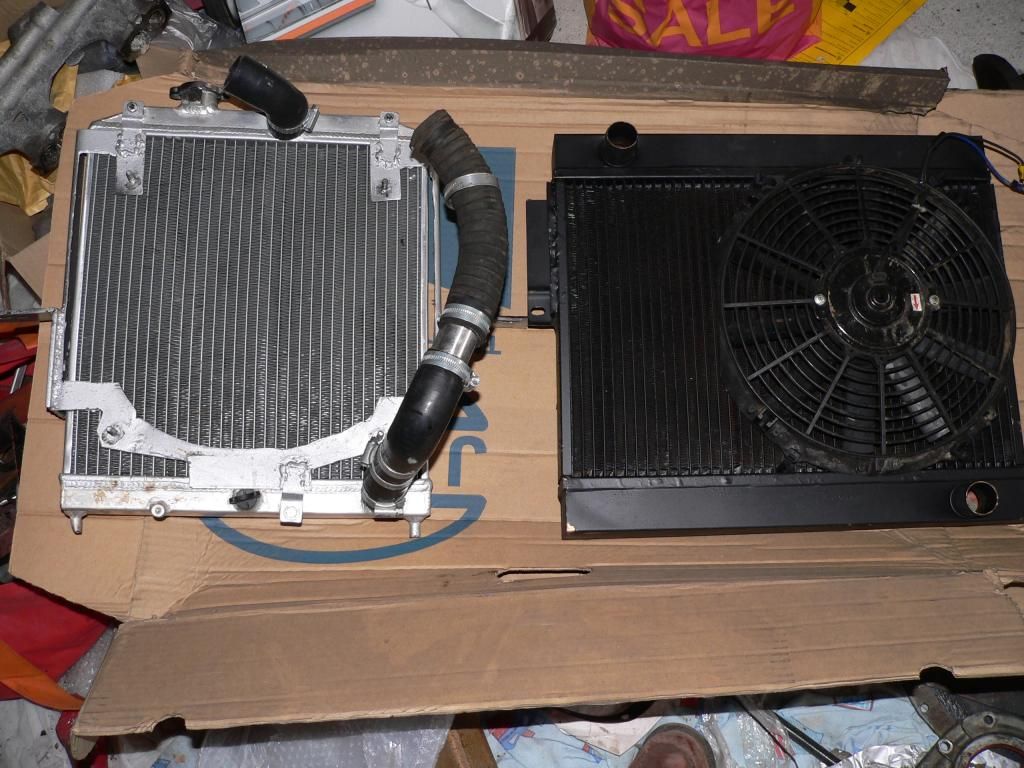
As you can see, it's a fair bit wider and thicker than the Civic rad, while it's about the same height.
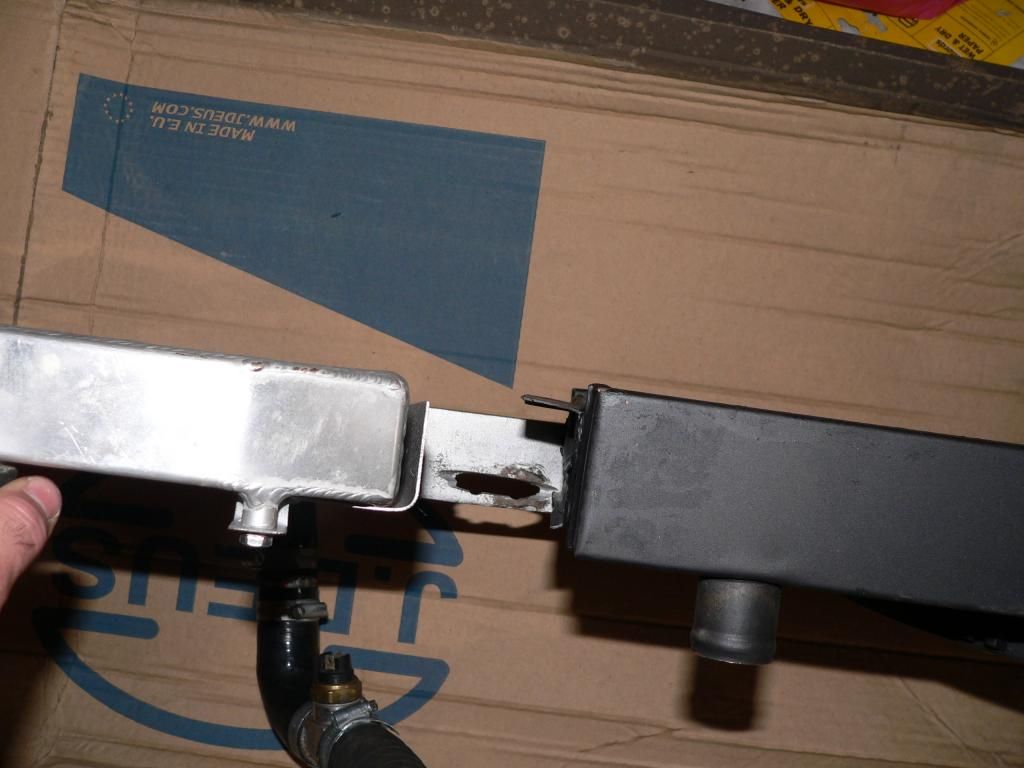
In traditional Sammio building fashion I measured the space available then ordered the radiator 10mm too wide to fit between the chassis rails.
No problem, just needed a bit of clearancing and some new brackets welding on -
Plumbed it all in like so -
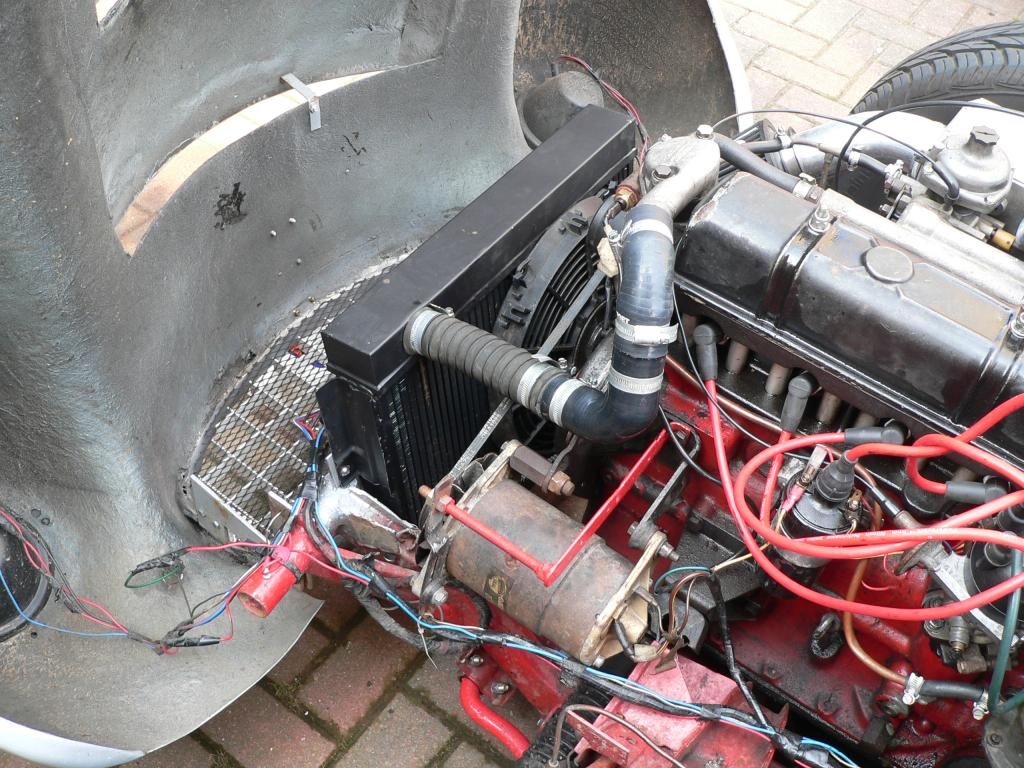
Made sure the system was completely full, checked for leaks then went for a blast...
After ten miles of, ahem, enthusiastic driving, the gauge stayed resolutely here -
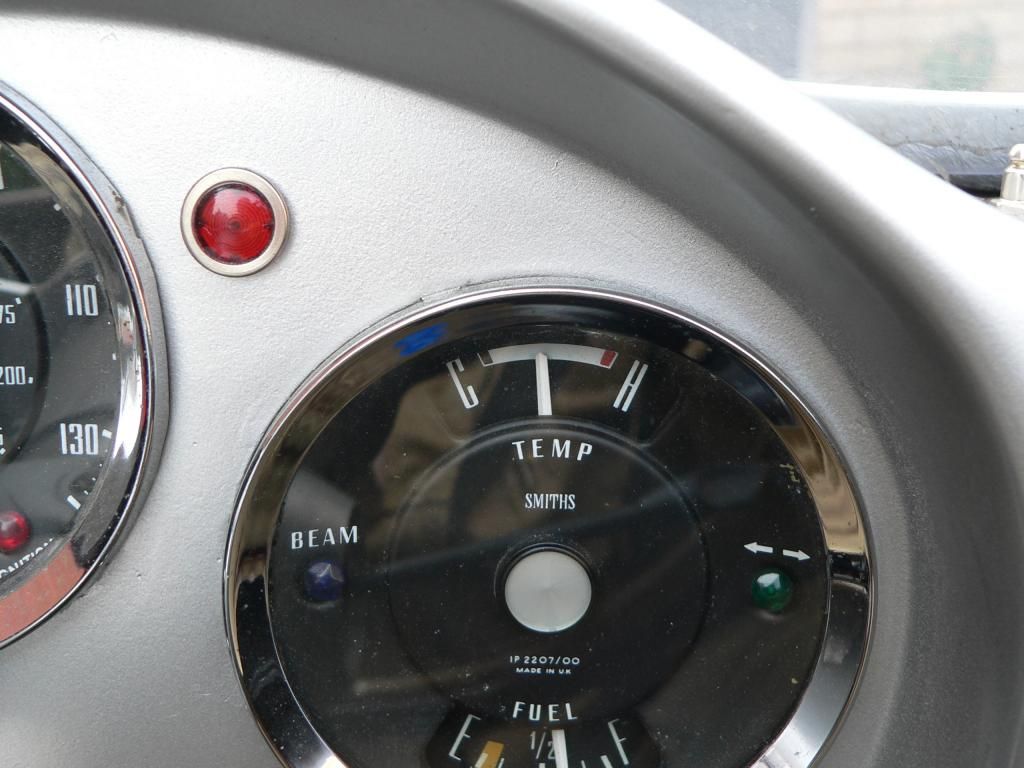
Success at last! It's running at just under the two dots and when you leave it idling the fan brings it nicely back down after a minute or so.
So, copper 1, aluminium nil, although, to be fair, perhaps the civic rad just wasn't quite big enough. |
12th July 2014, 16:06
|
|
Senior Member
|
|
Join Date: May 2013
Posts: 2,161
|
|
Well done Mr T!
I bet you are relieved to have sorted it out.
|
12th July 2014, 16:32
|
|
Senior Member
|
|
Join Date: Apr 2012
Posts: 1,163
|
|
Nice one T, hoping I don't suffer the same issues, hopefully won't as I'm a cylinder down on your!
Mac
|
13th July 2014, 07:40
|
 |
Senior Member
|
|
Join Date: Feb 2012
Location: Wembley, London
Posts: 5,056
|
|
Mr T - That is great news, really glad you can enjoy the rest of the Summer. 
Cheers, Paul. 
PS
If you are ever driving around Wembley, please pop around to say hello...
... and I will wrap your wiring up in black tape for you myself. 
|
14th July 2014, 06:16
|
|
Senior Member
|
|
Join Date: Mar 2012
Posts: 159
|
|
Hi Towed,
Glad to hear your cooling problem is over.
Looking at you picture, I noticed the way the dynamo is mounted. Did you consider using a smaller fan belt? Maybe this gives a better position to the dynamo for the use of a more simple tensioning bracket?
Michiel
|
14th July 2014, 07:39
|
|
Senior Member
|
|
Join Date: Jul 2011
Posts: 5,328
|
|
Quote:
Originally Posted by christinedmc

Hi Towed,
Glad to hear your cooling problem is over.
Looking at you picture, I noticed the way the dynamo is mounted. Did you consider using a smaller fan belt? Maybe this gives a better position to the dynamo for the use of a more simple tensioning bracket?
Michiel
|
Hi Michiel. The dynamo is mounted like that to clear the bonnet as it was just fouling the inside edge of the larger scoop. All I did was rotate it so it sits under the main bracket instead of over it, then made a simple stabiliser bracket to steady the third mounting point. That approach tucks the generator out of the way and uses the standard belt for simplicity and ease of replacement, and it works just fine.
Looks like it's going to be a nice, sunny day in the East today, so a run up to the North Norfolk coast is on the cards. It's going to be nice not having to constantly monitor the temperature gauge for the first time since I finished the car. Aluminium radiators might look cool, but copper cores actually help you keep your cool 
|
14th July 2014, 18:00
|
|
Senior Member
|
|
Join Date: Jul 2011
Posts: 5,328
|
|
Took a trip along the North Norfolk coast today, stopping for lunch (chips) at beautiful Wells Next The Sea -
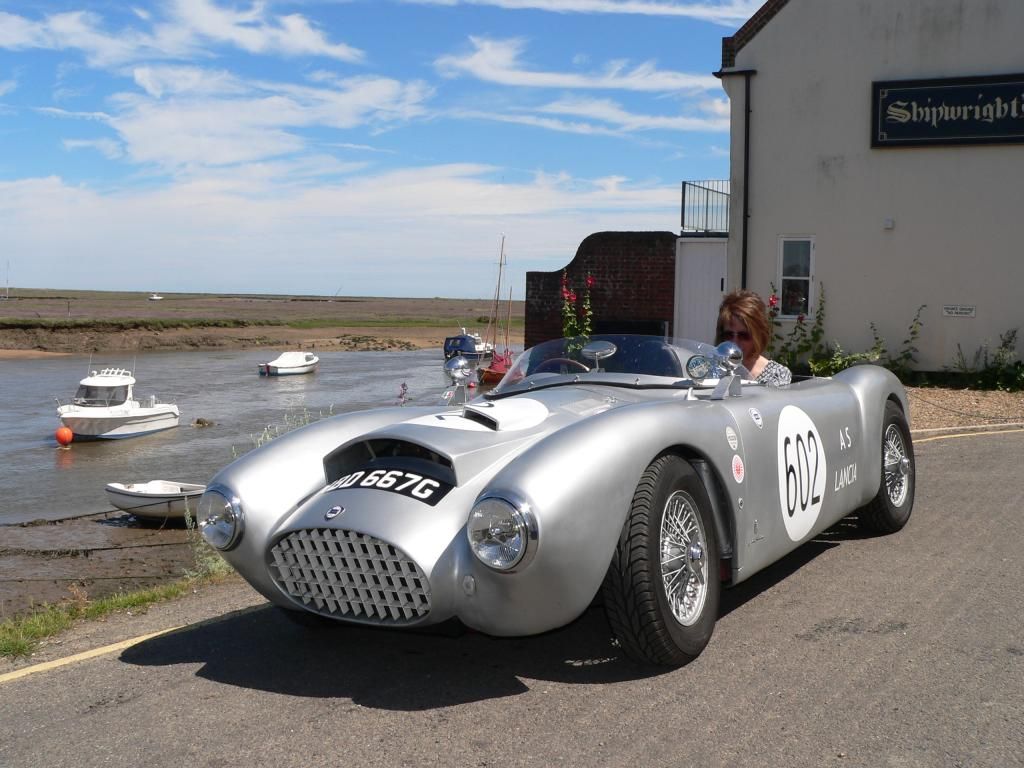
Weather was perfect and the 'gulls didn't mob us too badly whilst eating the chips -

Stopped off at a farm shop on the way back and couldn't resist parking next to this enormous off-roader -
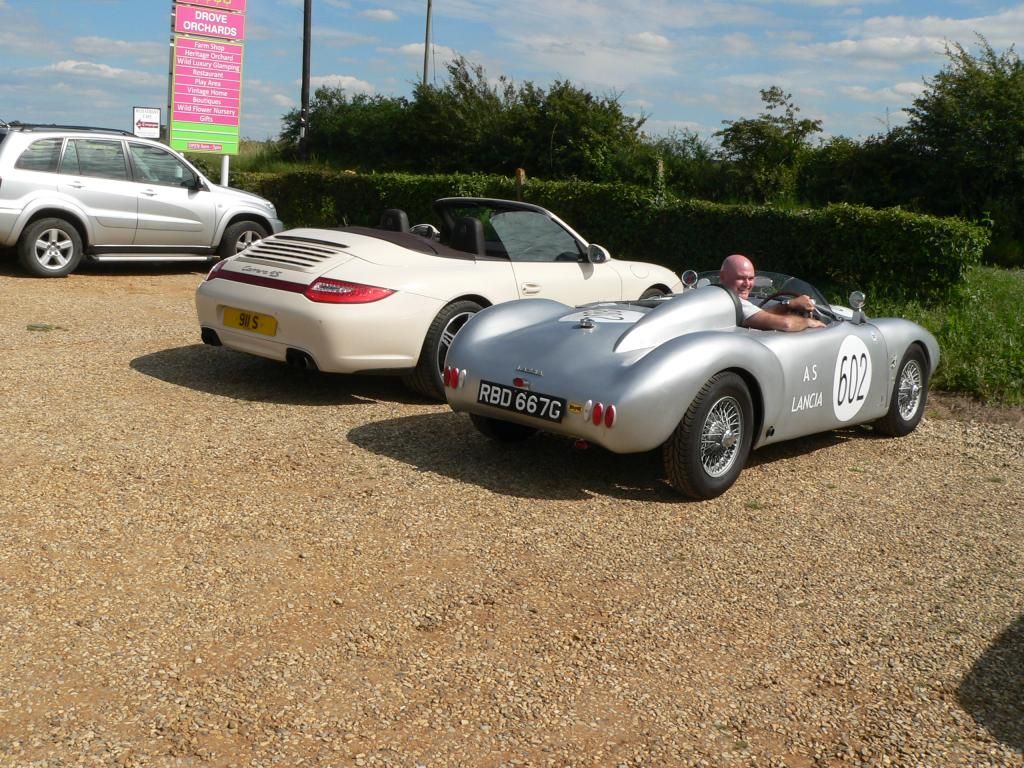
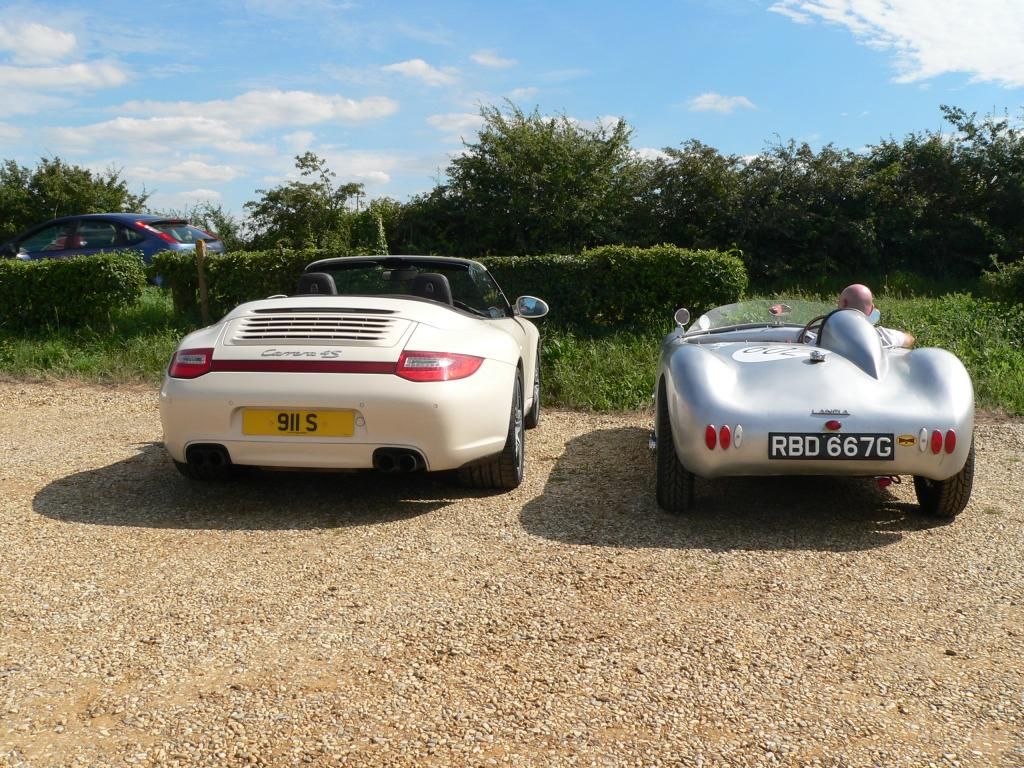
I reckon that 911S number plate would've cost around ten times what I've spent on my car 
Also found its little brother parked up in sunny Hunny on the way home -

MassIVVVE!
Car got loads of attention as usual. The bit of Norfolk to the East of Hunstanton is known locally as Chelsea on sea, as it's full of multi-millionaire mansions. There's nothing quite like seeing the look on a £120k Aston driver's face when you blast past in something far, far cooler. |
14th July 2014, 20:38
|
 |
Senior Member
|
|
Join Date: Dec 2013
Posts: 839
|
|
Good to see your back on the road again and i will use this for reference when i sort out the rad for my car.
I hope you had plenty of slip slap slop on the old barnet, the weather looked perfect for open top motoring.
|
14th July 2014, 21:00
|
|
Senior Member
|
|
Join Date: May 2013
Posts: 2,161
|
|
Nice one Mr T.
Silver really suits your car.
I know what you mean about the attention, when I had my little "Seven" I would drive about like one does, and then see people in very expensive soft top cars, coming the other way, and my car would suddenly become completely invisible to them!
They would not even look at it, they felt really super-cool until they spotted what you are driving, then pretend not to notice it at all!
Imagine how they feel, upstaged by a car that cost the same as what their car costs to service!
|
15th July 2014, 05:24
|
|
Senior Member
|
|
Join Date: Mar 2012
Posts: 745
|
|
looking good towed ...looks like car run fine and a nice day out ..great to see you back on road
|
15th July 2014, 12:33
|
|
Senior Member
|
|
Join Date: Feb 2012
Location: Wembley, London
Posts: 5,056
|
|
Mr T - More great photos.
I love seeing your car "standing out from the crowd" and it is a great motivator for my own build.
So carry on winding up the owners of expensive cars. 
Take care, Paul.
|
16th July 2014, 18:31
|
|
Senior Member
|
|
Join Date: Jul 2011
Posts: 5,328
|
|
MOT passed today
Can't believe it's been on the road a year now. Mind you, it's taken a full year of fettling to get it running as sweetly as it is now.
The changes I've made from its original spec as far as I recall are as follows:
One more leaf removed from rear spring, lowering blocks all removed to achieve desired ride height/handling/ground clearance;
150lb Spitfire front springs fitted, cut down by 1.5 coils (about 30mm), to replace 220lb springs cut down by 95mm again to achieve desired ride height/handling/ground clearance (might just change to 180lb at some stage in the future);
Heavy duty ARB fitted in place of standard, thin effort to compensate for softer front and rear springs;
Quicker, Spitfire steering rack fitted and clamped down with solid alloy mounts for more positive steering feel;
175/80/14 Uniroyals fitted in place of 175/70/14's once again to achieve desired ride height/handling/ground clearance/and how they just look better;
Alloy Honda Civic racing radiator replaced with larger, copper cored Stock Car radiator to cure overheating issue;
Mk2 Vitesse camshaft and new followers fitted for a bit more power;
Cylinder head decoked, valves lapped in, new timing chain and tensioner fitted whilst changing cam;
MSD multispark ignition unit removed and binned after it failed under full power, stranding me at the roadside in its only breakdown in 2,000 miles 
Modern stereo removed and binned when it never worked again once I'd dropped it prior to final fitting
I think that's about it. If I built another I'd be incorporating all of the above into the initial build, especially the suspension settings which were far too low initially - looked cool but fouled everything.
Things still to do include new wheel bearings all round (advisories on the MOT), fit the 1.75" Strombergs I have sitting in the garage and maybe purchase a Witor flow balanced manifold to go with them.
Oh, and here's some video of the MOT guy bringing it back from its brake test. Afraid it's mobile phone footage and he managed not to rev it at all as he passed by but you get the idea...

Here's to another year on the road and a few more finished cars to join me over the next twelve months.
|
17th July 2014, 08:26
|
|
Senior Member
|
|
Join Date: Mar 2012
Posts: 745
|
|
top job towed ......
|
17th July 2014, 08:38
|
|
Senior Member
|
|
Join Date: Mar 2012
Posts: 1,152
|
|
I'll try and join you for a drive after your next MOT.......
Last edited by oxford1360; 17th July 2014 at 10:53..
|
17th July 2014, 10:29
|
|
Senior Member
|
|
Join Date: Mar 2012
Posts: 745
|
|
i think i can say from me towed barry wee always up for a run out..
|
18th July 2014, 09:11
|
|
Senior Member
|
|
Join Date: Feb 2012
Location: Wembley, London
Posts: 5,056
|
|
Quote:
Originally Posted by Mister Towed
... Here's to another year on the road and a few more finished cars to join me over the next twelve months. ... |
Quote:
Originally Posted by oxford1360
I'll try and join you for a drive after your next MOT.......
|
Hmmm ... 12 months from now you say ... hmmm ...
Can I put myself down as a "definite maybe" for this group drive? 
Cheers, Paul. |
27th July 2014, 06:29
|
|
Senior Member
|
|
Join Date: Feb 2012
Location: Wembley, London
Posts: 5,056
|
|
Mister Towed - I know this is your on the road thread, but can I take you back to your building days?
It was just over two years ago (July '12) when you bonded the body shell to the frame. 
Looking at yours photos it appears that there were just four points of contact.
( 3 small blobs across the front of the frame and the huge blob at the rear. )
Were there any other places you used the bonding paste between the frame and the body shell?
I also remember your tip about using Tetroseal on the inside of the shell.
Given all my "cutting & shutting" going on with my body shell, I think this would be a very good idea for me.
However, I will bear in mind your other top tip...
Quote:
Originally Posted by Mister Towed
... If anyone does go with the Tetroseal coating on the inside of their shell, I'd mark the points where the bonding paste is going to go, rough sand them for adhesion and leave them free of Tetroseal so the body sticks to the frame properly ...
|
Which leads me to another question about the bonding process...
Was a "rough sand" all you gave the paint on the frame before adding the bonding blobs?
Similarly, when you were fibre glassing your floors to the body shell, was there any problems making the fibreglass stick to the painted floors?
Finally, your big bonding blob was there to support the centre of the rear cockpit.
By the looks of it, your internal cockpit panels support these outside corners of the rear cockpit.

I take it there is no issues with putting any weight on these corners on your car?
I was thinking of building extra supports for these corners on my car, but it seems the internal panels do the same job.
Sorry to bombard you will all these questions, but thinking about this stuff now, will hopefully save me time in the future.
Cheers, Paul.
|
27th July 2014, 18:16
|
|
Senior Member
|
|
Join Date: Jul 2011
Posts: 5,328
|
|
Hi Paul, never a problem asking questions.
I believe I used six blobs of bonding paste left, right and centre, front and rear. Don't recall even sanding the smoothrite on the frame and it's stuck down just fine.
Likewise the csm and resin stuck rock solid straight to my smoothrited floors when I attached the inside of the shell to them. Just remember that's your opportunity to set the body sides where you want them so make sure everything looks right before applying the old resin.
my interior cockpit panels (6mm marine ply screwed and bonded inside the return under the cockpit edge) gives the shell enough strength to take my weight when climbing in and out - in fact that's what transforms the shell from wobbly blancmange to rigid structure. for the curves that form the inside panel corners on mine I just stapled stainless mesh into the gaps where the side and rear panels didn't meet and 'glassed over the top, effectively bonding the rear corners of the body into the interior panels. Worked for me.
|
|
Currently Active Users Viewing This Thread: 1 (0 members and 1 guests)
|
|
|
 Posting Rules
|
You may not post new threads
You may not post replies
You may not post attachments
You may not edit your posts
HTML code is Off
|
|
|
All times are GMT +0. The time now is 09:38.
|


 Linear Mode

