|
|
| Sammio Builds and discussions Sammio bodied car builds and specials |

4th February 2013, 15:34
|
 |
Senior Member
|
|
Join Date: Sep 2012
Posts: 192
|
|
grind it back hit it with a hammer if it falls off try again
|
4th February 2013, 16:54
|
 |
Senior Member
|
|
Join Date: Feb 2012
Location: Wembley, London
Posts: 5,056
|
|

More Welding:
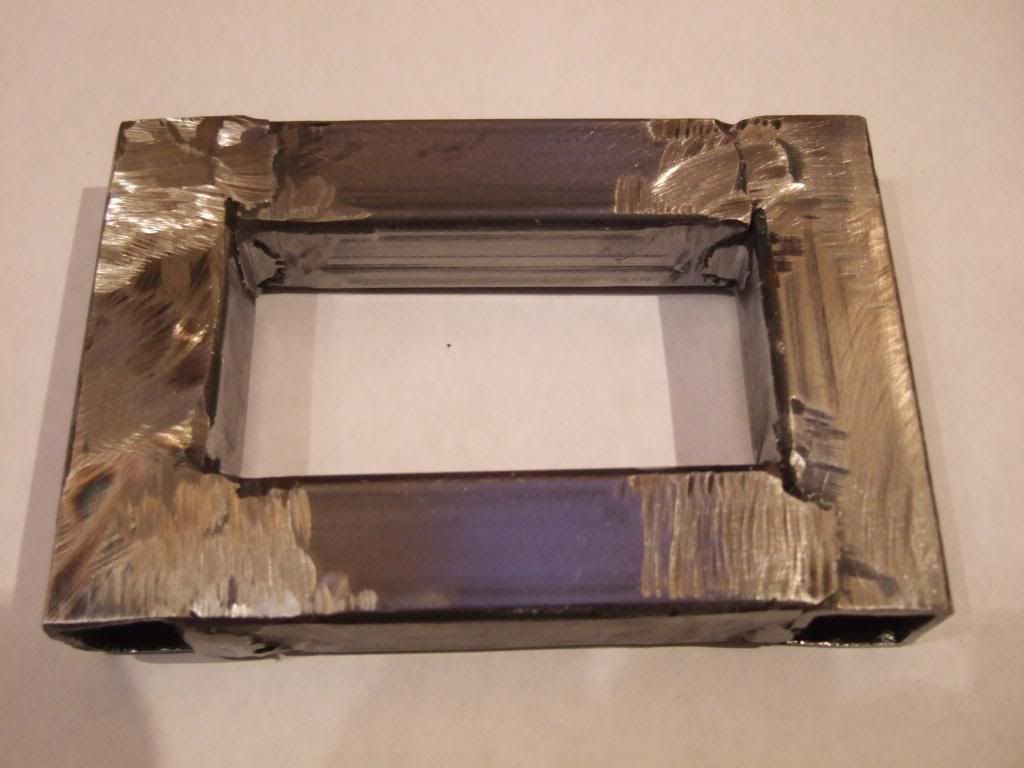
I wanted to practise making a section that I planned to use in the frame work.
The steering column will foul the existing frame rail (which was modified on later kits.).
So I will cut out a straight section & replace it with a "box" the column can pass through.

I simply cut out some box section and gave it a go.
My first attempt is the box on the left and my second attempt is on the right.

I was really pleased with my second attempt, which is shown after I ground down the welds.
( Sorry the close up photo is a blurred. )
There is more than enough room for the steering column to pass through.

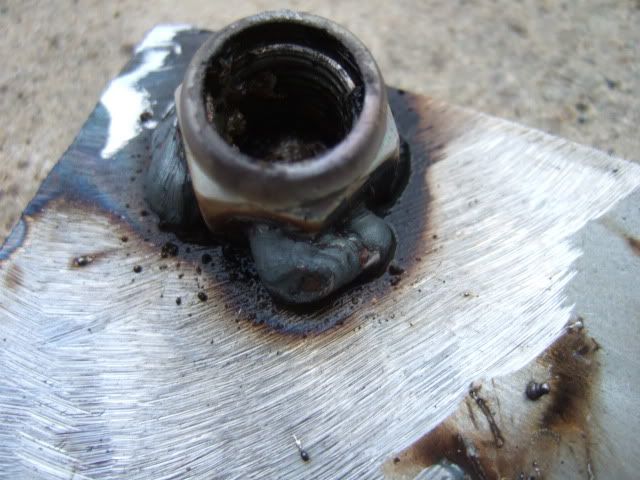
I had a small mis-hap when I had a go at welding a nut to some metal to make it "captive".
I'd picked up a Nyloc nut without noticing, although the small fire did catch my eye. 
So lots of practise still required, but the weather forecast isn't looking too good.
With that in mind, I turned my attention to a job I would be able do some of it indoors.
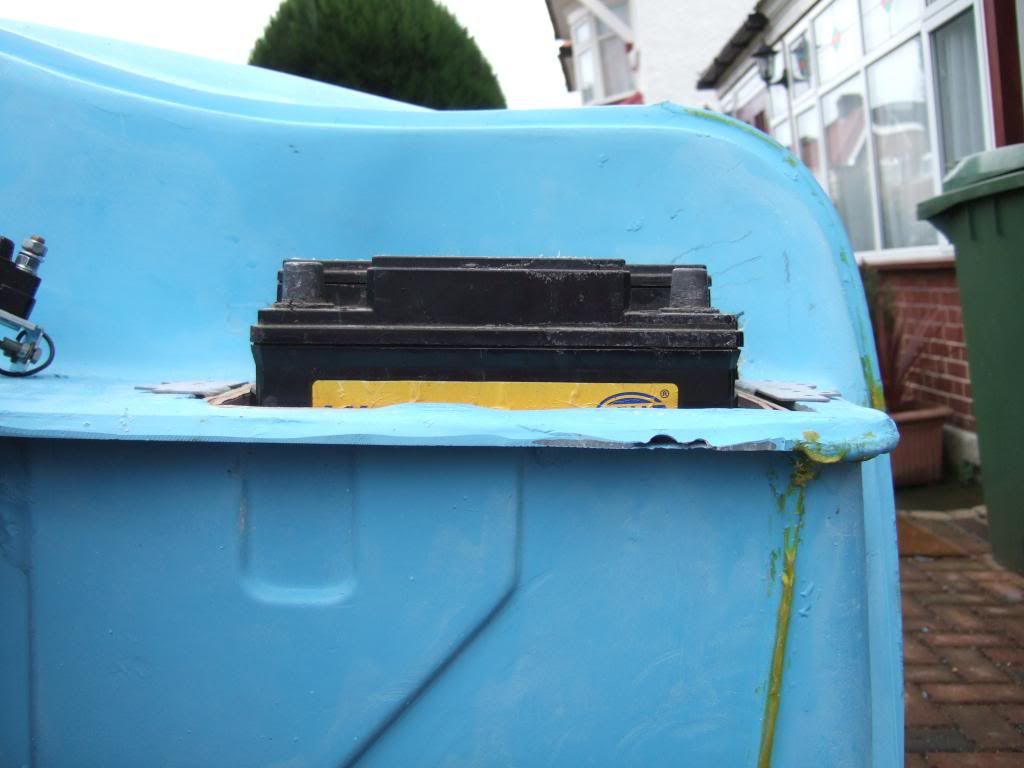
Battery Box - Part 1:
I'm building my "sunken" battery box out of exterior plywood, before sealing it in resin / fibreglass.
It is based on DonnySoutherner's design, but modified to steal an idea I saw on the battery tray below…

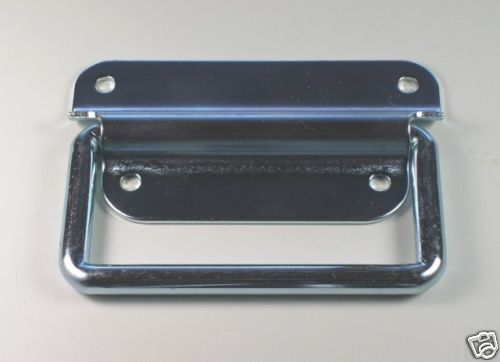
I intend to use a combination of "Chest D Handles" & a simple luggage strap to hold the battery in place.
Similar to these items below, but I haven't decided on my final choice yet.

I used Power Point as my poor man's CAD system to draw up the basic idea for the box.
( Perhaps I would be better off sticking to my dodgy sketches! )
I thought a plywood "lip" on the edge would give me something sturdy to mount the strap handles to.
Although when I had another look at the bulk head, I decided this was a bit OTT for what I needed.
So I will just mount the handles directly to the bulk head and re-inforce that area if required.
The other thing I need to consider is a simple "drain pipe" to avoid water collecting in the box.
This needs to go from the box & back out through the bulkhead, as the box is over the passenger foot well.
So I will build some ridges in the base of the box for the battery to sit on, allowing water to drain freely.
( Final layout to be decided, but hopefully you get the general idea. )
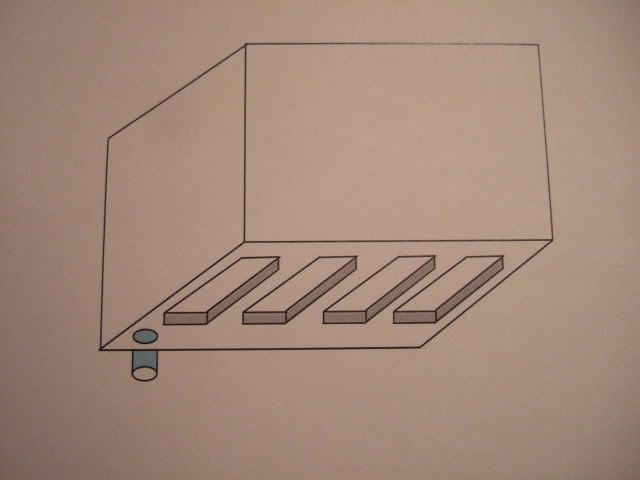
I worked out the the sizes of ply I needed based on my battery and the bulk head space available.
I also allowed enough space to replace my battery with a new one if required (no idea how old this one is).
Then is was simply a case of marking up a "spare" section of plywood, before cutting out with my jigsaw.

Hopefully I will be able to assemble this tomorrow.
Until then, take care, Paul.  Replies:
Viatron
Replies:
Viatron - Cheers Mac, yes it was a bit windy working outside today.
In the end, I re-arranged things, so that my body was forming a wind break.
CarNoob - I'll try the hammer test tomorrow.
Last edited by Paul L; 8th September 2019 at 10:06..
|
5th February 2013, 12:59
|
|
Senior Member
|
|
Join Date: Feb 2012
Location: Wembley, London
Posts: 5,056
|
|
A little bit of tinkering this morning before I do some more welding practise this afternoon.
I figured it would be better if I could actually feel my fingers when operating power tools.
My drive is North facing, which means no sun gets to it in Winter and it is bloody cold out.
Hump Head Rest:
I wanted to make a template that I could send off to get a padded head rest made to fit.
However, after two attempts, I am still not happy with what I have done so far...
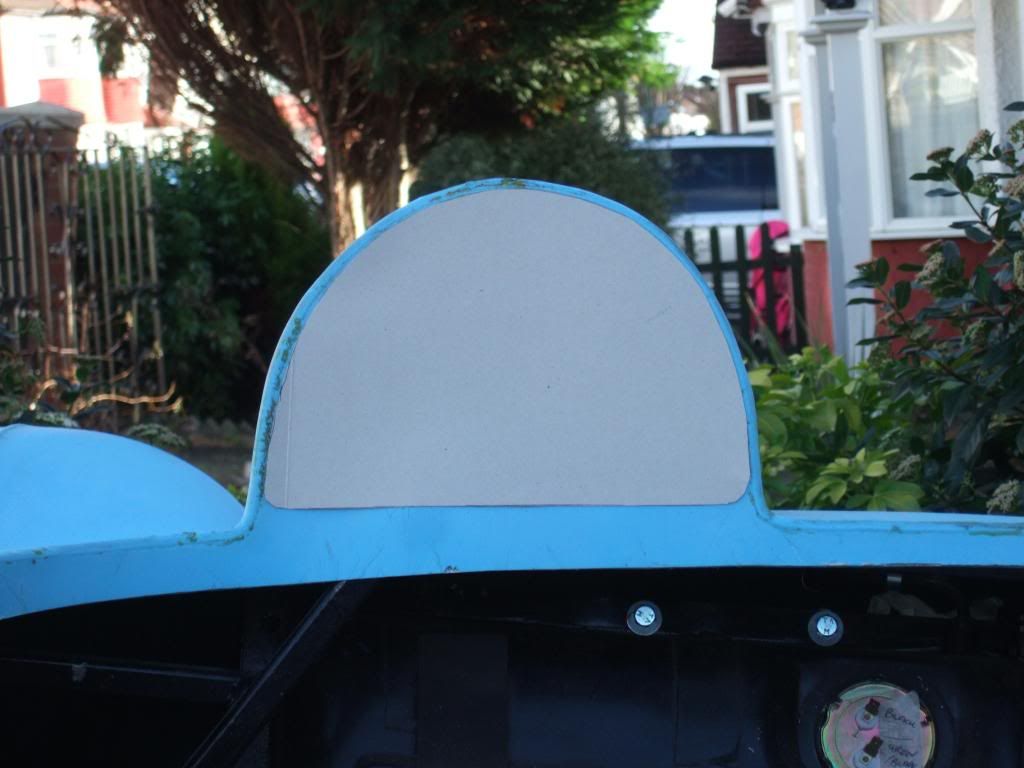
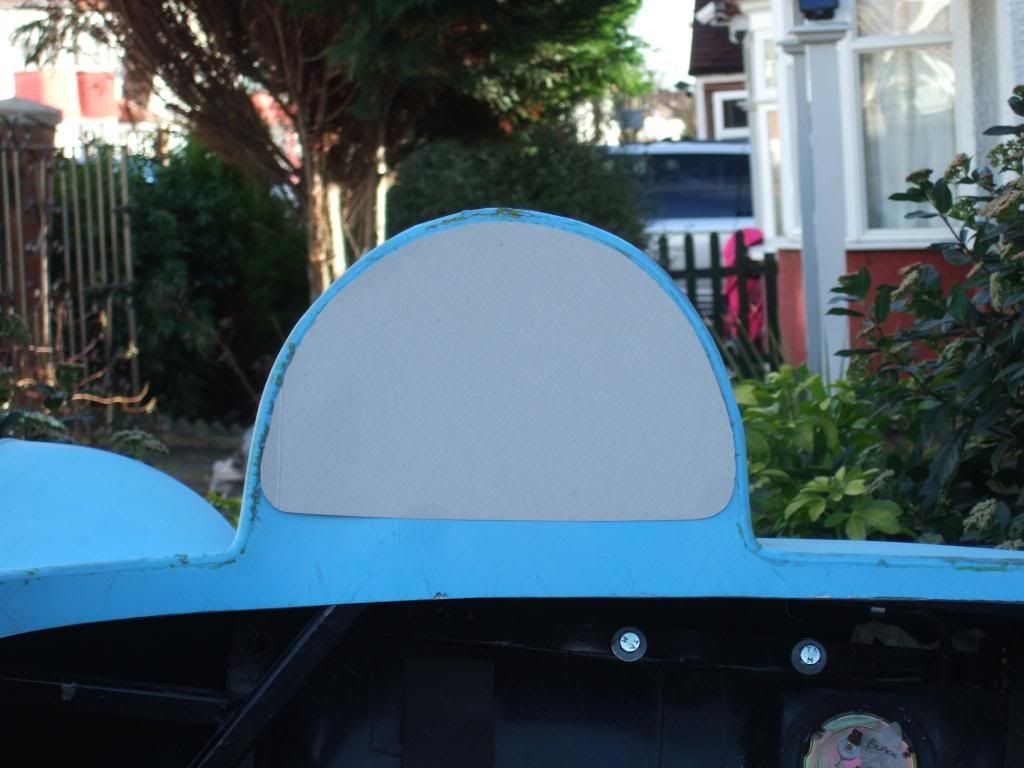
Should the bottom line of the head rest be equidistant from the hump top like a semicircle?
Or should it be at an angle in line with the slope in the body work either side of the hump?
The fact the car is on a sloping drive & the edge of the body varies too doesn't help either.
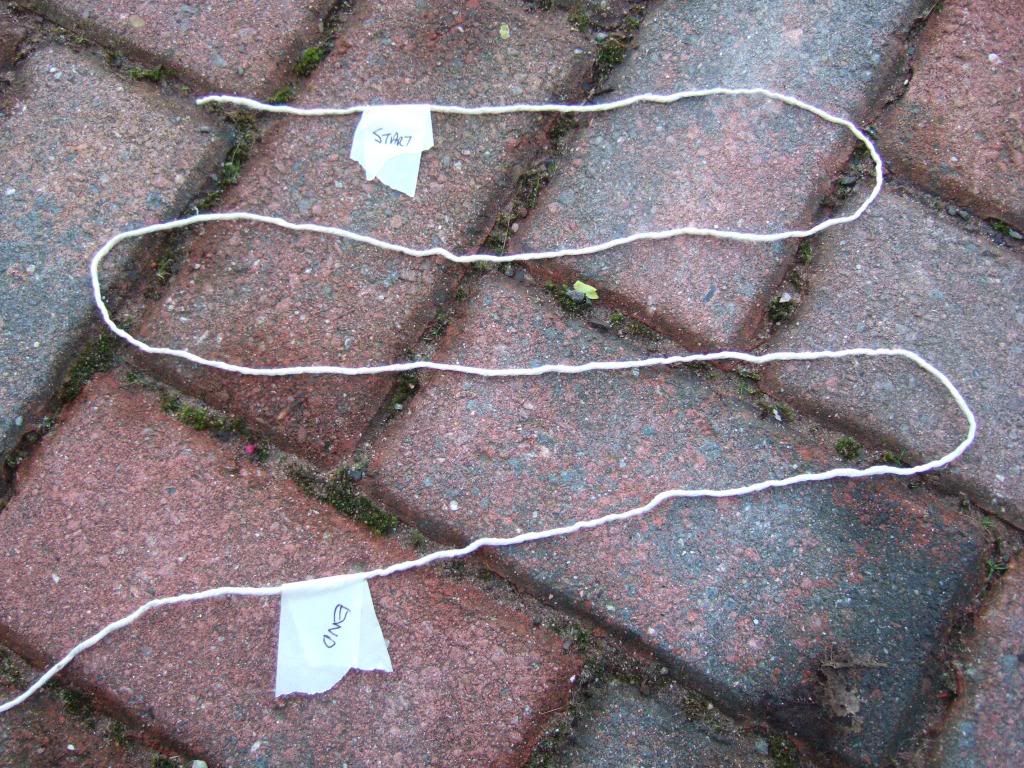
Flexible Fuel Line:
I wanted to check the maximum length of fuel line I needed to order.
So out came the string and I ran it along the top of the tank & down the side.
I then left a bit of flexibility depending on where it will join the existing hard line.
Then the distance between the two tags is the length of hose I need, simples.
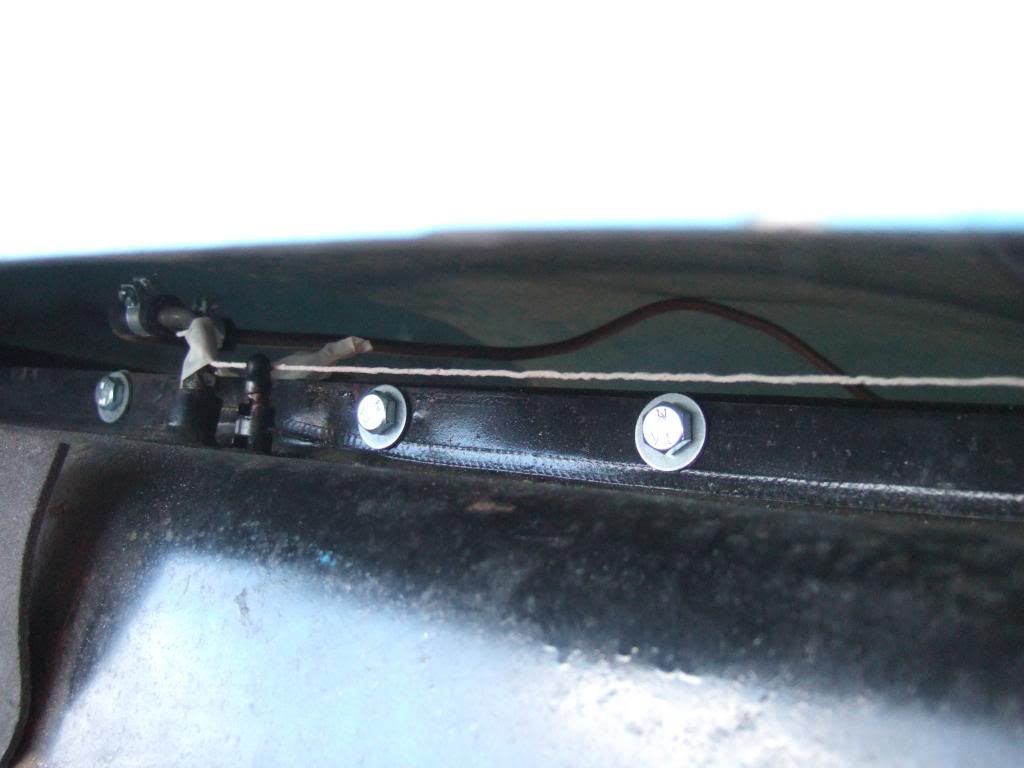
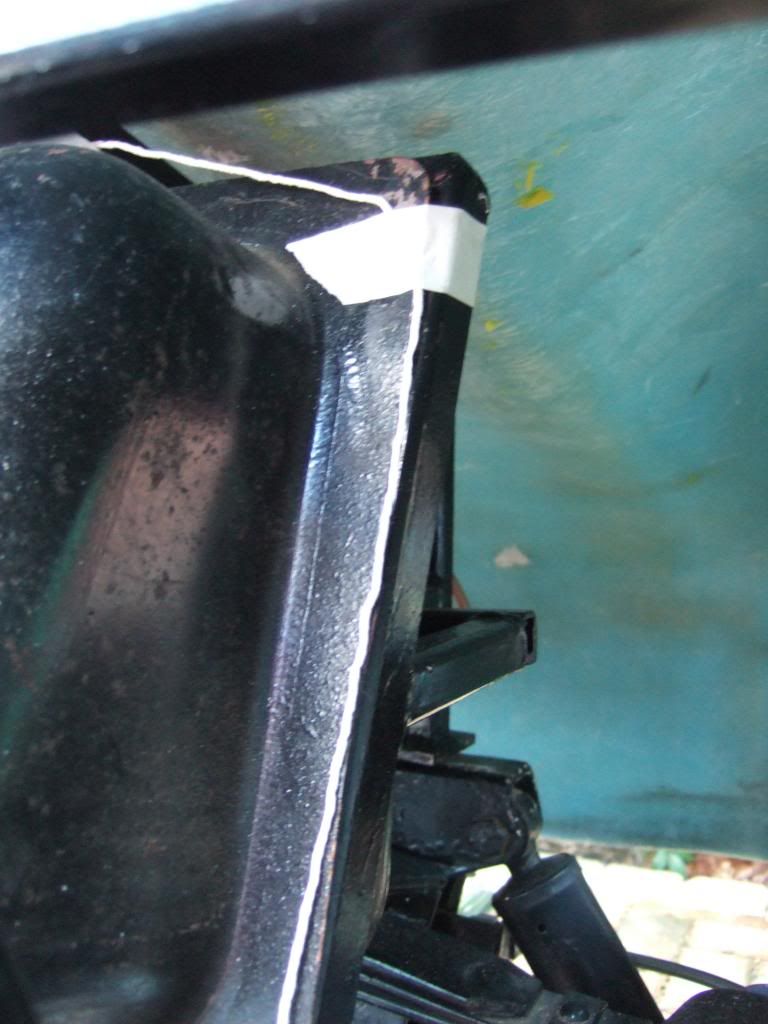

 New Earth Lead:
While the string was out I had a look at where I might earth the battery.
Again, I want to know roughly what length of new earth cable I need to order.
I think the chassis where the front of the Cordite frame bolts to will be my new earth.
Whilst the tape marks the spot, I could move the earth point to the outside a bit.
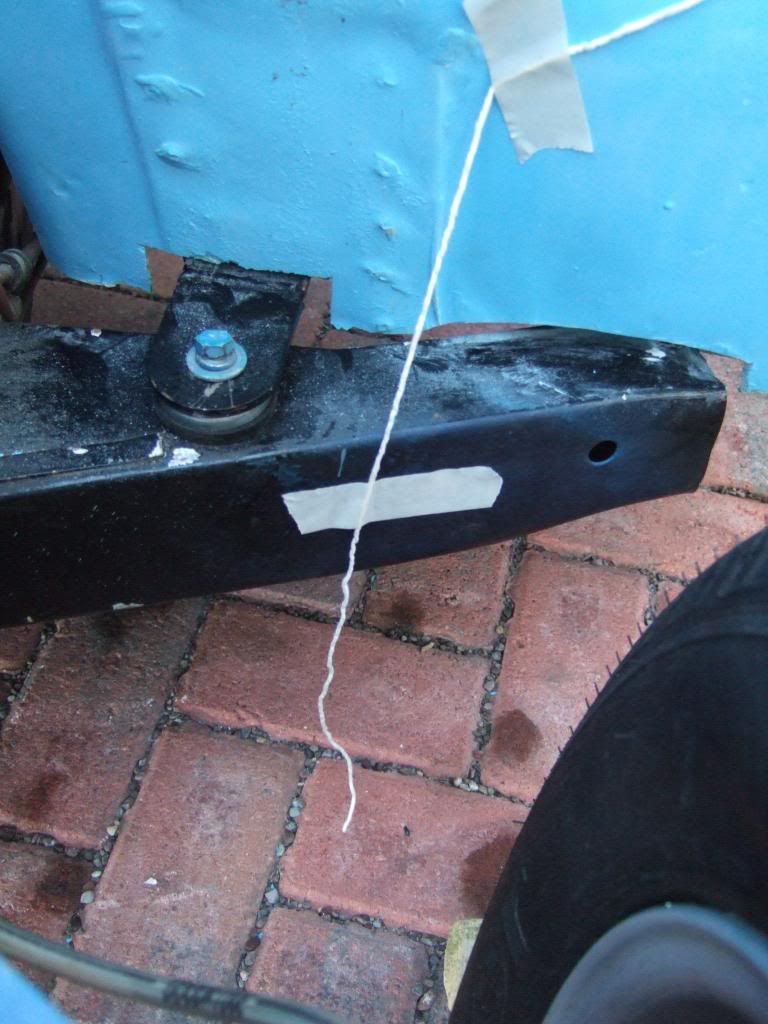
Previously, the engine earth strap joined the earth lead from the battery here...

This also earthed another part of the loom that went back through the bulk head.
So I might create a mounting point to connect the earth wires on the bulk head.
Again, the tape just below the bulkhead ridge marks a possible mounting point...
Can I connect the engine earth strap directly to the new chassis earthing point?
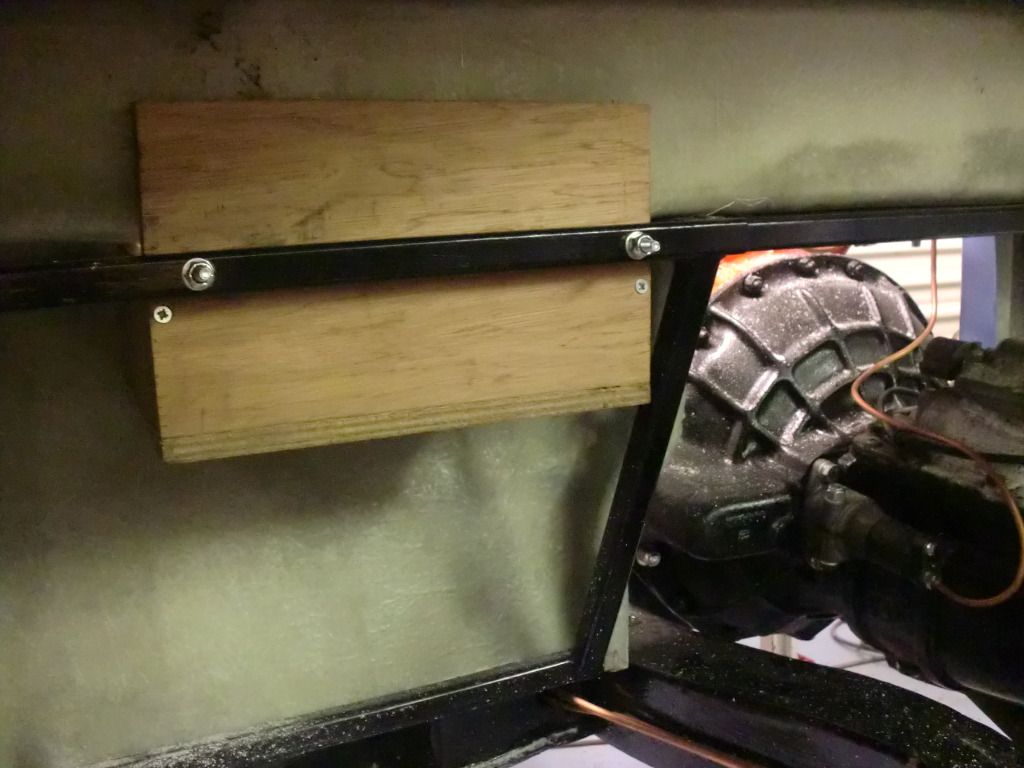
Battery Box - Part 2:
I drilled some pilot holes along the edges of my plywood sections.
I then used panel pins to form the box shape I wanted.
Note: This was a dumb idea, as the pins slit the ply layers in places.
So I've had to add a small corner "L" bracket to hold it in place on one side.
I am not too worried, as the final strength will come from adding resin & fibre glass.
But at least this will allow me to position the box in the bulk head & cut a hole.
( A job for either later today, or sometime tomorrow. )
Other Top Tip
Don't let you finger get trapped between a lip on the battery & the edge of the plywood. 
I removed a section of skin just below my finger nail. 
Right, well I have warmed up again, so back outside I go...
Cheers, Paul.

|
5th February 2013, 13:13
|
 |
Senior Member
|
|
Join Date: Nov 2011
Location: Emsworth
Posts: 810
|
|
Hats off, or on, to you for working outside today Paul. With regard to your template I would make the bottom parraelle to the...cockpit coaming. Then the next price of trim will fit against it easily.
|
5th February 2013, 14:05
|
 |
Senior Member
|
|
Join Date: Dec 2011
Posts: 656
|
|
You are braving this weather aren't you! There's always the option of a round cushion that can be placed to taste. In that way, there isn't the question of whether to line up with coaming or horizontal to ground.
|
5th February 2013, 14:12
|
|
Senior Member
|
|
Join Date: Nov 2011
Location: Emsworth
Posts: 810
|
|
Yes that would be nice. Maybe a buttoned bar stool cushion would look good!  |
5th February 2013, 15:41
|
|
Senior Member
|
|
Join Date: Feb 2012
Location: Wembley, London
Posts: 5,056
|
|
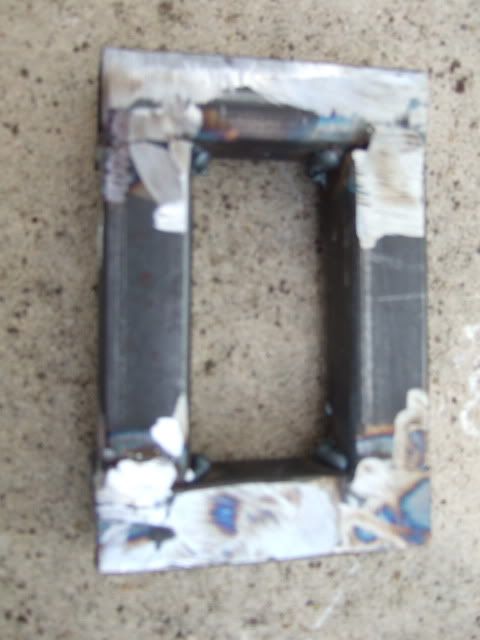
More Welding Practise:
I moved to the bottom of the garden in the vain hope that I'd have more shelter there.
But there is no escaping the fact that it is windy and this is not helping me to weld at all.
I will keep an eye out for arc welders on Ebay just in case, but I'll stick with the MIG for now.
The first thing I did was weld the "T" section & my first attempt at a box from yesterday together.
Then I cut another section of box section off & welded that to the other end of the box.
Then I cut out a section of the steel sheet my mate supplied & welded that to the box.
Note: No attempt made to line things up nicely, just wanted them to stick together.
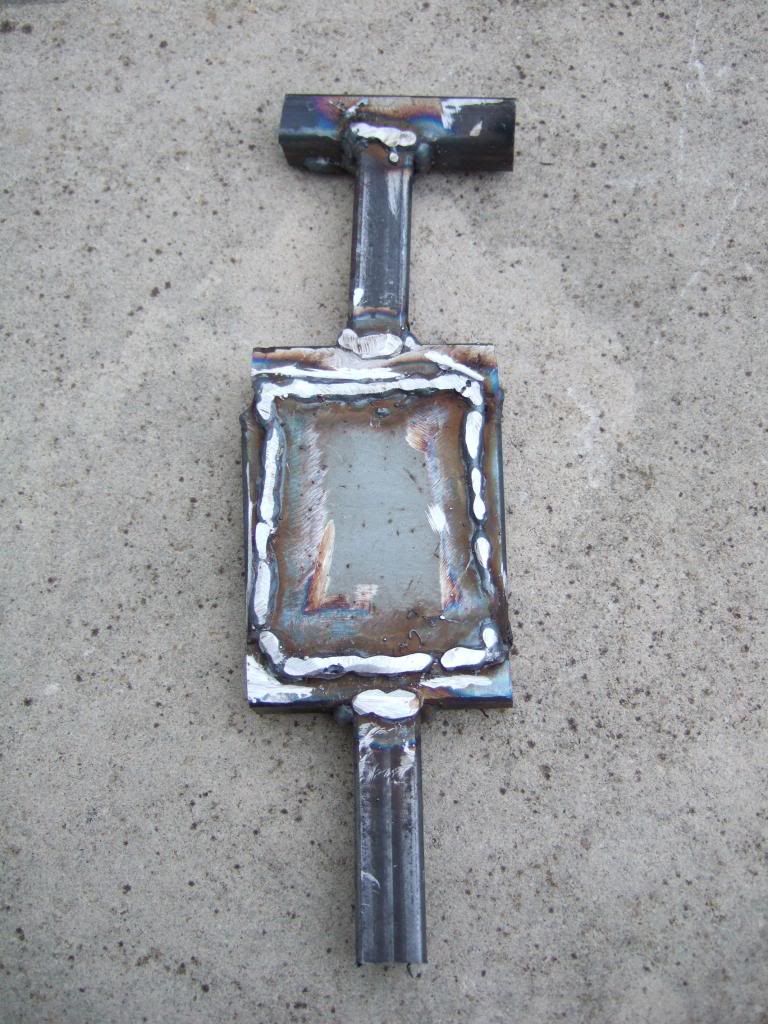
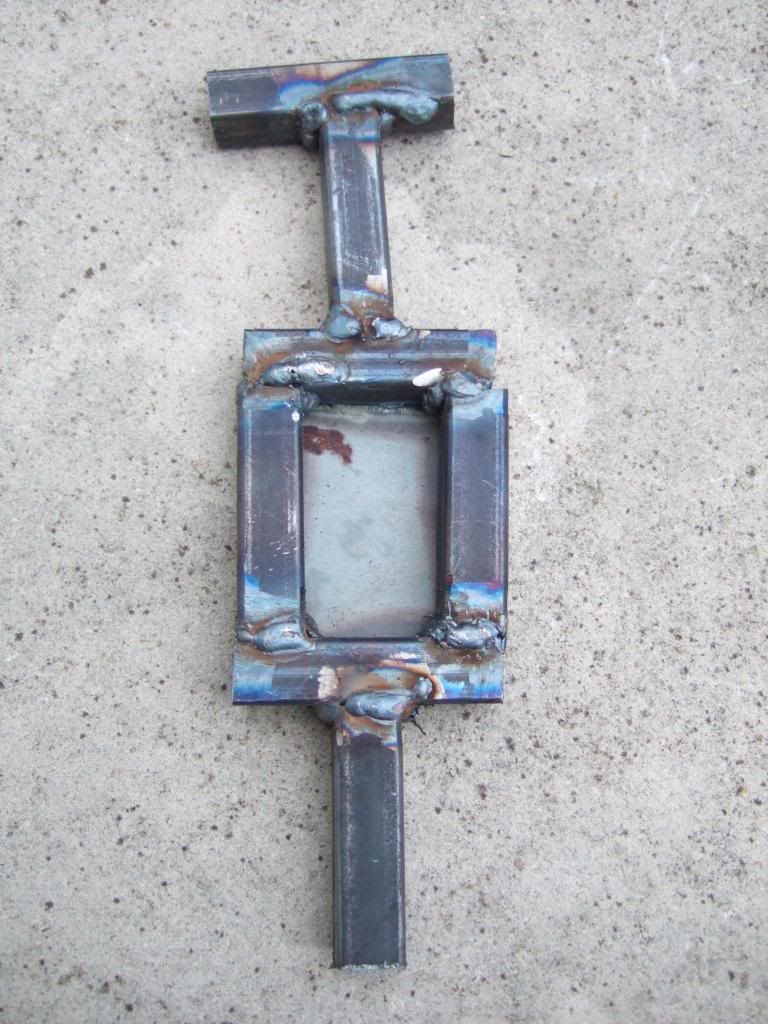
I know it isn't great welding, but I am really happy that they are at least joined.
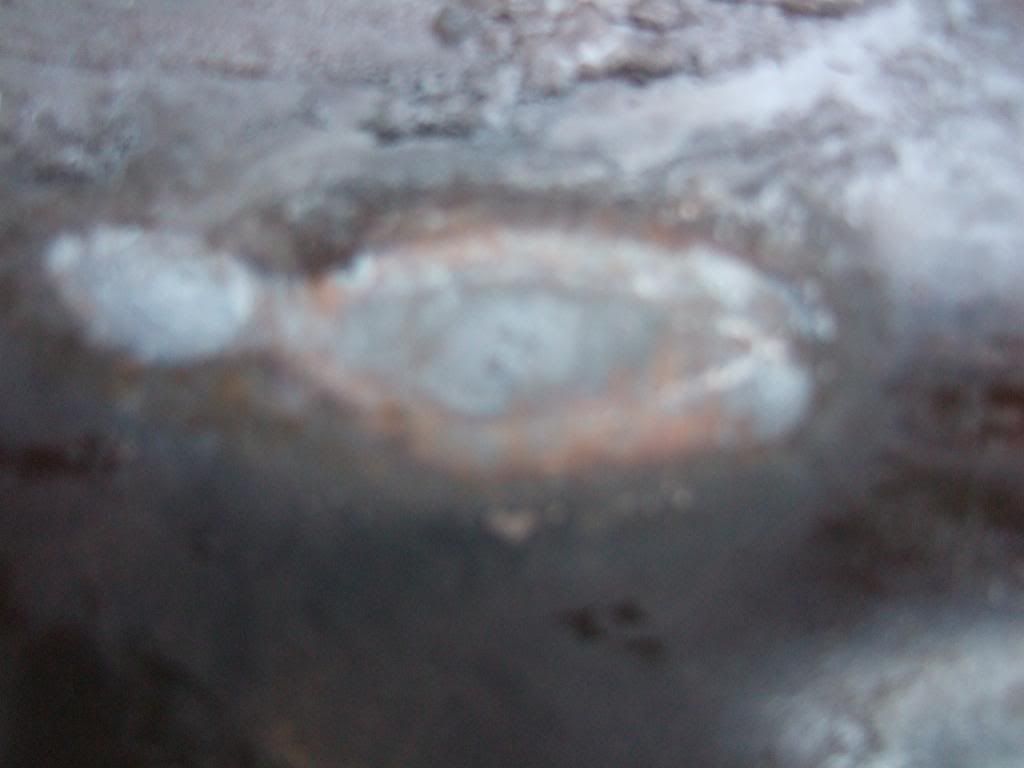
But I know I can't get ahead of myself & my attempt at patching a panel showed this.
I took one of the strips of metal I'd previously removed from my hand brake panel.
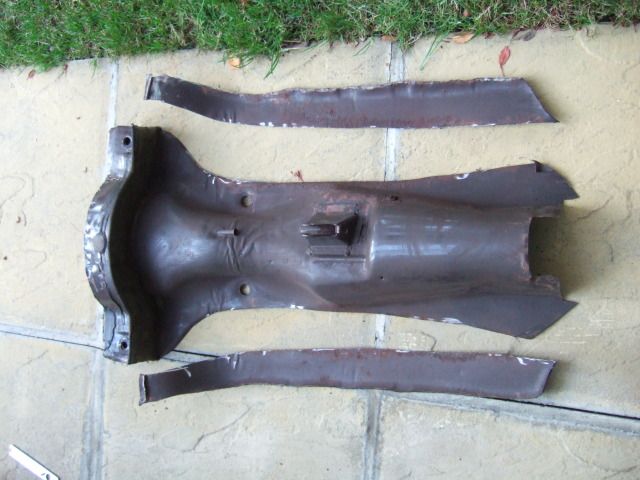
Then I cut two small squares out and tried to weld them back on top of the strip.
Sorry the photos are not great, but here goes...
This is one of the patches, I didn't try to do all sides.
The bottom edge I simply blew straight through the metal (note daylight in the holes).
The left edge I missed completely as I still haven't got used to the mask.
But the top edge wasn't too bad for a first attempt.
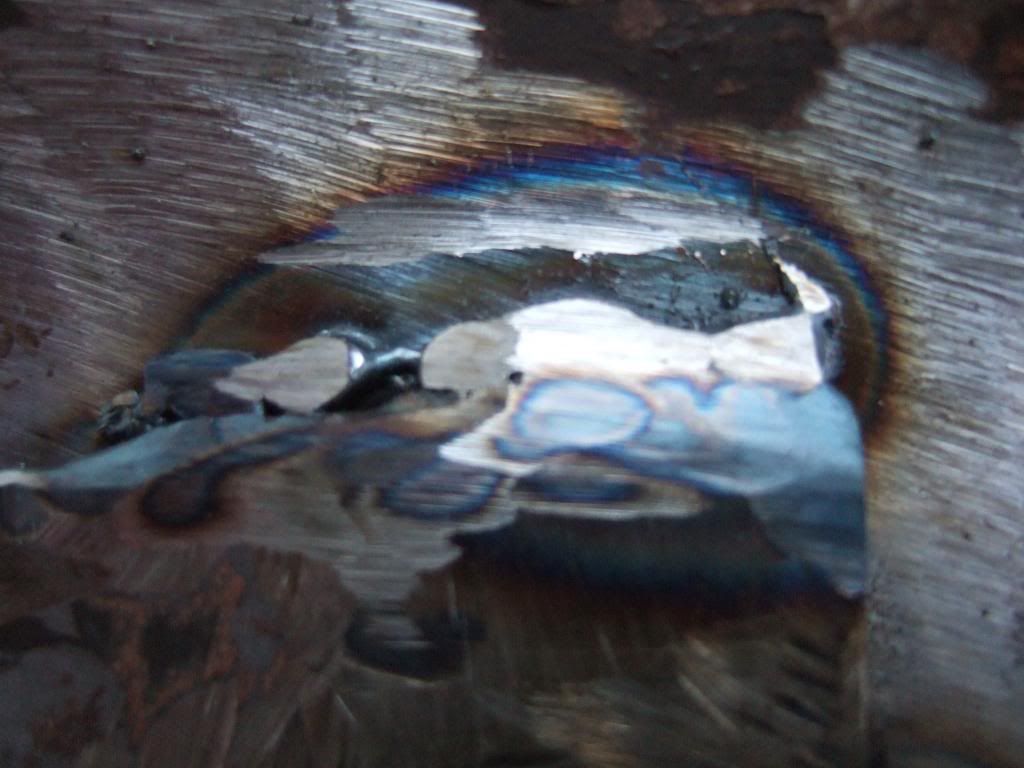
Is this what the metal is supposed to look like on the other side of the weld?
( Again, sorry it is a bit blurred. )
So plenty of room for improvement before I start on the Cordite framework.
Until next time, take care, Paul.
Replies:
SeaNick & AndyP57 - Thanks chaps I will have another go at the head rest template tomorrow.
Although I can't imagine a "scatter cushion" staying in place for long at speed. 
It is definitely wooly hat on weather at the moment and as I type this I still cant feel my toes!
I was having "Little Matchstick Girl" visions of garages with wood burning stoves at the end. 
|
5th February 2013, 15:48
|
|
Senior Member
|
|
Join Date: Jun 2011
Location: birchington, kent
Posts: 1,769
|
|
Theres Some Great Modern Art There... Might Pay For The Build!
Like Nick Said About The Welding, That Takes 26 Years.
|
5th February 2013, 16:02
|
|
Senior Member
|
|
Join Date: Jul 2011
Posts: 490
|
|
'Kudos' for being out there in this weather.
Any progress is progress.
I certainly wouldn't be able to do much out there at the moment - a couple of skinned knuckles and I'd quit!
|
5th February 2013, 16:40
|
|
Senior Member
|
|
Join Date: Apr 2012
Posts: 1,163
|
|
i admire you sticking withit, in my opinion the key to a reasonable mig weld is as much the settings as the technique, you may be better spending some time on a single piece of scrap adjusting the power and wire feed and just doing simple runs until you get a nice straight bead with good penetration, little or no splatter and in the place you want it :-) once you have the settings sussed for the thickness of material your using then move on trying to weld 2 bits together.
As has already been said time is the key ive been welding for years and still struggle with some jobs.
try welding a discovery boot floor in upside down with a piece of weld splatter dropping in your ear!
|
5th February 2013, 21:56
|
|
Senior Member
|
|
Join Date: Nov 2011
Location: Emsworth
Posts: 810
|
|
Hi Paul, Viatron has a good point, that is get hold of some scrap and just keep practicing. To be honest I have always struggled with a MIG outside. You have to turn up the gas so much it gets really expensive. If I may say, on your thin metal welds when you prep the metal to get it clean, try to remove as little metal as possible. Try a sanding disc instead of a grinder.
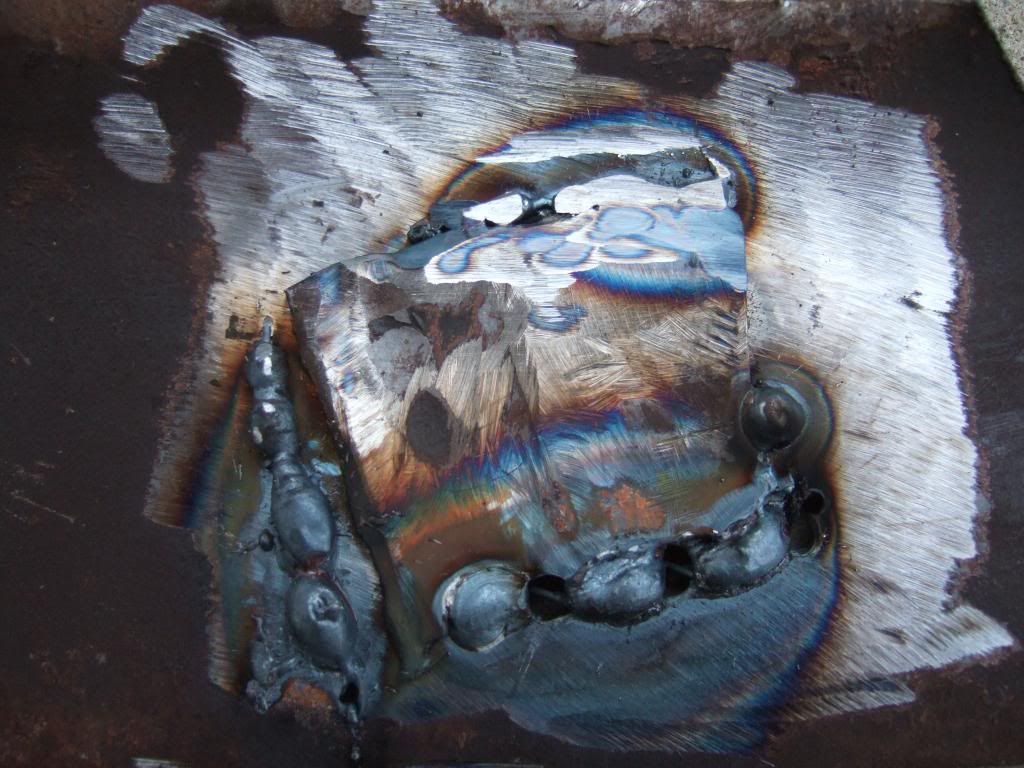
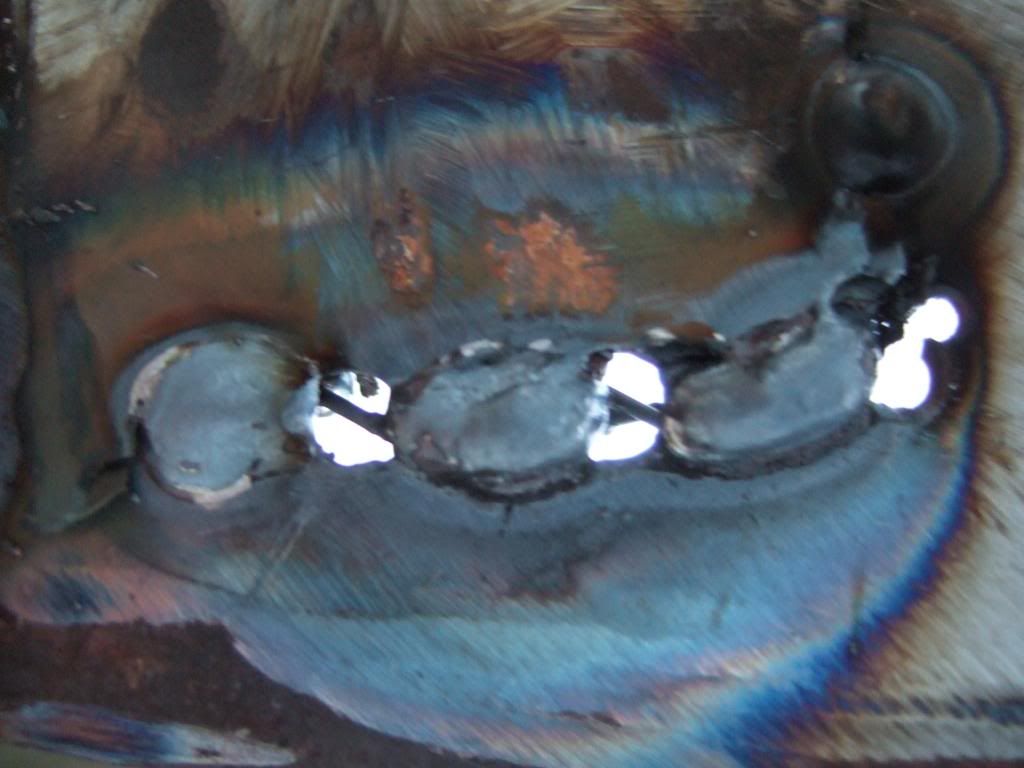
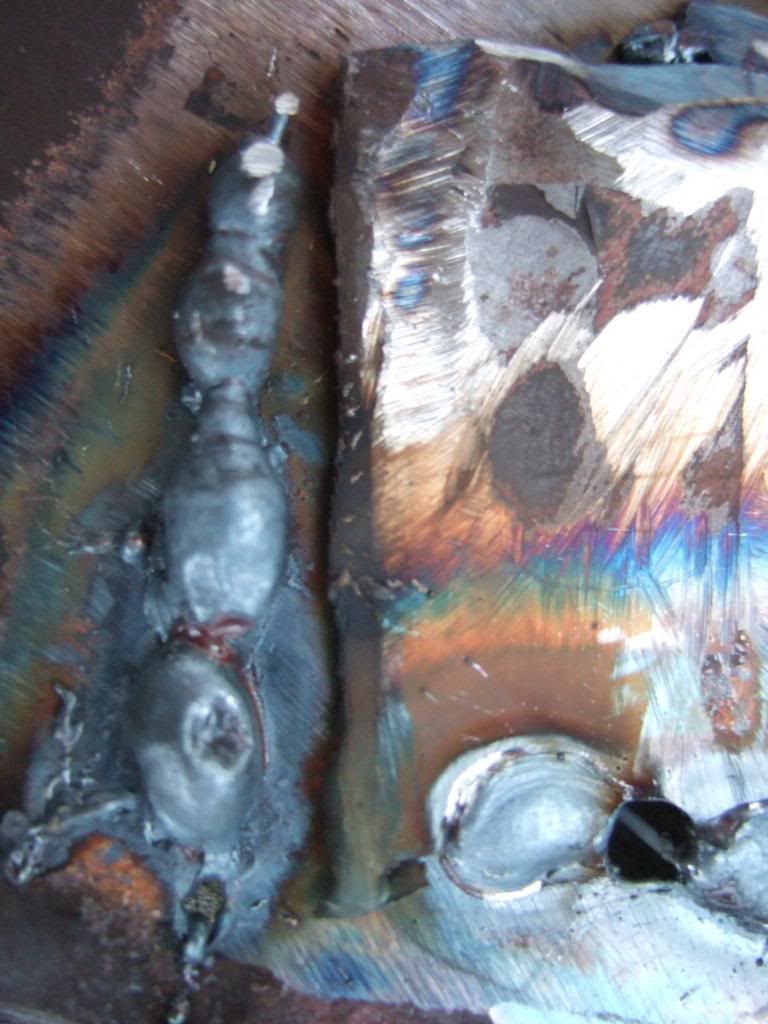
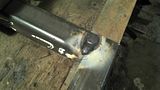
When it comes to your frame I would use an ARc welder as the box has plenty of thickness, and you can weld in a gale of wind-well nearly. I took some pics of a join I did this afternoon on 1" box section.
A bevel on the ends at 30deg, nearly through to the other side, and the millscale removed from the other piece...
[IMG] 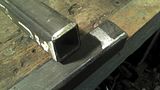 [/IMG]
Then line them up....
[IMG] 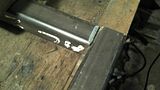 [/IMG]
Run a weld in the groove, leaving the black slag behind....
Remove the slag and do the other edges.....
[IMG] 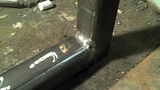 [/IMG]
The great thing is if you gring out the joint first and lay a reasonable weld in there there is no grinding afterwards, as the weld finishes flush.
[IMG]  [/IMG]
However I still left a hole! More practice required!!
[IMG] 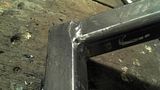 [/IMG]
Hope this helps a bit,
N
|
6th February 2013, 06:14
|
|
Senior Member
|
|
Join Date: Feb 2012
Location: Wembley, London
Posts: 5,056
|
|
GaryH & Nike55 - Cheers, I want to keep little things ticking over if I can.
I know I need to wait for some decent weather to make significant progress.
But hopefully by then I'll know what I want to do, rather than waste a sunny day "thinking".
Viatron & SeaNick - Really appreciate the tips and those photos are great. 
I'm happy to learn from others and that is why this forum is so helpful.
I think I will end up buying buy an ARC welder to go with my mate's MIG.
I might also keep an eye out for some sort of breach "windbreak" to work inside.

Well it is my last day off work today, but weather forecast is pretty grim.*
Hopefully I will still get the chance to tick a few little jobs off the list.
Cheers, Paul.
* In the time it has taken me to write this, the wind & rain are now lashing down outside.
|
6th February 2013, 07:36
|
 |
Senior Member
|
|
Join Date: Jul 2011
Posts: 5,328
|
|
Good effort so far Paul. Practice makes perfect as they say, but I wouldn't get too hung up on acheiving perfect, flowing zig zag welds like Seanick's. That takes years of experience.
Pretty though they undeniably are, everything that needs welding on these cars ends up hidden, so only you'll know what lies beneath. Unless you're an absolute detail freak, so long as it's strong enough to hold the parts together and sealed from the elements, it'll do the job.
I was a bit concerned about my newbie stick welds until I tried to remove a couple of seatbelt brackets I'd welded to the frame after a redesign - they were well and truly fixed in place to my surprise and delight.
So, my advice would be to follow an expensive brand of training shoes for people to walk to the off-licence in's marketing slogan and Just Do It!  |
6th February 2013, 10:00
|
|
Senior Member
|
|
Join Date: Feb 2012
Location: Wembley, London
Posts: 5,056
|
|
Rain stops play...
Whilst the heavy rain first thing this morning did stop, which allowed me to play outside for a bit.
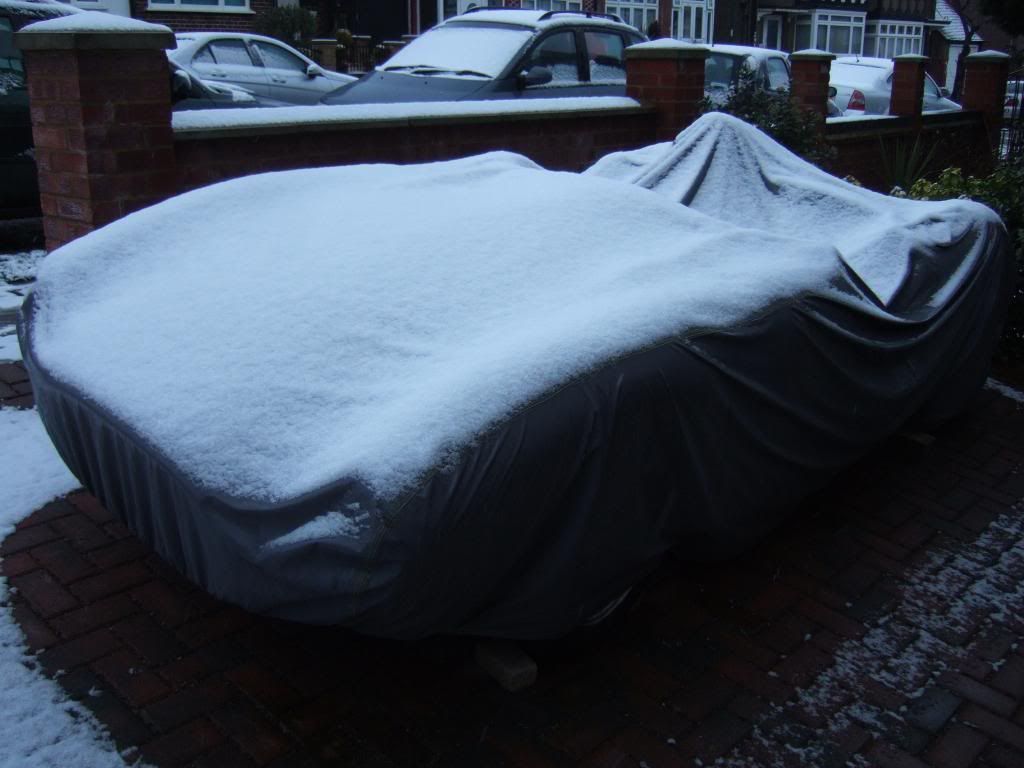
Unfortunately, it did return & once again, I had to quickly throw everything into the porch & cover the car.
But for once, I'm not really complaining as it gives me an excuse to thaw out indoors by my computer.
No sign of the snow that other areas are experiencing, but it is still very cold out & too windy to weld.
Still, I did make some progress while I was outside...
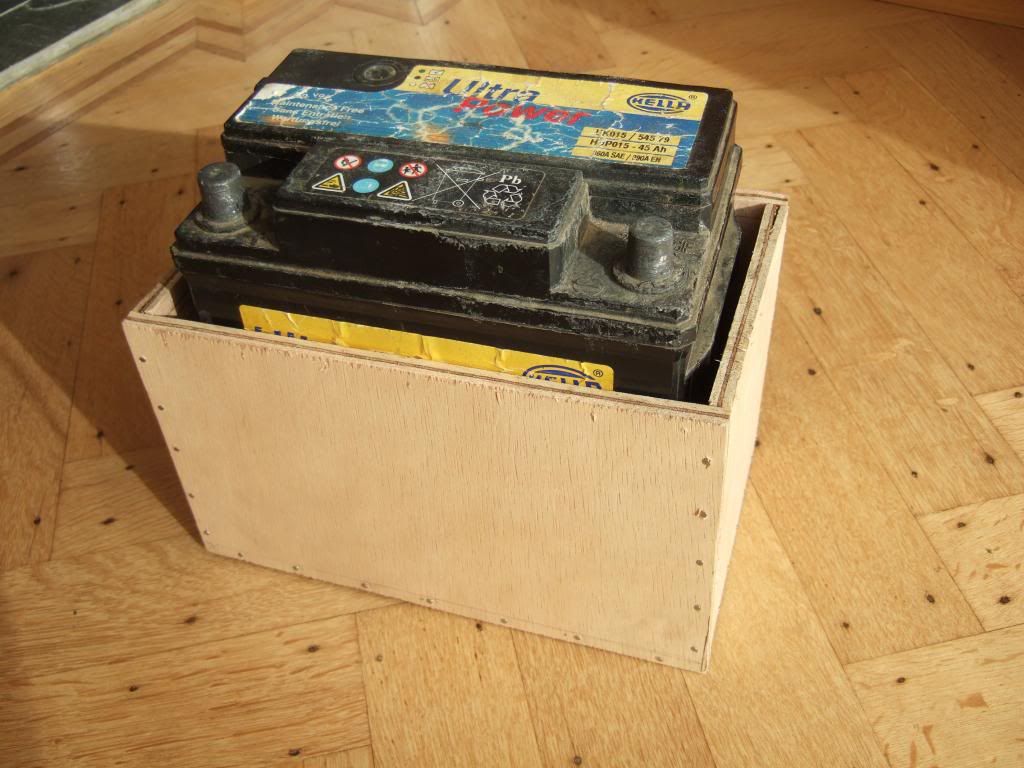
Battery Box - Part 3:
I have now decided that rather than reinforce my plywood box with fibreglass, I will use it as a mould.
Then I can make the whole battery tray out of fibreglass, including a supporting "lip" around the top edge.
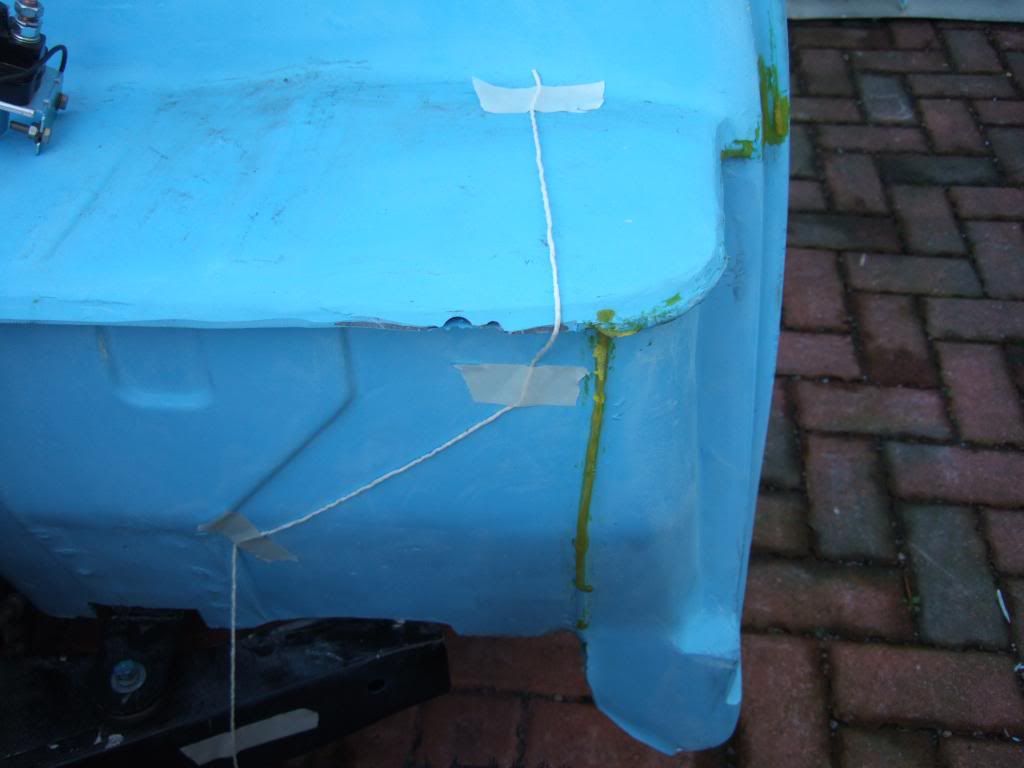
But for now, it was time to make a "hole" in the bulk head to drop the battery box into.
I remembered Simon ( DonnySoutherner) saying he cut more of his bulk head than was required…
Note - I will steal his idea of supporting the box through the frame when I am finished.
So I offered my box up underneath the bulk head as there are frame & fibre glass areas to avoid.
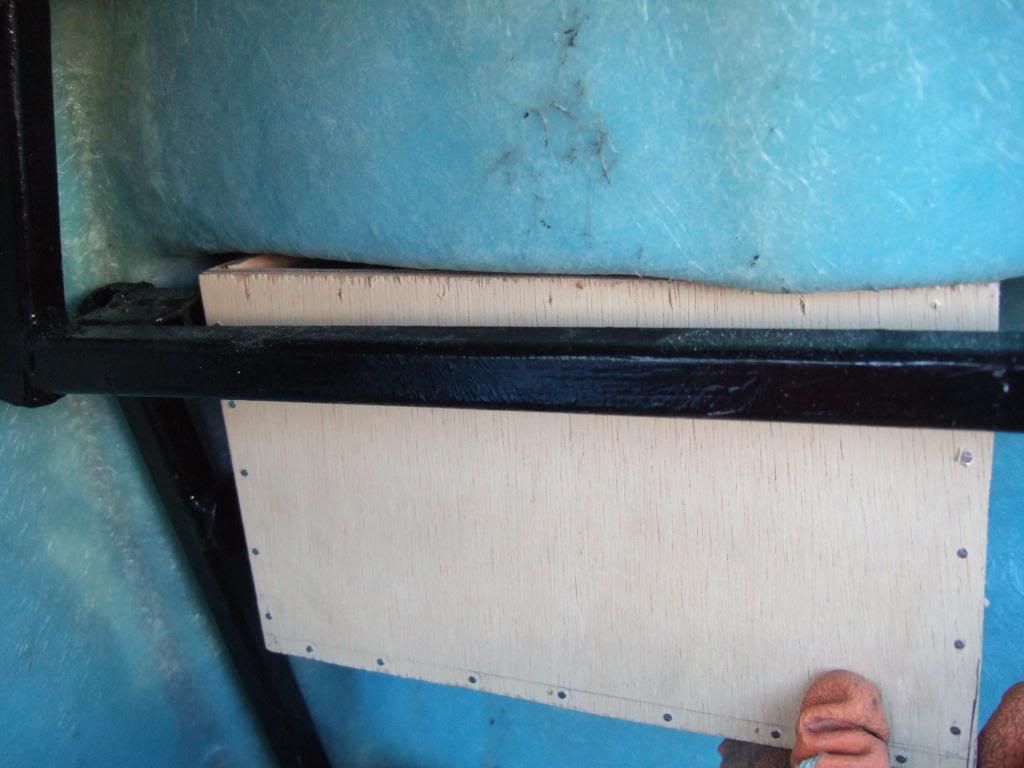
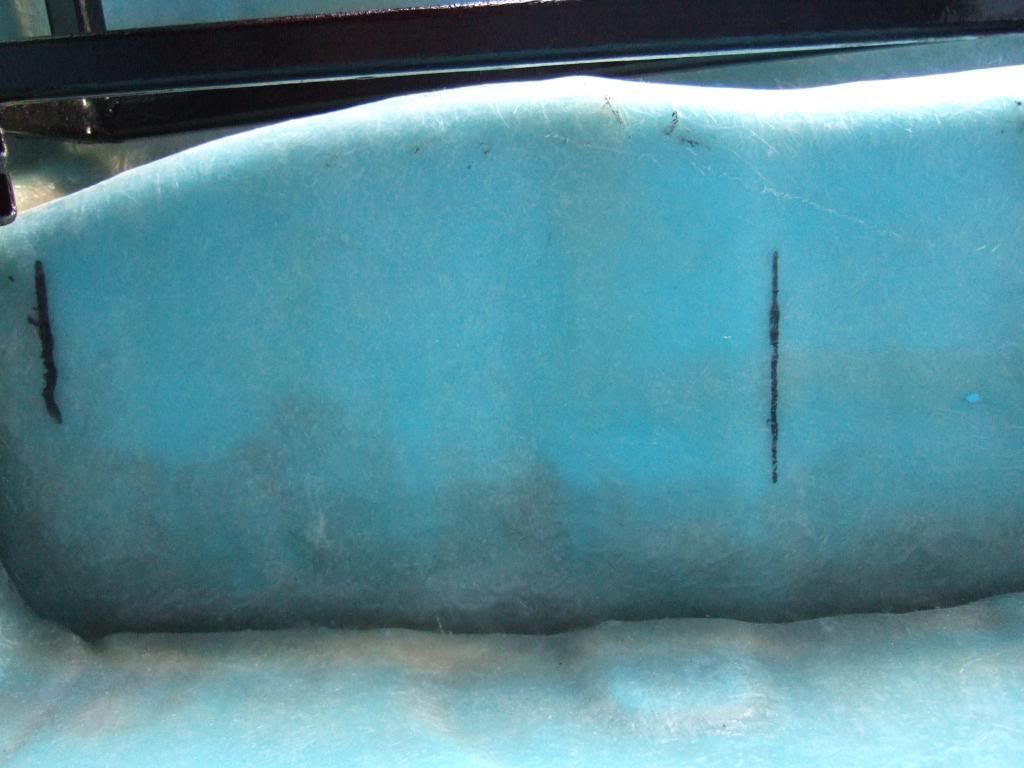
This allowed me to draw a couple of guide lines below & drill some pilot hole though to align above.
( The first photo is taken underneath, so the bottom of the photo is behind the front of the bulk head.
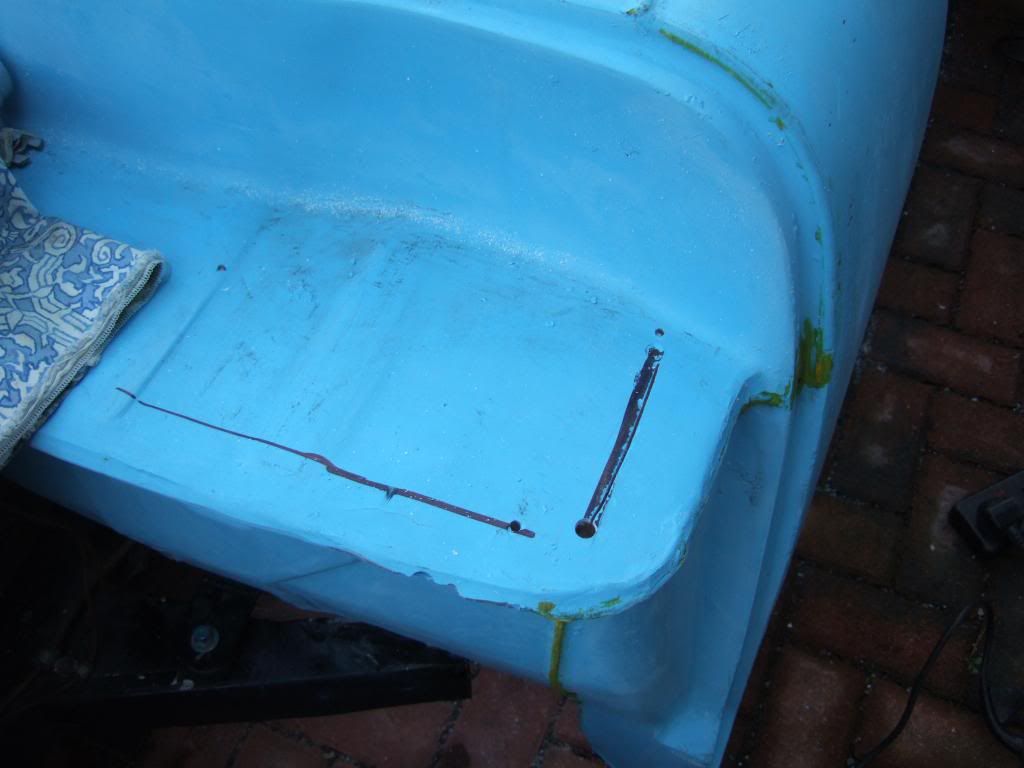
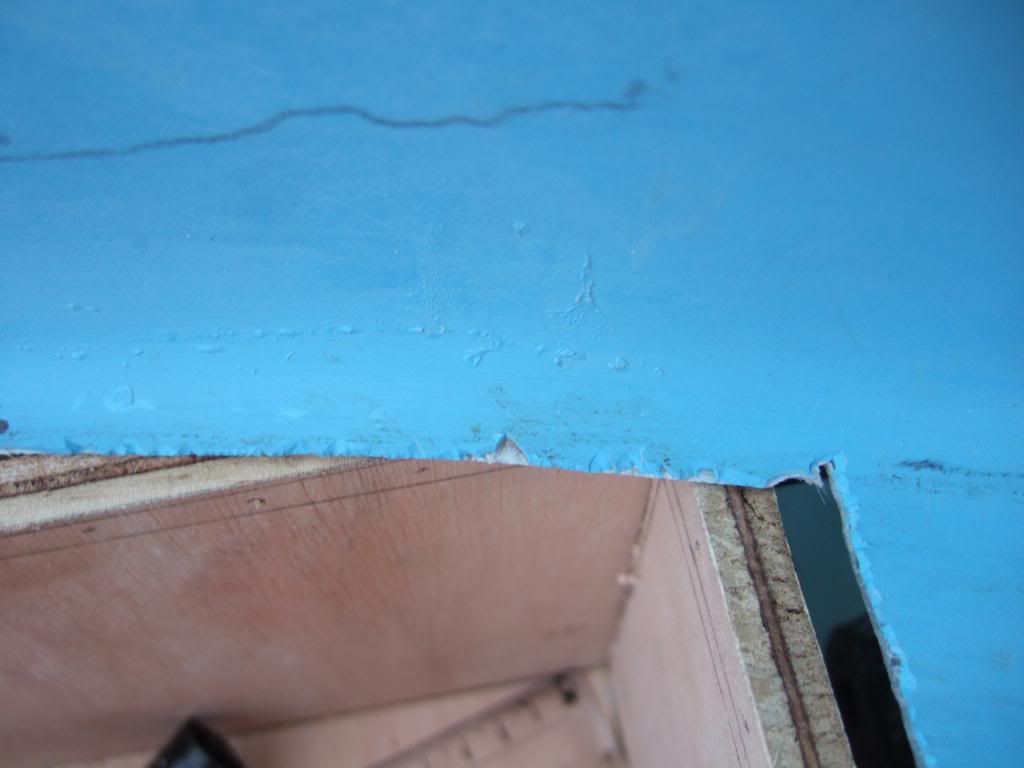
Then it was a case of drilling bigger holes to allow room for my jigsaw to cut the hole out.
This is bulkhead front edge & you can see how deep the fibre glass is due to the bulk head shape.
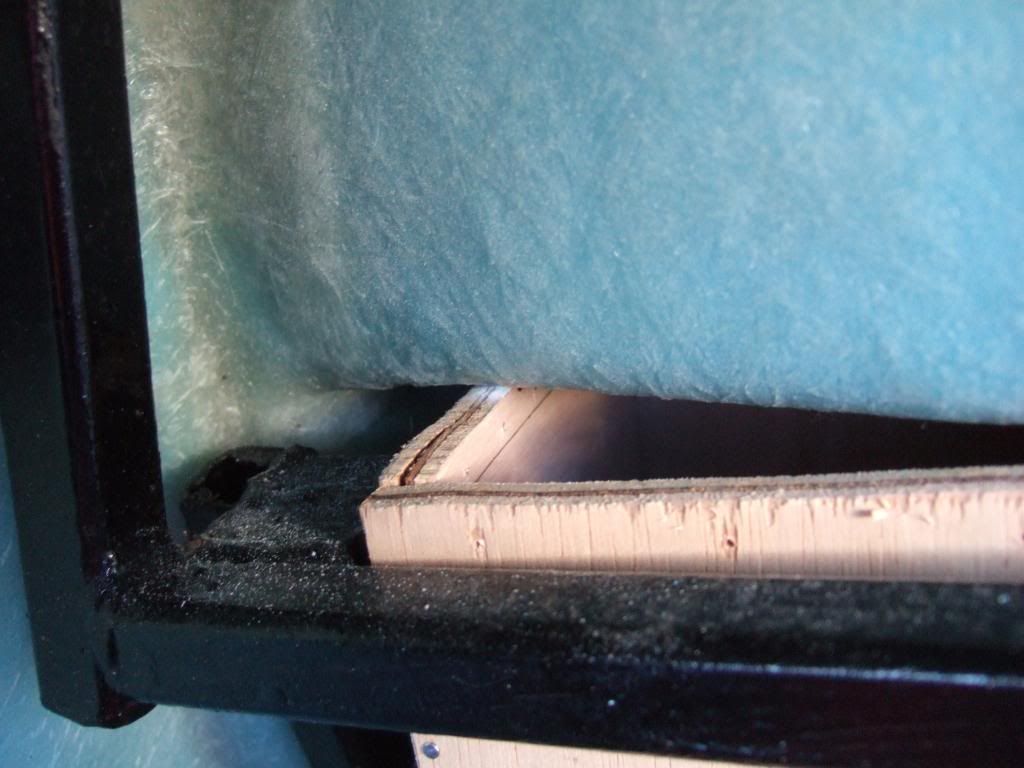
Once I offered the box back up to my initial hole, I knew there was still work to do in that corner.
( Note: The box was proving quite a useful place to store things! )
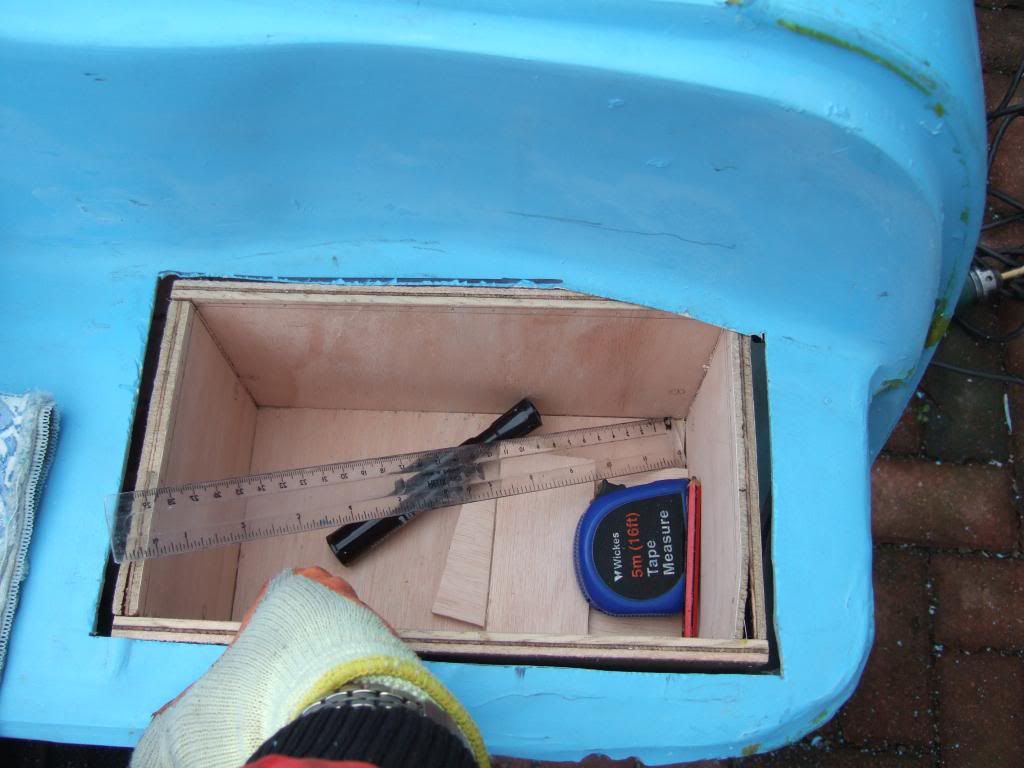
So I had to take quite a chunk out to let the box fit neatly, which will be repaired another day.
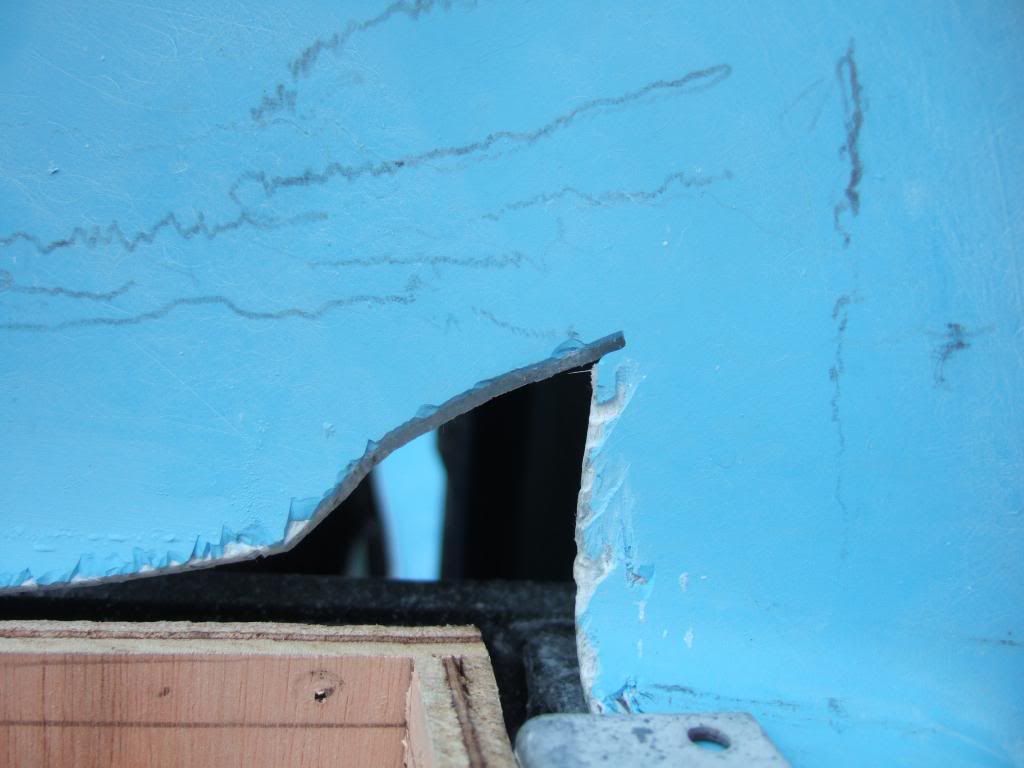
I just tacked on a couple of corner brackets to hold the box in place for now.
The gaps all around were to allow for the addition width of fibre glass around the ply.
No doubt, a bit of fine tuning will be required when the final box is finished.
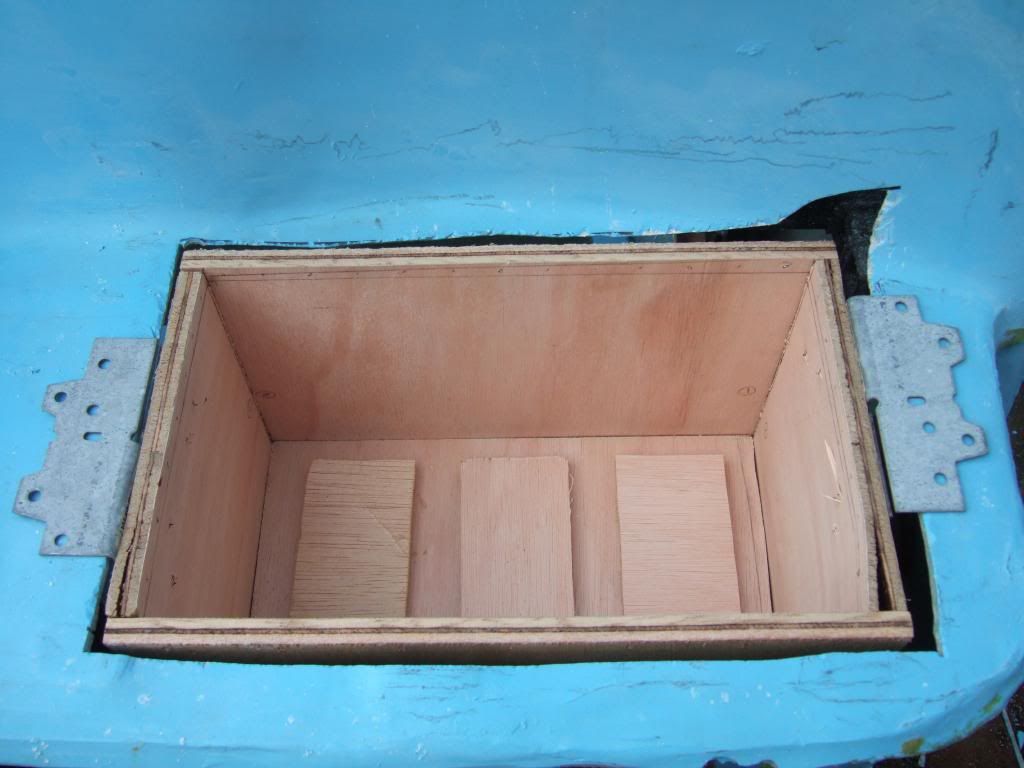
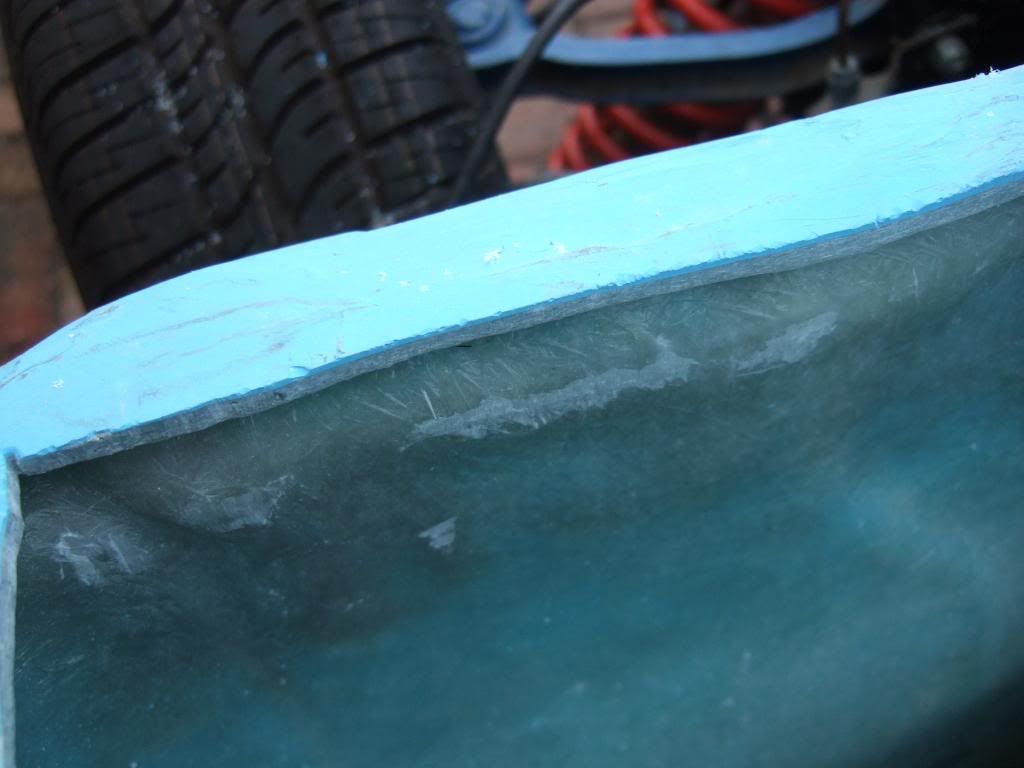
Here is the view from below & you can see the limiting factors in that corner clearly.
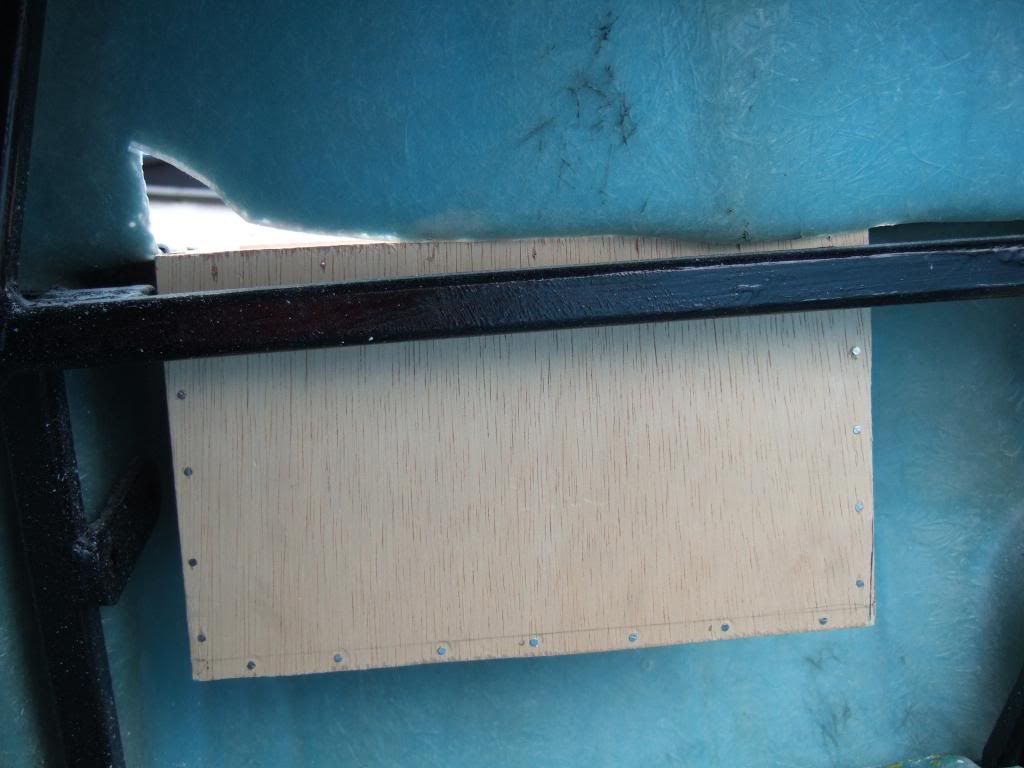
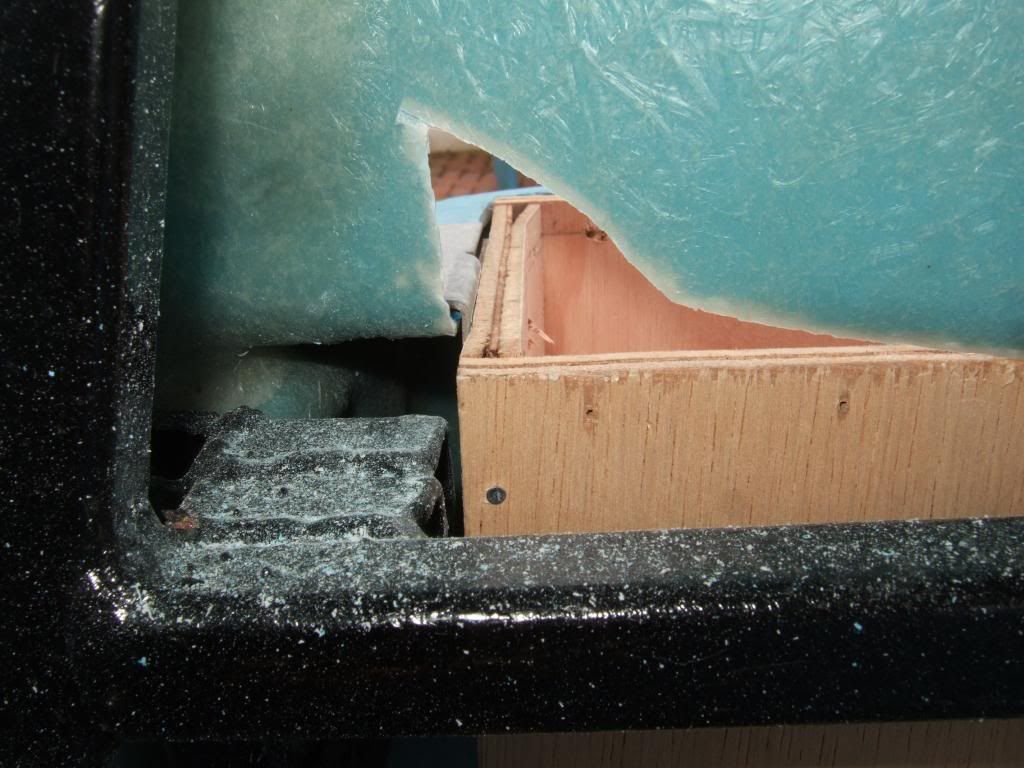
Still some work to do before this job is complete, but another step in the right direction.
And I am really pleased with my "Before" & "After" photos.

Note: The before was actually taken in July as there is definitely no sunshine today!
OK, well I am still cold, so I might nip to B&Q to get the sanding disc SeaNick mentioned.
As I might need my heated car seats to fully restore feeling in my "back end"!
Cheers, Paul.
Replies:
Mister Towed - Thanks mate, it is reassuring that your seat belt brackets wouldn't budge.
I was actually planning to re-read your thread on your welding experience for inspiration.
|
6th February 2013, 20:02
|
|
Senior Member
|
|
Join Date: Mar 2012
Location: Doncaster
Posts: 116
|
|
Hi Paul, it's going really well I see. Nearly caught me up given my three months off with a broken leg. back at work now but living away from home temporarily, so still no car work. Hope to be back to it again soon. Might be following you by then.
|
8th February 2013, 21:04
|
|
Senior Member
|
|
Join Date: Feb 2012
Location: Wembley, London
Posts: 5,056
|
|
Ended up spending Wednesday afternoon doing domestic chores rather than continuing to work on the car.
Although I did get the chance to do one small job, that was thankfully indoors in the warmth...
Cordite Specific Wiring Diagram:
I cross checked my lighting circuit wiring diagram and thankfully it seems OK, apart from one thing I'd missed.
I had forgotten that the headlight switch is also linked to the lights illuminating dashboard dials & gauges!
So I have modified my diagram accordingly & will re-print it here when I know wire colours for side repeaters.
I've now started on the wiring diagram for running the engine (something I've already done in practise).
Welding Update:
I had an Amazon gift voucher which I have now used towards a basic auto-darkening welding helmet.
This will hopefully allow me to see what I am doing before I start welding, which can only help.
There will also be the added bonus of freeing up my left hand from holding the mask in place too.

I'll keep an eye on Ebay for a decent second hand ARC welder for a few weeks, before buying new if I have to.
Depending on what the weather is doing, I will try to get some more practise in some time over the weekend.
Cordite Frame Work Modifications:
And I certainly need the practise as here is my current list of welding jobs:
- Add a "box" to a vertical bulk head frame rail to allow the steering column to pass through.
- Cut and reposition the three frame rails that meet at a point behind the top/front of dash board body work.
- Fix seat belt mounting plates into position, adding additional bracing to frame work where required.
- Extend framework under the dash to provide mounting points to attach the steering column to.
- Match passenger foot well rails so floor pan will sit flush (currently one frame rail is lower than the other).
- Rearrange driver's side footwell rails to allow the pedals to clear the floor pan when depressed fully.
- Reposition front bulk head frame mounting plates to give better alignment with chassis mounting points.
- Add brackets to frame to provide additional support for the battery box when fitted.
- Raise the driver's side lower outside corner bulk head mounting point so that it sits inside the bulk head. *
( * Unless other frame modifications lower body shell sufficiently for this current problem to go away. )
But it is not all welding work, as I have a few simple drilling & cutting modification jobs to do too:
- Drill 2 holes in frame to match original seat belt mounting points in Spitfire hand brake panel.
- Drill 4 holes in Cordite's frame "spine" to allow additional bolting down through main Spitfire chassis rails.
- Remove all traces of the original seat belt mounting plates.
- Remove the body shell fixing bracket on the side of the pedal mounting plate.
That just leaves a few other odd jobs I need to make a final decision on:
- Add a vertical mounting plate to attach the accelerator pedal (might just re-inforce the fibre glass).
- Add mounting plate below dash for choke lever (& maybe hazard light switch & milometer trip reset).
Note:
As always, this is a legacy of the Cordite frame design, which has been re-designed in the Ribble Navigator.
Other Welding Work Required:
- Weld bonnet hinge mounting brackets to front of chassis rails (after re-body inspection).
- Weld the bracket used to pivot the handbrake mechanism back to the panel it broke off from.
Until next time, take care, Paul.
Replies:
DonnySoutherner - Cheers Simon, but I think it will be a while yet before I start over taking you.
Last edited by Paul L; 9th February 2013 at 05:51..
Reason: Typos
|
9th February 2013, 07:57
|
|
Senior Member
|
|
Join Date: Jul 2011
Posts: 5,328
|
|
Looks like you've got a busy morning's work to get through that list. What're you going to do in the afternoon? |
10th February 2013, 07:25
|
|
Senior Member
|
|
Join Date: Feb 2012
Location: Wembley, London
Posts: 5,056
|
|
Another wash out weather wise yesterday & I was doing odd jobs round my mum's house too.
More Welding Shopping:
In addition to the auto-darkening welding helmet, I've picked up / ordered a few more bits...
Some welding gloves...

A book on welding (despite the title it was recommended as a good book for beginners)...

Some extra clamps...

And some more metal files....
 Metal Filing:
I take SeaNick's point about nice welds (see his example posted above) reducing the filing required.
But I wanted to tidy up one of the "boxes" I'd made the other day, just to see how long it would take.
I'd already taken an angle grinder to the flat outside edges, but this wouldn't reach the inside edges.
So I sat down with my new files and slowly, but surely, got rid of the excess metal on the welds...
I know I could tidy this piece up some more, but this is really just part of my learning phase.
So I gave it a quick coat of primer to see what difference that would make to it.
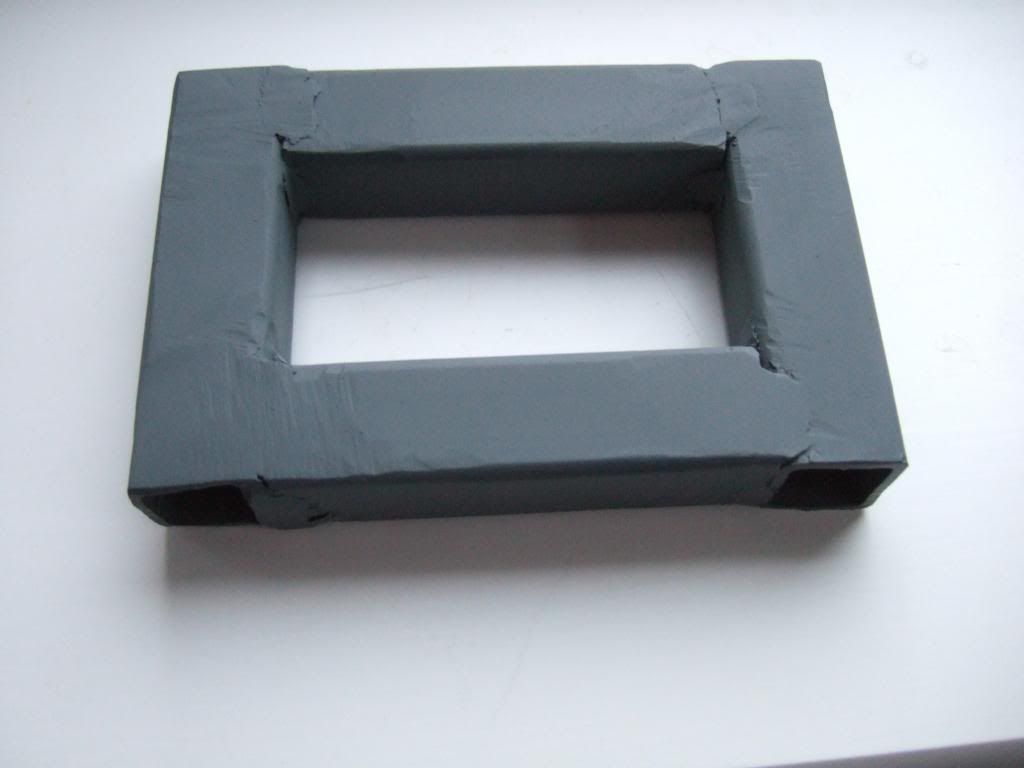
I know I have a long way to go, but this little piece does give me real hope.
Next Steps:
Well it is still raining this morning & snow is forecast for the afternoon.
But if I can take a few measurements, there is some more parts shopping I can do later on.
Other indoor activities will also include working on my wiring diagrams.
Plus I've another idea for shaping my front indicator mounting, but that does need me outside for a bit.
Cheers, Paul.
Replies:
Mister Towed - Half a day's work my ar$e!
I did re-read your first attempts at welding and it is great to see how far you have come.
|
10th February 2013, 20:23
|
 |
Senior Member
|
|
Join Date: May 2011
Location: Somerset
Posts: 1,671
|
|
Flap wheels in your angle grinder are your friend when learning to weld!
|
12th February 2013, 18:25
|
|
Senior Member
|
|
Join Date: Feb 2012
Location: Wembley, London
Posts: 5,056
|
|
There was no escaping the rubbish weather at the weekend, this was Monday morning...
 Welding Book:
Whilst the weather has prevented me practising my welding, I've have been reading my "Farm Welding" book.
I can highly recommend it for beginners as it uses lots of pictures to explain the techniques it is describing.
Especially when it comes to what "good penetration" is supposed to look like on the other side of the weld.
I'm now looking forward to putting some of the book's tips into practise and seeing what difference it makes.
Brake Master Cylinder - A Final Decision:
Much as though it pains me to abandon my Spitfire 1500 tandem master cylinder, it has to go.
The reality is there is just too much fabrication required to keep it & the work needed would look pig ugly too!
So I am just waiting for the supplier of an upgraded "single line" master cylinder to get a delivery of push rods.
This will allow me to sell my old master cylinder "whole" on Ebay, without providing him with an exchange part.
This is the same part and supplier that Mister Towed used on his build:

My donor came with a spare length of brake pipe which I will now use to join the new M/C with existing pipes.
It just needs to reach a new three way joint where the existing tandem M/C pipes will be re-routed.
( Note: I posted some pictures of this joint the last time I was discussing my options a while back. )
If possible, I'll just bend the tandem pipes into their new position without removing their existing fittings.
Which leads me nicely into another brake related mod I am planning to make…
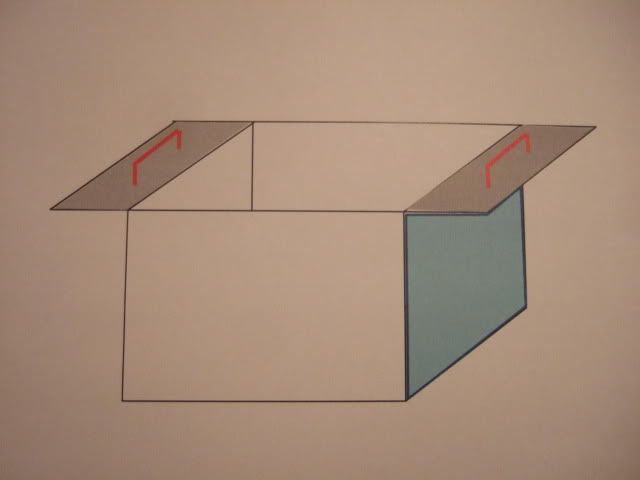
Brake & Clutch Pedal Mounting:
Previously, DonnySoutherner removed the front sections of his Spitfire clutch & brake pedal mounts.
This was due to the fact there wasn't a big enough gap between the pedal mounting plate & the bulk head.
I've now decided to keep my pedal mounts "whole" & remodel my bulk head to accommodate them instead.
Hopefully you can see the section from the original bulk head that all three pedals were mounted to here.
( Excuse the poor quality, I was taking a photo of a printed photo. )
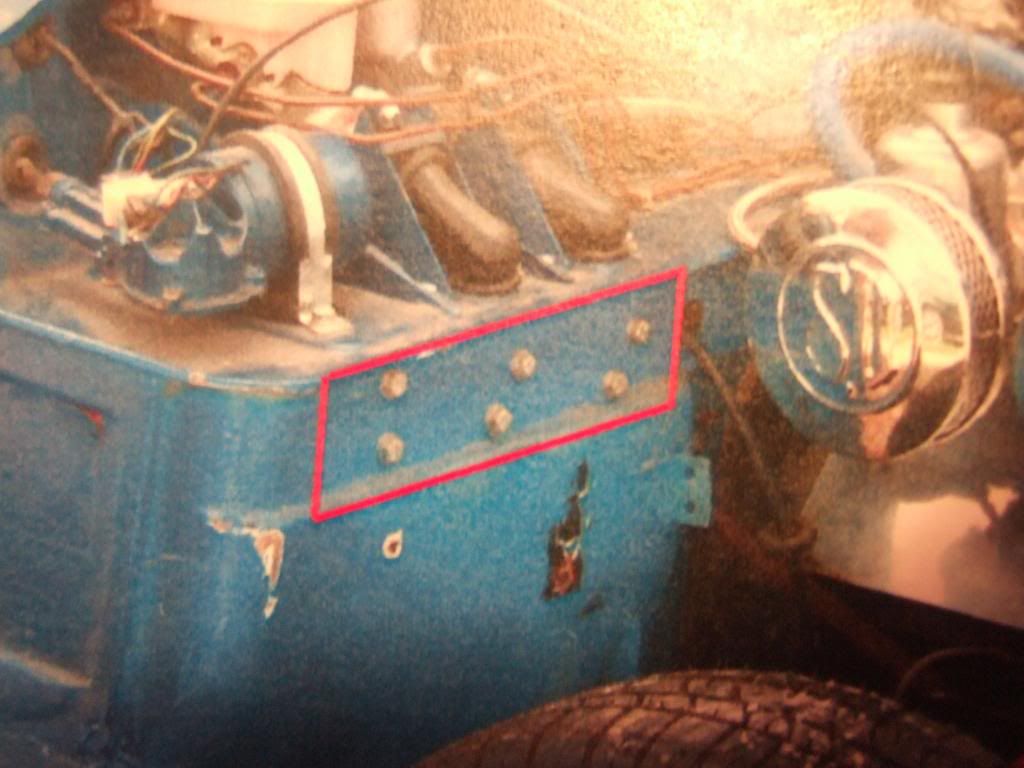
I intend to cut out a strip from my fibreglass bulkhead equivalent to the red section highlighted above.
Although I need to double check the pedal movement first, just in case this section needs to be deeper.
Once the pedals are mounted to the Cordite framework, this will show how far this section will stick out.
Then I will be able to build 4 "sides" from fibre glass to join the section I've cut out back to the bulk head.
I will also cut out a section of the sheet metal my mate gave me to attach to the front face of fibre glass.
This will provide additional support for the accelerator pedal without the need to modify the Cordite frame.
Time for another Power Point sketch which I hope makes this easier to visualise (as always, not to scale)…
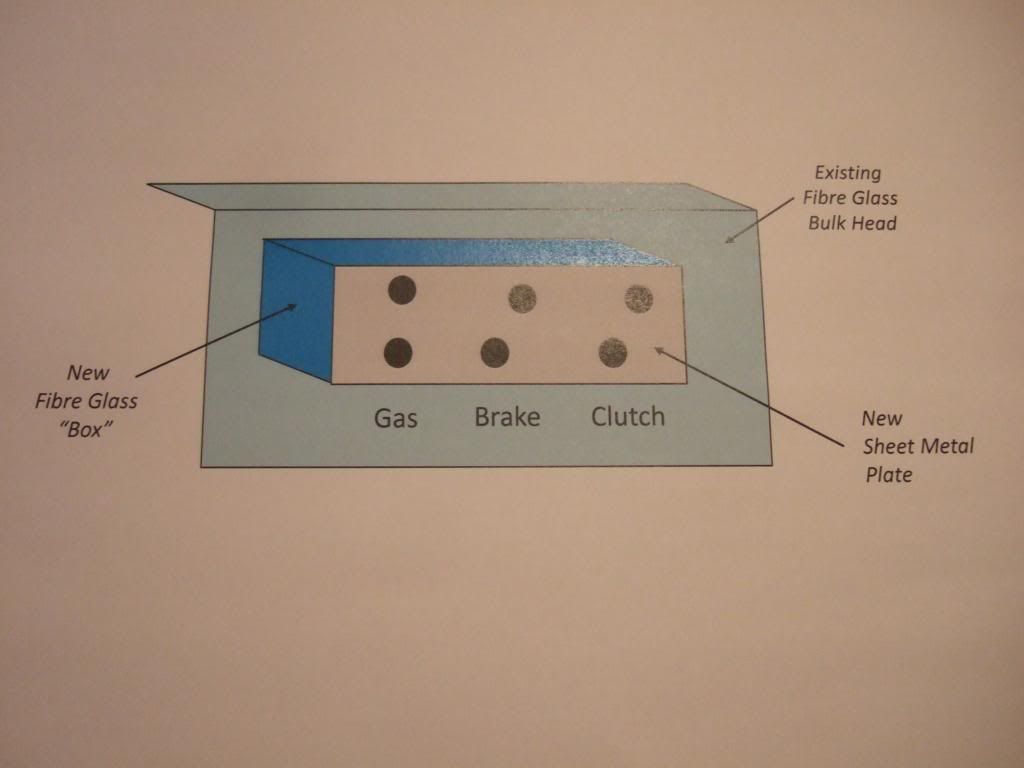
The sheet metal might end up inside this fibre glass bulk head "extension", but I'll worry about that later.
Mounting the pedals will also help me understand the frame mods required to provide pedal clearance.
I might have a go at that over the weekend if the weather holds.
Cheers, Paul.
Replies:
DaveCymru - Cheers.
|
|
Currently Active Users Viewing This Thread: 7 (0 members and 7 guests)
|
|
|
 Posting Rules
|
You may not post new threads
You may not post replies
You may not post attachments
You may not edit your posts
HTML code is Off
|
|
|
All times are GMT +0. The time now is 05:15.
|


 Linear Mode

