|
|
| Tribute Automotive Builds Discuss your Tribute kit build |

14th June 2021, 09:32
|
|
Senior Member
|
|
Join Date: Nov 2017
Posts: 109
|
|
I cant quite work out what's going on here... is that a trailer board, for towing, or is that the "clunky" reverse & fog lights you referred to? Do you have any pics taken at normal standing height, and at a slight angle please, to give an idea of the depth of those lights? I'm really struggling to find a set of rear lights I like, and have looked at something similar, but wasn't sure how well they'd sit on a curved rear, so any extra pics would be really handy.
Thanks.
|
14th June 2021, 16:18
|
|
Senior Member
|
|
Join Date: Aug 2012
Posts: 2,143
|
|
I used the Lucas rear number plate light which doubles up as a reversing light. The fog light I fitted was right under the body and could only be seen from the back. I think the style of the lights doesn't need to be messed with for a "classic" look !
|
15th June 2021, 13:48
|
 |
Senior Member
|
|
Join Date: May 2014
Location: Oxon
Posts: 1,118
|
|
Quote:
Originally Posted by kon

I cant quite work out what's going on here...
|
These should explain it, Kon- the lighting units are multi-function lorry/trailer lights that I partially shrouded with the number plate. With experience they are too large and certainly do not match my original ideas for the car. |
15th June 2021, 13:53
|
|
Senior Member
|
|
Join Date: May 2014
Location: Oxon
Posts: 1,118
|
|
Quote:
Originally Posted by Lucky@LeMans
I used the Lucas rear number plate light which doubles up as a reversing light. The fog light I fitted was right under the body and could only be seen from the back. I think the style of the lights doesn't need to be messed with for a "classic" look !
|
I did consider the combined reversing/number plate light but I also wanted better integrated lights rather than the afterthought fog light. The latest incarnation is closer to my original ideas.
Due to the curvature of the body at that point, a better solution may be to mount the lights and the number plate on the same sheet of metal or plastic. |
15th June 2021, 16:23
|
|
Senior Member
|
|
Join Date: Aug 2012
Posts: 2,143
|
|
I know what you mean about the fog light, it does look like an add on, which it is ! Typical of cars from the 60's - 70's, they were rarely integrated into the other lights.
To be honest I can't remember the last time I turned on a fog light in my daily driver, let alone a kit car that only comes out in the summer during good weather, they are redundant for the most part. Fit one for the mot and remove it when you get home !
|
17th June 2021, 13:01
|
|
Senior Member
|
|
Join Date: Nov 2017
Posts: 109
|
|
Thanks Ian, yup all makes sense now. I like your second attempt (post #24), looks like they'd blend in very nicely to a slightly extended number-plate plynth, similar to what you'd find on the front of an MX5, to allow you mount them flush, and hide the screws.
For the fogs, what do you think about using a pair from a Fiesta, in place of the reflectors currently at bottom?
 |
17th June 2021, 15:09
|
 |
Senior Member
|
|
Join Date: Feb 2012
Location: Wembley, London
Posts: 5,056
|
|
IanA – Apologies for turning up late to your new build thread.
I got these cheap and cheerful Reflector / LED Fog Lights from Ebay / China.

They have the option to be stop / tail lights, but I wired them together to create fog lights.

They are normal reflectors until you connect then to power, at which point they become very bright lights.
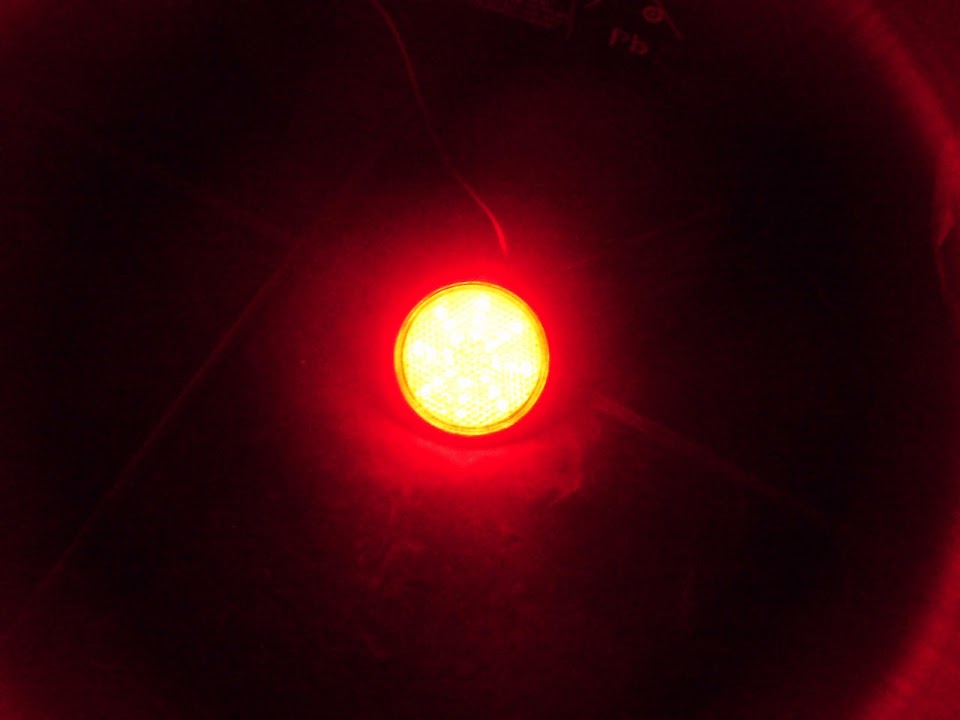

After adding an original Lucas reflector suround I had this.

Hope that helps.
Good luck, Paul. 
|
17th June 2021, 17:17
|
|
Senior Member
|
|
Join Date: May 2014
Location: Oxon
Posts: 1,118
|
|
Good shout, Paul.
I have similar but in orange as side indicator repeaters. Yes they are very bright when you wire them to use all of their LEDs.
Guess I didn't know that they are available in red.
Watch this space!!!
Last edited by IanA; 17th June 2021 at 17:21..
Reason: Ordered a pair.
|
17th June 2021, 17:51
|
|
Senior Member
|
|
Join Date: May 2014
Location: Oxon
Posts: 1,118
|
|
Quote:
Originally Posted by kon
...For the fogs, what do you think about using a pair from a Fiesta, in place of the reflectors currently at bottom?
|
Thanks for that, Kon. As it is supposedly emulating a 1960's car I think basic is better- see Paul's suggestion for the round lights. Being flat, they don't even need to be frenched in. Not sure my GRP skills could handle that. |
17th June 2021, 20:42
|
|
Senior Member
Enthusiast
|
|
Join Date: Jun 2015
Location: Reading, Berkshire
Posts: 688
|
|
I stole Paul’s idea regarding the led reflector fogs.
I like how they look clean on the back of my Kobra. You need reflectors for MOT and this way you get two fogs that look quite period.
Dave
|
18th June 2021, 08:00
|
|
Senior Member
|
|
Join Date: May 2014
Location: Oxon
Posts: 1,118
|
|
 I speak your weight
Whilst out and about yesterday I took the opportunity to visit a public weighbridge. Car with some fuel and empty boot- 1315kg.
|
18th June 2021, 11:19
|
 |
Senior Member
|
|
Join Date: Sep 2011
Posts: 1,446
|
|
looking good
|
28th June 2021, 20:16
|
|
Senior Member
|
|
Join Date: May 2014
Location: Oxon
Posts: 1,118
|
|
Now for the finalights
Thanks to Lucky for the example and Paul for the suggestion.
I've just fitted the combined reversing and number plate unit along with the reflector/LED rear fog lights. Some adjustments required but I'm very pleased with the results and hope to keep them like that. Just need to fill in the colander-holed bootlid from versions 1 & 2.
I've started on the rear bodywork with the DA sander using 600 grit discs- just a matter of time before the etch primer goes on. Roll on the next heatwave- it's raining here now.
Last edited by IanA; 28th June 2021 at 20:19..
|
29th June 2021, 08:30
|
|
Senior Member
|
|
Join Date: Aug 2012
Posts: 2,143
|
|
Looking good Ian ! How much of a dip did you find on the top of the rear wigs each side of the boot lid ? That was the only area of my kit that needed any extra work. Goes together very quickly otherwise.
|
29th June 2021, 19:48
|
|
Senior Member
|
|
Join Date: May 2014
Location: Oxon
Posts: 1,118
|
|
Thanks. It's only a few mm where the mould splits and restoring that contour line at the boot aperture is not the problem. It's the shaping of the filler to blend in away from there that I'm interested in. The Oberg file has done it's stuff, then the second cut file (I skipped the bastard cut) and now the 600 grit disc is doing the business. The rest of the body is smoothing out well, I've got rid of most of the seams and very little filler will be required elsewhere. I will fill in the number plate light recess- it needs to be flat there. I trial fitted some round door mirrors today- another success. As it's my everyday car, I need to keep it road legal between completion activities.
|
29th June 2021, 22:18
|
|
Senior Member
|
|
Join Date: Aug 2012
Posts: 2,143
|
|
The easiest filler I found to work with on GRP is "Bad Boy" Plastic Filler. It mixes into a really soft paste that remains slightly flexible when cured. Sands nicely too and blends in without problem.
I don't know if its an approved method but I use a 12"or 18" flexible plastic ruler to blend the filler to roughly the right shape of the panel. It gets the contours very close so minimal sanding is required.
|
30th June 2021, 08:16
|
|
Senior Member
|
|
Join Date: May 2014
Location: Oxon
Posts: 1,118
|
|
Quote:
Originally Posted by Lucky@LeMans
The easiest filler I found to work with on GRP is "Bad Boy" Plastic Filler...
|
"Big Boy" filler? There's a wide range on eBay. I'm using Plastic Padding flexible filler (now Terason). That's easy to sand as well.
I used Isopon P40 (now U-Pol) on the door mirror recesses followed by the PP stuff for the final skim. I'll do the same on the number plate light recess. |
1st July 2021, 16:45
|
|
Senior Member
|
|
Join Date: May 2014
Location: Oxon
Posts: 1,118
|
|
Quote:
Originally Posted by Lucky@LeMans
... I use a 12"or 18" flexible plastic ruler to blend the filler to roughly the right shape of the panel...
|
Good idea- I use a steel rule covered in cling film.
Pics show that I've started with the etching primer on the sills and boot lid. There are a few pinholes and I've not decided whether to fill them or let the high-build primer (the yellow patch on the door) cover them up. |
1st July 2021, 22:22
|
|
Senior Member
|
|
Join Date: Aug 2012
Posts: 2,143
|
|
[QUOTE=IanA;106572]Good idea- I use a steel rule covered in cling film.
The idea with the plastic ruler is that it is easy to bend to the right contour as you pull it across the panel to spread the filler.
|
2nd July 2021, 07:14
|
 |
Senior Member
|
|
Join Date: Jan 2014
Location: Egham, Surrey
Posts: 1,780
|
|
Dolphin Glaze is a very fine filler that is ideal for filling pinholes. Putting primer on thickly to try and fill them will normally cause runs and it will probably cause more problems.
I would give it a coat of Upol Reface before primer. It can be put on with a small gloss roller if you don't have access to a decent compressor.
|
|
Currently Active Users Viewing This Thread: 1 (0 members and 1 guests)
|
|
|
 Posting Rules
|
You may not post new threads
You may not post replies
You may not post attachments
You may not edit your posts
HTML code is Off
|
|
|
All times are GMT +0. The time now is 11:11.
|


 Linear Mode

