Are you madabout kit cars      
 "We've Got Kit Cars Covered" Information about Madabout-Kitcars.com Contact Madabout-Kitcars.com         Home of UK kit cars - madabout-kitcars.com Various kit car write ups All the latest kit car news Kit car related and general discussion

Search
Manufacturers
Kit Cars
Kit Car Data sheets
Picture Gallery
SVA Knowledgebase
Clubs & Communities
Build cost estimator
Kit cars for sale
Knowledge Base 
KitcarUSA.com
Classic-Kitcars.com
 

Go Back   Madabout Kitcars Forum > Mad Build Area > Tribute Automotive Builds

Tribute Automotive Builds Discuss your Tribute kit build

Reply
 
Thread Tools Display Modes
  #1  
Old 14th September 2017, 18:39
Jaguartvr's Avatar
Jaguartvr Jaguartvr is offline
Senior Member
 
Join Date: Jan 2014
Location: Egham, Surrey
Posts: 1,780
Jaguartvr is on a distinguished road
Default Z3 seat bushes-Warning

Replaced the seat bushes today as the seat was rocking badly. Bought them from Ebay about £13 (M12 3mm nylon washers would probably do the job just as well with a bit of trimming for a couple of quid).

Quite an easy job, refitted the seat, put the front runner nuts on first and thought the seat was a bit sluggish as I moved it forward to fit the rear bolts. I then tried to move the seat back and it wouldn't budge. Fortunately I hadn't fully tightened the front nuts so was just able to get a spanner on them, I do mean just, took almost 2 hours to get them undone!
There are 2 small Torx screws that hold the runner rail, on one side I had over tightened them which caused the problem so be careful. I thought at one point I was going to have to cut the seat out with an angle grinser.
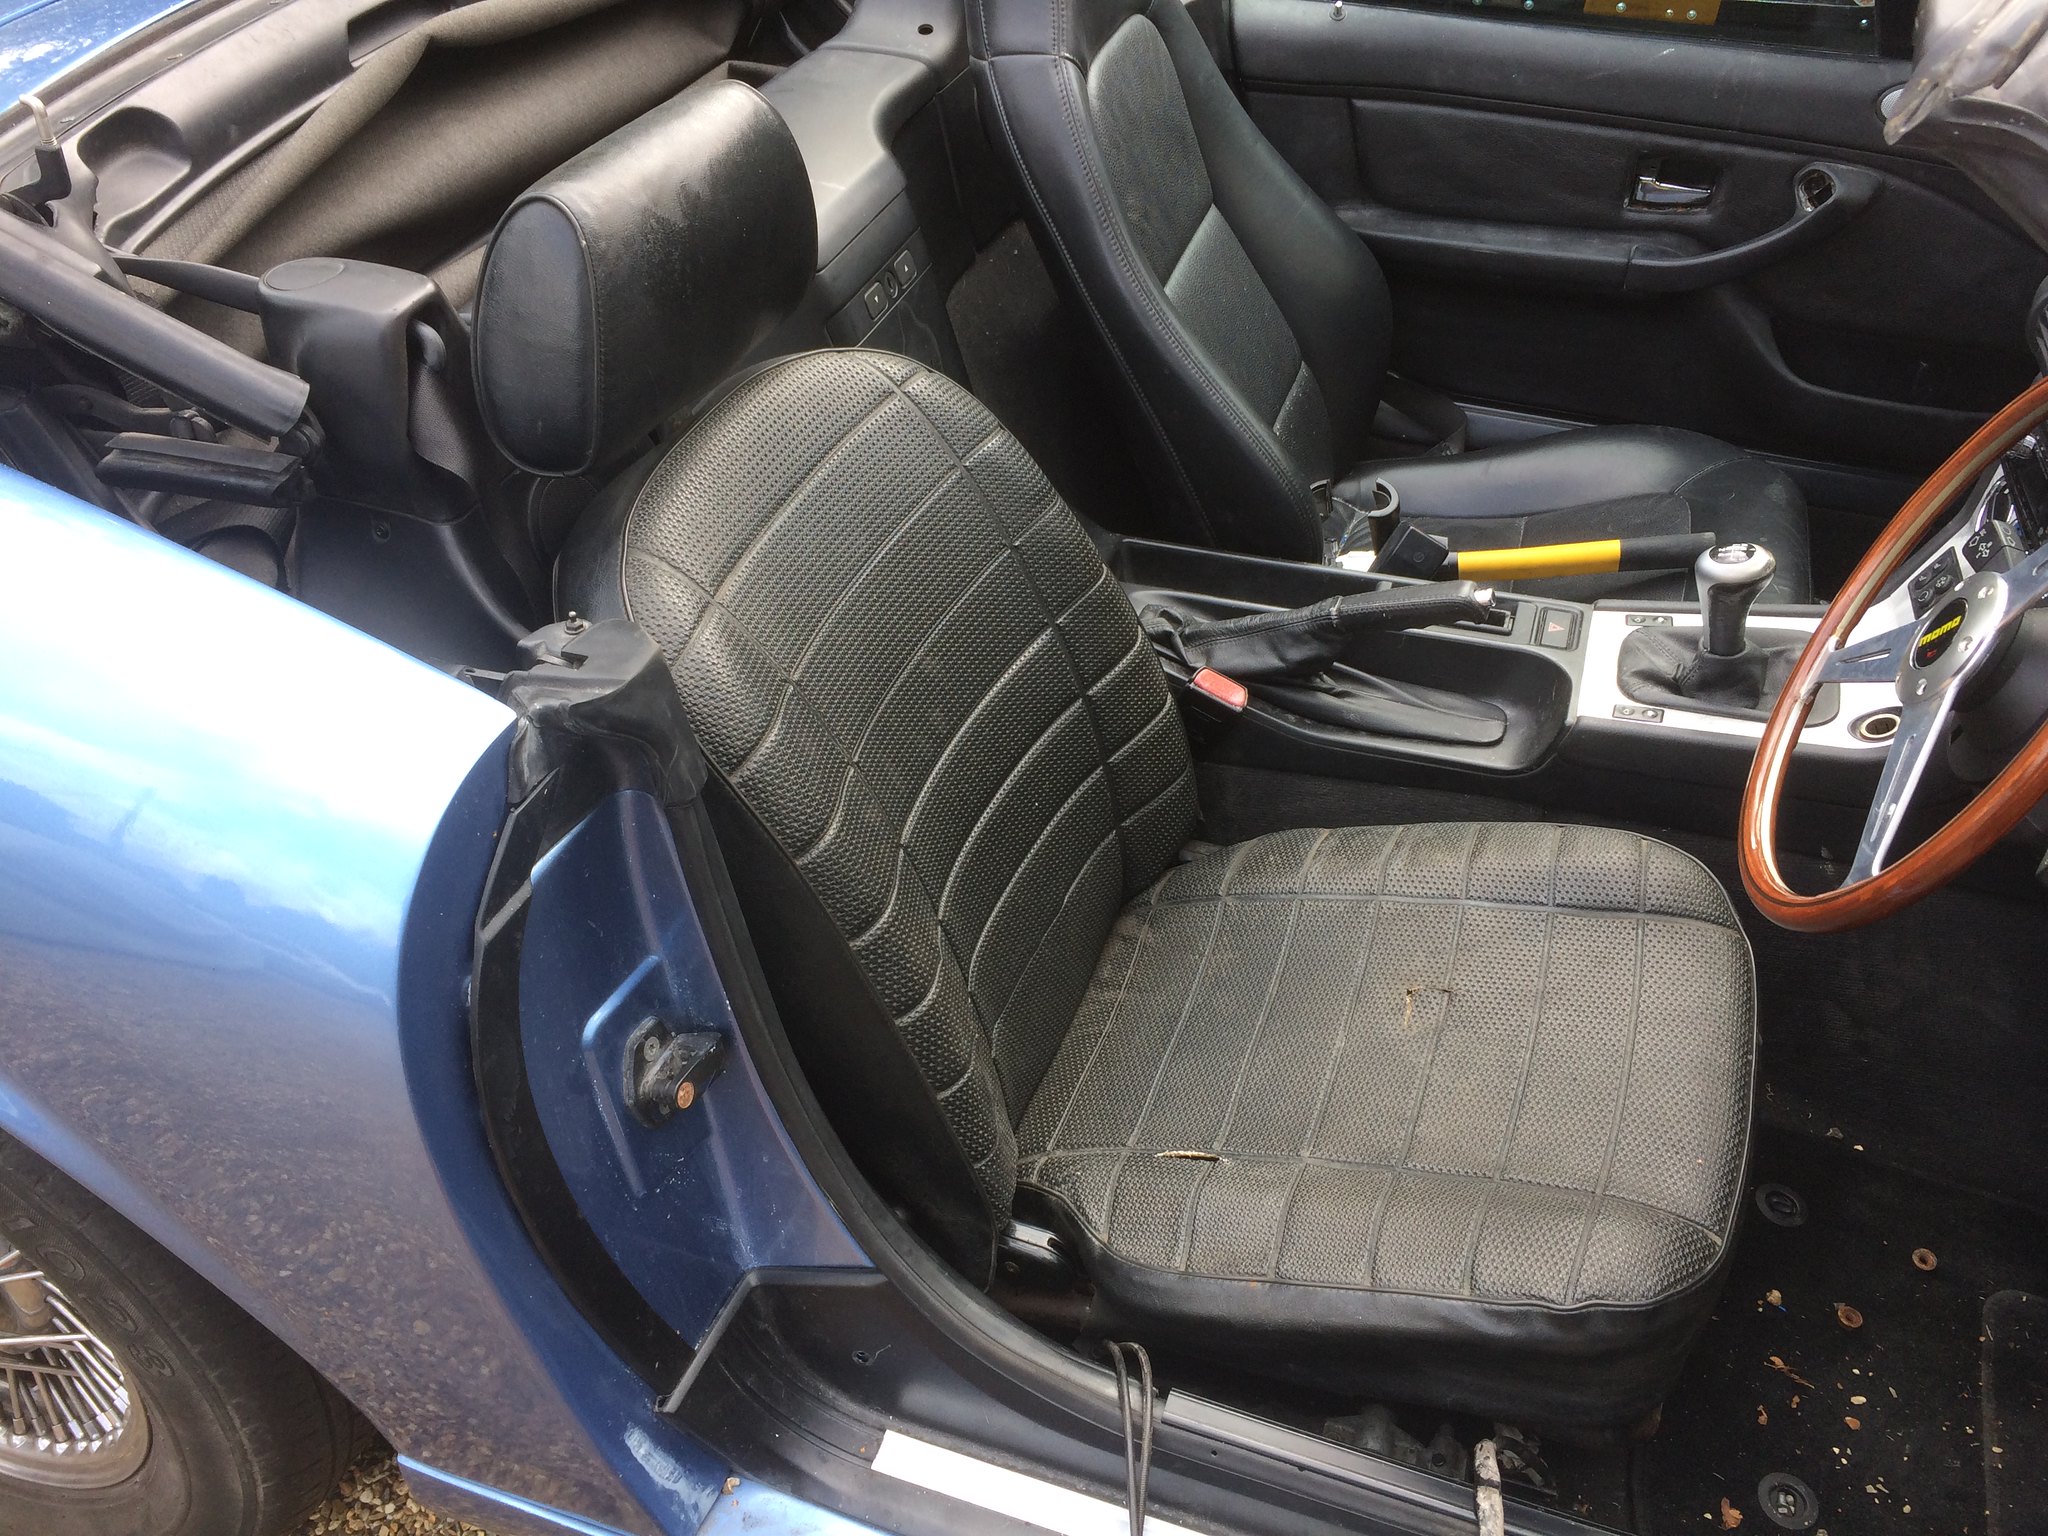
While the seat was out, I removed it to see how the MGB seat would look and I think it will work well. It is going to have to have new seat foams and some leather covers without headrests, a job for another time when funds become available.
MGB seat just placed on the seat runner to see how it looks. It will be fitted with leather seat covers in the "hump" style with headrests.

IMG_2535-1 by jaguartvr, on Flickr

Last edited by Jaguartvr; 16th September 2017 at 11:10..
Reply With Quote
Available from eBay
  #2  
Old 22nd September 2017, 18:10
WorldClassAccident WorldClassAccident is offline
Senior Member
 
Join Date: Nov 2011
Posts: 3,558
WorldClassAccident is on a distinguished road
Default

https://www.thingiverse.com/thing:1592443/#files
Reply With Quote
  #3  
Old 23rd September 2017, 09:01
Jaguartvr's Avatar
Jaguartvr Jaguartvr is offline
Senior Member
 
Join Date: Jan 2014
Location: Egham, Surrey
Posts: 1,780
Jaguartvr is on a distinguished road
Default

Severe lack of knowledge (and lack of a 3D printer) limits my use.
Very useful if you can print them yourself.
Reply With Quote
  #4  
Old 23rd September 2017, 09:59
WorldClassAccident WorldClassAccident is offline
Senior Member
 
Join Date: Nov 2011
Posts: 3,558
WorldClassAccident is on a distinguished road
Default

I bought a 3d printer kit for £155 delivered and have been looking for something useful to print ever since.

Really simple to use, you file the STL file you want on Thingiverse, download it, connect to the printer and print it.

My first 20mm X 20mm X 200mm test cube came out at 20.03MM X 19.94mm X 19.98mm which I was impressed with.

So far I have printed a couple of bits to improve the printer and a phone case.

Until I get a computer capable of running CAD and producing the STL for OBJ files myself I can only print other peoples designs.
Reply With Quote
  #5  
Old 23rd September 2017, 10:11
Jaguartvr's Avatar
Jaguartvr Jaguartvr is offline
Senior Member
 
Join Date: Jan 2014
Location: Egham, Surrey
Posts: 1,780
Jaguartvr is on a distinguished road
Default

It would help if I didn't have the IQ of a 5 year old.

To everyone else with a Z3,WCA wants to practice making seat packers for the experience!

I always though CAD was Cardboard Aided Design.
Reply With Quote
  #6  
Old 23rd September 2017, 11:02
WorldClassAccident WorldClassAccident is offline
Senior Member
 
Join Date: Nov 2011
Posts: 3,558
WorldClassAccident is on a distinguished road
Default

My traditional CAD for animated door hinge design


Reply With Quote
  #7  
Old 29th September 2017, 09:10
WorldClassAccident WorldClassAccident is offline
Senior Member
 
Join Date: Nov 2011
Posts: 3,558
WorldClassAccident is on a distinguished road
Default

I printed 2 sets plus a spare. 40 minutes to print and about 10p of PETG filament. Just need to clean them up and fit them now.

20170929_100157 by WCA!, on Flickr


Now printing a 'tool tidy' for the garage. 4 hour print!
20170929_103822 by WCA!, on Flickr

Last edited by WorldClassAccident; 29th September 2017 at 09:43..
Reply With Quote
Reply


Currently Active Users Viewing This Thread: 1 (0 members and 1 guests)
 
Thread Tools
Display Modes

Posting Rules
You may not post new threads
You may not post replies
You may not post attachments
You may not edit your posts

BB code is On
Smilies are On
[IMG] code is On
HTML code is Off

Forum Jump


All times are GMT +0. The time now is 18:52.

copyright © madabout-kitcars.com 2000-2024
terms and conditions | privacy policy