|
|
| Sammio Builds and discussions Sammio bodied car builds and specials |

9th April 2015, 14:45
|
 |
Senior Member
|
|
Join Date: Feb 2012
Location: Wembley, London
Posts: 5,056
|
|

8 Valve Ed - It is the impact on my productivity that is the biggest pain about working without a garage.
I dread to think of the number of hours I have spent covering/uncovering the car & unpacking/packing parts & tools.  Rene
Rene - Something tells me if I don't get this car finished soon, my family will be the ones kicking me out! 
- - - - - - - - - - - - - - - - - - - - - - - - - - - - - - -
Some Progress:
The sun was shining, I was feeling better, but due to other stuff I had limited time on the car today. 
I painted the inside corners of the bulkhead where the fibreglass & filler had been done.


So at least this repair job is now finished.
- - - - - - - - - - - - - - - - - - - - - - - - - - - - - - -
Floor, Frame Work & Rear Wheel Arches:
I removed this bracket so I could start working on the passenger side.

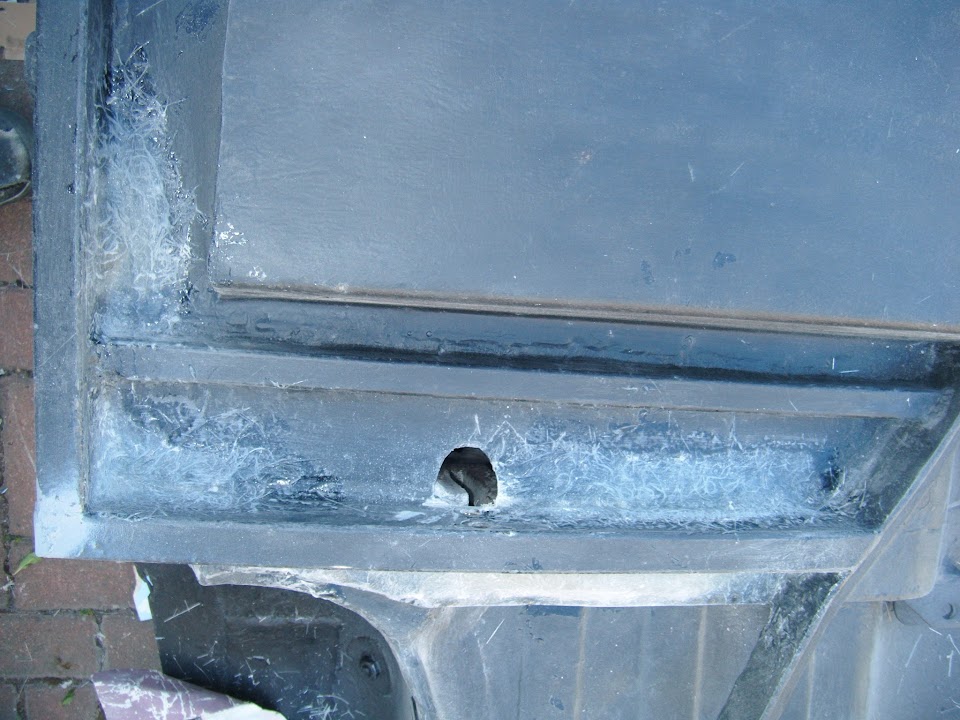
It was a straight forward job to prepare three of the holes for fibre glassing.
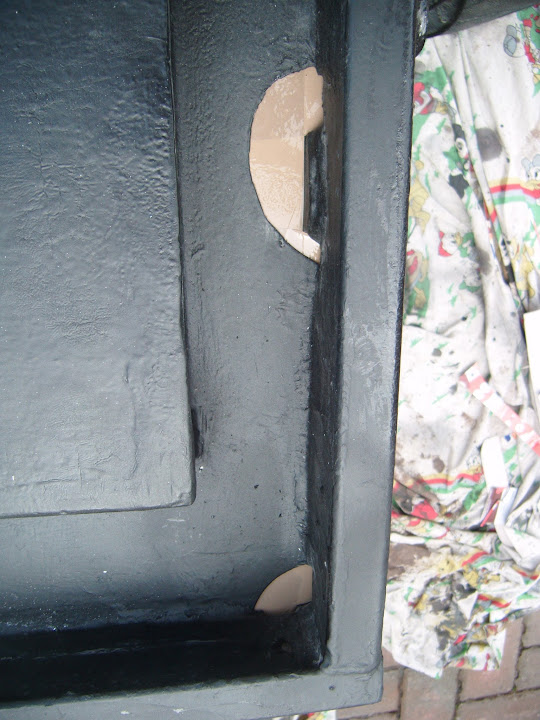

But I then spent ages trying to work out a way of preparing this hole, using hardboard, cardboard & yoga mat.
In the end my solutions were getting more complicated by the minute.

Until finally it dawned on me that I don't actually need a solution that sits "flush".
Instead I could make an oversize piece like this that would sit on top of the "hole".

So I then cut out a section from one of my fibreglass off cuts.

That slotted into place like so.
Unfortunately, I forgot to reduce the catalyst mix for the first batch & it set too quickly in the heat. 
So some matting & resin was wasted and I had to quickly peel off some matting that wasn't going to stick properly.
Thankfully the sunshine helped this first batch to set quickly and I could sand down the rough edges.
I adjusted the second batch to suit and that went on with no problems.


Whilst there is still a lot of work to do, at least I am on the road to making the cockpit water tight.
Well, water tight from below that is, as the lack of a roof means there is clearly a more obvious way of water getting in.
- - - - - - - - - - - - - - - - - - - - - - - - - - - - - - -
Anyway, I'm supposed to be doing something else, so I'd better go, Paul. 

|
9th April 2015, 15:11
|
|
Senior Member
|
|
Join Date: Jan 2015
Posts: 168
|
|
Perhaps you should leave a couple of holes in the floor,as the car will stay outdoors you need some drain holes.
|
9th April 2015, 16:10
|
|
Senior Member
|
|
Join Date: Dec 2013
Location: Sunny Cumbria
Posts: 470
|
|
Quote:
Originally Posted by Paul L

8 Valve Ed - It is the impact on my productivity that is the biggest pain about working without a garage.
I dread to think of the number of hours I have spent covering/uncovering the car & unpacking/packing parts & tools.
|
I put away every night, all my tools and power tools are carried back to the house and put away every night. I try to make sure the garage is tidy and the floor swept every night too. That way I start each day with a clean slate.
Probably takes me half an hour each day getting stuff out and at least the same putting away, but I think it's time well spent. There can be a temptation to leave everything lying around which over time becomes a mess, working in a mess isn't usually productive.
I have been enjoying the sunshine today. We had lunch next to the car which is now mobile and we are working on it outside. After lunch I enjoyed an hour of simply sitting and relaxing weighing up what I would do next.
The boys have demolished a microwave oven, they have discovered the cooling fan will generate electric in the wind to charge a battery. They are currently mounting said fan on the shed roof with wires to a battery... Watch this space, not sure if the shed will take off or the battery will get charged... Me thinks they will need some diodes. Will be glad when the Easter hols are over. ;-)
|
10th April 2015, 07:44
|
|
Senior Member
|
|
Join Date: Feb 2012
Location: Wembley, London
Posts: 5,056
|
|
Rene - I will drill drain holes in the lowered floor pans after I know where the seat bolts are going.
Although they will only be required if I get caught driving in the rain, as the car will have a waterproof cover when parked.
8 Valve Ed - There is something about the sun shining that does makes car work seem a bit easier. 
- - - - - - - - - - - - - - - - - - - - - - - - - - - - - - -
Family Time:
This is the last weekend before my daughters go back to school after Easter, so I am taking a break from car building for a few days.
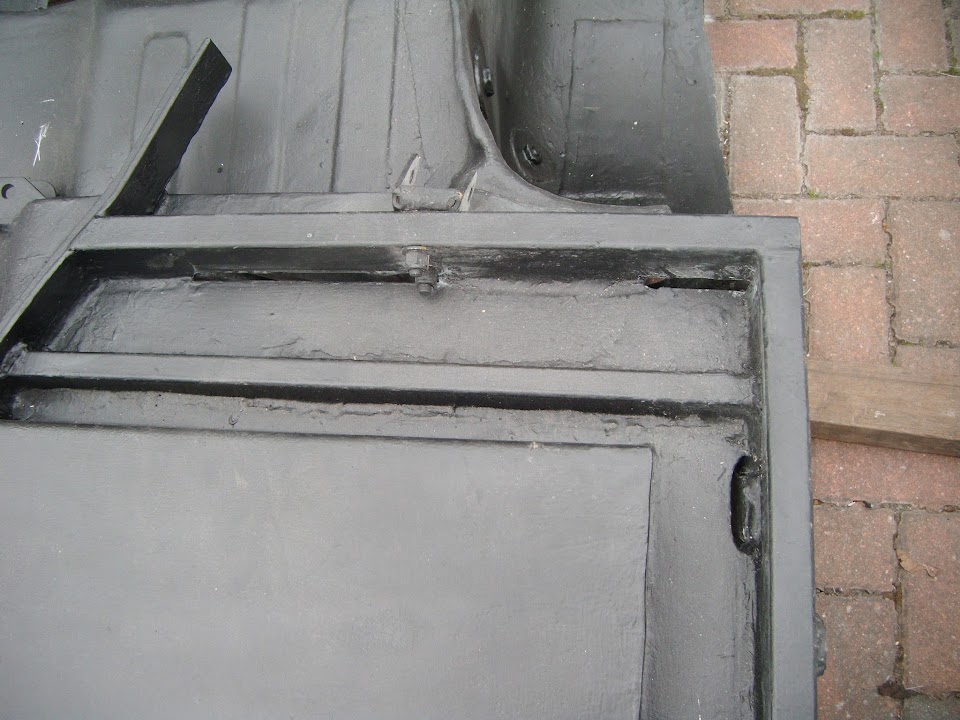
Although I did managed to drill some holes along the edges of the gearbox cover's coin tray while they were still asleep this morning.
( I was in the Summer House at the bottom of the garden so I wasn't going to disturb anyone. )
So I could test fit the false access panel.

Note:
At some point all of this will be the same colour which should hopefully make it look a bit better. 
The other day I bought this length of metal to form a strap across the cover that will be riveted into place.

But shaping that will take a bit of time and effort, so that will have to wait for another day.
My current plan is to seal both the access panel screws and the strap rivets on the under side.
Then I will add the heat reflecting material to form another protective layer.
The other thing I picked up the other day was some small metal tubing for the mirror pedestal.
( Although there is no rush to make this. )

I know I haven't been able to take full advantage of the recent good weather.
However, a few days of sunshine has convinced me that the worse of Winter is behind me. < Touch Wood. >
So I plan to keep chipping away at the "big pieces" until they are ready to be re-fiited.
As I know I am slowly heading towards a time where I will be building this car, rather than "mocking up".
Take care, Paul.
|
10th April 2015, 07:49
|
|
Senior Member
|
|
Join Date: Jun 2011
Location: birchington, kent
Posts: 1,769
|
|
Paul, it's easy to shape, just anneal it...
|
10th April 2015, 09:13
|
 |
Senior Member
|
|
Join Date: Sep 2011
Posts: 1,446
|
|
[QUOTE=8 Valve Ed;65583]I put away every night, all my tools and power tools are carried back to the house and put away every night. I try to make sure the garage is tidy and the floor swept every night too. That way I start each day with a clean slate.
Probably takes me half an hour each day getting stuff out and at least the same putting away, but I think it's time well spent. There can be a temptation to leave everything lying around which over time becomes a mess, working in a mess isn't usually productive.
[QUOTE]ha ha yes me and dad built a robin hood 20 odd years ago used to just walk away and leave everything as it was so it was all ready to start the next time we went in the garage...it never worked spent ages looking for things etc because you forgot what you were doing ..lol
|
13th April 2015, 18:08
|
|
Senior Member
|
|
Join Date: Feb 2012
Location: Wembley, London
Posts: 5,056
|
|
Gary - Sorry, but I am under strict instructions not to burn the house down while building this car.
RedRatBike - I really must try harder to "work tidy".
- - - - - - - - - - - - - - - - - - - - - - - - - - - - - - -
Weekend:
Spent a great family weekend in Woburn Center Parcs with some friends & their children (15 of us in total).


Note:
The guns my daughters are "firing" were not real, but part of a laser clay pigeon shooting activity.
- - - - - - - - - - - - - - - - - - - - - - - - - - - - - - -
Grand National:
We also had some family picks for this race, as a small bet once a year is hardly a serious gambling problem.
Especially as I'm more likely to pick a horse based on its name, rather than by studying the form!
( My biggest win to date was with Silver Birch, as we had some of these trees in our garden. )
This year one name jumped out at me based on its connection with this build, especially given the number of these photos I post.
So it was a pleasant surprise when my £2 each way bet paid out £66.50 on the winner, Many Clouds.
Let's hope next year's race features a horse called On the road at last.
- - - - - - - - - - - - - - - - - - - - - - - - - - - - - - -
Car Time:
Despite a pile of post holiday chores, I did get the chance to remove the covers and start working on the car again today.
The first job was to get some Tetroseal on part of the bulkhead, starting with beneath the floors.

I also covered the front "face" of the bulkhead below the horizontal "deck" where the pedals, etc. are bolted to.

I've left the sides of the bulkhead for now.

As I need just need to work out the best way of "sealing" the bulkhead to the body shell.
( Which is linked to extending the body shell to include the bottom edges of the bonnet. )
- - - - - - - - - - - - - - - - - - - - - - - - - - - - - - -
I removed the "formers" from the inside of the gaps in the passenger side floor.
Then I tidied up the fibreglass that I used to seal the gaps the other day.


Before adding a layer of fibreglass filler over the top.

Note:
I've left a gap around the area that I need to add the cut out section.
The last job of the day was to start sanding down this filler work.

- - - - - - - - - - - - - - - - - - - - - - - - - - - - - - -
I also marked up the cut out section on the driver's side floor.

And drilled / cut / filed that shape.

The gaps in the floor on this side a lot smaller.
But there is still the big hole where the rear arches were cut around the framework.
Although this time I just had to "flip over" the cardboard template I made for the other side & trim it to fit.

Hopefully I will be able to cut out a section of fibreglass tomorrow and start sealing up this side.
So until next time, take care, Paul.
|
14th April 2015, 17:59
|
|
Senior Member
|
|
Join Date: Feb 2012
Location: Wembley, London
Posts: 5,056
|
|
Small Jobs - Part 1:
I tried to make the most of the great weather and had a few little jobs on the go at various points during the day.
So, in no particular order...
Driver's Floor:
Cut out a section of fibreglass to bridge the big "hole".

But before I started any fibreglass work, I cleaned up the edges around the open end of the framework nearby.
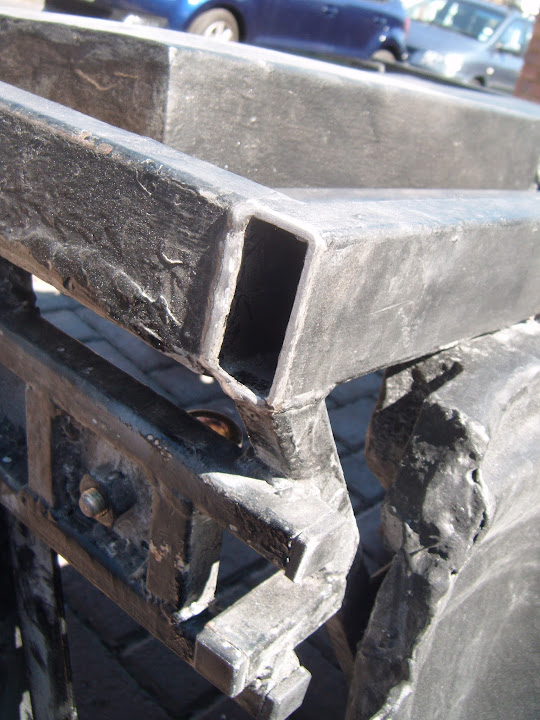
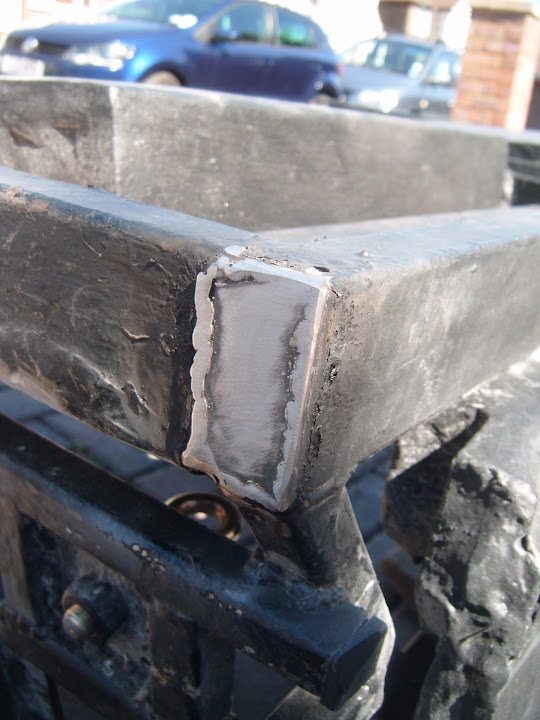
Then I cut the "cap" to shape and welded it into place & ground it down.
For now, the other end has been left with the plastic end cap in place.
( As unlike the other caps this size, this one actually stayed in place & didn't fall out. )

The welded cap got a coat of etch primer.

The formers for the small gaps around the floor were simple sections of cardboard covered with parcel tape.

Two sessions of fibre glassing later, and the gaps in the floor were sealed.

Plus the big hole was covered.

Despite lowering the catalyst ratio, the pot life was still short, making things a bit messy.
Still, at least the warm weather was helping the fibreglass to set and this allowed me to remove the formers later on.

Before giving the fibreglass a quick tidy up.

With a bit of luck I will be able to build the nut access "hollows" tomorrow.


- - - - - - - - - - - - - - - - - - - - - - - - - - - - - - -
End of Part 1...
|
14th April 2015, 18:01
|
|
Senior Member
|
|
Join Date: Feb 2012
Location: Wembley, London
Posts: 5,056
|
|
Small Jobs - Part 2:
Bulkhead:
Put a second coat of Tetroseal on the bottom section of the bulkhead.

Yesterday I forgot to say that using this stuff is like trying to paint with shoe polish.
- - - - - - - - - - - - - - - - - - - - - - - - - - - - - - -
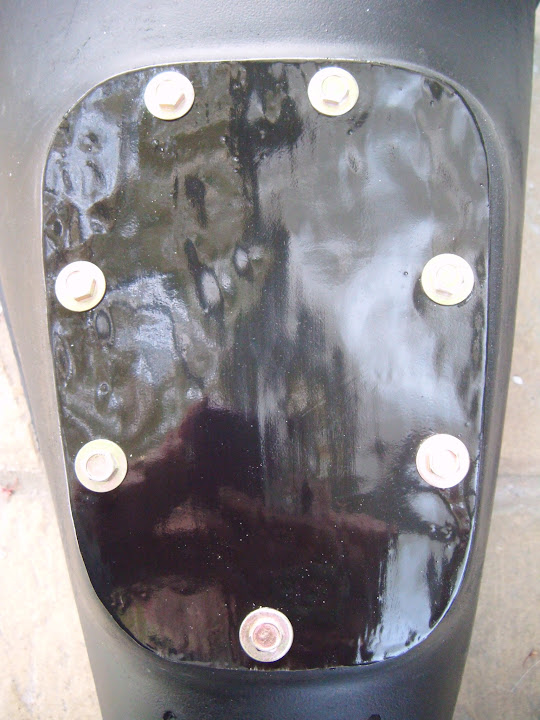
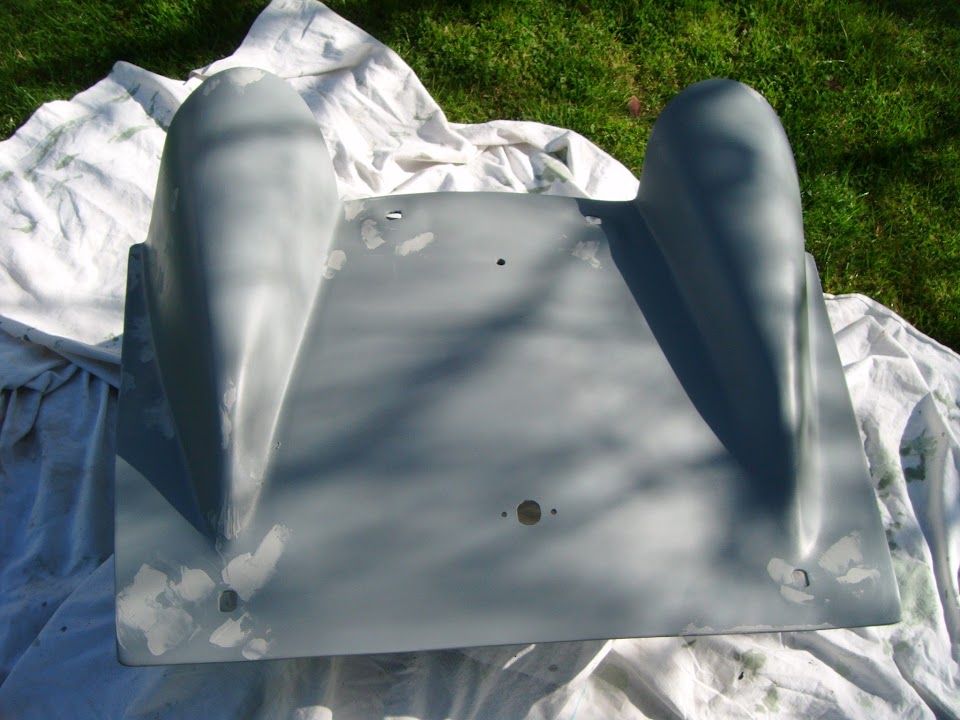
Boot Access Panel:
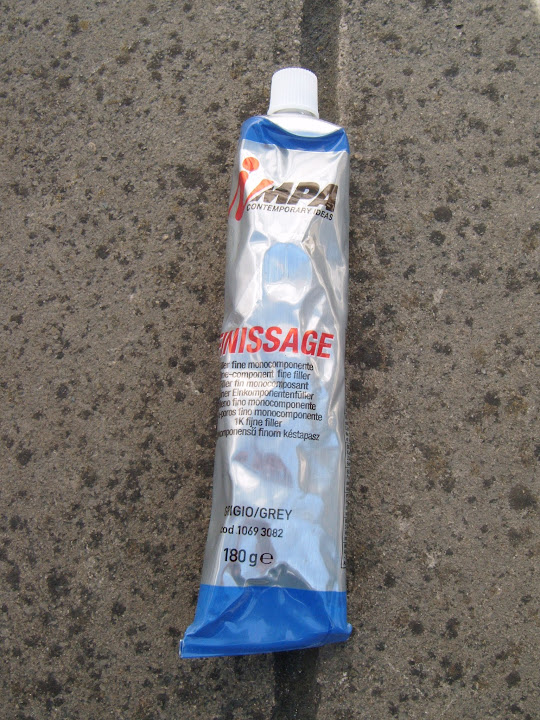
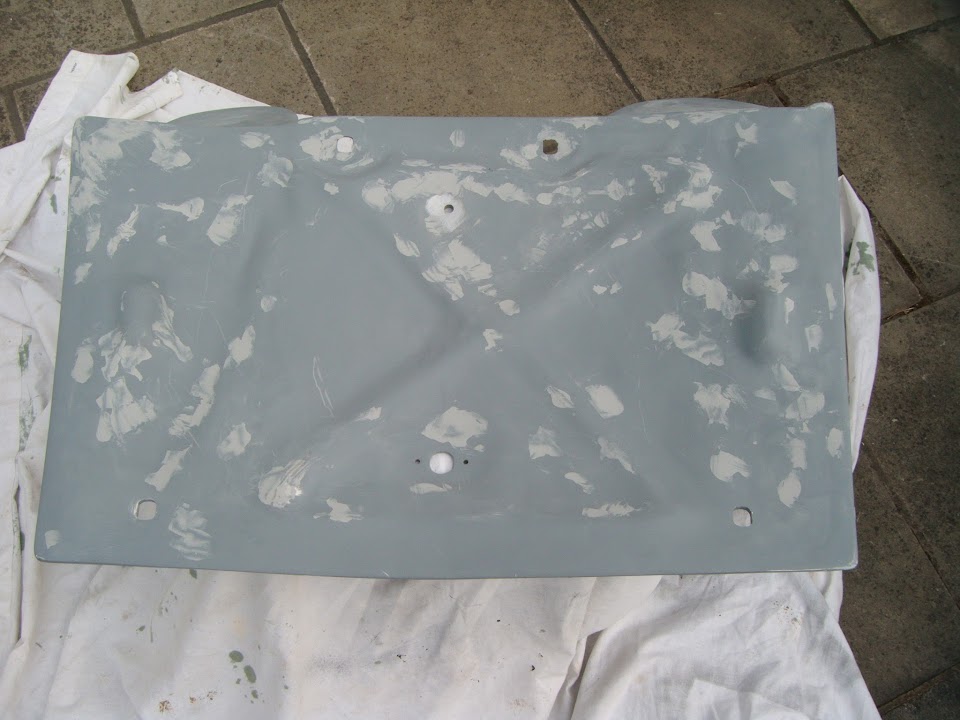
The body work Scottie is doing (& the sunshine) was a good excuse to test the "stopper" filler I bought the other day.
So I moved the boot lid to the rear patio & removed all the shiny bits.
The stopped filler went on OK, but I had a bit of a nightmare with a small batch of "Dolphin Glaze".
Unfortunately, I added too much hardener and it set mid application which made a bit of a mess. 
( Stopper = Grey & Glaze = Light green )
At least I could leave this setting in the sunshine before coming back to it to sand it all down.
Here is an attempt to show some of the pin holes that were filled in with the stopper.
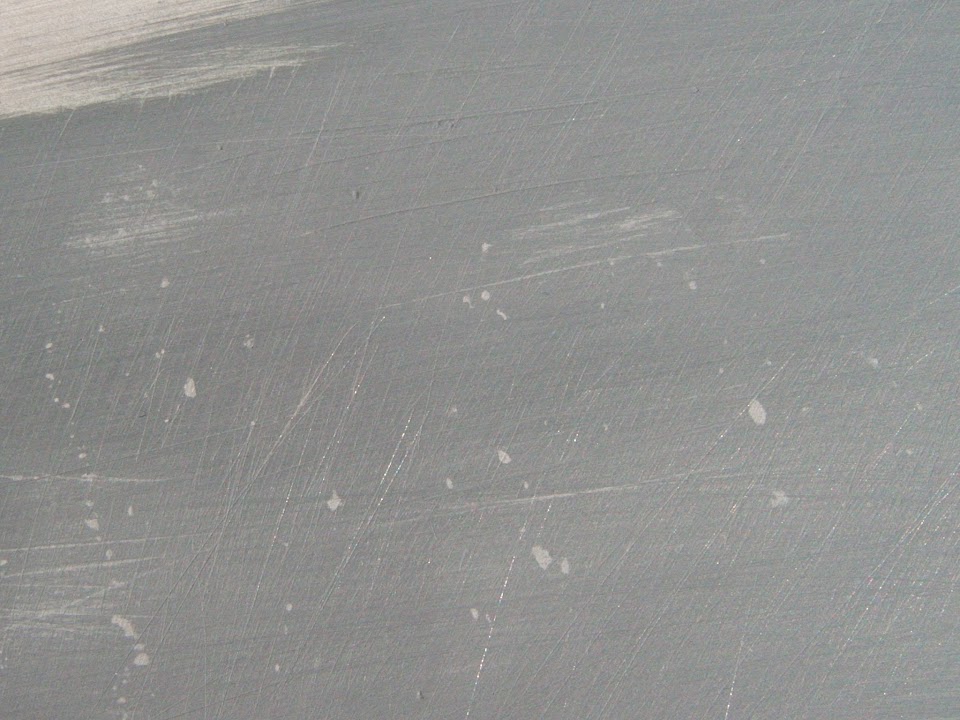
Then the lid got another coat of etch primer.
It is encouraging to see a smoother surface start to appear.
However, it is clear that the final prepping for paint stage is going to take a VERY long time.
- - - - - - - - - - - - - - - - - - - - - - - - - - - - - - -
It looks like it might be even hotter tomorrow & I hope I will get the chance to make the most of it.
Until then, take care, Paul.
|
15th April 2015, 07:19
|
|
Senior Member
|
|
Join Date: May 2013
Posts: 2,161
|
|
I've been so busy lately Paul I've not looked at your build for a while,
the boot lid looks good. Leave it out in the sun for the stopper to bake on!
I use a similar stuff, and put on thinly, in the sun it can be sanded back in less than an hour. (I have no patience)
|
15th April 2015, 18:39
|
|
Senior Member
|
|
Join Date: Feb 2012
Location: Wembley, London
Posts: 5,056
|
|
Scottie - Cheers, although I dread to think how much time you must be spending filling & sanding. 
- - - - - - - - - - - - - - - - - - - - - - - - - - - - - - -
More Small Jobs - Part 1:
Managed to combine my domestic chores with a solid day's work on the car.
Again, in no particular order...
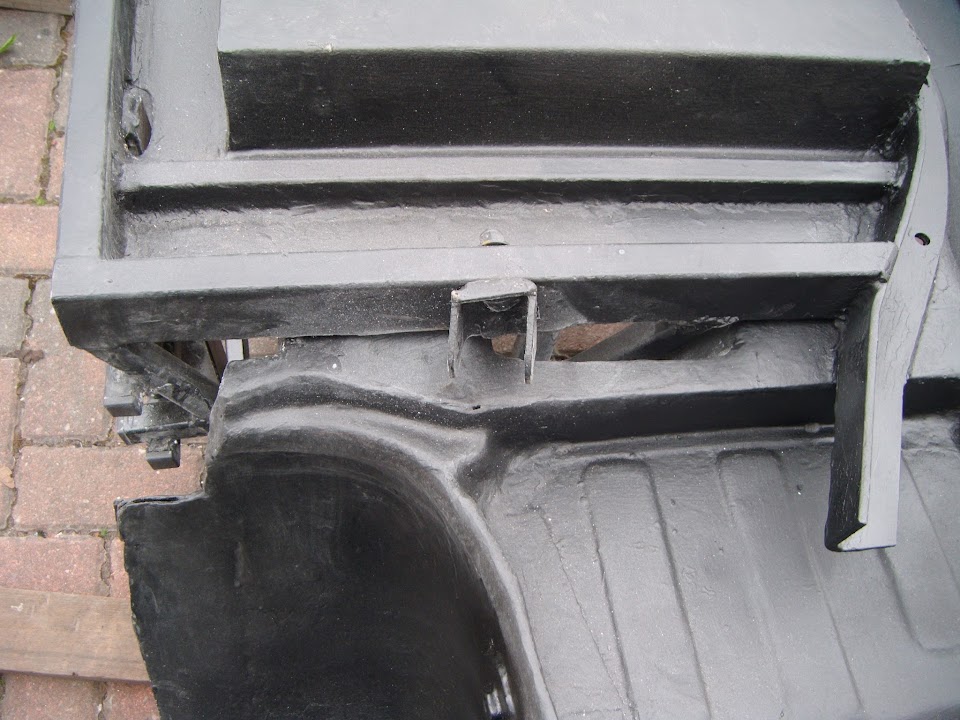
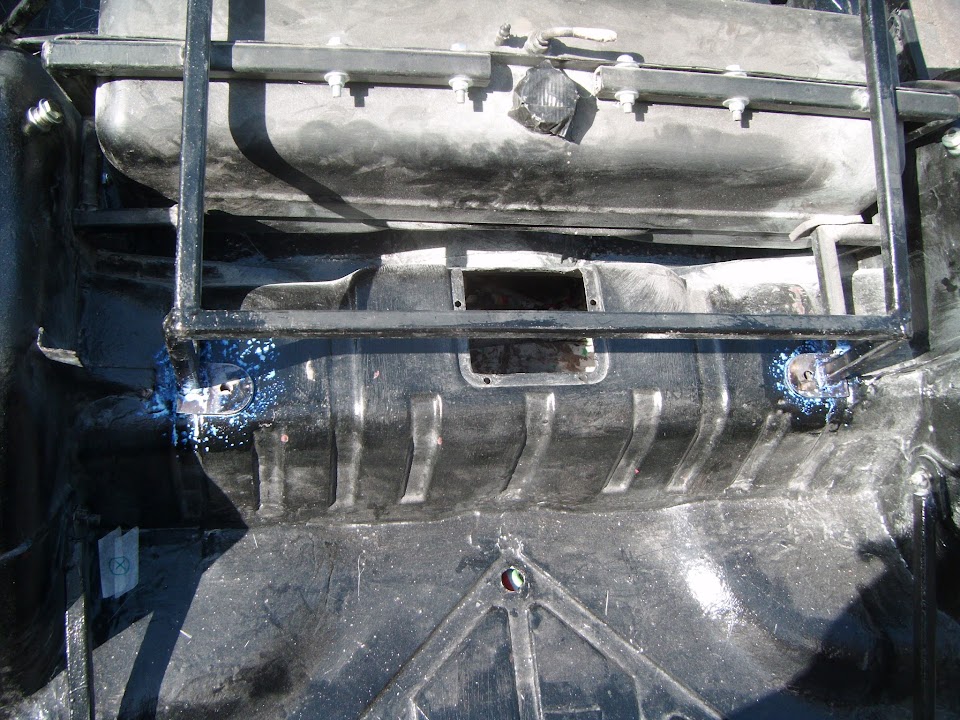
Frame Work / Floor:
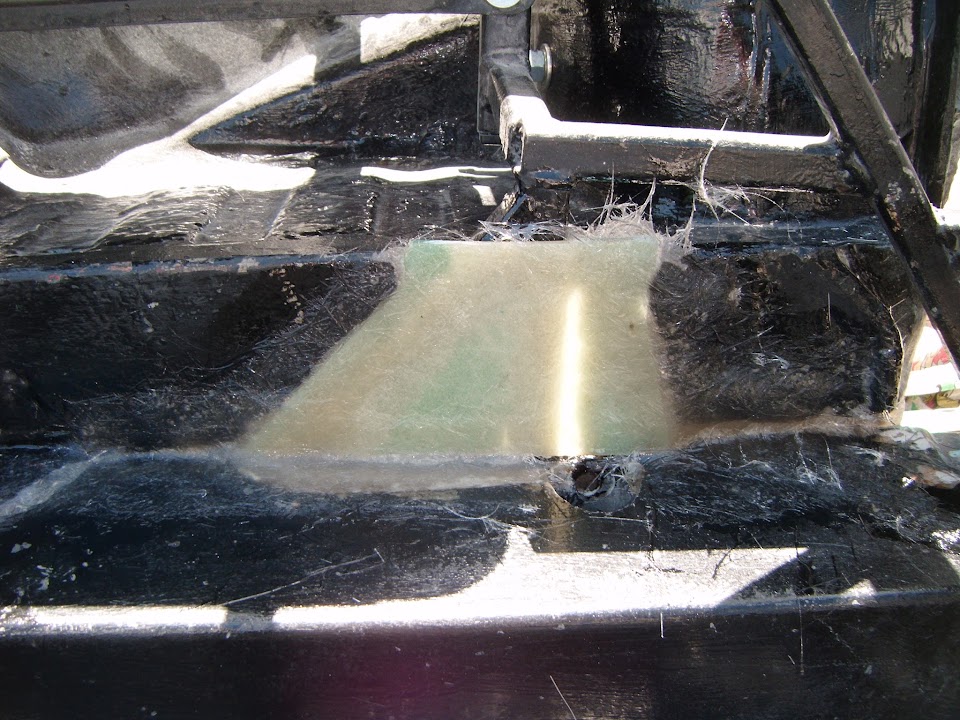
After a bit of huffing & puffing I managed to turn the frame over by myself.

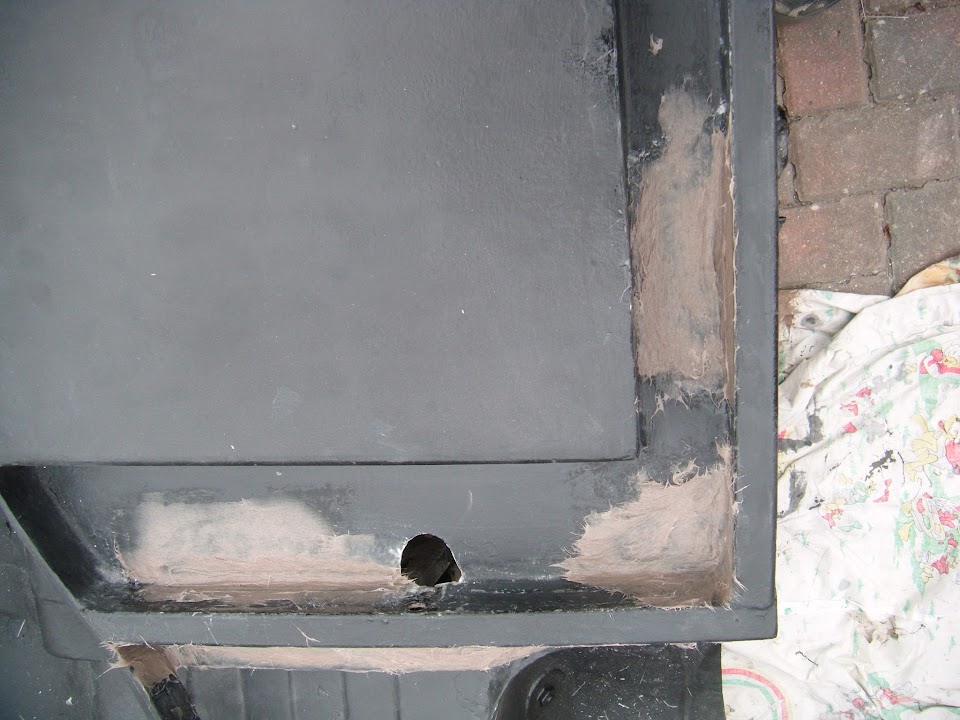
Unfortunately, I couldn't start making the egg shaped "hollows" until I sorted this "hole" out first.

This fix was going to need two sides, one on the top.

And one on the front.

Only then would I be able to fix these into place.

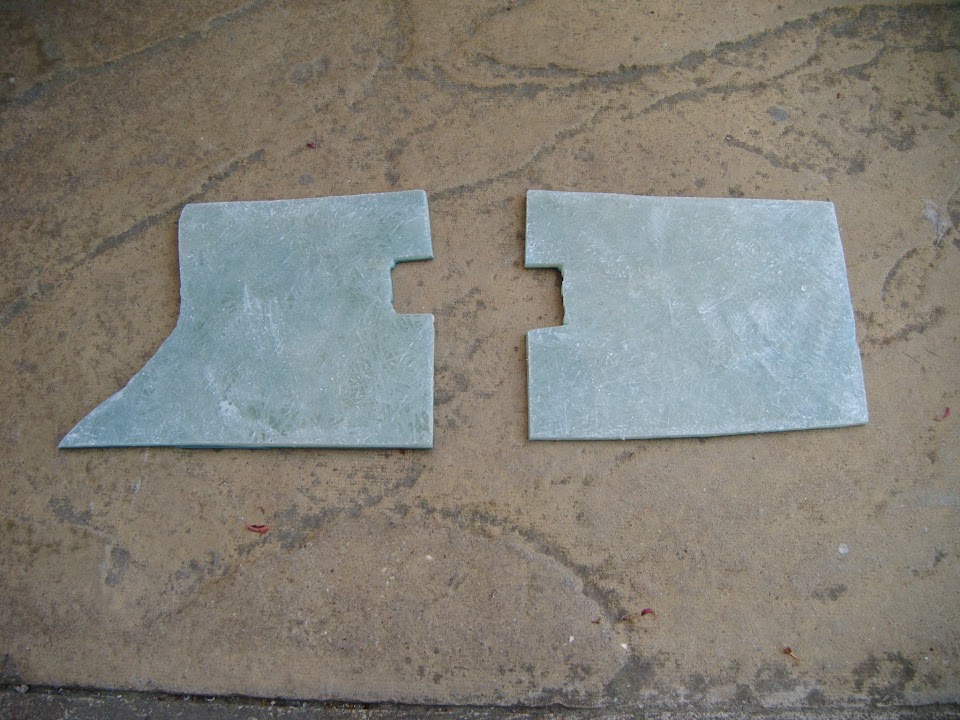
So it was time to recycle one of the original Cordite front foot wells.


Each piece then needed a bit of fine tuning to ensure a good fit.
The driver's side was pretty straight forward.

But the inner face of the front passenger side panel needed to be ground out a bit to accommodate the framework.

Before it would fit nicely.

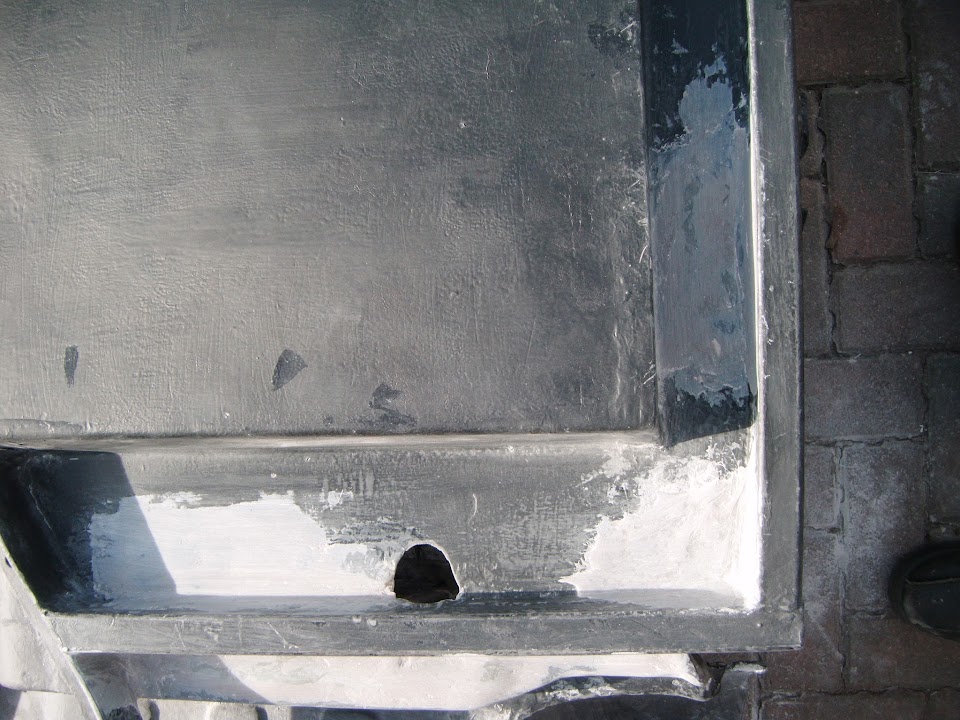
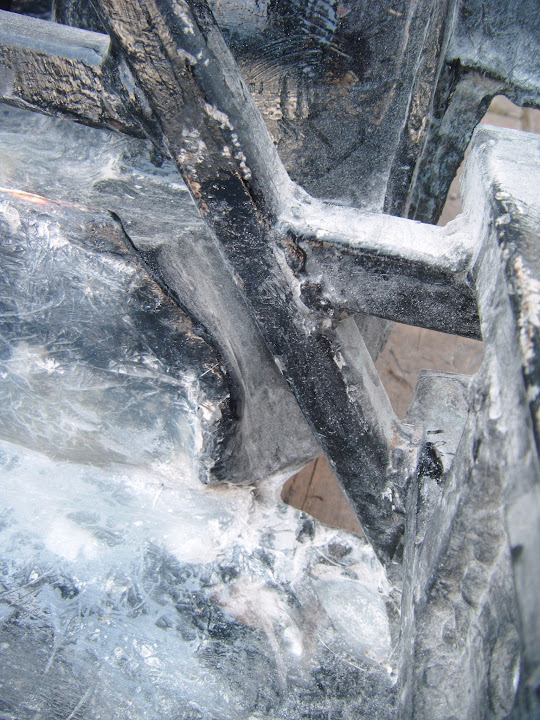
At this point I needed to clean up the mess before I could start any fibreglass work.
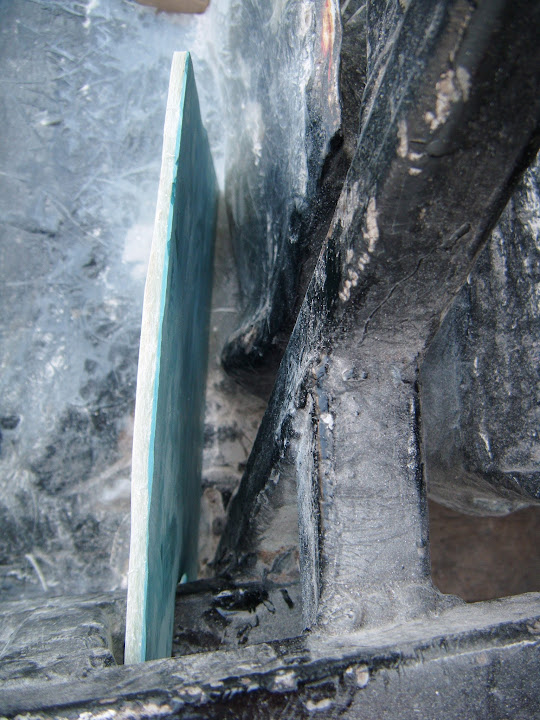
Each side followed the same steps, this is the driver's side.
Before:

Front panel 'glassed into place.

Top panel 'glassed into place and extra matting on front panel.

And the passenger side.


When this was set, I could tidy it all up a bit.

End of Part 1...
|
15th April 2015, 18:40
|
|
Senior Member
|
|
Join Date: Feb 2012
Location: Wembley, London
Posts: 5,056
|
|
More Small Jobs - Part 2:
Frame Work / Floor - Continued:
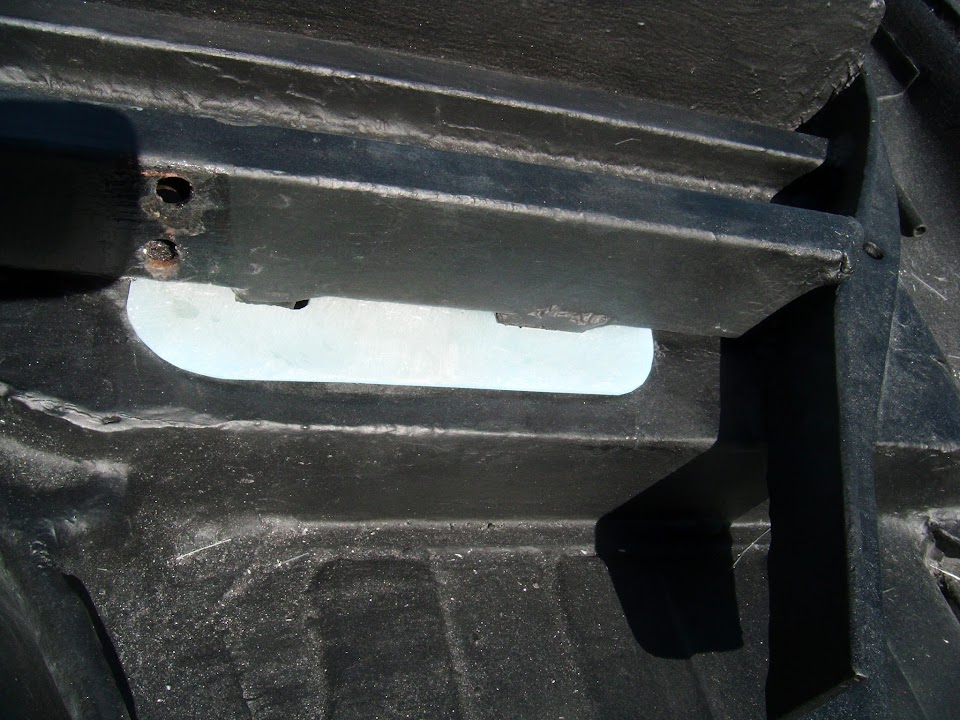
The area for the hollow on the passenger side just needed a bit of fibreglass filler in a small gap.
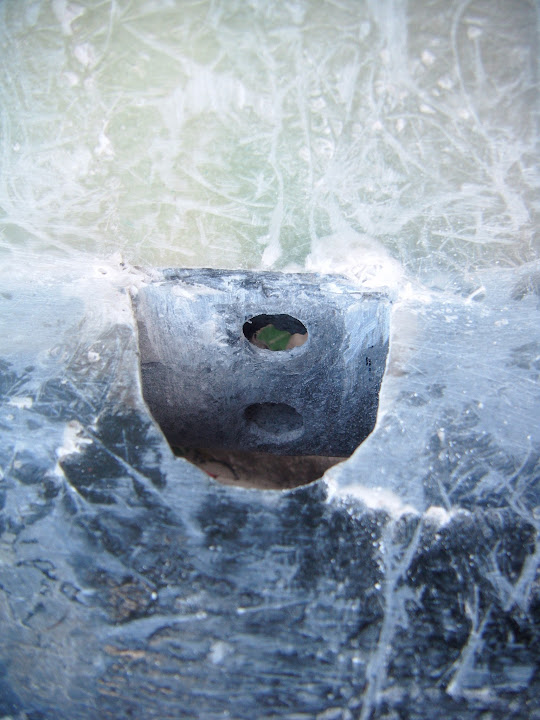

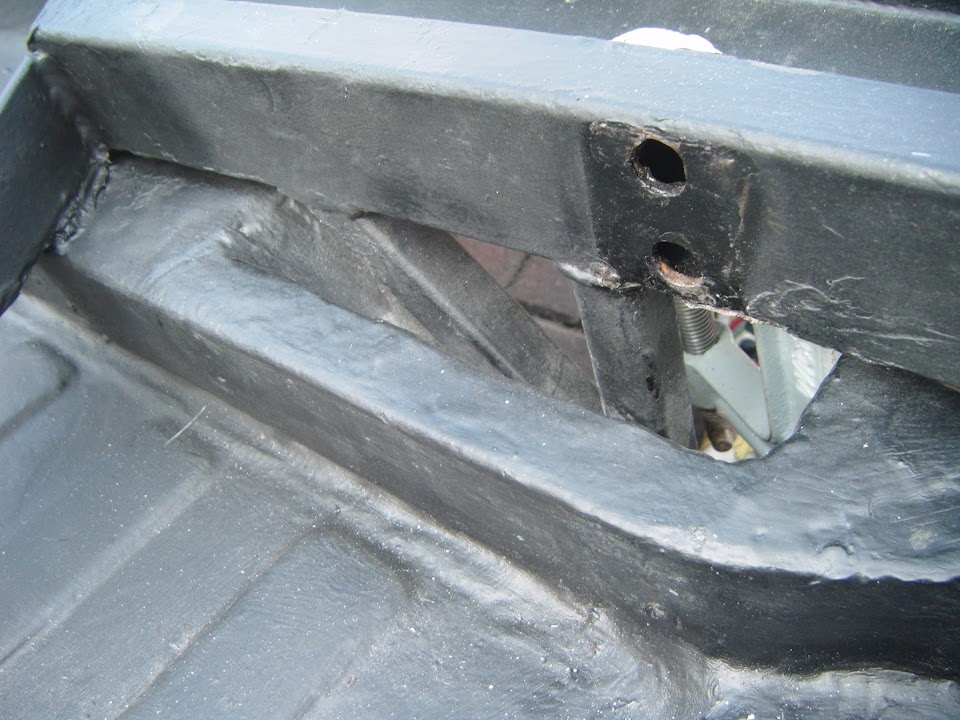
But the driver's side needed to be sorted out from underneath, as some matting has covered the top bolt hole.

I was planning to leave this fix until tomorrow, but ended up making it the last job of the day.
I just needed to prop up the frame so I could get some power tools into position.

Now you can see / reach both bolt holes.

So I just needed to mix up another very small small batch of filler.

Which means I am now finally in a position to start the job I thought I would finish today.
- - - - - - - - - - - - - - - - - - - - - - - - - - - - - - -
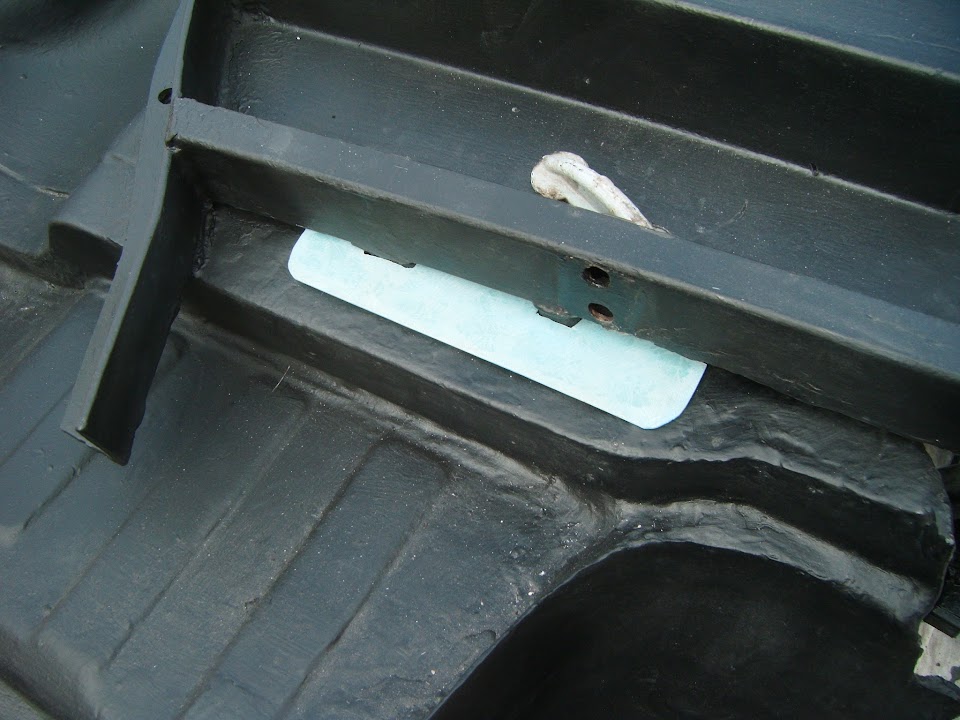
Bulkhead:
I wanted to fix these zip tie mounts for the heater hoses into place.

There are only four, which are stuck on first and then riveted to the bulkhead

Note:
The two in the middle support the "Y" joint that splits the hoses & the outer two support the hose for each side.
Thankfully using a slightly smaller rivet than originally planned, there were no problems getting the zip ties threaded through.

At one point I was toying with the idea of leaving the inside of the front foot wells in either Stone Chip, or Tetroseal.
But I've now decided to stick with some smooth Hammerite instead and got a first coat on today.


Note:
The sun is making the colour look more like grey, but it is black.
- - - - - - - - - - - - - - - - - - - - - - - - - - - - - - -
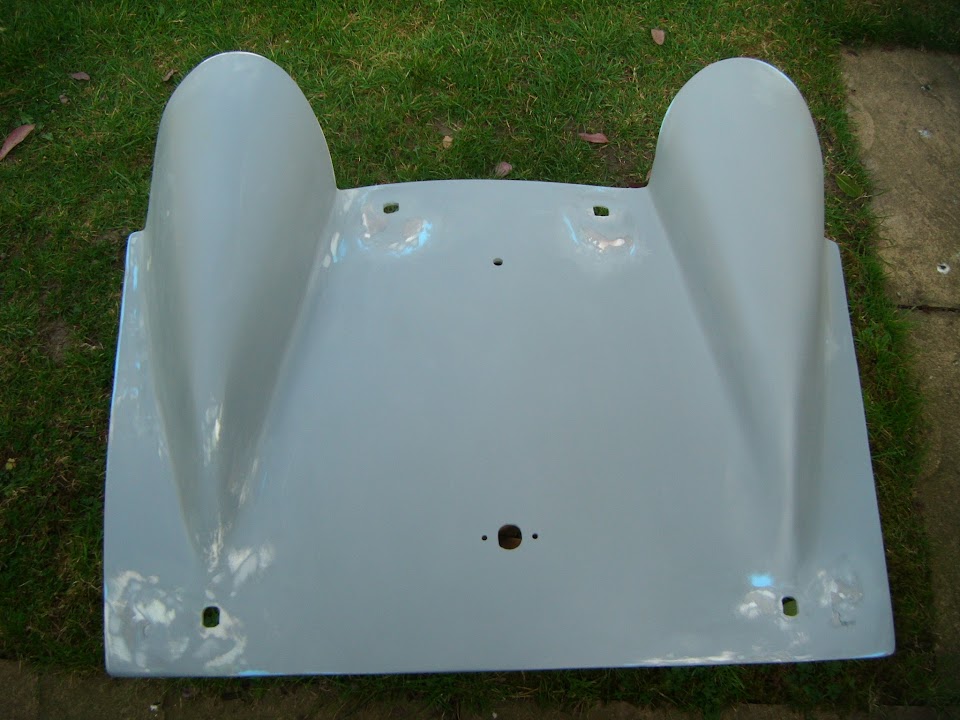
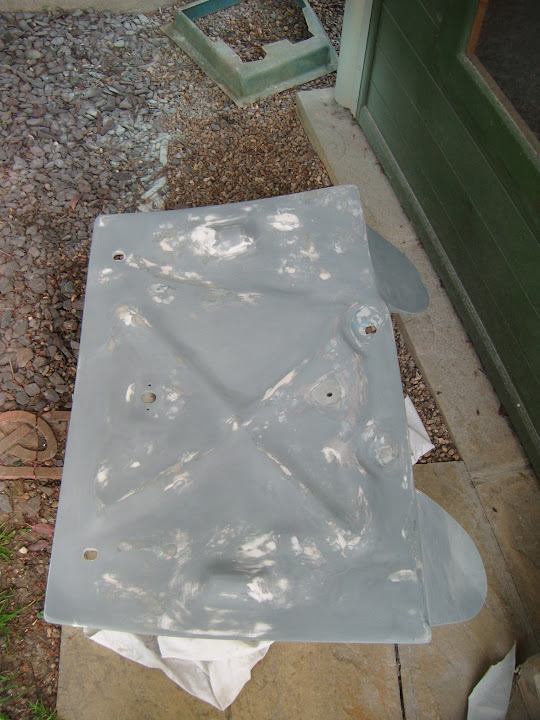
Boot Access Panel:
Another round of stopper filler, sanding & etch primer.
- - - - - - - - - - - - - - - - - - - - - - - - - - - - - - -
End of Part 2...
|
15th April 2015, 18:40
|
|
Senior Member
|
|
Join Date: Feb 2012
Location: Wembley, London
Posts: 5,056
|
|
More Small Jobs - Part 3:
Rear Framework:
The "feet" I welded on at the back of the frame need to be cleaned up.

So after a bit of sanding, they both got a coat of Kurust.
With a bit of luck these will be painted tomorrow.
- - - - - - - - - - - - - - - - - - - - - - - - - - - - - - -
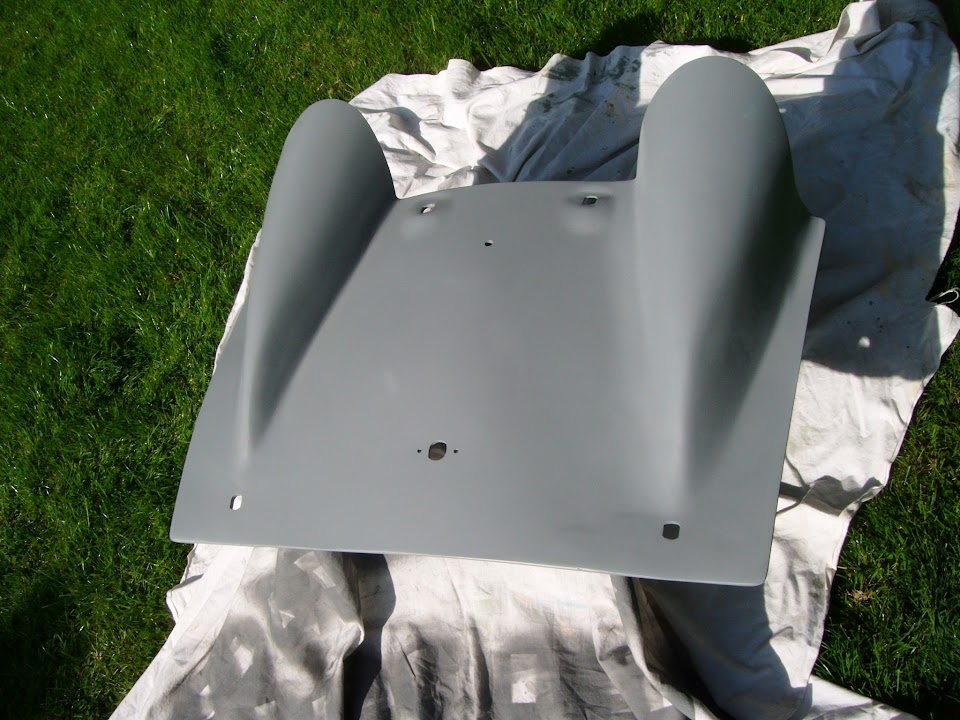
Gear Box Tunnel Cover:
This also got a first coat of Hammerite.

But I will wait until I've sorted out the fixings before giving it a second coat.
- - - - - - - - - - - - - - - - - - - - - - - - - - - - - - -
The "To Do" list for these big pieces seems to be never ending.
But I know if I keep chipping away at all these little jobs, they will be ready to bolt back on eventually.
So until next time, take care, Paul.
|
15th April 2015, 18:48
|
|
Senior Member
|
|
Join Date: Apr 2012
Posts: 1,163
|
|
just been catching up Paul, who's been a busy boy then? keep at it your progress will pick up a lot now the hopefully better weather seems to have made an appearance.
|
16th April 2015, 15:56
|
|
Senior Member
|
|
Join Date: Feb 2012
Location: Wembley, London
Posts: 5,056
|
|
Mac - Cheers, although at the moment it seems like I'm trying to walk up the down escalators.
As no matter how many jobs I get done, the number of jobs still left to do seems to get longer and longer.
Having said that, the sunshine certainly helps lift the spirits and it does feel like I am heading in the right direction.
( And not down one of the numerous blind alleys this build has taken me. )
- - - - - - - - - - - - - - - - - - - - - - - - - - - - - - -
Change of Plans:
Today's work was hampered by an April shower and my wife just telling me her niece would be coming round tonight.
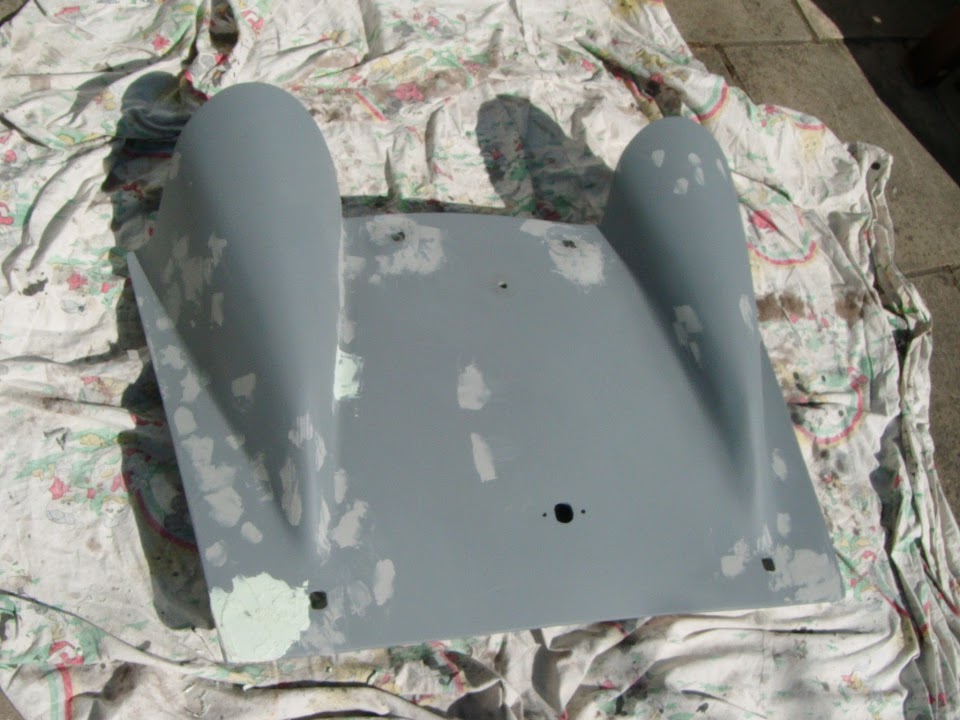
However, it started well enough as I sanded down the filler near the bolt holes in preparation for adding the "hollows".
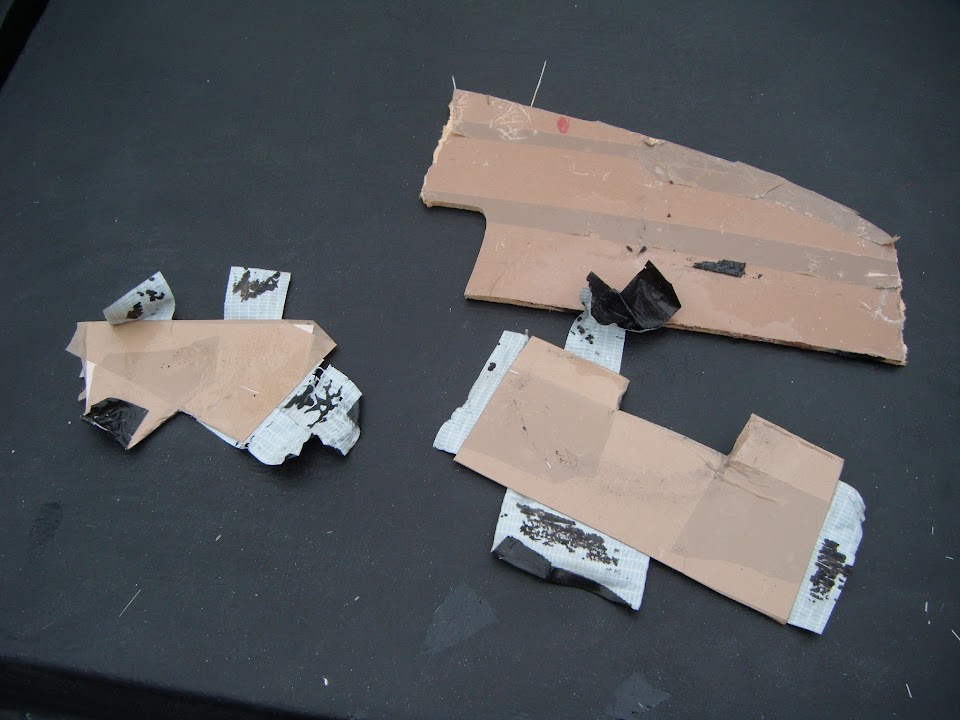
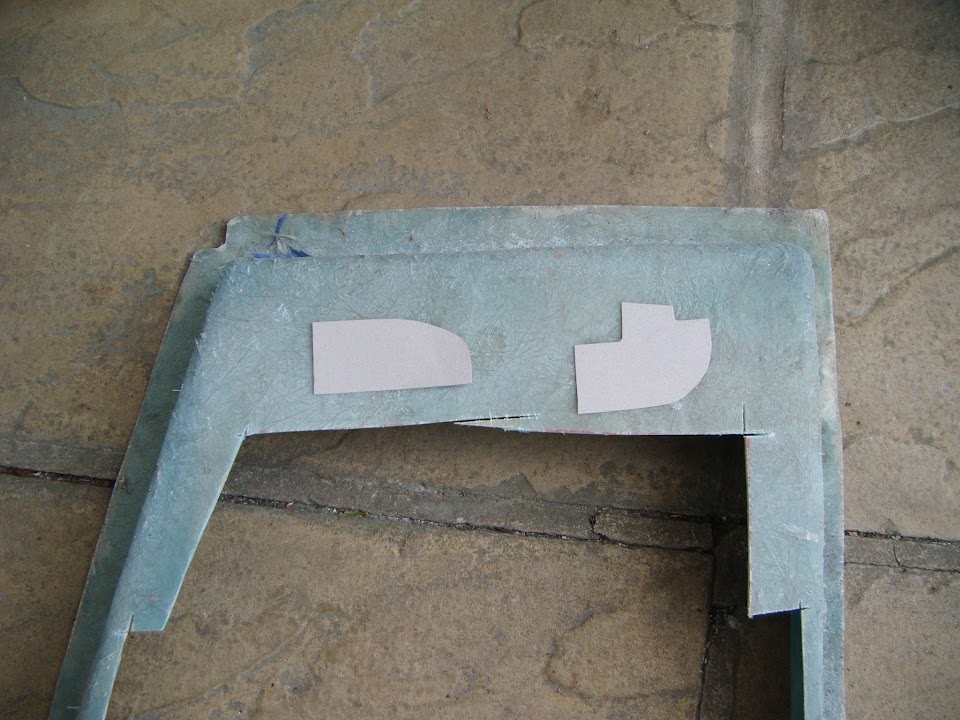
I also made some more cardboard templates to extend the "face" of the rear arches on both sides.


Cut these templates out of what remains of the fibreglass front foot well.

It was hard to get a decent photo of the problem, but the passenger side is a bit "wonky".
So I've made a panel to sit in front of this and cover it completely, rather than an in fill panel.
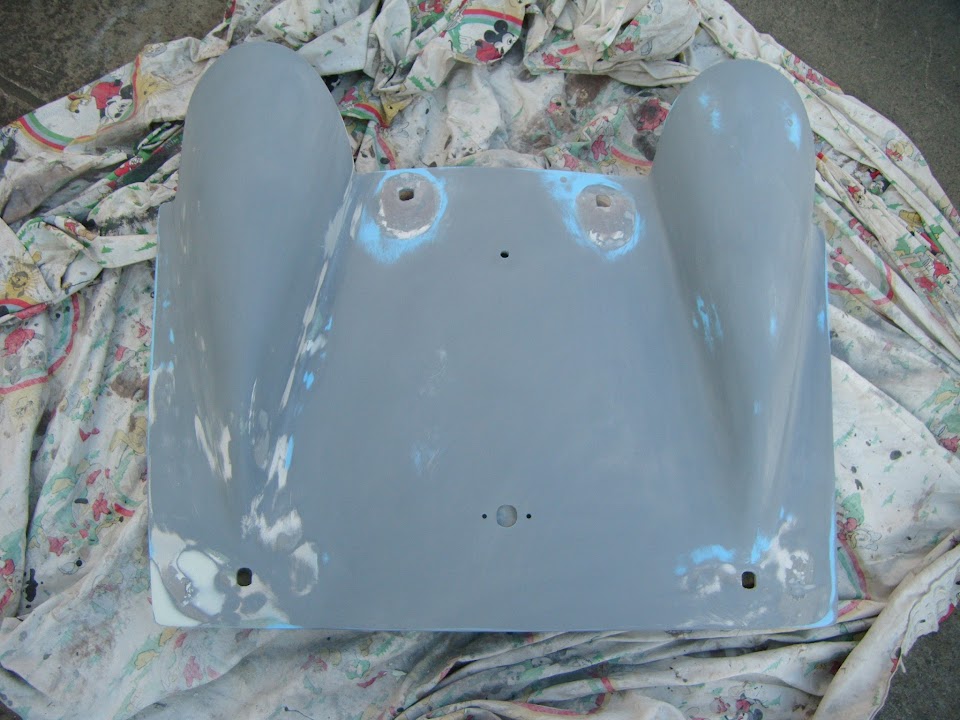
Added parcel tape to the outside of the egg moulds and held them in place from the underside.

By using strips of matting it was easier to maintain the shape as I started building up the layers.

I had just finished the second fibre glassing session of the day when the shower arrived.
So I quickly got the cover on.

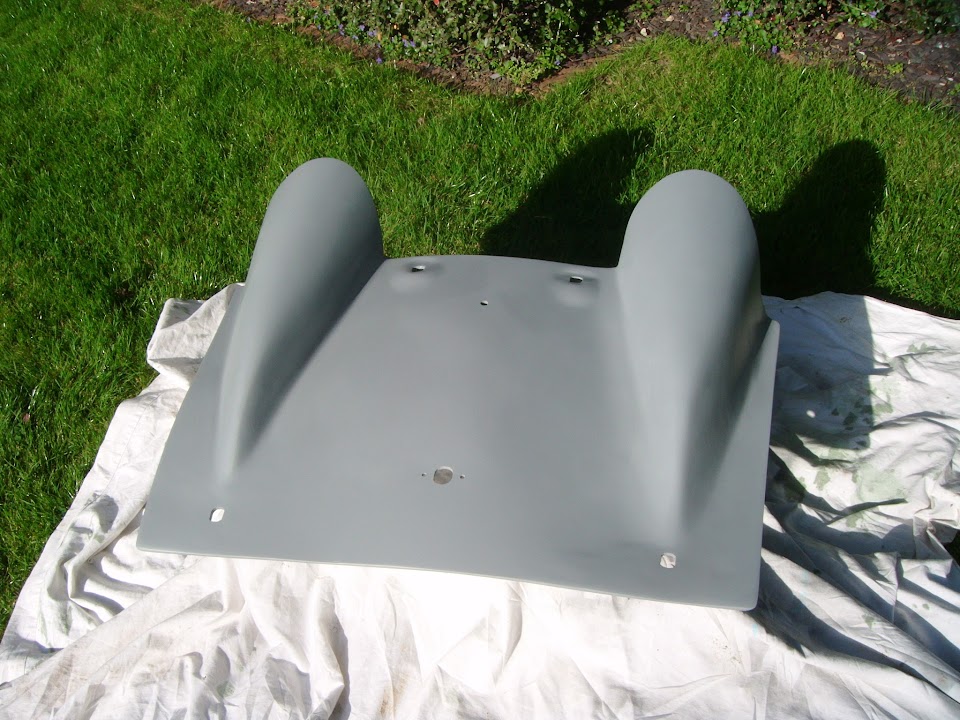
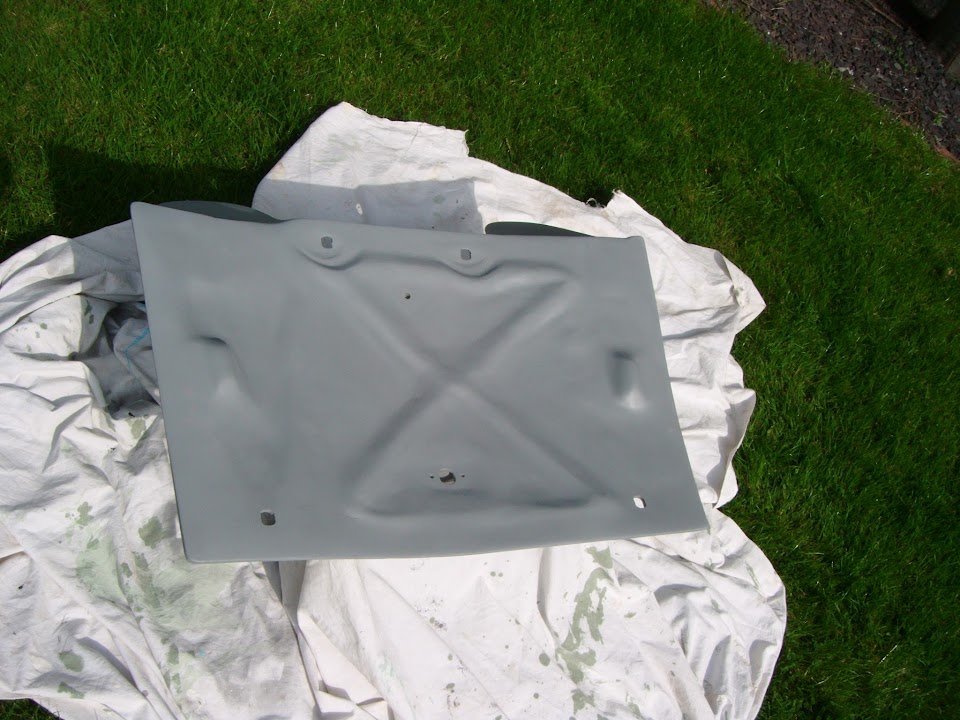
I also had to rescue the boot lid from the back garden while I had added some stopper filler to the inside surface.
When the rain stopped I was able to sand the lid down and get some primer on it.
For some strange reason I forgot to make the "top" edge panels for the rear wheel arch sides I was extending.
But that was a quick fix.

By now I knew I wouldn't get a chance to do another round of fibre glassing so called it a day.
I did remove the cover just so I could take a photo of where I have got to with this work.

I know it looks a mess now, but hopefully by the time I'm finished it will not look too bad.
Then I had to sweep up all the bits of matting littering the drive.

Before washing the route to the house.

So even though you still have to work your way around all the bits of car, at least it is clean.
Right, more domestic chores await, so I'm off, take care, Paul.
|
17th April 2015, 20:46
|
|
Senior Member
|
|
Join Date: Apr 2014
Posts: 198
|
|
Come on Paul, we are all counting on your updates for inspiring after dinner reading, you do realise it will be all eyes on your thread as soon as Scotties car is on the road? So the next time your not sure if you can be bothered or have time to juggle home chores to work on your car just picture the couple of hundred people all eagerly logging on and then sighing when there is no update. Do you think you will have the body bonded on any time soon ? Looking good BTW Ed.
|
17th April 2015, 21:32
|
|
Senior Member
|
|
Join Date: Feb 2012
Location: Wembley, London
Posts: 5,056
|
|
Ed - I am still debating at which point I will bond the body on, as I want to get the engine re-started ASAP.
So Option 1 is to delay bonding the body shell on until I get a fully working "Moon Rover" first.
Whereas Option 2 is to bond the body shell on ASAP and worry about the engine at the end of the build.
Unfortunately, there is a tragic reason for the delay in posting today's update, see "Part 2" below.
- - - - - - - - - - - - - - - - - - - - - - - - - - - - - - -
Yet More Small Jobs - Part 1:
A slow start to the day as I had to clean out our washing machine's filter (nasty) & then help a neighbour move their fridge/freezer.
Frame / Floors:
Tidied up the stray ends of the fibreglass matting.

Then had two more sessions of adding matting to this area, which included the two small caps on either end.


When that was all set it was tidied up again leaving it looking pretty much the same as when I started.

- - - - - - - - - - - - - - - - - - - - - - - - - - - - - - -
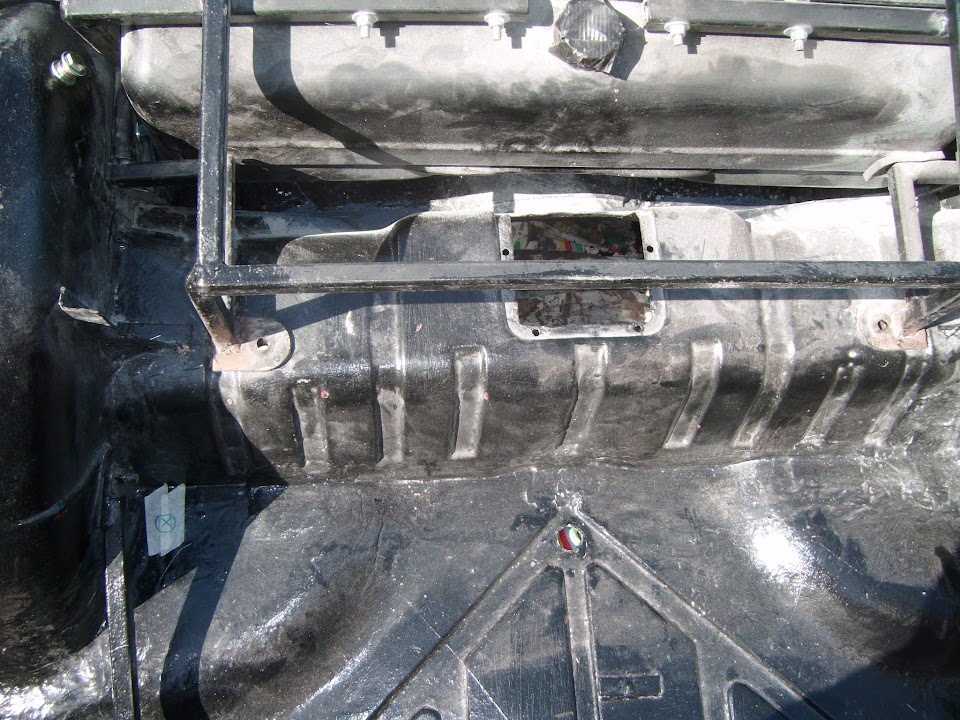
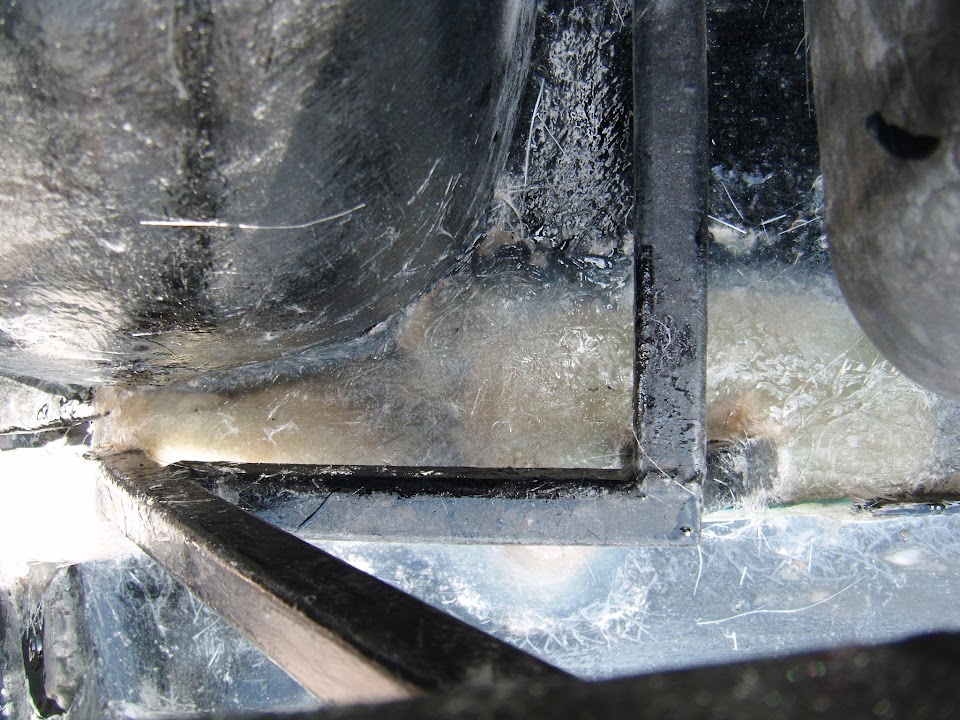
Petrol Tank:
Currently the fuel pipe points the wrong way.

Due to the fact the petrol tank is turned around to fit in the frame.
A very long time ago I bought a new "olive" so I could turn this pipe around.

I'd also bought a 8mm compression "stop end" for the vent pipe.
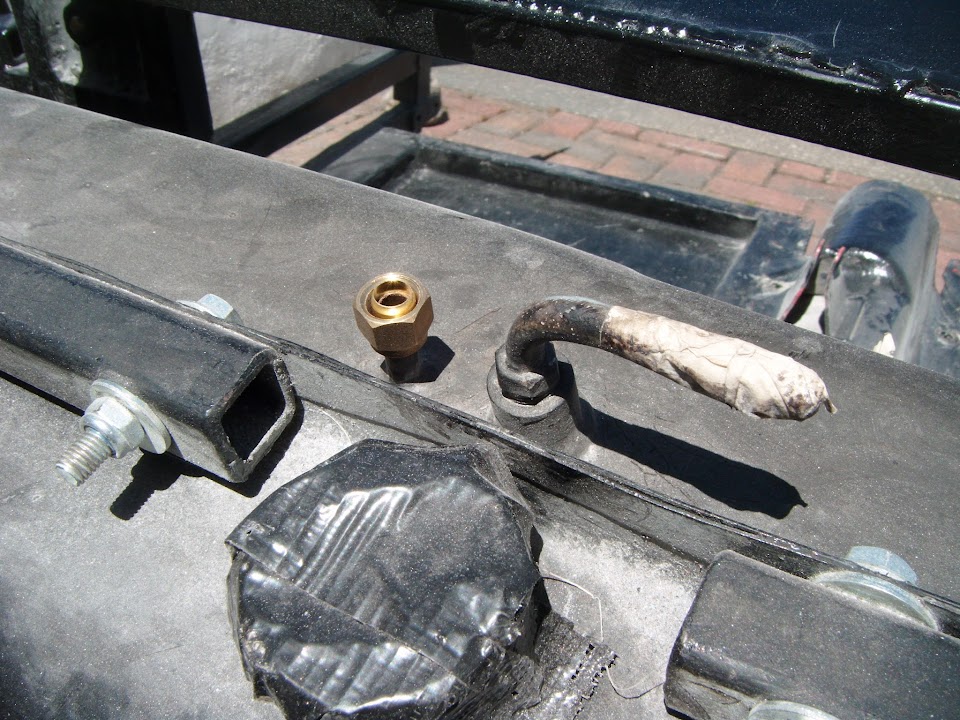
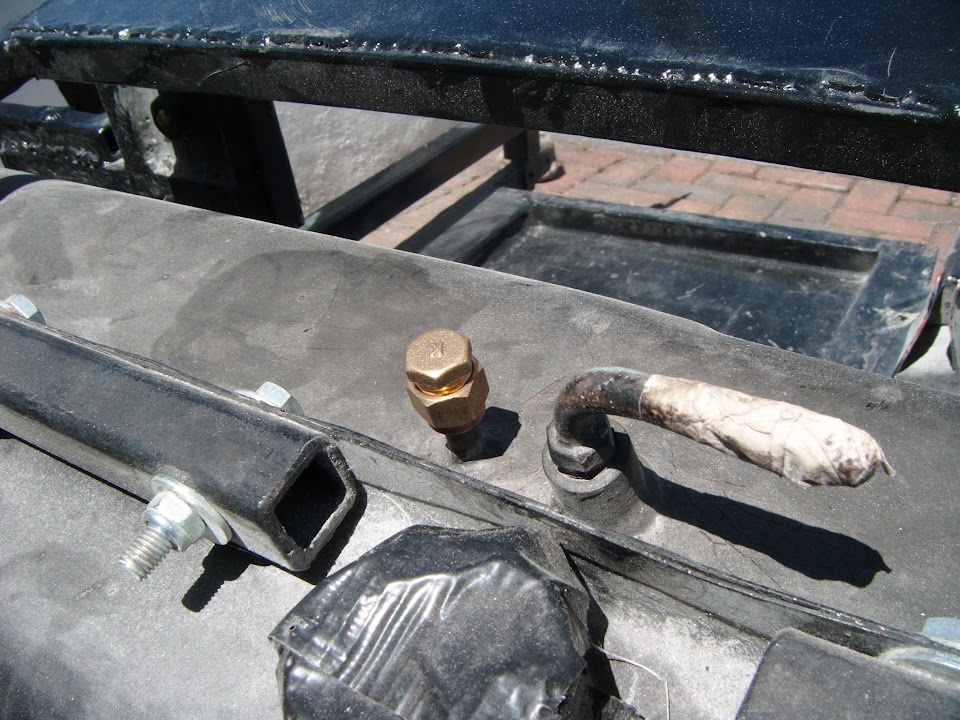
As my understanding is the tank is vented via the petrol cap & this vent was designed for the US market.
( Although please correct me if I am wrong. )
In the end I had to removed the fuel gauge sender.
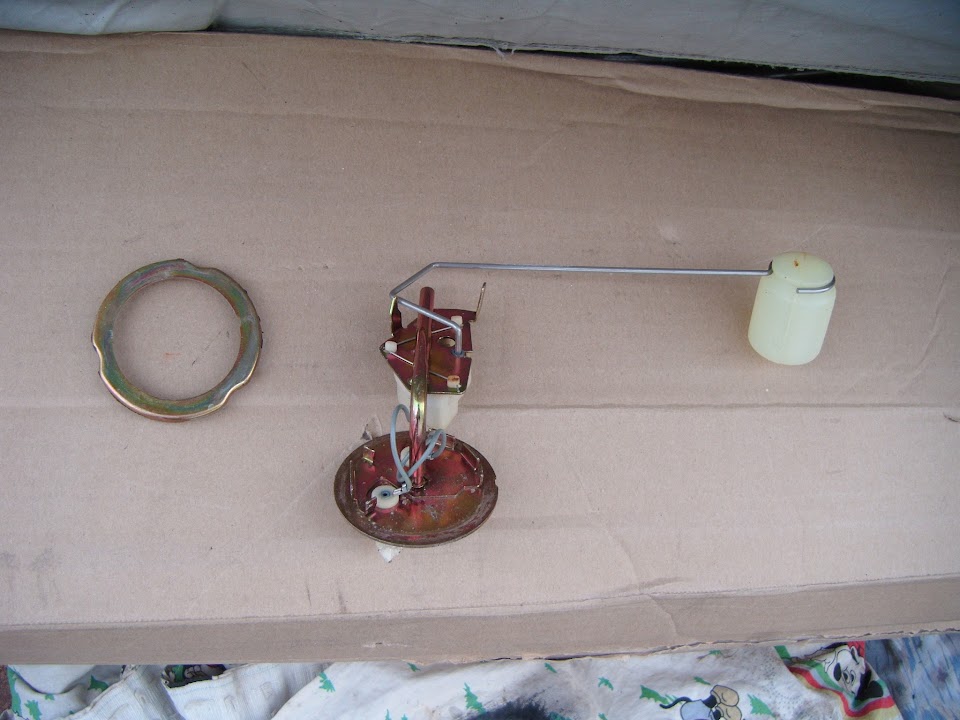
So I could remove the pipe completely.

And refit it facing the other way.

This allowed me to work out the best route for the new flexible fuel line.


This works well as I wanted to move the hole for hard fuel line to enter the boot over a bit.

Because I had already patched the original hole it might be too thick for the grommet.
So I drilled/filed out a fresh hole in "clean" metal.

And thankfully the grommet is a snug fit.

- - - - - - - - - - - - - - - - - - - - - - - - - - - - - - -
End of Part 1...
|
17th April 2015, 21:34
|
|
Senior Member
|
|
Join Date: Feb 2012
Location: Wembley, London
Posts: 5,056
|
|
Part 2:
I often type up my plans for the day in advance and then just add the photos / re-arrange the text as required.
These next two sections have been left as I wrote them first thing this morning...
Other Builds:
I always take hope from seeing other people's builds coming together.
So it is good to see a few of my favourites on the final straight.
Dave is on the road.
 Scottie
 is getting closer by the day.
Hopefully Mac and Swifty will be next ones finished.
- - - - - - - - - - - - - - - - - - - - - - - - - - - - - - -
Timing Perspective:
As it currently stands today, I still have no idea when I will finally be on the road myself.
But reading about the heath problems of nellieb & jmc14 puts this all into context.
Plus spending time over Easter with my family confirms that this car is not really my main priority.
However, I will keep chucking hours at it until the day comes with the car is done.
- - - - - - - - - - - - - - - - - - - - - - - - - - - - - - -
Unfortunately, this last section about perspective turned out to be a lot closer to the mark today than I expected.
As a teacher at my daughters' school had a heart attack this morning & died in hospital, he was 31.
He taught both of them in their first year (year 7) and was a very friendly bloke when we met him at parents' evenings.
So obviously I stopped car work to spend some time with my girls and we had all just had a cosy family night in with a takeaway & movie.
Take care, Paul.
|
17th April 2015, 21:53
|
|
Senior Member
|
|
Join Date: Apr 2014
Posts: 198
|
|
Hope the girls are coping Paul, I had a similar conversation about perspective and how short life is today with my best friend from school, he joined the RAF at 16 and seems to of moved progressively further away with each posting over 27 years so we rarely see each other now, he said you feel old when its your daughters 18 th birthday, to which I added can you remember when we went to stoneleigh kit car show with my dad, he said yes it was the spring we left school, I said yes and this year I am taking my daughter and her friend and its the spring they leave school ? Luckily my dad is still around and will also be attending in their motor home, I am looking forward to the family time more than the show. I am sure you building your car is teaching your children many lessons and also giving them many memories they will remember forever, so its not all about a car. Ed.
|
18th April 2015, 07:26
|
|
Senior Member
|
|
Join Date: Feb 2012
Location: Wembley, London
Posts: 5,056
|
|
Ed - Hopefully this weekend will give my daughters a better chance to come to terms with this.
( As clearly the whole school was in shock and very upset yesterday. )
I was actually in Center Parcs with my 3 best mates and their families last weekend and we have been friends since we were 12.
The oldest child in the group was not there as he was away in university, so you are right that time really flies by.
So whilst I'd love to be on the road in 2015, it certainly would not be the end of the world if it was 2016.
Take care, Paul.
|
|
Currently Active Users Viewing This Thread: 12 (0 members and 12 guests)
|
|
|
 Posting Rules
|
You may not post new threads
You may not post replies
You may not post attachments
You may not edit your posts
HTML code is Off
|
|
|
All times are GMT +0. The time now is 04:25.
|


 Linear Mode

