|
|
| Sammio Builds and discussions Sammio bodied car builds and specials |

14th April 2016, 15:00
|
 |
Senior Member
|
|
Join Date: Feb 2012
Location: Wembley, London
Posts: 5,056
|
|

Thursday - Part 3:
Finished off fitting the panel on the driver's side.
( You can just about see where the bottom of the panel has been hammered in to match the contours. )

Then cleaned all the surfaces before mixing up some bonding paste for the passenger side panel.


Not easy to get a decent photo, but the "teeth" have now been entombed.

Managed to extract the last 100ml from the tin…

To at least make a start on the driver's side panel.


Thankfully, a new tin arrived yesterday, so my 3rd round of bonding paste finished off the job.

Which means that the Moon Rover and body shell are now completely sealed together with no gaps. 
This join still needs to be tidied up at the front half of the car (plus the panels I did today are clearly not finished either).
- - - - - - - - - - - - - - - - - - - - - - - - - - - - - - -
The next steps will be to seal these panels in from the "inside" via the cockpit and boot areas.
But that means removing all the covers and I didn't want to push my luck with the clouds gathering overhead.
So that is all for today and until next time, take care, Paul. 

|
15th April 2016, 15:22
|
|
Senior Member
|
|
Join Date: Feb 2012
Location: Wembley, London
Posts: 5,056
|
|
Friday Wash Out:
There was no chance of getting any car work done outside today, but I still ended up getting soaked during a few domestic chores. 
But there was some good news when I stumbled this very nicely put together Sammio Spyder on Google Images yesterday.

But the thing that really caught my eye was the aluminium panel joining the gearbox cover to prop shaft tunnel.

This join is a problem area on my build, as there is currently a gap, where a "no longer available" rubber seal is supposed to go.

So at some point I will compare the size of panel I would need with what is left of my aluminium sheet.
I might also steal, sorry, I mean borrow, the aluminium gear lever surround idea too.
From what I've seen, tomorrow's forecast doesn't look much better than today. 
But hopefully I can make a bit more progress at some point over the weekend.
Until then, take care, Paul.
|
16th April 2016, 16:41
|
|
Senior Member
|
|
Join Date: Feb 2012
Location: Wembley, London
Posts: 5,056
|
|
One of those days...
This run of on/off/on/off rainy weather was a real pain in the  today.
But, I'll start with the one small job I could do inside the summer house...
As the other day when I was I pulling together all the various internal cockpit panels, I found these four as well.
( They will support the rear of the car from inside the boot. )

They looked a bit lighter in colour compared to the other, so they got an extra coat of paint/preservative.

Later on, I was able to turn these over and do the other side as well.
- - - - - - - - - - - - - - - - - - - - - - - - - - - - - - -
As for trying to work outside, it went something like this…
Take 1
- Peeled back the covers and got as far as removing one rear wheel before the rain returned.
Take 2
- Managed to get as far as removing the other wheel, but that was it before more rain.
Take 3 & 4
- Got as far as pulling out the extension lead, only to bring it straight back in again.
Take 5
- Ground down some of the excess bonding paste on the aluminium panel on the passenger side.
- But still had to bring all the power tools inside as the rain returned.
- By this stage I was seriously fed up and carried on for a bit longer using sand paper while getting wet.
- But had to admit defeat and come back inside again.
Take 6
- Finally had a dry spell long enough to finish the passenger side.
This included trimming a bit more off the return lip, so it is a similar depth to the other side.

Given that the inside of the wheel arches will be covered in Tetroseal, the finish didn't need to be smooth.
So eventually I had finished the driver's side too and after some cleaning, it was time to get some etch primer on.
Passenger Side:


Driver's Side:


By the time I'd finished, it had turned into a beautiful & sunny evening.

So at least I was able to leave the covers off to let the primer dry, while I got on with other stuff.
- - - - - - - - - - - - - - - - - - - - - - - - - - - - - - -
Also today, the postman delivered a parcel with some of this stuff in it.

Which is a length of fire/stove rope, so I can copy an idea I saw on Pompeyal's McCoy project.
He used this to reinforce his bonnet (by fibreglassing over it) and I will need to do something similar to my bonnet at some point.
( This should do a better job that the string I used to reinforce my boot lid. )
- - - - - - - - - - - - - - - - - - - - - - - - - - - - - - -
Until next time, take care, Paul.
|
17th April 2016, 14:25
|
|
Senior Member
|
|
Join Date: May 2013
Posts: 2,161
|
|
Looking good Paul!
Get that ally in the cockpit mate, like I said to Degsy, you can't put too much alloy in a home-built car!!
|
17th April 2016, 15:06
|
|
Senior Member
|
|
Join Date: Feb 2012
Location: Wembley, London
Posts: 5,056
|
|
Scottie - Cheers.
My original plan was to simply coat the cockpit's plywood panels in bed liner/Tetroseal for a very spartan look.
But the more time I spend spreading this stuff around the inside of the wheel arch, the less appealing that plan becomes.
I must confess I do love the look of an ally lined cockpit, so that may be added to the "Post MOT" jobs list.
- - - - - - - - - - - - - - - - - - - - - - - - - - - - - - -
Sunday Morning:
A bad night's sleep meant I was up early, but way too early to be making any sort of noise outside.
Still, at least it wasn't raining when I could finally start work on the car…
Removed some of the stuff stored in the boot.

It was actually quite chilly on the driveway, as the sun hadn't reached the area I am working in.

So I left the tins out on the rear patio where they could warm up gently in the sunshine.

Masked off the "sunny side" of the wheel arches.

Then slapped the first coast of Tetroseal on over the aluminium panels.
( Not easy to get any decent photos of the 'all black' finish. )
Driver's side:


Passenger side:


I know my approach to joining the body shell to the Moon Rover is a tad over-engineered, so say the least.
But, despite the fact it has taken me a very long time to do it, I really like the way this has turned out in the end.
- - - - - - - - - - - - - - - - - - - - - - - - - - - - - - -
Now I needed to complete the wheel arch join from the inside of the car…
This is the view of one of the aluminium panels from the cockpit.

The bulk of the first round bonding paste went in from this side.
Driver's side:

Passenger side:

- - - - - - - - - - - - - - - - - - - - - - - - - - - - - - -
End of Part 1…
|
17th April 2016, 15:08
|
|
Senior Member
|
|
Join Date: Feb 2012
Location: Wembley, London
Posts: 5,056
|
|
Sunday Afternoon:
The second round of bonding paste finished off the joins from the boot side.
This was very hard to reach, so the photos aren't great.
Driver's side:

Passenger side:

I also "capped" the last few open frame ends.


- - - - - - - - - - - - - - - - - - - - - - - - - - - - - - -
I gave a second coat of Tetroseal to the wheel arches.
( As before, see previous photos, as it all looks the same. )
- - - - - - - - - - - - - - - - - - - - - - - - - - - - - - -
By now the temperature had dropped & the clouds were rolling in.

So I just put some Kurust on the wheel hubs, before calling it a day.


Which means that I need to find my small tin of blue paint & the missing screw (bought years ago).
- - - - - - - - - - - - - - - - - - - - - - - - - - - - - - -
Overall, I'm happy with how things are progressing and I'm now off to spend some time with my family.
So until next time, take care, Paul.
PS
Confession time:
Remember this "hole" in one of my four sets of horizontal bridging panels/joins?

Remember how I said I was over thinking things and that this didn't really need to be closed off?
Well…

I know, I know, but I just couldn't help myself.
|
18th April 2016, 17:21
|
|
Senior Member
|
|
Join Date: Feb 2012
Location: Wembley, London
Posts: 5,056
|
|
A Mixed Monday - Part 1:
Thankfully the new screw I bought for the wheel hub (missing on my donor) was in the box I thought it was.

Masked off the threads poking through the drum brake.

Then test fitted the screw and it would not sit flush.
So I undid the other screw and of course the whole drum came away, so I thought I'd paint them off the car instead.

You can see where the newspaper was blown onto the fresh paint (it wasn't weighed down at the time).

I also put some of this blue Hammerite on the control arms.

Note: I'm not looking for a perfect finish, I just wanted to smarten it up a bit.
Then I put some masking tape over where the rear cockpit wall panels will be bonded on.


Then slapped some Tetroseal over the inside joins of the wheel arch panels from the cockpit side.
( I will do the "boot side" another day, as I want to do some more work in that area first. )


Now at this point the nice start to the day had been replaced with a drop in temperature and darker clouds.

But the forecast said it would stay dry, so I made a start on the cockpit panelling. 
I started with the main rear cockpit wall panel and it had bowed a little while being stored.

There wasn't an easy way to push out the middle, while pulling in the outside edges, so I will just live with that.
I put some masking tape over the seat belt mounting points & the fuel gauge sender.

Then it was time to bond it into place.

End of Part 1…
|
18th April 2016, 17:22
|
|
Senior Member
|
|
Join Date: Feb 2012
Location: Wembley, London
Posts: 5,056
|
|
A Mixed Monday - Part 2:
The next round of bonding paste fixed the outside edges of the rear cockpit wall in place.
( Both sides were a single panel cut into two sections so it can fit into the space available. )


Which left the rear cockpit wall looking like this.

By this stage the paint on the drums was dry, so I flipped them over and applied some Kurust.

Note: When this was set, I sanded down the braking surface, just to be on the safe side.
I left all of that to dry/set and switched to domestic chores.
I was just putting some washing on the line, when I felt some drops of rain. 
So I had to run back to the driveway, swearing profusely every step of the way…
Thankfully, I got all the covers back on in time.

- - - - - - - - - - - - - - - - - - - - - - - - - - - - - - -
Later on I was able to reassemble the drum on driver's side.

And refit the wheel (remember the car is still jacked up).

I started to put the passenger side together, but was still having trouble with the new screw.
I thought I felt a "lump" on one surface, so I ground that down, but still no joy.
It was only when I tried the screw without the drum in place that I discovered the problem.
The hole in the hub, was partially blocked, so I guess the previous owner just left the screw off. 
My ham fisted attempt to free the blockage with a bolt ended up like this.

So for the second time today I found myself f'ing and blinding.
I will add fixing this to the list of jobs I am leaving to the Triumph garage.
But for now, I have refitted everything so I can put the car back on the ground at some point.
The weather was still a bit dodgy, so I just uncovered the passenger side.

I made a rough template to show where the framework and wiring loom are.

After a lot of messing about test fitting the side panels, I decided to do this side in stages.
So two, of the four, side panels were bonded in, with a couple of clamps holding them in position.

Which leaves the rear passenger corner looking like this.

End of Part 2...
|
18th April 2016, 17:23
|
|
Senior Member
|
|
Join Date: Feb 2012
Location: Wembley, London
Posts: 5,056
|
|
A Mixed Monday - Part 3:
I have been thinking a lot about how I am going to "fill in" the gaps in the top corner.

And given Scottie's enthusiasm for an ally panelled interior, I had a play…
Option 1 - Try to make the corner panel follow the curves of the cockpit.

Option 2 - Use a 90 degree join and let the cockpit curve overhang.

If, and at this point, it is a BIG IF, I went down this road, I would screw the ally panels to the plywood.
So I will have another think about what is the best way to sort this out.
By now there was another few drops of rain arriving, so I called it a day.
Until next time, take care, Paul.
|
18th April 2016, 19:02
|
 |
Senior Member
|
|
Join Date: Jul 2011
Location: Marmande 47200
Posts: 501
|
|
What about pop rivet fixings they would look the part and work on the ply I'm sure..
|
19th April 2016, 07:31
|
|
Senior Member
|
|
Join Date: Feb 2012
Location: Wembley, London
Posts: 5,056
|
|
Pops - Unfortunately, I don't know enough about rivets to trust them in plywood.
I was actually thinking about using a hex head screw, something like this.
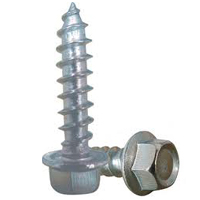
Hopefully, this would look slightly more industrial than using normal wood screws. 
- - - - - - - - - - - - - - - - - - - - - - - - - - - - - - -
Work in Progress:
Using bonding paste is a messy job and despite spending a lot of time on the cockpit panels yesterday they currently look awful.
The good news is that I know, or at least hope, the interior will look a lot better by the time I am finally finished.
Also, my frustration at sheering a bolt in one of the wheel hubs meant I kind of overlooked this photo.
As this actually represents the end of a very long process that has turned out much better than I could have hoped for.
The inside of the wheel arches now looks "factory" in some places and pit lane repaired/modified in others.
So full credit to Triumph for the former, but I'll happily take the credit for the latter. 
- - - - - - - - - - - - - - - - - - - - - - - - - - - - - - -
Priority Management:
I will think about whether I could make a decent job of adding an aluminium skin to the internal cockpit panels.
However, my first priority must be to "seal off" the entire cockpit before I do anything else.
So I plan to follow the approach taken by Mister Towed (& others) to seal their rear cockpit corners.
And I will worry about what to cover the cockpit walls with another day.
- - - - - - - - - - - - - - - - - - - - - - - - - - - - - - -
Anyway, let's see what I can get done today, cheers, Paul.
|
19th April 2016, 19:10
|
|
Senior Member
|
|
Join Date: Feb 2012
Location: Wembley, London
Posts: 5,056
|
|
Tuesday - Part 1:
Jacked up the car, removed the big blocks of wood, lowering it back to the ground & pushed it back towards the hedge a bit.

As, picking up from the post I made this morning, I have now finished all the work underneath the back half of the car.
I still have to finish off the underside of the front half of the car, but I'll come back to that another day.
Instead, I removed the clamps from the cockpit side panels I bonded in yesterday.
( Sorry for the blurred photo. )

As always, I am still pleasantly surprised when this stuff actually works and everything is held in place.
Believe it, or not, but almost 2 hours passed before I was able to bond the next panels in.
As I needed to grind down some excess bonding paste that was in the way & then hoover the dust & clean the surfaces.
Plus the panels needed a slight tweak here and there to fit back into the, now fixed, gaps available.
And there was laundry to do.
Eventually, I bonded in the last two panels for the passenger side.

Plus the main panel for the driver's side, which had to be clamped into position.

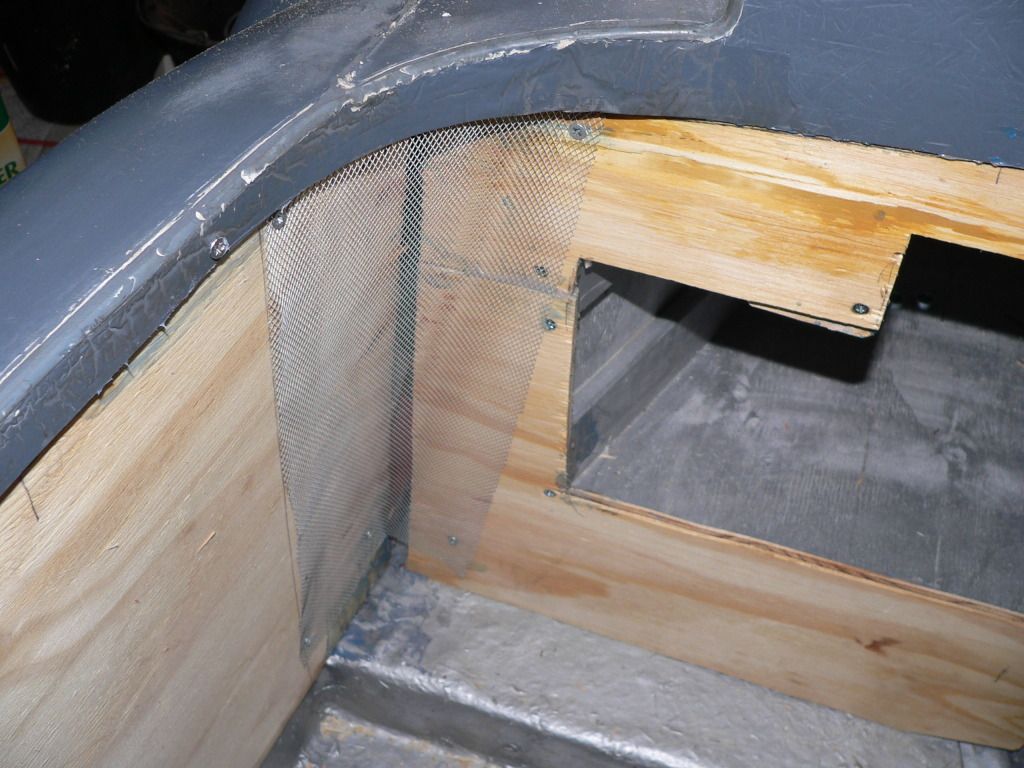
I started shaping some mesh for the rear passenger corner.

But then had an other idea about how to fill in the gaps…
The plywood is too thick to fit in the space available, but my fibreglass off cuts are much thinner.
So I made some cardboard templates:
Passenger side:

Driver's side:

Note:
I can only fill in the gap on the rear cockpit wall at this point, until the adjacent plywood panel for the cockpit side is fitted.
At around 12.45, the sun still hadn't reached the car on my North facing driveway.

At which point it finally dawned on me that the car is actually on wheels. 

So now the fresh bonding paste could cure in the sunshine.
Cut out the panels from fibreglass round the back of the Summerhouse.
( As I did not want to cover all the washing hanging on the line in dust! )

End of Part 1…
|
19th April 2016, 19:11
|
|
Senior Member
|
|
Join Date: Feb 2012
Location: Wembley, London
Posts: 5,056
|
|
Tuesday - Part 2:
It was almost 2pm by the time I was ready for the next round of bonding.
I measured out enough paste to finish off the passenger side panels and the in fill panels.
Just before I added the catalyst, I thought I'd better remove the clamps.
At which point I realised that although the bonding paste was firm to the touch, it hadn't set fully.
As the main passenger panel wanted to move when the clamp was loosened.
So the clamp was quickly retightened and I now had too much paste in a container.
I decanted 100ml into one of my plastic cups and used that to:
- Fix in the 3 fibreglass panels in the rear passenger corner.

- Fix in one fibreglass panel in the rear cockpit wall on the driver's side.

- Fix in one plywood "in fill" panel on the driver's side wall.

I just wrapped the remaining paste in cling film for use another time.

I know it is still very messy, but the passenger corner is looking marginally better now.

Rather than try to rush things, I just had to accept that the bonding paste on the driver's side panel needed more time to set.
So I took a break from the car and got on with a few other things.
- - - - - - - - - - - - - - - - - - - - - - - - - - - - - - -
It was almost 6pm by the time I had a chance to see what would happened when I loosened the clamp…
And the good news was, absolutely nothing happened, it was all set solidly.
But before I did anything else I made a template for the framework on the driver's side.
( Something that would have been much easier to do if I'd remembered before fixing the first panel. )

I also made some more cardboard templates for the last gaps to be filled.

Which I then cut out of fibreglass.

As the fibreglass is thicker than the cardboard, two of the panels just needed a bit of a tweak to fit.

Which wouldn't be to bad if I didn't have to go from the front drive to the bottom of the garden to do it.
End of Part 2…
|
19th April 2016, 19:12
|
|
Senior Member
|
|
Join Date: Feb 2012
Location: Wembley, London
Posts: 5,056
|
|
Tuesday - Part 3:
Then I mixed up what was left of the bonding paste I'd prepared earlier and fixed the last two panels in place.
The front one needed to be clamped in place.

The fibreglass panels filled the gaps as best they could.

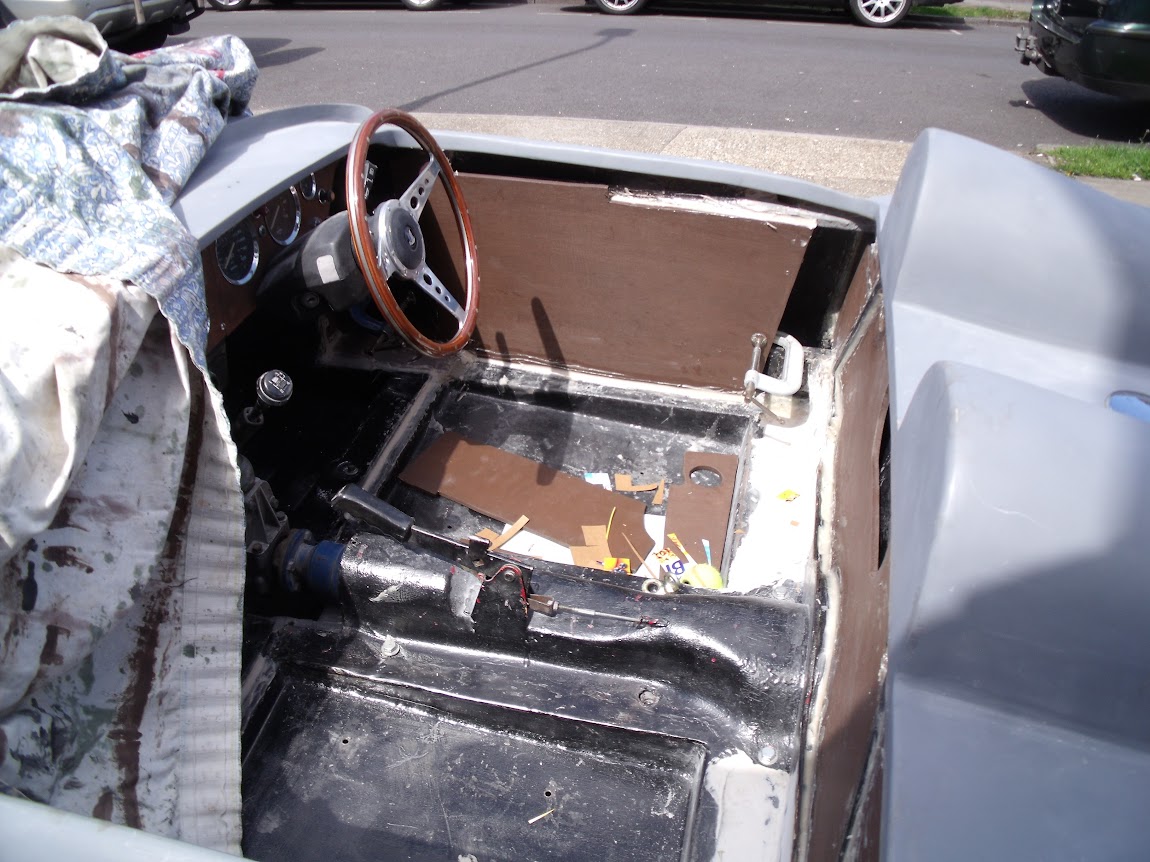
The driver's side is now looking like this.

And the internal cockpit is slowly coming together.

I still need to seal off a few areas at the front of the cockpit, where I've left a gap for the side mirror bolts.
( See the two holes in the body shell, just above the panelling. )

But that was certainly enough for today.
Until next time take care, Paul.
|
19th April 2016, 21:17
|
|
Senior Member
|
|
Join Date: Apr 2014
Location: Midlands
Posts: 405
|
|
Wow no wonder you took a bit of a break back there Paul you needed to build up some reserves of energy! Great progress and with every panel bonded it's coming ever closer to the fun stuff... driving it! It must be satisfying that the prep work come together so well.
Keep it up and keep one eye on the weather as always.
|
20th April 2016, 18:18
|
|
Senior Member
|
|
Join Date: Feb 2012
Location: Wembley, London
Posts: 5,056
|
|
Jones - Cheers Ian.
I am not sure about having reserves of energy, as I feel absolutely knackered at the moment.
( I am getting too old to be spending hours crawling around on the (cold) ground. )
My car break at the start of the year came about as I started a new job on a self employed basis.
The first project I worked on was for 3 months and I hope to start another project with them soon.
Hence the big push to get as much done as possible while I have some time available.
It is very satisfying to see the cockpit panels finally going in, even if they are a bit wonky.
( Which couldn't be helped due to a mis-match between the body shell and the framework. )
One of the biggest problems I have faced is trying to work out the best sequence to build things.
I'm pretty good following IKEA instructions, but my whole project seems to have just one illustration…

Thankfully, I am on the road to completion now & just need to keep ticking the jobs off the list.
- - - - - - - - - - - - - - - - - - - - - - - - - - - - - - -
Wednesday - Part 1:
Today, I 'ave been mostly applying fibreglass matting…

But I started by removing the clamp holding the front panel on the driver's side wall.

Allowing the bonding paste to cure over night has left everything feeling solid.
Now I just needed to tidy things up a bit before adding the fibreglass matting for extra strength.
This involved blocking off any holes to prevent dust getting in behind the panels.


And throwing a few dust sheets around.

Then I ground/sanded any excess bonding paste from the panel work, quite a messy job.

Cleaned everything up.

Then worked my way through a total of 5 fibreglassing sessions, each around 250ml.
( Any more and the resin starts to set before I've finished applying it. )
For the final session of the day, I thought I would try to "box in" one side mirror section.

This was an epic fail, and I quickly transferred the matting to other parts of the cockpit.
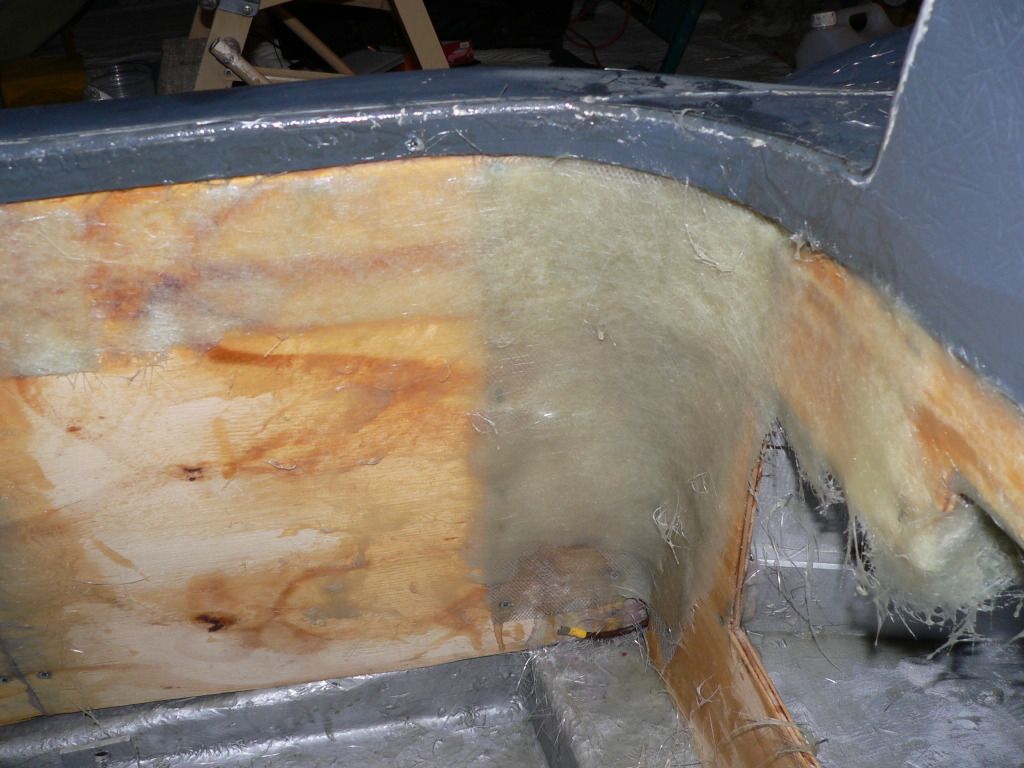
By the close of play, some areas were done and lightly sanded (to prevent fibreglass splinters).
Other areas will need to be finished off tomorrow, but this is what it looks like now.
Driver's side:


End of Part 1…
|
20th April 2016, 18:21
|
|
Senior Member
|
|
Join Date: Feb 2012
Location: Wembley, London
Posts: 5,056
|
|
Wednesday - Part 2:
Passenger side:


Until next time, take care, Paul.
PS
A curse on the person who gave Google plus images a photo code running into 100's of characters.
As I keep hitting the forum's 10,000 character post limit.
|
20th April 2016, 19:51
|
 |
Senior Member
|
|
Join Date: Dec 2013
Posts: 839
|
|
Great progress made over the last couple of days Paul, me thinks this build will soon be on the road in one form or another.
|
21st April 2016, 17:43
|
|
Senior Member
|
|
Join Date: Feb 2012
Location: Wembley, London
Posts: 5,056
|
|
Swifty - Thanks, I've had a good run at the car recently and it is slowly making a difference.
The only chance I have of being on the road soon (ish) is sticking to my plan of "just" getting it to an MOT standard.
I've used this photo of Micky1Mo's BMW powered Sammio "on the road", but not 100% finished, before:

Which means any thoughts of putting in a lovely aluminium lined cockpit interior will have to wait.
Instead, I need to finish "sealing" the interior panel work and simply paint it all black for now.
- - - - - - - - - - - - - - - - - - - - - - - - - - - - - - -
Wednesday - Extra:
I forgot to mention yesterday the reason my five fibreglassing sessions took most of the day…
After each session I can to clean the brush and roller in acetone and leave it to fully dry.
( I always remember SeaNick getting acetone contamination during his MX250 build. )
So I ended up with a routine of fibreglassing / domestic chores / 'glassing / chores / etc.
The other thing worth mentioning is not to ignore spilling some catalyst on your jeans.
Yes, I just wiped it off and carried on and by the time I stopped working on the car my leg was itching like crazy.
You'd think they would put corrosive warning symbols and text on the bottle wouldn't you?
Thankfully, my leg is much better now and my work clothes have been washed.
I also forgot to mark the day, 4 years ago, when I bought my 'barn find' donor.

OK, technically it was a modern farm building, but where is the romance in that?
- - - - - - - - - - - - - - - - - - - - - - - - - - - - - - -
Thursday - Part 1:
There was a lot of other stuff going on today, so I wasn't going to have a lot of time on the car.
Given the clouds above, I only unwrapped part of the car.

Made another mess tidying up any stray bits of fibreglass matting.

"Plugged" the holes in the seat belt mounting plates.

Then added some fibreglass filler around the inside edges.

Although the main use of the filler was to start shaping the underside of the cockpit's top edges.


At this I am not 100% this is going to look/feel right and some sections are certainly working better than others.
But it is still a work in progress at this stage, so I will reserve judgement for now.
- - - - - - - - - - - - - - - - - - - - - - - - - - - - - - -
After my attempt at using mesh failed yesterday, I was looking at by fibreglass "scrap" pile.
There were some promising looking curves here.

So I cut them out and cleaned them up.

Chance would be a fine thing if that idea had worked.
End of Part 1…
|
21st April 2016, 17:44
|
|
Senior Member
|
|
Join Date: Feb 2012
Location: Wembley, London
Posts: 5,056
|
|
Thursday - Part 2:
Instead I ended up chopping them up further to fill in the gap in stages like so.

But before I started messing about with fibreglass I roughly sanded down the fibreglass filler I'd applied earlier.


Then mixed up around batch to add along the bottom edge of the rear cockpit wall.

- - - - - - - - - - - - - - - - - - - - - - - - - - - - - - -
The round of fibreglassing that I did finished off some of the areas I started yesterday.
Plus I made a start on the passenger side "hole" for the side mirror bolts.

I also started to extend the matting from the sides (left of photo) along the join between the front bulkhead & lowered floor pans.

- - - - - - - - - - - - - - - - - - - - - - - - - - - - - - -
Roughly sanded down the filler.

- - - - - - - - - - - - - - - - - - - - - - - - - - - - - - -
Cut out the next section of fibreglass for the passenger side "hole", which is supported by the other two pieces.

But then complete disaster struck when I was test fitting a fibreglass section to box in this "hole".

Yes, you guessed it, Mr Clumsy strikes again... I dropped the piece behind the panelling.
Actually, I was so dumb struck by my own ineptitude that I could barely swear.
So at some point I need to cut out an access hole in this panel to retrieve it.

As it turned out, I was running out of car time, so I decided to quit before I did any more damage.
So until next time, take care, Paul.
|
|
Currently Active Users Viewing This Thread: 2 (0 members and 2 guests)
|
|
|
 Posting Rules
|
You may not post new threads
You may not post replies
You may not post attachments
You may not edit your posts
HTML code is Off
|
|
|
All times are GMT +0. The time now is 17:21.
|


 Linear Mode

