|
|
| Sammio Builds and discussions Sammio bodied car builds and specials |

12th November 2014, 15:37
|
 |
Senior Member
|
|
Join Date: Feb 2012
Location: Wembley, London
Posts: 5,056
|
|
Scottie & Dave - Thanks again chaps. 
Hopefully testing on the inside of the boot lid will give me a better idea of what paint will/will not hide/cover.
- - - - - - - - - - - - - - - - - - - - - - - - - - - - - - -
Another Skim:
Only had the chance to get another round of filler on the boot lid today.

I used a metal spreader in an attempt to reduce the amount of excess filler I need to sand off.
With a bit of luck I will get a chance to sand that down tomorrow, Paul. 
|
12th November 2014, 16:14
|
|
Senior Member
|
|
Join Date: May 2013
Posts: 2,161
|
|
"Hopefully testing on the inside of the boot lid will give me a better idea of what paint will/will not hide/cover."
This made me smile Paul! I used to think that paint would cover certain things, IT COVERS NOTHING, in fact what it does is HIGHLIGHT the blemishes.
I don't think any one would argue with that statement.
(WCA perhaps! :-)
|
13th November 2014, 09:40
|
|
Senior Member
|
|
Join Date: Feb 2012
Location: Wembley, London
Posts: 5,056
|
|

Scottie - Cheers. Deep down, I know there are no short cuts to getting a decent paint finish.
Last night I went back and re-read your lid painting experience and the experience of Mister Towed & DaveCymru.
The one thing that really stuck me was the pride you all took from doing the work yourself.
So here are a few quotes to prepare me for all the work that lies ahead...
Quote:
Originally Posted by davecymru

If you try and rush any part of the filling, sanding, priming, sanding, painting, flatting (sanding with a posh name!) processes, it'll look rubbish!
|
Quote:
Originally Posted by phil9
These are home built cars put together by amatuers, they're not going to be perfect.
|
Quote:
Originally Posted by Mister Towed
...the finished result is going to look like a 60 year old race car that's had a hard life on the track and been damaged and hastily repaired in the paddock occasionally in its past...
|
With a bit of luck I will get the chance to sand the boot lid later on today.
- - - - - - - - - - - - - - - - - - - - - - - - - - - - - - -
Only Fools And Horses:
It appears that, as Del Boy often described Rodney, I've been a bit of a plonker. 
There was a throw away comment on a Rods 'n' Sods thread about fog light rules, so I did some digging last night.
It turns out that it is a legal requirement to fit one on any car first used after 01/04/80.
http://www.motuk.co.uk/manual_130.htm
To my horror, when I checked the date my donor Spitfire was first registered, it turned out to be 02/04/80.
 
Do not ask me how I made such a school boy error, but, for the sake of 2 days, I am currently stuffed.
As I have already removed everything to do with the fog light switch and its associated wiring. 
However there is some good news:
- I still have the original Spitfire fog light switch in a box "somewhere" in the Summerhouse.
- I have more than enough spare wire to re-create the wiring required.
- Although I have already wrapped most of the loom, it is not fitted to the car.
- Plus the rear loom wires are not wrapped as I need to shorten them to make the rear lighting layout.
Finally, the rules do not specify a minimum size for a rear fog light.
http://www.legislation.gov.uk/uksi/1...hedule/11/made
So some small LED light should be OK, something like this.
http://www.theonlinepartsshop.co.uk/...on-the-market/
I know I have one of the "youngest" Sammio donor cars, so I should have been more careful.
I remember discussing reversing lights, plus the seat belt & hand brake warning lights.
So somewhere along the line I must have just assumed that the fog lights were part of the same group of optional items.
Clearly all the Sammio Spyder rear lighting layouts I have looked at don't have a fog light, because they don't need one!
AndyP57 used a 1981 Spitfire as a donor for the original silver Ribble Cordite/Navigator on show at Stoneleigh.
That car wasn't fitted with any fog lights, but it was also not on the road at the time, so had not been given an MOT.
Note: If the new owner of that car is reading this, I'd love to know if you got an MOT without fog lights fitted.
I have no intention of driving my car in the fog, which was a bad enough experience when I got caught out riding motorcycles. 
But if I have to fit fog lights to be road legal, then that is what I will do.
Cheers, Paul.

|
13th November 2014, 11:10
|
|
Senior Member
|
|
Join Date: Apr 2014
Posts: 198
|
|
Good morning sir,have a look at these :- ebay 121440956978
Kill 2 birds with one pebble as you need red rear reflectors I have some on my jeep and they are DOT marked. They have 3 wires earth low and high light intensity so I wired mine both positive together and its nice and bright. Option 2 :- 331281127061 I also have these in fact I picked the plastic dome off a pair cut a small disc of translucent orange PVC type stuff from my daughters inflatable pumkin lantern sandwiched them back together and used them under the door mirrors as side indicator repeators. Use them as number plate bolts a red right one as fog lamp, and a white left one as reverse. Or an angled one on the left as number plate light. I just bought a 12v remote controlled switch to fit a fog lamp to my folding camper trailer just for a bit of a laugh. Anyway stop reading this and crack on so I have something to read whilst pretending to be busy on the sewing machine later. I will send you some pics of my camper as it nears completion in a few weeks seen as it was your thread that inspired its major rebuild and now I'm becoming half proficient on the sewing machine I may even be able to assist you come trimming time, or even take the machine to stoneleigh we can have a stab at drunken upholstering! Contact adhesive drills and leather needles what could possibly go wrong? Ed.
|
13th November 2014, 12:56
|
|
Senior Member
|
|
Join Date: May 2013
Posts: 2,161
|
|
I think the bit about fog lights may be good news for me Paul.
My donar was first registered in 1971, so it looks like it does not need a fog light?
|
13th November 2014, 14:23
|
|
Senior Member
|
|
Join Date: Feb 2012
Location: Wembley, London
Posts: 5,056
|
|
Ed - Thanks for the ebay listing, that is a great find.
As it would allow me to keep my original rear lighting layout and still follow the rules.

Good luck with your camper & sewing.
Scottie - I think 1971 was a good year for a donor car, no fog lights & no road tax costs.
- - - - - - - - - - - - - - - - - - - - - - - - - - - - - - -
More of the same...
It was a bit damp out when I finally had the chance to sand down the lid.

At this point, all I can say is that it is certainly smoother than when I started.
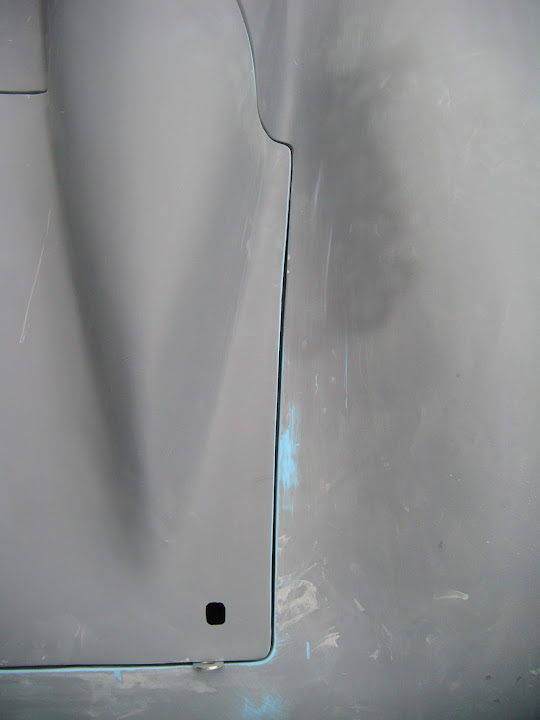
Although the etch primer shows up the fact it certainly isn't flawless. 

But as far as my painting experiment goes, I will be testing the normal undercoat/pimer on this surface when it arrives.
I take Scottie's point about how the paint will really highlight the blemishes.
However, I'd like to see what I am up against before I start the preparation work on the main body shell.
Although the next jobs are to sort out the boot lid rain channel and mounting points for the locking pins.
So until next time, take care, Paul.
|
13th November 2014, 17:35
|
|
Senior Member
|
|
Join Date: May 2013
Posts: 2,161
|
|
Paul! The inside of your boot lid looks smoother than than snake sh*t
and certainly smoother than the outside surface of my car at the moment!
|
14th November 2014, 12:46
|
|
Senior Member
|
|
Join Date: Feb 2012
Location: Wembley, London
Posts: 5,056
|
|
Scottie - Cheers, I guess the real test will come when I get some paint on it. 
- - - - - - - - - - - - - - - - - - - - - - - - - - - - - - -
Holding Pattern:
It was late afternoon (& dark) when my delivery from Jawel Paints arrive safe and sound.

Top marks to Jawel for careful wrapping.
( Green Paint, Grey Primer, Thinner, Yellow Paint. )

When it finally stop raining today I could get my first look at the colours in daylight.
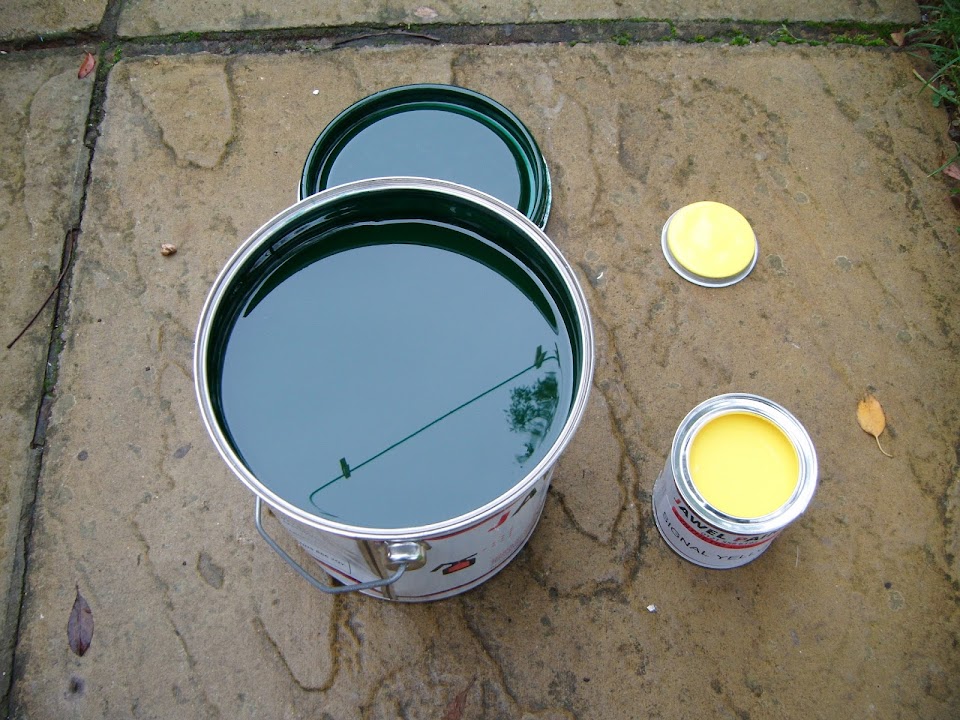
Even though the sky was pretty dull overhead, the green is absolutely gorgeous.
I can also see why Scottie has to work hard not be seen in the paint reflection.
Although, clearly, I could have picked a better angle to avoid getting our clothes line in the shot.
Whilst it was very tempting to get some high build primer on the inside of the lid right away, I need to wait.
As I can't start painting the inside surface until I am happy that the sides give me the right gaps.
So spend some more time sanding the boot opening edges and the edges of the lid to even out the gaps as best I could.
Initially I was planning to use some thick washers to check the gaps.

But if I add the thickness of the paint to both sides, perhaps this gap is not big enough?
So far, the passenger side looks pretty good to me.

The bottom edge is also there, or thereabouts.

But I still need to do a bit of work on the driver's side.
But it occurred to me that I should really fix the bonnet pins into position before trying to finalised the gaps.
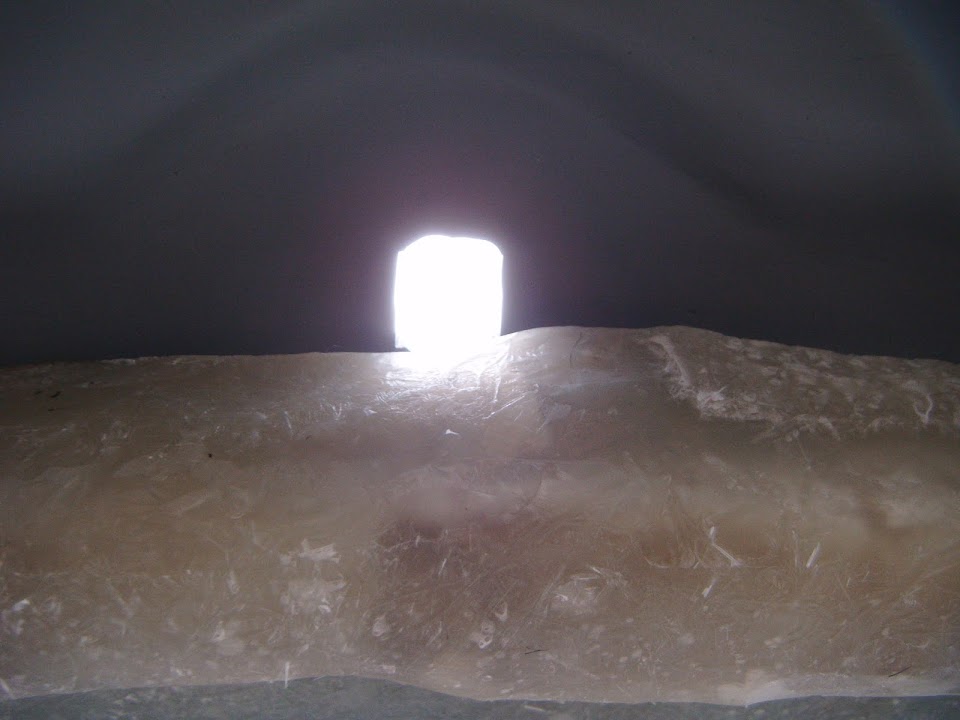
You can see where I need to re-route the rain channel by looking through the bonnet pin holes.
Top Right Edge:

Bottom Left Edge:

Unfortunately, these days I just can not physically lift the body shell cleanly off the frame work by myself.
So I will now need to wait until the weekend when my wife can help me move it (weather permitting).
Until next time, take care, Paul.
|
14th November 2014, 14:18
|
|
Senior Member
|
|
Join Date: May 2013
Posts: 2,161
|
|
Apart from where you've yet do do work Paul, your gapping is absolutely spot-on.
With the dark colour you've chosen, the gapping will be almost invisible anyway, its only the lighter colours that would show any discrepancies. Crack on mate!
|
14th November 2014, 15:08
|
 |
Senior Member
|
|
Join Date: Jul 2011
Posts: 5,328
|
|
Agree about the gaps, looking spot on so far.
Going to be a nice colour combo too, you can't go wrong with Jawel Cellulose. |
14th November 2014, 16:11
|
 |
Senior Member
Enthusiast
|
|
Join Date: Dec 2006
Posts: 1,130
|
|
That green looks stunning.
I'v got a nice Jag just waiting for that green  |
16th November 2014, 13:36
|
|
Senior Member
|
|
Join Date: Feb 2012
Location: Wembley, London
Posts: 5,056
|
|
Scottie, Mr T & Micky - Thanks chaps.
I know that painting the shell is still a very long way off, but seeing the colour does make me smile.
- - - - - - - - - - - - - - - - - - - - - - - - - - - - - - -
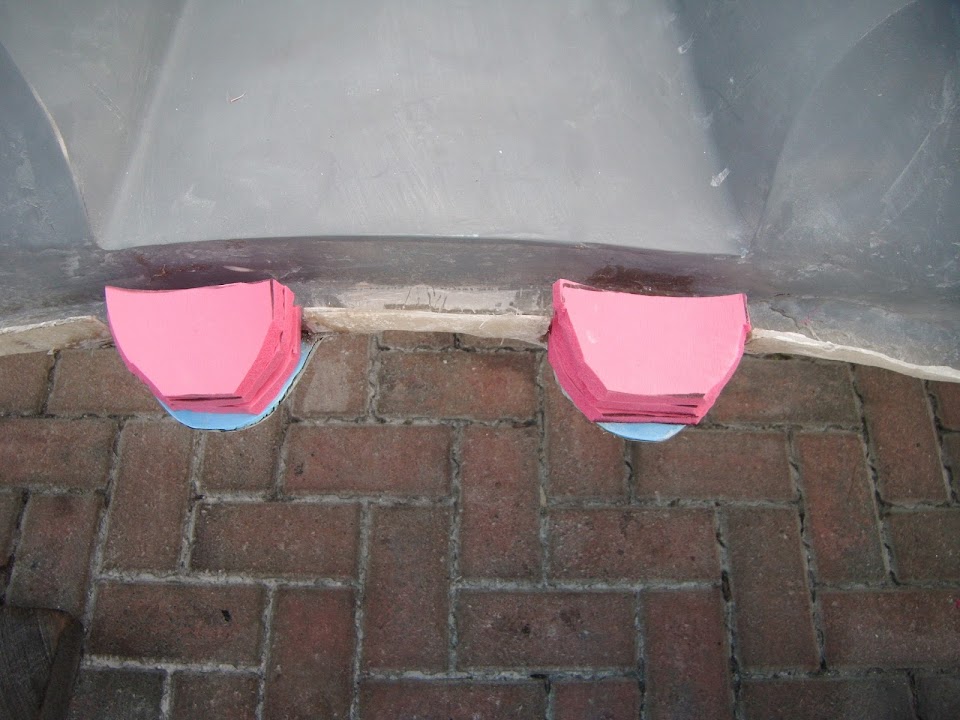
Some Preparation Work - Part 1:
Turns out Saturday was family Christmas shopping day!
Today is also not really my own either, so I made the most of the little chance I got.
My wife helped me lift body shell and I propped up the rear end to give me more space to crawl under it.

I then taped some washers to the body shell to ensure the lid was basically centred.

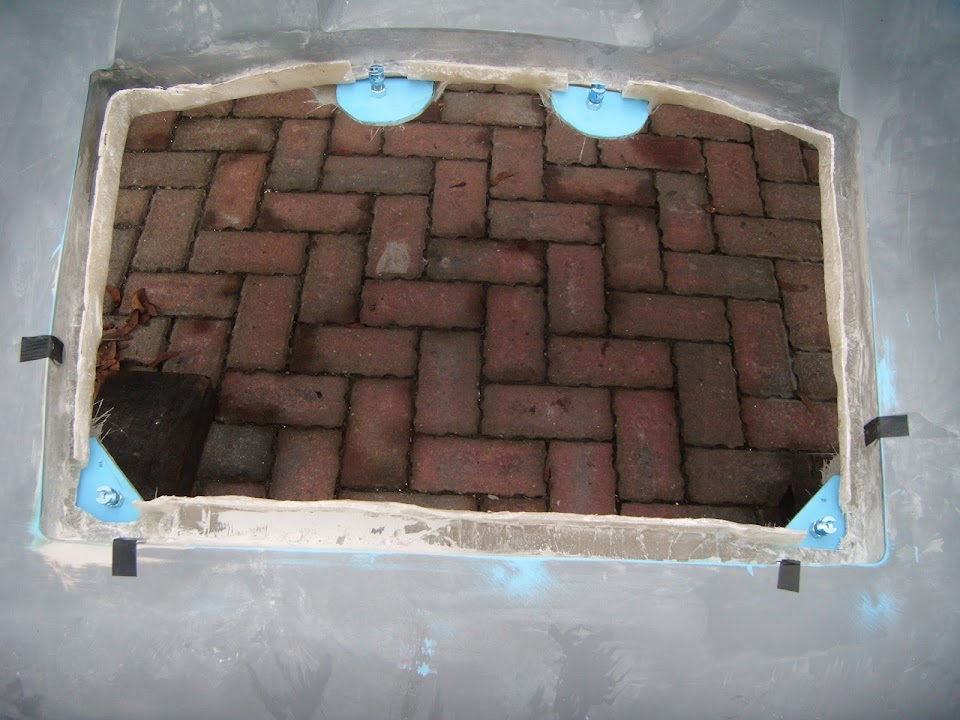
This is the view of the holes for the locking pins from underneath.


Initially it looked like there was only one hole that would work without any further adjustments.
But when I put the lock in place, the locating pin was just a little too close to the edges of the rain channel.

So I was going to have to made some adjustments to accommodate all four holes.
A quick double check confirmed that the bottom of the rain channel was deep enough to be used to support the bolt mounts.

I will add a simple triangle to the bottom edge corners.

But I will have to build extra supports for the top edge bolt mounting plates.

I marked up a couple of my fibreglass "off cuts" and cut them out.


Then I butchered the existing rain channel, which I will be rebuilding to match the locking pins.


End of Part 1...
|
16th November 2014, 13:38
|
|
Senior Member
|
|
Join Date: Feb 2012
Location: Wembley, London
Posts: 5,056
|
|
Some Preparation Work - Part 2:
I marked up where the fibreglass bolt mounting plates are going to go and this gives you the general idea.


Once the bottom of the channel is in place, I will rebuild the inside edge that supports the rubber seal.
Note:
Without a doubt, I should have fitted the locking pins first, then build the rain channel around them from the start.
I actually cut a slice off the rubber seal to do some more testing and it will sit like this.

Currently large sections of the rain channel touch the lid, so I gave them a quick initial trim.


However, I want paint on the inside surface of the boot lid before making the final adjustments to the rain channel.
I get the impression that getting this gap right will be a very time consuming job, but will also be worth the effort.
As there is no point in building a boot area at all if I can't keep it water tight.
Talking of water, the sky had looked like this even before I stepped outside.

So there was no way I could risk starting some fibreglass work, so I covered the shell up for the day.
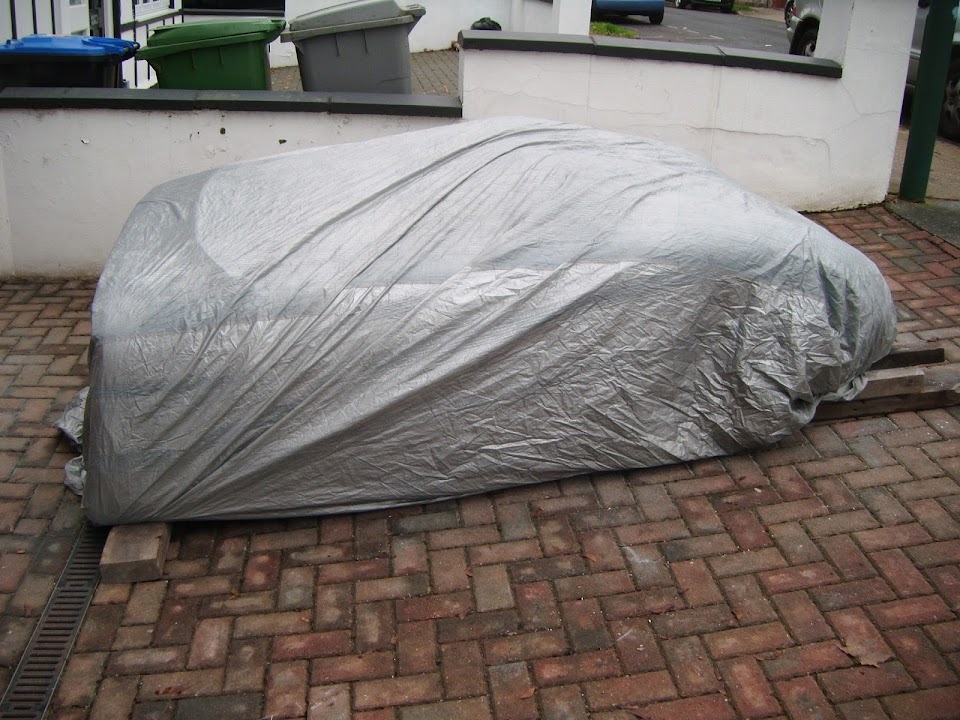
Sure enough, it was raining again, shortly after that photo was taken.
By all accounts I am off doing more family Christmas stuff shortly, so I'll leave you to it.
Take care, Paul.
|
18th November 2014, 12:53
|
|
Senior Member
|
|
Join Date: Feb 2012
Location: Wembley, London
Posts: 5,056
|
|
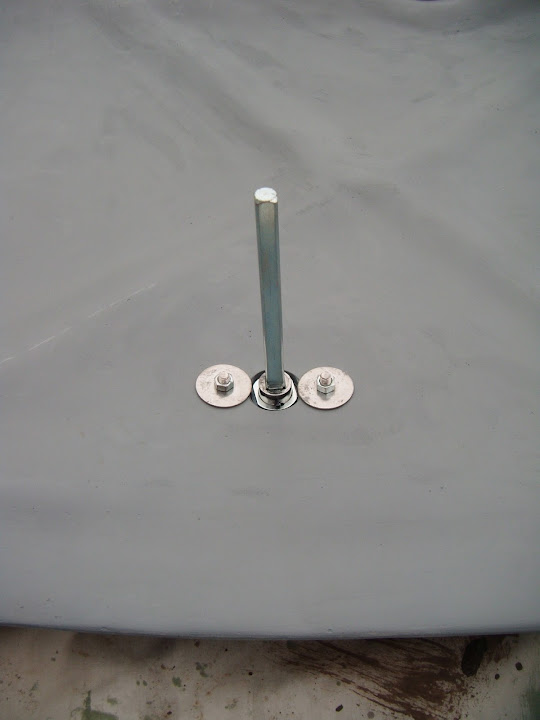
A Bit Of Progress:
The persistently damp conditions of late have not helped my cause, but I did get a little bit done today.
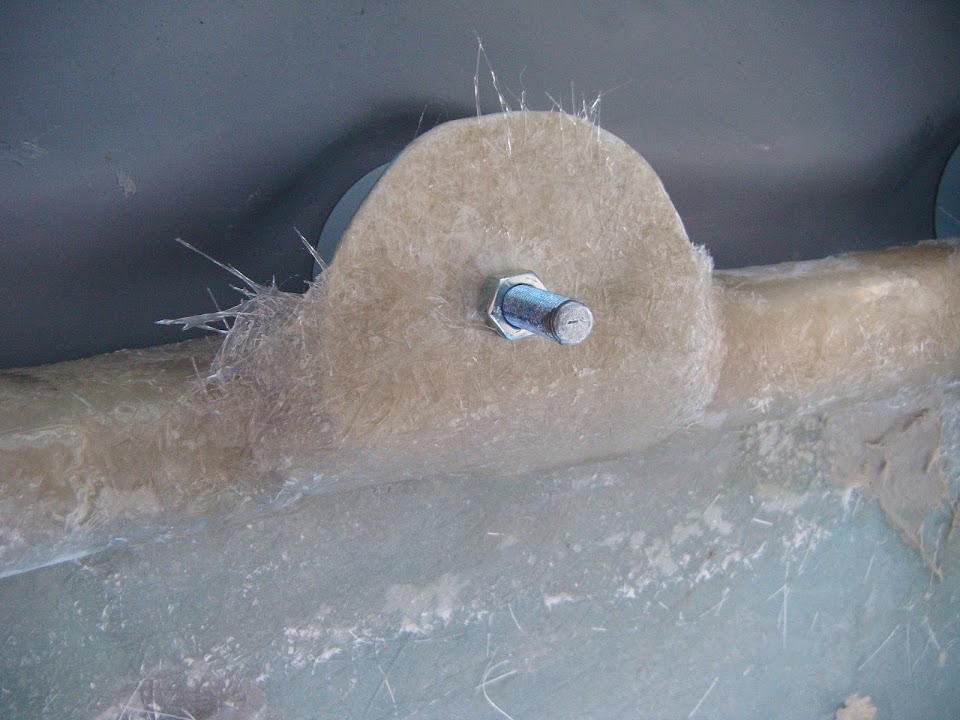
I used the cardboard templates to roughly mark out where the bolt holes needed to be for each locking pin.

Then I drilled a hole in each of the fibreglass "bases".

Don't ask me why I didn't spot that the two holes in the semicircle bases were not in the middle.
Then I temporarily fitted all four locking pins to the boot lid.

For the OCD suffers amongst us, I even made sure all the locks faced 9 o'clock.

As it is possible to have all the locking pins aligned, but the locks out by 180 degrees.
I roughly set up a bolt in each mounting plate

Then, with the lid back in place, I could set the position of each base plate.


As I figured this was the best way of ensuring that the bolts ended up in the right position.
Now fibre glassing is quite messy at the best of times.
But applying it upside down, while crawling on my back, underneath the body shell set a new standard.
Still, at least I managed to get enough matting to stick in order to hold the base plates firmly in position.

Unfortunately, the rain clouds had returned overhead before the fibreglass had set hard.
So I just started bolting the boot handle into place, before covering everything up for the night.

The handle will let me test how easy the boot lid lifts off (& then slots back into place) with the bolts in position.
Then, provided I don't need to adjust any of the bolts, I will re-enforce the mounting plates from above.
- - - - - - - - - - - - - - - - - - - - - - - - - - - - - - -
Other Builds:
The winter months are traditionally a bit of a struggle for my build in terms of real progress.
However, I do enjoy following all the work that other builders are doing during this time.
Thankfully Mac, Swifty, Scottie & DaveCyrmu are all taking big strides towards the finish line.
I'm also looking forward to seeing Micky1Mo getting DonnySoutherner's Cordite on the road.
- - - - - - - - - - - - - - - - - - - - - - - - - - - - - - -
Branding:
You may have seen the photos of some 50's cars I posted on Swifty's build thread the other day.
The idea that for most people, certain colours evoke certain brands, reminded me of an old MZ racing buddy of mine.
He had an MZ road bike for getting around London, which retained the look of its East German origin.
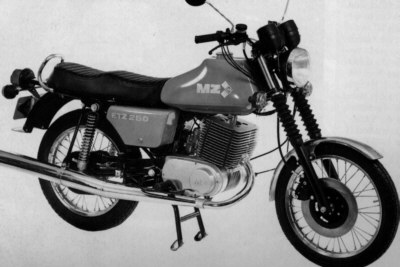
So for a laugh he put a BMW sticker on one side of the petrol tank and a Harley Davidson sticker on the other.
But what he didn't expect were the number of genuine "Nice Harley" comments he got!
It seems the general public really knew the Harley brand, even if they didn't know what the bikes looked like!
- - - - - - - - - - - - - - - - - - - - - - - - - - - - - - -
Until next time, take care, Paul.
|
19th November 2014, 15:01
|
|
Senior Member
|
|
Join Date: Feb 2012
Location: Wembley, London
Posts: 5,056
|
|
One Of Those Days - Part 1:
Another misty start, but at least all the fibreglass that I had applied yesterday had set.
So I unlocked the boot lid and it came away cleanly.
I then tried to be clever and turn the bolts through 90 degrees so the locking pins would be in line with the bolts in the open position.
( This is the way I had them when I fitted the lid, but the bolts would only "hang" in the closed position underneath. )
When I tried to re-fit the lid, it just wouldn't line up as I had clearly moved the bolts slightly.
Part of the problem is that the top edge mounting plates still have some flex in them, as they are only supported on one side.
So I decided to finish off fixing the mounting plates before I come back and re-align the bolts.
I did a quick test with the boot lid seal and it was clear I needed to remove a bit more of the rain channel to get a nice shallow curve.

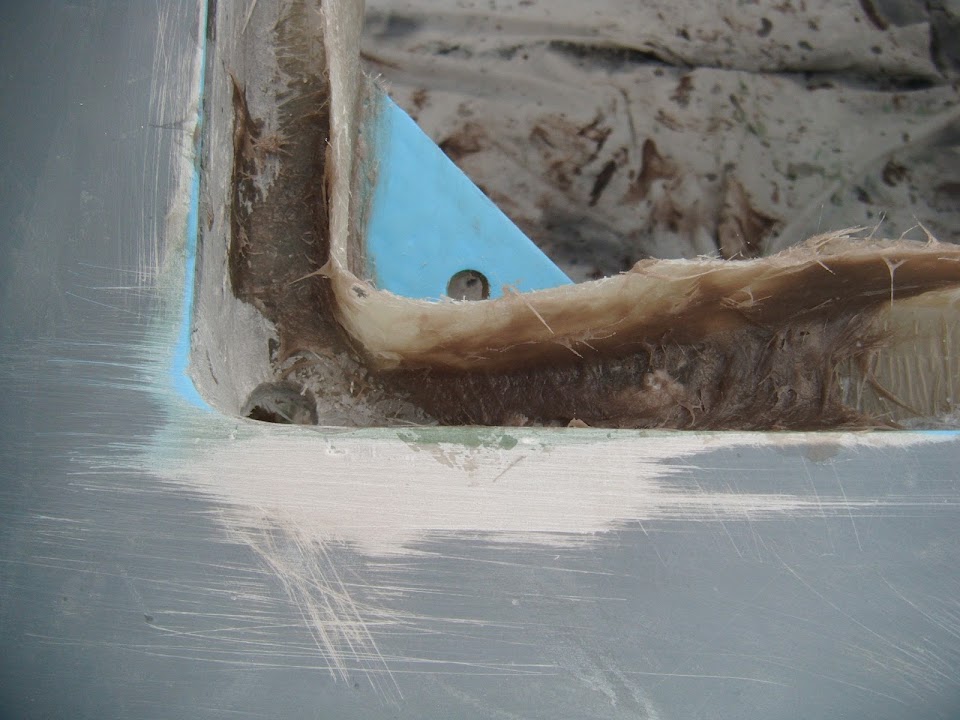
Unfortunately, I ran into a small problem when I tried to remove the bolts.
Due to working upside down, some resin had covered the threads making it hard to remove the nut.
( Clearly I should I masked off the bolts, but it is a bit late to realise that now. )
Then disaster struck when the application of brute force & ignorance did this to the final bolt.

Not sure if the misty weather was finally getting to me, but I was not a happy bunny at this point.
So I tried to cheer myself up by marking up the two top edge plates.

As I was going to be playing with the grinder anyway, I might as well reshape them around the bolt hole while I was at it.
The other job I tackled while the angle grinder was out was to trim down the boot handle mechanism.
I even remembered to cover the lid to avoid sparks hitting the etch primer.

I've left a little bit protruding as this gives the lid something to rest on.

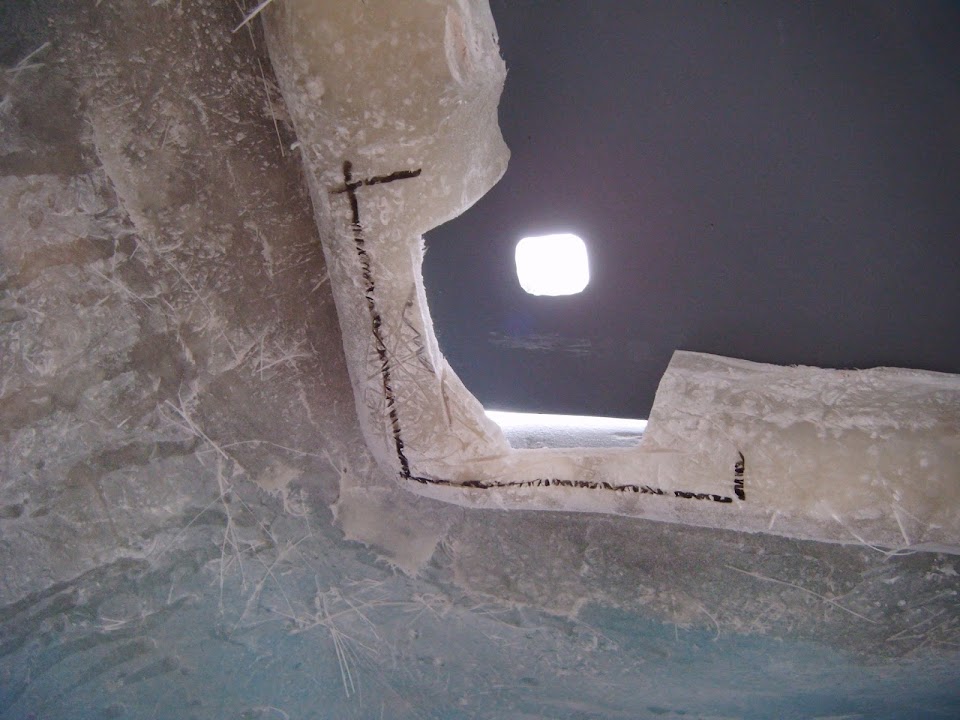
After cutting and grinding away at the rain channel I pushed some fibreglass filler into the gaps where the mounting plates met the rain channel.


I also stuffed some filler along the rear edges of the fibreglass off cut on the inside of the driver's hump.

After the filler had set and I'd tidied it up a bit, I made some cardboard templates for the bottom edge rain channel.


I then cut out three layers of the yoga mat.

For the top edge mounting plates I need to support the plate first and build the new rain channel second.
At this point I made yet another mistake as forgot to extend the foam beyond where I wanted it.
( Which would allow me to cut the fibreglass back and give it a nice edge. )
So I just pushed the foam forward a bit and re-trimmed it to match the mounting plate below.
I then added some parcel tape to the foam and I was finally ready to start fibre glassing.


End of Part 1...
|
19th November 2014, 15:01
|
|
Senior Member
|
|
Join Date: Feb 2012
Location: Wembley, London
Posts: 5,056
|
|
One Of Those Days - Part 2:
Both the bottom edges worked well.

But the top edges turned into a complete mess as I got a little over ambitious.
What I should have done was build the sides of the support first, then when they had set, join the sides to the base.
However, what I actually did was attempt to do all of this in one session and it was an epic fail.
The matting joining the sides to under side of the base simply pulled the sides off completely. 
Again, what I should have done at this point was pull the whole lot off and start again.
But no, I continued in vain to try to fix the problem and only succeeded in making things worse.
I the end, I simply gave up and left it looking like a complete dog's dinner.

The only good thing about this mess is I know I can trim it all back into shape when it sets.
Then I can add some more matting a bit at a time until I have the strength / support I need.
At this point I simply called it a day cursing my own ineptitude. 
One thing is for sure, I will be very glad when I have finally finished messing about with the boot!
Until next time, take care, Paul.
|
19th November 2014, 15:49
|
|
Senior Member
|
|
Join Date: May 2013
Posts: 2,161
|
|
I feel for you Paul! I sometimes do similar things and wonder why I'm such a tw*t!!
|
19th November 2014, 20:29
|
|
Senior Member
|
|
Join Date: Apr 2014
Posts: 198
|
|
Its all looking much more factory than you imagined possible the day the shell arrived therefore you should be proud of your vision and new skills, I would wager that your luggage compartment will be replicated by many others now, as it looks the part. I would like to see it rise up on scissor hinges electronically though or even assisted by gas struts like a pop top camper van roof. How are you going to stop water getting to the fixing retainer on the extensions you have just fitted, the top ones by the hump. Ed.
|
20th November 2014, 08:03
|
 |
Senior Member
|
|
Join Date: May 2011
Location: Somerset
Posts: 1,671
|
|
That's looking good matey and after watching your progress forming this lip it has made my mind up about my bonnet lip. I think i'm going to try and just use rubber extrusion on the existing lip, at least in the first instance, as i'm also not a fan of upside down fibreglasing!
For me this type of experimentation is one of the best bits about these 'budget' kits. i.e. We can mess about, try new things, see how they go, learn new things and if it turns out to be a complete mess we can just chop them out and try again
Not that anything you've done has even been a complete mess, i will add quickly!!! |
20th November 2014, 13:51
|
|
Senior Member
|
|
Join Date: Feb 2012
Location: Wembley, London
Posts: 5,056
|
|
Scottie - Yesterday was a text book case of "More haste, less speed".
Ed - I just hope anyone who wants to copy my boot lid idea learns from all my mistakes!
There are certainly easier ways of doing this, but unfortunately I didn't know what they were when I started.
As for the top mounting bolts, have a look at today's work below as it should be a bit clearer.
Dave - I think there is a lot to be said for simply creating a water tight seal, rather than a rain channel.
But I also think "a complete mess" is the only way to describe some of what I was doing yesterday. 
However, as you say, it is not the end of the world and it is easy to fix fibreglass (see below).
I can really appreciate how your Sammio building experience is a great help when building your Miglia.
- - - - - - - - - - - - - - - - - - - - - - - - - - - - - - -
Cleaning Up The Mess:
After a bit of work with my angle grinder, the two top edge bolt mounting plates were looking a lot better.

Just to pick up on Ed's reply, these extensions are not the rail channel and will eventually be cut down a bit lower.
I just wanted to give the mounting plates a bit of extra support, but still retain access for a spanner.

I have now made two cardboard templates for the top edge rain channel, so the bolt remains safely on the outside.

As I've said before, it would have been miles easier/quicker to build the channel around the bolts in the first place!
Thankfully there were no issues with the plates on the bottom edge once the foam was removed.

I also drilled into the bottom two corners to start building the drain holes required for the rain channel.

Then I added a bit of fibreglass filler into any of the small gaps around yesterday's fibre glassing.

Next I turned the body shell over, so that gravity would work in my favour, instead of against me.
This certainly made applying the fibreglass matting to join the sides to the bottom of the mounting plates much easier to do.

Initially I was going to some plastic pipe for my drain hole, but some domestic cable seemed a better bet.

So the cable was wrapped in parcel tape and I used some plasticine to make a "funnel".

Eventually I will attach rubber hoses to drain the channel out of the car somewhere around here.

I decided to build up the drain for the rain channel in stages, so I don't make another big mess.

Because the bottom edge mounting plates are triangles joined on two sides, they are already pretty strong.
So I just added a little bit of extra matting in the corners, just to be on the over-engineered side.
I was hoping to make a start on the re-routed rain channel for the top edge, but other chores need to be done first.
Still, I am much happier with what I managed to do today, compared to yesterday.
Until next time, take care, Paul.
Last edited by Paul L; 20th November 2014 at 14:28..
Reason: Typo
|
|
Currently Active Users Viewing This Thread: 13 (0 members and 13 guests)
|
|
|
 Posting Rules
|
You may not post new threads
You may not post replies
You may not post attachments
You may not edit your posts
HTML code is Off
|
|
|
All times are GMT +0. The time now is 03:40.
|


 Linear Mode

