Are you madabout kit cars      
 "We've Got Kit Cars Covered" Information about Madabout-Kitcars.com Contact Madabout-Kitcars.com         Home of UK kit cars - madabout-kitcars.com Various kit car write ups All the latest kit car news Kit car related and general discussion

Search
Manufacturers
Kit Cars
Kit Car Data sheets
Picture Gallery
SVA Knowledgebase
Clubs & Communities
Build cost estimator
Kit cars for sale
Knowledge Base 
KitcarUSA.com
Classic-Kitcars.com
 

Go Back   Madabout Kitcars Forum > Mad Build Area > Sammio Builds and discussions

Sammio Builds and discussions Sammio bodied car builds and specials

Reply
 
Thread Tools Display Modes
  #1  
Old 15th May 2019, 16:22
Barber's Avatar
Barber Barber is offline
Senior Member
 
Join Date: Apr 2016
Location: Camberley
Posts: 972
Barber is on a distinguished road
Default

A "Z" shaped air inlet manifold?
Reply With Quote
Available from eBay
  #2  
Old 5th August 2019, 19:13
cbjroms cbjroms is offline
Senior Member
 
Join Date: Jul 2011
Location: Hampshire
Posts: 146
cbjroms is on a distinguished road
Default

Well, solved that problem by cutting another hole in the back of the filter plate so the whole unit sits (off centre) 25mm lower.

Another question, I need something to switch my colling fan on/off and am wondering whether anyone has used one of these - .

Thinking of glueing it to the front of the thermostat housing.

The only other option (cant find a T-piece to allow me to fit another sender into the single thermostat housing threaded hole anywhere) is to fit a hetal section with a threaded hole into the radiator top hose. But I haven't really got room!
Reply With Quote
  #3  
Old 6th August 2019, 08:18
peterux's Avatar
peterux peterux is offline
Senior Member
Enthusiast
 
Join Date: Mar 2005
Posts: 3,079
peterux is on a distinguished road
Default

Have you looked at one of these?
https://rover.ebay.com/rover/0/0/0?m...2F151054632193
I've used one before and it worked very well.
Reply With Quote
  #4  
Old 8th September 2019, 17:23
cbjroms cbjroms is offline
Senior Member
 
Join Date: Jul 2011
Location: Hampshire
Posts: 146
cbjroms is on a distinguished road
Default

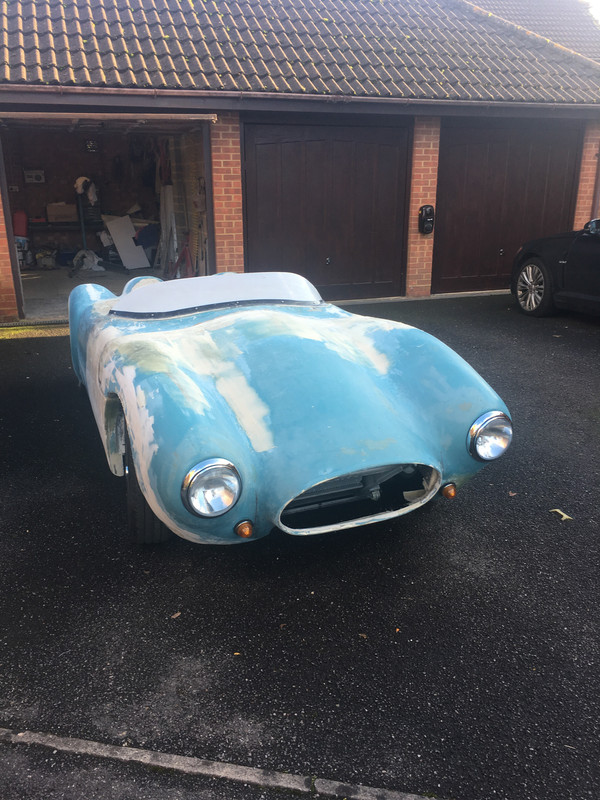
Lots of progress over the past few months.

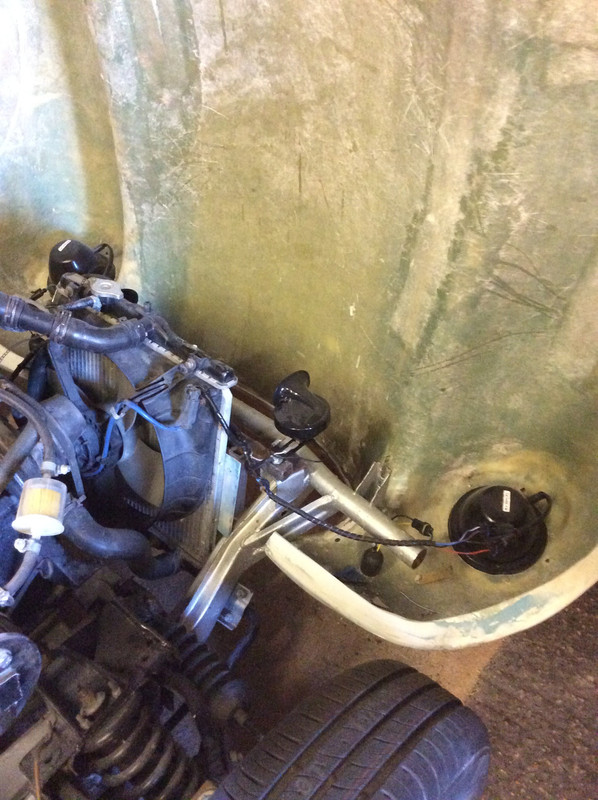
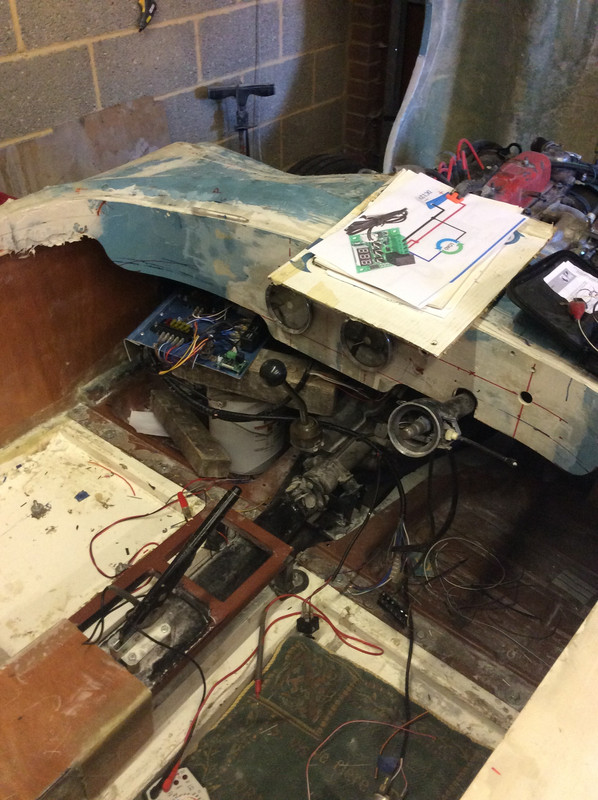
Wiring is just about complete and ready for final testing. I have used Superseal connectors for the front and rear lights with a fuse/relay panel under the dash which brings together all of the wiring. I decided to purchase an electronic fan controller for the the princely sum of £2.46 have seen very positive reviews on a triumph forum.

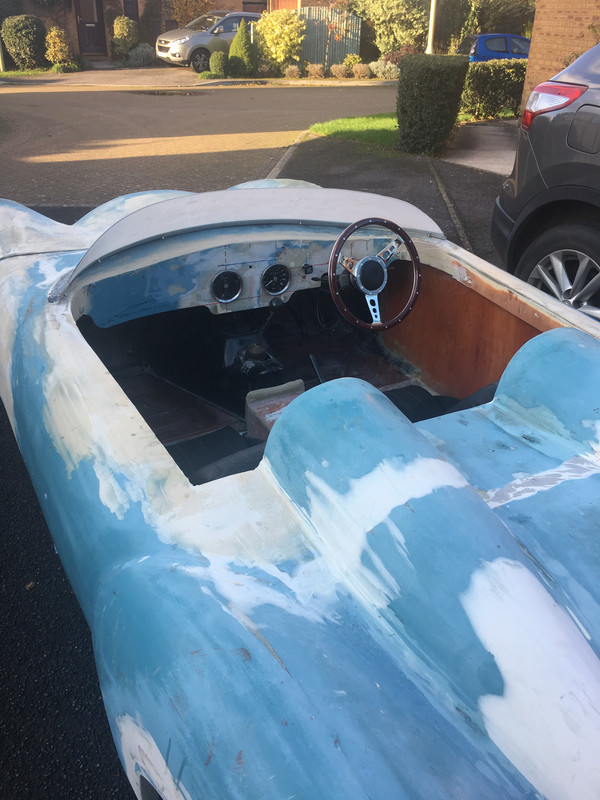
The cockpit is just about boxed-in now and the dash is looking how I want it to be. I have decided to stick with the 2 x Herald gauges as the cost of getting them reconditioned is about the same as a new set of after market ones.


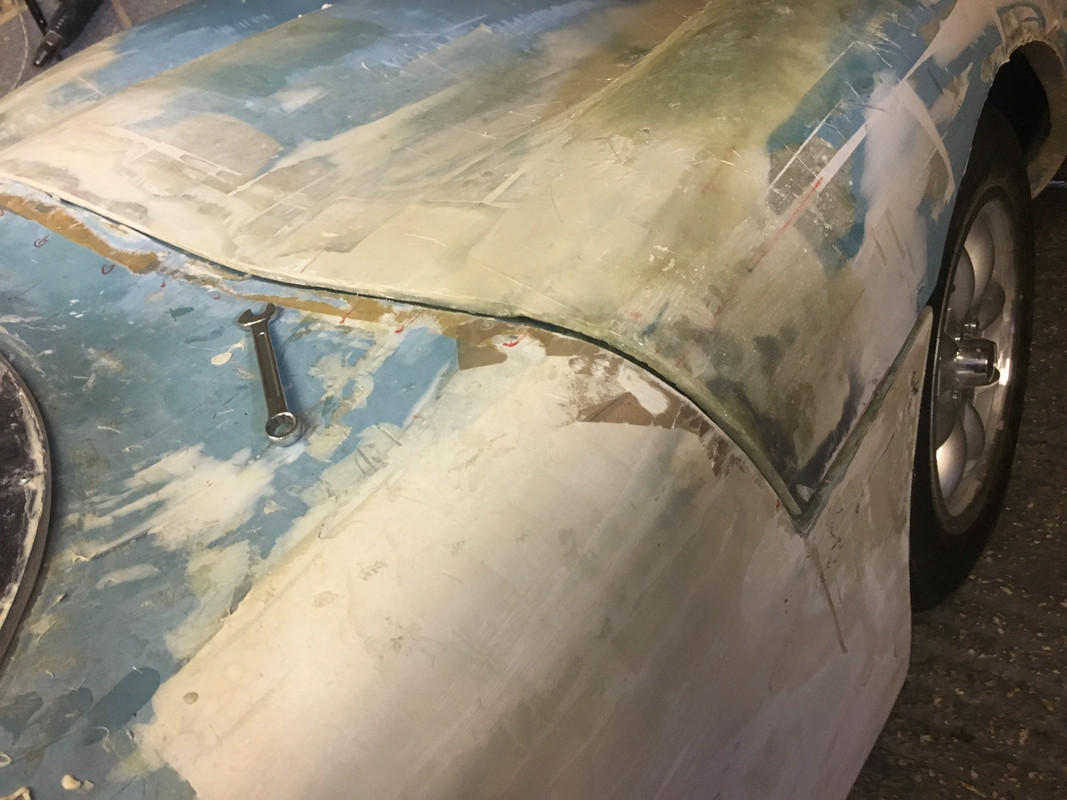
My plan is to get all the mechanical and electrical elements 'set to work' over the next few weeks and then put the car through an MOT so that I can take it on the road in an unpainted condition. Found a local bodyshop guy who has offered to take the rough body, fair/finish and paint for £1000!!!! I know this guy has a number of part-time jobs but have first-hand experience of his work.

Thats all for now.

Chris
Reply With Quote
  #5  
Old 11th September 2019, 13:41
Paul L's Avatar
Paul L Paul L is offline
Senior Member
 
Join Date: Feb 2012
Location: Wembley, London
Posts: 5,058
Paul L is on a distinguished road
Default

Chris - Lots of good progress there.

I think re-using the old Herald gauges will help the car look old.

Great to hear you are working your way towards the first MOT.

As you know, I am a firm believer in running the car without paint.

It certainly gives you a morale boost, which helps in the final prep for paint.

Good luck, Paul.
Reply With Quote
  #6  
Old 7th November 2019, 14:19
cbjroms cbjroms is offline
Senior Member
 
Join Date: Jul 2011
Location: Hampshire
Posts: 146
cbjroms is on a distinguished road
Default

I have now reached the stage where it is all together and working.


Just got to:
a) Fix number plates
b) Sort out bonnet fit

As regards bonnet, the image below shows that the off-side of the bonnet sits a bit high. I gentle push gets it into place and I am thinking that bonnet straps will do the trick. Or should I do another cut down the middle of the bonner and see if I can stich it back into a better shape?


What would be your advice?
Reply With Quote
Reply


Currently Active Users Viewing This Thread: 1 (0 members and 1 guests)
 

Posting Rules
You may not post new threads
You may not post replies
You may not post attachments
You may not edit your posts

BB code is On
Smilies are On
[IMG] code is On
HTML code is Off

Forum Jump


All times are GMT +0. The time now is 22:00.

copyright © madabout-kitcars.com 2000-2024
terms and conditions | privacy policy