|
|
| Sammio Builds and discussions Sammio bodied car builds and specials |

10th July 2014, 07:37
|
 |
Senior Member
|
|
Join Date: Jul 2011
Posts: 5,328
|
|

Quote:
Originally Posted by Scottie22

Paul, a lot of cars from the 50's and 60's had mirrors way far forward on the front wings, and the biggest problem with that was, you can't see bugger-all in them! They are so far away, the image is just too small to see.
I plan to have my mirrors ( when I get that far) as close to my face as I can, to give me the best chance of seeing anything!
|
Agreed Scottie. My first car had 'wing' mirrors way forward about a foot back from the headlights. Absolutely useless, all they did was added drag.
I spent hours trying to find suitable points to mount mine directly on the body and there wasn't anywhere on the driver's side you could actually see behind, and nowhere on the passenger side where you could even see the mirror.
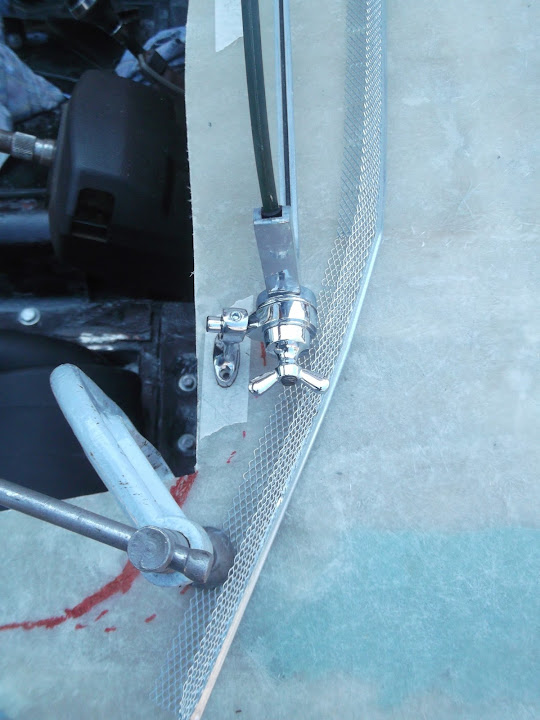
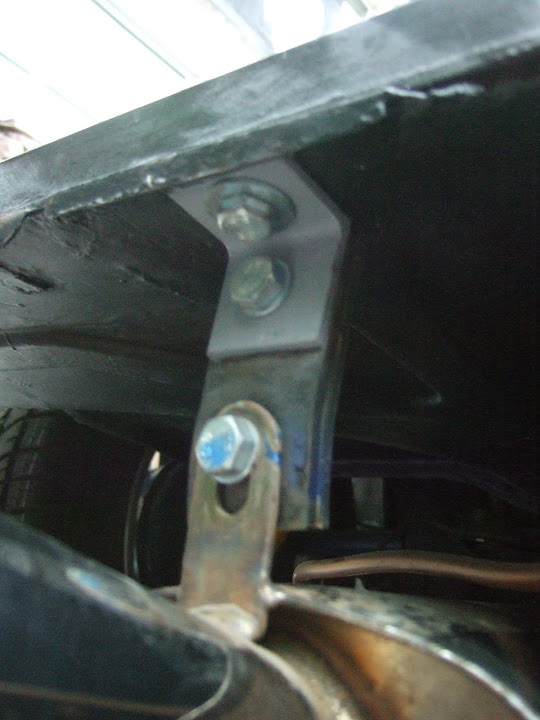
As I actually wanted to see behind me in traffic, my solution was to mount them on alloy plinths -
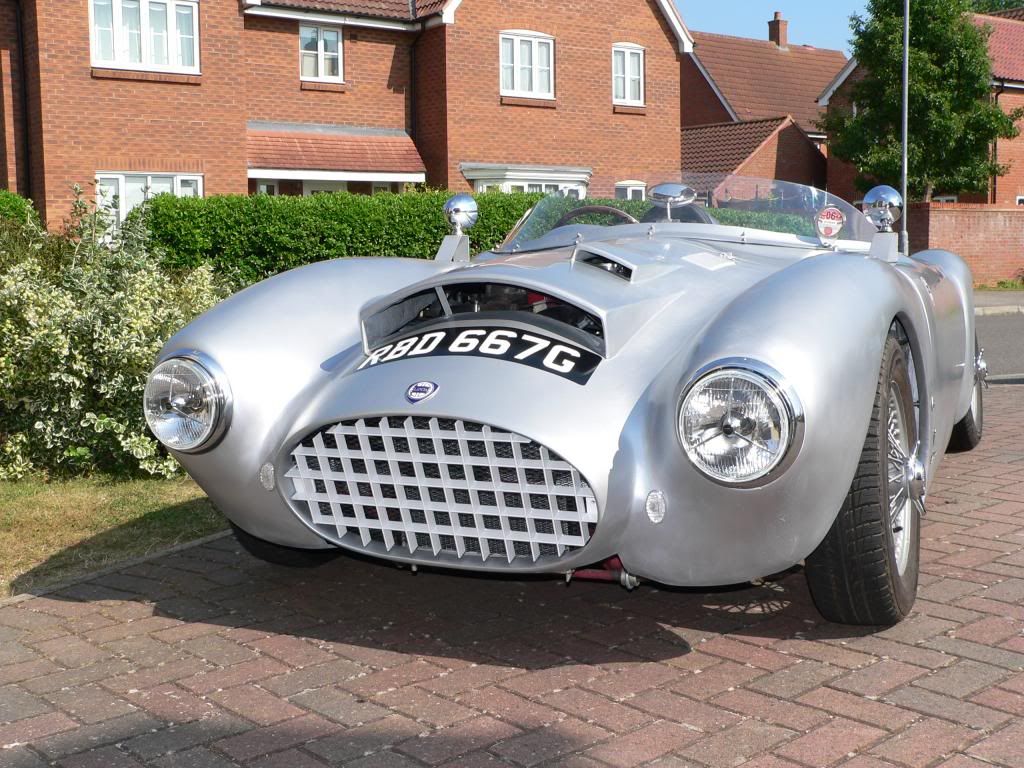
They work really well giving me a good view of the road behind on both sides.
I've seen a C Type Jag with a similar arrangement, although the alloy brackets were oriented edge on to give less drag, so they were used back in the day.
What did the XKSS have by way of side mirrors? Having driven my small, open Spyder in busy traffic and on the motorway I'd thoroughly recommend having mirrors that actually work. Otherwise the experience would be very scary...

|
10th July 2014, 07:38
|
 |
Senior Member
|
|
Join Date: May 2011
Location: Somerset
Posts: 1,671
|
|
TBH after a year of driving my Sammio with those bullet mirrors I'd say stick them wherever you think they look best/prettiest as they aren't a great deal of use no matter where you put them!
Plus, as i'm sure others who have driven these cars for any amount of time will back-up, you tend to get into the habit of just looking over your shoulder most of the time anyway  |
10th July 2014, 12:44
|
|
Senior Member
|
|
Join Date: May 2013
Posts: 2,161
|
|
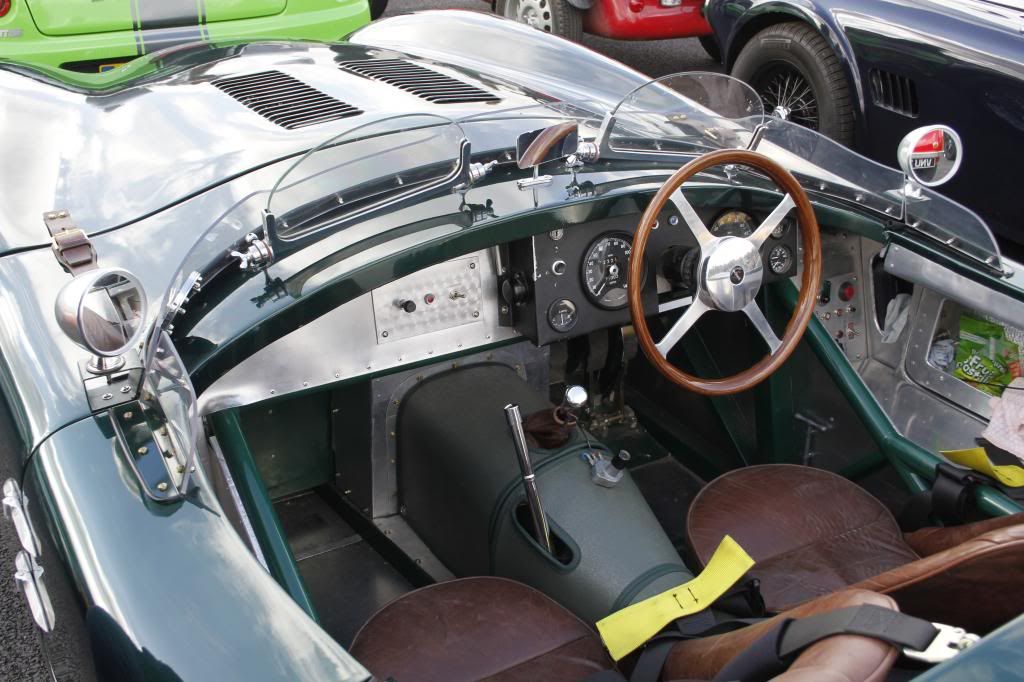
Although I have seen several pictures of your car Mr T, I have never noticed the mirrors until now!
Looks like a good solution, I will bear that in mind when I come to do mine.
As far as the XKSS is concerned, as you can imagine, I have dozens and dozens of pictures of most of the original 16 cars, and a lot of replica's, and I think all but one original cars simply don't have any external mirrors at all, and strangely enough, neither do most of the replica's!
I'm not sure how they fare in the Mot, but its a fact.
Knowing what is around me on the road, especially to the rear, has always been very important to me, and I find it hard without three good mirrors, so my car definitely will have all three one way or another.
|
10th July 2014, 14:50
|
 |
Senior Member
|
|
Join Date: Feb 2012
Location: Wembley, London
Posts: 5,056
|
|
Scottie, Mr T & Dave - Thanks for the feedback chaps. 
I find it really useful to bounce these ideas around before I commit to a final design.
Scottie - Your "close to my face" comment gave me another idea, see below.
And I had actually Googled the XKSS the other day to see where the mirrors were & couldn't find any either.  Mr T
Mr T - Your car & build treads are the "reference manual" I refer back to the most.
So your mirror plinth solution is still in the running, not sure if it is a C type in the photo below.
Dave - After 19 years of motorcycle riding I have a habit of looking over my shoulder when driving any car.
- - - - - - - - - - - - - - - - - - - - - - - - - - - - - - -
More Thinking Out Loud...
A teacher's strike, dodgy weather forecast & finally having all the info for my tax self assessment conspired against me today.
So I just had a chance to do a little more testing based on the feedback I got above.
I keep coming back to this photo...
In addition to having the plinth that Mr T describes, the mirrors echo Scottie's point too.
I have been struggling to find the best way to mount the mirrors in between the bulkhead & body shell.
But if I fit them a bit closer to me then access to the mounting bolts becomes much easier to arrange.
I would even be possible to build up the body shell in this area to form a built in plinth.


I can certainly see something out of the mirror on the driver's side, but need an extra pair of hands to test the passenger side.
At this point I'd even consider a bolt on plinth for just the passenger side, to add to the general lack of symmetry.
Then I turned my attention back to the scuttle & mocked it up like this.

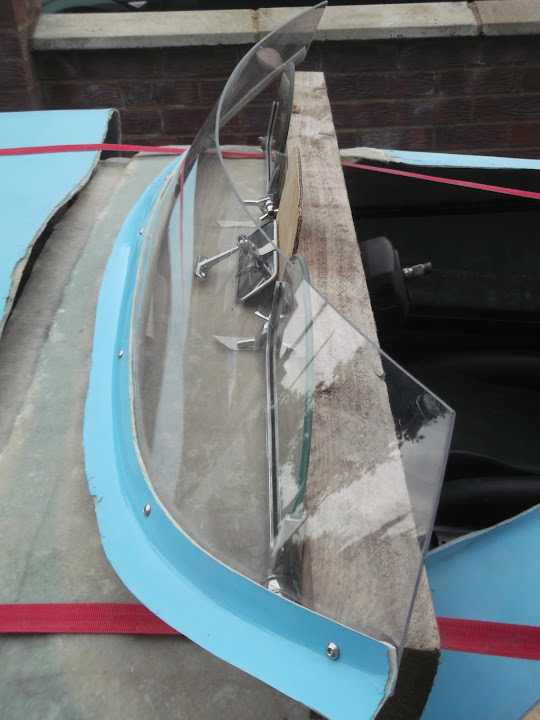
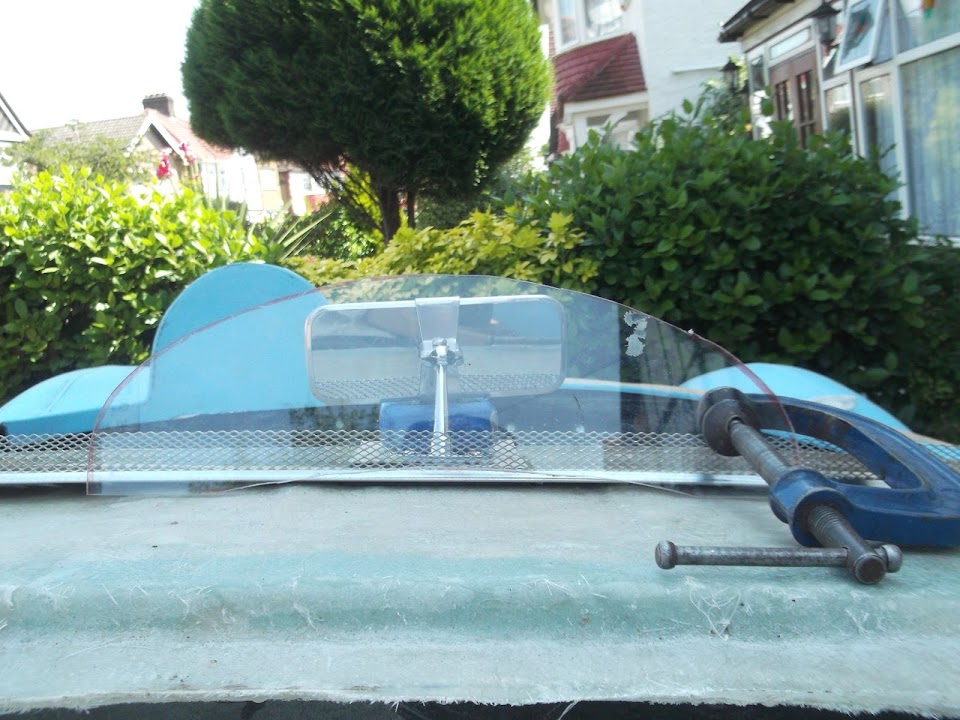
As my next idea is to create a mini "Brooklands" type screen for the rear view mirror.
It would be shaped something like this.

With a built in "stagger" between the three screens like so.

And I could even cut down the original side screen perspex to make it, with a new base.

This would allow me to make simple "matching" wind deflecting bases for the aero screens.
There is one other, more complicated option, which is based on that earlier cockpit photo.
It needs a lot more work to test the shaping, but perhaps I could re-cylce the original screen as a wind deflector.
It would be kept very low in front of the aero screens, but then extend up in front on the rear view mirror.

It really is a question of whether I have enough perspex in the right places to cut and shape to match the contours I need. *

* The other thing to consider is that this is going to be a lot more work than the other option, so maybe KISS applies.
So once again I end a session on the car with more questions than answers.
However, I am beginning to regain the hope that I can do a half decent job on what ever set up I finally decide on.
Until next time, take care, Paul.
|
10th July 2014, 16:36
|
|
Senior Member
|
|
Join Date: May 2013
Posts: 2,161
|
|
What is that green car Paul?
It has a Jag start button and dials I noticed?
|
10th July 2014, 18:36
|
|
Senior Member
|
|
Join Date: Feb 2012
Location: Wembley, London
Posts: 5,056
|
|
Scottie - I think it was Nike55 who first posted that photo.
Although I couldn't find the original photo after a quick Google search, it does look like a C type.
More images here:
http://atspeedimages.com/search.php?s=Jaguar+C-Type
And while I'm typing....
- - - - - - - - - - - - - - - - - - - - - - - - - - - - - - -
Quick Car Update:
No sooner had I posted my two latest ideas for the wind deflectors, when I came up with another.
Next time I am out at the car I am going to change the initial design of my mini Brooklands screen from this...
To a profile that is:
- Lower in the middle until it is marginally higher than the mirror.
- Wider at the sides until it just overlaps the edges of the main aero screens.
Given that the mirror screen will sit further forward on the scuttle it will hopefully look like a continuous mounting lip from the front.
I also remembered that the new Navigator body shell now has the wind deflector mount built in.

So KISS it is, I will build in 3 mounting lips to act as wind deflectors.
- One will have some perspex bolted to it in front of the rear view mirror.
- The other two will sit just in front of the aero screens so that they can still be tilted.
Obviously, I still need to come up with a final design, but I am happy that my various tests have come up with a good plan.
At least I hope it is a good plan. 
Cheers, Paul.
|
10th July 2014, 19:44
|
|
Senior Member
|
|
Join Date: May 2013
Posts: 2,161
|
|
Thanks Paul, I believe it is a C Type. I was never a hot fan of that model, so don't know that much about it, except that all XKSS's have the C Type gear knob. I also have one (replica) and very expensive they are too!
Gotta have one though!
|
11th July 2014, 12:34
|
|
Senior Member
|
|
Join Date: Feb 2012
Location: Wembley, London
Posts: 5,056
|
|
Wet Play Time:
Well it was chunking it down with rain when I had some free time to work on the car.
So this was a good excuse to tidy up the Summerhouse, as it is a complete tip.


It has got worse recently to two reasons.
- Trying to find the parts I wanted to test fit.
- Quickly tidying up the tools & parts left in the dining room by dumping them in here out of sight.
Not surprisingly it actually took a bit of time to return some sense of order.


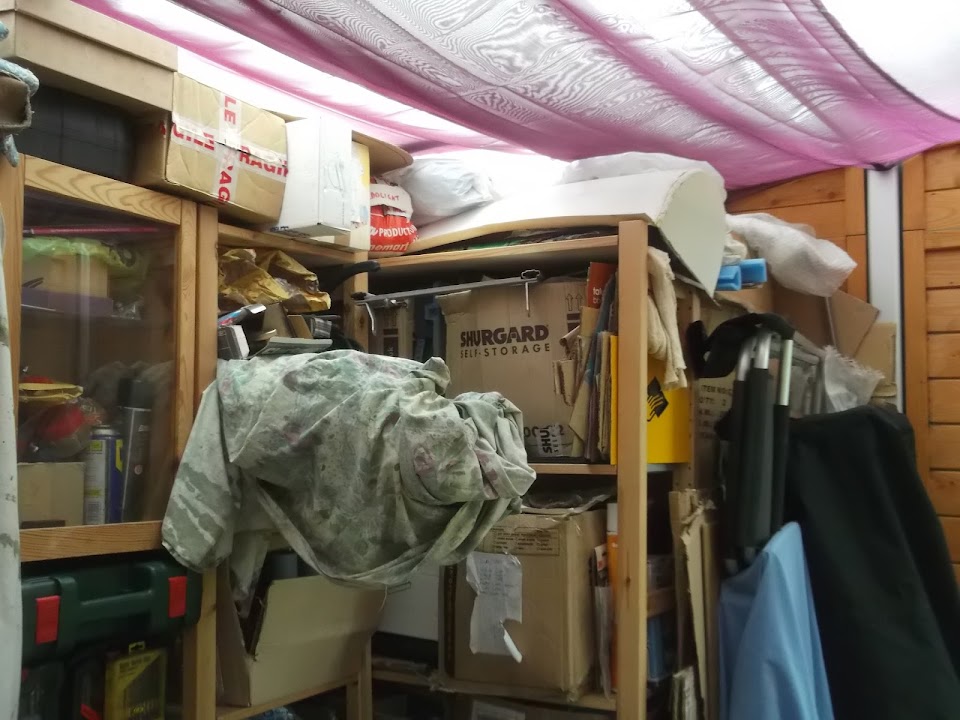
No doubt by tidying up I have reduced the chances of me finding anything I need in the future!
- - - - - - - - - - - - - - - - - - - - - - - - - - - - - - -
However, in addition to tidying up, I also spend a bit more time working on my wind deflector ideas.
These are just some of the things stored in the Summerhouse that "might come in handy".


This was packing from our washing machine (& I have two lots of each), that I can now recycle.
I will use the slightly bigger cardboard as a former for the wind deflector for the aero screens.

Although I will need to cut some slots in the cardboard, so I can bend it to match the curve of the scuttle.
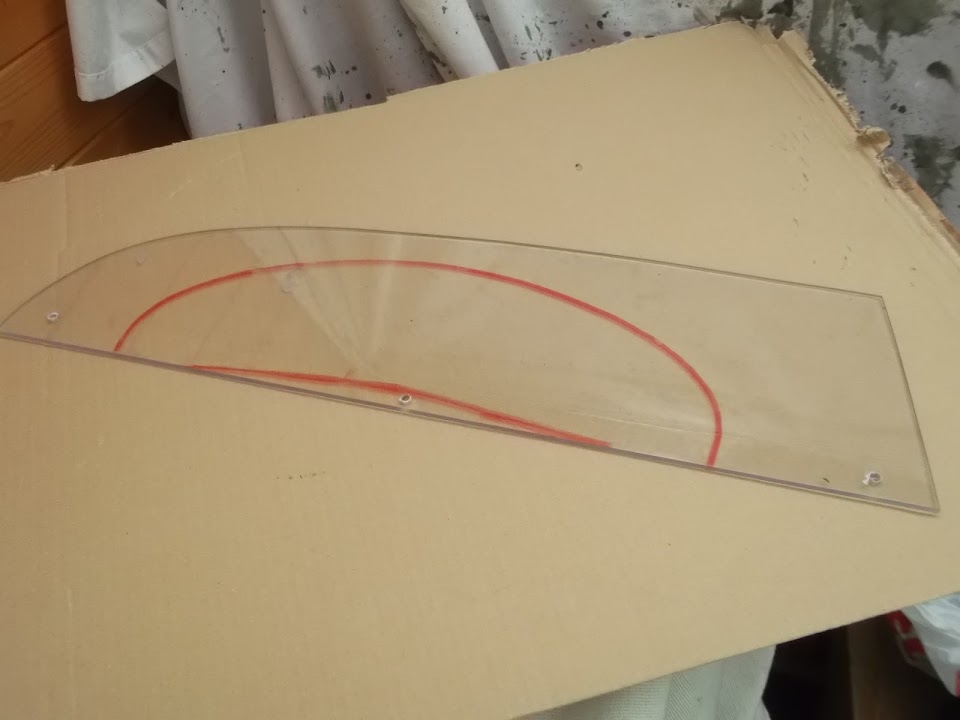
I also remembered that the curve in the scuttle when I was having another look at my rear view mirror deflector.
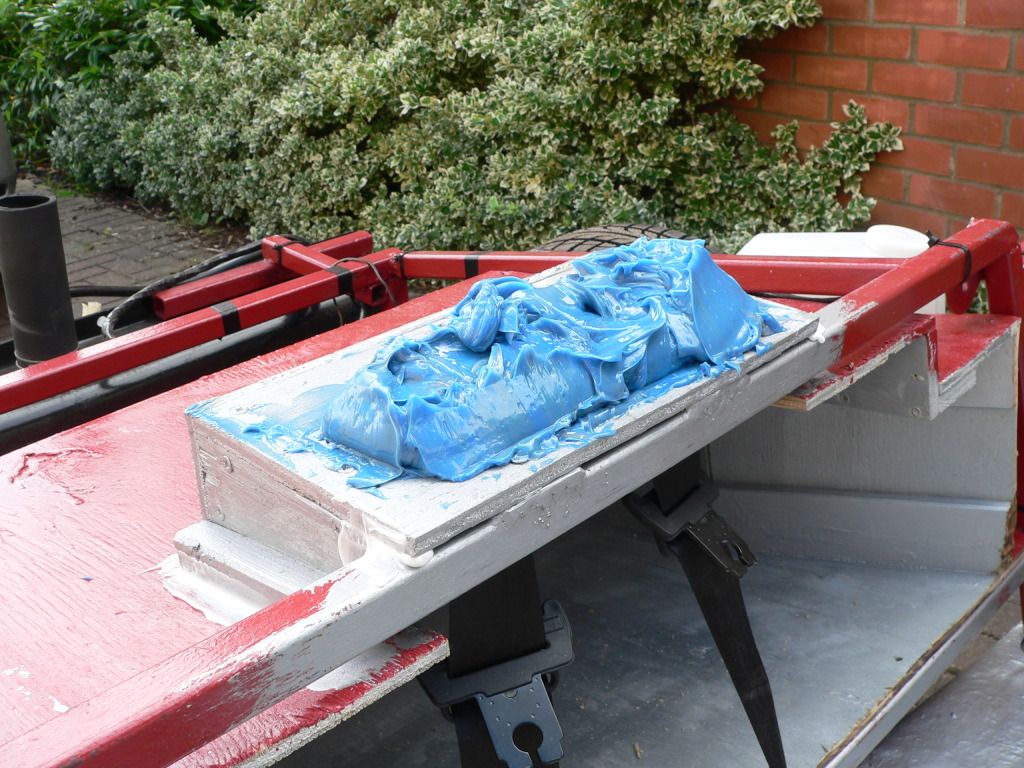
I started by cutting another section of cardboard to represent the revised perspex profile.

Then I cut the blue foam to give me an idea how the mounting lip would work.

It was easy to put a gentle bend in the foam to get the general idea.
I will cut a final template for the perspex to match the real scuttle profile when it is finished.
The three drawing pins represent the bolts that came with the kit's screens that I will re-use.

Note:
The foam underneath the cardboard represents the scuttle itself.
So, similarly, the depth of the mount (when viewed from the front) will be reduced by the height of the bottom lip of foam.

I will also trim the edges of the foam to match the ends of the perspex once I have test fitted this.
As I need a final check that this lines up OK with the edges of the aero screens.
I actually have some new perspex, still with the protective wrapping on.

So I will cut the final screen out of that, in the mean time I could do some test cutting on this perspex.
I used my jigsaw and that seemed to work OK, although I would need to be a bit tidier when cutting out the real one.

Overall, it was a small step in the right direction and these wind deflectors will be a very simple design.
This in turn means that I should be able to build them up with a mixture of fibreglass (for strength) and filler (for a smooth finish).
Right, I'd better get on with my other chores, cheers, Paul.
PS
I will be helping some friends move house on Sunday and this was the moving card I got for them.

Whilst I am sure that most people would notice the cute dog on the back first.
I found myself looking at the rear light / reflector cluster and wondering if that would work on my car.
|
12th July 2014, 20:31
|
|
Senior Member
|
|
Join Date: Feb 2012
Location: Wembley, London
Posts: 5,056
|
|
A very busy day today, so this update is not in strict time order.
Car Work:
I cut out the rusty bits from both sides of the chassis.

Then I gave the insides of the main box section a coat of Kurust.

Three hours later a coat of etch primer went inside too.

I cut out two cardboard templates & transferred them to some fresh steel.
Which filled in the gaps like so.

I then gave the "inside" faces of these patches a coat of etch primer too.

Before finally welding them into place.

And giving the chassis a coat of etch primer.


Once I get around to putting a slight skin of filler over the top, it should hopefully look OK.
I must confess that I was pleased with how my welding went today.
Gardening Chores:
I actually had to tackled two gardens today as I helped our neighbour out while her husband is away.
Their grass was a bit overgrown, but I also trimmed all of our trees & bushes that were overhanging their side.

This was serious hard labour in the heat and I still have to cut up that pile into smaller sections.
Shopping:
When the build starts to get to me a bit, I find buying stuff on ebay can lift my spirits a bit.
This arrived today.

Which will should look go well with the vintage AA badge I've bought after stealing that idea from other builds.
I will be "styling" the car as a Triumph and may use the motorcycle stickers that AndyP57 used on his Spyder.
End of Part 1...
|
12th July 2014, 20:31
|
|
Senior Member
|
|
Join Date: Feb 2012
Location: Wembley, London
Posts: 5,056
|
|
Beard Scratching Finally Pays Off:
I know I have spent a lot of time tinkering with the design for my aero screen wind deflectors.
But last night I finally came up with a plan that is really KISS.
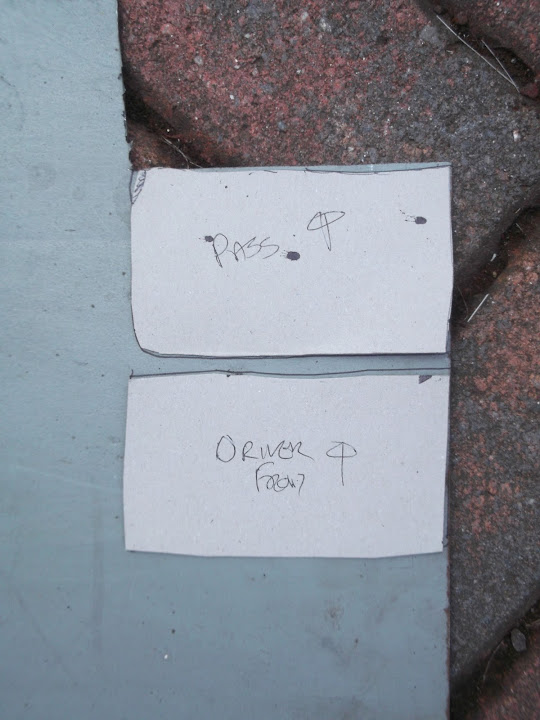
So I did some more marking up of the fixing points for the screens and rear view mirror.

The rear view mirror will sit over the hole in the bulkhead where the ash tray used to go.

Note:
No lasers were harmed in this marking up process.
Initially I mocked up "Plan #3", just so the design evolution makes sense.

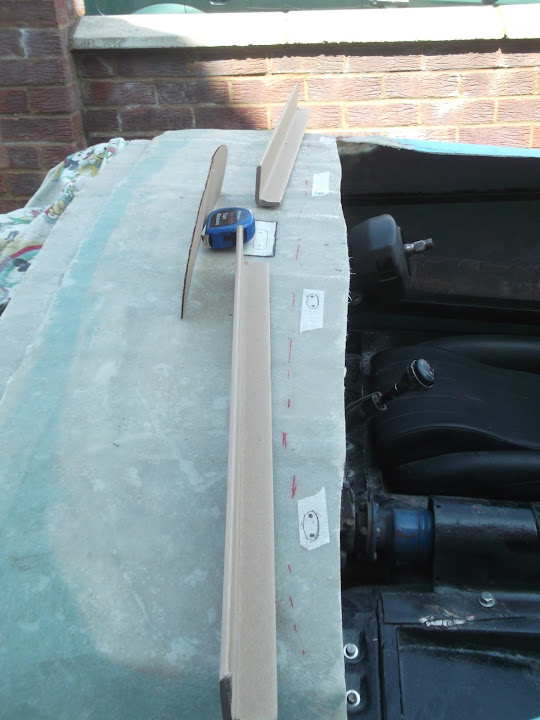
Whilst this might look a bit like a single strip when viewed from the front, it clearly wasn't.
However, "Plan #4" was a single strip that would cover the screens and provide a based for the mirror deflector too.
Time for one of my dodgy sketches where scale and perspective are not included.

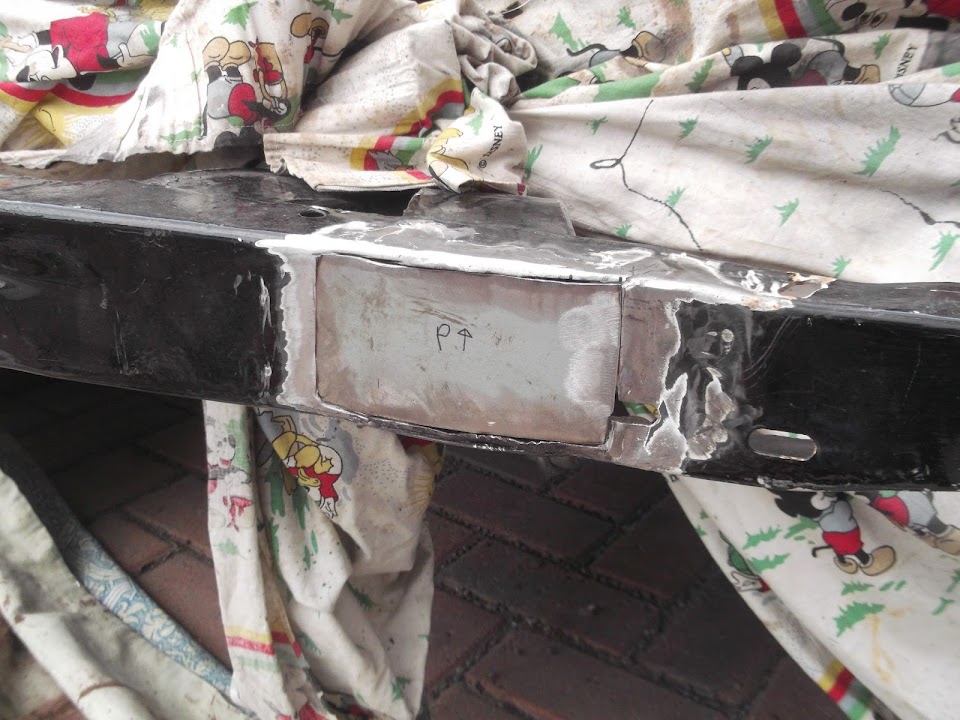
I dug out the old former that matches the original Spitfire bulkhead curve.

I also picked up a edge strip used by plasterers this morning.


After a few quick cuts, this could be bent to match the shape of the former.

Unfortunately, it was very hard to see the mesh in the photos, so I added an off cut of hardboard.


This will give me a nice curve on top of the scuttle, with a very gentle bend in the centre.
This bend will be shallow enough for the perspex to be bent to match with no issues.

The whole point of testing is to check everything and it quickly became clear that the whole curve needs to move forward a bit.
But overall I am really happy that I have got a design that will work and should look OK.
At some point I will be carrying the body shell through my neighbour's garden to my back garden.
They have access to the road around the side of their house & we can remove a fence panel.
( Which is what my wife & I did today to get the lawn mower into their garden. )
That way I can work on the body shell in the same way that I worked on the bulkhead.
I must confess that this has been a very tiring day, so I am off for some beer and bed.
Take care, Paul.
|
12th July 2014, 20:55
|
|
Senior Member
|
|
Join Date: Apr 2012
Posts: 1,163
|
|
Nice welding Paul, and KISS is king!
Mac
|
12th July 2014, 23:05
|
|
Senior Member
|
|
Join Date: May 2013
Posts: 2,161
|
|
Great stuff Paul its coming along nicely!
|
13th July 2014, 07:38
|
|
Senior Member
|
|
Join Date: Feb 2012
Location: Wembley, London
Posts: 5,056
|
|
Mac & Scottie - Thanks gents.
I need to make a few more decisions on the body shell before the next round of surgery can start.
But I want to switch back to finishing off the "Moon Rover" stage before I tackle the body work.
- - - - - - - - - - - - - - - - - - - - - - - - - - - - - - -
I will be helping my friends move house for most of today, so I'll leave you with this thought.
Nose Art:
Part of me thinks that my "rough and ready" build will look more military, than race car.
So perhaps I should just brush on some "Nato Green" and add a pin up?
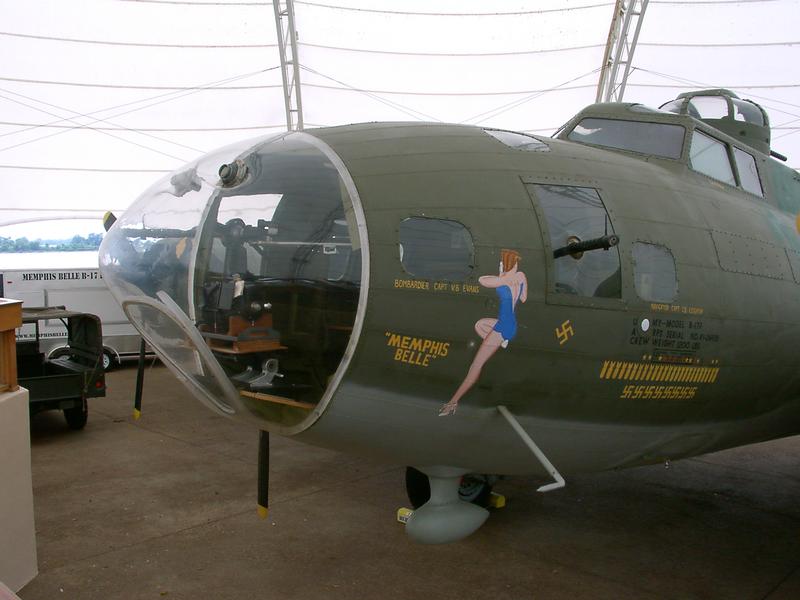
Well a quick Google search of "Frankenstein Hillbilly" gave me this. 

So perhaps not.
Take care, Paul.
|
13th July 2014, 07:58
|
|
Senior Member
|
|
Join Date: Apr 2012
Posts: 1,163
|
|
Great minds think alike or fools never differ? Been talking to a tattoo artist locally about a nose art style pinup for my 50th !
|
13th July 2014, 08:23
|
|
Senior Member
|
|
Join Date: Jul 2011
Posts: 5,328
|
|
The expression on Frankenbilly's face suggests he'd have got away with it if it wasn't for those pesky kids...
|
14th July 2014, 17:03
|
|
Senior Member
|
|
Join Date: Feb 2012
Location: Wembley, London
Posts: 5,056
|
|
Mac - I don't think I'd get away with a pin up on my car, let alone a tattoo!
Mr T - I guess a "Mystery Machine" paint job would be a tad excessive...

- - - - - - - - - - - - - - - - - - - - - - - - - - - - - - -
Odd Jobs Sort of Day...
Excessive Gardening Chores:
As well as moving some stuff for my friends yesterday, I also did some gardening for them!
The path to their house needed pruning so we could carry the boxes in without getting tangled in the weeds!
But there was no escaping the big pile of stuff I needed to finish in my own garden this morning.
Before:
After:


This pile of bags does not even include any of the grass cuttings bags in the before photo.
- - - - - - - - - - - - - - - - - - - - - - - - - - - - - - -
Car Work:
After working through a huge list of other domestic chores, I could only do a little bit on the car.
I finished welding the edges of the hand brake panel to the lowered floor pans.


Then I added some fibreglass filler over the join.


I also put some filler on the welding I did to repair the chassis the other day.

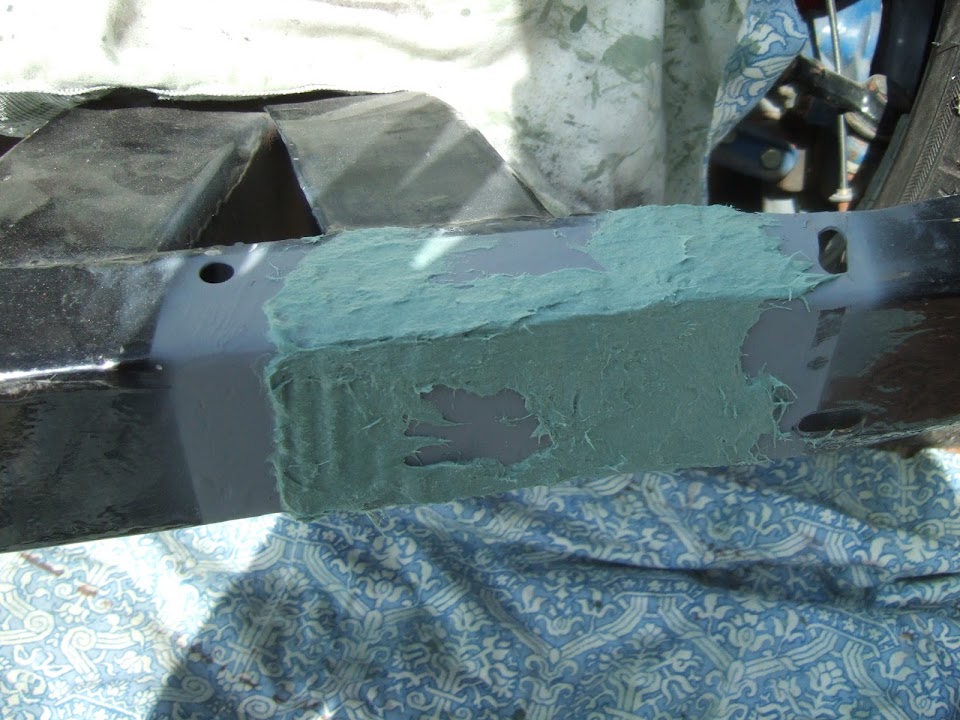
The amount of filler used turned out to be a tad excessive, but it will be sanded down smooth (ish) another day.
- - - - - - - - - - - - - - - - - - - - - - - - - - - - - - -
Body Work Tools:
A big thank you to Mac for sorting out a box of goodies for me, that arrived today.

It is basically a beginner's guide to body work and I certainly have a lot to learn.
Given all the "cutting, shutting & filling" work that still lies ahead, I am sure these will get a lot of use.
I know Mister Towed was also a fan of the long board and his car looks great.
So it only seemed right that I got my first bit of sanding practise in with it.
I started on the filler around the door gap on the passenger side.

I didn't get a chance to finish the work, but I did at least make a difference.
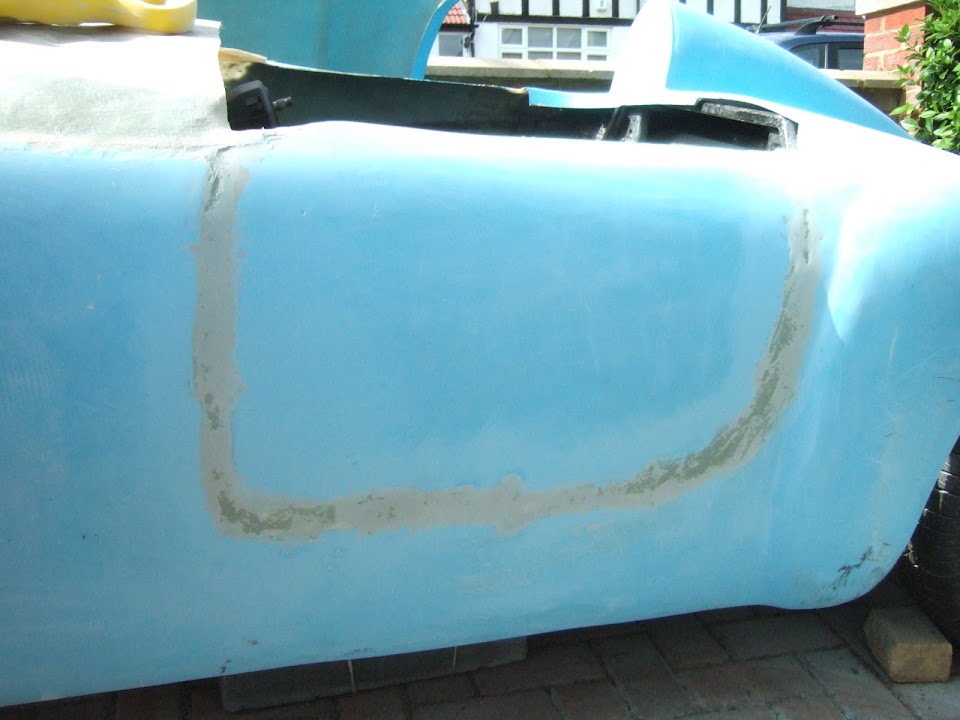
Some bits came out very well, with just a few pin holes to fill.

Other areas are a lot rougher.

But this was an area I didn't really spend too much time on.
Also the door skin profile isn't an exact match to the body shell in this corner.
This was actually my first time using sandpaper attached by velcro and that is a clever trick.
I hope with some more practise I will be able to at least get a "reasonable" finish on the body work. 
- - - - - - - - - - - - - - - - - - - - - - - - - - - - - - -
I've got to pick my mum up from the airport at 6.20 AM tomorrow.
So not quite sure how the day will pan out, but I hope to at least chip away at a bit more.
Until then, take care, Paul.
Last edited by Paul L; 14th July 2014 at 20:15..
Reason: Typo
|
14th July 2014, 20:43
|
 |
Senior Member
|
|
Join Date: Dec 2013
Posts: 839
|
|
Nice work Paul, it's good to get some new toys to keep the enthusiasm running or at least that what i tell the missus.
|
15th July 2014, 12:30
|
|
Senior Member
|
|
Join Date: Feb 2012
Location: Wembley, London
Posts: 5,056
|
|
Swifty - Cheers. These new toys definitely give a better finish than my angle grinding toy.
- - - - - - - - - - - - - - - - - - - - - - - - - - - - - - -
More Odd Jobs...
I used my angle grinder to take off the worst bits of the filler I applied yesterday.
Then I had my first go with one of the sanding blocks in the box.

I wasn't even sure how the circular sandpaper fixed to the straight edged block (it continues around the edges).
Well, I did say that this was all new to me.
This left the chassis repairs looking like this.


And the welding along the hand brake panel edges like this.


While I was making a mess, I took the long board to the driver's side door.
Before:

After:

As before, this was really just a bit of body working practise and there is still a lot of work to do.
I will finish painting the hand brake panel when I remove this whole section for the last time.
( I need to seal the underside of the panel / floor join. )
But I did get some etch primer on the chassis repairs.


Clearly this is not a perfect finish, but my work is still neater than this patch done by a previous owner.

At some point I will need to wash down the drive (again) as all this sanding certainly makes a mess.

Anyway that was all I managed to get done so far today.
Depending on other factors, I might be able to get a bit more done later on.
- - - - - - - - - - - - - - - - - - - - - - - - - - - - - - -
Note:
It was not possible to get a perfect alignment between the doors and the body shell when I sealed them shut.
As a result of this, I may end up with some gentle "undulations" along the sides of the body shell.
However, I do like the way Scottie is leaving his side panels as they are, so his car looks "used".

Which also ties in nicely with this reply I had a while back...
Quote:
Originally Posted by oxford1360
... like a 50 year-old race car that has been into the hay bales a few times in its life - perfect...
|
Finally if I ever want to be able to post a great photo like this one from Mister Towed...
Then I really need to work to an acceptable / achievable standard, not begin an epic quest / crusade for perfection.
So until next time, take care, Paul.
|
16th July 2014, 20:53
|
|
Senior Member
|
|
Join Date: Feb 2012
Location: Wembley, London
Posts: 5,056
|
|
More Mocking Up...
Whilst I want to focus on reaching the "Moon Rover" stage, I do need to make a plan for the body shell.
As my basic plan is to work on the body shell when the engine is being sorted out by a professional.
However, if the car is in a garage, I will not be able to test fit anything until it gets back.
So unfortunately, I need to consider starting some of the "cutting & shutting" work now.
Even if I don't come back and "heal the wounds" until later on.
Talking to Mac it was clear that I need to pick one part of the car as a fixed point.
Then everything else can be "squared" up to that point, rather than a true datum line.
For me, this will be the dash board which will be in the "factory" position, so the rest of the body will align with that (ish).
So although I didn't actually get much time on the car today, I did start the whole thinking process.
First job was dig out my twin silencers from the summer house and remove the rusty brackets.
These look like angle iron cut to fit by a previous owner, rather than a factory part, but they still got the Kurust treatment.

Three hours later I was able to give them a coat of etch primer.

I will eventually get around to painting these black, but I just needed to use them as they were for now.
So I removed the body shell and bolted them into position.
( I will also be sorting out the previous owner's over spray at some point too. )
The exhaust support bracket that I made seems to be doing its job with no issues.

However, when the body shell went back on, it was clear that it was resting on the tail pipes.

Some masking tape and a marker pen means that I know where I need to make two cut outs for the exhaust.
( Not a great photo. )

I will make that initial cut another day, so I can finalised the other work required on the body shell.
- - - - - - - - - - - - - - - - - - - - - - - - - - - - - - -
I took a few more photos while the body shell was out of the way so I could bolt in the exhaust.
This shows the markings I have started to make on the under side of the scuttle.

This should allow me to re-enforce the fibreglass on the under side without fouling the bulkhead.
Mac posted this photo of the two halves of the Cordite body shell on his build thread today.
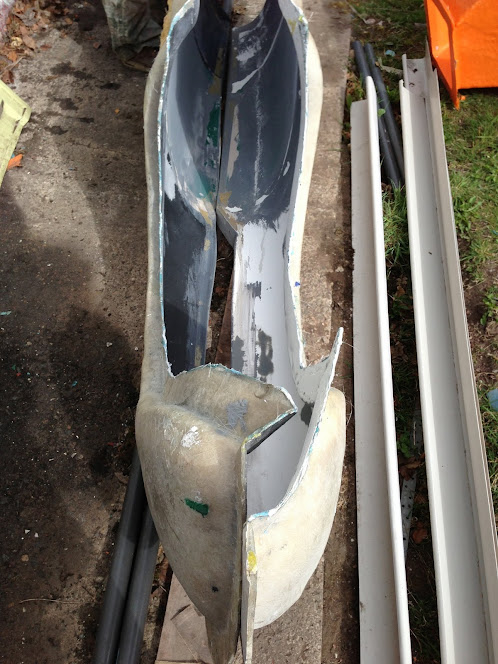
This is my best attempt to show how that translates to the body shell I have to "adjust"


I know Mac did some major surgery to the rear passenger side and I will need to do the same.
The key driver for me is getting the body shell to cover the rear wheel.
There are no issues on the driver's side.

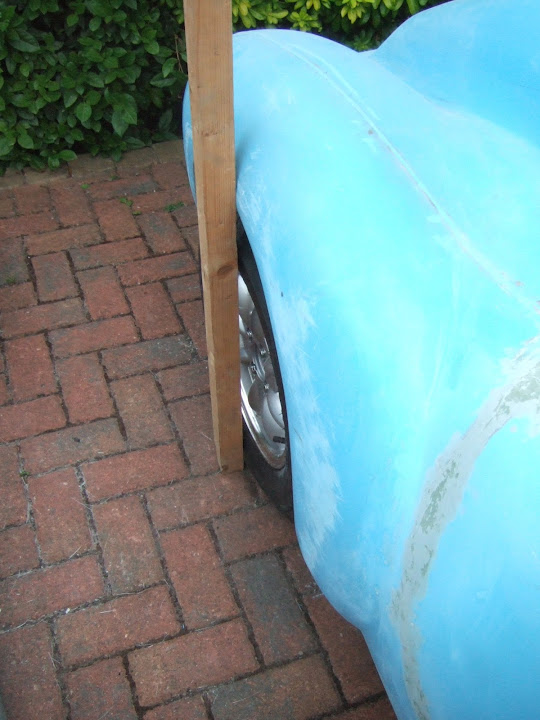
But the passenger side needs to move out at least two inches to clear the tyre.


Given that this will be a major "cut & shut" exercise I will consider adding an extra hump while I'm at it.

The other thing I need to consider in this area is where (and how) I put a boot lid into the body work.
So there is still a few things I need to get worked out in my head before I start the cutting process.
I've also been thinking about some final mods to the rear framework.
One of these will be to provide an area for a "bonding blob", similar to (but smaller than) the one Mr T had.
This will strengthen the rear of the cockpit, where you instinctively reach when getting in and out of the car.
Anyway, that is all for now, take care, Paul.
|
17th July 2014, 05:55
|
|
Senior Member
|
|
Join Date: May 2013
Posts: 2,161
|
|
Good work Paul.
Have a look back at my thread for strengthening
the rear of the cockpit, I had the same problem, and solved it in two ways. might save you a bit of beard scratching as you put it!
|
|
Currently Active Users Viewing This Thread: 2 (0 members and 2 guests)
|
|
|
 Posting Rules
|
You may not post new threads
You may not post replies
You may not post attachments
You may not edit your posts
HTML code is Off
|
|
|
All times are GMT +0. The time now is 14:39.
|


 Linear Mode

