|
|
| Tribute Automotive Builds Discuss your Tribute kit build |

1st November 2017, 13:52
|
|
Senior Member
|
|
Join Date: Nov 2016
Posts: 228
|
|
Ooooooo I like that. Quite partial to Pat Dorans Q8 colours on his rallycross one too.
|
1st November 2017, 14:01
|
|
Member
|
|
Join Date: Apr 2013
Posts: 55
|
|
looking good! 
are you going to black up the intakes and detail bits? makes a ton of difference to my eye. works in gloss and matte black.
I'm intrigued by your side window idea... 
what white is it? FOrd Diamond white Version 1,2 or 3, or something else?
if you were wanting a front bib, B&Q does a natty little lawn/gravel edge roll for about £15. its basically a P profile, with the bead about 12mm, and the long bit about 10cm. looks good as it lowers the car quite a lot. works well esp if you are going to black up the bits n bobs. a roll is enough for 2 cars. |
1st November 2017, 14:45
|
|
Senior Member
|
|
Join Date: Oct 2016
Posts: 181
|
|
Quote:
Originally Posted by Redandy

looking good!
are you going to black up the intakes and detail bits? makes a ton of difference to my eye. works in gloss and matte black.
I'm intrigued by your side window idea...
what white is it? FOrd Diamond white Version 1,2 or 3, or something else?
if you were wanting a front bib, B&Q does a natty little lawn/gravel edge roll for about £15. its basically a P profile, with the bead about 12mm, and the long bit about 10cm. looks good as it lowers the car quite a lot. works well esp if you are going to black up the bits n bobs. a roll is enough for 2 cars. |
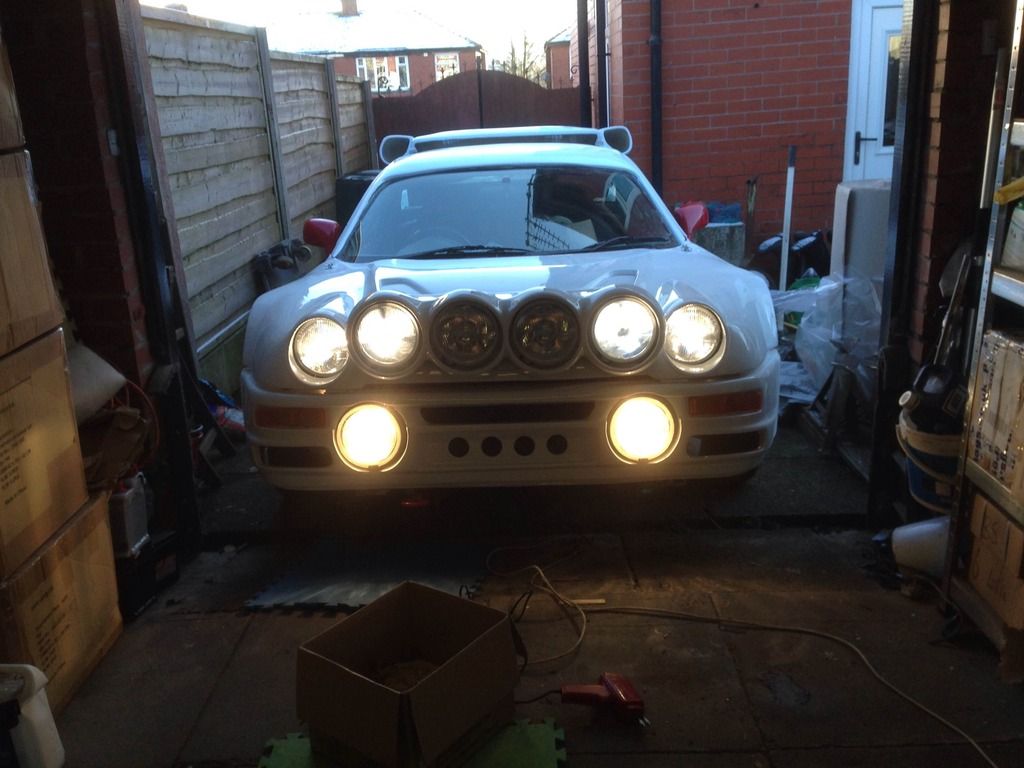
Hi
I like the sound of that, i will have to take a look.
The colour is Ford Frozen white,
I have some black mesh for all of the intakes, even wrapping the intercooler in mesh, Can't do the whole top intake as the clam needs to pivot to the roof.
the rear of the doors are going to be black. |
3rd November 2017, 08:13
|
|
Senior Member
|
|
Join Date: Sep 2016
Posts: 326
|
|
Hi Wozzy - fantastic job and paint looks great. You are definitely spurring me on to complete my build!
|
8th November 2017, 14:59
|
|
Senior Member
|
|
Join Date: Oct 2016
Posts: 181
|
|
[IMG] 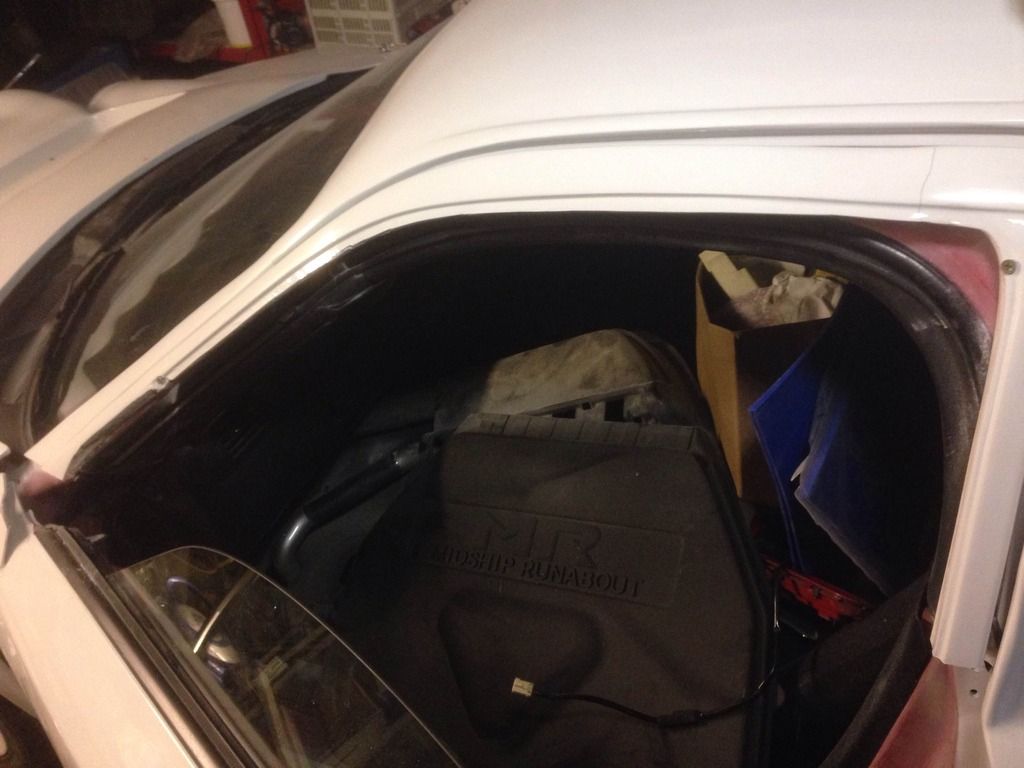 http://[/IMG]had a couple of hours on the car today,managed to get a start on sorting the door issue out.
cut the door frame around the window and had a play about
[IMG] 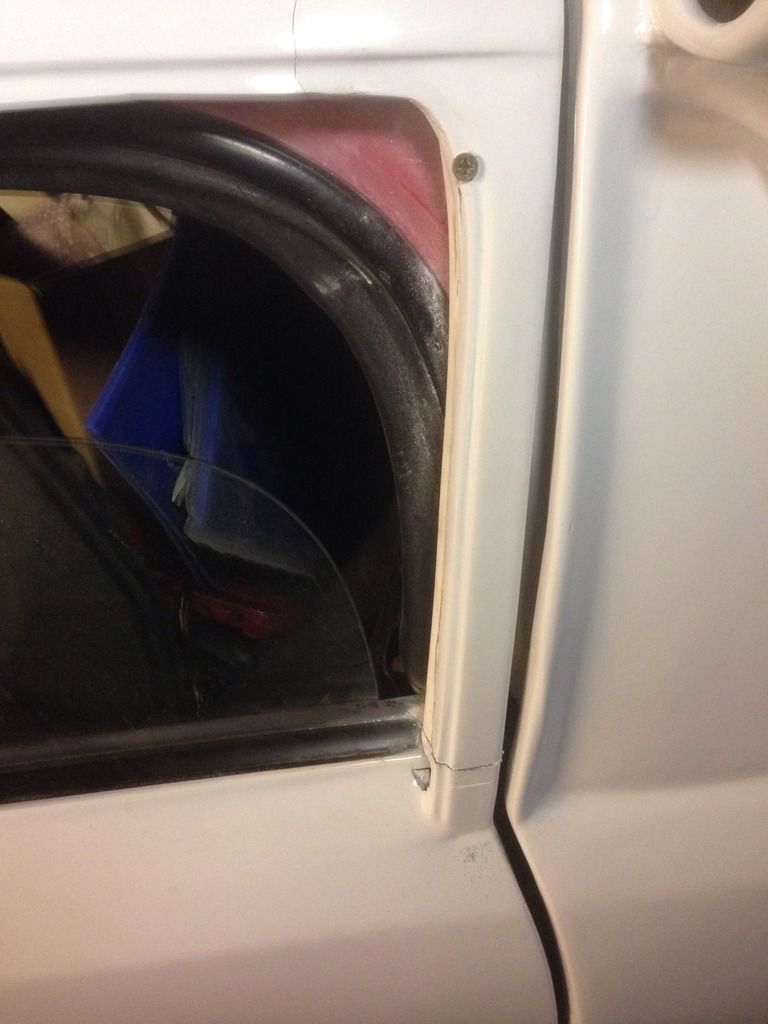 http://[/IMG]
It only needed to be a small cut as 2mm should be plenty at this stage
Also cut to the other side
[IMG] 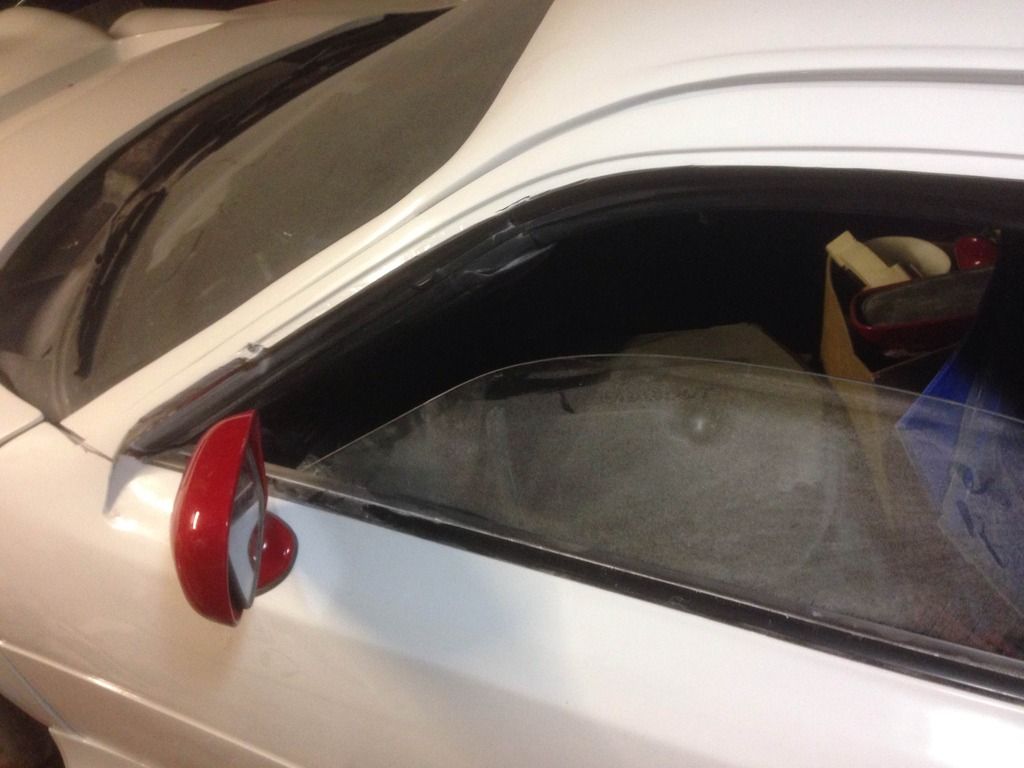 http://[/IMG]
Even managed to put the mirror back on.
This part is going to be sculptured so its a nice smooth curve when the door is open
[IMG]  http://[/IMG]
once it's all blended in it should look pretty good
Door now opens fine 
Last edited by wozzy; 8th November 2017 at 15:02..
Reason: .
|
8th November 2017, 20:45
|
|
Senior Member
|
|
Join Date: Nov 2016
Posts: 228
|
|
Any chance I could ask a favour? If you take off the top of the door frame again, would mind taking a photo of where the MR2 roof meets rs200 roof on the driver's side?
Love the idea, what will you do with the top corner where you can see the hardtop? Fill it?
|
9th November 2017, 07:14
|
|
Senior Member
|
|
Join Date: Oct 2016
Posts: 181
|
|
Yes, the frame will all be filled and blended into the roof to give nice even lines.
I will get some pics to you later when i am doing the other door.
|
19th November 2017, 19:38
|
|
Senior Member
|
|
Join Date: Jul 2012
Posts: 576
|
|
Quote:
Originally Posted by Nostromo
Ooooooo I like that. Quite partial to Pat Dorans Q8 colours on his rallycross one too.
|
http://www.autoblog.nl/gallery/0_Div...11-wrap-04.jpg
Love the build and the look of this. |
20th November 2017, 09:52
|
 |
Senior Member
|
|
Join Date: Apr 2016
Location: Camberley
Posts: 972
|
|
Quote:
Originally Posted by tonyt
|
That looks like a well worked piece of kit. |
9th December 2017, 09:29
|
|
Senior Member
|
|
Join Date: Oct 2016
Posts: 181
|
|
Since it was a nice dry day yesterday, i though i would get the car out of the garage and start soldering some of the wires in.
Managed to get the side indicators done, and also got the fog lamps wired up.
Still not sure on the high beam yet, so will leave it until i make a final decision.
called it a day as it was very cold.
[IMG] 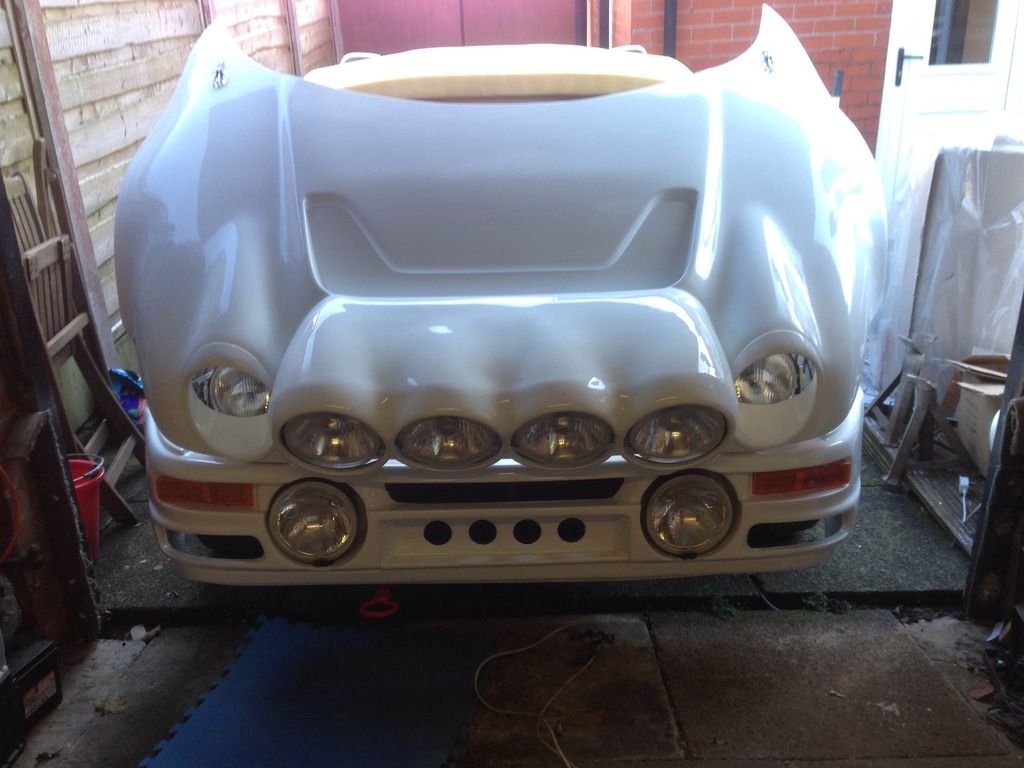 http://[/IMG]
 |
13th March 2018, 15:36
|
|
Senior Member
|
|
Join Date: Oct 2016
Posts: 181
|
|
Not really done anything for a while, but having seen the other guys getting on with theirs i have got started again.
Fitted the mudflaps, arch liners and mesh to the rear clam.
[IMG]  [/IMG] |
13th March 2018, 23:13
|
|
Senior Member
|
|
Join Date: Nov 2016
Posts: 228
|
|
How have you gone about the arch liners mate? Have done a bit of the from t ones but haven't started on the rear yet.
|
14th March 2018, 14:59
|
|
Senior Member
|
|
Join Date: Oct 2016
Posts: 181
|
|
Having used the original ones then extended them out with these
ebay item number 112690567538
They are a great starting point, cut the curve lip off each side and then cut in half down the length.
i managed it with a stanley knife
|
24th March 2018, 14:37
|
|
Senior Member
|
|
Join Date: Oct 2016
Posts: 181
|
|
Has anyone sorted the light wiring out yet, so we can use the 1 lamp for dip and main, if so can you please let me know how its done.
cheers
|
25th March 2018, 16:46
|
|
Member
|
|
Join Date: Dec 2016
Posts: 43
|
|
Unfortunately, I'm not at that stage yet, but would love know how!
|
2nd April 2018, 09:56
|
|
Senior Member
|
|
Join Date: Nov 2016
Posts: 228
|
|
Not yet but will be looking into it when I'm off at the end of this week.
|
15th May 2019, 14:57
|
|
Senior Member
|
|
Join Date: Oct 2016
Posts: 181
|
|

just putting this back to top so it easier to locate for info |
|
Currently Active Users Viewing This Thread: 1 (0 members and 1 guests)
|
|
|
 Posting Rules
|
You may not post new threads
You may not post replies
You may not post attachments
You may not edit your posts
HTML code is Off
|
|
|
All times are GMT +0. The time now is 12:19.
|


 Linear Mode

