|
|
| Sammio Builds and discussions Sammio bodied car builds and specials |

18th April 2012, 15:39
|
 |
Senior Member
|
|
Join Date: Jan 2012
Location: Poole, Dorset
Posts: 615
|
|
Post-inspection, things have been exciting...
Bonnet was lined up and it starts to look like a Sammio Spyder now...

I cut the ends off the front bumper bar, and found a useful way of recycling them....
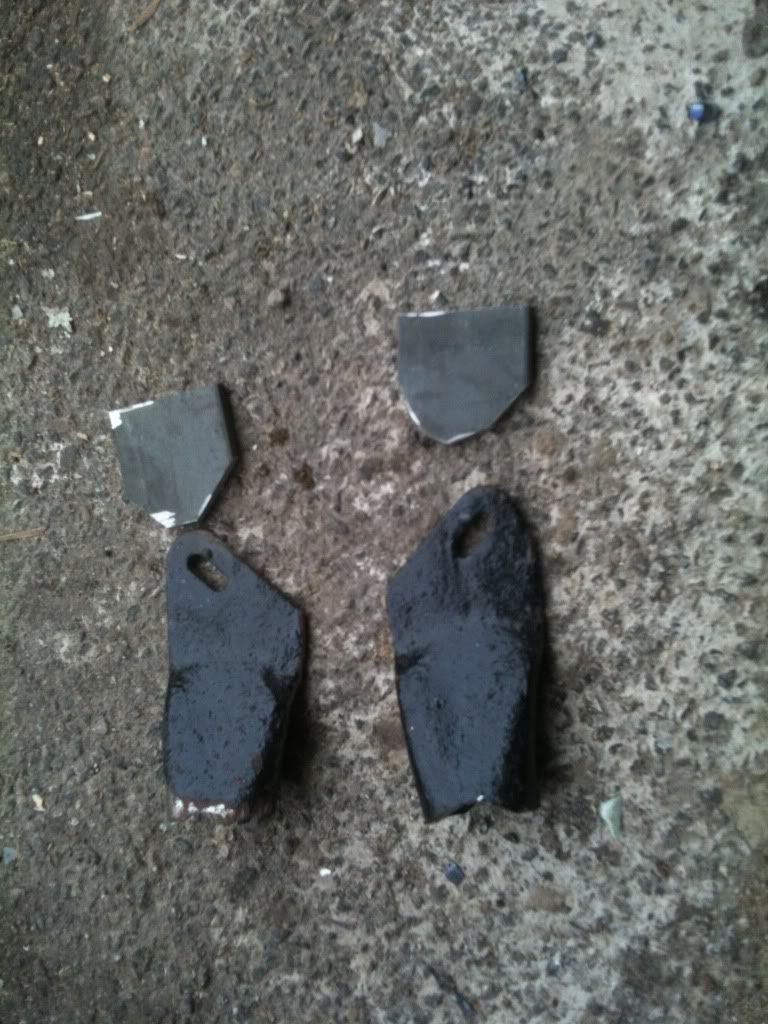
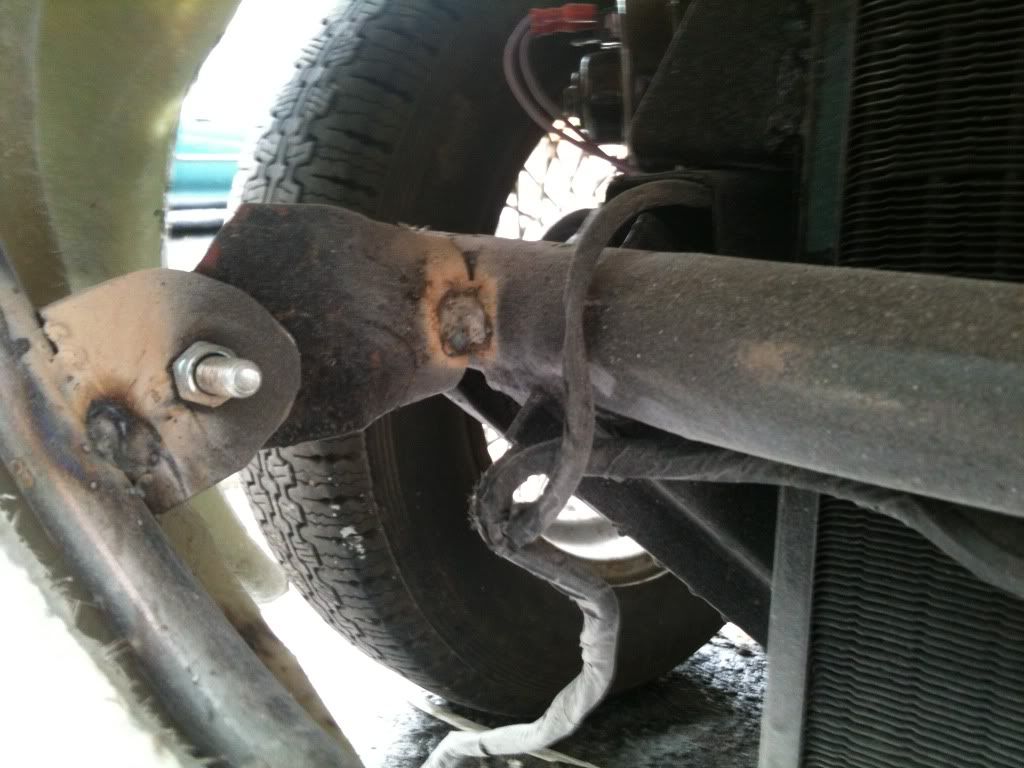
so now I have an opening bonnet..... (still some things left to tidy up, but getting there)

Last edited by tlrtone; 18th April 2012 at 16:13..
|
18th April 2012, 17:48
|
 |
Senior Member
|
|
Join Date: Jul 2011
Posts: 5,328
|
|
Wow, great progress and it looks like your bonnet actually fits!  |
18th April 2012, 17:51
|
 |
Senior Member
|
|
Join Date: Jun 2011
Posts: 935
|
|
congrats tony
so what colour is it going to be?
|
18th April 2012, 18:04
|
|
Senior Member
|
|
Join Date: Jan 2012
Location: Poole, Dorset
Posts: 615
|
|

Quote:
Originally Posted by Mister Towed

Wow, great progress and it looks like your bonnet actually fits! |
Well, to a degree. Still needs some fettling. It hit on the thermostat housing exit pipe and I don't really want a scoop, so I cut it shorter which seems to make a difference. Everything else, including my header tank clears the bonnet okay.
I have also got to do some minor adjustments to the hinge points so it will sit a bit better over the wheels, which in turn I think will muff up the shut line again.
The secret to this stage is to make small adjustments and take a step back, have a coffee and do a bit more. It pays to take your time on the bonnet I reckon as learned from Davecymru, who found moving the bonnet forwards with the 6 cylinder engine helped the look. Once I have it all so I am happy with it I am going to take the 80mm lowering block out of the back spring and reduce it to 60mm so it lifts the back end up a tad. I reckon that will help with the 15" wheels and make it sit better.
I will have a play at the weekend now, as I am busy the next couple of days with work... 

|
18th April 2012, 18:22
|
|
Senior Member
|
|
Join Date: Aug 2011
Location: Emsworth
Posts: 119
|
|
Clever with the recycled bonnet hinges Tony. I like that idea a lot.
We cut ours off at the beginning not realising that it was going to be important for the inspection.
So now we have to weld them back on - in order to take them off again - and then weld them back on again - as hinges.
Is it me or is it all just a little bit silly.
Nice work!
|
18th April 2012, 19:02
|
|
Senior Member
|
|
Join Date: Jan 2012
Location: Poole, Dorset
Posts: 615
|
|
Quote:
Originally Posted by Roadster
congrats tony
so what colour is it going to be?
|
I have decided on Pepper White which is the creamy white that is on the new mini's. Black wire wheels and interior. Subtle and a little bit classy (or Gay as Gary called it! ) |
18th April 2012, 19:56
|
|
Senior Member
|
|
Join Date: Jun 2011
Posts: 935
|
|
Quote:
Originally Posted by tlrtone
I have decided on Pepper White which is the creamy white that is on the new mini's. Black wire wheels and interior. Subtle and a little bit classy (or Gay as Gary called it! )
|
I like it i cant wait to see it finished |
18th April 2012, 20:01
|
 |
Senior Member
|
|
Join Date: Dec 2011
Location: Devon
Posts: 550
|
|
Well done, what a productive day you've had!!! Looking great. Really enjoying watching your progress.
|
19th April 2012, 08:45
|
 |
Senior Member
|
|
Join Date: May 2009
Location: POOLE , DORSET
Posts: 2,200
|
|
Great work Tony......looking good.
We do recommend 60mm block with the 15's ....
And another dodgy picture of me at inspections to add to the collection !!
|
19th April 2012, 16:04
|
|
Senior Member
|
|
Join Date: Sep 2011
Location: Margate, Kent
Posts: 133
|
|
looking good...and spurring me on a lot....I might just be upto inspection stage after the May B.Hol.
Have to agree with you on the cup of tea and ponder route.....just realized how stupid I may have been bolting on the fuel tank prior to fitting the frame!!!!looking at the tweaks I will need to do the holes won`t line up on the tank after will they  .....The good thing about all this as a build virgin,  is that I will know for the next one  |
19th April 2012, 16:05
|
|
Senior Member
|
|
Join Date: Jan 2012
Location: Poole, Dorset
Posts: 615
|
|
Quote:
Originally Posted by lancelot link
Great work Tony......looking good.
We do recommend 60mm block with the 15's ....
And another dodgy picture of me at inspections to add to the collection !!
|
Thanks again Gary - enjoy the beer!
I have now cut'n'shut the lowering block to 60mm and the ride height is much better. Thanks - I should have listened to you in the first place!
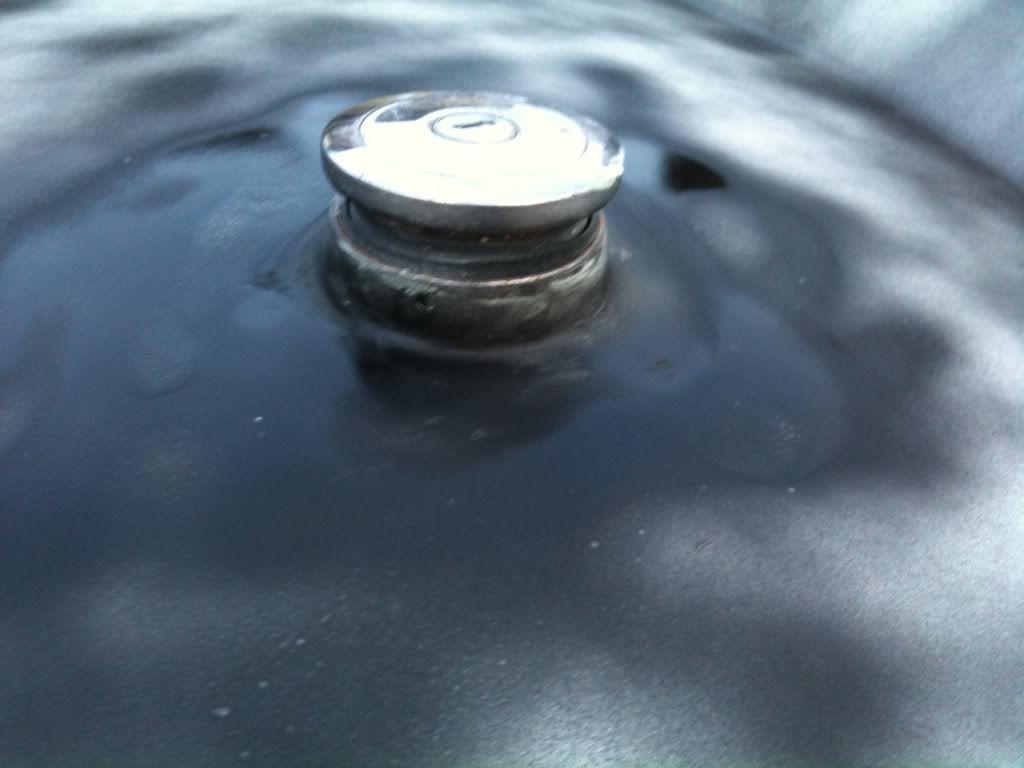
I have fitted the fuel cap as well today. The fuel cap I used was an Aston cap for a classic Mini - £15 from ebay. It took a bit of working out how to fit it but managed it with a £5 three-step exhaust pipe reducer, and the fuel cap and filler neck from my old Vitesse tank. It is now secured, waiting for making good around the opening, so I can fill the tank with fuel and see if the old girl will start at the weekend!
Starting to get excited about the prospect of it being on the road in May!! |
20th April 2012, 19:05
|
|
Senior Member
|
|
Join Date: Jan 2012
Location: Poole, Dorset
Posts: 615
|
|
Oooh, I had my inspection Wednesday, and look what turned up TODAY!
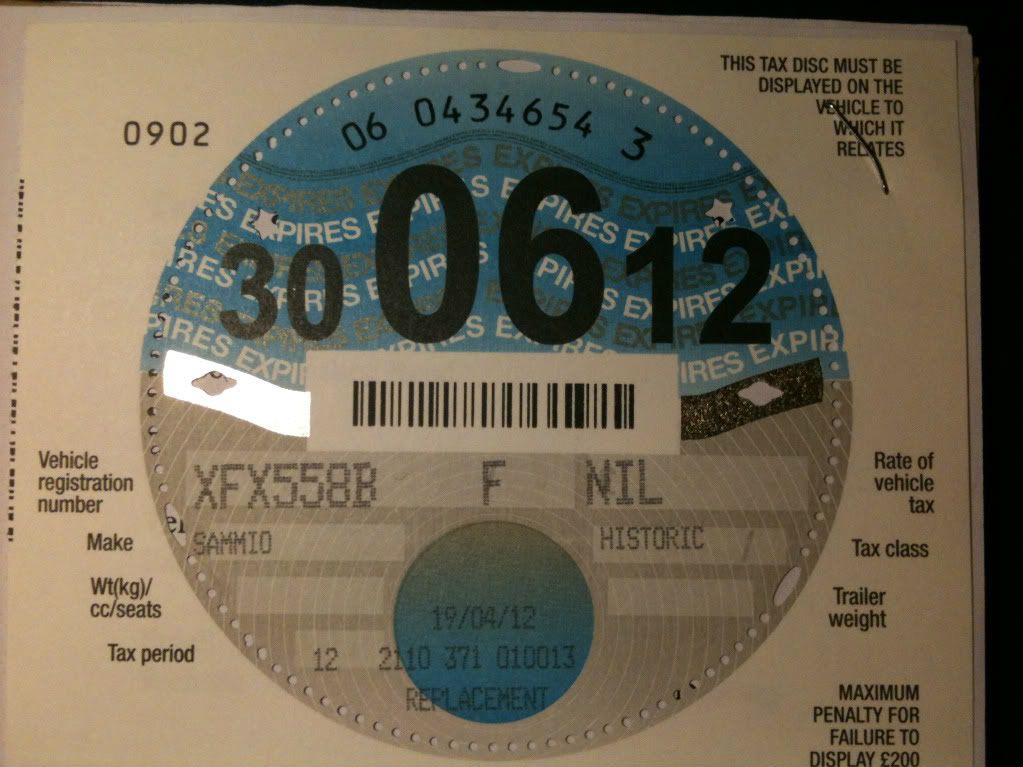
Note the make  |
20th April 2012, 22:44
|
|
Member
|
|
Join Date: Mar 2012
Posts: 42
|
|
Has that been issued on an existing MOT and insurance??
|
21st April 2012, 06:11
|
|
Senior Member
|
|
Join Date: Jan 2012
Location: Poole, Dorset
Posts: 615
|
|
Quote:
Originally Posted by Ben Caswell
Has that been issued on an existing MOT and insurance??
|
The donor was already taxed and mot'd so they have just reissued the taxdisc. I have returned the old one that says Triumph.
My spyder isn't even finished yet but it's nice to know I can drive it straight away! |
21st April 2012, 08:39
|
|
Senior Member
|
|
Join Date: Dec 2011
Location: Devon
Posts: 550
|
|
I am glad you have managed to get it registered and the build is looking great. It does make me laugh though that you can recondition the chassis and components related to that and change the body without the need for a new MOT. They seem to be so strict in some ways and lax in others. I bet you can't wait to get it finished now, stick the tax disc on the screen and go for a blast down the road. If you take a video camera with you we can all be with you on that momentous first outing. As you say we all love piccys!!!!!
This forum is better than any build manual and an inspiration to all. Cheers
|
21st April 2012, 08:46
|
|
Senior Member
|
|
Join Date: Jul 2011
Posts: 5,328
|
|
Towed agrees with Froggy (amphibians of the world unite?)
You're doing a great job of inspiring the rest of us to bl  dy well get on with our own builds.
I also thought it's bizarre that hacking the car to pieces and changing just about everything doesn't void the MOT. There is always the catch-all law regarding driving a vehicle in a condition likely to cause danger to stop you driving the bare chassis round the bypass though.  |
24th April 2012, 19:13
|
|
Senior Member
|
|
Join Date: Jan 2012
Location: Poole, Dorset
Posts: 615
|
|
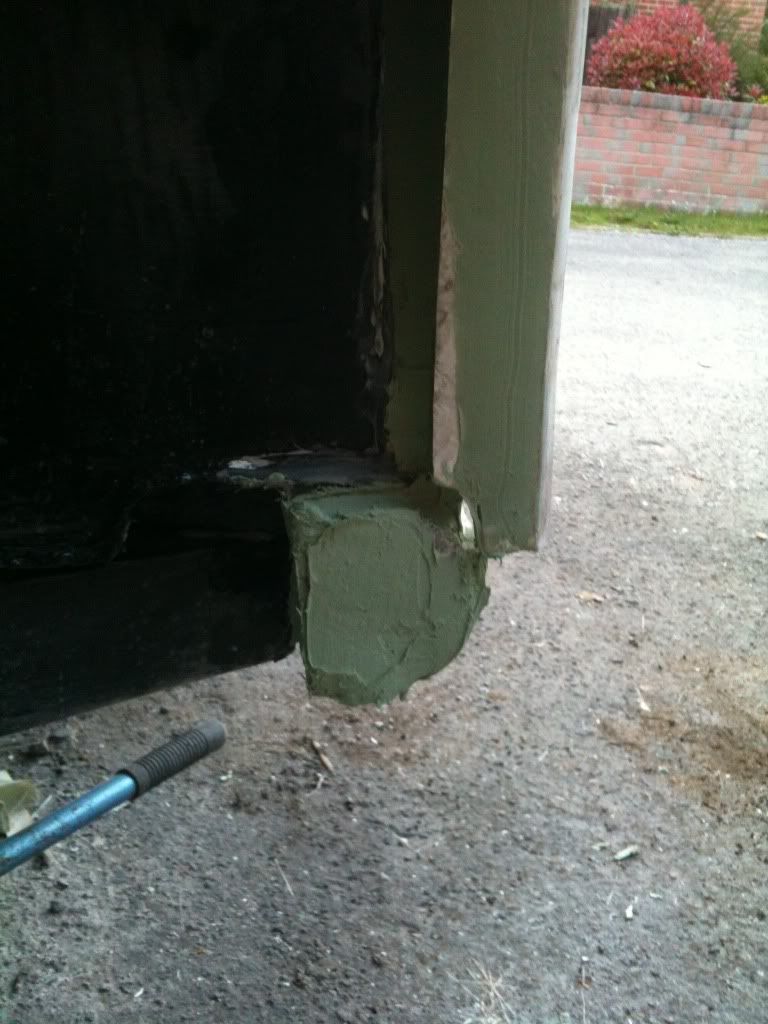
quick update, I have been thinking of the rat-cammo look......

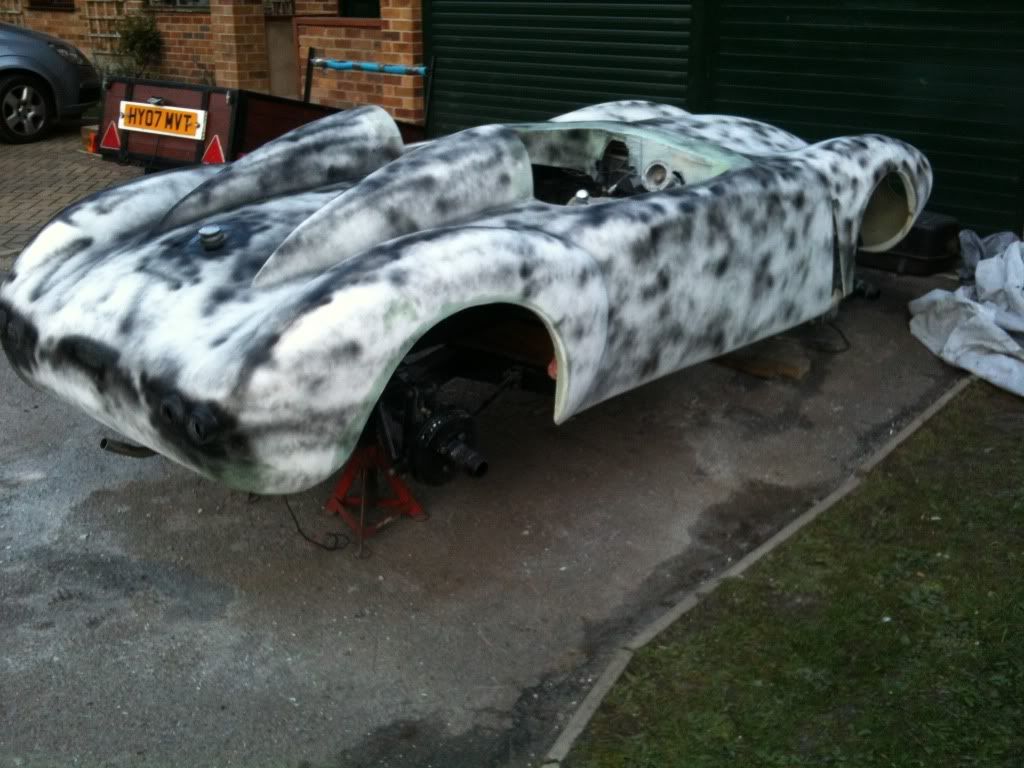
OK I got carried away with the guide coat! ( i have to put in the bonnet formers/strengtheners yet, hence the bottom edges still stick out.)
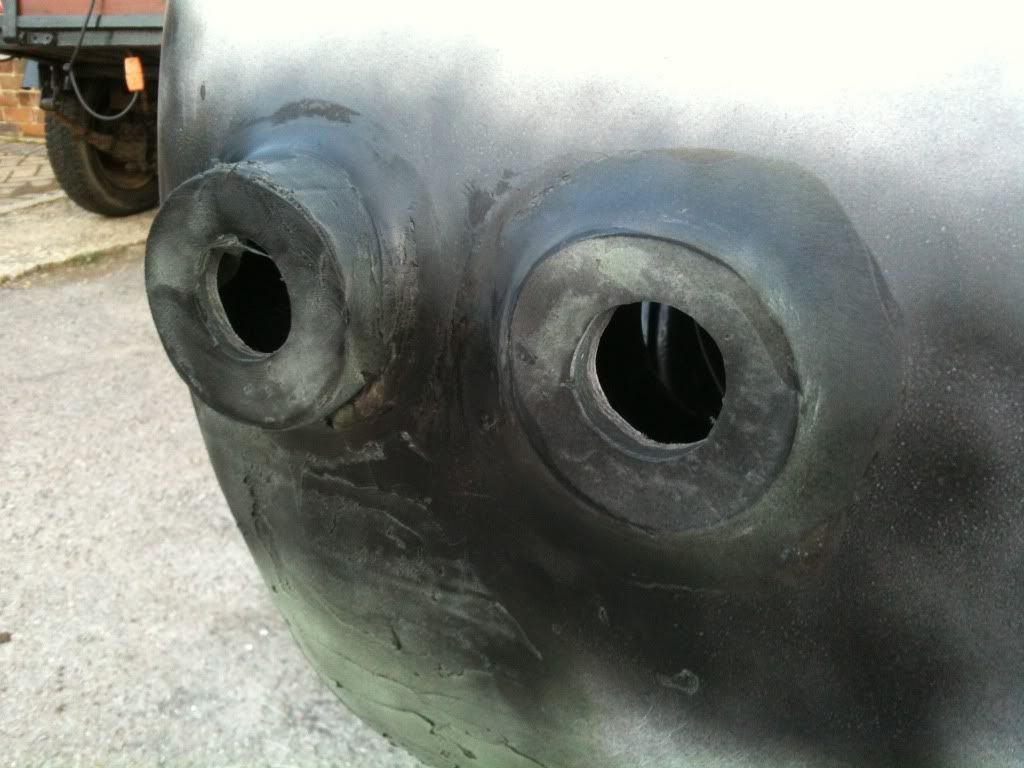
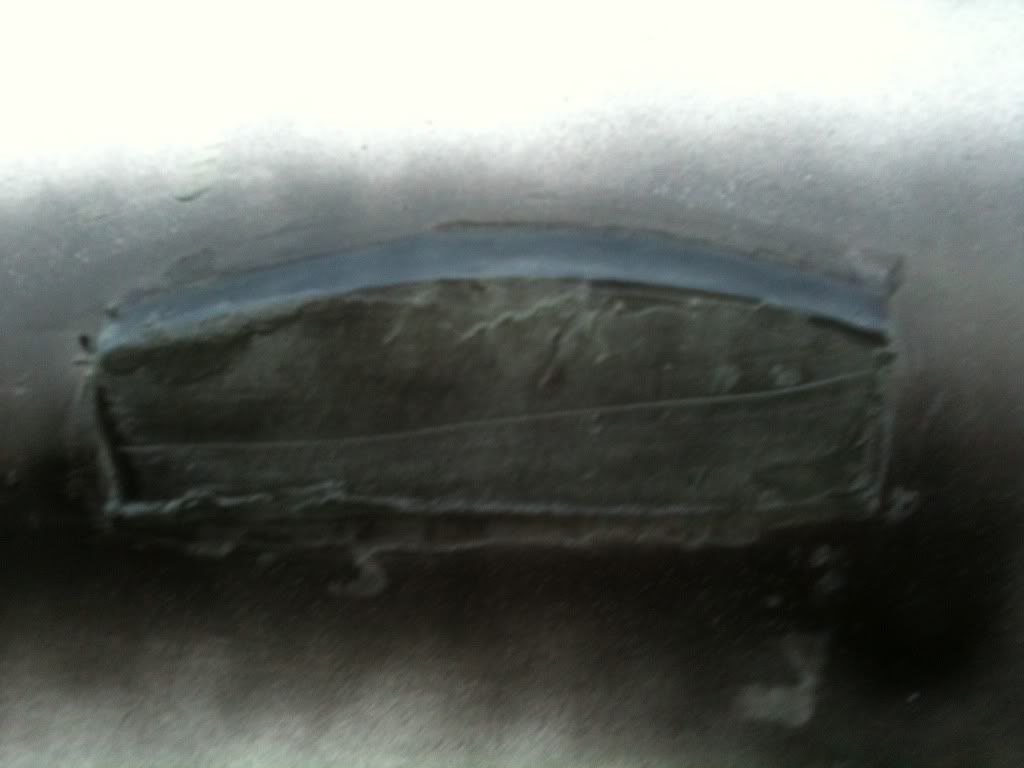
A couple of the detail shots....
I have made mould seats for the rear lights so they look more factory fitted
and the same for the number plate light...
and I have also moulded in the filler neck. This is the standard Vitesse cap and filler neck from the Vitesse tank, and adapted by means of an exhaust pipe reducer with some washers welded on and then the lot bonded on. It will be covered with a standard Mini Aston cap, so the locking cap will be hidden. The actual filler tube is on a flexible pipe to the tank and has a rubber seal between the bonded part, so it will move without cracking the fibreglass! (so the theory goes...)
oh and I started on the sill closing plates....
 |
24th April 2012, 19:47
|
|
Senior Member
|
|
Join Date: Jul 2011
Posts: 5,328
|
|
Looking good - love the kubel wagen camouflage!
How did you make your rear light pods?
|
24th April 2012, 20:12
|
|
Senior Member
|
|
Join Date: Jan 2012
Location: Poole, Dorset
Posts: 615
|
|
Quote:
Originally Posted by Mister Towed
How did you make your rear light pods?
|
6" sections of 68mm standard plastic rainwater downpipe - just the right size for my Lucas 488 flat lens lights when you have a layer of fibreglass and filler on it! Rough up the surface well and then hold them in place with some hot-melt glue gun and then use bonding paste and fibreglass to secure them behind and in front. Finish off with body filler to the shape/style you want.
The number plate light was done by covering the light in packing tape and then holding it at the right angle with gaffer tape down the sides. Fill from the top with body filler to make the wedge shape. Remove the light when it is all set (the tape stops the body filler from sticking to it) and then tidy up accordingly.
Still lots of work to go, but getting there! |
24th April 2012, 20:20
|
|
Senior Member
|
|
Join Date: Jun 2011
Location: birchington, kent
Posts: 1,769
|
|
Job done... thats as ratty as you can get! very Madmax, this is the bit that everybody likes? RUBBING DOWN,
|
|
Currently Active Users Viewing This Thread: 1 (0 members and 1 guests)
|
|
|
 Posting Rules
|
You may not post new threads
You may not post replies
You may not post attachments
You may not edit your posts
HTML code is Off
|
|
|
All times are GMT +0. The time now is 00:54.
|


 Linear Mode

