|
|
| Sammio Builds and discussions Sammio bodied car builds and specials |

19th May 2013, 07:27
|
 |
Senior Member
|
|
Join Date: Feb 2012
Location: Wembley, London
Posts: 5,056
|
|
AndyP85 - I think Froggyman is referring to building the kit's body shell itself, rather than "just" * putting the kit together.
Anyway, I'm meant to be somewhere else, so got to go, Paul. 
* And we all know there is no "just" involved. 
|
19th May 2013, 08:05
|
|
Senior Member
|
|
Join Date: Apr 2012
Posts: 1,163
|
|
i dont think anyone who is building a Sammio is "just" putting the kit together!!!! hopefully the Ribble version should be somewhat simpler!
|
19th May 2013, 09:28
|
 |
Senior Member
|
|
Join Date: Jul 2011
Posts: 5,328
|
|

Quote:
Originally Posted by Viatron

i dont think anyone who is building a Sammio is "just" putting the kit together!!!! hopefully the Ribble version should be somewhat simpler!
|
Simpler? Simpler? No no no.
OK, it might be nice if one or two things fitted a bit better, like the internal frame, but where's the challenge if any Tom Dick or Jeremy could bolt one together in a weekend?
The people building these 'kits' all have one thing in common - we understand that we've bought a low priced, basic package that we need to add value to with our imagination and mechanical skills. Good luck to those who want the car and can pay someone to build it for them, but the average customer will relish the process of building it more than they desire the finished article imho.
Mine's taken two years of tinkering to get it the way I want it and I wouldn't have it any other way. Improve quality by all means, but leave simpler to the Caterham crowd.
On the other hand, I suppose if you want to sell to a wider market you could make it simpler. Sniff.

|
19th May 2013, 09:54
|
 |
Senior Member
|
|
Join Date: May 2012
Location: Preston
Posts: 139
|
|
Quote:
Originally Posted by Viatron
i dont think anyone who is building a Sammio is "just" putting the kit together!!!! hopefully the Ribble version should be somewhat simpler!
|
Trust me it is (for the Navigator and the new frame for the Pilot should make things easier) Mr T  |
19th May 2013, 11:25
|
 |
Senior Member
|
|
Join Date: Dec 2011
Posts: 656
|
|
With you all the way T. Simpler isn't really the right description of what we want to do with the kits. More a process of getting it 'right' so when you receive a frame, there's a good chance of it fitting. When you get a body shell, there is an acceptable level of symmetry and the options such as doors (once designed) shouldn't present a year of head scratching.
Sure, there will be work to do and we're aiming fair and squarely at the budget end of the market but you should end up working with the kit and not fighting it. 'Phoenix', our first Navigator demonstrator, is being built from the kit as it will be supplied so we can have the experience of building it as a customer would and, if necessary, tweaking the design so subsequent kits will have problems removed. We are lucky in having a guy like Mac (Viatron) as the first customer of the new kit who understands this process and is actively helping us get it right.
|
19th May 2013, 11:52
|
|
Senior Member
|
|
Join Date: Apr 2012
Posts: 1,163
|
|
Towed, notice i also said "somewhat simpler" not simple! by the nature of what it is it will always be a more involved proces than assembling a seven alike from a kit for example.
|
22nd May 2013, 07:00
|
|
Senior Member
|
|
Join Date: Apr 2012
Posts: 1,163
|
|
Well was booked to be in Sunderland on Monday but customer called at 07:00 as i was ab
Out to set off to tell me that they had no power so a free Day and as the cancellation was less than 24 hours i was being paid as well! What do do with my time......
Since finishing work on the Navigator buck one glaring issue has annoyed me so i took
My life and a cutting disc in my hand and got stuck in.
 |
22nd May 2013, 07:22
|
|
Senior Member
|
|
Join Date: Jul 2011
Posts: 5,328
|
|
Which glaring issue would that be then?
|
22nd May 2013, 07:36
|
|
Senior Member
|
|
Join Date: Apr 2012
Posts: 1,163
|
|
Dont lnow if it exists on previous cordites or whether its just as a result of the state of the moulds or the modifications done to the moulds but the Passenger rear quarter needed moving back a fair bit.
|
22nd May 2013, 07:45
|
|
Senior Member
|
|
Join Date: Jun 2011
Location: birchington, kent
Posts: 1,769
|
|
Very neatly cut.
|
22nd May 2013, 07:46
|
|
Senior Member
|
|
Join Date: Dec 2011
Posts: 656
|
|
And, as a result, which will soon be seen in full, pictorially, the end product is MUCH better than before with a good degree of symmetry, cockpit shape and finish. Can't wait to see the first shell out of the new mould |
22nd May 2013, 07:51
|
|
Senior Member
|
|
Join Date: Apr 2012
Posts: 1,163
|
|
Took some time taping the cut line to make the job as painless as possible, good job too as the cut was over 8 foot long!
|
22nd May 2013, 18:50
|
|
Senior Member
|
|
Join Date: Feb 2012
Location: Wembley, London
Posts: 5,056
|
|
At this rate I'm not sure I want to see how much work you put into getting the body "straight".
I think I will just need to learn to live with a "wonky" body shell. 
Although at least when you document the changes I will know it is not my imagination that things don't line up.
Jokes aside, I am looking forward to seeing this finished. 
Good luck, Paul. |
25th May 2013, 08:43
|
|
Senior Member
|
|
Join Date: Apr 2012
Posts: 1,163
|
|
Just waiting to load the buck, its getting a final polish before loading

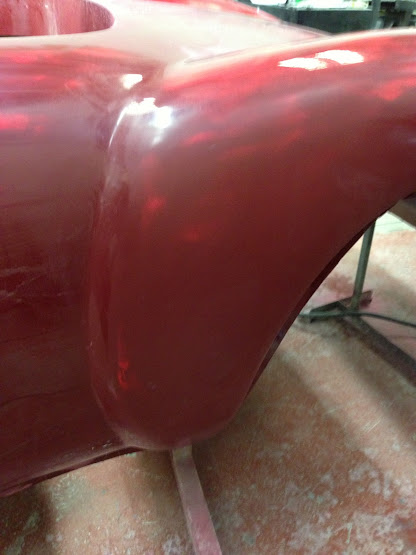

The different shades of red make for an interesting finish but being a buck it doesn't matter as long as its shiny |
25th May 2013, 22:00
|
|
Senior Member
|
|
Join Date: Feb 2012
Location: Wembley, London
Posts: 5,056
|
|
It is all looking very good.
I really like the deep lip that runs around the rear cockpit.
Keep up posted, Paul. |
27th May 2013, 08:09
|
|
Senior Member
|
|
Join Date: Apr 2012
Posts: 1,163
|
|
Saturday was a bit like the curates egg, good in parts.....
Managed to empty the tater storage parts bin onto the floor, 3 hours of going through it and everything i want to keep is now on shelving and thie rest is ready for the scrap man. Also meant i could get the tater box out of the workshop which as its approx 6 foot long buy 4 foot wide and 4 foot tall made a big difference in the space available, also meant i got to play with the forklift which is always good :-)
Bad bit was that i was hoping to fit the inlet and exhaust manifolds using my shiny new stainless steel head studs, wasn't to be though. The engine was built by a Triumph tuning specialist near me and part of the job was to use a brand new Triumph 1500 FWD head i got off eBay as it has bigger valves as standard and being brand new already had brand new valves and guides etc. only problem is that the tapped holes for the manifold studs are bigger than the spitfire ones so if anyone wants a set of stainless head studs with allen keyed ends for easy fitting on the cheap drop me a pm. I think i have identified the studs i need now though so should hopefully have them for next weekend.
Did manage to touch up the blue grey engine block paintwork though as moving it outside revealed a few areas that needed work, also got the water pump housing blasted in our new monster blasting cabinet and got it painted and a brand new water pump fitted that i found during the parts sorting exercise forgot to take pictures though unfortunately. Dave made a start on blasting the thermostat cover but it became apparent we were wasting our time as it was like a colander once blasted so will have to see if new ones are available.
I was going to cut down a distributer to fill the hole in the block as i am running a distributor less ignition system but have decided that it s too much work for no real benefit so made a start on cleaning one of the ones found in the tater box and will just fit it with no HT leads as a dummy.
And the biggest news of the day is that the buck finally left the body shop and is now at the laminators ready for him to make a start on the new moulds.....
|
1st June 2013, 17:37
|
|
Senior Member
|
|
Join Date: Apr 2012
Posts: 1,163
|
|
Went up the workshop today and got a few bits and bobs done in between working on the GTA
1. fitted the rear shock top mount bolts that arrived last week.
2. fitted my new manifold studs and managed to get the exhaust and inlet manifolds fitted
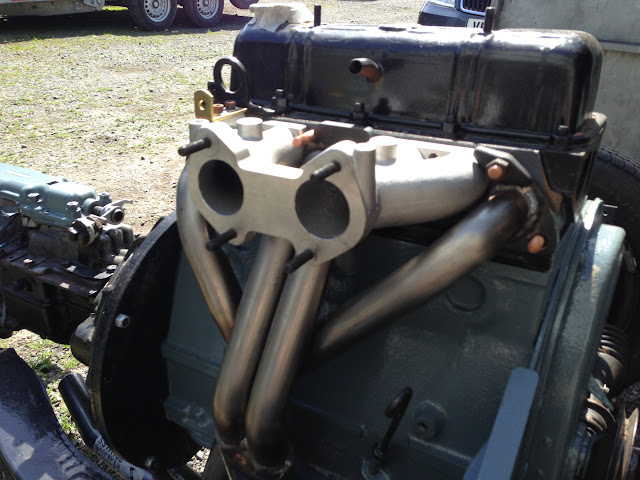
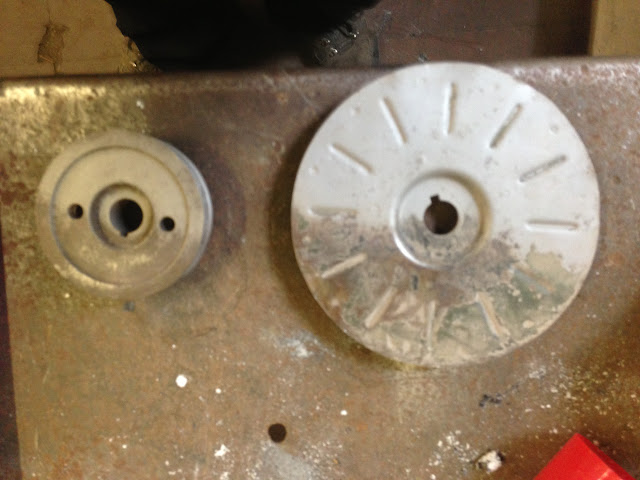
3. finished painting my freshly blasteed water pump housing including painting the pully black.

Got some time off next week so hopefully will make some more progress.
TTFN |
5th June 2013, 12:28
|
|
Senior Member
|
|
Join Date: Apr 2012
Posts: 1,163
|
|
fell across these on ebay, they are actually vespa rear lights and would almost definately need a pedestal making to mount them on but am quite taken with the period look and neatness, they combine stop tail and idicator all in one unit. any thoughts or comments?
 |
5th June 2013, 12:39
|
|
Senior Member
|
|
Join Date: Apr 2012
Posts: 1,163
|
|
|
5th June 2013, 12:42
|
|
Senior Member
|
|
Join Date: Jul 2011
Posts: 5,328
|
|
Love the Vespa tail lights. Are you planning to mount them with the indicator to the side or on top?
|
|
Currently Active Users Viewing This Thread: 1 (0 members and 1 guests)
|
|
|
 Posting Rules
|
You may not post new threads
You may not post replies
You may not post attachments
You may not edit your posts
HTML code is Off
|
|
|
All times are GMT +0. The time now is 07:14.
|


 Linear Mode

