|
|
| Sammio Builds and discussions Sammio bodied car builds and specials |

24th May 2017, 19:49
|
 |
Senior Member
|
|
Join Date: Feb 2012
Location: Wembley, London
Posts: 5,056
|
|

Oxford - As I've already bought a cheap polishing machine and some G10, I will at least try to remove the brush marks.
Micky1Mo - Thanks for the link, but I am going to try the wet & dry brush approach the canal boat painters use.
Molleur - That is my problem in a nut shell, I just haven't got time to go around the sand/fill/sand/fill/sand loop often enough.
Having said that, the old etch primer does act as a guide coat, so the bodywork is getting pretty smoother in some places. 
( The less said about the other places the better.  )
Casamolino - Well it is funny you should say that Geoff...
- - - - - - - - - - - - - - - - - - - - - - - - - - - - - - -
Another Bonus Session:
My real workload is all over the place at the moment as I am dependant on others before I can make any progress.
So after two hours working from home, it was time to get back outside and push on…
After some sanding down, the boot lid got another coat of the high build primer.

The really good news is that this side is now ready for a coat of BRG! 
Then it was back out the front, where I numbered the brackets holding the grille in place.

The brackets were then removed, bagged and the grille came out too.

Then I can to peel back the cockpit cover, so I could get in and drive the car.
( As it was parked too close to the hedge for me to fit in and sand the bonnet nose. )

I must confess, just hearing the engine run lifted my spirits. 
So I just left it ticking over for a while and scraped off the front number plate.

Then I decided I should really hose down the driveway before I make any more mess.


But backing the car up, gave me a better view of each side.
( Light grey = Prep started, Dark grey = Still to do and Light brown = Knife putty.)


Overall, that is close enough for a race car that has seen some action.
Note: I will flat down the etch primer before the high build primer goes on, so it will get better.
What is left of the yoga mat protected me from the wet driveway.

Sanded down the front wing on the driver's side.

End of Part 1…

|
24th May 2017, 19:50
|
|
Senior Member
|
|
Join Date: Feb 2012
Location: Wembley, London
Posts: 5,056
|
|
Part 2
Plus the bonnet nose.

I did spot a small 'ripple' in this area, a legacy of the 'nose job', but that is staying as is.
I also worked my way around the edge of the grille opening.

I've been used tack clothes before applying the etch primer and they really do pick up a lot.

Unfortunately, by the time I was ready to apply the etch primer it was very hot outside.
So the paint was drying almost as soon as it hit the (hot) bonnet, which made it a messy application.

The only advantage of the heat was that by the time I'd finished using the etch primer, I could start with the knife putty.


Note: I've left the area around the front indicator alone until I do the remedial filler work on the opening.

Last job of the day was to start sanding down the front wing on the passenger side.

Obviously I still need to remove the lights on this side, but I am slowly getting more of the body work done.
I'm back in the office tomorrow morning for the meeting that was cancelled the other day.
So until I get another chance to work on the car, take care, Paul. 
|
24th May 2017, 23:06
|
|
Senior Member
|
|
Join Date: Jun 2015
Posts: 1,401
|
|
Looking better every session. Well done Paul!
|
25th May 2017, 18:38
|
|
Senior Member
|
|
Join Date: Feb 2012
Location: Wembley, London
Posts: 5,056
|
|
Molleur - Thanks.
As long at the car ends up looking better than when I started I will be happy.
- - - - - - - - - - - - - - - - - - - - - - - - - - - - - - -
Thursday Evening:
Not much time available after work, but I know the key is to at least do something, as all jobs count.
First job was to remove the headlight and indicator from the passenger side.

Then I cut the zip ties holding the wiring in place so I can paint this area before re-fitting the lights.
( First photo taken before the indicator wiring was disconnected. )


Then it was time to get the angle grinder out…
As I needed to clean up some excess filler / fibreglass around the light holes on the driver's side.

Plus I wanted to 'thin out' the excessively thick depth around both the front wheel arches.
Before:

After:


But that was enough noise and mess for one evening.
So until next time, take care, Paul.
|
25th May 2017, 19:46
|
|
Senior Member
|
|
Join Date: Jun 2015
Posts: 1,401
|
|
Nice work on the wheel arch returns. Very neat.
Keep at it!
|
25th May 2017, 20:29
|
 |
Senior Member
|
|
Join Date: Apr 2016
Location: Camberley
Posts: 972
|
|
Quote:
Originally Posted by molleur

Nice work on the wheel arch returns. Very neat.
Keep at it!
|
Here, here |
26th May 2017, 19:59
|
|
Senior Member
|
|
Join Date: Feb 2012
Location: Wembley, London
Posts: 5,056
|
|
Molleur & Barber - Cheers chaps.
- - - - - - - - - - - - - - - - - - - - - - - - - - - - - - -
Good News / Bad News:
Starting with the bad news, my real work project is temporarily cutting back on my hours and no hours = no pay. 
Still, every cloud and all that, so obviously the good news is yet more unexpected car time available today.
Although this is not a great photo to mark the start of my day, the front indicator hole on the passenger side.
( Where the fixing hole on one side broke. )

I fixed some card to the front face, mixed up some fibreglass filler & liberally applied to the indicator holes on both sides.


Then I made the tough decision to tackle the inside of the bonnet during this phase of work.
Initially, I was hoping to just work on the areas around the lights and come back to the rest later.
However, if I started slapping on Tetroseal after I'd painted the rest of the car it was bound to end in tears. 
Now previously, I used up the last bit of some filler on one of my Frankenstein cuts.

Note: I wasn't trying to create a smooth surface, just "take the edge off" the really rough surface.
So after mixing up multiple batches of filler, I had made a start on covering the various 'cut and shut' joins.


Unfortunately, there was so much butchery done to the bonnet, I will have to come back to the nose area another day.

I only remembered that I was supposed to put some brown parcel tape on the cardboard after I tried to remove it.

End of Part 1…
Last edited by Paul L; 27th May 2017 at 04:26..
Reason: Typos
|
26th May 2017, 20:00
|
|
Senior Member
|
|
Join Date: Feb 2012
Location: Wembley, London
Posts: 5,056
|
|
Friday - Part 2:
Then it was time to sand down the numerous spots of knife putty.


I also sanded down more of the area around the headlight on the passenger side.

I will just leave this rough section where the headlight is mounted as it will never be seen.

So the passenger side of the bonnet was now ready for some etch primer.

Which, as before, was tricky to apply to any of the areas that were now in direct sunlight.


Then it was time to start removing everything from the rear of the car.
Driver's side.

Passenger side.

End of Part 2…
|
26th May 2017, 20:01
|
|
Senior Member
|
|
Join Date: Feb 2012
Location: Wembley, London
Posts: 5,056
|
|
Friday - Part 3:
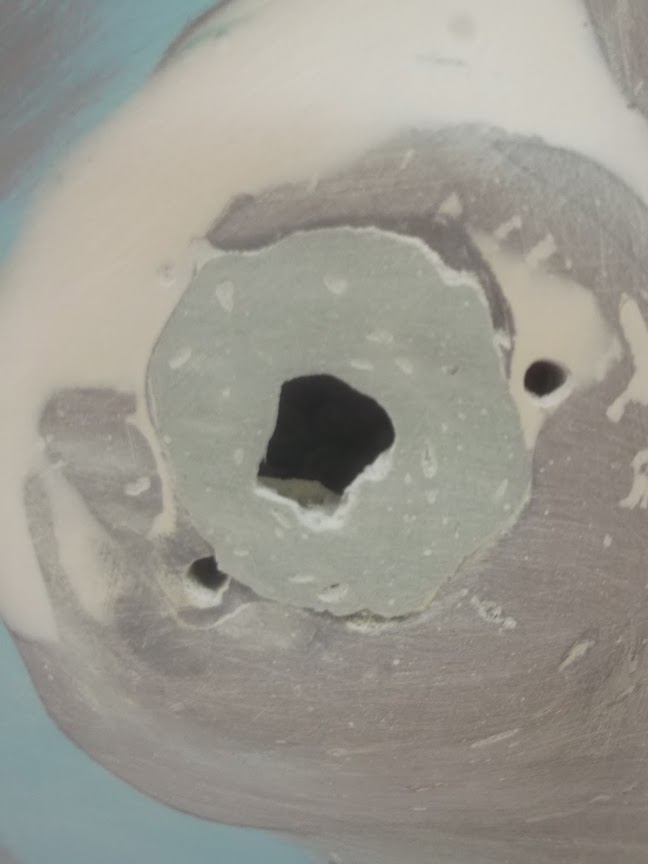
Now the rear stop/tail light on the passenger side is being replaced and this is my third light on this side.
So I needed to decide which of the multiple holes I had to choose from were staying.
( Which would allow me to fill in the spare holes. )

As it turned out, the new light (on the left) has nothing that naturally lines up with either hole.

So I used the light I had just removed as a template.
( Apologies for another blurred photo. )

At some point I will then use this template to drill holes in the new light and it should then fit the holes nicely.

I've also got a pair of surplus holes on the rear number plate plinth that need to be filled in.
( Plus some 'flaky' filler to tidy up. )

In the mean time, I put tape behind all the holes and re-sealed the boot.


But first it was time for a first round of smoothing to the underside of the bonnet.
As this is all going to be covered in Tetroseal anyway, this was the ideal tool for the job.

First pass complete.


I did make a start on finishing the sanding by hand, but I need to come back and finish that another day.
End of Part 3…
Last edited by Paul L; 27th May 2017 at 04:27..
Reason: Typos
|
26th May 2017, 20:02
|
|
Senior Member
|
|
Join Date: Feb 2012
Location: Wembley, London
Posts: 5,056
|
|
Friday - Part 4:
But while the angle grinder was out, I also tidied up the rear number plate plinth.

I also skimmed off the cardboard from the front indicators.


Note: Both indicator plinths will get a skim of filler from this side too, along with re-opening all the holes required.
Then it was time to cover everything back up again and wash down the driveway.

As I was knocking off early so I could take my wife out for a meal.
Until next time, take care, Paul.
|
27th May 2017, 18:56
|
|
Senior Member
|
|
Join Date: Feb 2012
Location: Wembley, London
Posts: 5,056
|
|
Just One Of Those Days…
I am going to get my excuses in early and state that I am absolutely knackered, so I should really have rested today.
As it appears that these are testing times, both literally and metaphorically.
The early morning rain had finished, so I thought putting some BRG on the boot lid would be a good start.
So I sanded down some areas of high build primer well, some OK and some I left alone.

So far, so good.
Unfortunately, my first error of the day came when I wiped the panel down.
It was so hot yesterday that the white spirits evaporated almost as soon as they were applied.
Did I mention I was tired?
Anyway, you guessed it, I didn't wait long enough today and so, obviously, the paint reacted.
Still, I was making so many other mistakes with my painting technique that was the least of my worries. 
This paint is supposed to be applied as a single (thick) coat, which is then flatted and polished.
Yet, I kept brushing the paint out too thinly, which kind of defeats the whole object really.
Still, this is meant to be a test piece and I am definitely learning the hard way.

The Good - Some bits came out really well, but the reflections in the paint make it hard to see.
( You can actually see me in this photo if you look hard enough. )

The Bad - Other bits I didn't put enough paint on.

The Ugly - This was quite hard to take, knowing it was my own fault.

Plus it became very windy outside, which didn't help either.

I also painted the bonnet latches, although I haven't had a chance to even look at an alternative option yet.

Overall, while this was very disappointing, there are lessons to learn which will be a big help in the long run.
Also, whilst it is hard to get a decent photo (due to the reflections of the sky), it is a great colour.

After that, I went back to some simple jobs, such as drilling holes for the new stop/tail light.

And sanding back more of the rear wheel arch.

At which point, I remembered there was some damage to this arch that needed a repair.
( After the car fell off the jacks. )

End of Part 1…
|
27th May 2017, 18:59
|
|
Senior Member
|
|
Join Date: Feb 2012
Location: Wembley, London
Posts: 5,056
|
|
Saturday - Part 2:
Rather than follow a strict time line, I've grouped some of the jobs together.
The broken bit of the rear wheel arch was ground out and smothered in fibreglass filler.

After sanding down, it looks like I need to add a minor bit of normal filler to finish the job.

The fibreglass filler was also used to fill in the two spare holes on the rear number plate plinth.

But the most time consuming job of the day was sorting out the front indicator mounting points.
Which started the day looking like this.
I used a big drill bit and a hand file to open up the hole in the middle, so the rubber cover would just squeeze in.
I then reopened the holes for the fixing bolts and drilled a small cut out for the earth lead bolt.


Then I added a skim of normal filler to blend in the various surfaces.
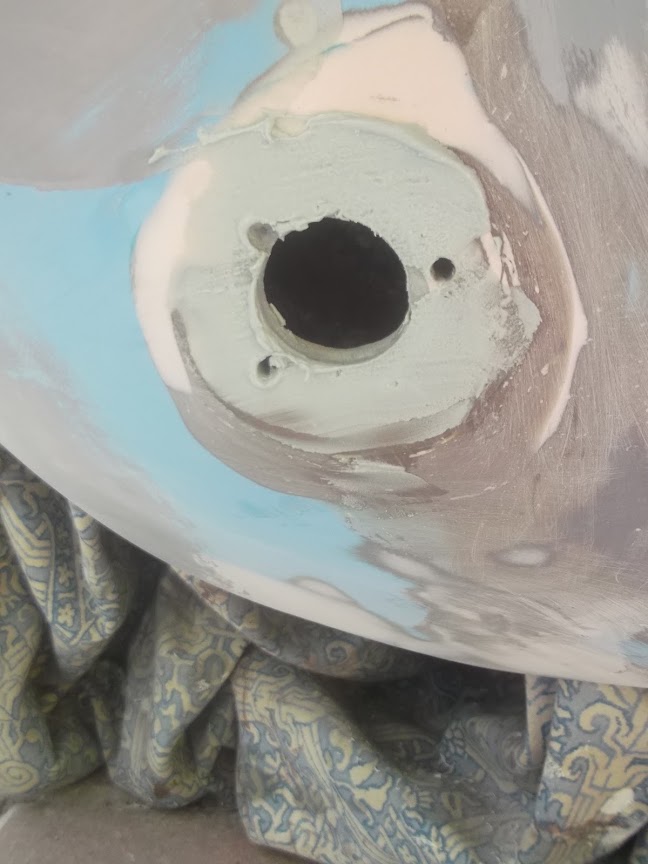
Which was then sanded down and ended up looking like this.

I was very happy with the end result, as although it will not be seen when the indicator is in place…

These mounts represent another small piece of the car that I created from scratch.
But to show the kind of day I was having, I removed the indicator bulbs to "keep them safe".
Before promptly going and standing on one!

So I took that as a sign to stop all car work and watch the FA Cup on TV with a beer in my hand instead.
Until next time, take care, Paul.
|
27th May 2017, 19:09
|
 |
Senior Member
|
|
Join Date: Jan 2014
Location: Egham, Surrey
Posts: 1,780
|
|
I may be wrong but I would't use white spirit, 5 litres of panel wipe can be bought for less than £15 on EBay including delivery.
I think you need to work out which product is causing the reaction and change to something else. You won't be a happy chappy of you get a reaction a few weeks after painting.
I've been using all UPol product to minimise the risk of reaction. ReFace, primer, filler, Dolphin stopper all UPol, only other thing I have used from a different manufacturer is the GRP.
|
28th May 2017, 06:41
|
|
Senior Member
|
|
Join Date: Feb 2012
Location: Wembley, London
Posts: 5,056
|
|
Jag – Thanks for the feedback, I really do appreciate it.
To save time, I will try to pick up some panel wipe locally and use that instead of the white spirit going forward.
One my ‘challenges’ is that the surface I am painting really is ’Frankenstein Hillbilly’ in places.
So the etch primer is covering:
- Original gel coat
- Raw fibreglass
- Fibreglass filler
- Normal body filler
The paint supplier’s advice was a base layer of etch primer was the best way to tie all these surfaces together.
The good news (as I desperately try to see the glass as half full ) is that I am only suffering ‘spot’ reactions.
Which suggests the primer/paint products are compatible and it was my haste in not waiting long enough from cleaning to painting that caused the problem. 
There are lots of flaws associated with the mixed approach I took to preparing the lid.
( As this was a test piece to see which marks showed up and which disappeared. )
My hopeless painting technique resulted in more problems.
But the ‘truck coat’ paint itself really does ‘self level’ nicely when applied properly.
As some parts of the lid really do look good and I didn’t even use the “2nd brush” technique to smooth out the brush strokes.
So, with a bit of luck, I will be able to do a better job all round when I tackle the ‘sunny side’ of the car.
My plans for today include some domestic/gardening chores, so I might just take a break from car work.
Cheers, Paul.
PS
I hope you all saw the ‘Old meets new’ photo shoot on Andy/ericholm’s Tribute 250 SWB build.
|
28th May 2017, 06:52
|
|
Senior Member
|
|
Join Date: Jan 2014
Location: Egham, Surrey
Posts: 1,780
|
|
GSF sells panel wipe, I'm sure there will be one not too far away.
I know it's more work but I would suggest a rub down all over with 320 grit to get rid of the etch primer and then a coat pf ReFace applied with a fine sponge gloss roller as Jeff did.
This will hide an awful lot of imperfection but more importantly it will seal the filler and GRP repairs together and prevent sinkage which could be a problem for you later on as you have used a tad more filler & GRP the most!
If you put your top coat on with a gloss roller you don't get any brush marks and it flows out very well. I have always used a foam brush for where you can't get a small roller in.
http://www.ebay.co.uk/itm/Rustins-Fo...QAAOSwajVUO5Nk
Chin up, you are slowly winning.
Last edited by Jaguartvr; 28th May 2017 at 07:52..
|
28th May 2017, 09:10
|
 |
Senior Member
|
|
Join Date: Jul 2011
Posts: 5,328
|
|
Shame about the paint reacting Paul, colour looks good though.
Came across this TR7 V8 running at Prescott yesterday and thought of you...
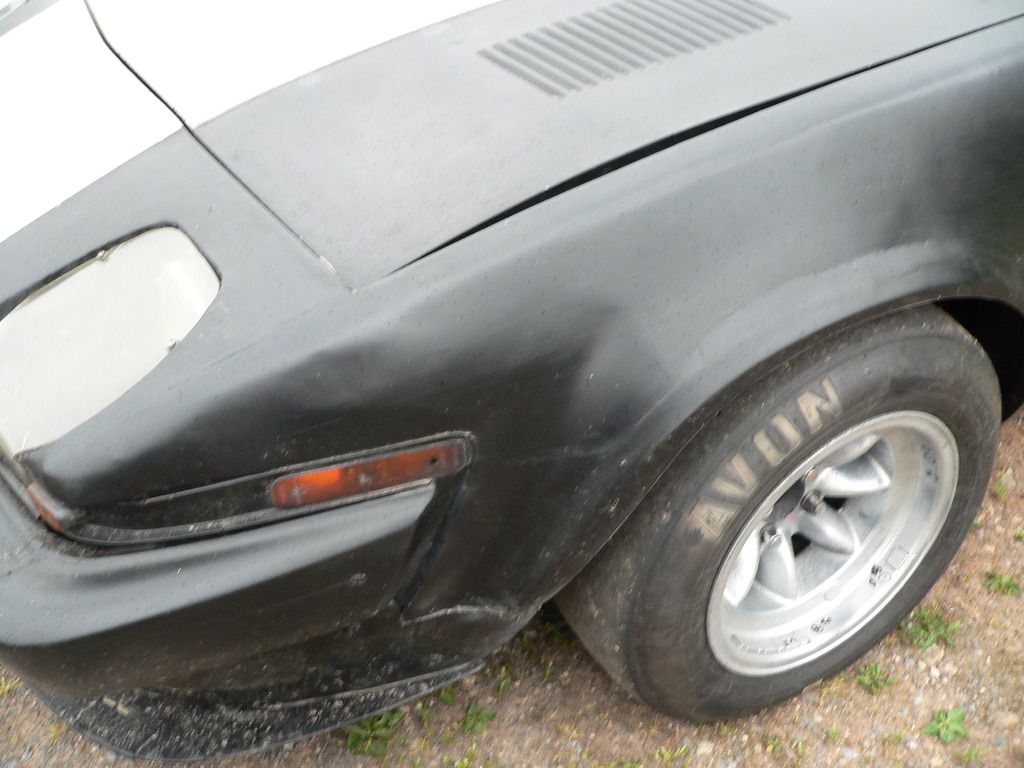
Appears to have been 'painted' using a bog-brush dipped in a mixture of creosote and old engine oil after being prep'd with a lump hammer.
Had one of the best sounding motors of the day though and was pretty quick up the hill too (click image for video).
 |
28th May 2017, 14:50
|
|
Senior Member
|
|
Join Date: Feb 2012
Location: Wembley, London
Posts: 5,056
|
|
Jag – I am sure you are right about the ReFace, but my heart sinks at the very thought of the extra work involved.
The fact I’ve already sanded down and freshly etch primed over 2/3rds of the car was one of the few crumbs of comfort I had.
I did have a quick look in the Summerhouse today and, thankfully, most of the boot lid has not reacted badly in any way.
- - - - - - - - - - - - - - - - - - - - - - - - - - - - - - -
Mr T – Thanks for that photo and video clip, as they have cheered me up no end.
It is not that I don’t want to have a nicely painted car, it is just that I need to keep putting it into context.
That ‘TR8’ owner is out there racing first and foremost and so what if the panel gaps & paint could be better?
- - - - - - - - - - - - - - - - - - - - - - - - - - - - - - -
A Day Of Rest
Well, from car work at least, as I’ve spend hours working hard in the garden instead today.
So I’m taking a quick break now to post a few replies before heading back outside to get the BBQ going.
And ultimately that is why I want to get the car finished ASAP, because it just eats into family time too much.
( I honestly dread to think how many hours I have given to this project. )
But, with a bit of luck, I’ll be back at the car tomorrow.
So until then, take care, Paul.
PS
I noticed the TR8 was running slicks and I’ve only used treaded racing rubber during my MZ racing days.
But I couldn’t believe the difference in grip between racing and road tyres.
|
29th May 2017, 13:43
|
|
Senior Member
|
|
Join Date: Feb 2012
Location: Wembley, London
Posts: 5,056
|
|
Start… Stop… Start… Stop… & Repeat:
At some point I need to sort out the mess I'm making of the porch.


I only got as far as peeling of the covers when the first drops of rain arrived. 

So I relocated to the Summerhouse, where there was a bit of shelter.
I sanded the headlight cover from the passenger side back down to bare metal.

Then I turned my attention to the boot lid.
As I wanted to fix the areas where the paint reacted and test how well the finish would buff up.
I liked the way Fatbloke described his initial paint finish as "lemon peel" due to his bright yellow paint job.
So after a light rubbing with sandpaper I can give you Lime Peel.

Now I was pleasantly surprised at how quickly this became a matt flat surface.

Which, after some G3 & a polish should come back up to a gloss shine.
However, as I tested different grades of sandpaper on different areas the inconsistent BRG paint thickness showed up.
Not a great photo, but you can see the small spot where I rubbed through the BRG to the primer below.

Still, this was the whole reason behind starting on an area that will not be seen, so I can live and learn.
By the time I'd finished playing around the lid looked like this.

I then turned my attention to the 'sunny side' and started sanding the old primer off that.

I only made a start, because at that point the rain really came down and I had to take shelter.
During the next dry spell I headed out to the front driveway.
As my first job of the day was meant to be sanding down the lower valance area of the bonnet.


I plan to lift the car onto blocks before painting it, which will make this area easier to reach.
But for now I was reduced to crawling around on the ground and slowly losing the feeling in my arm from all the sanding I've done.
At one point, the rough black finish of the TR8 that Mister Towed posted the other day seemed more appealing by the minute.
As I figured if I started slapping on Tetroseal now, I've have the whole car painted in a matter of minutes.
Anyway, I didn't get a chance to finish this area completely, as it started raining again.
So I will call time for today and get on with some other stuff instead.
Until next time, take care, Paul.
Last edited by Paul L; 31st May 2017 at 05:03..
Reason: Typo
|
29th May 2017, 13:49
|
|
Senior Member
|
|
Join Date: Jan 2014
Location: Egham, Surrey
Posts: 1,780
|
|
I use the Tesco home delivery crates for storing tools and parts in.
Easy to see and of course they stack. I also have the wheeled trollies that you can stack the crates on, also very useful for stacking wheels and tyres on, much easier to move around the garage.
The trollies are also useful on working on bikes, you can place them under the engine and still move the bike around even with the forks removed.
And especially for you, they are available in BRG!
|
30th May 2017, 09:16
|
|
Senior Member
|
|
Join Date: Feb 2012
Location: Wembley, London
Posts: 5,056
|
|
Jag - More top tips, thanks.
- - - - - - - - - - - - - - - - - - - - - - - - - - - - - - -
Possible Bonnet Breakthrough:
Yesterday I also started rubbing down the BRG on the locks, where (again) the paint was a bit thin in places.

However, I also had a play around with the various latch options I had left over from the boot lid.

As I was trying to think of a way of mounting the pins directly to the bonnet lip on the body shell, rather than to a separate bracket.
Unfortunately, nothing came to mind, so I carried on.
Last night I saw this photo that kevemm posted of his engine bay.
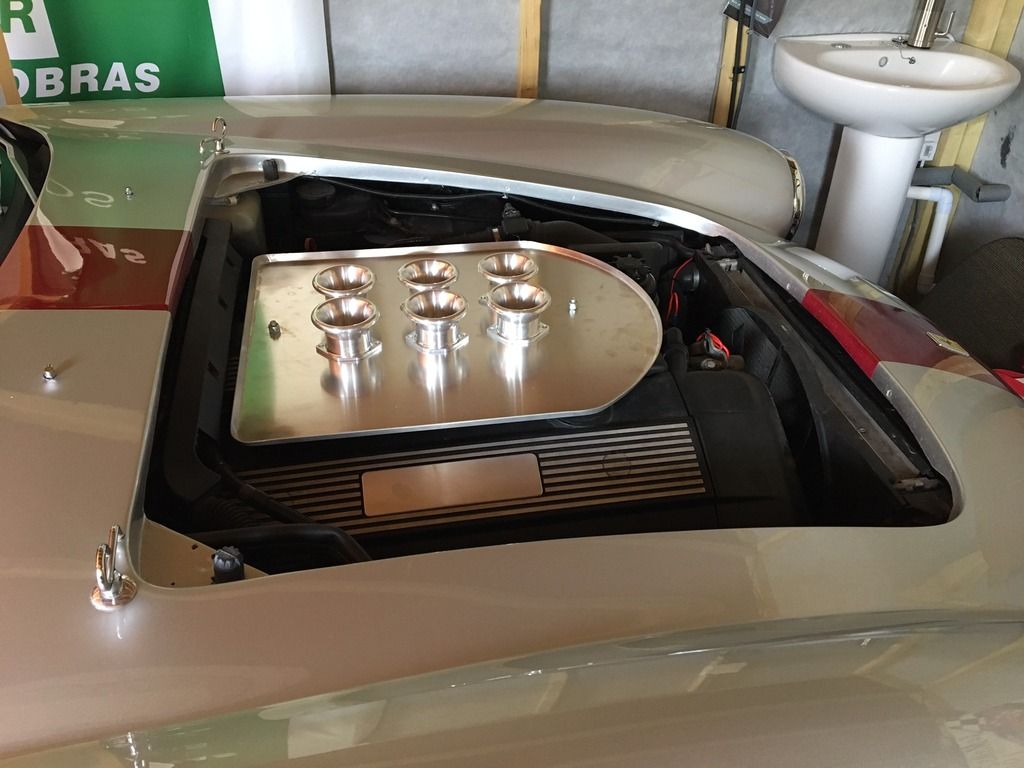
Which also shows his spring loaded Ferrari GTO bonnet catches.
Now I remember that Swify made his own.

But it turns out that Kev bought his from Ebay in Italy.
However, as I was doing a search, an another image popped up that reminded me of something else I saw yesterday.
As I have a pair of these sitting with the other bonnet pins/latches.

They were no good for the boot, as the key didn't come out in the open position, just the locked.
( Which kind of defeated the object of getting a pair with matching keys for me. )
But the Eureka! moment was the fact that this type of lock is definitely a KISS solution for my bonnet.
So I swapped the surround from the locking pins and in this (blurred) photo the tip of my finger lines up with the end of the cam arm.

So it the surround was kept away from the very edge of the bonnet the lock would be around here.

This would leave this much of the cam arm under the bonnet lip.
( Which will have a rubber seal running along its whole length after it has been painted. )

Apologies for another blurred photo, but the locks would need to be a bit deeper than these so everything would line up.

Note:
The advantage of using the big chrome washer around the locks is that it comes with a suitable rubber sealing washer.
However, I could just used a normal washer in the same way as the boot locks are fitted.

Either way, I'd be interested to hear what the rest of you think of this idea, have I stumbled across a solution?
Anyway, I came back inside because it had started to rain when I was outside at the bonnet.
But it appears to have brightened up a bit now, so I'm heading back outside again.
Cheers, Paul.
|
|
Currently Active Users Viewing This Thread: 1 (0 members and 1 guests)
|
|
|
| Thread Tools |
|
|
| Display Modes |
 Linear Mode Linear Mode
|
 Posting Rules
|
You may not post new threads
You may not post replies
You may not post attachments
You may not edit your posts
HTML code is Off
|
|
|
All times are GMT +0. The time now is 01:55.
|


