|
|
| Sammio Builds and discussions Sammio bodied car builds and specials |

25th March 2015, 06:10
|
 |
Senior Member
|
|
Join Date: Feb 2012
Location: Wembley, London
Posts: 5,056
|
|
Dave - Unfortunately, I am fully aware that I wouldn't know a simple solution if it came and bit me on the  !
The only good news is that I am slowly running out of big jobs to make a complicated mess of. 
Jokes aside, I'll be very glad when my "simple" boot access panel is finally working properly. 
Cheers, Paul. 
PS
Hopefully I can at least get some etch primer on the lid later on.
|
25th March 2015, 16:45
|
|
Senior Member
|
|
Join Date: Feb 2012
Location: Wembley, London
Posts: 5,056
|
|

Struggling A Bit - Part 1:
Unfortunately this was another one of those days where I was trying to fit car work in around other stuff.
So a lot of stop/start efforts, which meant everything took longer than it should have.
Still, at least I crawled a bit closer to the finish line...
Boot Lid:
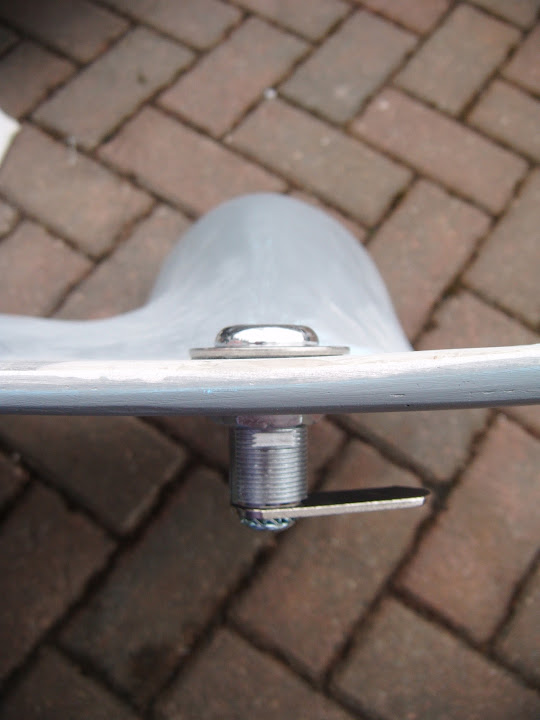
Sanded down the mounds around the top edge lock holes and used a hand file to re-open them to just the right size.

Then decided to give the area a quick coat of etch primer to see how it looked.

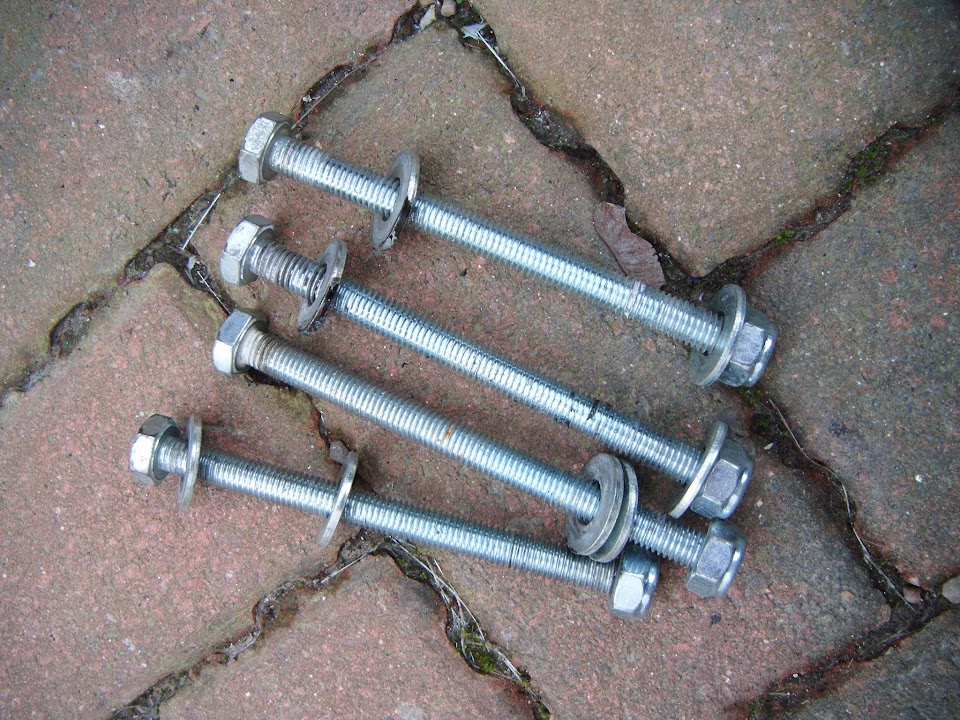
These new smaller washers certainly reduce the visual impact of the locks & eye bolt. 
So I am hoping that when the lid is painted BRG it will not look as quite as "fussy" as the big washers were making it.
When that area was dry enough, I removed all the lid "furniture" and gave the underside a coat of etch primer.
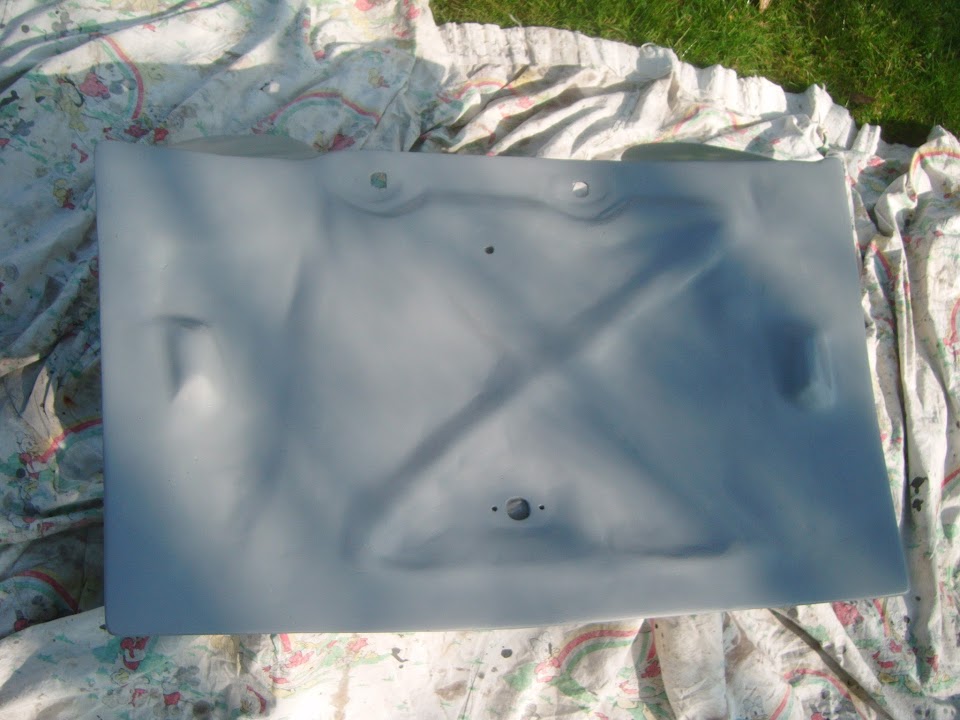

It is scary just how many small imperfections the primer highlights. 
But the whole point is to use this my area to practice prepping the bodywork for paint.
- - - - - - - - - - - - - - - - - - - - - - - - - - - - - - -
Boot Rain Channel:
Sanded down the filler I'd applied the other day.

So at least the rubber seal should sit nicely again.
- - - - - - - - - - - - - - - - - - - - - - - - - - - - - - -
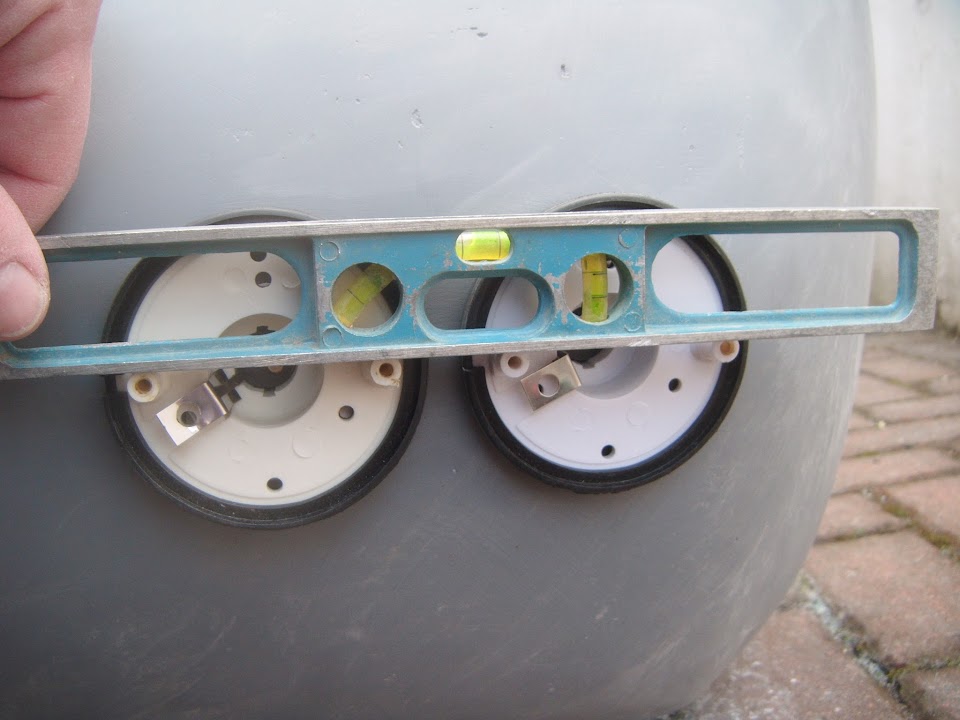
Rear Lights:
I wanted to drill the fixing holes for the rear lights and almost had an OCD meltdown. 
First I lined up the holes in the light fitting with the holes in the surrounding rubber seal for my new bolts.
There is a "drain" opening in the rubber seal, so I assume this should be facing down, like so.
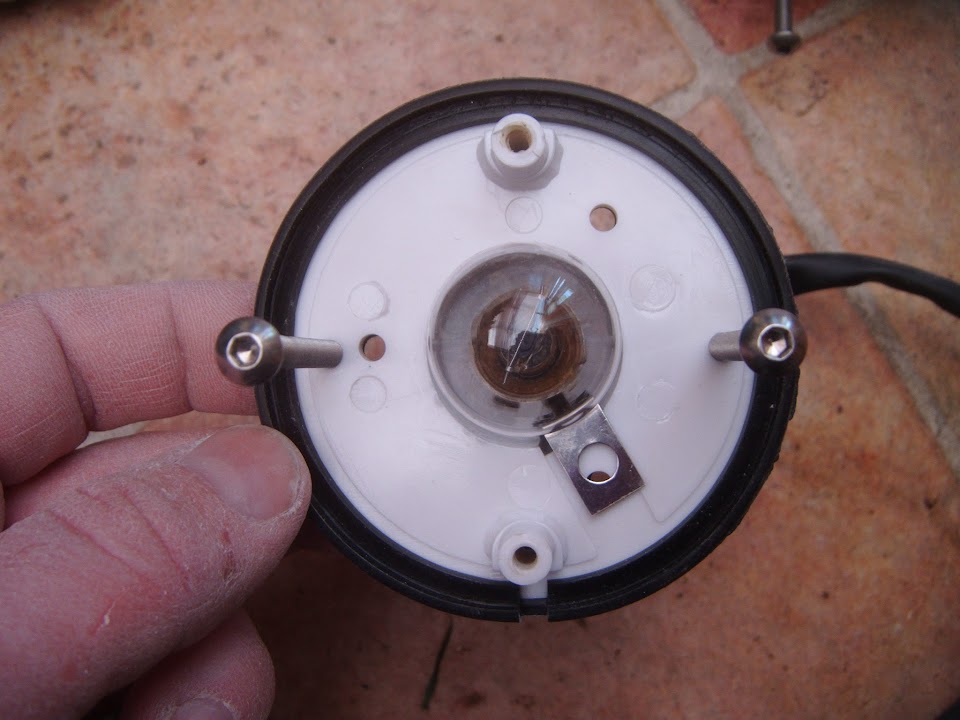
However, this would leave the lens screws lining up vertically like this.

Whereas, I had originally assumed they should be fitted with the lens screws horizontal like this.
( Because that would leave all the lens names & markings the right way up. )

So at this point I went back to check a few other builds with the same indicators.
Micky1Mo has lined his indicator lens screws up vertically.

But GazDavies lined them up horizontally, which seems to be the way they are fitted on Land Rovers.
So in an attempt to stick with simple solutions, I simply rotated the rubber seal 90 degrees.

Now I just need to drill two holes in the seal and I can line everything up horizontally as planned.
End of Part 1...

|
25th March 2015, 16:47
|
|
Senior Member
|
|
Join Date: Feb 2012
Location: Wembley, London
Posts: 5,056
|
|
Struggling A Bit - Part 2:
Next I wrapped some newspaper around the rear of the lights to "fill" the slightly oversized hole.
Rather than use my spirit level to find the horizon, I just used it to line up both light fittings with each other.
Then with the holes drilled into the body shell...
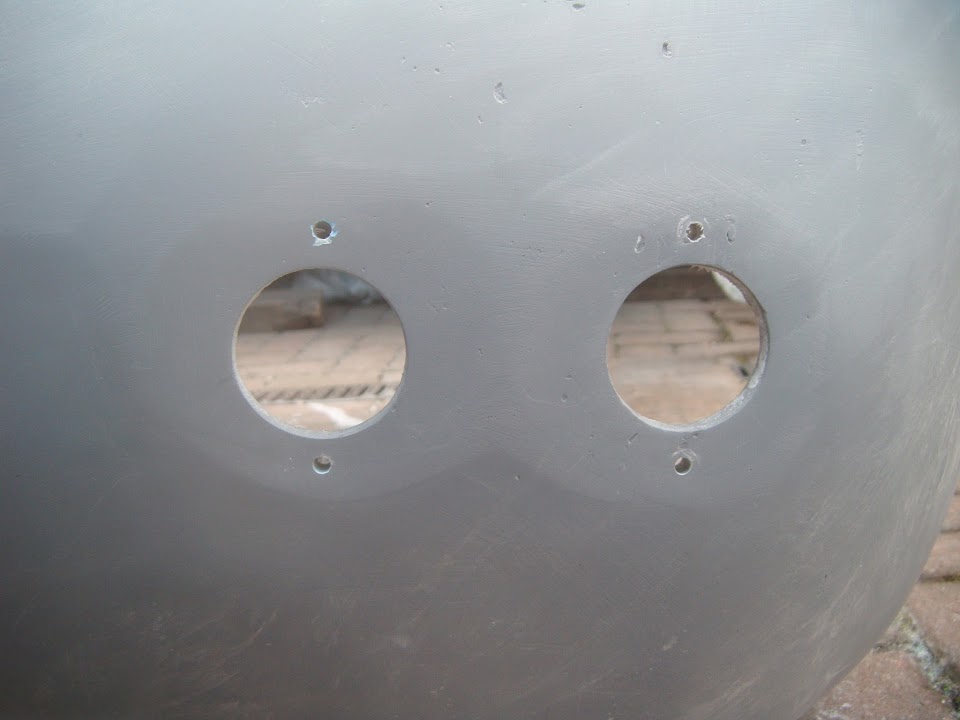
I could just push the bolts into place.

Although I've had to order a 2.5mm allen key to tighten these bolts, as this is one size I don't appear to have. 

With the driver's side done, I switched to the passenger side, where it turns out my replacement indicator had a different hole arrangement.

So I simply drilled two new holes in the fitting and that will work just as well.

Although I can't believe how much time I actually spent just to drill 8 small holes. 
- - - - - - - - - - - - - - - - - - - - - - - - - - - - - - -
Hopefully the locks for the bottom edge of the boot lid will arrive tomorrow.
As I really would like to put this job behind me and move on to other things.
Cheers, Paul.
PS
To end on a more up beat note...
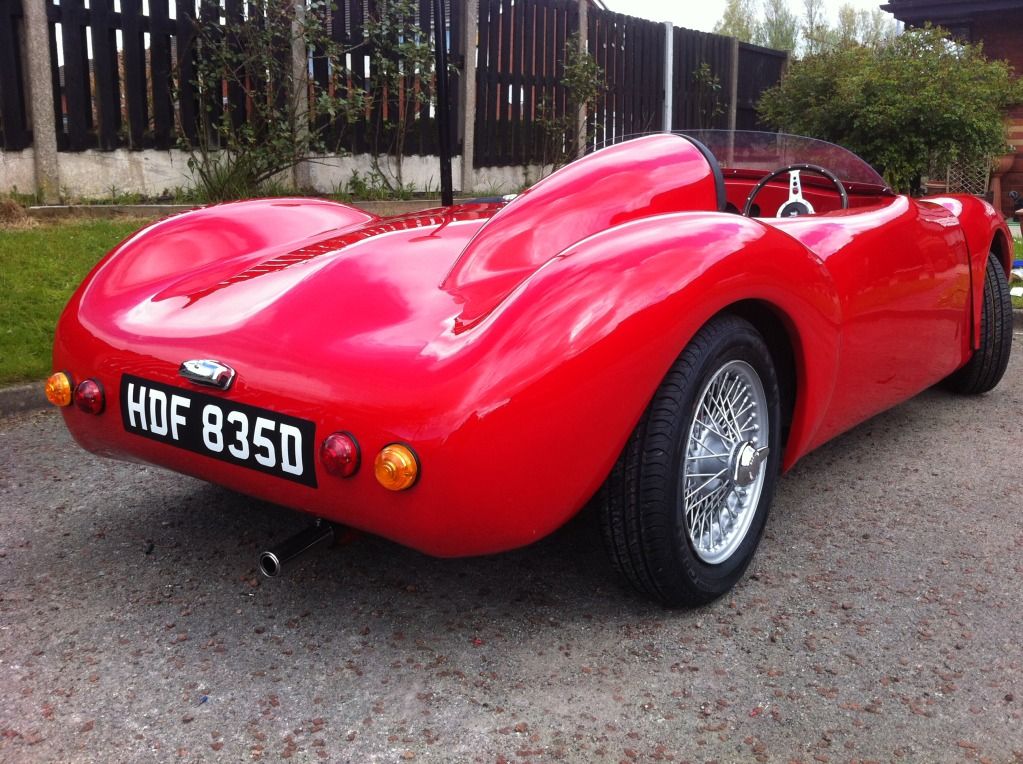
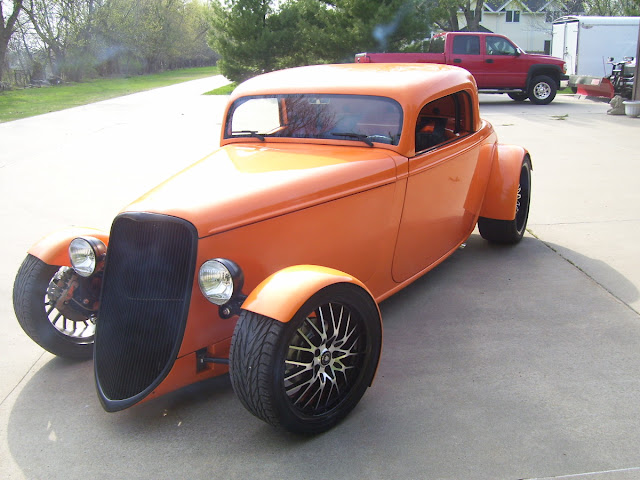
Factory Five Racing - '33 Hot Rod:
The kit car I saw "under construction" during our epic family holiday to Florida in 2013 in now on the road.

Which ties in with a recent debate over on the Tribute section about old looks & modern performance.
As there is a very high tech rolling chassis under that traditional "hard as nails" exterior.

Although if you wanted any hope of passing the IVA over here, your version of this kit would need to look more like this.
|
25th March 2015, 21:47
|
|
Senior Member
|
|
Join Date: May 2013
Posts: 2,161
|
|
Glad to see your boot lid looking better Paul!
Are the two locks waterproof, or will the rain get in the boot?
Or have you put them over the rain channel?
|
25th March 2015, 22:11
|
|
Senior Member
|
|
Join Date: Dec 2013
Location: Sunny Cumbria
Posts: 470
|
|
Paul, is there a drain at the bottom of the boot lid aperture rain channel?
According to your picture above it looks as though the rain channel could fill with water, or have you incorporated a drain tube?
|
26th March 2015, 07:46
|
|
Senior Member
|
|
Join Date: Jun 2011
Location: birchington, kent
Posts: 1,769
|
|
back to the drawing board...
|
26th March 2015, 08:53
|
|
Senior Member
|
|
Join Date: Feb 2012
Location: Wembley, London
Posts: 5,056
|
|
Scottie - Cheers, it does look like I will finally be able to make this lid work.
The locks are outside the rain channel, but there will be a thin rubber seal under the washers & a blob of grease in the lock.
So all I can say is that if that doesn't work, then I am officially stuffed.
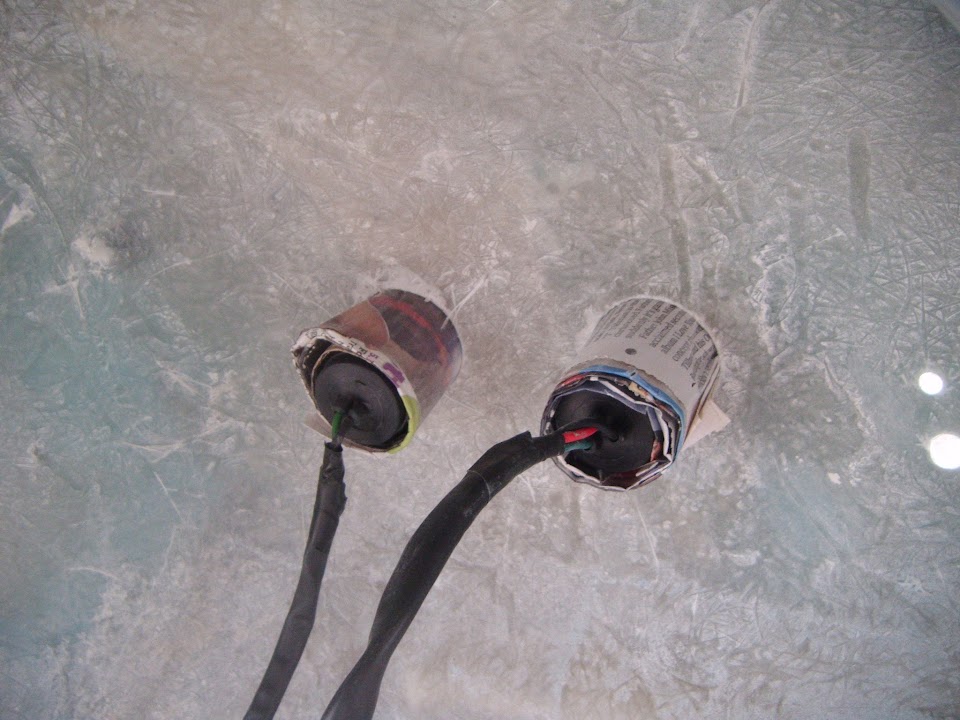
8 Valve Ed - There are two drain holes on either side of the rain channel like this.

Which lead to a plastic connector like so.
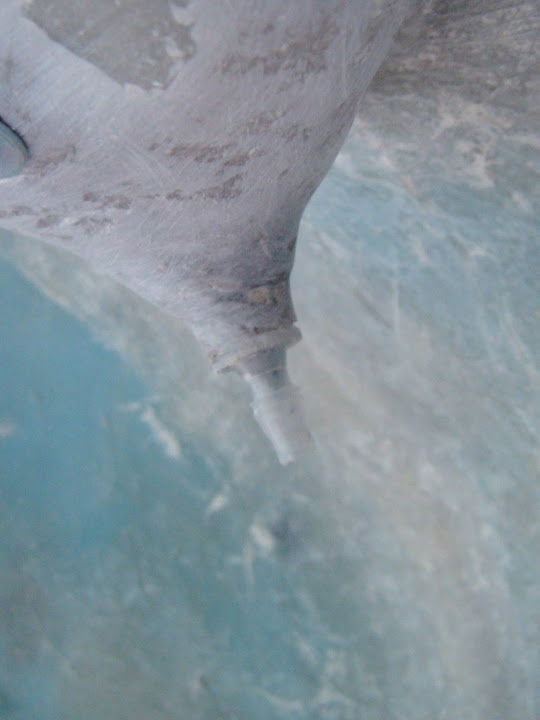
Which will eventually be connected to a plastic pipe & outside.
Gary - Nooooooooooooooooooo!
Although it would have been easier to create a "wet room" boot area and just waterproof my luggage!
- - - - - - - - - - - - - - - - - - - - - - - - - - - - - - -
I think the rain has finally stopped, so I'd better go...
Last edited by Paul L; 4th April 2015 at 06:23..
Reason: Typo
|
26th March 2015, 11:11
|
|
Senior Member
|
|
Join Date: Dec 2013
Location: Sunny Cumbria
Posts: 470
|
|
Quote:
Originally Posted by Paul L

8 Value Ed - There are two drain holes on either side of the rain channel.
|
Glad to hear it!
You have rain... Take a look at this, the view from my shed:

While that white stuff's up there it will never be warm in my shed! |
26th March 2015, 15:13
|
|
Senior Member
|
|
Join Date: Feb 2012
Location: Wembley, London
Posts: 5,056
|
|
8 Valve Ed - Well you have certainly got a better view out of your window.
No snow here, but I did have to turn the heater on in the Summer House to take the chill out of the air.
- - - - - - - - - - - - - - - - - - - - - - - - - - - - - - -
Misty Morning:
It turned out that whilst the rain had stopped, it had been replaced by a cold, damp, mist.
So following my reply about rubber seals earlier, I thought I'd stay in the Summer House and make some.
Using some more of my old bicycle inner tube, I cut out four for the boot lid locks.

Plus one for the eye bolt.

Note:
The handle came supplied with its own gasket.
Then I could re-fit everything to the lid and the rubber seals on the "sunny" side look OK to me.

Given the weather and the other stuff I've got to do, that is all the car work I've managed to do today.
Hardly what you would call progress now is it?
Cheers, Paul.
Last edited by Paul L; 4th April 2015 at 06:24..
Reason: Typo
|
26th March 2015, 16:07
|
|
Senior Member
|
|
Join Date: Jan 2015
Posts: 168
|
|
Paul you better not use old innertube as rubber washers,under the infuence of the weather they will"rot"and deform in time.
Better use these........... http://www.rubberwashers.co.uk/M2_to..._Washers/W0045 |
27th March 2015, 17:43
|
|
Senior Member
|
|
Join Date: Feb 2012
Location: Wembley, London
Posts: 5,056
|
|
Rene - Thanks for the tip and the link.
I will definitely replace the "inner tube" seals with "real" ones at some point.
- - - - - - - - - - - - - - - - - - - - - - - - - - - - - - -
The Only Way Is Up - Part 1:
Today I was planning to fit the new locks to lower boot lid edge, but they still haven't arrived.
( Chased the ebay seller who will "look into it" if they haven't arrived by next week.  )
Instead I had face the reality of dismantling the "Moon Rover" to get access to the underside.
In terms of my build morale, I know this is going to be the absolute low point as thoughts of the finish line simply evaporate.
However, as the saying goes, "You can't make an omelette without breaking eggs."
So here goes...
The seats had to come out.

The twin tail pipes had to come off.

The brake pedal had to be disconnected.


Plus all the original Spitfire chassis bolts & the four bolts holding the frame to the chassis.

Note:
One good thing about having no body work is I can just about reach both ends of any bolt to remove it.
I also unbolted the rear framework from the Spitfire bulkhead.
Then I made a note of a few jobs that I will need to do.
A hole needs to be drilled here for the petrol hard line to enter the boot.
 Swifty
 added a neat panel to this build to provide easy access to these nuts.

I just need to double check I can get sufficient access to mine, or I'll need to modify the floor a bit.


But no matter what I do, there is no way to get a good join here.

So that is something else I will need to come back to.
But one of the key questions is whether I can get away with removing these metal spacers at the front of the bulkhead.
This would have the effect of lowering the front scuttle ever so slightly.
Which in turn is why I have to wait until this work is finished before I re-profile the rear edge of the bonnet.
As I look at the great period features that other builders are adding, my gear knob stands out for all the wrong reasons.

Unfortunately, this is yet another area where I don't know what I am talking about.
But I believe you could fit an overdrive switch on the dash that would look something like this.
Q~~_12.JPG) Questions:
Questions: Is this correct?
And if so, is it simply a case of running the wires from here to a separate dash board switch?

If I could move the switch, I could then swap the gear knob for something else.
Clearly I need to make a decision PDQ if I am going to do this mod before everything goes back on.
Although deep down, KISS tells me to leave everything as it is and worry about something else!
End of Part 1....
|
27th March 2015, 17:45
|
|
Senior Member
|
|
Join Date: Feb 2012
Location: Wembley, London
Posts: 5,056
|
|
The Only Way Is Up - Part 2:
The good news is that the "Moon Rover" structure was now free to be removed from the chassis.

The bad news is that this is simply too heavy for me to lift off by myself.
So I just started to rearrange the driveway so there would be somewhere to move the framework to.
The body shell is currently sitting here.

I started to peel off the covers and thought this was a bit harder to do than normal.
Then I spotted the amount of water caught in the middle.

After a bit of huffing & puffing, I had rearranged the body shell like so.


At which point I simply had to wait until my wife came back to give me a hand.
The bulkhead was quite straight forward to remove.
But the rear frame work, lowered floor pans & rear wheel arches "combo" was just too heavy for my wife to lift safely.
In the end we got it onto its side and I pushed it along a "rolling path" of lengths of wood in a Stonehenge style.
Thankfully my neighbour was passing and he gave us a hand to get it into it's final resting place for now.

It is these "gaps" where the hand brake panel was welded to the frame / floors from above that I want to seal.

 Questions:
- Is this sort sort of gap that seam sealer is designed to be simply "stuffed" into?
- Should the whole underside of the car get a protective coat of general sealer?
Unfortunately, this was all that was left of my "car" by the time we'd finished.

Which is the depressing part, given that it looked like this just a few weeks ago.

But while this last photo does give me hope that the car will look good when finished.
The reality of my driveway tonight tells me this is still a long way off yet.
However, I am trying to remain positive, as when these bits go back on it will be for good!
Next the bulkhead was moved over.

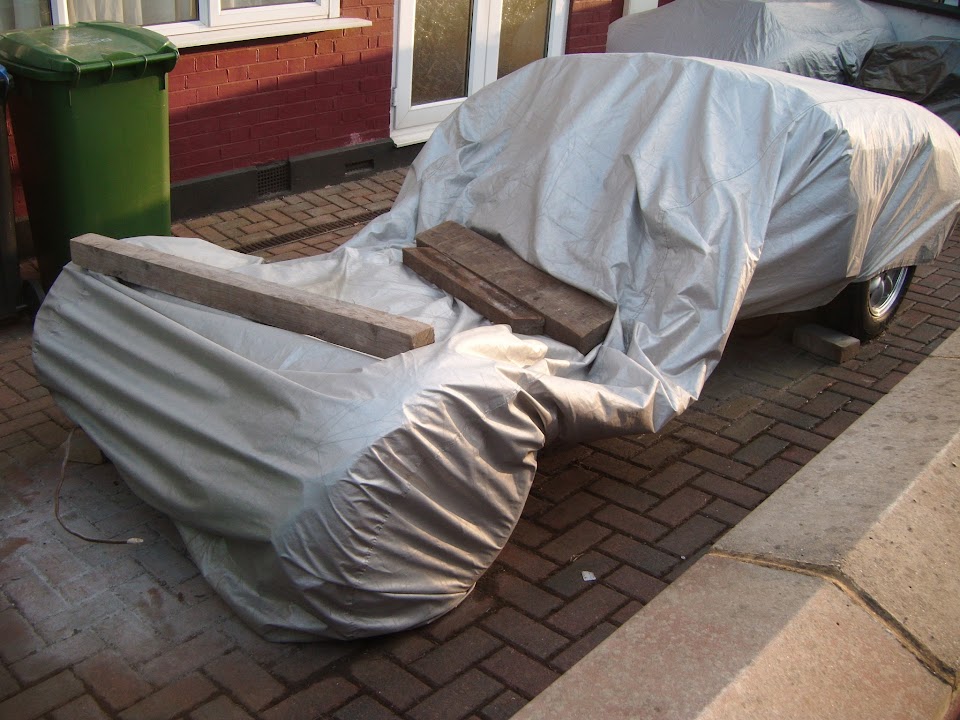
Before the new extra large tarpaulin was used to cover everything up.

The bonnet and rolling chassis leaves a very strange shape under the cover.
There will now be a load of small, time consuming jobs to do and the weather forecast doesn't look good.
So I will try to take comfort from the fact that whilst the finish line seems miles off...
The "Start Line" will now slowly come into sight.
I can genuinely say that I have started the process of finally assembling the car when I put these big parts back on.
So until next time, take care, Paul.
|
28th March 2015, 03:05
|
|
Senior Member
|
|
Join Date: Dec 2013
Location: Sunny Cumbria
Posts: 470
|
|
Hi Paul, I couldn't help but notice the overdrive wiring on your gearbox, I think it would be wise to give it a check over. I have annotated your photo showing the items I would look at. You may take the view that sleeping dogs are best left but those connections don't look fresh to me and bullet connections are prone to unreliability. Easy to sort now, very difficult later.

If it's possible to start the engine I would also check the operation of the overdrive with the back of the car jacked up before putting the floor back on. There is also an inhibit switch on top of the gearbox which should be checked over too. The length of time the car has stood is sufficient for bad connections to creep in.
If the bullets won't pull easily cut the rubber off and prise the brass tubes apart. The sleeves are only cheap and are difficult to clean properly anyway.
I know you are short of tasks but a few minutes spent checking these could save hours of frustration later!!! LOL
Last edited by 8 Valve Ed; 28th March 2015 at 03:10..
Reason: Adding information.
|
28th March 2015, 09:58
|
|
Senior Member
|
|
Join Date: Feb 2012
Location: Wembley, London
Posts: 5,056
|
|
8 Valve Ed - Hi Robert, thanks for the very comprehensive reply.
I've just printed that out and will work my way through the "To Do" list.
This has also confirmed that I will NOT touch the original Spitfire gear knob.
After all, my trim details all have Triumph on them anyway.
Plus the rest of the interior will be largely standard Spitfire, unlike Scottie's car's transformation.
- - - - - - - - - - - - - - - - - - - - - - - - - - - - - - -
It's been a hectic morning, but now it is car time, so I'd better go.
Cheers, Paul.
PS
Does anyone have any thoughts on simply using seam sealer in the gap under the hand brake panel?
Last edited by Paul L; 4th April 2015 at 06:25..
Reason: Typo
|
28th March 2015, 10:24
|
|
Senior Member
|
|
Join Date: Dec 2013
Location: Sunny Cumbria
Posts: 470
|
|
Glad you feel it's constructive, one point about the vinegar, it really needs neutralising after the cleaning process, perhaps washing with water and spraying with a water repellant like WD40 perhaps?
I have a cheap ultrasonic cleaner I use for small objects, brings many things up like new, especially plastics and brass carburettor parts, very handy.
As for the OD switch, I would leave 'as is' it keeps the gear changing all in one place, (KISS?) after all, you aren't trying to create a specific replica, just a 'period' car, like I am. We aren't bound by the need to be faithful to specifics, merely the style of the period.
Last edited by 8 Valve Ed; 28th March 2015 at 10:33..
Reason: Punctuation.
|
28th March 2015, 11:54
|
|
Senior Member
|
|
Join Date: Jan 2015
Posts: 168
|
|
Quote:
Originally Posted by Paul L
8 Value Ed
PS
Does anyone have any thoughts on simply using seam sealer in the gap under the hand brake panel?
|
Just blob it full with a good sealer will do the job just fine. |
28th March 2015, 12:57
|
|
Senior Member
|
|
Join Date: Dec 2013
Location: Sunny Cumbria
Posts: 470
|
|
Quote:
Originally Posted by Paul L
Does anyone have any thoughts on simply using seam sealer in the gap under the hand brake panel?
|
Bit of a difficult one that Paul. Not keen on pumping all that grunge into a large void, on the other hand you will never be able to clean it out in the future... It will become a bit of a rust trap. I think I would have clamped and welded the two together at a much earlier stage but we are well past that now. Is it possible to pull them closer with maybe 4 bolts? Squirt some warm sealant in, then squash the panel onto the angle iron with the bolts? Or would that move or distort things above...
I am a great lover of builders foam, it's light, relatively cheap and inert, won't soak up moisture and fills gaps effortlessly. You could always run a little sealer over the foam once you have trimmed it. |
28th March 2015, 16:45
|
|
Senior Member
|
|
Join Date: Feb 2012
Location: Wembley, London
Posts: 5,056
|
|
Rene & 8 Valve Ed - Thanks for the suggestions gentlemen.
I'll have another good look at the gap before making a final decision.
- - - - - - - - - - - - - - - - - - - - - - - - - - - - - - -
A New Hope - Part 1:
I dropped my wife and daughters off to the airport at "Silly O'Clock" this morning.
( As they are visiting my wife's relatives for a few days.)
The boot lid locks also arrived today, although it turns out they are a complete waste of time. 
I bought a pair of "keys alike" locks so that, like the top edge ones, one key would open both locks.
So far, so good.
But these locks do not let you remove the key when they are in the open position?
Therefore these would only work if I used both the two matching keys & kept them on separate key rings too.
I couldn't believe it, especially after such a long wait for them.
So at this point I started searching the internet for any locks I could actually go out and buy today.
A local ScrewFix had some, but were out of stock of "key alike" pairs, so I just bought two single locks.
These allow key removal in the open & closed positions, so at all 3 keys needed to open the boot lid can be carried together.
This meant that I could at least start the process of fitting the locks.
I needed to work out the best position in between the bottom of the aero humps & the rain channel.

Which translated into these positions on the sunny side of the boot lid.

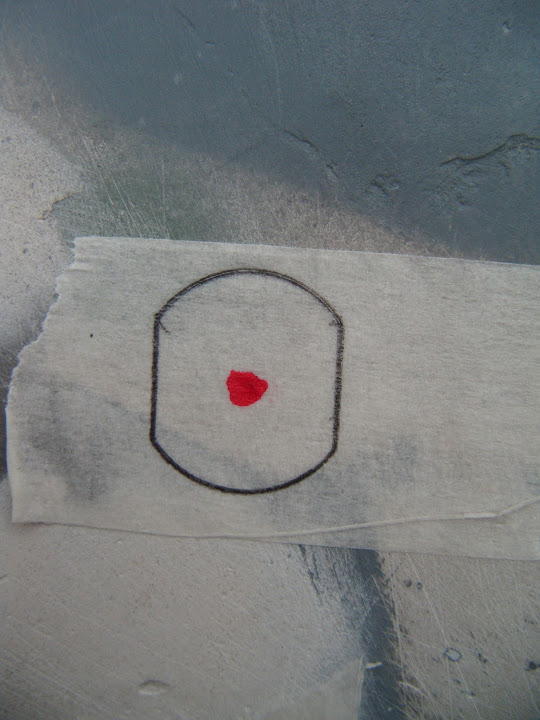
Then I marked up the odd shape holes required.
At which point it started to rain and I had to pack everything away on the drive.
I then relocated to the Summer House to cut the holes out using a combination of drilling and hand filing.

Note:
Thankfully, the locks sit "square" in the lid, without the need for any shaping.
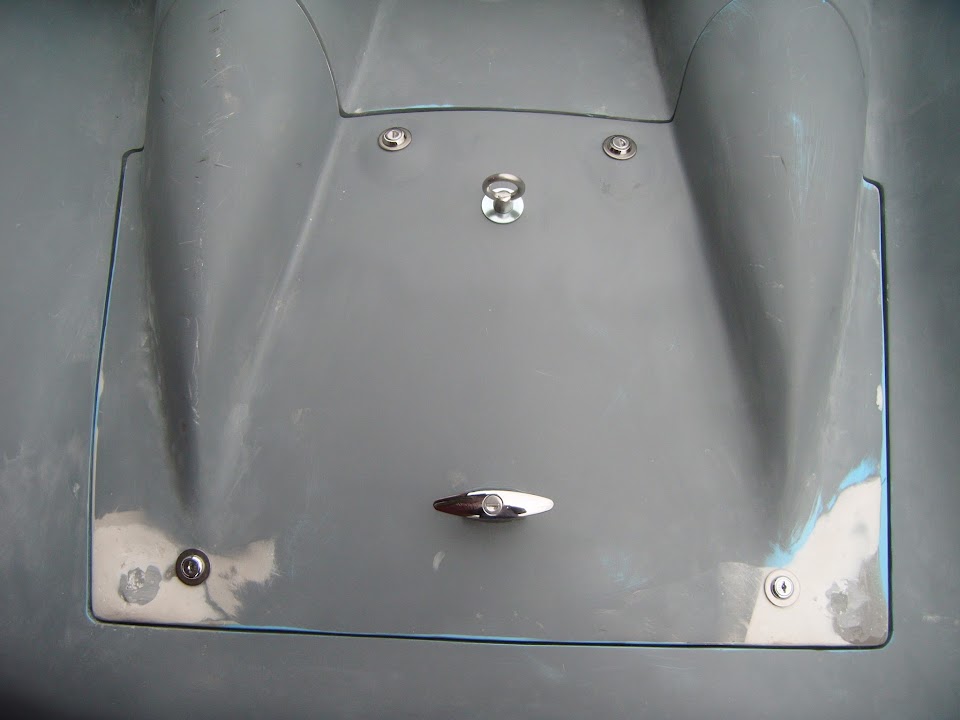
And with the locks fitted, the lid looked like this.

I think that the smaller washers I bought make this a much neater job.
Unlike the top locks, I need the bottom edge locks to point outwards in different directions.

Then it was back to the front drive and more crawling through the wheel arch to work on the underside of the lid.

I made cardboard template for the catches.

Which were cut out of metal and bent into shape.

Then fitted to the existing mounting plates.

And the catch works like this underneath.

There then followed a prolonged period of "tweaking" all four catches until the boot lid sat nicely when locked...
End of Part 1...
Last edited by Paul L; 4th April 2015 at 06:25..
Reason: Typo
|
28th March 2015, 16:46
|
|
Senior Member
|
|
Join Date: Feb 2012
Location: Wembley, London
Posts: 5,056
|
|
A New Hope - Part 2:
And there you have it, after what seems like an eternity, my "simple" access panel finally works.
But before I get too excited, there is still a bit of work I need to do:
- Weld some bracing to the catches.
- Smooth out both bottom edge corners that where previously built up for the locking pins.
- Set the final panel gaps around the boot lid.
- Sort out the lid locating pins.
So I removed the bottom locks & started sanding the bottom edge corners.
Unfortunately, I didn't get very far before rain returned again, so I had to wipe this area down to get the photo.

I am looking forward to getting a coat of etch primer on, as this will give a better idea of how the locks will actually look in practise.
However, I really hope that by the time everything is in BRG this over complicated arrangement will not look too fussy.
As it is still damp out I think that is it for today, so I will end this update with some other stuff...
- - - - - - - - - - - - - - - - - - - - - - - - - - - - - - -
Kit Car Building:
When I started my Cordite project I figured that if an accountant with no car building experience could build one, anyone could.
Unfortunately, the harsh reality of a "problematic" kit, combined with my limited skills and lack of facilities has been very tough.
However, I absolutely love the new Tribute 250 SWB kit.
It has classic car looks, great donor car performance & reliability, plus a "simple" method of construction.
Chris & Dan are seriously hard workers, but even so, this transformation took less than 3 weeks!
Donor Car Arrived - 9th March 2015

Donor Car Stripped - 12th March 2015

Roadworthy SWB 250 - 26th March 2015


Clearly it is not 100% finished, but Bob ( Hurnleft) was still able to drive it home.
In a few weeks I will have reached 3 years of building & the best I can now hope for is a sub 4 year build.
The never ending list of things to do just seems to grind me down these days and it is hard to stay motivated.
But as I said yesterday, I know I have reached a real low point of the build, with everything in bits all over my drive.
So I am hoping that as things finally start getting put back together and the weather improves so will my spirits.
- - - - - - - - - - - - - - - - - - - - - - - - - - - - - - -
Spooky!
I mentioned the FFR '33 Hot Rod the other day and it is featured on the cover of this month's KitCar.

- - - - - - - - - - - - - - - - - - - - - - - - - - - - - - -
You May Want To Look Away Now...
One-off Mercedes-Benz 300 SLS 'Porter Special' crashes into rare Lister-Jaguar at Goodwood | Autoweek
- - - - - - - - - - - - - - - - - - - - - - - - - - - - - - -
Right, I'm off to tidy up all the stuff I've dumped in the porch to shelter from the rain.
So until next time, take care, Paul.
|
28th March 2015, 18:17
|
|
Senior Member
|
|
Join Date: Jan 2015
Posts: 168
|
|
Paul i think you are thinking too little about your own capabilaties building a kitcar.
If someone like yourself is taken the challence to build a car himself and as you mentioned a kit with a lot of problems to fix,already building for 3 years outdoors in his front driveway without any decent carbuilder tools or expirience i must say that you earn my deepest respect....
I have build a hotrod,trailer,restored other cars and buil many racing bikes and even a boat........always indoors with good tools and a heather...........I have more admiration for your determination to finish your car as i have for a pro-builder even as his car looks 100% better as yours.........remember you did all the work yourself.
When at last you are driving around in your car you can put a bumpersticker on with: This car is build by hand,not bought with a creditcard.
Keep the faith brother..........
|
|
Currently Active Users Viewing This Thread: 5 (0 members and 5 guests)
|
|
|
 Posting Rules
|
You may not post new threads
You may not post replies
You may not post attachments
You may not edit your posts
HTML code is Off
|
|
|
All times are GMT +0. The time now is 20:08.
|


 Linear Mode

