|
|
| Sammio Builds and discussions Sammio bodied car builds and specials |

16th June 2015, 19:13
|
 |
Senior Member
Enthusiast
|
|
Join Date: Dec 2006
Posts: 1,130
|
|
 SAMMIO SPYDER to RELIANT SS1 conversion.
SAMMIO SPYDER to RELIANT SS1 conversion
|
16th June 2015, 20:03
|
|
Senior Member
Enthusiast
|
|
Join Date: Dec 2006
Posts: 1,130
|
|
Cocked that one right up 
So to start again.
I have at last been given permission the list this conversion on this forum  .
This whole thing started in Ribble HQ.
I belive it was Gaz Davies who started it but when the workshop was being cleared out it was offered to me.
I was told is was complete and as it had a type 9 gearbox, galvanized chassis and a pair of very nice aluminium "boomer" seats so I agreed.
But with all thing Ribble what I got was not what I was expecting, surprise surprise 
The original SS1 body was cut down and the tub very badly cut,widened by about 5" and badly re-joined, there was plenty of parts missing and the "boomer" seats disappeared as well.
The whole thing looked terrible so it was pushed into the corner of my workshop and left.
For some reason I am unable to upload photos from photo bucket so I'll try again tomorrow |
17th June 2015, 06:33
|
|
Senior Member
Enthusiast
|
|
Join Date: Dec 2006
Posts: 1,130
|
|
here we go.


The car was cut down to brake master cylinder level with a VW tank fitted.

Body was widened along with the bonnet.

The body was way short. and fitted where it touched.
On the whole it looked awful and a lot of work but my little mate took a shine to it so work (on a casual basics) commenced  |
17th June 2015, 08:05
|
|
Senior Member
Enthusiast
|
|
Join Date: Dec 2006
Posts: 1,130
|
|
The body in place.


For some reason the whole thing just didn't look right but we carried on regardless 
We, removed all the welded sections, or should I say knocked the off with a hammer 

Replaced the fuel tank with a late spitfire tank. This meant the original Reliant fuel lines could be plugged striate into the new tank with no modifications and a much easier run for the fuel filler pipe  .

Then much effort to put some strength into the chassis. We done this by welding around the "a" and "b" door posts.
Here's a moon buggy image juts for Mr T


still if didn't look righ or sit right 
Then we lowered it and wow the difference was a massing.

The next job was to "adjust" the body to fit, much work went into getting the back end to fit.

The front of the body was still a problem because of the gap between the scuttle panel and the steering column .

And then there was the bonnet.
 .
 .
It all looks very easy but this has taken weeks to work-out as every thing is bespoke to this car.  |
17th June 2015, 08:16
|
 |
Senior Member
|
|
Join Date: Jul 2011
Posts: 5,328
|
|
Interesting thread, is it a customer car or a personal challenge?
|
17th June 2015, 08:33
|
|
Senior Member
|
|
Join Date: Jan 2012
Location: Warrington
Posts: 383
|
|
Good luck with the build Mike. It was my idea to build it but I didn't do any work on it so can't comment on any possible challenges that you may face. I still think that it will look fantastic once done and really look forward to seeing it progress.
Oh and it is REALLY nice to drive also!
|
17th June 2015, 09:08
|
|
Senior Member
Enthusiast
|
|
Join Date: Dec 2006
Posts: 1,130
|
|
Mr Towed- - - it started as a Ribble disaster, then a project for my "apprentice" but he fell in love and moved on 
Due to a failed project it's now on order to go to France ASAP hence the rush. 
Gaz- - I know you where involved some where but as I'v said nothing from Ribble surprises me anymore. 
We have driven it around the yard and it fells fantastic.
This is no surprise as the chassis was designed to have a fiberglass body right from the start, although this body is a few hundreds kilos lighter.
I think this will end up being be on of the best road going Sammio's built, independent all round suspension, duel line braking with servo, modern Ford engine, 5 speed gearbox and a correctly designed chassis!!!it's a no brainer 
In fact, if I was out to build a SAMMIO SPYDER for myself I would start with an SS1, the only change I would make is to find and use the Nissan turbo version!!!! 
That said I'd hate to build another one .  |
17th June 2015, 10:28
|
|
Senior Member
Enthusiast
|
|
Join Date: Dec 2006
Posts: 1,130
|
|
|
17th June 2015, 11:12
|
|
Senior Member
Enthusiast
|
|
Join Date: Dec 2006
Posts: 1,130
|
|
As I said earlier on major problem is the gap between the scuttle panel and the steering wheel.

Well here a future SAMMIO product (as I don't have any products now).


It's not finished but it usable. The finished product will be in two pieces, the pod and the dash being separate . The dash can be bonded in place so the pod can be placed where the builder wants R/H or L/H or in the centre.
I will try and have the dash built-in on the new SPYDER (when I have a product), the pod will then be separate item like the screen surround.
First fit,

Final fit,

I think this "dash panel" transforms the whole look of the cockpit area. Making the cockpit look less like the top of an empty bucket and more like a racer 
TBH, I think we stole the idea from Mr T  |
17th June 2015, 17:43
|
|
Senior Member
|
|
Join Date: Jul 2011
Posts: 5,328
|
|
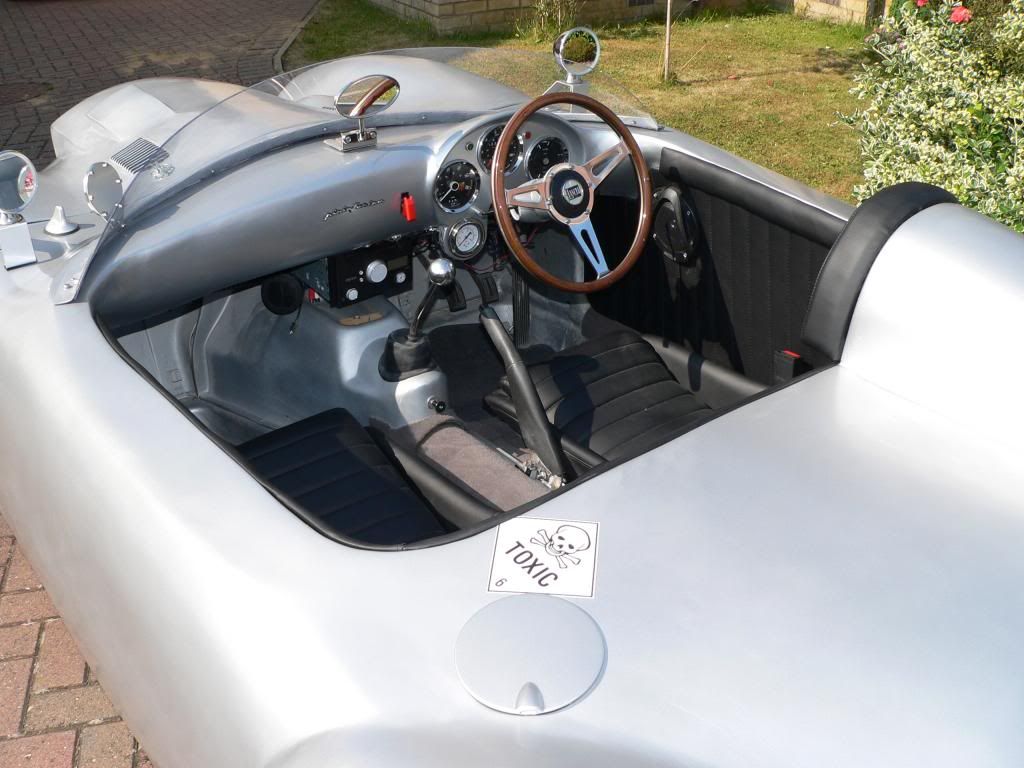
No problem. As it happens I'm rather pleased with my own (Porsche 550) dash as it does take the car a step further away from the kit car look imho -
 |
17th June 2015, 18:44
|
|
Senior Member
Enthusiast
|
|
Join Date: Dec 2006
Posts: 1,130
|
|
I didn't realize just how similar the dashes are  |
23rd June 2015, 07:02
|
|
Senior Member
Enthusiast
|
|
Join Date: Dec 2006
Posts: 1,130
|
|
Quote:
Originally Posted by Mister Towed

|
It that a radio speaker and an aerial I can see!!
Where the head unit? |
23rd June 2015, 16:34
|
|
Senior Member
|
|
Join Date: Jul 2011
Posts: 5,328
|
|
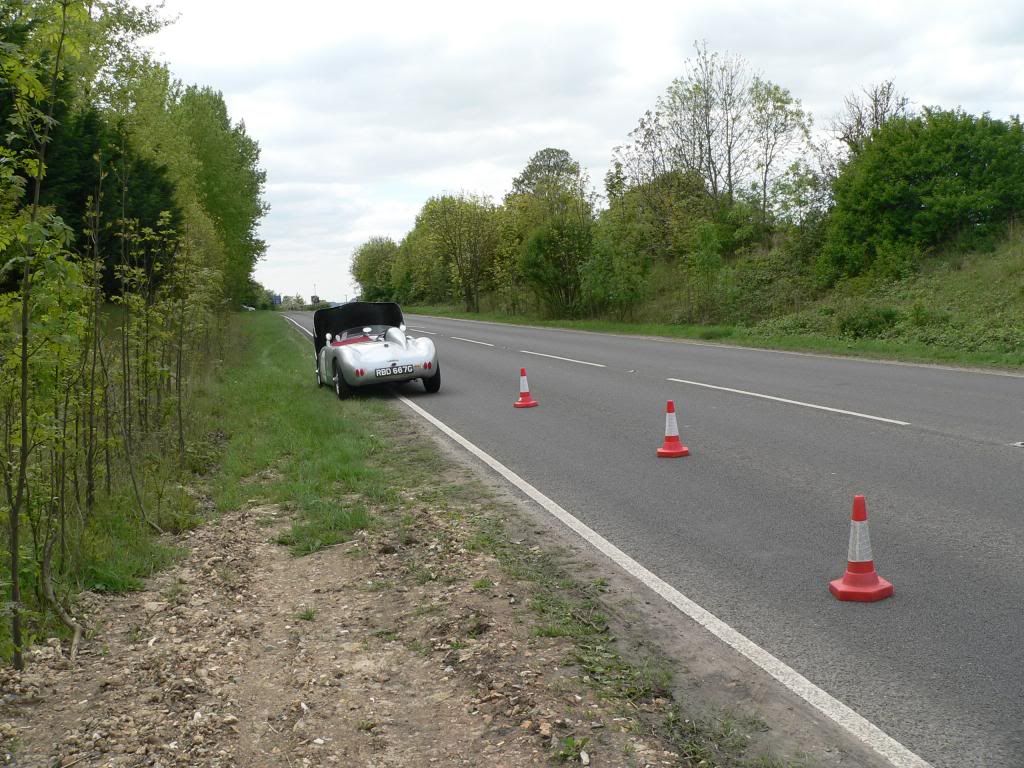
Yep, I fitted a stereo initially so I'd have something to listen to while I waited for the RAC at the roadside.
The head unit was under the dash ahead of the gear lever -
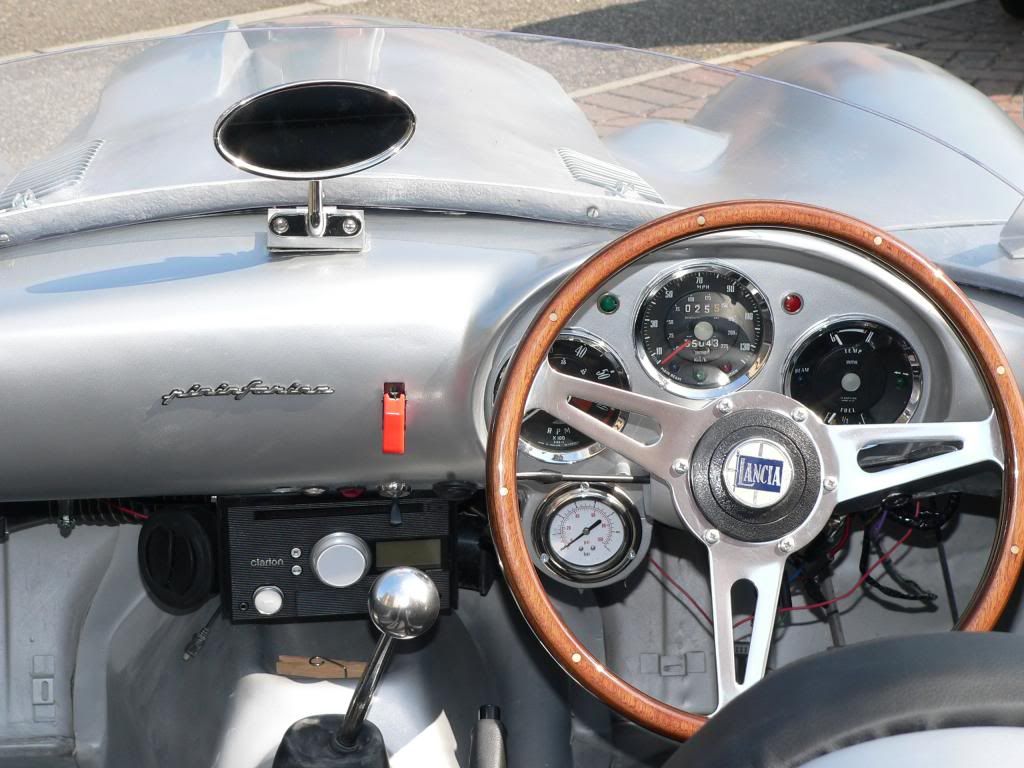
...a Clarion double-din unit I chose because it didn't look much like a stereo.
It was really powerful and worked fine right up until I dropped it during the final fit of accessories after paint, and I've now removed it.
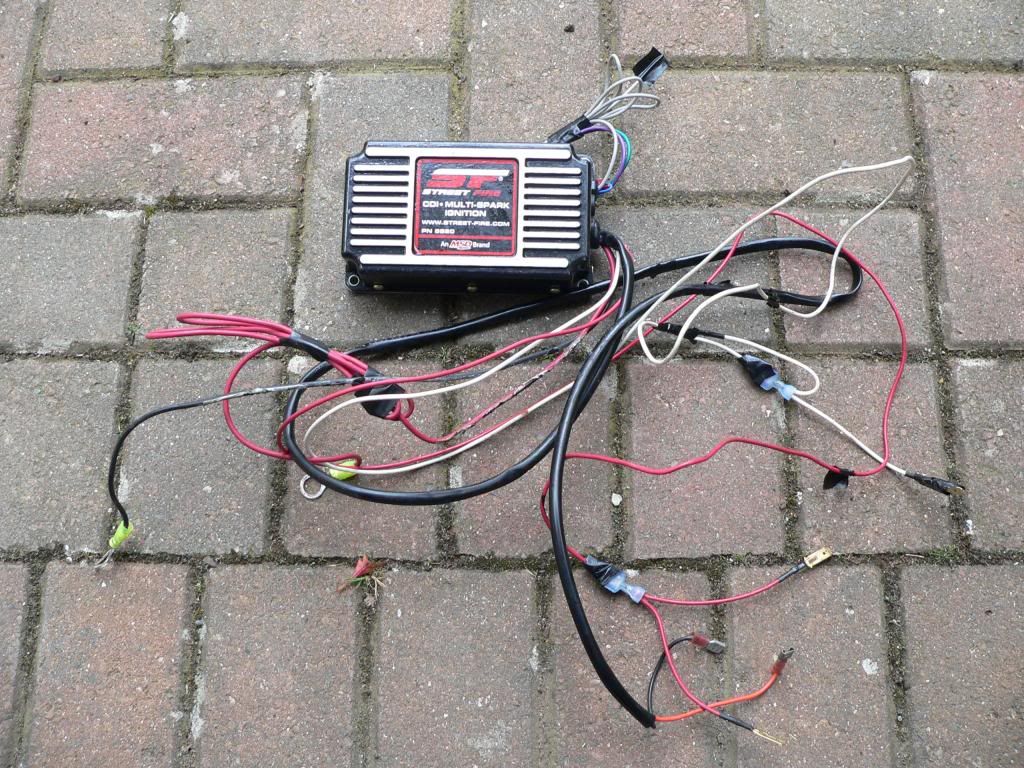
I haven't bothered having it fixed or replacing it as the engine makes plenty of music. The car's also only broken down the once and that was a modern electronic ignition module that failed, so it's clear that the car, in Christine stylee, doesn't want any modern electronics fitted to it.
At the end of this summer I might just remove the aerial and the speakers as they're redundant now. |
28th June 2015, 18:27
|
|
Senior Member
Enthusiast
|
|
Join Date: Dec 2006
Posts: 1,130
|
|
Spent more time today on the interior.
Speaking to SIMJIM I decided to lower the floor pans thus lowering the drivers seat.
The before shots


If you look closely you will see the drivers foot well is lower than the passengers foot well even though the seats bases are the same.


The pans where cut out and the thin seat supports remove to be replaced with some 50x20x3 box section.
Up until now I have only been working on GTE's and I was surprised just how thin the floor on this SS1 was compared the GTE's floor. 

These where welded into place

I remade the floor pans from 12mm ply which was covered in 300g fibergalss matting.

After fitting the new flooring I laminated around it again with 300g matting.


Both pans where now the same height and level with the bottom of the sills lowering the seats by about 4".
Now the floor pans are lowered the exhaust needs to be reworked as it originally ran under the passenger floor.
I am hopping this is the last major modification job I have to do, apart from re-trimming and re-fitting the bonnet that is 

|
30th June 2015, 18:37
|
|
Senior Member
Enthusiast
|
|
Join Date: Dec 2006
Posts: 1,130
|
|
Spent the day filling in the gaps around the edges!!!


Also fitted the lights just to see what they look like

Still undecided on the front indicators
 |
10th July 2015, 17:23
|
|
Senior Member
Enthusiast
|
|
Join Date: Dec 2006
Posts: 1,130
|
|
Spent more time today making good.
Forgot just how far the rear wheel arches are out 
The good one.

The bad one.

The amount of "adjustment" needed.

Made a very simple exhaust, out of the manifold, along the car, into a silencer and out the back.

Also sorted out the dash clocks ect.
This dash style will soon be available for the Sammio Spyder

All coming along nicely |
10th July 2015, 18:31
|
 |
Senior Member
|
|
Join Date: Feb 2012
Location: Wembley, London
Posts: 5,056
|
|
The dash looks good. 
But the less said about the original Cordite arches the better. 
Good luck, Paul.  |
12th July 2015, 07:55
|
 |
Senior Member
|
|
Join Date: May 2011
Location: Somerset
Posts: 1,671
|
|
That's looking really good!
As far as the front indicators are concerned, a small vertical rounded plinth front-n-centre underneath the headlights always looks best (imho) and also makes the indicators most visible. Which is always useful
I've personally tried all manner of sizes and styles of front indicators when building the Sammio and the Miglia and I've never been totally happy with the end result. That is one area that I will be changing on the Miglia this winter |
12th July 2015, 08:04
|
|
Senior Member
Enthusiast
|
|
Join Date: Dec 2006
Posts: 1,130
|
|
I agree with the indicator idea.
When I finally get around to "re-working" the original Spyder moulds I will put a small flat area under the headlights.  |
24th July 2015, 14:37
|
|
Senior Member
Enthusiast
|
|
Join Date: Dec 2006
Posts: 1,130
|
|
Getting it ready for the MOT.
Fitted the P700 head lights and a set of mini LED style indicator because these leave the smallest foot-print as I'm sure I'll have to change them later 

Number plate will fix to the grill but just for now it's on a bracket behind the grill.

After a few mods I fitted a nice shiny air filter .

Also found a nice period steering wheel.

Had a lot of problems working out the cooling system but I think I finally have it sussed, I'll know more on the MOT test run. 

Another problem was the filler it just wouldn't sit right on the body work so I crafted a small plinth.
This gave a flat surface for the filler to sit square and broke up the vast rear body area.

On top of that as an after-thought I fitted a pair of LED brake lights.

If this b**ldy rain would stop I could take it for an MOT, and a test run of course.  |
|
Currently Active Users Viewing This Thread: 1 (0 members and 1 guests)
|
|
|
| Thread Tools |
|
|
| Display Modes |
 Linear Mode Linear Mode
|
 Posting Rules
|
You may not post new threads
You may not post replies
You may not post attachments
You may not edit your posts
HTML code is Off
|
|
|
All times are GMT +0. The time now is 08:28.
|


