|
|
| Sammio Builds and discussions Sammio bodied car builds and specials |

8th October 2017, 17:40
|
 |
Senior Member
|
|
Join Date: Feb 2012
Location: Wembley, London
Posts: 5,058
|
|
Sunday - Part 2
Late Morning
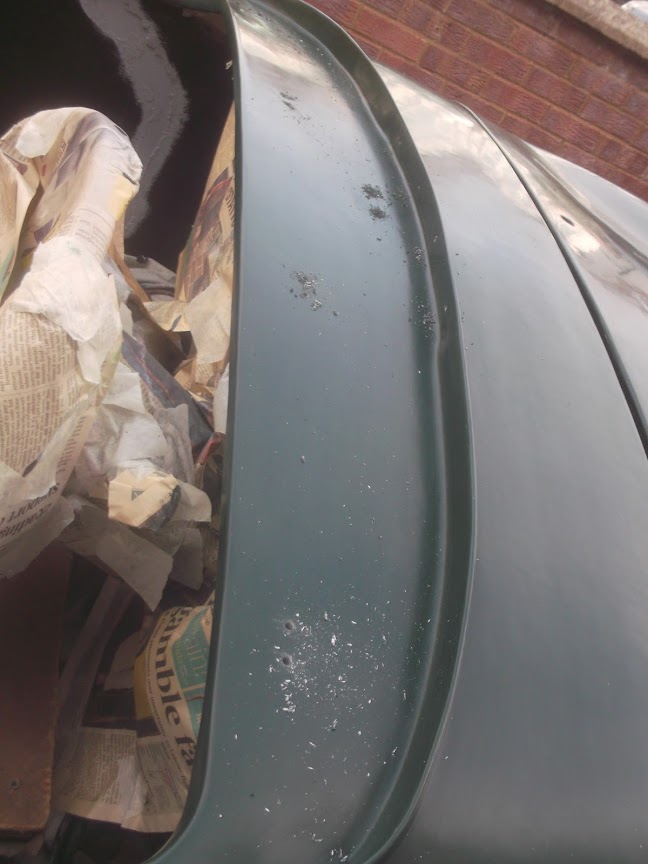
Then it was time for some more flatting back, starting with 800 grit.


Followed by a wipe down.

Then a final round of flatting back with 1200 grit.

And another wipe down.

- - - - - - - - - - - - - - - - - - - - - - - - - - - - - - -
Afternoon
At this point it is probably worth giving this day some context:
- I have been very busy with 'real' work recently.
- The long hours are likely to continue until mid Dec.
- The constant showers around here lately are soul destroying.
- So I really had to make the most of today's dry forecast.
Which is a long excuse for the fact that I haven't picked up the proper polisher from my mate yet. 
So, despite knowing it wasn't really up to the job, I ended up doing the cutting stage with the machine I had.

Which left the car looking like this after yet another wipe down.

Unfortunately, by now, the sky was starting to make me feel a little nervous.

End of Part 2…
|
8th October 2017, 17:42
|
|
Senior Member
|
|
Join Date: Feb 2012
Location: Wembley, London
Posts: 5,058
|
|
Sunday - Part 3
With so little car time to play with, I just had to push on and hope for the best.
So on went the polish…


- - - - - - - - - - - - - - - - - - - - - - - - - - - - - - -
WARNING
Those of you expecting to see a mirror shine, should look away now.  WARNING
- - - - - - - - - - - - - - - - - - - - - - - - - - - - - - -
As, I've actually ended up with the look of old paint that has lost it gloss over the years. 


Which leads me nicely to this old quote.
Quote:
Originally Posted by oxford1360

It's all looking good and solid - like a 50 year-old race car that has been into the hay bales a few times in its life - perfect.
|
And, given the Frankenstein Hillbilly nature of my build, I think the paint is just right.
I will give it another coat of polish when I can, just to give it some protection from the tarpaulin.
I also need to finish off the boot lid and headlight rims at some point.
But that is all for now, so until next time, take care, Paul. 
|
8th October 2017, 17:59
|
 |
Senior Member
|
|
Join Date: Jan 2014
Location: Egham, Surrey
Posts: 1,780
|
|
Get the proper polisher and use the Farcela cutting compound. Then do sections about 2' square and don't be tempted to move onto another section until you have got a good standard of finish on the section you are working on.
|
8th October 2017, 18:01
|
|
Senior Member
|
|
Join Date: Jun 2015
Posts: 1,401
|
|
Quote:
Originally Posted by Jaguartvr
Get the proper polisher and use the Farcela cutting compound. Then do sections about 2' square and don't be tempted to move onto another section until you have got a good standard of finish on the section you are working on.
|
This will be your final success Paul! |
9th October 2017, 09:33
|
|
Junior Member
|
|
Join Date: Jan 2014
Posts: 17
|
|
 patience of a saint
Hi Paul ,it's looking good after all the time and effort ! you could leave as it is and have that lived in look and patina , just like some of the 50's race cars at the Goodwood Revival ! or you can continue too try and get a mirror finish so she looks like a concours queen ! ,the car will look good either way ! Pete.
|
9th October 2017, 13:59
|
|
Senior Member
|
|
Join Date: Mar 2012
Posts: 1,152
|
|
Paul, absolutely fantastic. I love the almost matt look of older race cars. Yours is shinier than that and looks perfect. I wouldn't do any more. Get the roundels on and enjoy. Congratulations.
|
9th October 2017, 19:14
|
|
Senior Member
|
|
Join Date: Feb 2012
Location: Wembley, London
Posts: 5,058
|
|
Jag, Molleur, Slickshod & Oxford – Cheers chaps.
Unfortunately, I have neither the time, nor inclination, to improve the paint finish any further. 
( But I do appreciate both the advice given and the good intentions behind it. )
There are two main problems with the paint as it currently stands:
- A number of ‘blotches’ where the different shades of BRG have come to the surface.
- A number of areas that have rubbed through to the primer underneath.
The harsh reality is that I was getting trapped in a never-ending cycle of trying to fix these small problems.
( The fact I need to leave the car uncovered for the thick end of a day when painting doesn’t help. )
This game of ‘Whack-a-mole’ could go on for months, so I have to draw the line somewhere and yesterday was it.
I know the finish isn’t perfect and I know that throwing more hours at it would improve it.
But, for me at least, it is good enough.
In fact, for a car painted al fresco, with a brush, the final dull shine is nothing short of amazing. 
It was never my intention to fake patina, but I seem to have managed it whilst trying my best.
I actually think the paint is appropriate for the overall wonkiness of the bodywork.
As the shiner the paint gets, the more the undulations in the panels themselves shows up. 
Anyway, I am now going to start bolting the shiny bits back on and try to get back on the road ASAP.
Although, with both the weather and work against me these days, that might take a while.
Deep down, I am really looking forward to seeing the reaction the car gets now it is in ‘colour’.
Take care, Paul.

|
9th October 2017, 19:38
|
|
Senior Member
|
|
Join Date: Jun 2015
Posts: 1,401
|
|
I think it really will be fine. Looks pretty good as it is now, and I can appreciate your decision to leave it alone. With the shiny bits and roundels it will be fantastic and period looking. Well done, and kudo's for "sticking with it".
|
10th October 2017, 05:03
|
|
Senior Member
|
|
Join Date: Nov 2012
Posts: 845
|
|
 10/10 For Dedication!
I must add my accolade to all the others. It's really looking the part now and will doubtless be besieged every time you park when it's back on the road. Let's hope for some dry crisp autumn/winter weather!
Regards, Mick 
|
10th October 2017, 06:26
|
|
Senior Member
|
|
Join Date: Feb 2012
Location: Wembley, London
Posts: 5,058
|
|
Molleur & Mick – Thanks gentlemen, 'period looking' works for me.
- - - - - - - - - - - - - - - - - - - - - - - - - - - - - - -
I really hope my last post didn’t come across as a flippant reply to Jag, as that was not my intention.
I do appreciate his advice and I know using the right tool for the job would make a big difference.
But I’ve already spend 100s of hours on this over the last 5 months.
Which added to the 1,000s of hours over the last 5 years has produced ‘the straw that broke the camel’s back’.
But it is really my life outside ‘car building’ which is having a bigger influence on my paint finish.
As, with a bit of luck, my eldest daughter will be leaving home for Uni next year.
So I’d rather spend some quality time with her than turning my paint finish from good to great.
( Note: Good is a relative concept in this case. )
Cheers, Paul.
|
10th October 2017, 08:35
|
|
Senior Member
|
|
Join Date: Jan 2014
Location: Egham, Surrey
Posts: 1,780
|
|
I know exactly what you mean but honestly an afternoon with the correct polisher and compound makes all the difference, you are so close.
I have a red Mitsubishi GTO on the drive, it is one of those dreadful reds that goes to a matt pink colour, to look at it you would value it at £1200, an afternoon with the polishing buff and you honestly would not believe it was the same car, after polishing it I would put it up for £4500. The shine (or lack of) is the first thing your eyes go to.
Get it back on the road without the stickers and you can pop round and I'll help you have a go.
They say you can't polish a turd but with the right polisher you can! (not that I'm saying your car is a turd of course!)
|
10th October 2017, 16:11
|
 |
Senior Member
Big Cheese
|
|
Join Date: Sep 2002
Posts: 1,080
|
|
From the pictures posted I personally think the matt look suits it better than the satin look, I'd go back and 'rough' it up again  |
10th October 2017, 20:51
|
|
Senior Member
|
|
Join Date: Feb 2012
Location: Wembley, London
Posts: 5,058
|
|
Jag - Thanks for the kind offer, it means a lot.
JG - Go and stand in the corner and think about what you wrote.
Driving In Central London
The video below just appeared in my YouTube suggestion box.
So if you want to get an idea of the reaction I get when sight seeing in my Swordfish, have a watch of this.
( Although I have to give this guy full credit for driving something that small in town, scary stuff.  )
Enjoy, Paul.
https://www.youtube.com/watch?v=4Fo1ngtXoXI
|
14th October 2017, 17:46
|
|
Senior Member
|
|
Join Date: Feb 2012
Location: Wembley, London
Posts: 5,058
|
|
A Long Week
It seemed that by the time I got home from work each day this week, it was either dark, wet, or dark AND wet.
My earliest start on the work lap top was 5.15am and my latest finish was 10.55pm.
So to say I am knackered would be a bit of an understatement.
Still, I did smile when I saw a photo of the little car in the video clip in the Metro.

Turns out this is actually another one and not the one in the video, but £46,000!
- - - - - - - - - - - - - - - - - - - - - - - - - - - - - - -
Saturday - Part 1
Given it was getting dark when I finished the polishing last Sunday, I was looking forward to seeing the paint in daylight.
Unfortunately, I think all the rain during the week created a damp environment under the covers (via the sheets?) and car looks a mess.
As there is now a 'tiger stripe' effect all over the place, which was really quite hard to take and I'm absolutely gutted.

I spent a while just wandering around the car in a bit of a daze as I just couldn't believe it.
But, to avoid giving up on this project completely, I decided to regroup and focus on getting back on the road.
So my first job was to treat the leather bonnet straps.

At which point a little Red Robin dropped in and that lifted my spirits quite a bit.

Next it was time to put the filler cap back into place.


Notice the two big green paint drips on the petrol tank.
Next I started to clean up all the holes in the bodywork that had been part filled with paint.


End of Part 1…
|
14th October 2017, 17:48
|
|
Senior Member
|
|
Join Date: Feb 2012
Location: Wembley, London
Posts: 5,058
|
|
Saturday - Part 2:
Finally removing the newspaper from the dash was a little job that also lifted my spirits.


As did fitting the first aero screen.

In order to fit the other screen I had to find the new spare bracket I'd bought to replace the original one that broke.

As you can see the new one is slightly deeper at the base than the original and it expects a thinner fixing bolt.
So I had to spend ages opening up the holes in the new bracket until they were big enough to take the bolts I had.
I also put the bonnet straps on and the Union Jack badges too, starting with the driver's side.

And this is the passenger side, showing the second screen fitted too.

By this point it was starting to cloud over.

I just wasn't in the mood to take a chance with the weather, so the covers went back on and I swept up the leaves on the driveway instead.

Including the pile that had collected in the drip tray under the car.

I did get a chance to do a bit more in the afternoon, starting with cleaning up the holes for the bonnet locks.


This is the "open" position.

End of Part 2…
|
14th October 2017, 17:49
|
|
Senior Member
|
|
Join Date: Feb 2012
Location: Wembley, London
Posts: 5,058
|
|
Saturday - Part 3:
The thickness of the paint made fitting the grommet for the number plate light wiring quite tricky.

I then ran into a small technical problem when I couldn't find the allen key for the bolts. 

And I need to have this tightened up before I can fit the rear number plate over the top.
Still, at least I had already cleaned up the number plate before I realised I couldn't refit it.
So I fitted the rear fog lights instead.

Last job of the day was to crawl around under the boot floor to sand down the filler.
Not easy to get some decent photos, but you get the general idea.


There are also a few normal 'patches' on the boot floor that need a coat of Tetroseal too.

With a bit of luck I will be able to do that tomorrow, which will then allow me to refit the tail pipes and restart the engine. 
Until next time, take care, Paul.
|
14th October 2017, 18:02
|
|
Senior Member
|
|
Join Date: Mar 2015
Posts: 395
|
|
Awesome Paul she's really coming on now you'll be back on the road in no time
|
14th October 2017, 19:45
|
|
Senior Member
|
|
Join Date: Jun 2015
Posts: 1,401
|
|
Looking good Paul, pretty soon now....
|
15th October 2017, 09:33
|
|
Senior Member
Enthusiast
|
|
Join Date: Jun 2015
Location: Reading, Berkshire
Posts: 688
|
|
Tigers are cool
Paul.
I'm so glad you are putting the car back together. You deserve to get out in it after the hard work on the paint. When you get back in you'll fall back in love with the darn thing.
Keep the updates coming
Dave |
15th October 2017, 12:06
|
 |
Senior Member
|
|
Join Date: May 2009
Location: POOLE , DORSET
Posts: 2,200
|
|
Quote:
Originally Posted by DaveP
Paul.
I'm so glad you are putting the car back together. You deserve to get out in it after the hard work on the paint. When you get back in you'll fall back in love with the darn thing.
Keep the updates coming
Dave |
Agreed , when you drive them , the last thing on your mind , is ''I hope no one notices the paint issues ...''
For what its worth , I actually like the paint finish , it looks in pictures like its 60 years old !! not what you were heading for , I know , but it looks great to me .....choice of paint and the blooming issues etc have given you a very cool , 'established' look ... |
|
Currently Active Users Viewing This Thread: 22 (0 members and 22 guests)
|
|
|
| Thread Tools |
|
|
| Display Modes |
 Linear Mode Linear Mode
|
 Posting Rules
|
You may not post new threads
You may not post replies
You may not post attachments
You may not edit your posts
HTML code is Off
|
|
|
All times are GMT +0. The time now is 08:10.
|


