|
|
| Sammio Builds and discussions Sammio bodied car builds and specials |

1st March 2014, 10:00
|
 |
Senior Member
|
|
Join Date: Jul 2011
Posts: 5,328
|
|
Quote:
Originally Posted by davecymru

No i'm Gary J.... .and so's my wife!
(sorry, couldn't resist)  |
Ha Ha! Nice one, I did wonder if anyone would get the connection.  |
1st March 2014, 14:38
|
|
Senior Member
|
|
Join Date: Jul 2011
Posts: 490
|
|
He's not GJ - he's a very naughty boy.
Back to the point. Michel, I like your version of this vehicle - its the best executed example I have seen so far.
|
1st March 2014, 21:46
|
|
Senior Member
|
|
Join Date: Mar 2012
Posts: 159
|
|

Thanks for all the kind remarks.
Today I got the prop shaft tunnel finished and got the hand brake working. Together wirh the transmission cover, it forms the backbone of the interior so to say.
I bought a grp tansmission cover. I decided to pimp it. How much I like a good coin tray, I don't think it suits a 50's racing car very much. The coin tray had to go. I covered it up with a plate and used plenty of small bolts to fix it. It looks more like an inspection panel now.
For the surround of the gear lever I did something similar. I used an alu ring that came with my steering wheel. I bonded it to the cover. Then I crossed an alu strip over the cover to visually break it's proportion somewhat.
[IMG]  [/IMG]
[IMG] 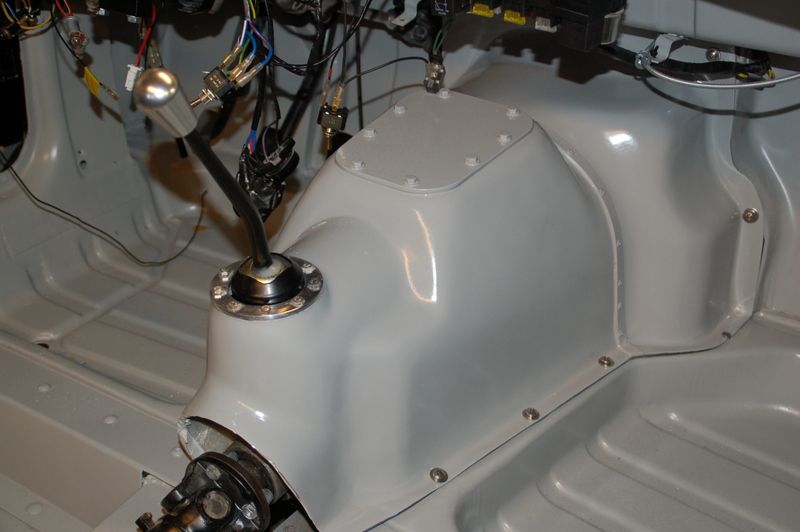 [/IMG]
For the tunnel over the prop shaft, I bought a 2mm thick heat stove pipe, which I cut in two. I cut out the piece in the original tunnel that had the hand brake mountings on it. I cut a hole in the pipe and welded the piece in. For the sides of the tunnel I had a metal strip angled 90 degrees. I welded them to the pipe as well.
[IMG] 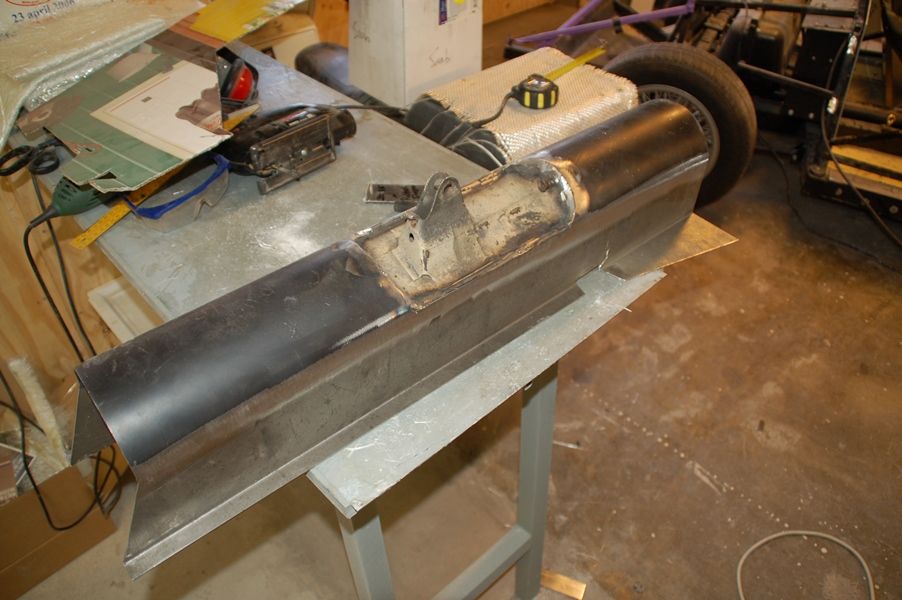 [/IMG]
[IMG] 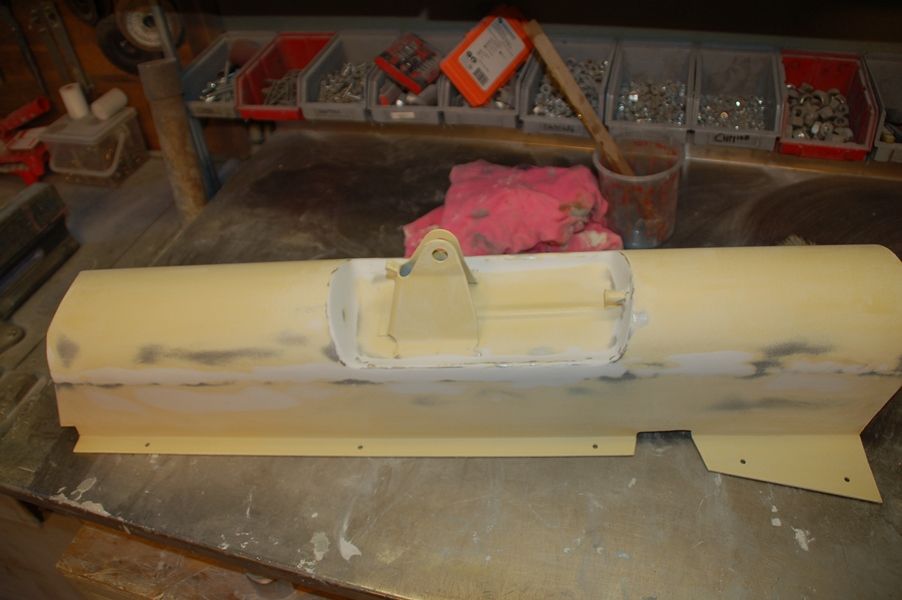 [/IMG]\
I still have to finish the gaps and connections here and there.
[IMG] 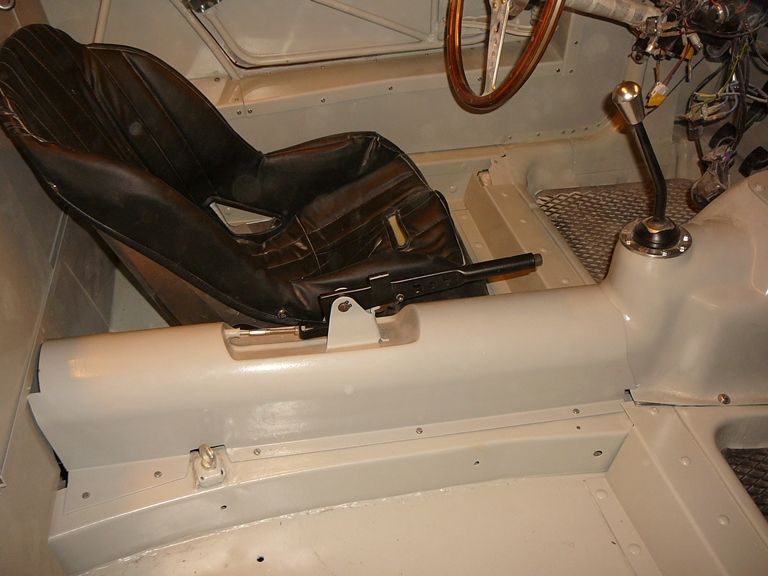 [/IMG]
It doesn't show very well on this photo, but I have drilled a few holes into the brake lever which look rather well if I may say so. And perhaps more important, I got it working!
[IMG] 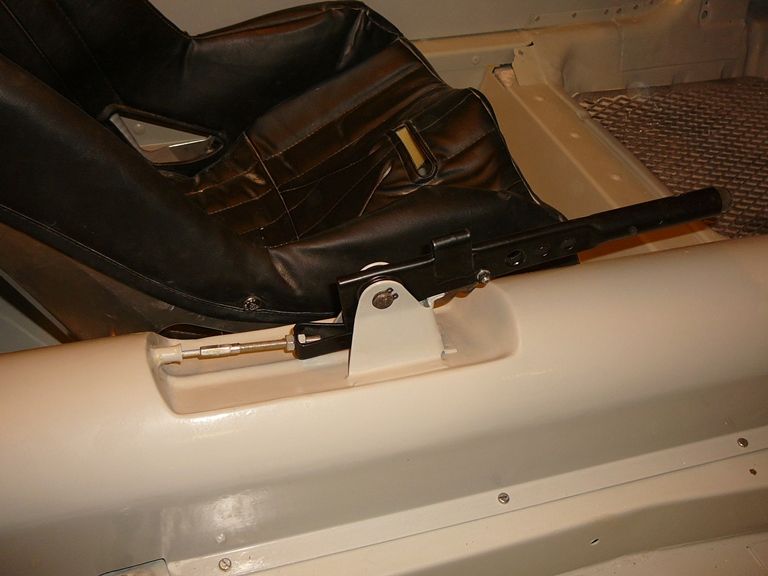 [/IMG]
Michiel
Last edited by christinedmc; 2nd March 2014 at 17:54..
|
2nd March 2014, 08:18
|
|
Senior Member
|
|
Join Date: Jul 2011
Posts: 5,328
|
|
That's looking very impressive Michiel.
I do like your seat shell with loose cover, do you have another one for the passenger side, or will you go with the racing car style of a non-matching basic cushion on the floor for the mechanic to perch on?
|
2nd March 2014, 12:11
|
 |
Senior Member
|
|
Join Date: Feb 2012
Location: Wembley, London
Posts: 5,058
|
|
Michiel - Your gearbox cover is a real work of art. 
I'd be happy if my own cover looked half as good when I have finished with it.
Good luck, Paul.
|
3rd March 2014, 19:52
|
 |
Senior Member
|
|
Join Date: Aug 2012
Location: Surrey/Sussex border
Posts: 169
|
|
Michiel ..... that is FANTASTIC ! a great idea to copy 
Seating looks soooooo retro.
Keep it up
Slarti |
6th March 2014, 05:54
|
|
Senior Member
|
|
Join Date: Mar 2012
Posts: 159
|
|
Hi you all,
Since I reached the stage of placing the bonnet, I had a problem with pieces of engine sticking out of it and a radiator beeing pushed down to street level.
[IMG] 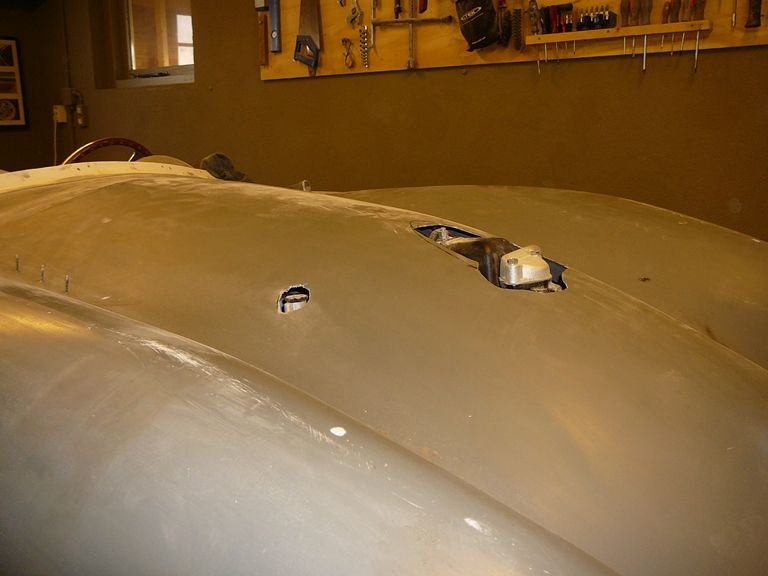 [/IMG]
Off course, this means scoops. The shape of the thermostat housing and the hose coming out of it, directs a pretty wide scoop. As seen before with manny Spyders. I wanted a more narrow scoop and this ment that I had to change the thermostat housing.
[IMG] 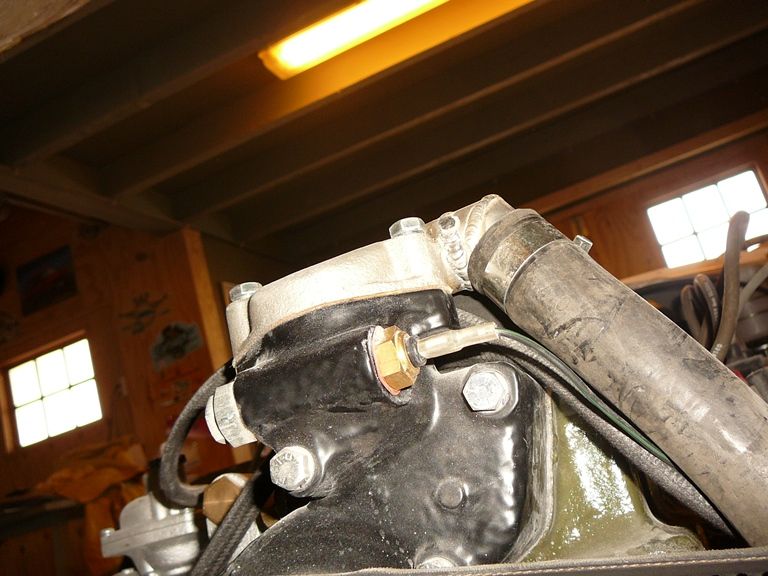 [/IMG]
As fot the radiator, I decided to have one made according to my own specs. I want a system with an expansion tank, a filler screw, connecting pipes at the right place, correct mounting, hight, with, sensor for the electric fan, sufficient colling capacity, correct mountng for the electric fan I have. Well, there was no way a stock radiator would meet all these needs.
[IMG] 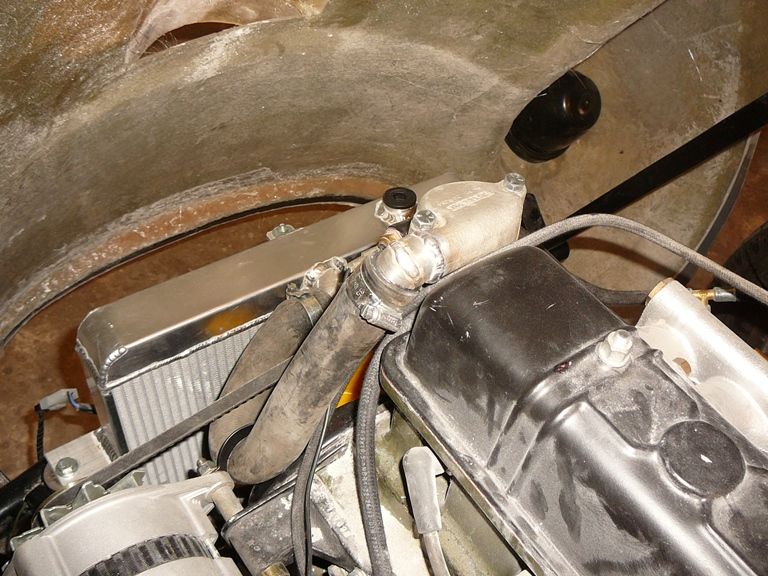 [/IMG]
Also I had the expansion tank changed. One pipe outlet was plugged and one pipe at the under side was changed in shape and diameter.
[IMG] 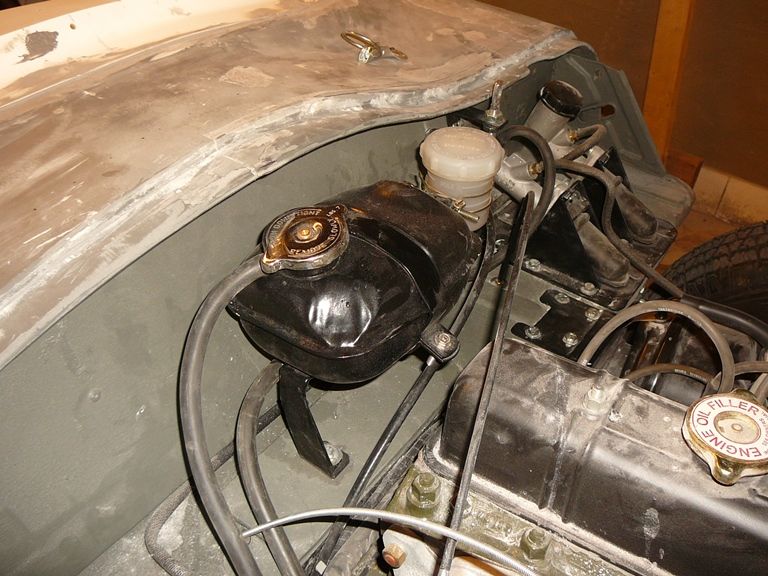 [/IMG]
As you can see here, I used the bracket for the expansion tank to mount the remote reservoir for the master brake cilinder as well.
[IMG] 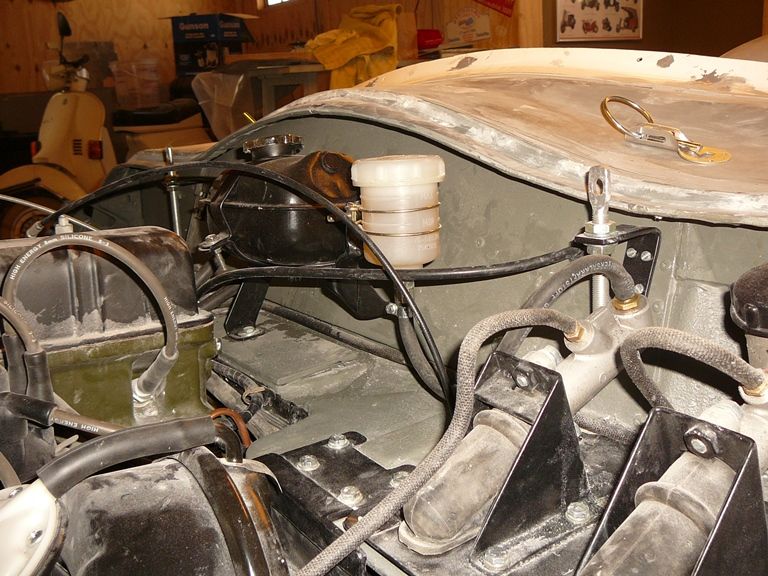 [/IMG]
Michiel

|
6th March 2014, 14:45
|
|
Senior Member
|
|
Join Date: Apr 2012
Posts: 1,163
|
|
Nice work, I'm hoping to start catching you up soon!
|
7th March 2014, 06:02
|
|
Senior Member
|
|
Join Date: Mar 2012
Posts: 159
|
|
Hello Viatron, for catching up, you have to hurry I guess. Because this is my last report for a short while. I still can tell you how I made the bonnet scoop. But after this job, my car was sent to meet his maker...
Let me explain that. I gave it a good thought. I was thinking that with the effort I made so far, I want the best prep and paint job I can get. It would need experience/skill to straighten the body (the new rear I made wasn't that perfect as it turned out), rework the gaps, finalise the grill (the hoop wasn't centrered seen from the outside), check the roundness of the wheel arches etc.
There could only be one who could achive the workmanship and quality I want and still would be affordable, and that would be it's maker that laminated this particular body (number 47) three years ago.
After arrangements I put a lot of post stamps on it and had it shipped to Poole where Mike (mikmiglia/Miglia sports cars) will perform his work and give this car the finish it deserves.
Work has all ready started, so fingers crossed now.
[IMG] 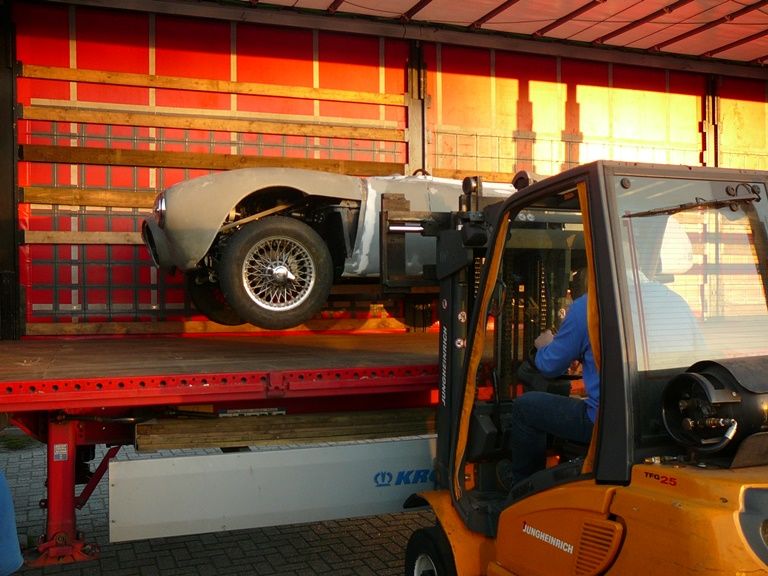 [/IMG]
Michiel
|
7th March 2014, 07:22
|
|
Senior Member
|
|
Join Date: Jul 2011
Posts: 5,328
|
|
Shame you weren't able to finish it yourself Michiel, but well done for handing it over to someone who can rather than abandoning the project. Look forward to seeing the finished article. |
7th March 2014, 08:34
|
 |
Senior Member
|
|
Join Date: Nov 2013
Posts: 143
|
|
Michiel , I am looking forward to seeing this one getting finished , it is a really nice example of the range.
As a point of history for you , Mike was heavily involved in turn key builds and kit preperation by the time your car was made , number 47 would have been made by one of the part time laminators that were being used by then.
Mikes forte is bodywork , he has grown up around bodyshops his whole life , working for his fathers busy shop from a very young age after school , weekends etc. His finish work and prep will be first class if he is on board.
|
7th March 2014, 17:52
|
|
Senior Member
|
|
Join Date: Feb 2012
Location: Wembley, London
Posts: 5,058
|
|
Michiel - I bet you were nervous when your car was lifted up on the forklift!
Although, that doesn't look as bad as the crane lifting a Sammio over the top of a house. 
I think Mike will do a great job preparing your car and it will look great when done.
Good luck, Paul.
|
9th March 2014, 09:17
|
|
Senior Member
|
|
Join Date: Mar 2012
Posts: 159
|
|
I have received a message out of Poole. The car was delivered without any complications I came to hear about. So that is a releif.
@Paul, I made a wooden frame. That way a fork lift won't damage the underside of the car. This worked well. Still, nothing beats solid ground 
@Towed. Abbandon the project, like in abbandoning the ship? I think I don't understand. I'm not abbandoning the project, au contraire, I'm having the car sprayed so that I can finished it and drive it 
@el primer, you must be right about the laminators. It's just that I talked to Mike on collection three years ago, and this lead to my assumption that he made the body
Anyway, I still have some pictures left that concerns my scoop, which I will post now.
Now that my thermostat housing is changed, I could look out for a narrow scoop. After searching for shapes that I could use for the building of the scoop (or bulge). I found a vase that I thought, had a nice shape.
After waxing, I gave it a gelcoat.
[IMG] 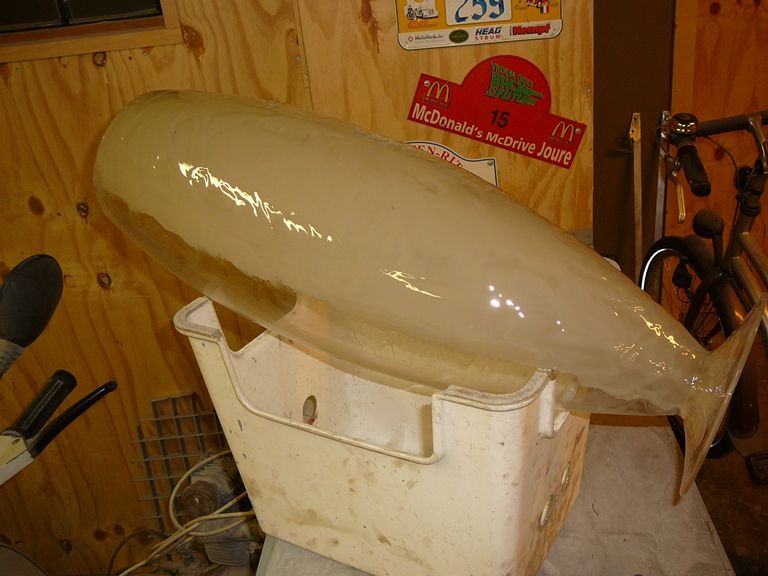 [/IMG]
After this I laminated it, to make a mould. With this mould I made the final scoop.
For the little scoop/bulge that was needed to cover the above of the first carburettor, I used a plastic gardening shuffle.
It all lead to this:
[IMG] 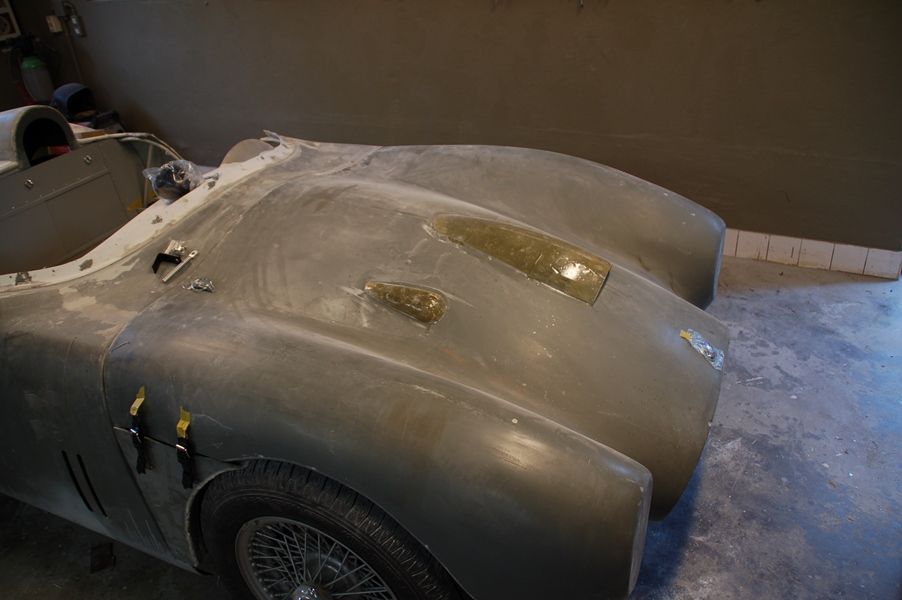 [/IMG]
I also made a mould that has the shape of a sfere. With the scoop and the sfere, I can make a bulge. After some consideration, I choose for the scoop and not for a bulge. A bulge would change the shape of the bonnet beeing more of an integral part. A scoop is more laying on top of the bonnet leaving the bonnet shape as is.
Michiel
Last edited by christinedmc; 9th March 2014 at 09:19..
|
9th March 2014, 10:08
|
 |
Senior Member
|
|
Join Date: Aug 2012
Location: Teesside
Posts: 234
|
|
Like the scoops, bet you can't wait to get it back and enjoy driving it |
9th March 2014, 11:16
|
|
Senior Member
|
|
Join Date: Apr 2012
Posts: 1,163
|
|
Can I ask what triumph the gearbox cover is from? I had to cut mine about a bit to get the gear leaver to fit through and think yours may be more suitable
Mac
|
9th March 2014, 20:37
|
|
Senior Member
|
|
Join Date: Mar 2012
Posts: 159
|
|
Hi Mac,
Maybe we have the same cover, mine had a horrible fit! My cover should be a Triumph Vitesse cover. At least, that's what I ordered.
Nevertheless, I got it sorted out in the end. But it took a lot of fiddling and there is some tension on the screws.
@mas, yes I want to drive it! It took a ride of approx 4 m's to get the car to the load area. It was a hell of a ride. I want plenty more of that.
Michiel
|
19th March 2014, 19:00
|
|
Member
|
|
Join Date: Aug 2013
Posts: 50
|
|
Scoop
Hey Michiel,
You're going strong with the built - very impressive the quality standard you achieved. I was surprised that you shipped it to Poole for the exterior finish, but you're right, they know best how to handle this body.
I have made a cut out in my hood as well to let the air filter through but also have been looking for a good shape to laminate a scoop. Sofar not found... Is it anywhere possible to borrow your "Vase"? - the size seems perfect...Please let me know...
I'll post an update on the 2cv next week, we have had to do a lot of reshaping of the body with filler.. The body is really full of gaps and not straight at all.
But we are now getting somewhere, it's a lot of work though and had to call in a friend that is good with filler..
Cheers,
Marcel
|
19th March 2014, 19:29
|
|
Senior Member
|
|
Join Date: Mar 2012
Posts: 159
|
|
Hello Marcel,
Bringing the car to Poole was my best idea. This is no job for an ordinary paint shop. I want best.
You can use my mould, no problem.
Regards,
Michiel
|
3rd April 2014, 19:28
|
|
Senior Member
|
|
Join Date: Mar 2012
Posts: 159
|
|
Hi you all,
Finally I have some progress to report. And what progress it is! I received pictures out of Poole, where Mike and his co-workers (from Miglia sportscars) have prepped and sprayed my car. I live in Holland, but I wanted a quality GRP paint job and figured that I should take the car to the other side again for that. It was more then a regular sprying job. Mike did loads of work, correcting all my work where necessary to get it top notch. And for a fair price I would say. Thank you Mike.
I changed my mind on the colour many times, before we came to: Jaguar Bronze metallic. A beautiful 50's colour. Totally different from all the colours I have seen on our kits before. Now it looks distighuished, but wait how it looks with the leather and the panamericana stickering I have planned.
What do you say?
[IMG] 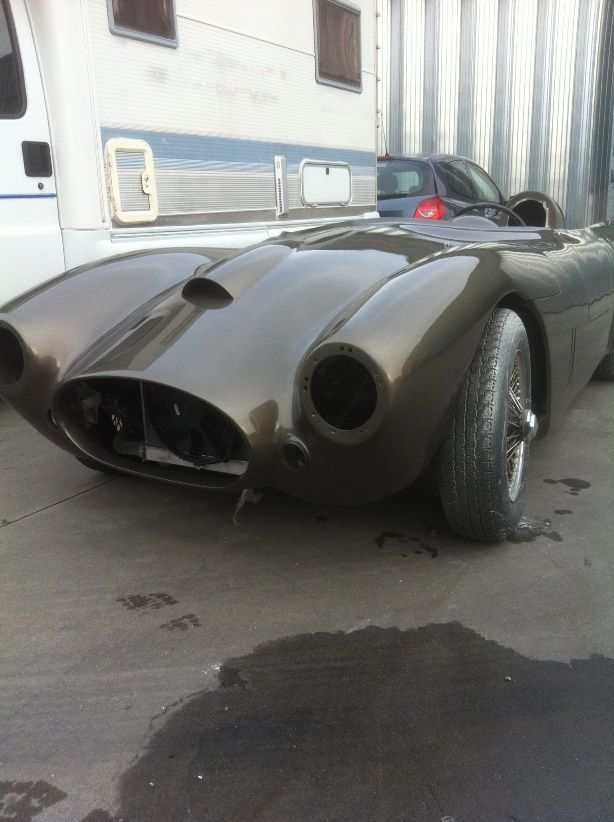 [/IMG]
[IMG] 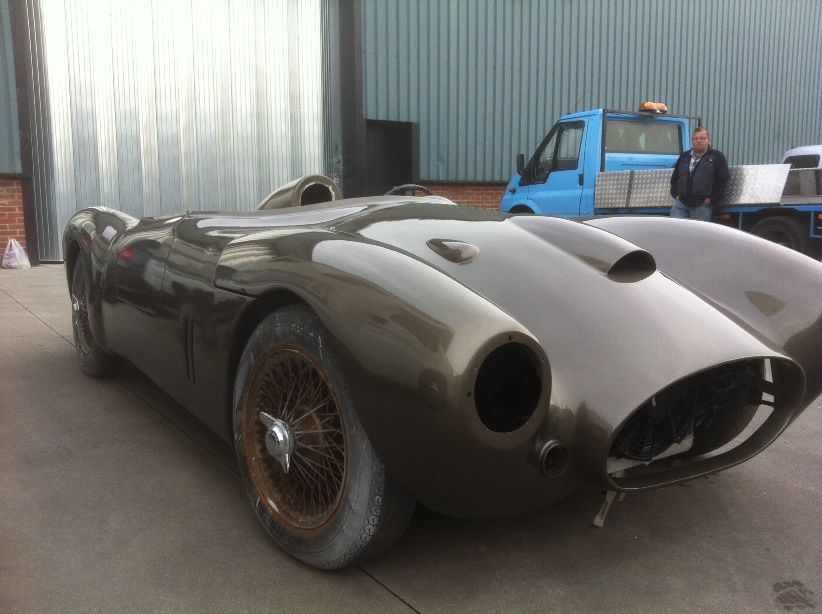 [/IMG]
[IMG] 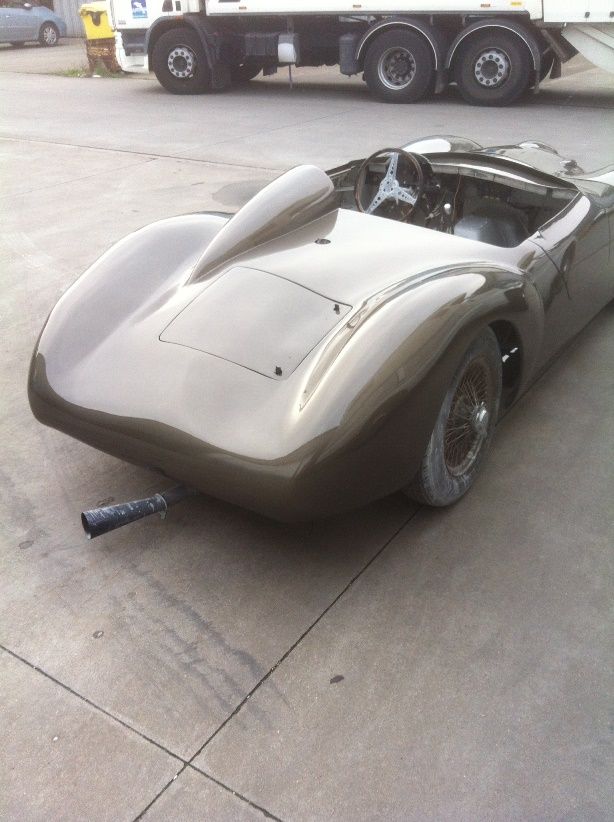 [/IMG]
Michiel
Last edited by christinedmc; 3rd April 2014 at 19:30..
|
3rd April 2014, 19:56
|
 |
Senior Member
|
|
Join Date: Sep 2011
Posts: 1,446
|
|
Yes ...now that works!!!!,
Great choice
|
|
Currently Active Users Viewing This Thread: 1 (0 members and 1 guests)
|
|
|
 Posting Rules
|
You may not post new threads
You may not post replies
You may not post attachments
You may not edit your posts
HTML code is Off
|
|
|
All times are GMT +0. The time now is 05:22.
|


 Linear Mode

