|
|
| Vintage and Classic Roadster Kit Car Builds For Vintage and Classic era kit cars. Post your build reports, problems and progress here |

17th June 2015, 08:32
|
|
Senior Member
Enthusiast
|
|
Join Date: Jan 2007
Posts: 932
|
|

Peter
The M50 Marlin Cabrio/Sporster solution is marginally more involved than your stright forward 180 degree rotation, but offers two significant benefits:
Significantly reduced effective elbow width, which will help with your rocker cover location on the opposite side, and
The ICV pipework remains at the bottom of the elbow, not rotated to the top as your photo shows.
I do not know that this will work with the M52, but the solution on an M50 is to cut off the concertina section of the elbow, which currently attaches to the MAF, and then use the new end to attach to the throttle body. This then positions the ICV port facing down.
I cut an old elbow up to test fit and prove it worked, and then bought a new elbow and made the change before for the final fit.
My elbow is rotated further round than you may need to, due to the position of my steel water tanks and my decision to take the air inlet pipe back to the bonnet.
[IMG]  Complete M50B25 Inlet Manifold Fits - Just! Complete M50B25 Inlet Manifold Fits - Just! by Mike Garner, on Flickr[/IMG]
Quote:
Originally Posted by peterux

Y
At the moment I'm kind of doing space planning to work out where everything will fit.
I've had a look at the air intake elbow and MAF sensor. It clearly doesn't fit in its original position pointing towards the front of the car.
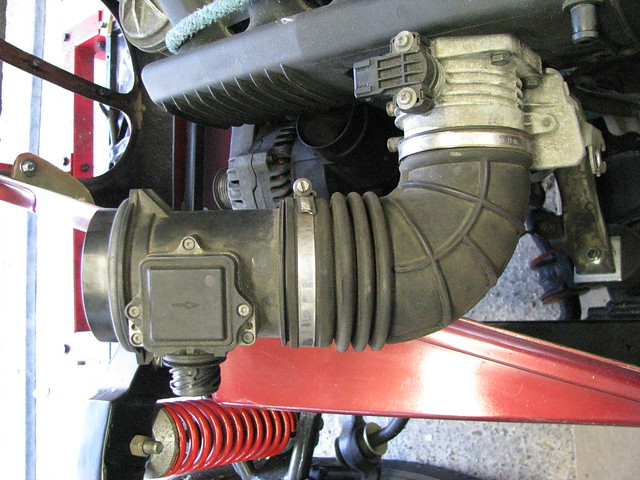 Air Inlet Air Inlet by marlinpeter, on Flickr
But borrowing the standard Marlin solution, reversing the elbow seems to work.....
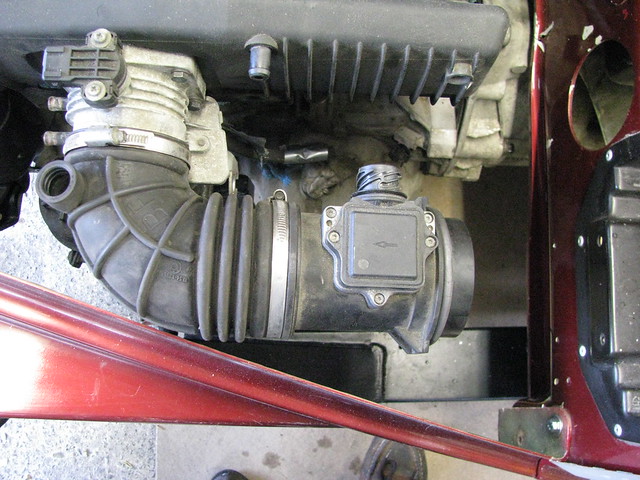 Possible Air Inlet solution Possible Air Inlet solution by marlinpeter, on Flickr
It's a bit tight so I've got to be carefull how much I move the engine across to clear the rocker cover on the other side.
Just got to figure out where to put the air filter and 'cold air' input. I've also got to re-route the ICV pipe.
...peter |
Last edited by Mike; 17th June 2015 at 08:38..
Reason: Improved explanation
|
18th June 2015, 21:34
|
 |
Senior Member
Enthusiast
|
|
Join Date: Mar 2005
Posts: 3,079
|
|
Quote:
Originally Posted by Mike
Peter
The M50 Marlin Cabrio/Sporster solution is marginally more involved than your stright forward 180 degree rotation, but offers two significant benefits:
Significantly reduced effective elbow width, which will help with your rocker cover location on the opposite side, and
The ICV pipework remains at the bottom of the elbow, not rotated to the top as your photo shows.
I do not know that this will work with the M52, but the solution on an M50 is to cut off the concertina section of the elbow, which currently attaches to the MAF, and then use the new end to attach to the throttle body. This then positions the ICV port facing down.
|
Hi Mike,
thanks for the suggestion and explanation.
I've had a a look at mine and found that the MAF is 80mm diameter but my throttle body is only 73mm so swapping the elbow around has it's own challenges. But I will keep your idea in mind as an option if I need the extra clearance. I guess the m50 has a larger throttle body?
...peter
Last edited by peterux; 18th June 2015 at 21:36..
Reason: additional comment
|
19th June 2015, 07:30
|
|
Senior Member
Enthusiast
|
|
Join Date: Jan 2007
Posts: 932
|
|
Quote:
Originally Posted by peterux
Hi Mike,
thanks for the suggestion and explanation.
I've had a a look at mine and found that the MAF is 80mm diameter but my throttle body is only 73mm so swapping the elbow around has it's own challenges. But I will keep your idea in mind as an option if I need the extra clearance. I guess the m50 has a larger throttle body?
...peter
|
Hi Peter
I've had a quick look at my set up, and the throttle body is 73mm, and the MAF is larger like yours.
By cutting the concertina end off the elbow, the new internal diameter of my elbow is 73mm, so that fitted perfectly onto the throttle body.
My MAF is larger (I can't get at it easily to measure) so I bought a rubber adaptor from K&N taking 70mm upto 80mm.
http://www.knfilters.co.uk/search/pr...x?prod=85-6001
The adaptor comes with a sleeve and jubilee clips to join it to your elbow, so its a simple fit.
Its not particularly cheap, but it will gain significant space over the straight forward 180 degree rotation, and makes fitting the ICV pipe a nice neat standard fit, rather than having to adapt it to plumb it up and over the top of the throttle body.
I added a length of flexi tube in my set up to be able to locate the MAF in a different place (it would have interfered with my washer/water tank?) and to then take the air intake back up to the top of my bonnet grill to ensure a cold air intake.
This was my initial set up, after I had cut 75mm out of all 6 tubes of the M50 inlet manifold, as Marlin recommended, in order to fit the M50 into the engine bay - (they did exactly the same on their demonstrator)
[IMG] 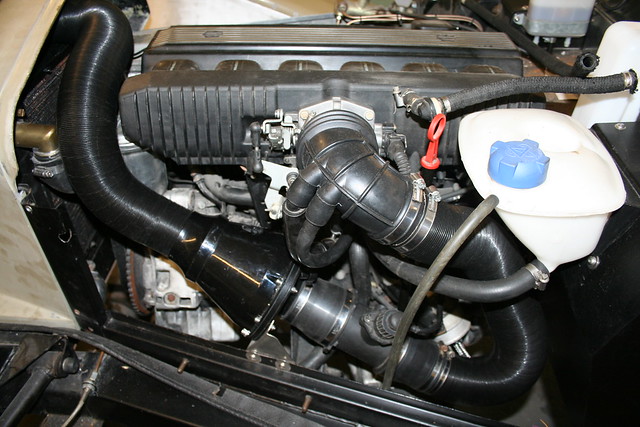 Air In-take : Revised - see later Air In-take : Revised - see later by Mike Garner, on Flickr[/IMG]
I was never happy with the chopped and sleeved inlet manifold (it was always a potential weak point for a reliable engine) and looked for a way to fit a standard one.
As the standard manifold was effectively 60mm wider I needed to reduce the effective width of the elbow to compensate. By cutting the concertina section off, it now just fits.
[IMG] 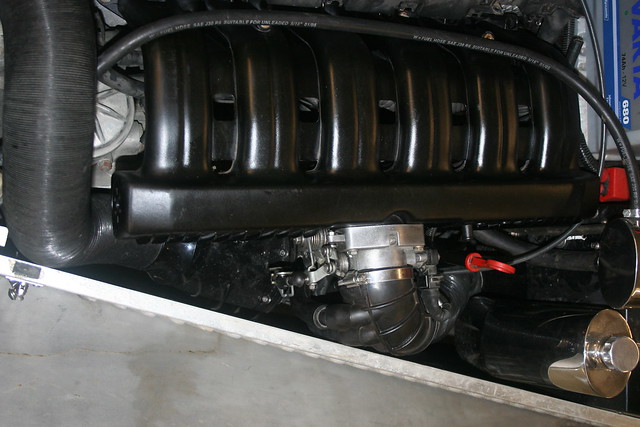 Inlet Manifold Fits Inlet Manifold Fits by Mike Garner, on Flickr[/IMG]

|
20th June 2015, 07:15
|
|
Senior Member
Enthusiast
|
|
Join Date: Mar 2005
Posts: 3,079
|
|
Thanks again for the K&N link and pictures, Peter
|
20th June 2015, 13:20
|
|
Senior Member
Enthusiast
|
|
Join Date: Mar 2005
Posts: 3,079
|
|
Weekly progress....
This week I have been focussing on positioning the dual circuit bake servo...
The Iruna brake servo has one M8 mounting bolt on one end and two m5 bolts the other. It is really designed to be mounted horizontally against a vertical bulkhead. The m8 welded on bolt is designed to take most of the weight and the two m5 fixing points on the other end are to support its weight and stop it rotating. The Royale Sabre does not have too many vertical faces strong enough to support the weight of the servo so I made up some 4mm think mounting brackets. It took a while as it was a kind of 3D puzzle to make them up. The Iruna has a bleed nipple on each slave cylinderso the m8 fixing hole is slotted so I can level the servo once the cars suspension has been set up.
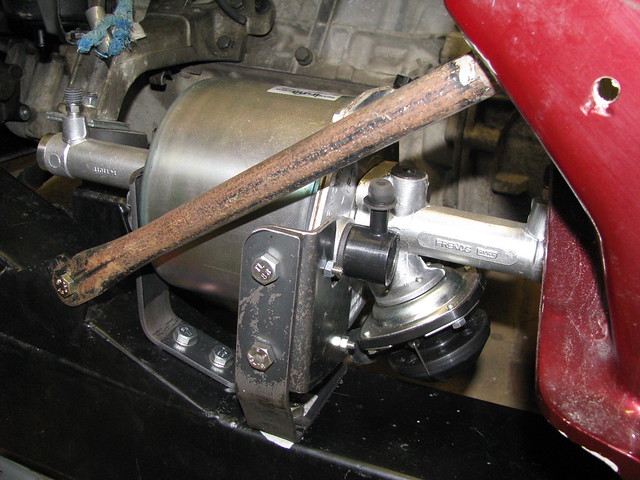 Brake Servo mounting Brake Servo mounting by marlinpeter, on Flickr
 Brake Servo mounting Brake Servo mounting by marlinpeter, on Flickr
Brake Servo support brackets bolted to offside chassis rail.The 'rusty' bar in front of the servo is the the 'A' post support. I've not finished de-rusting and painting it yet. Before final assembly the brackets will be primed and painted and the mounting nuts will be changed to nylocs. Pipe routing will be finalised and installed once I've got other components, like the fuel pump and filter, positioned and the engine is out again.
Another new component arrived this week.........
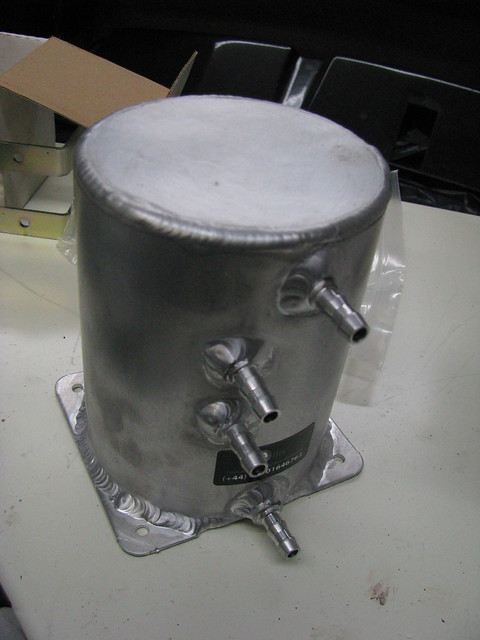 Fuel swirl pot or surge tank Fuel swirl pot or surge tank by marlinpeter, on Flickr
This is the fuel swirl pot or as it's sometimes called the surge tank. This is to ensure that the HP pump always has a constant uninterrupted supply of petrol. Looks like a nice piece of kit and was hand made by a guy in Wales who advertises on eBay.
Next up I will be mounting the swirl pot, HP fuel pump and filter.....
...peter
|
23rd June 2015, 14:02
|
|
Junior Member
|
|
Join Date: Aug 2014
Posts: 10
|
|
Hey Peter, looks like fantastic progress being made there. Lovely shiny new bits to put on - practically drooling here! I noted in your threads that you had doubts about the front springs (too many coils!?) - have to say that was my experience and eventually they just broke. Not only were they too tightly coiled they were also rather 'soft' - especially once I'd swapped out my first 2l SOHC engine for a 3.4 Essex..! You'll probably want to do the same I should think. I ended up getting new springs which a/ had fewer coils and b/ were stiffer, and it markedly improved the ride. Especially over speed bumps, as the Sabre is not particularly far off the deck anyway! After changing for the stiffer springs it made it much easier to traverse humps without bottoming out, so I thoroughly recommend doing it. I'll have a look through my old docs and see if I can find the exact spec of what I ended up with and will let you know! As ever, it's properly inspirational seeing what you're doing and I follow with interest. Cheers! Ivan.
|
23rd June 2015, 19:12
|
|
Senior Member
Enthusiast
|
|
Join Date: Mar 2005
Posts: 3,079
|
|
Quote:
Originally Posted by lordivanhoe
Hey Peter, looks like fantastic progress being made there. Lovely shiny new bits to put on - practically drooling here! I noted in your threads that you had doubts about the front springs (too many coils!?) - have to say that was my experience and eventually they just broke. Not only were they too tightly coiled they were also rather 'soft' - especially once I'd swapped out my first 2l SOHC engine for a 3.4 Essex..! You'll probably want to do the same I should think. I ended up getting new springs which a/ had fewer coils and b/ were stiffer, and it markedly improved the ride. Especially over speed bumps, as the Sabre is not particularly far off the deck anyway! After changing for the stiffer springs it made it much easier to traverse humps without bottoming out, so I thoroughly recommend doing it. I'll have a look through my old docs and see if I can find the exact spec of what I ended up with and will let you know! As ever, it's properly inspirational seeing what you're doing and I follow with interest. Cheers! Ivan.
|
Hi Ivan,
thanks for the feedback and yes this is the exciting bit of the build with lots of new goodies 
I would be very interested to hear what size and stiffness springs you fitted as I'm definitely going to change mine.
I spoke some time ago to Malcolm Badger at Automotive Creations who now supply and build Sabres. He recommends 8" 300 lb springs which sounds a little on the firm side to me but he does have a lot more experience than me.
cheers, Peter
|
23rd June 2015, 20:42
|
|
Junior Member
|
|
Join Date: Aug 2014
Posts: 10
|
|
Hi Peter, well I just checked. 8" springs with 300lb would I suggest almost certainly not be too soft - I went for 9" springs at the same (300lb) weight. What I do remember is they certainly helped keep her a lot more level in the corners! Either way, clearly the originals would by popular opinion seem to have been very soft. I can't claim any particular expertise myself but at the time I took advice from my brother who used to do spanners for Benetton and McLaren F1 teams (as well as running his own saloon race car!) and they were his recommendation. He would probably as a rule favour slightly harder suspension, of course..! ;-) Hope that helps! Ivan.
|
23rd June 2015, 21:11
|
|
Senior Member
Enthusiast
|
|
Join Date: Mar 2005
Posts: 3,079
|
|
Quote:
Originally Posted by peterux
Next up I will be mounting the swirl pot, HP fuel pump and filter.....
|
So there I was in my garage making up some brackets to mount my new swirl pot when I started to ponder on why the donor cars don't have or seem to need swirl pots. I knew that some Ford Sierras had external HP fuel pumps that according Mr. Haynes run directly from the fuel tank so I thought it was time to take a closer look at the fuel tank that came with the Sabre. I'd gaffer taped the holes up, to keep the dust out and stored it away in my garage loft but hadn't looked at it closely.
Sure enough, peering in through the fuel sender hole I can see it has an internal baffle / surge tank.
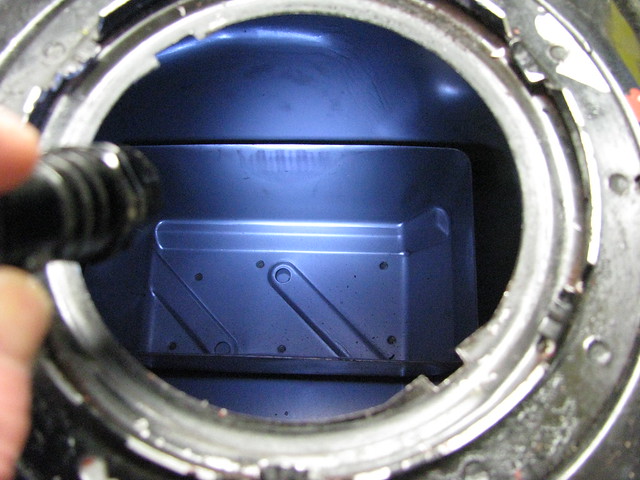 Fuel tank internal Fuel tank internal by marlinpeter, on Flickr
I also bought a sender some months ago which luckily appears to be the right fitting for this tank. The supply and retuen pipes sit inside the baffled tank when mounted.
 Fuel tank sender unit Fuel tank sender unit by marlinpeter, on Flickr
Not clear to me what the rubber foot does? Should it have a gauze type filter around it?
 Fuel tank supply and return Fuel tank supply and return by marlinpeter, on Flickr
Unfortunately the loom that came with the car didn't have the plug that goes in this connector. Anyone recognize it?
 Fuel sender connector Fuel sender connector by marlinpeter, on Flickr
Ford Granada fuel tank sender locking ring. Anybody know the whereabouts of a new one? I've only got the old one that was fitted to the old rusty tank.
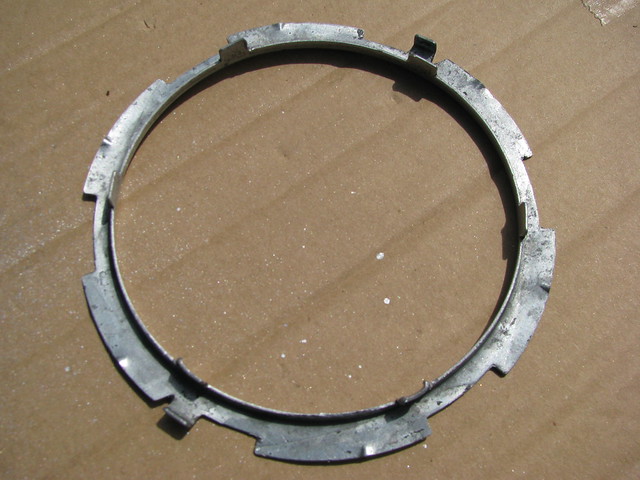 Fuel sender locking ring Fuel sender locking ring by marlinpeter, on Flickr
So I think I'm going put the swirl pot and LP pump 'back on the shelf' and keep it simple with just the HP pump.
Whilst I had the tank out of storage I decided to give it a coat of paint....
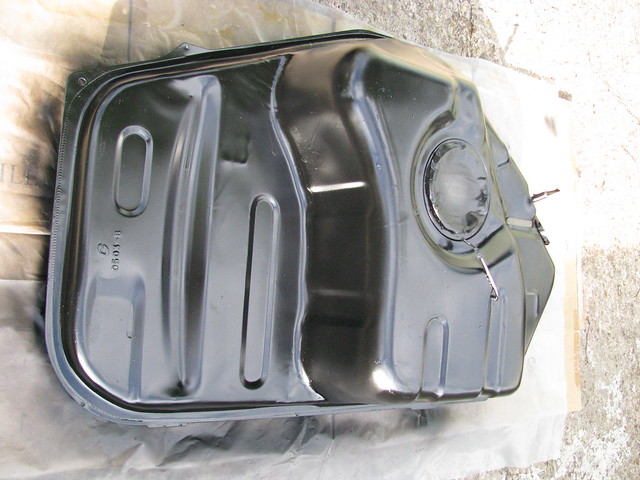 Fuel tank Fuel tank by marlinpeter, on Flickr
Comments and contributions welcome....
....peter
|
23rd June 2015, 21:19
|
|
Senior Member
Enthusiast
|
|
Join Date: Mar 2005
Posts: 3,079
|
|
Quote:
Originally Posted by lordivanhoe
Hi Peter, well I just checked. 8" springs with 300lb would I suggest almost certainly not be too soft - I went for 9" springs at the same (300lb) weight. What I do remember is they certainly helped keep her a lot more level in the corners! Either way, clearly the originals would by popular opinion seem to have been very soft. I can't claim any particular expertise myself but at the time I took advice from my brother who used to do spanners for Benetton and McLaren F1 teams (as well as running his own saloon race car!) and they were his recommendation. He would probably as a rule favour slightly harder suspension, of course..! ;-) Hope that helps! Ivan.
|
Hi Ivan,
that's great information, thanks for looking it up. I think I'll be getting 8" 300 lb springs then 
Do you recall if you used the standard Sierra anti-roll bar?
thanks, peter |
5th July 2015, 20:45
|
|
Senior Member
Enthusiast
|
|
Join Date: Mar 2005
Posts: 3,079
|
|
Progress update....
Not made huge progress over the last couple of weeks but have spent a fair amount of time working out the locations for the fuel pump and filters plus the routes for the fuel and brake lines.
The previous builder had managed to crush the fuel lines between the body tub and the chassis so I have planned some routes that will hopefully avoid the same issue.
 Fuel/brake line planning Fuel/brake line planning by marlinpeter, on Flickr
 Fuel/brake line routing Fuel/brake line routing by marlinpeter, on Flickr
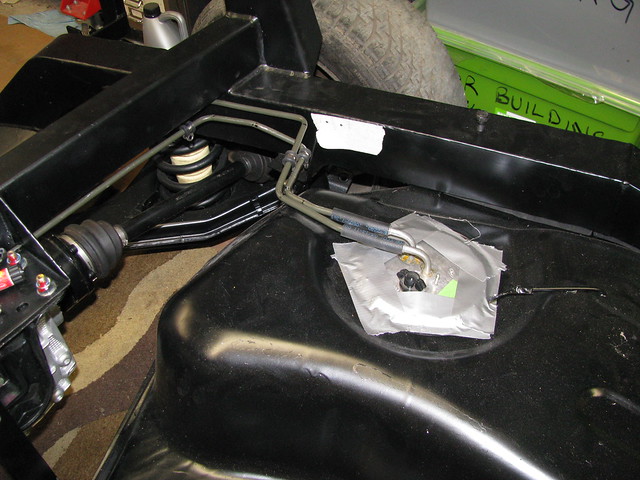
I've also now trial fitted the fuel tank so I can start installation of the fuel lines.....
 Fuel tank - trial fitting Fuel tank - trial fitting by marlinpeter, on Flickr
I've also been buying up more parts from ebay.....
A high flow rate 100 micron fuel pre-filter.
 High flow fuel pre filter High flow fuel pre filter by marlinpeter, on Flickr
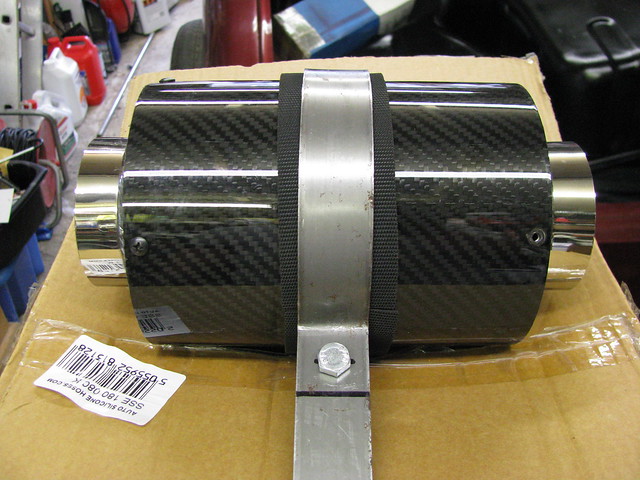
A 80mm diameter 180 degree silicone bend for the air inlet.
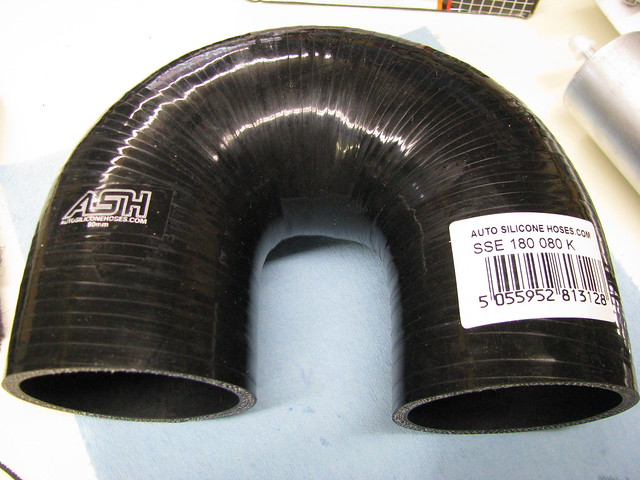 Air inlet bend Air inlet bend by marlinpeter, on Flickr
and another pedal box. This one is from an e87 BMW116 that has less offset on the brake pedal compared to the e36 and e46 pedals. Haven't had time to try it properly yet as the body tub is off at present.
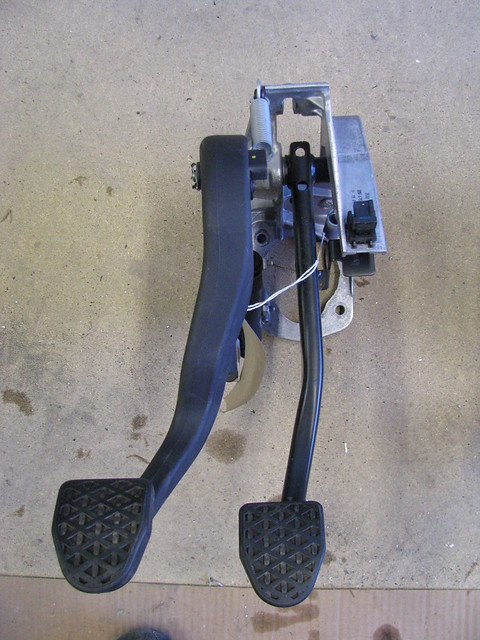 BMW 1 (e87?) series pedal box BMW 1 (e87?) series pedal box by marlinpeter, on Flickr
And finally, started making up another bracket, this time to mount the air input filter....
 Air box mounting bracket Air box mounting bracket by marlinpeter, on Flickr
Next job is to start the fuel lines and mounting the fuel pump,etc...
...peter
|
13th July 2015, 20:39
|
|
Senior Member
Enthusiast
|
|
Join Date: Mar 2005
Posts: 3,079
|
|
Weekly progress report.....
Quote:
Originally Posted by peterux
Next job is to start the fuel lines and mounting the fuel pump,etc...
|
Well, I did make a start on the fuel lines but then had to wait for some 'p' clips to arrive so went back to finishing the air inlet filter mounting bracket.
I then moved onto painting a number of brackets which I'll grab some photos in a future update.
I found the green house a useful place to let things dry....
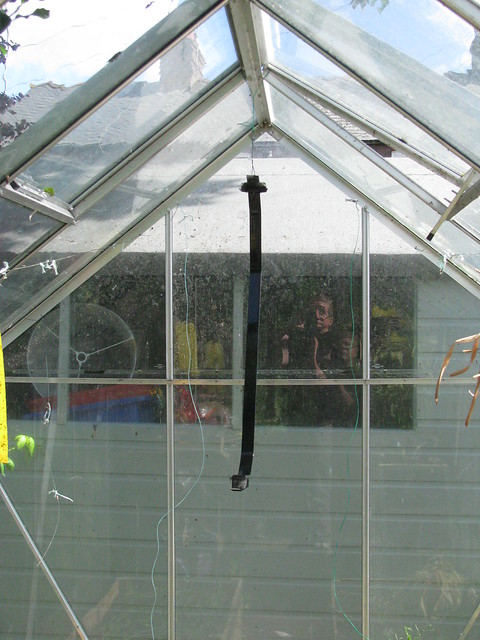 Spray booth? Spray booth? by marlinpeter, on Flickr
The item hanging up is the right hand fuel tank strap which is a standard Ford part with some unusual mounting points with rubber insulated mounts.
The left hand strap doesn't have any part numbers on it so I assume this was supplied by the RMC.
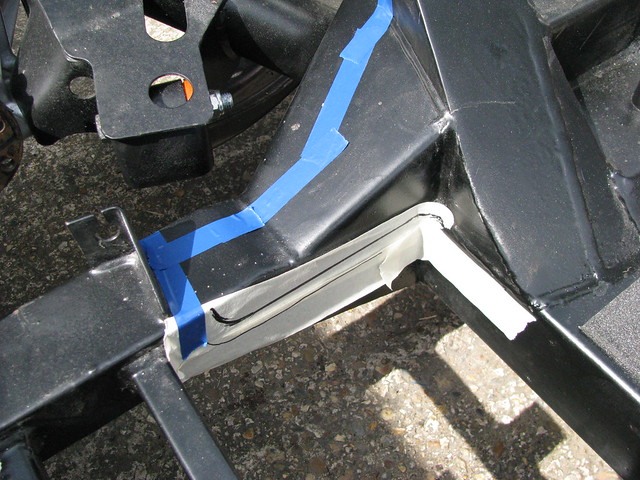
One of the benefits of documenting my builds on this forum is to provide a useful memoir for my own future reference and potentially for other builders, especially when some things are hidden or difficult to see once the bodywork is fitted. So here are some reference photo's of the fuel tank fixing...
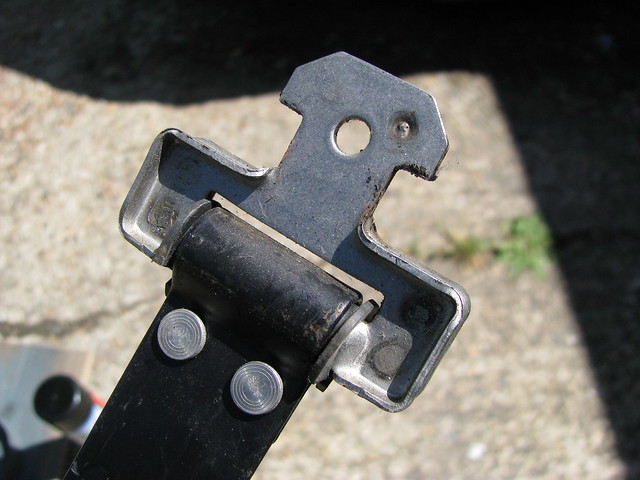 RH Fuel tank strap RH Fuel tank strap by marlinpeter, on Flickr
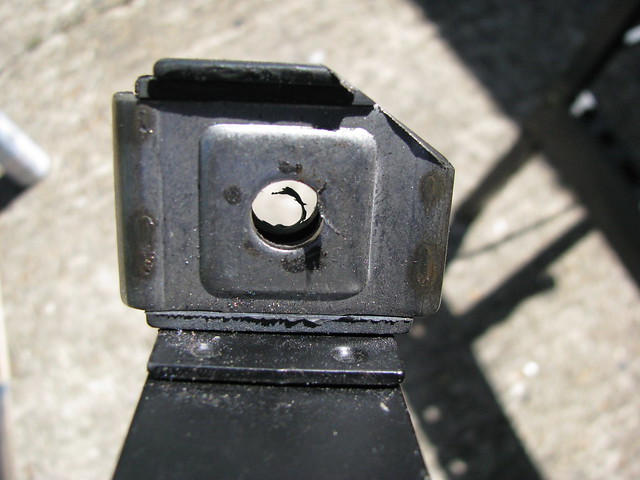 RH Fuel tank strap RH Fuel tank strap by marlinpeter, on Flickr
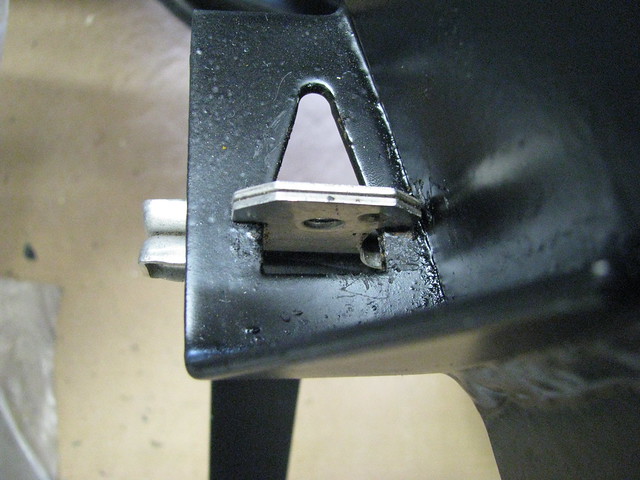 RH Fuel tank strap RH Fuel tank strap by marlinpeter, on Flickr
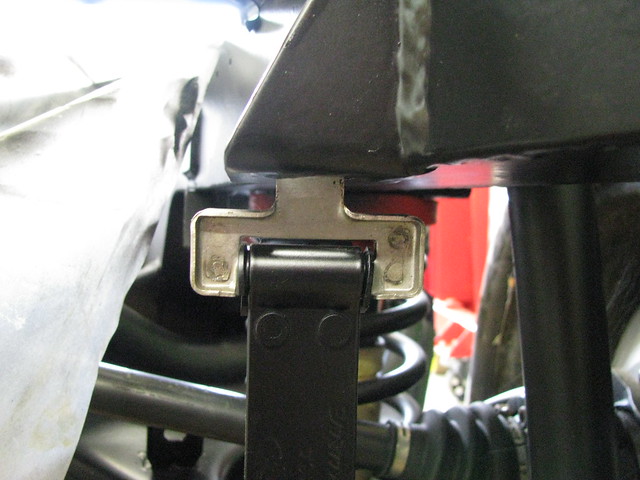 RH Fuel tank strap RH Fuel tank strap by marlinpeter, on Flickr
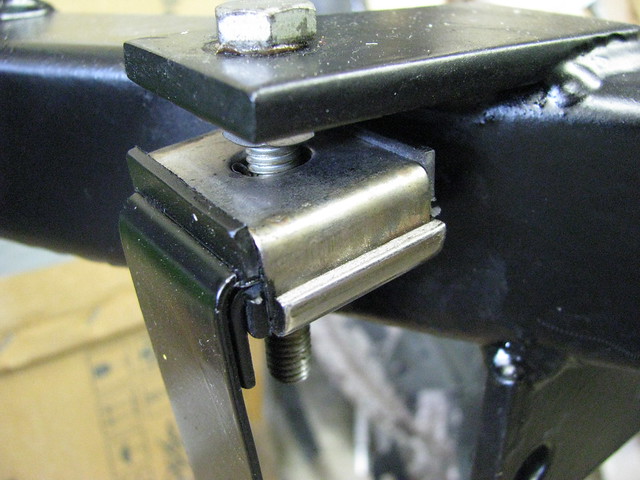 RH Fuel tank strap RH Fuel tank strap by marlinpeter, on Flickr
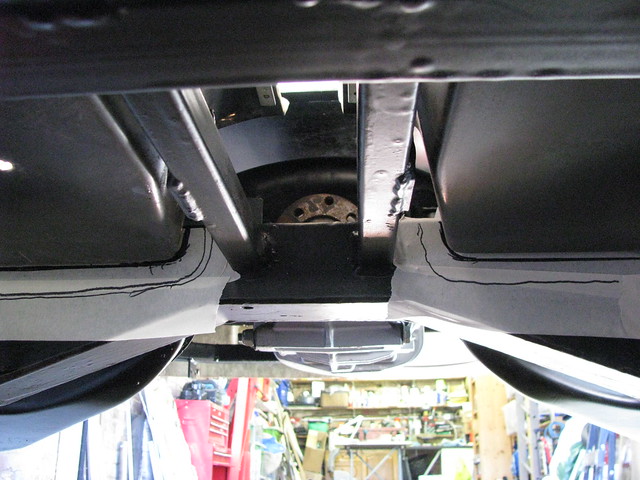
Finally, before completing the fuel tank fitting I decide to give the diff/final drive an oil change. There is no drain plug (as Ford didn't believe it needed changing before the Sierra body rusted away and the car was scrapped). I didn't fancy disturbing the real cover's seal so I used a syringe and short length of plastic windscreen washer hose to remove the old oil. There was very little swarf on the magnetic filler plug suggesting all is well. The old oil wasn't in bad shape and not black as I expected. It was more the colour of a good brown ale whereas the new stuff is a nice amber colour.
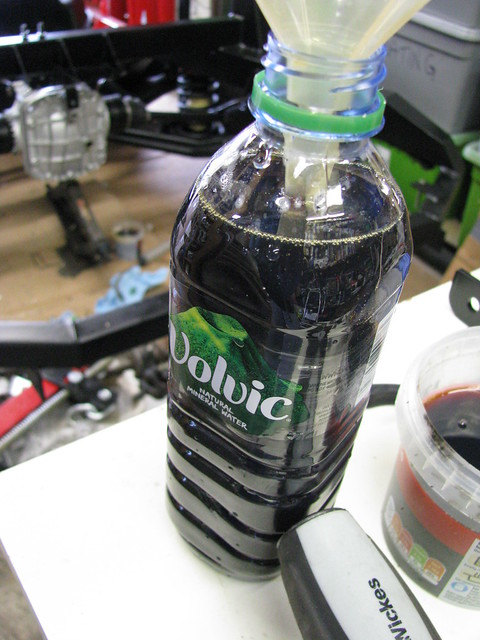 Diff oil change Diff oil change by marlinpeter, on Flickr
It looks a bit darker than it really was in this photo and it may have been unnecessary but as the oil is over 20 years old, it's one of those jobs that is worth doing while it's easy to do without crawling under the car.
Hopefully next weeks pictures will be a bit more interesting....
....peter
|
18th July 2015, 20:19
|
|
Senior Member
Enthusiast
|
|
Join Date: Mar 2005
Posts: 3,079
|
|
Weekly progress report.....
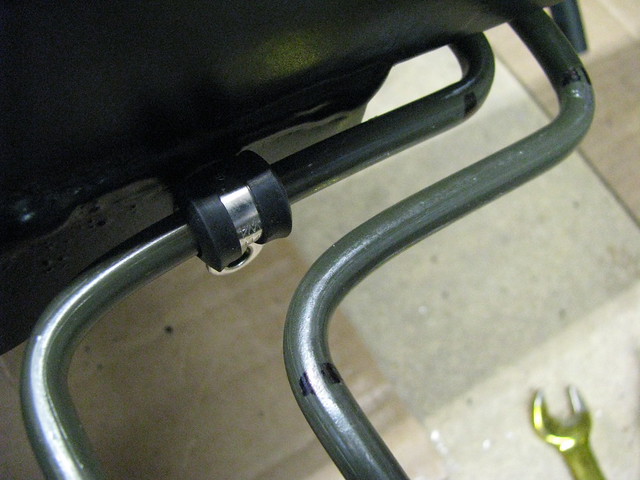
This week I made up a mounting bracket for the pre-pump fuel filter. A couple of stainless steel 'T bolt' hose clamps riveted to a strip of steel. These were amazing value at only £3.18 for both including postage! The trickiest part was drilling the holes in the SS hose clamps.
 Fuel filter mounting Fuel filter mounting by marlinpeter, on Flickr
It's now mounted above one of the rear drive shafts and is mounted so that the filter can be removed from beneath the car with all the bodywork fitted.
 Fuel filter mounting Fuel filter mounting by marlinpeter, on Flickr
I've now started on the fuel lines, photo's next week....
....peter |
26th July 2015, 20:11
|
|
Senior Member
Enthusiast
|
|
Join Date: Mar 2005
Posts: 3,079
|
|
Weekly progress report.....
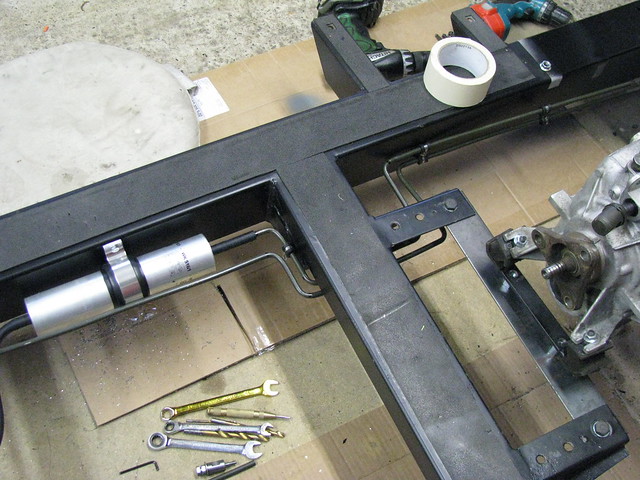
Work continued this week on installing the fuel lines...
 Fuel pipes to tank connections Fuel pipes to tank connections by marlinpeter, on Flickr
 Pre-pump filter Pre-pump filter by marlinpeter, on Flickr
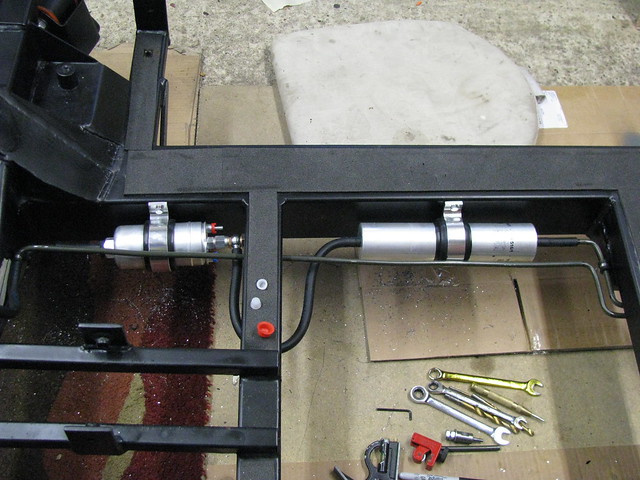 High Pressure pump and filter High Pressure pump and filter by marlinpeter, on Flickr
 Post Pump filter Post Pump filter by marlinpeter, on Flickr
For the flexible sections of the fuel system I'm using Cohline 2240 which is an FPM/ECO hose and it's even better than the so called 'R9' hose and can withstand 100% Ethanol. It's specified and used by BMW, VW, etc.
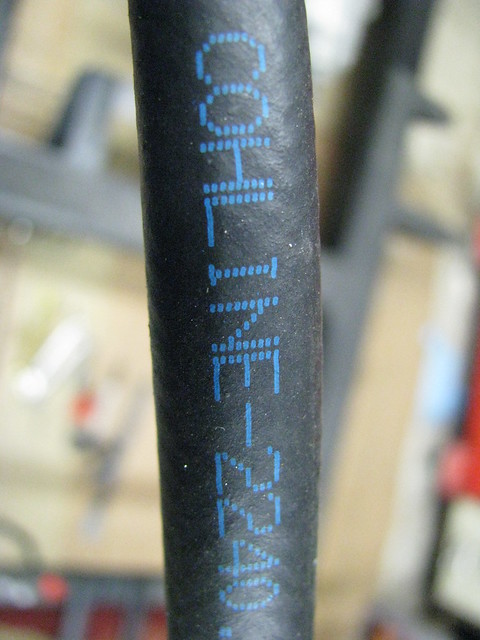 Rubber fuel hose Rubber fuel hose by marlinpeter, on Flickr
For the hard lines I'm using Poly-Vinyl Flouride (PVF) coated dual wall seamless steel fuel pipe. Steel pipes are resistant to corrosion from Ethanol in E10 petrol.
 Fuel pipes Fuel pipes by marlinpeter, on Flickr
The downside of steel fuel pipes, as we all know, have a tendency to rust from the outside and unfortunately the hand pipe bender I'm using has scratched the coating off in places. So once I'm happy with all the routing and mounting points, I'm going to strip it all off and give the pipes a coat of paint. I also need to de-burr all the ends and blow out any swarf before refitting with the hose clamps.
The installation of the fuel lines has taken longer than anticipated due to the rather torturous route needed to avoid chassis members and the body tub but I'm getting to the end and can start on the brake lines next....
...peter
|
27th July 2015, 21:44
|
|
Senior Member
Enthusiast
|
|
Join Date: Mar 2005
Posts: 3,079
|
|
Quote:
Originally Posted by peterux
The downside of steel fuel pipes, as we all know, have a tendency to rust from the outside and unfortunately the hand pipe bender I'm using has scratched the coating off in places. So once I'm happy with all the routing and mounting points, I'm going to strip it all off and give the pipes a coat of paint.
...peter
|
I've just taken another look at the spec for the steel fuel lines and found that beneath the PVF coating is a zinc plating layer so some scratches in the PVF coating may not be a big issue. For anyone interested this is the manufacturer...
http://agscompany.com/product-catego...s/poly-armour/
I've now left an offcut out in the rain to see how well it survives. |
28th July 2015, 20:35
|
 |
Senior Member
|
|
Join Date: Dec 2013
Posts: 839
|
|
Just read through your whole thread Peter for the first time with great interest, looking like a very through build and i like the detail you put into the research for the various parts fitted.
Keep up the great work and looking forward to the next update.
|
28th July 2015, 20:56
|
|
Senior Member
Enthusiast
|
|
Join Date: Mar 2005
Posts: 3,079
|
|
Quote:
Originally Posted by swifty
Just read through your whole thread Peter for the first time with great interest, looking like a very through build and i like the detail you put into the research for the various parts fitted.
Keep up the great work and looking forward to the next update.
|
Thanks for the feedback, Swifty. I'm glad you are enjoying my updates. |
11th August 2015, 12:11
|
|
Junior Member
|
|
Join Date: Aug 2014
Posts: 10
|
|
sorry peter, been offline for a bit - yes, I just used the standard sierra anti-roll bar. Didn't seem to cause a problem..!
|
11th August 2015, 12:16
|
|
Senior Member
Enthusiast
|
|
Join Date: Jan 2007
Posts: 932
|
|
Quote:
Originally Posted by lordivanhoe
sorry peter, been offline for a bit - yes, I just used the standard sierra anti-roll bar. Didn't seem to cause a problem..!
|
There are at least three, if not 4 different "standard" Sierra ARBs:
22mm
24mm
26mm
28mm
- as well as some having different crank shapes in the centre which can make a big difference depending on the engine you fit.
- do you kinow what diameter yours is? - and which donor it came from? |
11th August 2015, 12:42
|
|
Junior Member
|
|
Join Date: Aug 2014
Posts: 10
|
|
sorry..
Quote:
Originally Posted by Mike
There are at least three, if not 4 different "standard" Sierra ARBs:
22mm
24mm
26mm
28mm
- as well as some having different crank shapes in the centre which can make a big difference depending on the engine you fit.
- do you kinow what diameter yours is? - and which donor it came from?
|
Rats. Apologies, I just don't know and as you know don't have the car anymore... I do remember that the donor was an E-reg 2.0i sierra with the SOHC EFI engine, if that helps at all? |
|
Currently Active Users Viewing This Thread: 2469 (0 members and 2469 guests)
|
|
|
 Posting Rules
|
You may not post new threads
You may not post replies
You may not post attachments
You may not edit your posts
HTML code is Off
|
|
|
All times are GMT +0. The time now is 05:51.
|


 Linear Mode

