Are you madabout kit cars      
 "We've Got Kit Cars Covered" Information about Madabout-Kitcars.com Contact Madabout-Kitcars.com         Home of UK kit cars - madabout-kitcars.com Various kit car write ups All the latest kit car news Kit car related and general discussion

Search
Manufacturers
Kit Cars
Kit Car Data sheets
Picture Gallery
SVA Knowledgebase
Clubs & Communities
Build cost estimator
Kit cars for sale
Knowledge Base 
KitcarUSA.com
Classic-Kitcars.com
 

Go Back   Madabout Kitcars Forum > Mad Build Area > Vintage and Classic Roadster Kit Car Builds

Vintage and Classic Roadster Kit Car Builds For Vintage and Classic era kit cars. Post your build reports, problems and progress here

Reply
 
Thread Tools Display Modes
  #1  
Old 17th January 2018, 09:15
Amir Manzoori Amir Manzoori is offline
Member
 
Join Date: Jul 2014
Location: Ealing London
Posts: 54
Amir Manzoori is on a distinguished road
Default

Your improvisation is second to none. Good on you Peter.
Reply With Quote
Available from eBay
  #2  
Old 20th January 2018, 17:53
peterux's Avatar
peterux peterux is offline
Senior Member
Enthusiast
 
Join Date: Mar 2005
Posts: 3,079
peterux is on a distinguished road
Default

Quote:
Originally Posted by Patrick View Post
I like the 'torque wrench' nice work
Quote:
Originally Posted by Amir Manzoori View Post
Your improvisation is second to none. Good on you Peter.

Thanks, chaps. With hindsight (which is always a wonderful thing!) I could have made it more accurate by using a small ring spanner as I didn't take into account the weight of the adjustable but its done now.
Reply With Quote
  #3  
Old 20th January 2018, 18:45
peterux's Avatar
peterux peterux is offline
Senior Member
Enthusiast
 
Join Date: Mar 2005
Posts: 3,079
peterux is on a distinguished road
Default

Despite the cold weather, I've removed the body tub (again!!) which is now mounted on the trailer. I can now finish off the gearbox tunnel mods and prep the body tub before painting.

Gearbox tunnel by Sabrebuilder, on Flickr

I need to keep the body tub dry in the garage as it's prep'ed for paint so the chassis will have to live outside for a while.

Chassis under tarp by Sabrebuilder, on Flickr

( Note to self: a trip to the dump is overdue )

Gearbox tunnel mods need to be bonded on this side and finished.

Gearbox tunnel by Sabrebuilder, on Flickr

More next week....


...peter
Reply With Quote
  #4  
Old 27th January 2018, 20:15
peterux's Avatar
peterux peterux is offline
Senior Member
Enthusiast
 
Join Date: Mar 2005
Posts: 3,079
peterux is on a distinguished road
Default Getting my body into shape....

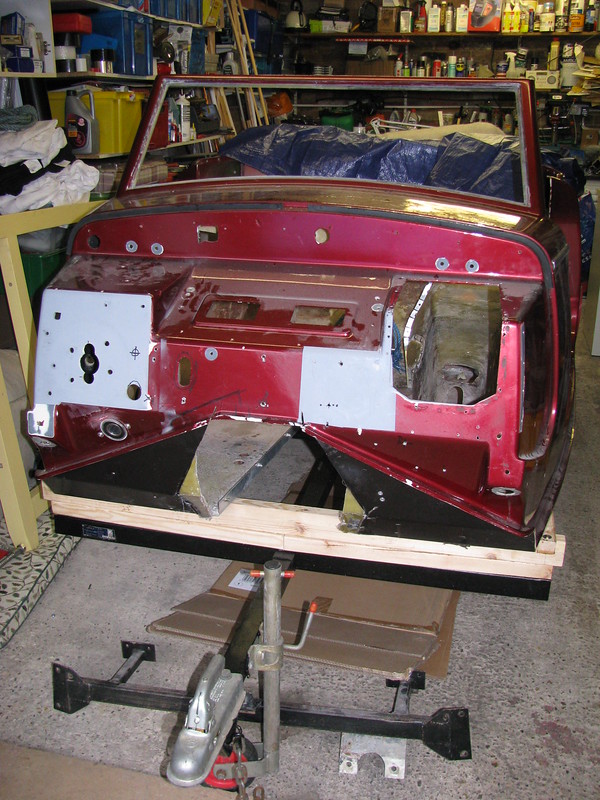
This weeks report is a miscellany of updates but all with the same aim of getting the body tub in shape for the paint bodyshop.

Following on from last weeks update I've done some more work on the gearbox tunnel reshaping.
I reinforced the gearbox tunnel mods by first grinding back the gelcoat on the surrounding bodywork and then bonding on a layer of chopped strand mat followed by a layer of tissue. I then sanded back, smoothed out with a skim of P38 filler and then sanded smooth. It will be finished off by the bodyshop.

Gearbox tunnel mods by Sabrebuilder, on Flickr

The modified gearbox tunnel jointing angle doesn't quite fit flush to the body. My original idea was to fill this gap with a closed cell foam strip but I wasn't happy about the size of the gap. So I covered the angle in parcel tape and filled the gap with body filler. When I finally fit the gearbox tunnel it will only need a thin smear of mastic sealant.

Gearbox tunnel mods by Sabrebuilder, on Flickr

Another small job was to enlarge the heater hose hole to take this rubber grommet.
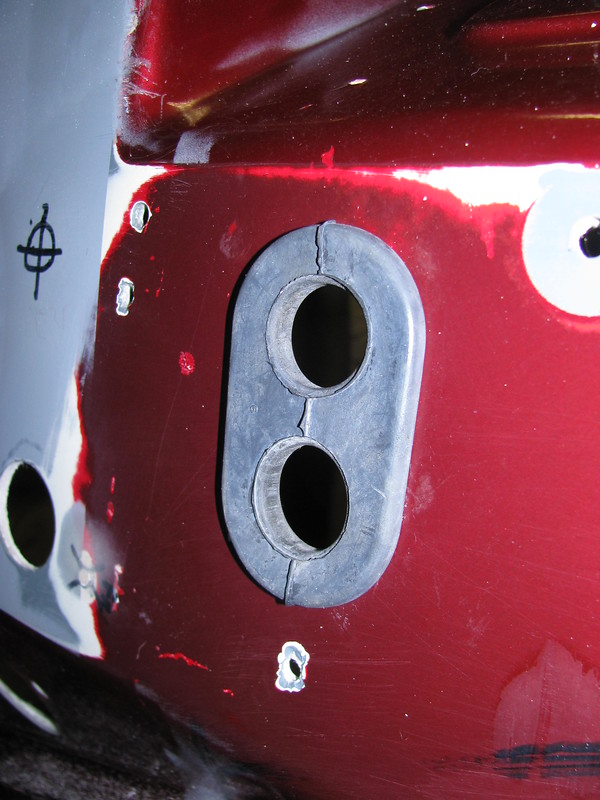
Heater Hose grommet by Sabrebuilder, on Flickr

And the bulkhead had this rather ugly hole where the OB had cut a hole for the loom connector.
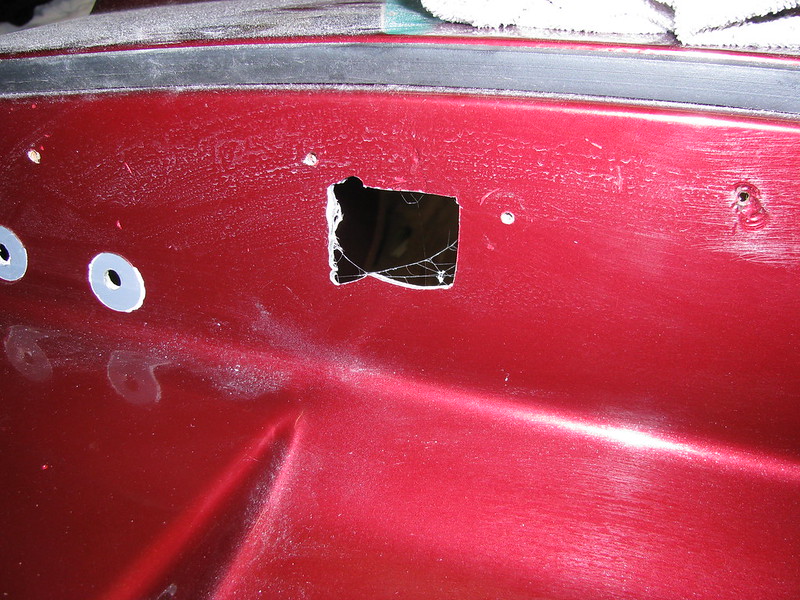
Body mods by Sabrebuilder, on Flickr

I have tidied up the hole by cutting a circular hole with a hole saw. An off-cut of MDF was screwed to the bulkhead to support the hole saw's central drill bit. The mounting holes will be filled and I'll fit a suitable grommet after the tub is painted.

Body mods by Sabrebuilder, on Flickr

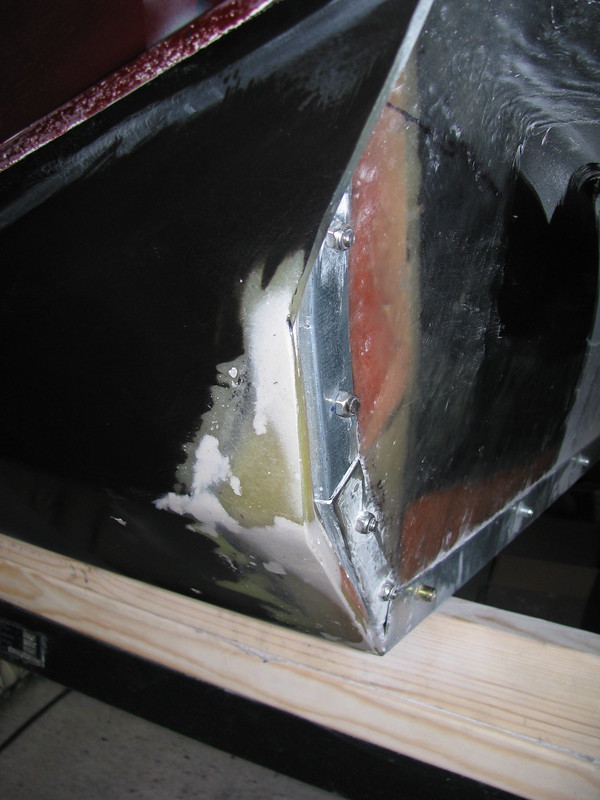
I then turned my attention to the windscreen surround sides which are supported by steel inserts. According to the Royale build manual these should be painted and then bonded to the GRP frame with body filler. On my car the filler has cracked and I wanted to see if the supports were still bonded securely.
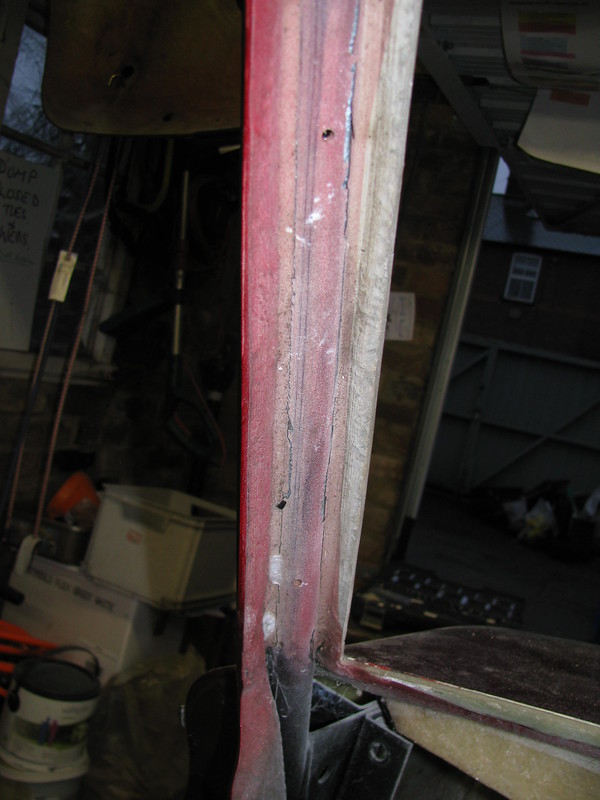
'A' Post steel by Sabrebuilder, on Flickr

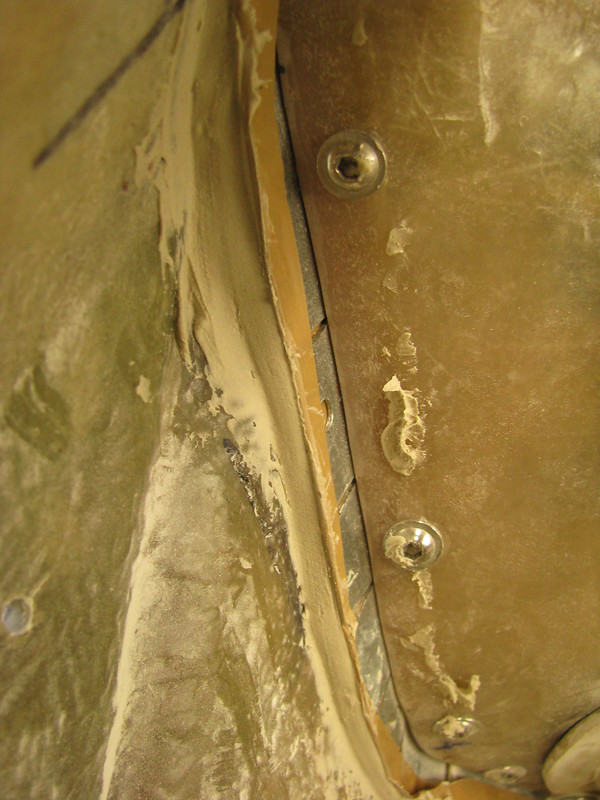
Close up of the cracks.

'A' Post steel by Sabrebuilder, on Flickr

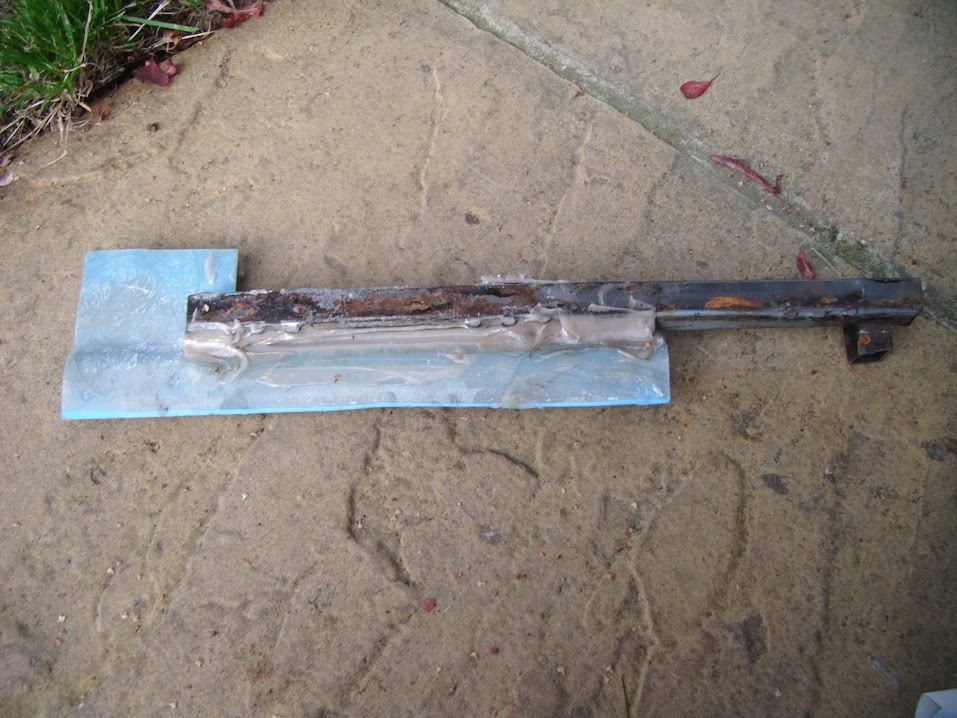
On the drivers side I had already removed the door hinge, so I cut out the filler with a plunge cutter multi-tool. The filler was really soft and came away easily. When I finished cutting out the filler, which only took about 5 minutes, the steel support fell out.
The bond between the steel and GRP had completely failed!!!!!!

'A' Post steel by Sabrebuilder, on Flickr

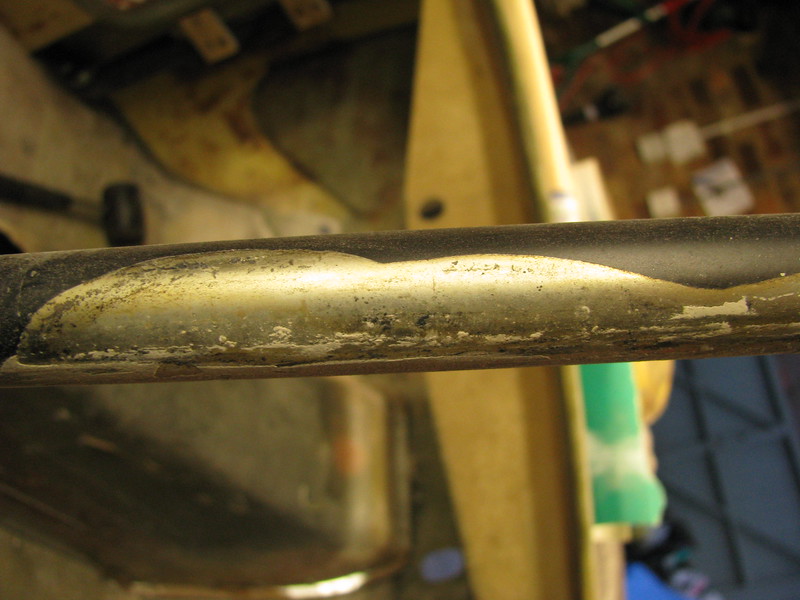
Here you can see the very little bonding used by the OB.

'A' Post steel by Sabrebuilder, on Flickr

And the bond between the 'A' post steel and the back of the hinge box had also failed.

'A' Post steel by Sabrebuilder, on Flickr

This photo shows where the windscreen surround steel bonding has failed.

'A' Post steel by Sabrebuilder, on Flickr

I'm thinking of using something like Tiger Seal to re-bond the 'A' post and windscreen surround but I'm open to expert advice


Hopefully more updates next week....

....peter
Reply With Quote
  #5  
Old 28th January 2018, 15:28
Paul L's Avatar
Paul L Paul L is offline
Senior Member
 
Join Date: Feb 2012
Location: Wembley, London
Posts: 5,058
Paul L is on a distinguished road
Default

peterux – Hi Peter,

I’m certainly no expert, but based on the advice of others on here, I bought some bonding paste from Glasplies.


This works with a catalyst, in a similar way to fibreglass resin.

This was a test piece I did to stick metal to fibreglass and it was rock solid.


I used the bonding paste to join my bodyshell to the inner framework.

But I also used Tiger Seal to close any small gaps that were left.

Hope that helps, Paul.

PS
Not really sure why I haven’t posted on your thread before?

As it is a very meticulous build with great attention to detail and problem solving.

Good luck.
Reply With Quote
  #6  
Old 28th January 2018, 19:35
peterux's Avatar
peterux peterux is offline
Senior Member
Enthusiast
 
Join Date: Mar 2005
Posts: 3,079
peterux is on a distinguished road
Default

Hi Paul,
many thanks for your feedback, but I had a 'free' day today and the weather was quite mild so I was keen to crack on whilst my motivation was high.

I found a couple of tubes of this stuff in my 'come-in-handy-one-day' box and a quick check on the manufacturers website confirmed it was suitable for bonding GRP to steel (amongst many other things). I can't remember why I bought it but its seemed to be suitable so I've used it on the first side.

Polyurethane Adhesive/filler by Sabrebuilder, on Flickr

The first side is setting over night so I'll see how strong it is tomorrow.....


....peter

P.S. I've watched your car building and I'm amazed at what you achieved on a slopping front drive. It's a great looking little car, well done!!
Reply With Quote
  #7  
Old 29th January 2018, 12:22
MartinClan's Avatar
MartinClan MartinClan is offline
Senior Member
Enthusiast
 
Join Date: Sep 2004
Posts: 1,897
MartinClan is on a distinguished road
Default

That stuff looks idea as it remains flexible once cured (according to the data I read). One of the main problems and causes for failure when bonding disimilar materials is their different expansion rates so a flexible addhesive has got to be a good bet.

Cheers, Robin
Reply With Quote
Reply


Currently Active Users Viewing This Thread: 2627 (0 members and 2627 guests)
 

Posting Rules
You may not post new threads
You may not post replies
You may not post attachments
You may not edit your posts

BB code is On
Smilies are On
[IMG] code is On
HTML code is Off

Forum Jump


All times are GMT +0. The time now is 16:42.

copyright © madabout-kitcars.com 2000-2024
terms and conditions | privacy policy