|
|
| Tribute Automotive Builds Discuss your Tribute kit build |

6th February 2013, 07:12
|
 |
Senior Member
|
|
Join Date: Jan 2013
Location: Germany
Posts: 188
|
|
I'm surprised how great it looks,
awesome I like that.
|
6th February 2013, 18:24
|
 |
Senior Member
Enthusiast
|
|
Join Date: Nov 2005
Location: Cheshire
Posts: 404
|
|
Nick, now you are just showing off!
This car is going to look truely magic. I look forward to seeing the finished article at stoneleigh.
|
6th February 2013, 19:34
|
 |
Senior Member
|
|
Join Date: Nov 2011
Location: Emsworth
Posts: 810
|
|

JG, Chargerstang and Bigrich thankyou! By endurance we conquer ! 
I took a run down to Dorset today to Tribute workshop to collect my replacement bonnet. Chris and Dan were very welcoming and also sorted me out with some other bits and pieces. Many thanks for making it so quickly, and sorry for taking up so much of your afternoon.... 
The workshop and yard were packed with cars in all stages of build, from the moulds, to ones being laminated, new projects underway, finished bodies and the finished MX250C.  Like most cars this one looks so much better in the flesh than in pictures.
Heres a few pics from today...
[IMG] 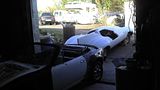 [/IMG]
A Jaguar D-type shell awaiting collection.
[IMG] 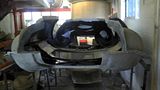 [/IMG]
An A352 in black gell coat awaiting its GRP:
[IMG] 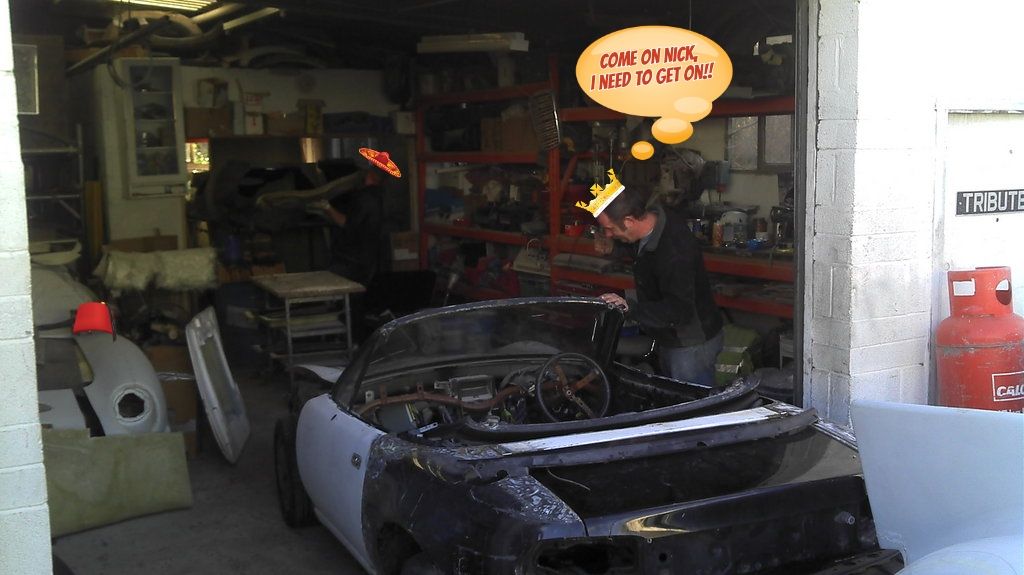 [/IMG]
Main workshop and Artisans!!
Tributes workshop is sited on a garage and I happened to meet with the owner who has been running the garage for 60 years! He is in his early eighties but still enjoys cycling to and from work, and servicing cars. He draws the line at Dual mass flywheels but has just serviced a nice Austin A35.
Here is the MOT bay:
[IMG] 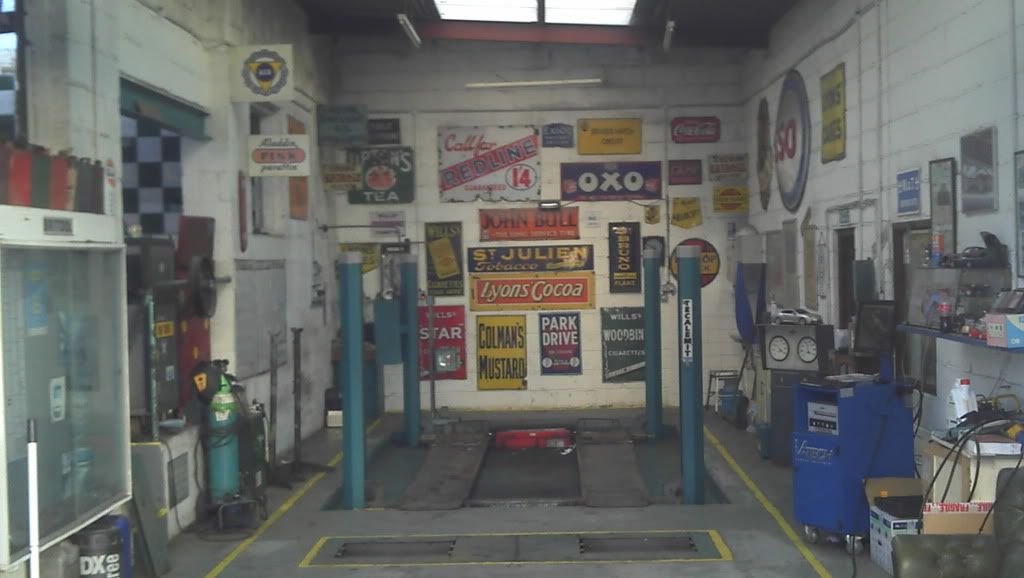 [/IMG]
Last edited by seanick; 6th February 2013 at 19:54..
|
6th February 2013, 20:57
|
|
Member
|
|
Join Date: Dec 2012
Posts: 75
|
|
Hi Nick have a look at this one ebay.com/ebaymotors/1962-FERRARI-GTO-replicar-PROJECT-/390537472159?pt=US_Cars_Trucks&hash=item5aedd8e89f #ht_29582wt_1161
|
6th February 2013, 21:20
|
|
Senior Member
|
|
Join Date: Nov 2011
Location: Emsworth
Posts: 810
|
|
The link did not work for me but its ebay number 390537472159
MMmmmmm, thats interesting, and plenty of pics to look at. I dont like his choice of bonnet shut line.........
Thanks,
N
|
6th February 2013, 21:35
|
 |
Senior Member
|
|
Join Date: Oct 2010
Posts: 1,622
|
|
Thanks for covering my bold spot up Nick! You could have given Dan a funny hat too, he's always wearing that Sombrero, it keeps the dust out of his eye's.
Good to see you today and thanks for the biscuits  |
7th February 2013, 22:39
|
|
Senior Member
|
|
Join Date: Nov 2011
Location: Emsworth
Posts: 810
|
|
 Bit of a long afternoon/evening. I wanted to get my new bonnet in whilst I have room so removed all the flanges from the body and feathered the edges. Chris had not made the lip on the new bonnet so that just needed feathering. Set it up upside down and ran a couple of battens over the join and fitted some self tapper to hold it in p;lace. Turned it over then fitted ply strips over the join with closely spaced self tappers to pull the bonnet and wings nicely in line. The ply is parcel taped on the inside so it does not stick (ok I forgot to do one bit!)
[IMG] 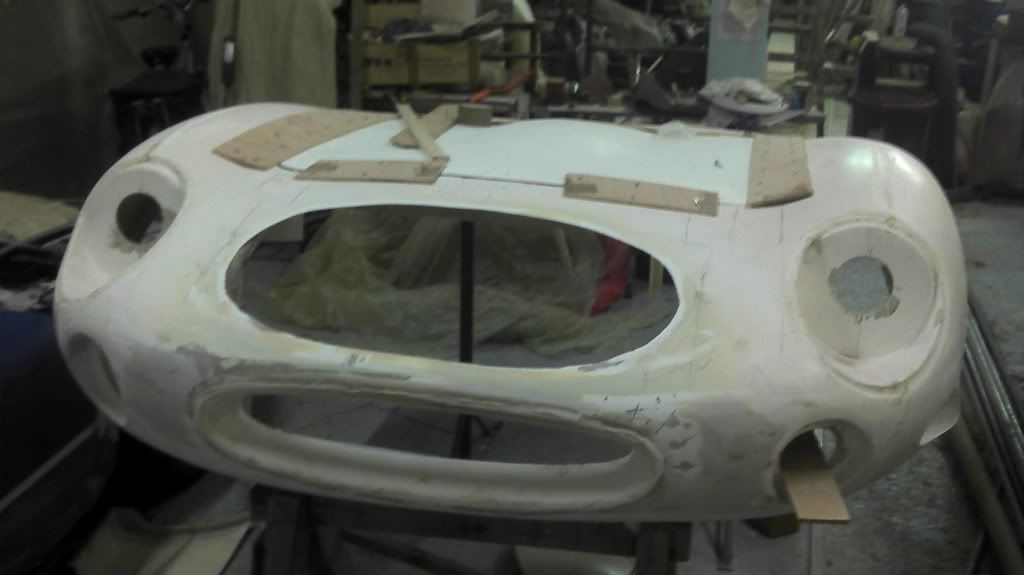 [/IMG]
Anyway all ready to turn ang glass in place, but I started to look again at where I had blocked off the vents. There was a 'hard spot' at the top of the vents where the slope changed. This is not noticable with the vents in place but to lose it properly would mean a lot of filler. So I thought sod it, its got to go...on the grounds of weight! marked it out and cut out an oval....Gulp.
[IMG] 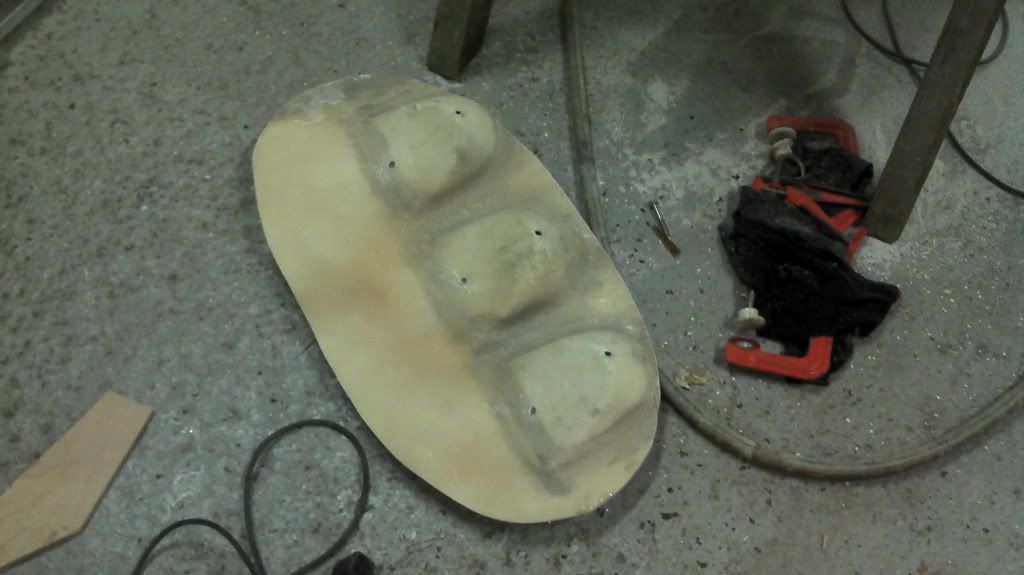 [/IMG]
[IMG] 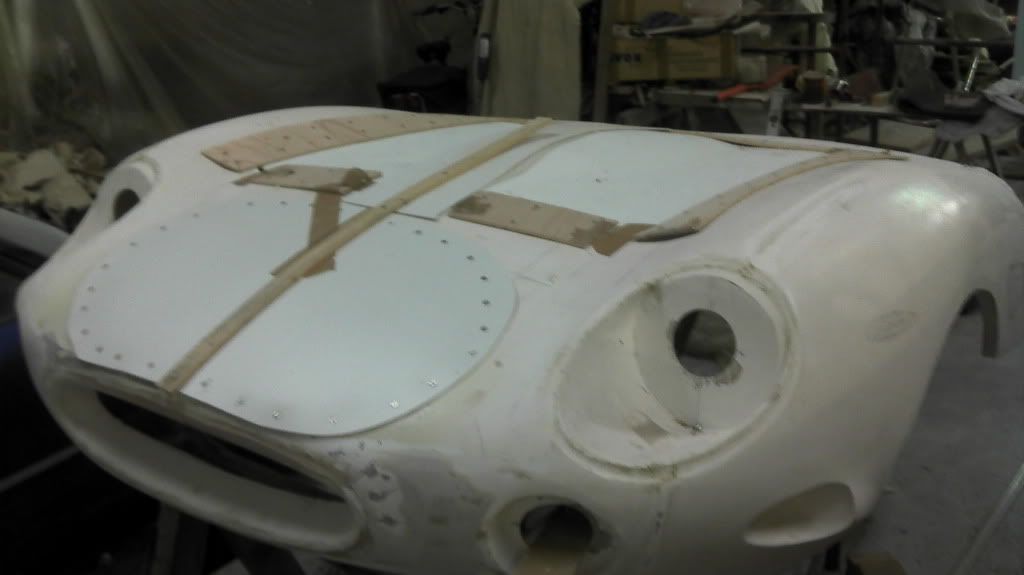 [/IMG]
Feathered the edges and fastened a layer of smooth foam plastic stuff over the top. starting at the bottom and working my way equally around the sides as its a compound curve. A bit of a bubble at the top, but a small slit layed the panel flat enough.
Turned the bonnet over, put on two coats of flow coat (ran out of gel) and glassed in a few layers, plus a foam core to stiffen things up bit. Well you never know, some model may want to drape herself over the bonnet...........
[IMG] 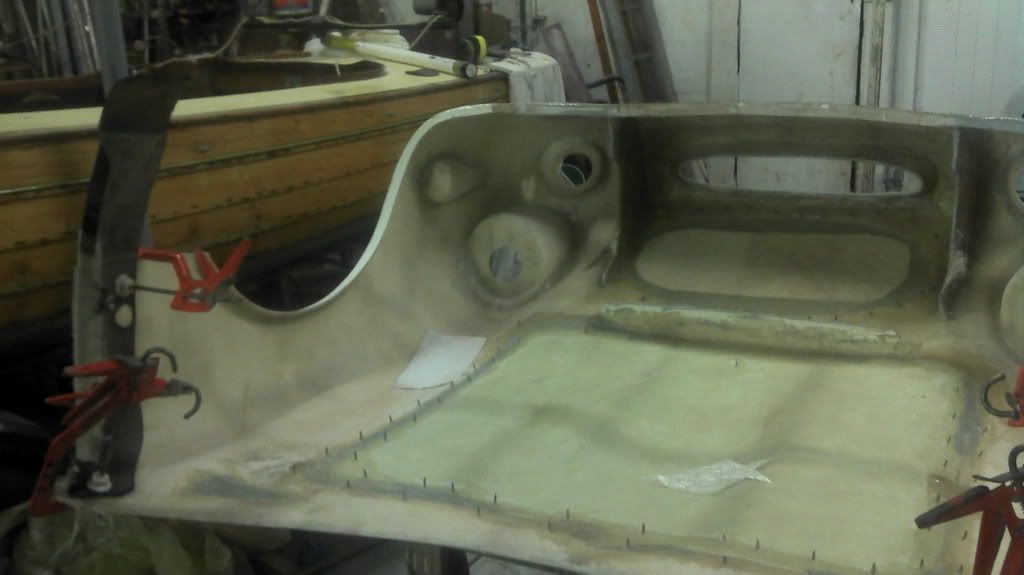 [/IMG]
Glassed in the bonnet, but only one layer as I ran out of CSM. By this time it was very late but then had another idea!!!
[IMG] 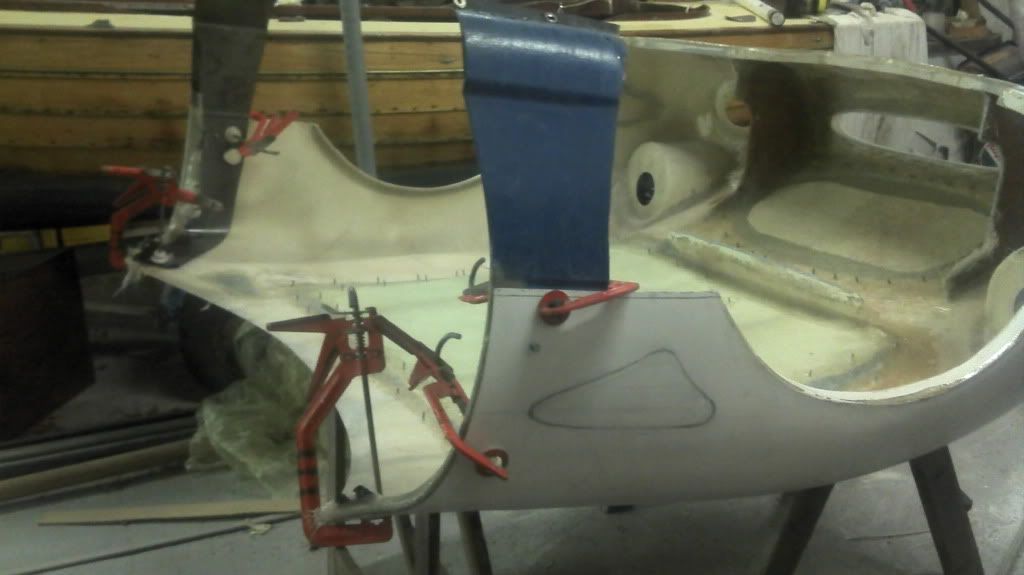 [/IMG]
Put a couple of layers of matt on the wing edges, then put the old steel wings on, located by the tech-screw holes from before. folded the glass around the wing edge, and if the wing pops off tomorrow I should have nice wing returns. If they line up with the door I'll eat my hat!!
Pics to follow from phone....
Last edited by seanick; 7th February 2013 at 22:53..
Reason: pics
|
9th February 2013, 20:59
|
|
Senior Member
|
|
Join Date: Nov 2011
Location: Emsworth
Posts: 810
|
|
'Live' workshop report
After a wet aftenoon at Goodwood, watching Escorts going sideways, and flipping quick to, its time for the steel frame to get glassed in..
I have added some thin still pads at the only hard spot to prevent crazing later.
[IMG] 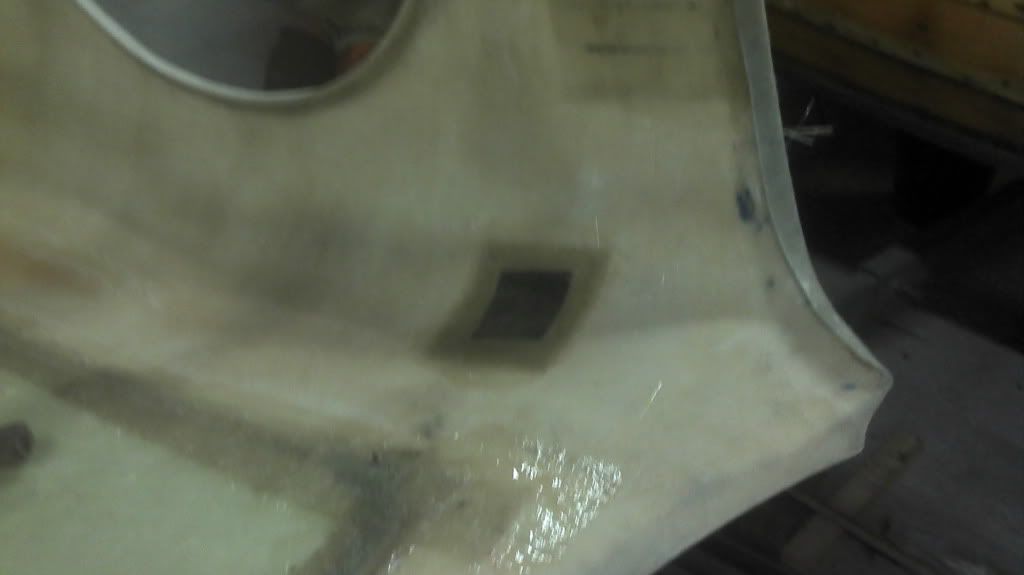 [/IMG] |
9th February 2013, 21:28
|
|
Senior Member
|
|
Join Date: Oct 2010
Posts: 1,622
|
|
Glassing around those screws can be a pig can't it 
You haven't modified the roof skin yet Nick, you're slipping!  |
9th February 2013, 22:27
|
|
Senior Member
|
|
Join Date: Nov 2011
Location: Emsworth
Posts: 810
|
|
The frame is now glassed in with two layers. Just got glass under the return for the new shut line. Tomorrow it gets fitted for good. Well, if you know what I mean!
Chris, I need the number of your physiciastist, or maybe I just l need to learn to spell shrink ?

[IMG] 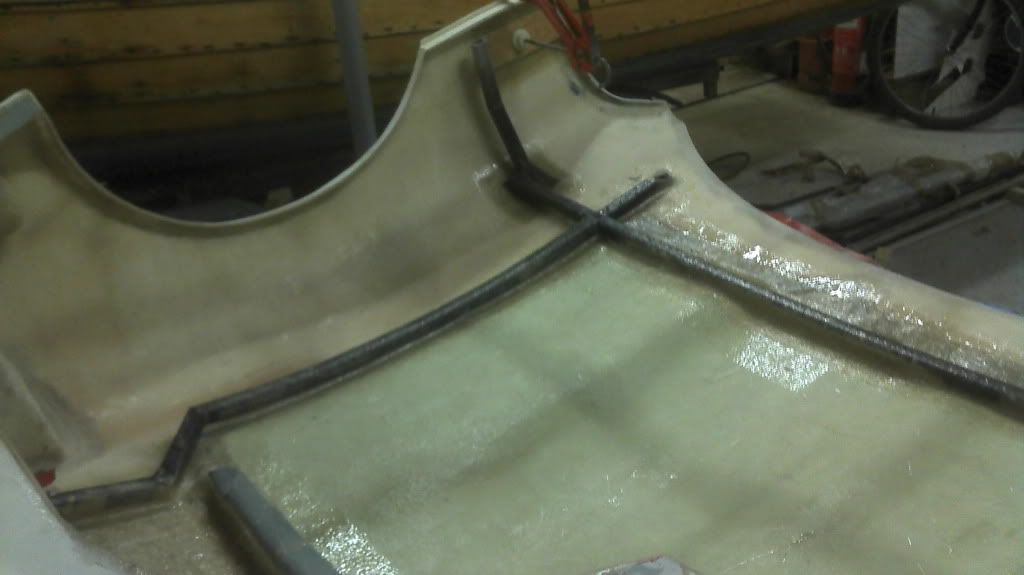 [/IMG]
Hell I know how to spend my saturday nights!![IMG]  [/IMG]
Last edited by seanick; 9th February 2013 at 22:30..
|
10th February 2013, 21:27
|
|
Senior Member
|
|
Join Date: Nov 2011
Location: Emsworth
Posts: 810
|
|
[IMG] 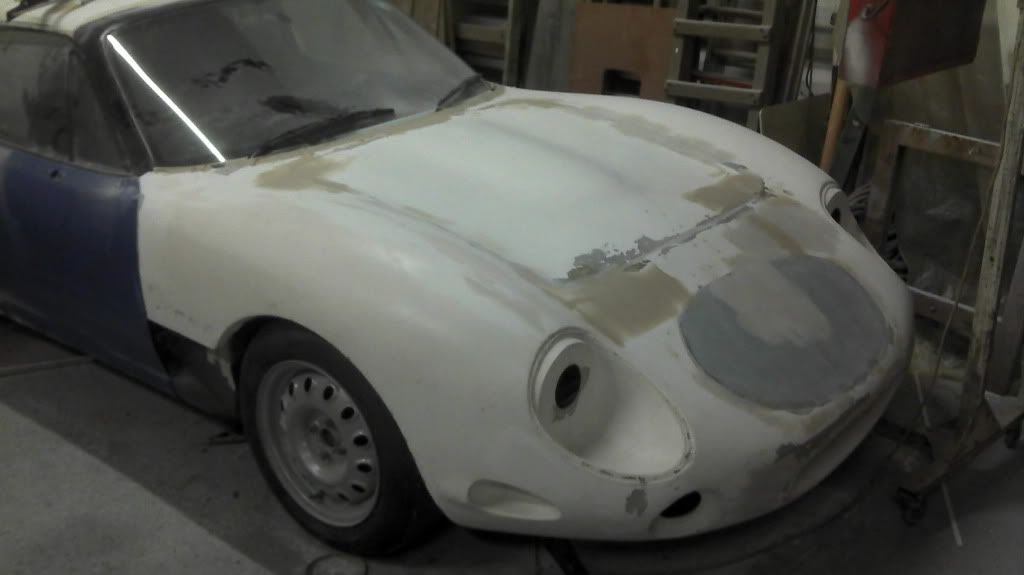 [/IMG]
Mixed results this eve. Bonnet fitted, and gaps on the doors are ok. Time came to cut the bonnet lip back to give clearance for the wipers. My lovely chrome wipers are of course taller than the Mazda ones, which would mean chopping back further than the original bonnet, which would look pants!
Therefore my compromise for now is to fit the original wipers and I will get the steel bits chromed.
Anyway, heres a pic.
I have sprayed the black bit white, and am forming a small lip hence the mess!
The point at which the front of the bonnet is not fair by anymeans. I am thinking how I can fix that without too much filler.
FOR SALE two chrome (well polished stainless) wiper arms and adaptors. Adaptors have been drilled, tapped and tapered to fit Mazda spindles. All new. £25 plus P&P.
Last edited by seanick; 10th February 2013 at 21:41..
|
10th February 2013, 21:32
|
|
Senior Member
|
|
Join Date: Oct 2010
Posts: 1,622
|
|
|
10th February 2013, 21:55
|
|
Senior Member
|
|
Join Date: Nov 2011
Location: Emsworth
Posts: 810
|
|
Inhale polyester 4 times per day, and you will be fine!
|
10th February 2013, 21:58
|
|
Senior Member
|
|
Join Date: Dec 2012
Location: Alton, Hampshire
Posts: 451
|
|
Nick, if the wipers will fit a standard build I'll take them mate
|
10th February 2013, 22:06
|
|
Senior Member
|
|
Join Date: Nov 2011
Location: Emsworth
Posts: 810
|
|
They are 15" long. The adaptors are the one Chris recommends but I have improved them. They will need extending as per standard build.
|
11th February 2013, 19:20
|
 |
Senior Member
|
|
Join Date: Feb 2012
Location: Wembley, London
Posts: 5,058
|
|
SeaNick - I finally got round to "borrowing" my daughter's homework PC to watch your bonnet video. 
( My own computer now refuses to play video clips at all these days.  )
You are doing a great job and thanks for all the photos and explanations, they are a big help.
Good luck, Paul. 
|
13th February 2013, 21:18
|
|
Senior Member
|
|
Join Date: Nov 2011
Location: Emsworth
Posts: 810
|
|
Right, had enough, going home now. Spent the last couple of eves working on the front. It now closes onto the catch, which release from inside. Door gaps are okay and nearly there. Started to fit the lower wing sections too, drilling out the broken wing bolts. In between that I have been filling and fairing the bonnet. Thankfully I have now run out of filler. The whole front works well as Chris intends it, but as I have removed the bonnet and vents its been bit of a challenge to get the whole lot to run together as I would like. As well as closing ones eyes and running ones hand over offending areas (!) I also use a batten as this gives you a bigger.....picture!
Off to supper now. Photos when I get home.
Thanks Paul, I enjoy your detailed posts. Keep going!
|
13th February 2013, 21:40
|
|
Senior Member
|
|
Join Date: Nov 2011
Location: Emsworth
Posts: 810
|
|
[IMG] 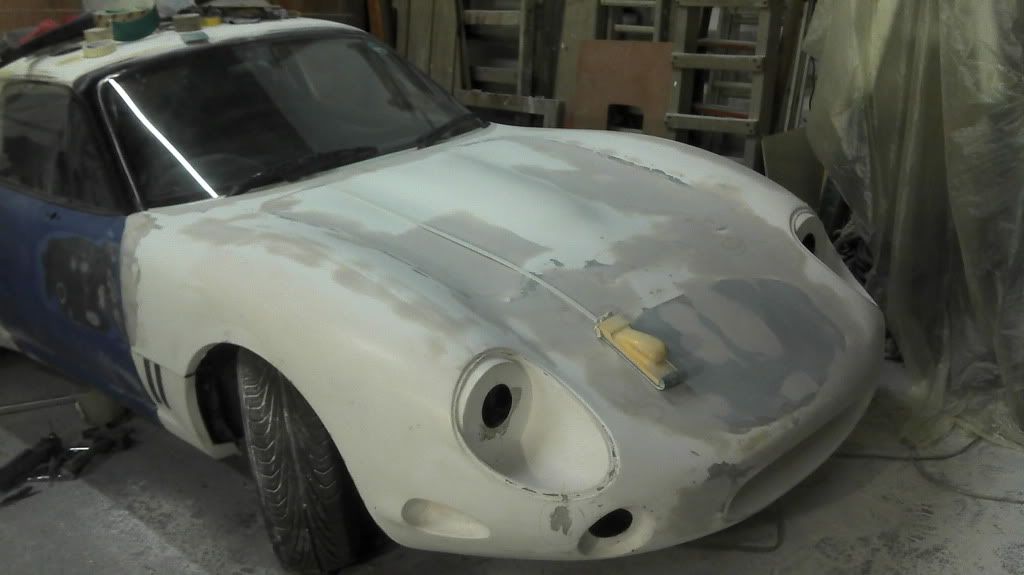 [/IMG]Right, had enough, going home now. Spent the last couple of eves working on the front. It now closes onto the catch, which release from inside. Door gaps are okay and nearly there. Started to fit the lower wing sections too, drilling out the broken wing bolts. In between that I have been filling and fairing the bonnet. Thankfully I have now run out of filler. The whole front works well as Chris intends it, but as I have removed the bonnet and vents its been bit of a challenge to get the whole lot to run together as I would like. As well as closing ones eyes and running ones hand over offending areas (!) I also use a batten as this gives you a bigger.....picture!
Off to supper now. Photos when I get home.
N
[IMG]  [/IMG] |
15th February 2013, 20:37
|
 |
Senior Member
Enthusiast
|
|
Join Date: Sep 2005
Location: Northampton, UK
Posts: 1,891
|
|
I'm not building one, nor do I have any plans to do so - but I just have to post that I can't wait for your updates on this Seanick - the willingness to invent new stuff and depart from the constraints of the supplied parts is brilliant.
Hats off to you! |
16th February 2013, 08:04
|
 |
Senior Member
|
|
Join Date: Sep 2011
Posts: 1,446
|
|
Quote:
Originally Posted by GreatOldOne

I'm not building one, nor do I have any plans to do so - but I just have to post that I can't wait for your updates on this Seanick - the willingness to invent new stuff and depart from the constraints of the supplied parts is brilliant.
Hats off to you! |
think there are lots of admirers on here that feel same way.... |
|
Currently Active Users Viewing This Thread: 4 (0 members and 4 guests)
|
|
|
 Posting Rules
|
You may not post new threads
You may not post replies
You may not post attachments
You may not edit your posts
HTML code is Off
|
|
|
All times are GMT +0. The time now is 21:27.
|


 Linear Mode

