|
|
| Tribute Automotive Builds Discuss your Tribute kit build |

7th February 2017, 17:24
|
|
Senior Member
|
|
Join Date: Nov 2015
Posts: 278
|
|
Good progress jag.... Keep going keep going!
|
7th February 2017, 18:03
|
 |
Senior Member
|
|
Join Date: Nov 2014
Location: Norwich, Norfolk
Posts: 412
|
|
Glad to see you're back on it. I'll be following progress again.
Bob.
|
13th February 2017, 18:08
|
 |
Senior Member
|
|
Join Date: Jan 2014
Location: Egham, Surrey
Posts: 1,780
|
|

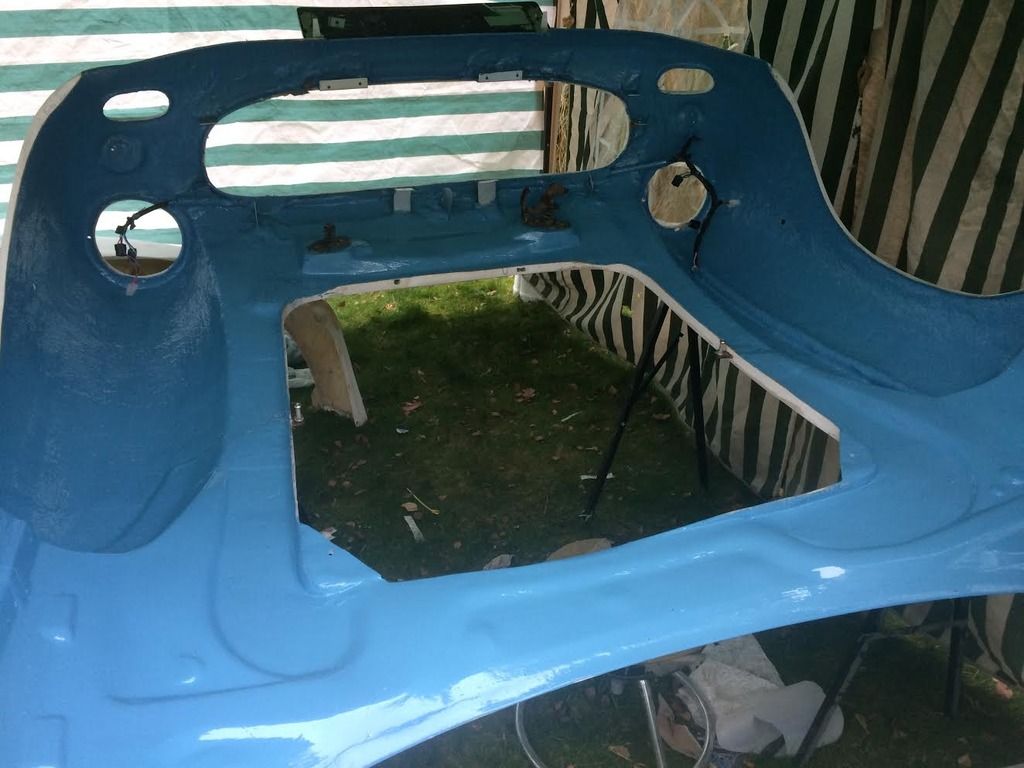
No pictures today because some numpty put his camera in the boot before fibreglassing it closed. Doh!
My boot lid hangs over the rear panel by about a cm. I had put a slice previously and re glassed it when it was clamped with a couple of ratchet straps but it didn't make much difference.
I came to the conclusion that it may be down to the fact that I have opted for the far superior and better looking internal boot hinges! Nobody else has reported any problems in this area. I took the belt sander to the lip on the top of the boot and levelled it all up plus a bit more so I could try and move the boot lid back to try and make it sit flush at the back. Again a small improvement but no enough.
I then covered the bottom of the boot ld with duct tape to prevent GRP paste sticking to the lid including the return. I then did the same to the closing section (where the striker plate sits). trimmed it of fish to the bodywork. I then built up the rear body section with GRP paste using the lower section of the boot as my guide. Just before it went hard I ran a stanly knife along the join.
It has worked pretty well and now the rear body has exactly the same profile as the boot lid and it has also given me a much better closure gap.
I also built up the passenger door skin to close the gap at the top to allow the fitment of s window rubber.
This gave me plenty of time to continue sanding the rest of the body shell because the GRP took ages to go off due to the cold even though I had put extra hardener in the mix to help it go off.

|
17th February 2017, 09:38
|
|
Senior Member
|
|
Join Date: Jan 2014
Location: Egham, Surrey
Posts: 1,780
|
|
Lucas L539 lights
Just ordered a set of 6 lights from Tim Hodgekiss for £165 inc post. A pair each of clear, amber and red.
Now that I have them I have found that the clear lens light that was going to be used as a front indicator has a double filament bulb so it can be used as a sidelight and indicator. I'm going to fit this to the rear with the amber lens and will wire up the "brake" filament to the reversing lights, ok they will be amber but better than nothing. I have also wired up a couple of white bulbs into the rear reflectors as reversing lights but wouldn't have bothered if I had know the light had a double filament.
So for anyone else
L539 lights
Amber single filament bulb
clear double filament bulb
red double filament bulb
|
20th February 2017, 18:13
|
|
Senior Member
|
|
Join Date: Jan 2014
Location: Egham, Surrey
Posts: 1,780
|
|
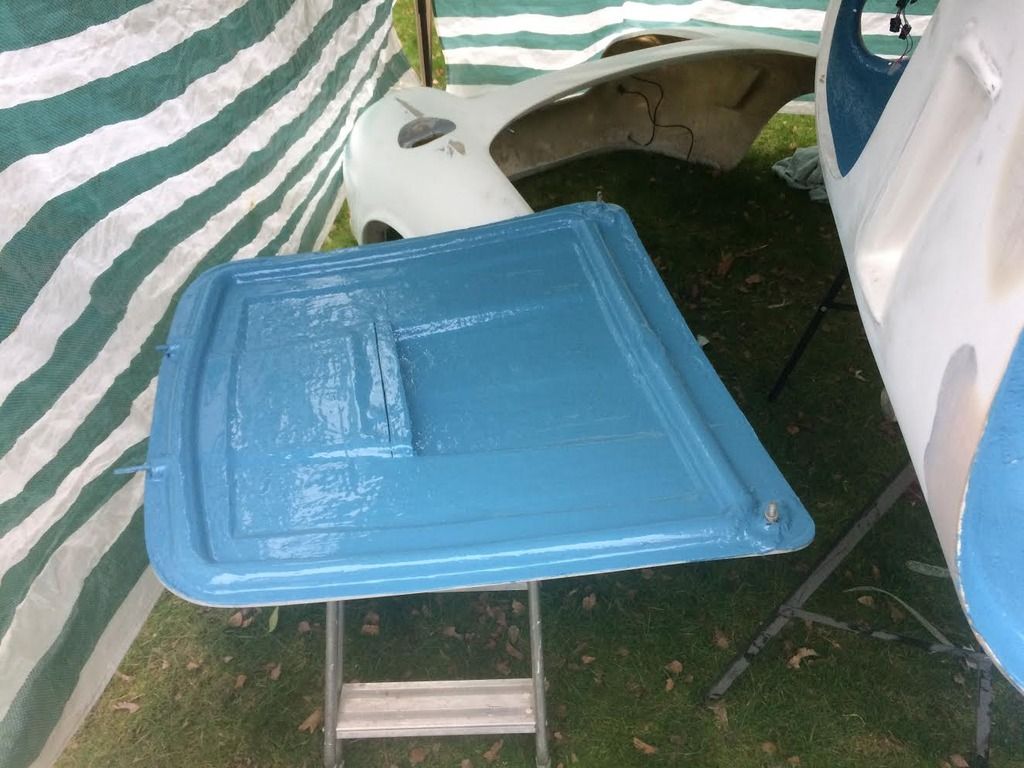
Slow progress, lots of filling and rubbing down. I have built up the area under the boot lid and it looks much better. I have also given the boot and bonnet 2 coats of reface and rubbed it all down. Very pleased with the result but am not going to say too much in case it all goes tits up when the final coat goes on. Took 1/2 litre to do both panels, 2 coats, doesn't go very far. Almost finished the rear and front sections ready for the polyester coat. Just the bloody doorskins to do which are going to be the hardest. Thought I would leave them to last, if I started with them I might sell it and buy a Nissan Micra! 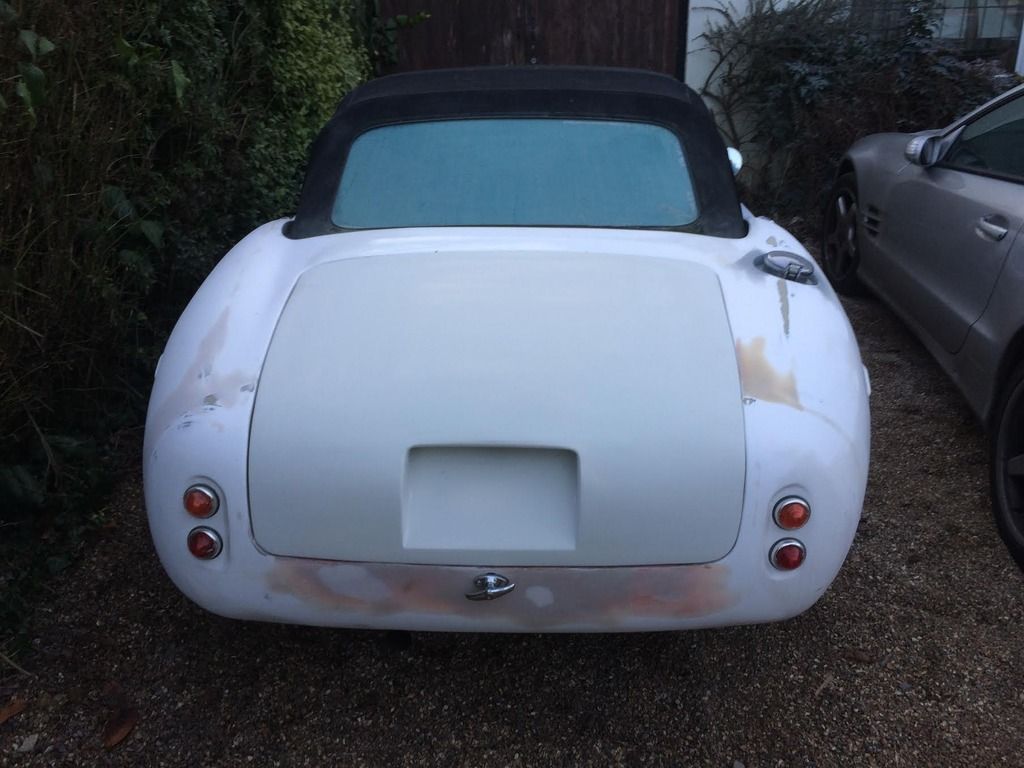 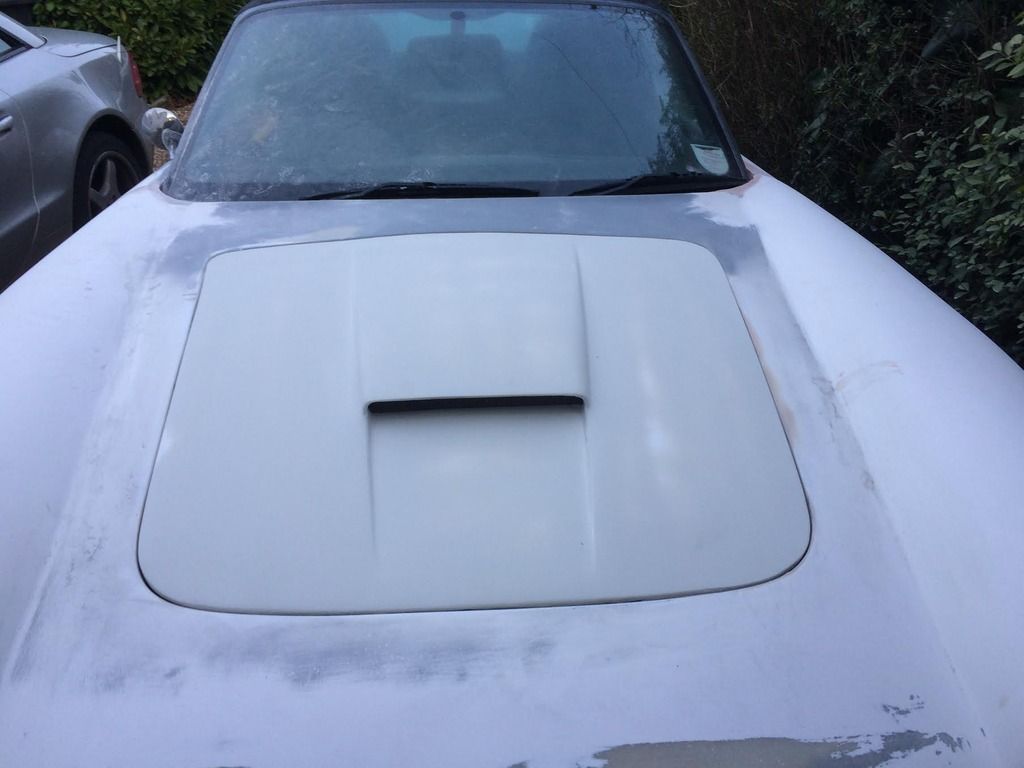
Boot gaps are better than in the picture but not worth lining it all up and it's going to be on and off more times than a whore's knickers!
Last edited by Jaguartvr; 20th February 2017 at 18:19..
|
27th February 2017, 15:53
|
|
Senior Member
|
|
Join Date: Jan 2014
Location: Egham, Surrey
Posts: 1,780
|
|
Not sure
I bought some aluminium slots to fit the brake ducts when I was at Stoneleigh last year. I have been toying what to do with them. When I opened them up they turned out to be chrome. I had decide to fit the same stainless mesh behind them as is in the front bonnet aperture, I was going to route out a recess at the back to fit the mesh but can't now do that as the are chromed steel.
Plan B
I carefully trimmed the mesh to size and then stuck a 1.5mm gasket around the edge so it would all sit flush and was very pleased with the result
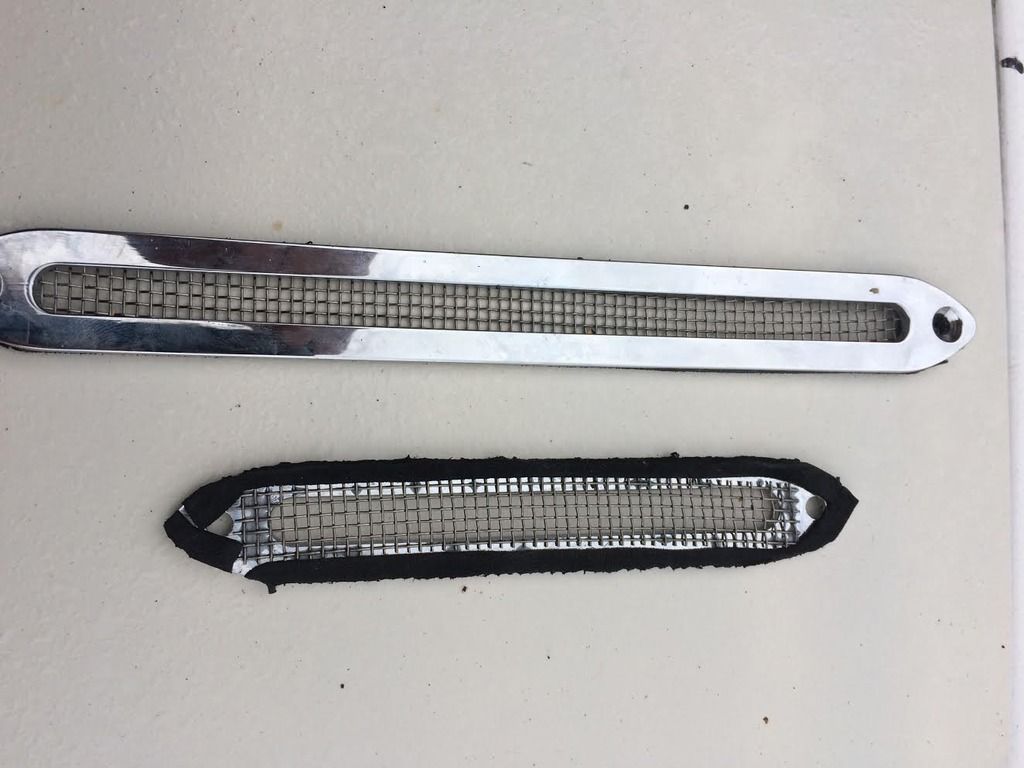
However I'm not sure if I like them on the car
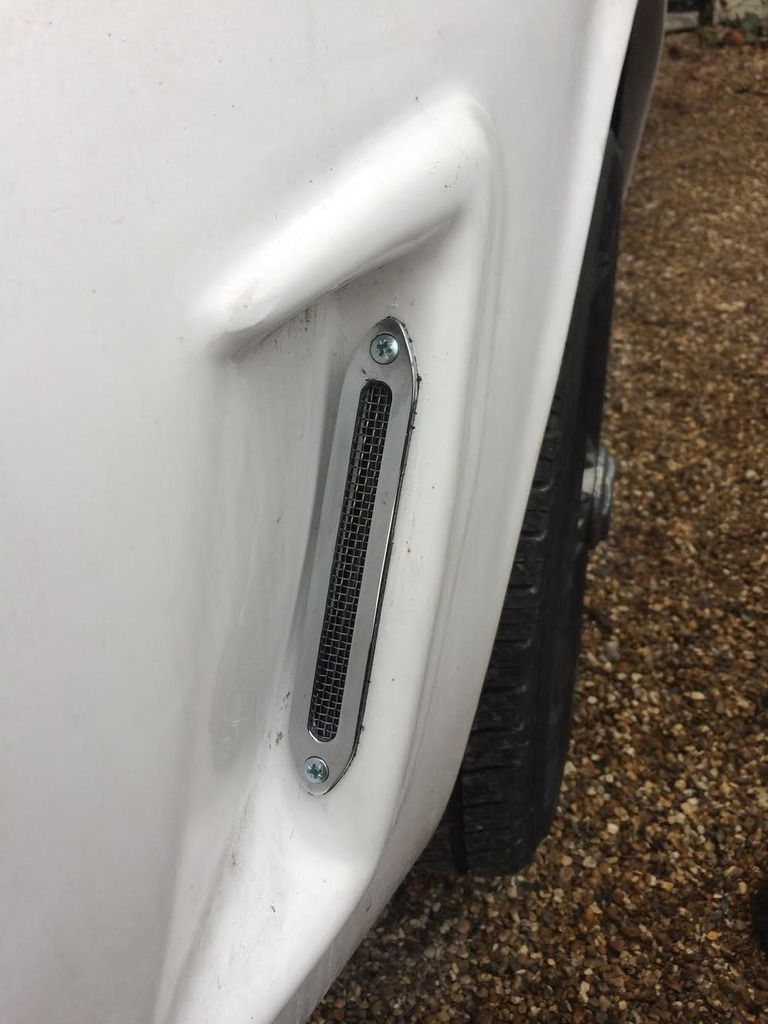
Do they look a bit like a boy racer add on bought from Ebay?
I'm not keen on the bare slots as I think they make it look a bit unfinished |
27th February 2017, 15:57
|
 |
Senior Member
|
|
Join Date: Apr 2016
Location: Camberley
Posts: 972
|
|
If you could route them out so more of the black grill showed?
|
27th February 2017, 16:02
|
|
Senior Member
|
|
Join Date: Nov 2014
Location: Norwich, Norfolk
Posts: 412
|
|
I think they look fine.
The problem now is you are just focused on that one tiny bit of the car. When it's finished and painted they will look a small, nicely finished off part of an overall picture.
I took my front ones off for paintwork then panicked that I'd riveted them back on upside down as they are handed. I've not looked again or given it any thought.
Bob.
Last edited by hurnleft; 27th February 2017 at 19:55..
|
27th February 2017, 16:18
|
|
Senior Member
|
|
Join Date: Jan 2014
Location: Egham, Surrey
Posts: 1,780
|
|
The black behind the grill is my trusty black felt pen!
These fit the same either way round so I can't cock them up. The front duct is larger than the rear and both fit just about perfectly.
Sometimes less is more so was a bit worried that I might be overdoing it.
Getting very close to painting so I need to nail down some details.
|
27th February 2017, 18:48
|
|
Senior Member
|
|
Join Date: Aug 2012
Posts: 2,148
|
|
Quote:
Originally Posted by Jaguartvr

The black behind the grill is my trusty black felt pen!
These fit the same either way round so I can't cock them up. The front duct is larger than the rear and both fit just about perfectly.
Sometimes less is more so was a bit worried that I might be overdoing it.
Getting very close to painting so I need to nail down some details.
|
Sometimes, less is more ! |
4th March 2017, 20:32
|
|
Senior Member
|
|
Join Date: Jan 2014
Location: Egham, Surrey
Posts: 1,780
|
|
Been progressing nicely with my home spraying. Doors, boot and bonnet primed in reface. Have now had notification from next door that they are knocking their house down in the next two week for a rebuild. There is going to be dust everywhere so I need to pull my finger out.
Professional spray both set up in the rear garden (gazebo)
Professional heating system ( gas patio heater)
Full filtration system (fold back panels)
What could possibly go wrong?
|
5th March 2017, 10:04
|
|
Senior Member
|
|
Join Date: May 2013
Posts: 748
|
|
Quote:
Originally Posted by Jaguartvr
Been progressing nicely with my home spraying. Doors, boot and bonnet primed in reface. Have now had notification from next door that they are knocking their house down in the next two week for a rebuild. There is going to be dust everywhere so I need to pull my finger out.
Professional spray both set up in the rear garden (gazebo)
Professional heating system ( gas patio heater)
Full filtration system (fold back panels)
H
What could possibly go wrong?
|
I painted my first mx250 in a gazebo, go for it. |
8th March 2017, 16:53
|
|
Senior Member
|
|
Join Date: Jan 2014
Location: Egham, Surrey
Posts: 1,780
|
|
Guess the new colour!
Out in the gazebo today, sorry the professional spray booth! A coat of flow coat to the inside of the front clam and a coat to cover the dark blue on the small bonnet. I gave the bonnet a good clean with meths to get rid of the wax from the previous for coat. All looks very much neater. I can confirm that light blue matches very well with green grass and a green gazebo. Someones going to be in trouble when you know who spots it.
I also cut some alloy brackets to hold the grill and grill surround. I have fitted the spots to these brackets so they double up for holding the spots and surround. I now only need 1 small screw in the underside of the surround to hold it firmly.
As soon as the flow coat is dry I will flip the bonnet and give it a couple of coats of reface and am then having a go at priming it before refitting everything to drive it to the painter.
I think I am going to cut the slots in the wing vent and fix stainless mesh behind. Sort of a compromise. |
10th March 2017, 13:46
|
|
Senior Member
|
|
Join Date: Jan 2014
Location: Egham, Surrey
Posts: 1,780
|
|
2 coats of Reface on the front clam. I bought a cheap gun from Ebay for about £20 with a 2.5 nozzle. The Reface tech sheet says 2.0>3.0, I have a reasonable compressor with a 150 litre tank but it is hobby rather than pro. It takes a while for the paint to come out of the gun, in hindsight I think the 3.0 nozzle would have been better. Saying that it's gone on ok and is baking now. It was 60f this morning and my small space heater has brought the temperature up in the gazebo to just over 80f.
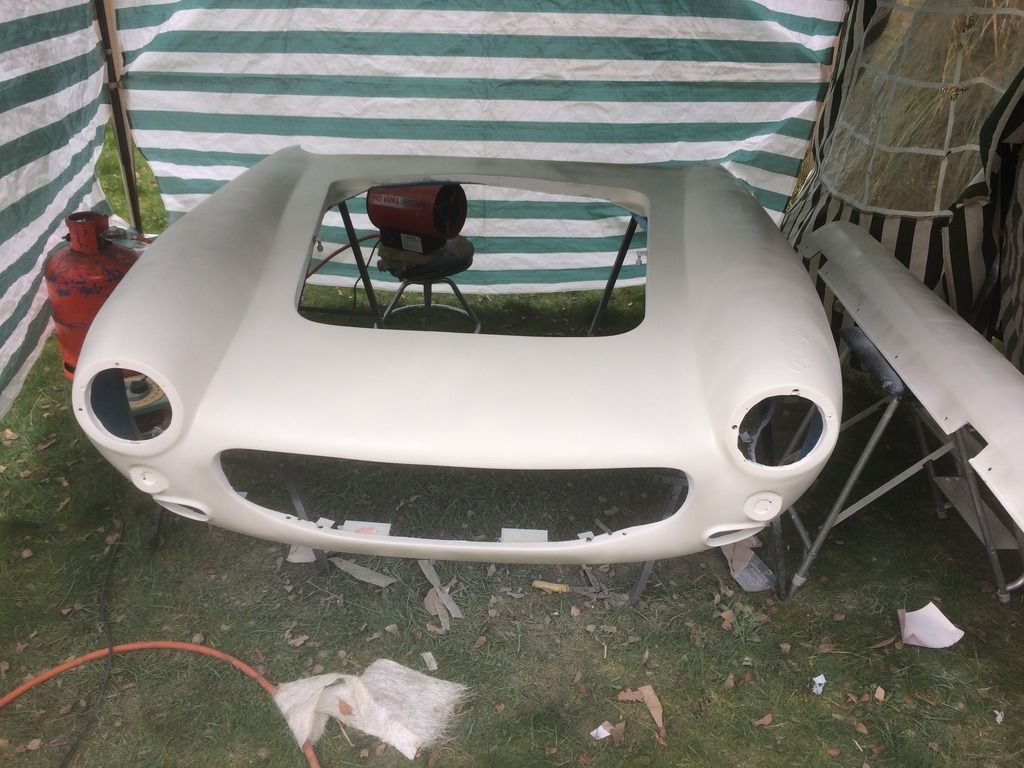
Now all I've got to do is get the paint of you know who's food mixer before she gets back from work, otherwise i'll be sleeping in the gazebo tonight. Hope to get it flatted down tomorrow and a coat of primer filler on over the weekend.
I was pleasantly surprised by how little filler I had to use, most of the shaping was sanding down the gel coat rather than building it up with filler. Being white it is very hard to see low and high spots so I found the best way was to close my eyes and do it by feel. This can be quite boring so just imagine you are giving Liz Hurley a breast exam. It's surprising how thorough you can be, looking forward for another go as soon as the paint is dry!
Last edited by Jaguartvr; 10th March 2017 at 13:50..
|
12th March 2017, 11:26
|
|
Senior Member
|
|
Join Date: Jan 2014
Location: Egham, Surrey
Posts: 1,780
|
|
Primer filler painted yesterday, I was using the 2.5 nozzle cheap gun I used for the reface. I was a bit worried as they recommend a 1.8>2.0 nozzle. Good news is that it went on perfectly, good coverage and no runs. I fact it went on so well I'm tempted to do the top coat as well, but I know that if I do I will only fcuk it up.
I have been spraying the inside of the gazebo with the remaining thinners in the gun that I leave in it when not in use, this kills any bugs or flies. Then pull back 2 flaps when spraying to keep the mist down. As soon as I have finished spraying, drop the flaps and fire up the space heater. So far all my panels have come out very well with no flies or bugs landing in the wet paint which I have always found a problem.
I would suggest that if anyone buys a kit that they ask for the gel coat to be any colour other than white. It has been very hard to see any imperfections or low/high spots, same with the recoat. As soon as the grey primer filler was applied everything became much easier to see.
Last edited by Jaguartvr; 12th March 2017 at 16:07..
|
15th March 2017, 17:38
|
|
Senior Member
|
|
Join Date: Jan 2014
Location: Egham, Surrey
Posts: 1,780
|
|
Coat of reface has been rubbed down and 2 coats of primer filler sprayed on. Bonnets, door skins all flatted back, rear,boot and sills hopefully to be flatted off tomorrow. Each time you finish a couple more defects seem to appear. Off tho the painter on Monday, whats the betting I get a great deal of sucking of teeth and rolling of eyes!
Grill surround has gone off to be chrome vacuum plated.
Last edited by Jaguartvr; 15th March 2017 at 17:40..
|
15th March 2017, 17:44
|
|
Senior Member
|
|
Join Date: Jan 2014
Location: Egham, Surrey
Posts: 1,780
|
|
I hope not, he is a friend who paints all my bike panels. I've bought the paint and hopefully done 95% of the hard work. Can't possibly be more than £40......can it?
With the rear end being off I have looked again at the petrol filler tube. At one point it bows slightly upward, I think I can route it better so it is all downwards. The flexible pipe is wire reinforced (CBS) and has a concertina effect, I have ordered some
smooth boat petrol pipe, hopefully this will speed up refuelling. I will report back when fitted and trialled.
Last edited by Jaguartvr; 15th March 2017 at 17:57..
|
15th March 2017, 22:06
|
|
Senior Member
|
|
Join Date: Aug 2012
Posts: 2,148
|
|
Quote:
Originally Posted by Jaguartvr
Coat of reface has been rubbed down and 2 coats of primer filler sprayed on. Bonnets, door skins all flatted back, rear,boot and sills hopefully to be flatted off tomorrow. Each time you finish a couple more defects seem to appear. Off tho the painter on Monday, whats the betting I get a great deal of sucking of teeth and rolling of eyes!
Grill surround has gone off to be chrome vacuum plated.
|
Who is doing your grill surround ? |
15th March 2017, 22:47
|
|
Senior Member
|
|
Join Date: Jan 2014
Location: Egham, Surrey
Posts: 1,780
|
|
Friend of a friend, nudge nudge wink wink.
He did quite a few Triumph motorcycle radiator grills for me.
I'll wait to see how this one comes out and how much he charges and if good I'm sure I can get a few done.
He does them on the basis that he can do them when there is room in the machine (& crispy £ notes).
|
16th March 2017, 08:24
|
|
Senior Member
|
|
Join Date: Feb 2015
Posts: 678
|
|
Very keen to see how the surround comes out. Local company does the spray chrome thing but not vac plate - what do the DNA guys do?
I still need to sort mine, powder coat grill and fit spot lights (but need brackets as holes are in the wrong place)
Last edited by smash; 16th March 2017 at 08:37..
|
|
Currently Active Users Viewing This Thread: 1 (0 members and 1 guests)
|
|
|
 Posting Rules
|
You may not post new threads
You may not post replies
You may not post attachments
You may not edit your posts
HTML code is Off
|
|
|
All times are GMT +0. The time now is 03:29.
|


 Linear Mode

