|
|
| Miglia Builds and discussion Miglia bodied builds |

19th July 2015, 13:05
|
 |
Senior Member
|
|
Join Date: Aug 2013
Location: Brisbane, Australia
Posts: 284
|
|
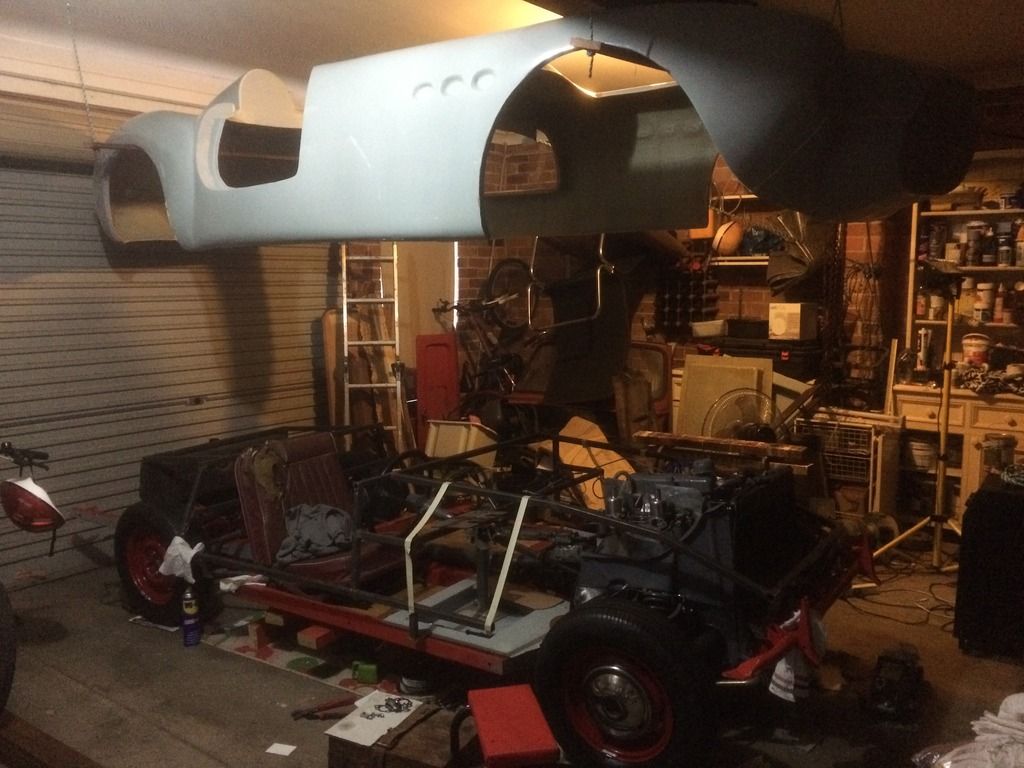
I've had another crawl around and a few more mental notes. I must say that the gear lever extension that mike supplied is the perfect length. I'll need to consider changing to a later model rocker cover to get that height down. Anyone done this? The rear frame mount points are a little uneven: I may simply shim one side.
I've spent some time in the seat and stuck on some instrument placings too! But the steering wheel will need moving up and out so that will change in time.
|
19th July 2015, 16:26
|
 |
Senior Member
|
|
Join Date: Nov 2013
Posts: 143
|
|
looking at that front 3/4 shot the rear bulkhead support bar looks very low to me , again no expert on the Miglia frame but I would have expected the body to drop down and sit on that 'goalpost' bar putting the seat belt mounts into the top outside area of the cockpit rear , ie , just behind your shoulder. Perhaps Davecymru can jump in here but if the body could drop to that height would that possibly sort out the front height issue too ? Is your inner wing area sat on the frame ? Is your steering support area , the front goalpost under the dash anywhere near being sat right under the front bulkhead ? Thats where I would expect it to be , but cannot stress enough that I am familiar with the Sammio concept and not the Miglia , so it may be different.
|
19th July 2015, 16:30
|
|
Senior Member
|
|
Join Date: Nov 2013
Posts: 143
|
|
I would be tempted to chop those front support legs right off , let the front of the frame drop and see how that changes things , re instating the support legs later when you know therir correct length and changing them to pickup with a mounting point on the chassis , maybe an angle iron style bracket mounting to the rail behind the front tube and bolting horizontally through the rail ?
|
19th July 2015, 22:07
|
 |
Senior Member
|
|
Join Date: Dec 2013
Posts: 839
|
|
Just caught up with your build 1iTim and congratulations on the arrival of the body.
The fun now begins and the figuring out of how to make things fit is what makes these builds unique. By the looks of it the finish on your tub looks a million dollars compared to what i started with so definitely a lot less work required as i have just spent 8 whole hours rubbing the shell down to try and aim for a good finish and still have to do it all again twice over, oh happy days.
Looking forward to see the rest of your build with plenty of photos i hope.
|
23rd July 2015, 20:01
|
|
Senior Member
|
|
Join Date: Nov 2013
Posts: 143
|
|
Quote:
Originally Posted by EL PRIMER

Having spoken to Mike recently , the kits are very much still available
|
Further to this , I visited Mikes neighbour in the unit 3 doors down this evening . Although it was well after hours and Mikes unit was locked up for the night , there are 3 Miglia frames sat outside looking like they have recently been delivered by his fabricator. So , I have seen physical evidence of the kits still being produced. |
23rd July 2015, 20:58
|
|
Senior Member
|
|
Join Date: Aug 2013
Location: Brisbane, Australia
Posts: 284
|
|
Hi all, may be crass talking costs but if any Aussies are reading this and weighing up the costs it cost me just under $5k Australian to get the crate of parts from door to door.
T
|
23rd July 2015, 23:15
|
|
Member
|
|
Join Date: Dec 2014
Location: Worcester
Posts: 59
|
|
 Miglia Kits and Mike Still Available
Quote:
Originally Posted by EL PRIMER
Further to this , I visited Mikes neighbour in the unit 3 doors down this evening . Although it was well after hours and Mikes unit was locked up for the night , there are 3 Miglia frames sat outside looking like they have recently been delivered by his fabricator. So , I have seen physical evidence of the kits still being produced.
|
Yes they are available I just took delivery of my subframe last week. Although Mike is doing other things he is available and can be caught during the day. Happy days for me, its on with my next phase, I might get my body on before the winter set in, which will leave me the cold months to trim and flatten ready for final painting next spring. |
24th July 2015, 07:54
|
|
Senior Member
|
|
Join Date: Dec 2013
Posts: 169
|
|
Well, that is good news - I might still be able to get a receipt from him then, so I can register mine. Wish he would reply to calls, texts and emails though...sigh...
|
24th July 2015, 14:15
|
|
Senior Member
|
|
Join Date: Aug 2013
Location: Brisbane, Australia
Posts: 284
|
|
|
24th July 2015, 14:16
|
|
Senior Member
|
|
Join Date: Dec 2013
Posts: 169
|
|
Indeed Tim - good to see progress for all our cars :-)
But $5k shipping - wow, you guys down South sure have it tough. The car will be worth it though - I think all of us who have embarked on these builds love the look of these cars, and I guess we know they will cost us far more than our original budgets - part of teh fun :-)
|
25th July 2015, 09:47
|
|
Senior Member
|
|
Join Date: Aug 2013
Location: Brisbane, Australia
Posts: 284
|
|
For sure Marc. Transit was factored in but the aud tanked and what was 60 p to the dollar became 45, and parity with the U.S. became 70c. Bit of a nightmare.
But, today was hoisting the body to its temporary home near the roof which I saw on someone's thread and thought a great idea.
I've seen several people cut a bit of the rear frame out to put the tank in. If it goes in backwards that's not needed. Anyone tell me if this is a fundamental error that I'm not seeing the problems with this?
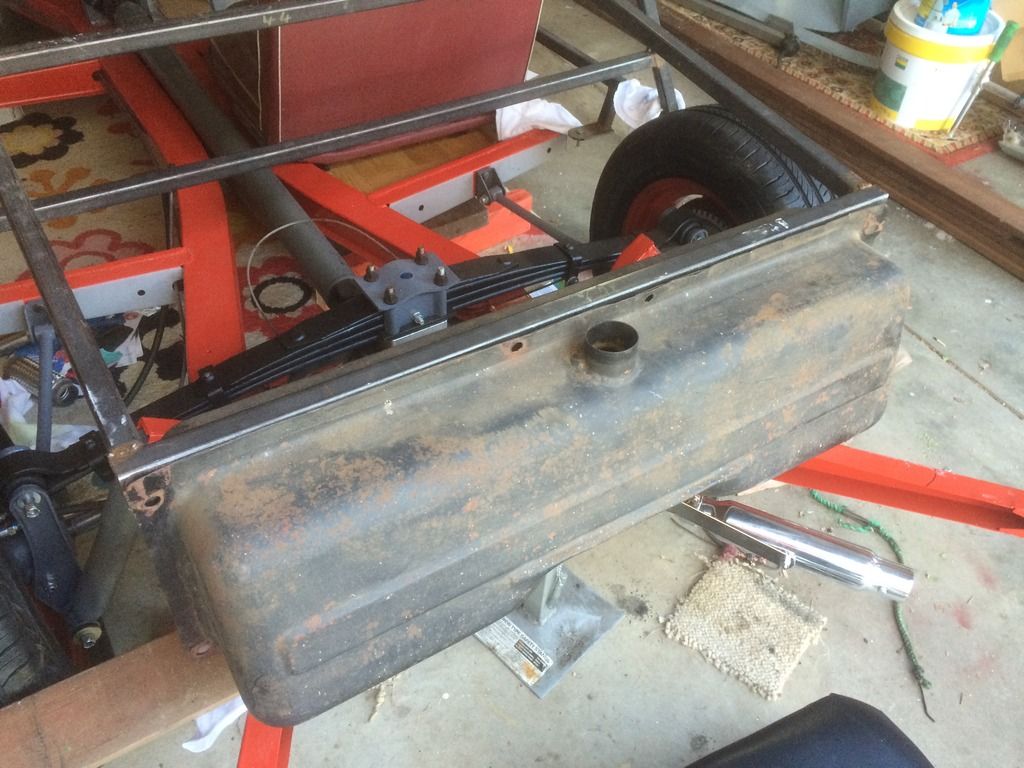
Thoughts? |
25th July 2015, 15:19
|
|
Senior Member
|
|
Join Date: Dec 2013
Posts: 169
|
|
I hope that was my thread you saw my car until on the roof - kept it out of the way and out of the weather. Really pleased I did it.
Oh, and my tank is fitted in front of the spring - I wanted to bring the weight forward within the axle lines.
Last edited by Marc F; 25th July 2015 at 15:25..
|
26th July 2015, 11:50
|
|
Senior Member
|
|
Join Date: Nov 2013
Posts: 143
|
|
You might want to check clearance on the body at that point . Memory is failing me a bit but I know that clearance is quite tight in that area on a Sammio and when a couple were fitted with rear tanks , they had to be dropped in height a bit , on a Vitesse this causes rear shock clearance issues but you will be ok on yours .
Obviously , this isnt a Sammio so my advice may be totally wrong , but the similarities in this area between the 2 marques would prompt me to check that out first .
|
3rd August 2015, 09:23
|
|
Senior Member
|
|
Join Date: Aug 2013
Location: Brisbane, Australia
Posts: 284
|
|
Hi all, bank holiday meant I'm off but steel suppliers are not!
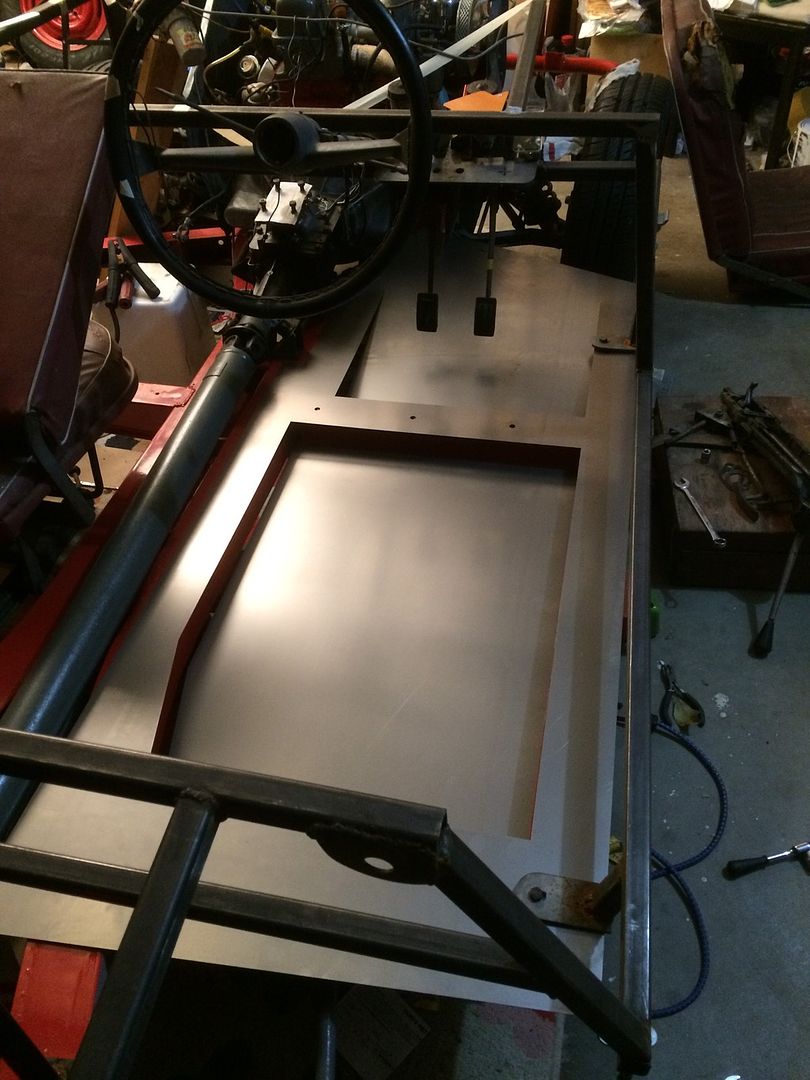
I went to the supplier to buy stuff for the floors. I'd already taken a full size Indiana jones style crayon rubbing of the chassis and drawn out the door and cuts so I knew how much to buy.
Then I got to the steel place to be told minimum order $300. (Aud) not fazed at this point I asked if cutting could be included. Yes. So I asked if they could lazer cut and again yes. So I'm getting floors lazer cut to size for no more than the cost is otherwise be charged for the steel !
Lesson in not stopping the negotiation even when minimum agreements are achieved!
I also tried my hand to welding new front supports on. I used 3mm steel and drilled and tapped holes for the hinge mount points as you can see.
Not bad for a first job but did use 3 rods doing it!
 |
3rd August 2015, 20:22
|
|
Senior Member
|
|
Join Date: Jun 2011
Location: birchington, kent
Posts: 1,769
|
|
Very tidy, Tim. So the brackets at the front are to put some hinges onto? Are you making them as well.
|
4th August 2015, 05:41
|
|
Senior Member
|
|
Join Date: Aug 2013
Location: Brisbane, Australia
Posts: 284
|
|
Thanks Gary no they are just to locate the front of the frame, as my early chassis did not have the mount points the frame was designed for.
T
|
11th August 2015, 11:41
|
|
Senior Member
|
|
Join Date: Aug 2013
Location: Brisbane, Australia
Posts: 284
|
|
Laser cut floors, mmm. A bit of tweaking to the cad drawing and I'll be able to email it to whoever.
I'll get it all lined up and the drop I need to accommodate the herald seats then get it TIG'ed by a pro as I've used 0.9mm steel like the herald did. I'll also try to get some swages done in them for shape stiffness.
Tim |
11th August 2015, 13:16
|
|
Senior Member
|
|
Join Date: Jun 2011
Location: birchington, kent
Posts: 1,769
|
|
Nice... the swage lines make all the difference.
|
6th September 2015, 08:12
|
|
Senior Member
|
|
Join Date: Aug 2013
Location: Brisbane, Australia
Posts: 284
|
|
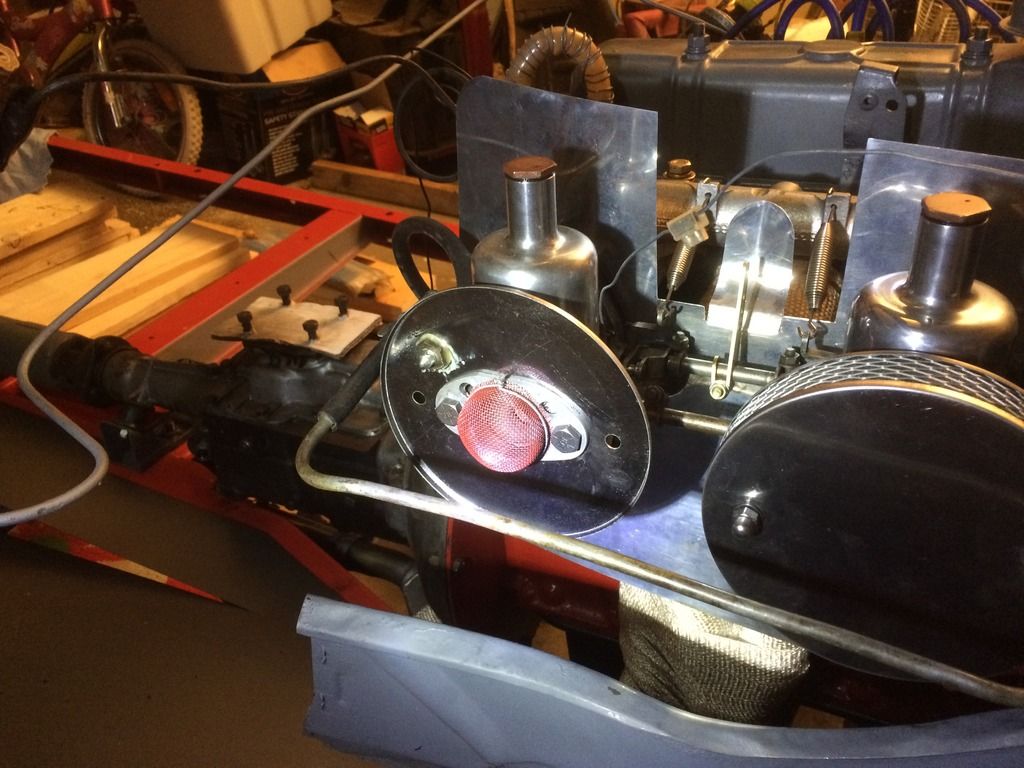
Hi, been a while, still trying to sort out the floors.
So I've been doing more tuning and still misfiring (on new plugs) so a mixture thing. Spoke to a triumph racer last weekend and I'll try no springs in the su2's and no dashpot oil. The mesh is to actually restrict the airflow as with the spit mk 2 induction I'm getting too much air for the little 948.
Then I'll work back up the three steps of increasingly richer needles as I go.
 |
15th September 2015, 09:58
|
|
Senior Member
|
|
Join Date: Aug 2013
Location: Brisbane, Australia
Posts: 284
|
|
Triumph! Pun intended! Springs from a local supplier. With the spax adjustable shocks from rimmer I can go 10" or 9" same height so I'll go with 10" 2 3/4 (70mm)ID 300lb/inch springs. Should give the bottom control arms level. I made 1/4" shims from aluminium for front camber but may not need them. I'll need to shim the steering rack about that too.
|
|
Currently Active Users Viewing This Thread: 3 (0 members and 3 guests)
|
|
|
 Posting Rules
|
You may not post new threads
You may not post replies
You may not post attachments
You may not edit your posts
HTML code is Off
|
|
|
All times are GMT +0. The time now is 03:58.
|


 Linear Mode

