|
|
| Phantom GTR/Vortex Builds In a Vortex with your Phantom build? Share your build experiences here. |

19th June 2006, 09:42
|
|
Senior Member
Enthusiast
|
|
Join Date: Apr 2006
Posts: 226
|
|
Greg, reacros are ok, ive got sportline ones in mine, and you can just get to the adjusters etc.. the only really tricky one to get to is the lumbar pump on the side.
Be weary of the WRX seats, most of them dont tilt forward, IMO you really do need them to if you wish to use the area behind the seats. Its a real pain if they dont tilt.
|
25th June 2006, 17:18
|
|
Senior Member
Enthusiast
|
|
Join Date: Jul 2004
Location: Leamington Spa
Posts: 155
|
|
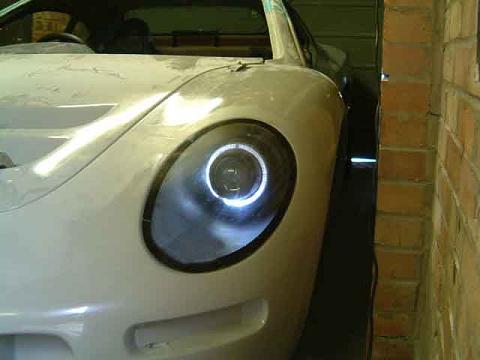
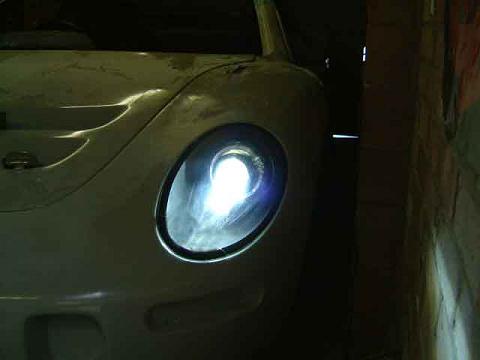
 light progress
Finally made up some mouldings for the headlights and started modifying them for the bi-xenon projectors from a 2002-2004 BMW M3 plus angel eye sidelight
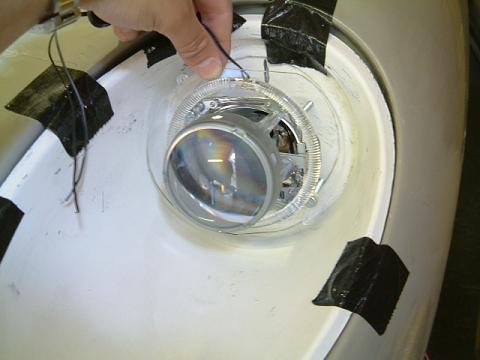 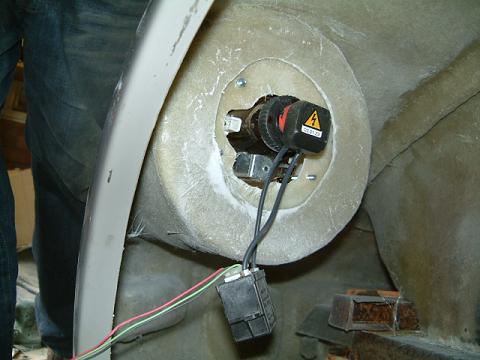
One with the BMW shroud:

I plan to make up some custom shrouds to accomodate the angel eyes, possibly in carbon fibre...
Rich |
2nd July 2006, 17:22
|
|
Senior Member
Enthusiast
|
|
Join Date: Jul 2004
Location: Leamington Spa
Posts: 155
|
|
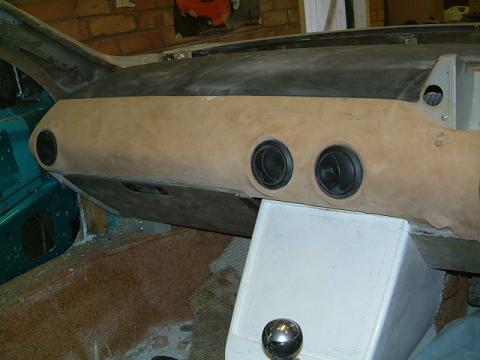
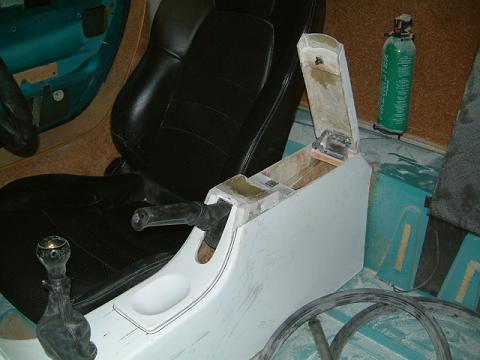
Tweaked version of phantom's centre console with recessed switch section, I think I will still make some modifications to the rear section instead of just putting a padded top on it:
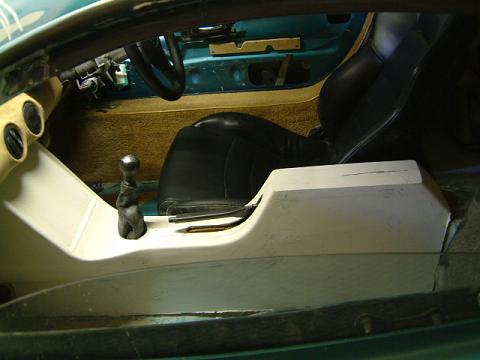
Light isn't finished, but quick mock-up gives a pretty good idea of the final result:
  |
4th July 2006, 08:50
|
 |
Senior Member
Enthusiast
|
|
Join Date: Feb 2005
Location: Hampshire
Posts: 2,497
|
|
Those headlights look great  |
9th July 2006, 20:15
|
|
Senior Member
Enthusiast
|
|
Join Date: Jul 2004
Location: Leamington Spa
Posts: 155
|
|
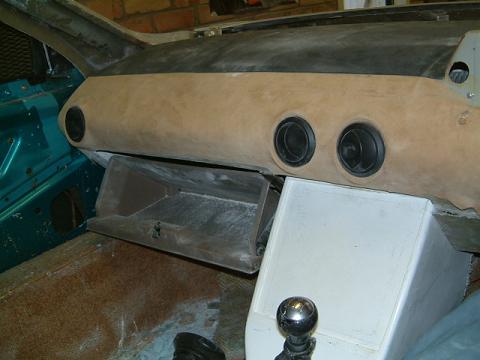
One of my bugbears was the expanse of dash not being broken up, so I fitted a glovebox from a Rover 214:
Rich |
31st July 2006, 10:54
|
|
Senior Member
Enthusiast
|
|
Join Date: Jul 2004
Location: Leamington Spa
Posts: 155
|
|
Some more progress this weekend:
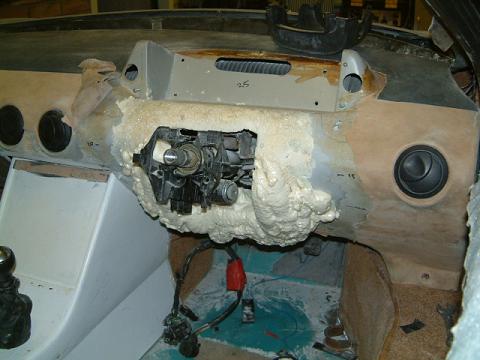
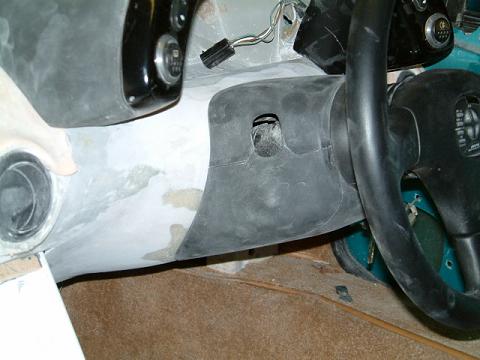
The electric assisted corsa column needs the dash reshaping to suit.
So, some polyfiller expanding foam
then fibreglass
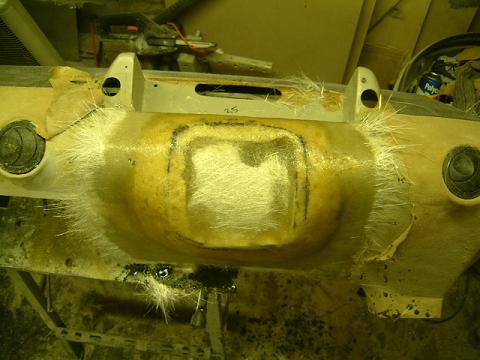
finally filled to shape
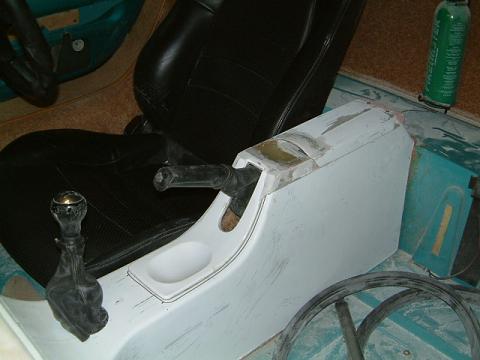
Then I wanted to have an extra opening cubby hole in the rear section of the centre console. Hinges/clips from the local scrappy and lots of reshaping ended up with this:
Rich |
31st July 2006, 19:07
|
 |
Senior Member
Big Cheese
|
|
Join Date: Sep 2002
Posts: 1,080
|
|
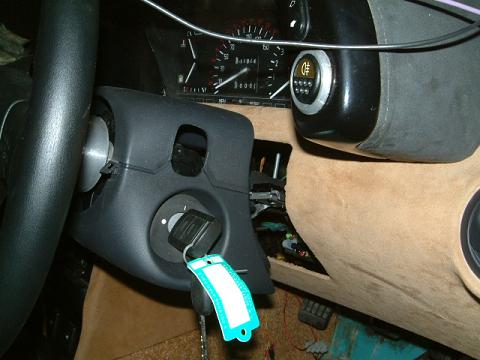
Thats a nice neat job you've done there on the steering column shroud.
John
|
31st July 2006, 19:48
|
|
Senior Member
Enthusiast
|
|
Join Date: Feb 2005
Location: Hampshire
Posts: 2,497
|
|
As I said on TA, very nice FG work  |
25th August 2006, 07:50
|
|
Senior Member
Enthusiast
|
|
Join Date: Jul 2004
Location: Leamington Spa
Posts: 155
|
|
I guess most people didn't know, but I have decided to change my chassis for a straight one rather than repair and make new wishbones myself, just don't have the time! It was the one made after mine with the 'production' geometry but slightly beefier top rail. It uses production front suspension and uprights instead of the current steel uprights with spherical bearings (not ideal for road use and future replacements).
All I need to do is notch the top rail for increased steering lock and modify the steering rack mounts for a sierra rack (which I will convert to quick ratio).
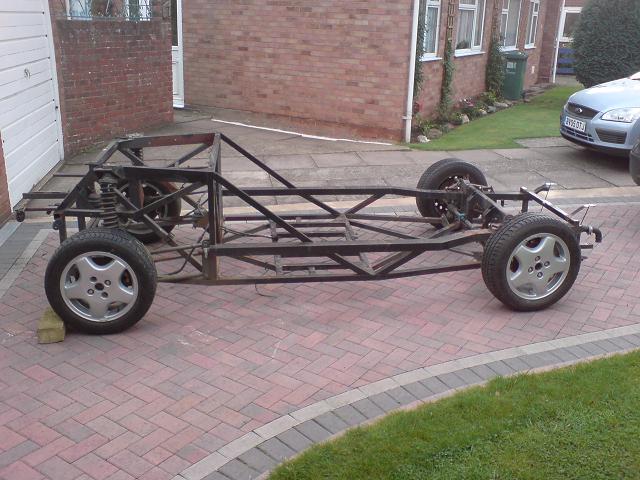
Fun getting it home, it was wider than the trailer!
Rich |
25th August 2006, 10:42
|
|
Senior Member
Enthusiast
|
|
Join Date: Apr 2006
Posts: 226
|
|
bet you're popular with the missus at the mo 
they are suprisingly wide arent they, mine only just fit in the trailer i used to pick it up as well.
when you get the sierra rack dont forget its an LHD one you need, not an RHD. |
27th August 2006, 07:51
|
|
Senior Member
Enthusiast
|
|
Join Date: Jul 2004
Location: Leamington Spa
Posts: 155
|
|
Got a sierra rack from Norman, so I'm assuming it is correct!
To get it on the trailer we had to put a load of planks on one side so it rolled over the mudguards and then back down, then lots of ratchets and a slow drive home..
|
11th September 2006, 12:44
|
|
Senior Member
Enthusiast
|
|
Join Date: Jul 2004
Location: Leamington Spa
Posts: 155
|
|
More progress, had to do a few mods to the chassis to bring it into line with later ones, also put some extra strengthening in and converted for later sierra quick rack for which I've just ordered a quick ratio kit, welded in new top rear damper mounts for the adjustable dampers that were on the car
body on old chassis out of the way:

Rich |
12th September 2006, 21:53
|
|
Senior Member
Big Cheese
|
|
Join Date: Sep 2002
Posts: 1,080
|
|
When you look back at what you started with not that long ago you can see that you have made great progress with this rebuild. 
John |
13th September 2006, 08:06
|
|
Senior Member
Enthusiast
|
|
Join Date: Jul 2004
Location: Leamington Spa
Posts: 155
|
|
Cheers for the comment, it's much more satisfying at this stage putting the new/repaired parts together than cleaning fixing older parts!
Rich
|
13th September 2006, 10:05
|
|
Senior Member
Enthusiast
|
|
Join Date: Apr 2006
Posts: 226
|
|
you going to put the rad pipes through the top chassis rails now rich?
and reply to my email  |
13th September 2006, 17:58
|
|
Senior Member
Enthusiast
|
|
Join Date: Jul 2004
Location: Leamington Spa
Posts: 155
|
|
yup, pipes through the top rail, not much choice in the matter now! That's the reason I had to redo the rad mounts too...
|
25th September 2006, 09:05
|
|
Senior Member
Enthusiast
|
|
Join Date: Jul 2004
Location: Leamington Spa
Posts: 155
|
|
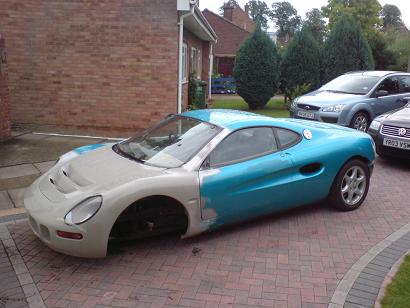
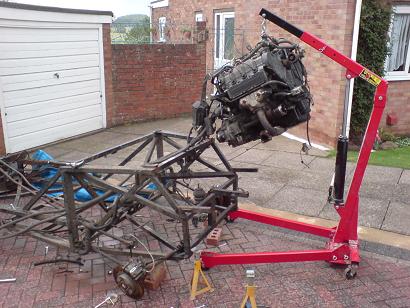
Body is now off the old chassis 
'just' have to transfer the engine etc etc to the new one and then I'll be on the home straight..
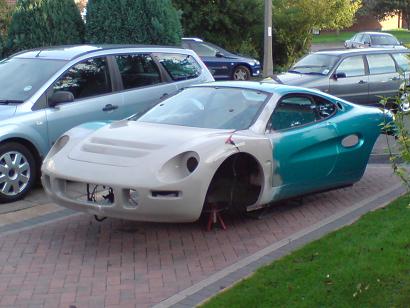
Was fun lifting the body up so high to get over the engine! 
Rich |
26th September 2006, 13:35
|
|
Member
Kit Car Dreamer
|
|
Join Date: Apr 2006
Location: North Essex
Posts: 37
|
|
Quote:
|
Originally Posted by ricola
Body is now off the old chassis
'just' have to transfer the engine etc etc to the new one and then I'll be on the home straight..
Was fun lifting the body up so high to get over the engine!
Rich |
I put a length of 6x4 timber through the door apertures (with blocks so it lifts on the built-in steel cage) and used a couple of strops and an engine crane to lift my bodyshell off the chassis I didn't have four strong bodies handy
Greg |
27th September 2006, 12:44
|
|
Senior Member
Enthusiast
|
|
Join Date: Jul 2004
Location: Leamington Spa
Posts: 155
|
|
Good thing you used the blocks, Eddy didn't and suffered the consequences!
I just rounded up some neighbours for a 5 minute lift, my engine hoist wouldn't have lifted it high enough to go back over the engine anyway.
I'm making good progress on transferring bits, unfortunately semi reliant on weather for that and the dark evenings don't help now..
Rich
|
1st October 2006, 20:28
|
|
Senior Member
Enthusiast
|
|
Join Date: Jul 2004
Location: Leamington Spa
Posts: 155
|
|
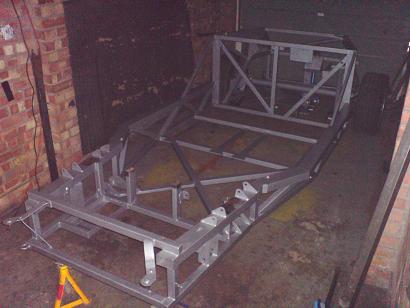
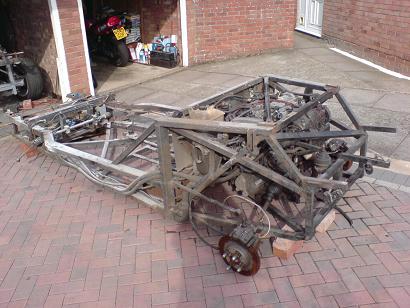
Out of the old chassis...
...and into the new!
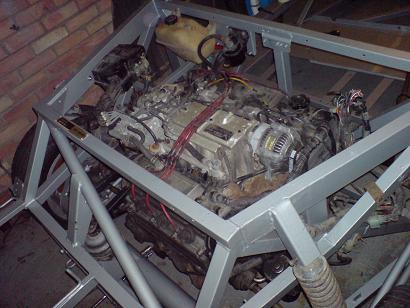
body will be on within a week... |
|
Currently Active Users Viewing This Thread: 2 (0 members and 2 guests)
|
|
|
 Posting Rules
|
You may not post new threads
You may not post replies
You may not post attachments
You may not edit your posts
HTML code is Off
|
|
|
All times are GMT +0. The time now is 22:07.
|


 Linear Mode

