|
|
| Tribute Automotive Builds Discuss your Tribute kit build |

28th August 2016, 20:20
|
|
Senior Member
|
|
Join Date: Jan 2013
Posts: 429
|
|
Hmmm, how to convince my wife about another project...
|
30th August 2016, 18:54
|
 |
Senior Member
|
|
Join Date: May 2009
Location: POOLE , DORSET
Posts: 2,200
|
|
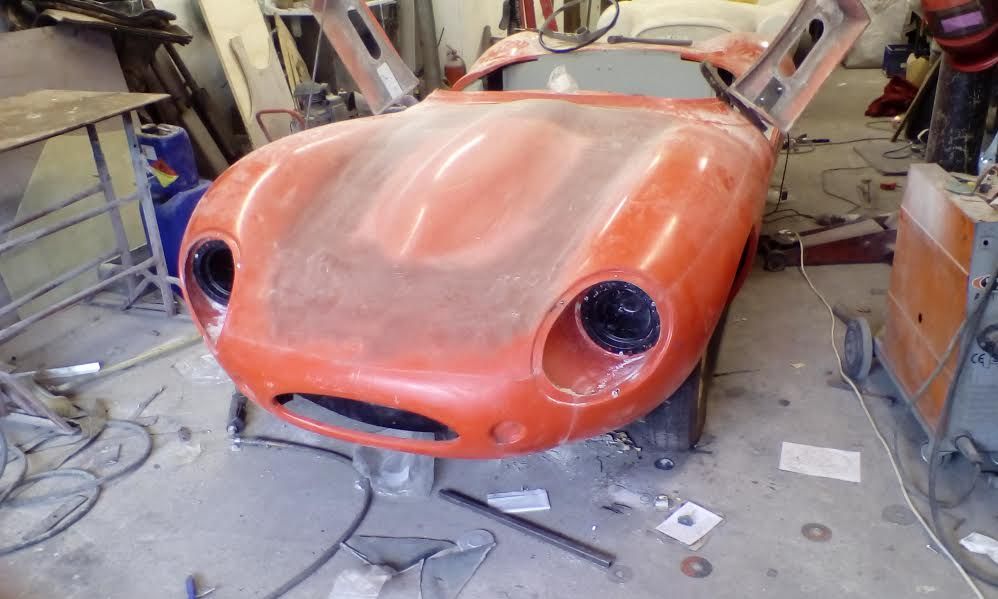
Chris delivered the bodyshell today and gave me an hour of his time to ensure that the shell fitted as it should ....there were a few differences on this one , its been extensively welded and repaired at some time and we aren't convinced its totally as the factory intended ...I have had similar issues with Heralds so no surprises ...but after some jiggling , we were happy with its first fit ...
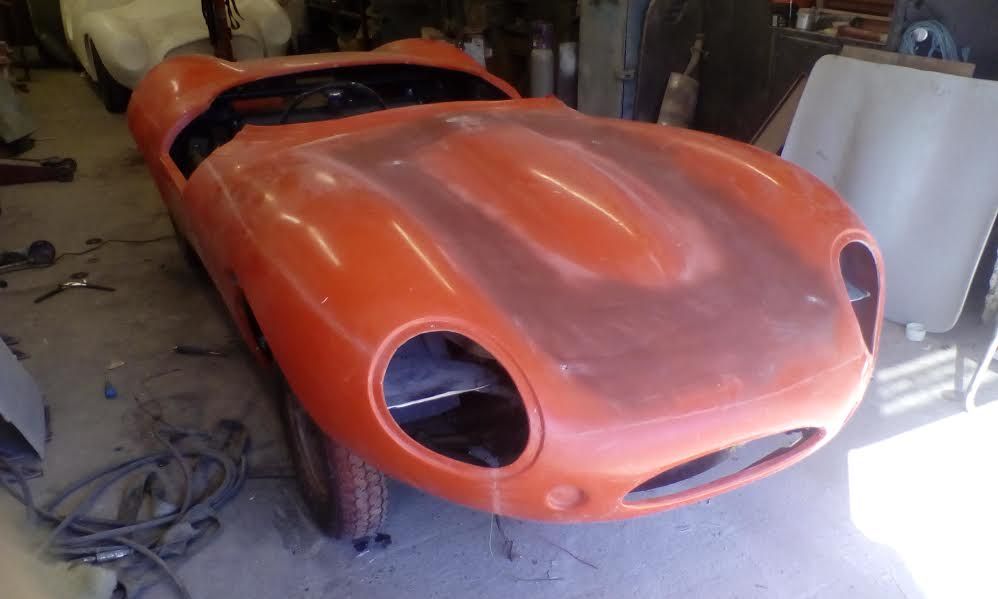
I mounted the flip front before I came home , but no pics as of yet ... |
4th September 2016, 18:06
|
|
Senior Member
|
|
Join Date: May 2009
Location: POOLE , DORSET
Posts: 2,200
|
|
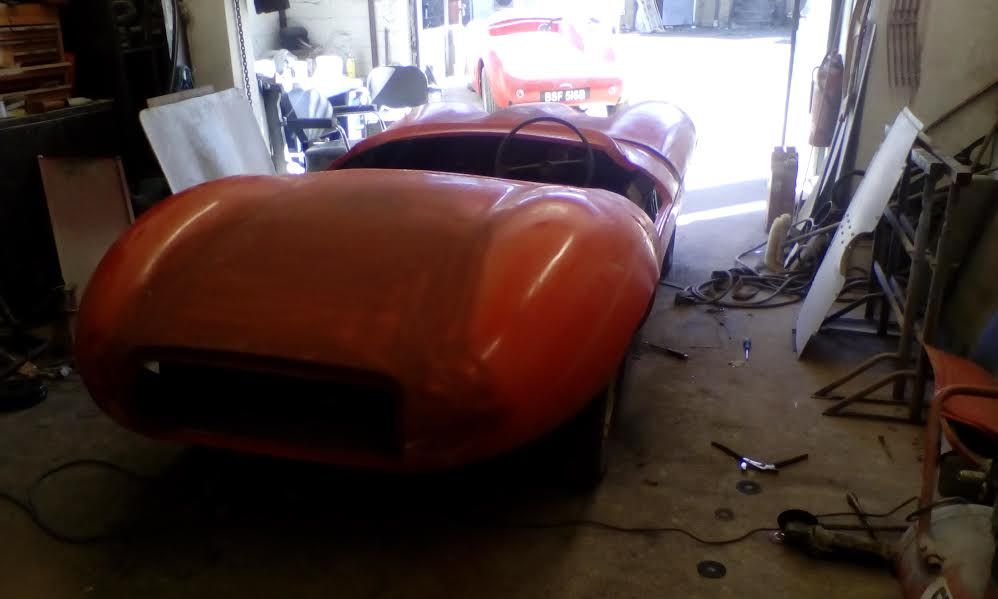
Bit more done on Friday / Saturday ...
internal bulkheads were glassed into the boot area ....always interesting glassing panels in an area you can just about get your head and one arm into and just about reach the panel !! But a massive improvement on rigidity on the rear , so worth it !
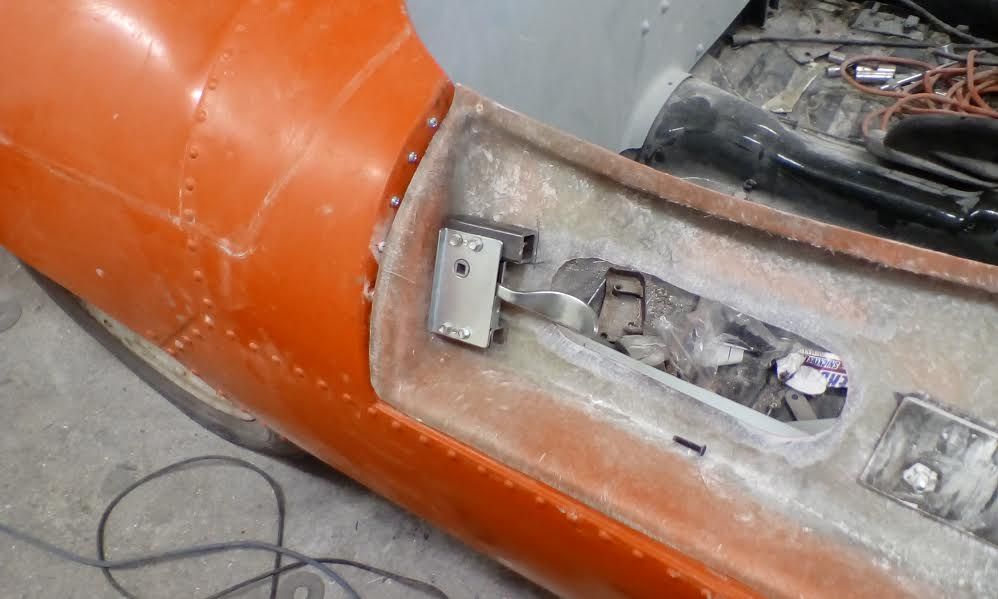
rear light units , boot hinges and D type style latch and handle fitted too ...
headlight buckets were bonded and glassed into place , holes cut and buckets fitted ...hopefully got a plan for front indicators tomorrow ..
Last edited by lancelot link; 4th September 2016 at 18:10..
|
5th September 2016, 21:36
|
|
Senior Member
|
|
Join Date: May 2009
Location: POOLE , DORSET
Posts: 2,200
|
|
|
5th September 2016, 22:38
|
 |
Senior Member
|
|
Join Date: Jan 2014
Location: Egham, Surrey
Posts: 1,780
|
|
Look how easy and quick it was to mount that door. Scottie will be very pissed off  |
6th September 2016, 06:38
|
|
Senior Member
|
|
Join Date: May 2009
Location: POOLE , DORSET
Posts: 2,200
|
|
lol...I reckon I have about 5 hours in that door and about 2-3 hours in the other one so far ... Its the fiddly lining up stuff that takes a while ...The panels on this one fitted the aperture pretty good , which really helped .
 |
6th September 2016, 15:41
|
|
Senior Member
|
|
Join Date: May 2009
Location: POOLE , DORSET
Posts: 2,200
|
|
|
24th September 2016, 18:53
|
|
Senior Member
|
|
Join Date: May 2009
Location: POOLE , DORSET
Posts: 2,200
|
|

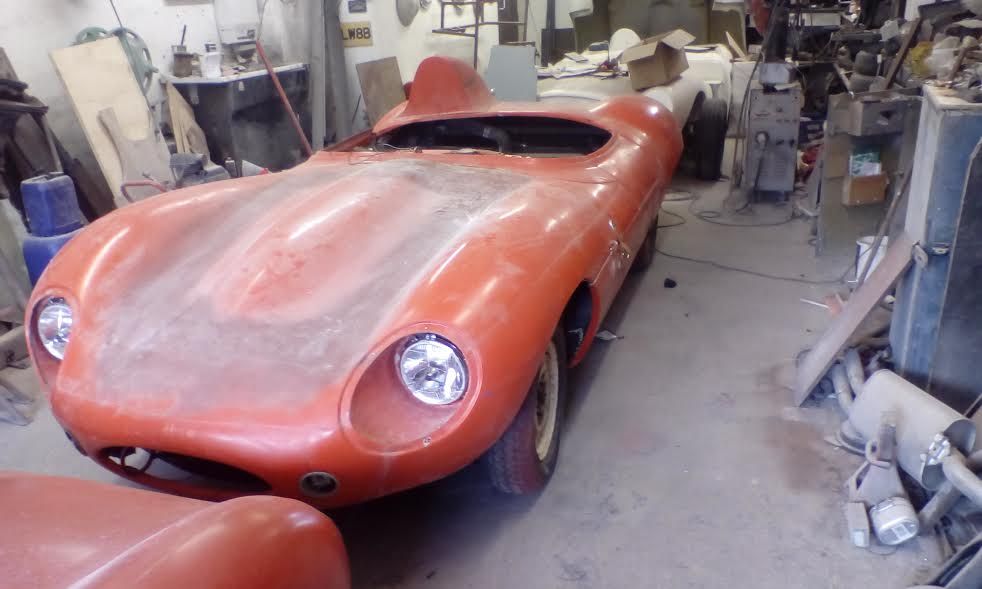
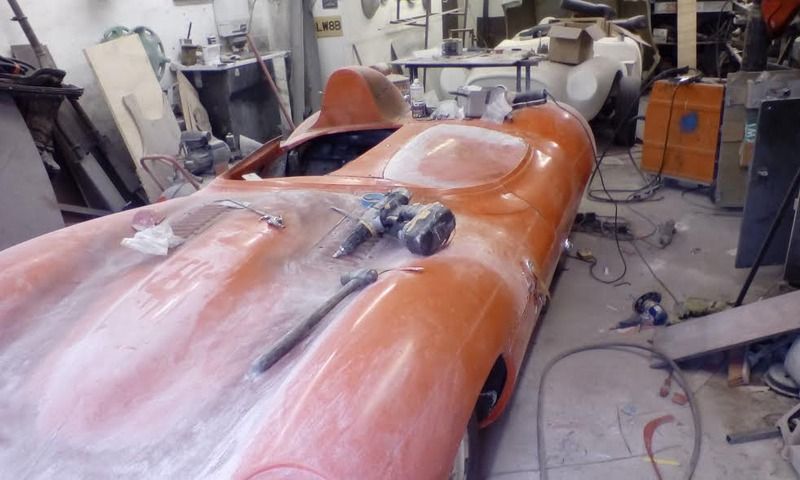
Lots of work being going on with the A352 but not a lot thats particularly photogenic ...
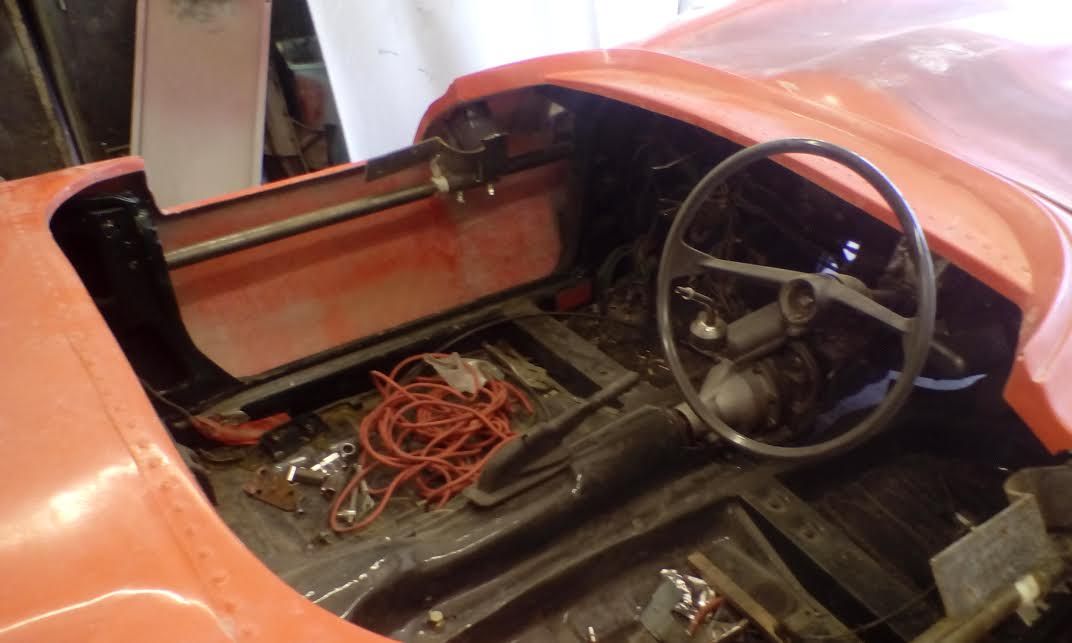
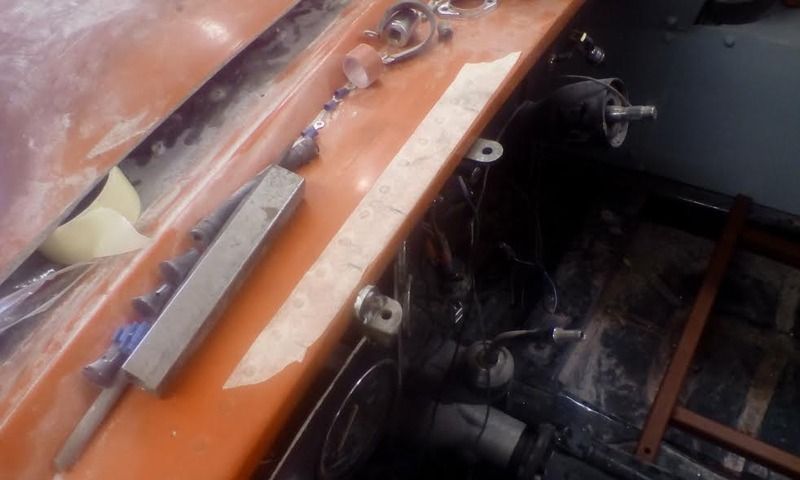
More notable things that are happening is the wiring is well underway . A D type dash has been modified to fit and has gained some extra switch gear etc.
An ignition key and start button system has replaced the standard ignition , all controls are off the column , so headlight switch and floor dipper switch now in place ..indicator switch just below dash , extra idiot lights in a row horizontally and pull out switches for heater fan , map light and roundall lights travelling vertically next to the two smaller gauges ...

still work to do but getting there ....
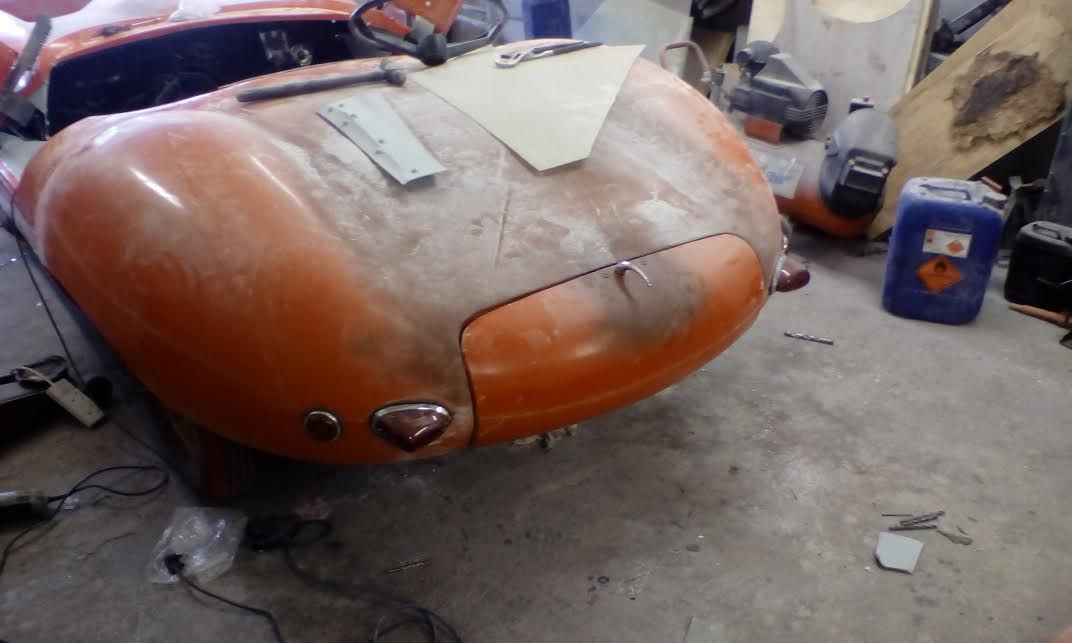
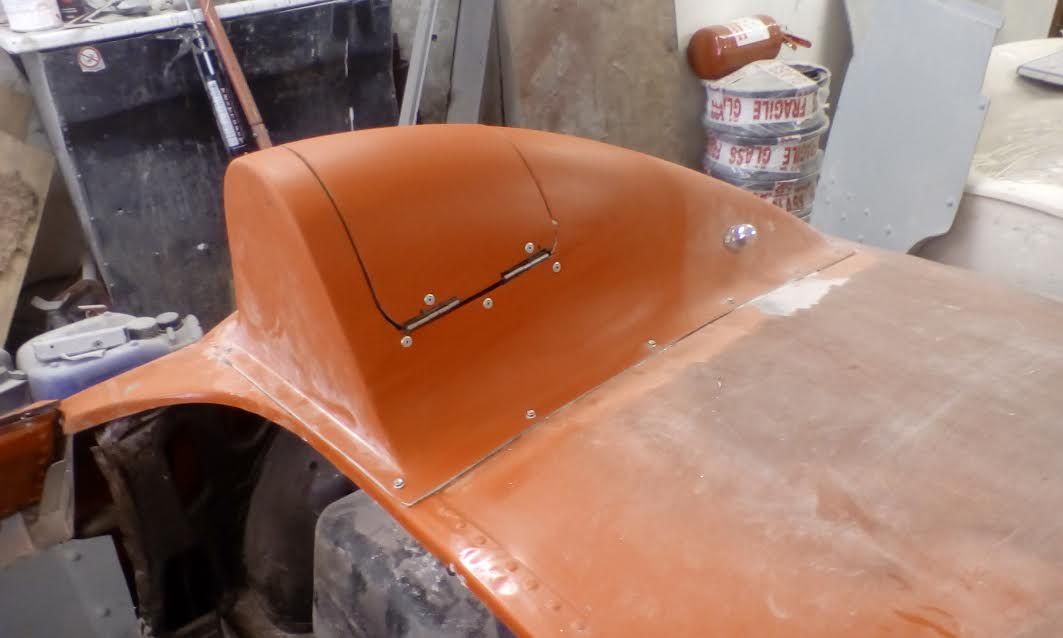
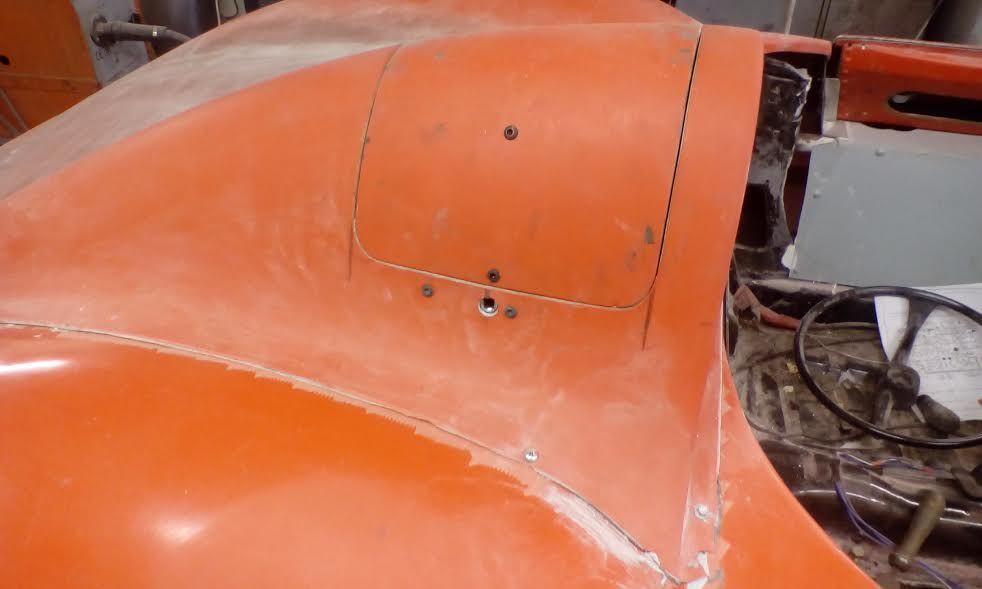
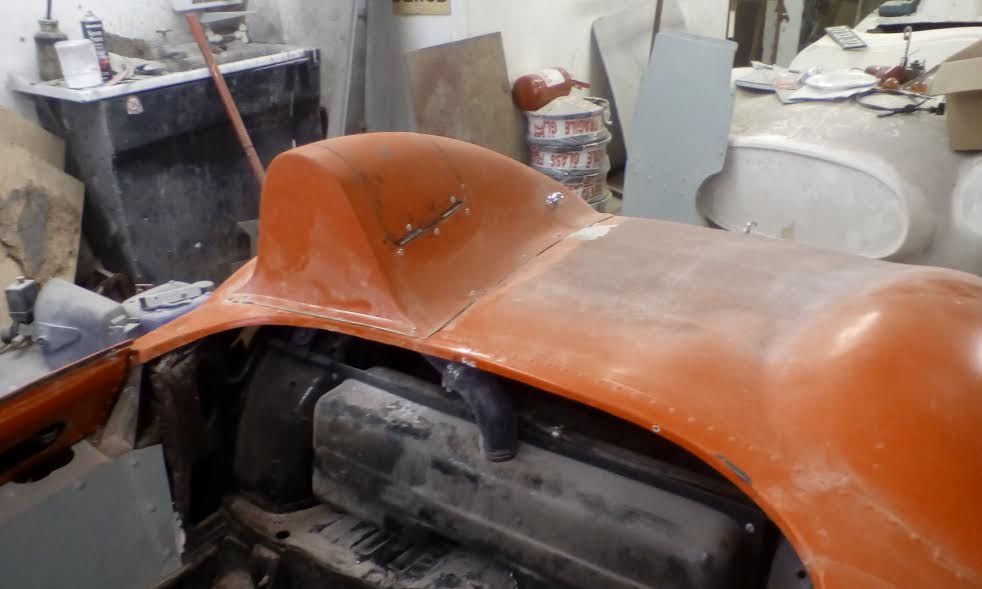
A non tailfinned headrest has been fitted , Chris has developed this panel to adorn both the 352's and the D type bodies ..this is the first one and they are a nice job ..the curve is just right for that D type styling ...they sit higher than a Sammio one and look very tall without the screen in place but they are very cool with the petrol flap and hidden fuel cap system .
I have bonded it on and will be adding some rivet detail when its glued firmly ...I have hinged and latched the flap using standard butt hinges fitted to aluminium angle shelves rivetted through the headrest and bonded in place too ...The latch is a standard quarter turn Herald boot handle type and will be opened with a square drive Church key T handle through the hole on the side ...The original D type simply has a hole here you push a spring clip through with your finger to release the flap ..but we felt a lock was better !!
Last edited by lancelot link; 24th September 2016 at 19:00..
|
24th September 2016, 21:46
|
|
Senior Member
Enthusiast
|
|
Join Date: Jun 2015
Location: Reading, Berkshire
Posts: 688
|
|
Looks pretty darn good already. Good looking car (of course)
Thanks for the updates
Dave
|
25th September 2016, 06:39
|
 |
Senior Member
|
|
Join Date: Feb 2012
Location: Wembley, London
Posts: 5,058
|
|
Gary - Lots of nice details going into this build. 
I assume you re-routed the fuel line before the hump was bonded into place?
Good luck, Paul. 
|
25th September 2016, 12:14
|
|
Senior Member
|
|
Join Date: May 2009
Location: POOLE , DORSET
Posts: 2,200
|
|
Yes Paul , I did .... before the hump was bonded on , 2 large holes big enough to get your hand through were cut ...not sure of the size but the biggest hole saws I had , so about 6'' at a guess ...the front hole allows access to the bottom of the stock Spitfire filler cap , the rear hole allows access to the roundall light to change the bulb or get to the wiring and fixings .

A trip to Hypehose got me two large 90 degree bends that when suitable cut and sleeved with a stainless steel insert , gave me a continual rubber filler hose from filler cap to tank . All accessible when interior in as I intend to change the way the rear cockpit panel fits so it can be removed easily when cockpit sides are in place properly .
Last edited by lancelot link; 25th September 2016 at 12:17..
|
25th September 2016, 17:48
|
|
Senior Member
|
|
Join Date: Mar 2015
Posts: 395
|
|
It's looking good and progressing well putting mine to shame doh!
|
2nd October 2016, 07:56
|
|
Senior Member
|
|
Join Date: May 2009
Location: POOLE , DORSET
Posts: 2,200
|
|
A bit more progress this week ....
I made a start on the seat bases ...Landrover swabs are being used ...
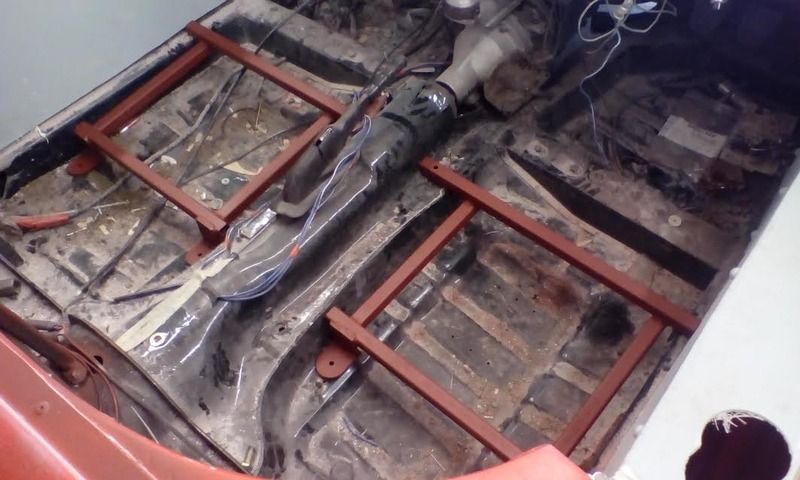
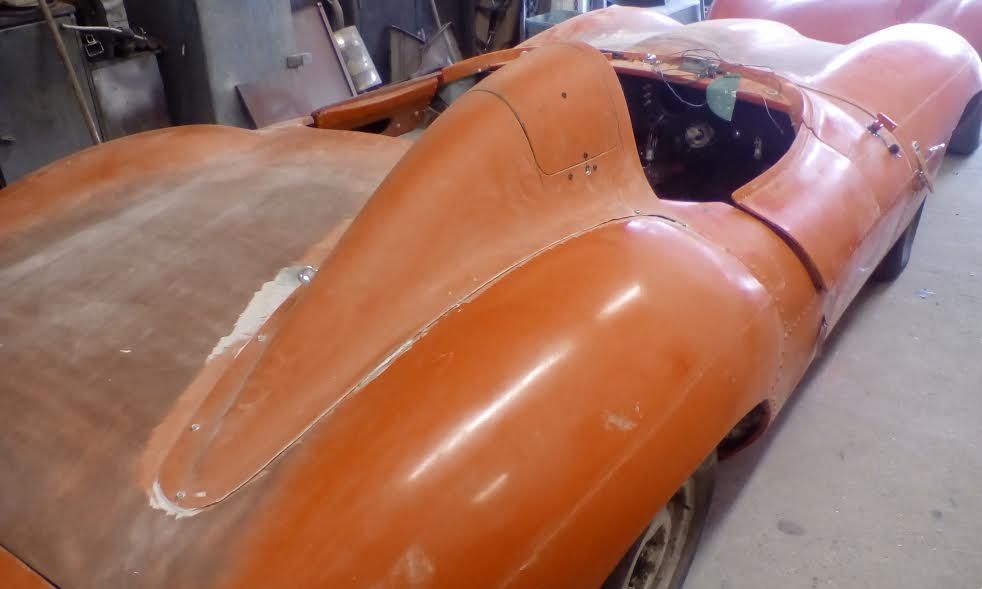
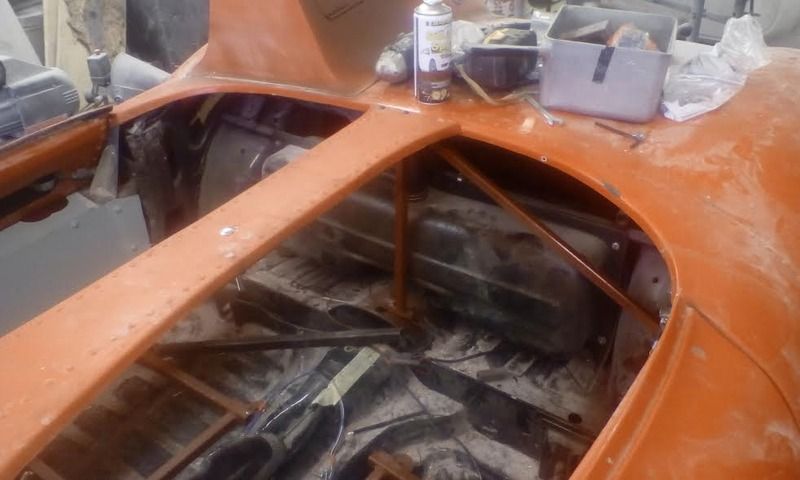
Then whilst the welder was out , I made a start on the removable centrebar and tonneau.. Chris supplied a D type centre bar , which with about 10mm trimmed from the rear , fitted very nicely ..
A 20mm box frame was made to span the area and sits on a small shelf at the rear attached to a 20mm box brace secured to the body and the floor and across to the B pillar too ..
At the front 2 little shelfs poke out from the dash about an inch and are beaced back to the Spits original bulkhead ...nice and strong as people will push on it to get in and out ...

Centre bar is bolted using 6mm domed bolts to resemble rivets through into the shelves and will be bonded to the internal frame when finished ...
The compound curved sheet of fibreglass Chris supplied has been roughly trimmed to size but thats as far as I got .... it will be fitted seperately , so we have full tonneau , centre bar only or fully open cockpit options ...
Last edited by lancelot link; 2nd October 2016 at 08:03..
|
4th October 2016, 14:33
|
|
Senior Member
|
|
Join Date: May 2009
Location: POOLE , DORSET
Posts: 2,200
|
|
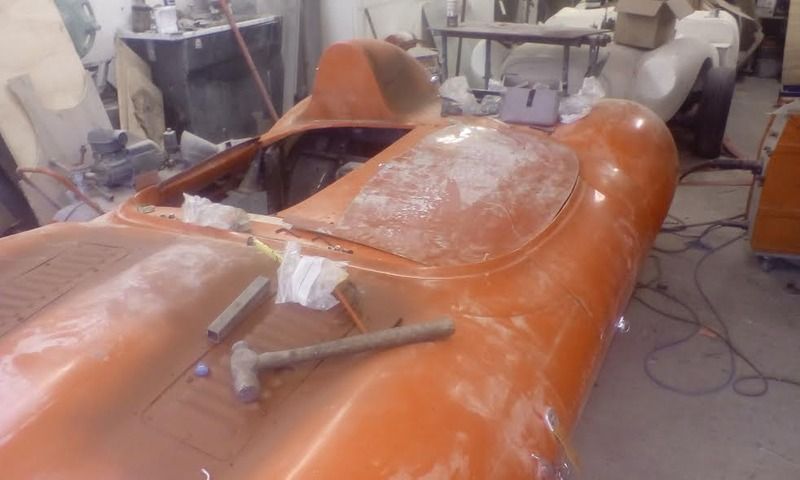
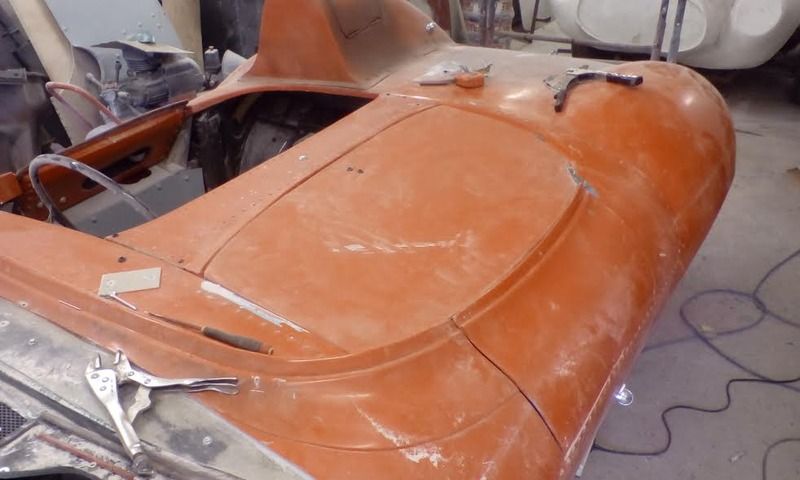
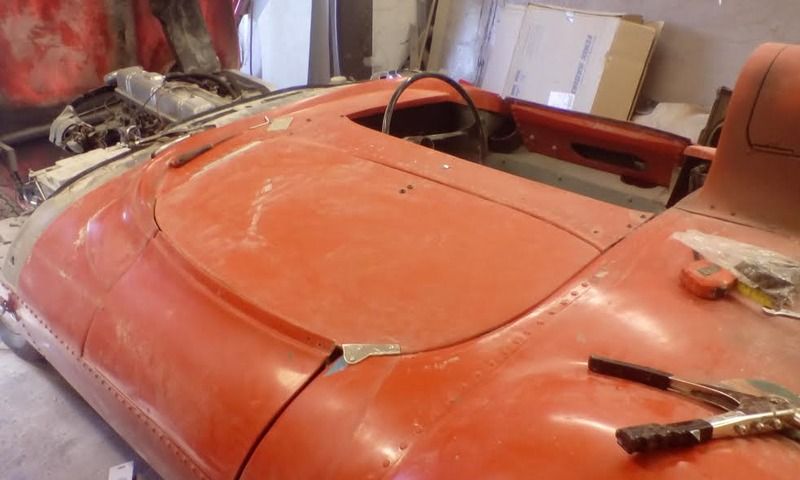
Still fighting the tonneau cover ....
The complex curves of the bodyshell are quite challenging when it comes to making a tonneau look fitted rather than 'screwed on'
Chris supplied me a nice bit of fibreglass that had the double curve thing going on but it still needed work to fit ...
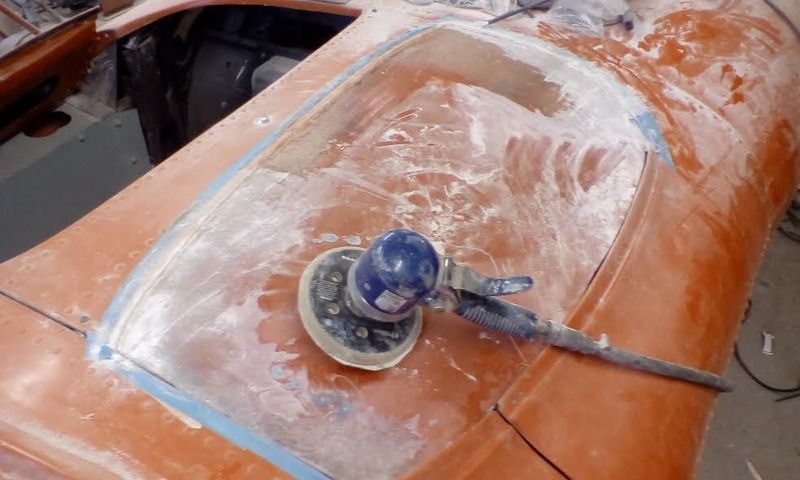
I cut a piece roughly to shape and fixed some 2'' flatstrip around the cockpit perimeter and put the tonneau in place ...by opening the pass. door I could reach in and tag the pieces together with small strips , just enough to hold it all together ....I then removed it and fully glassed it ....lots of gapping up and tweaking later and it is starting to take shape ....
The tonneau is held in place with a pin through a bracket on the bottom of the centre bar and a small ally bracket on the rear , just behind the pass. door , which will be rivetted in place eventually and screwed to the body using a rubber thread sert fixing .. Another fitting will be near the dash but I'm not doing that until I tackle the screen and mirror fixings ...
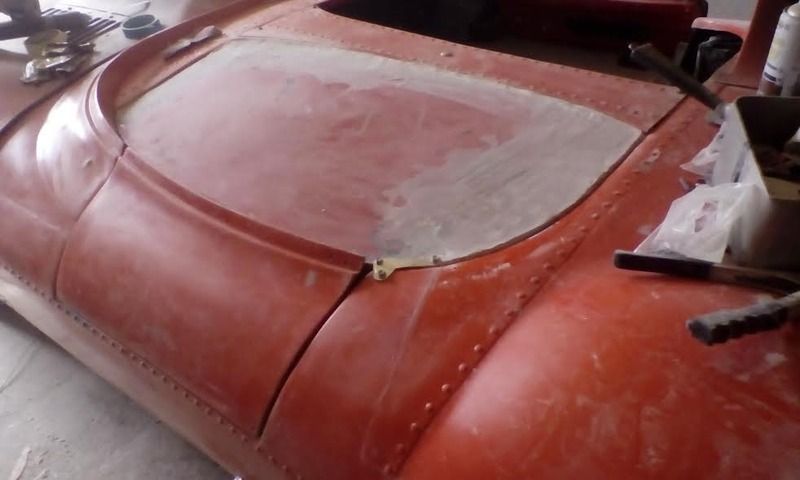
Lots more filling to do to get it nice ... I might talk to Chris about allowing me to take a mould from it so that I can produce a lighter version for the final fit ..

|
7th October 2016, 07:58
|
|
Senior Member
|
|
Join Date: May 2009
Location: POOLE , DORSET
Posts: 2,200
|
|
Spoke to Chris yesterday about moulding the tonneau and hes going to do it for my customer ...so thank you Christoph for that ...You needed something to do anyway ...pretty sure you stopped for a few seconds last time I called in ... !!
My customer has requested small dzus style fixings to hold it on , so a slight rework of the bracket on the rear and an additional one on the dash/ door area will deal with that ...
Today , hopefully , I will be mostly fitting a radiator ...
|
7th October 2016, 08:36
|
|
Senior Member
|
|
Join Date: Jan 2014
Location: Egham, Surrey
Posts: 1,780
|
|
How about a tonneau cover with a lump for the steering wheel for the other side?
They could both live un the boot but would give both rain protection and a bit more security?
You've done one side, I'm sure someone as skilled as you could knock it up in half an hour
Looking good though |
7th October 2016, 21:34
|
|
Member
|
|
Join Date: Jun 2011
Posts: 35
|
|
contactnumber
hi Gary, what number can you be contacted on?
|
8th October 2016, 14:00
|
|
Senior Member
|
|
Join Date: May 2009
Location: POOLE , DORSET
Posts: 2,200
|
|
I have pm'd you Striker ...
|
10th October 2016, 17:58
|
|
Senior Member
|
|
Join Date: May 2009
Location: POOLE , DORSET
Posts: 2,200
|
|
The absolutely gorgeous Chris from Tribute pulled out all the stops this weekend and moulded and produced a tonneau cover for me alongside his epic workload ...so big up the Chrismeister !!
 |
10th October 2016, 18:38
|
 |
Senior Member
|
|
Join Date: Oct 2010
Posts: 1,622
|
|
Quote:
Originally Posted by lancelot link

The absolutely gorgeous Chris from Tribute pulled out all the stops this weekend and moulded and produced a tonneau cover for me alongside his epic workload ...so big up the Chrismeister !!
|
Actually Dan is the one you need to thank. |
|
Currently Active Users Viewing This Thread: 1 (0 members and 1 guests)
|
|
|
 Posting Rules
|
You may not post new threads
You may not post replies
You may not post attachments
You may not edit your posts
HTML code is Off
|
|
|
All times are GMT +0. The time now is 05:32.
|


 Linear Mode

