|
|
| Sammio Builds and discussions Sammio bodied car builds and specials |

5th September 2013, 16:54
|
 |
Senior Member
|
|
Join Date: Sep 2011
Posts: 1,446
|
|
Quote:
Originally Posted by Paul L

RedRatBike - Belated congratulations on your wedding.
)
|
Thanks very much  |
5th September 2013, 17:45
|
|
Senior Member
|
|
Join Date: Sep 2012
Posts: 424
|
|
Quote:
Originally Posted by redratbike
Thanks very much |
Same from me mate..  |
10th September 2013, 17:07
|
 |
Senior Member
|
|
Join Date: Feb 2012
Location: Wembley, London
Posts: 5,058
|
|

Another Quick Update:
It has been raining pretty much every time I've had any chance to work on the car. 
While I've been waiting to work on my own car I have been constructing a new build thread.
As I promised the guy I went to visit in Florida that I would post some photos on his forum.
It was taken a bit of time to summarise this build thread into a more condensed & logical order.
I've haven't finished yet, but it has been a very useful exercise in reminding me how far I've come.
Obviously, I wish I was further on in my build, but I have completed a lot of work I can be proud of.
Again, I'd rather not have to over come some of the problems I've faced.
But the amount of problem solving I've done has been pretty good (for an accountant!  ).
However, whilst searching for the right section of their forum to post in, I found another kit build.
This had come up with a great way to solve the perpetual door problem that looked great.
They took a standard fibre glass body (similar to the Sammio/Ribble/Miglia) and added alloy doors! 
So I thought I would share their solution with you...

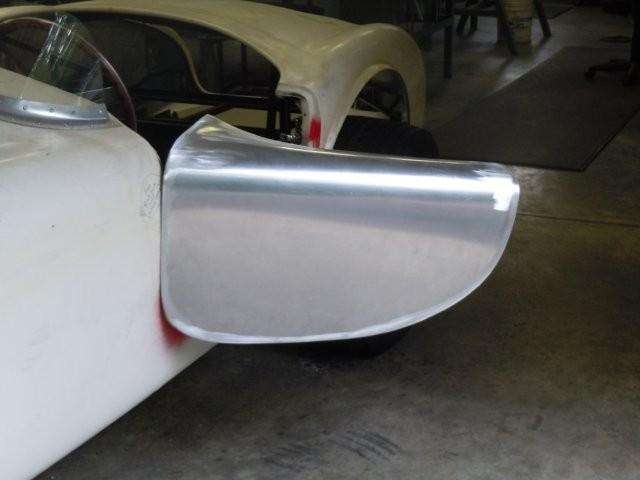
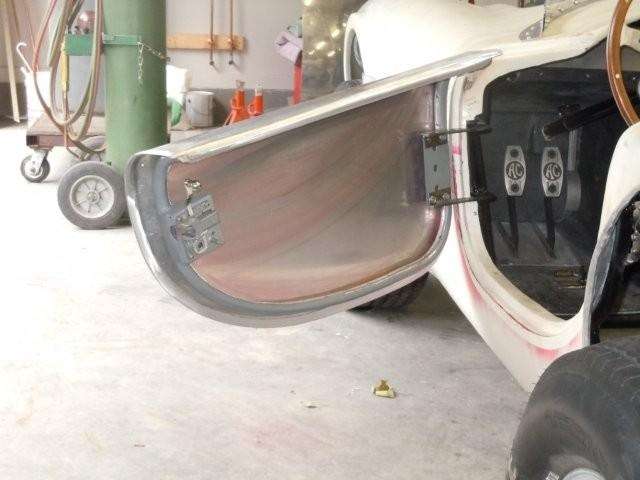
It looks like they used a specialist fabricator for the job, but what a great result.
If the weather ever improves, I'll be back on my own car soon.
Take care, Paul.  Replies:
Mr T
Replies:
Mr T I just love those custom cars based on the old "curvy" '40s style cars.
If you are interested, here is a link to another inspirational build from 'Rods n Sods':
http://www.rodsnsods.co.uk/forum/gar...uild-pics-8642
I'd also love to see the Bluesmobile become standard UK police issue. 

|
10th September 2013, 19:40
|
|
Senior Member
|
|
Join Date: Mar 2012
Posts: 159
|
|
Wow, these doors look very good. It's probably the part of the car you feel and touch. Making these out of aluminum would make the "illusion" complete. However, I think it won't be cheap to have them made. I'm thinking of having the windscreen rail made out of aluminium (3 pieces).
|
16th September 2013, 05:26
|
|
Senior Member
|
|
Join Date: Feb 2012
Location: Wembley, London
Posts: 5,058
|
|
Still Raining:
Well it does look like the Summer is over. 
So I'm preparing myself for the months ahead, where the weather dictates progress.
Clearly getting nothing done in the last two weeks has been a good reminder of this.
Re-body Inspection:
AndyP57 posted a helpful update on the changes to the way this will be done in the future.
http://www.madabout-kitcars.com/foru...ead.php?t=4497
At one point I really was hoping to have reached that stage by now, but I am no where near.
In my defence, the issues around leaving my job meant missing a lot of good weather to work in.
So I will keep chipping away and see how the new offices deal with these inspections.
Frame & Body Bonding:
I do like to follow other build threads and see what other people are doing.
zèbre69 / Sebastien posted these great photos of this 2CV kit...
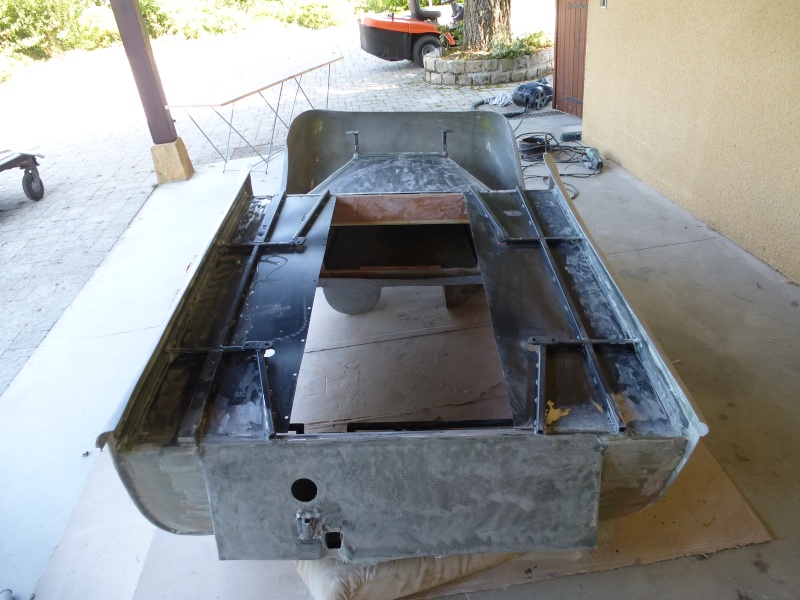
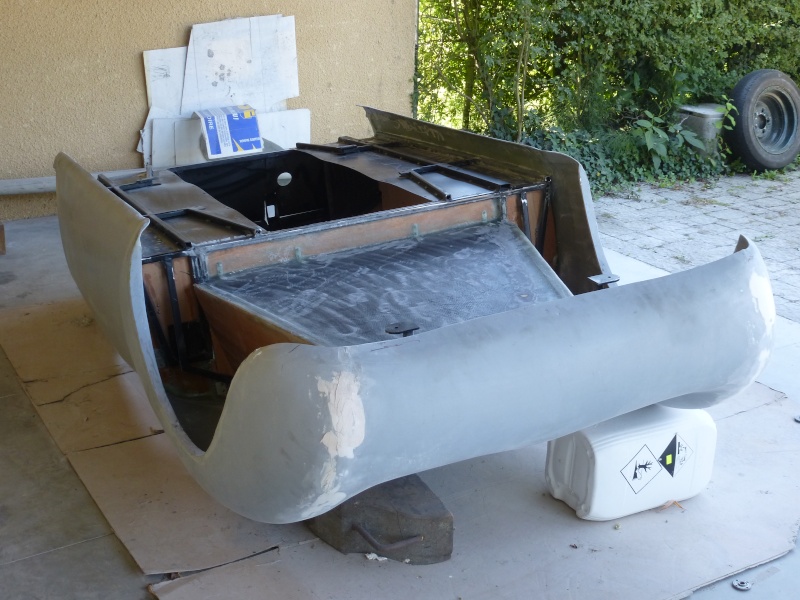
I remember asking the question a long time ago about whether anyone did this.
To me, it would make it easier to fibreglass the underside of the frame/body.
It would also make it easier to stone chip / paint the area with no rolling chassis in the way.
So I will bear this in mind when I finally get to that stage.
Wise Words:
Taken from the Tribute section "next door"...
Quote:
Originally Posted by tonyt
There is no such thing as an easy build with kit cars, otherwise everyone would do it, its a rollercoster ride of good days and bad days.... Mine has been built outside between working shifts and around family life, so I've taken my time. I've made changes along the way some inspired by others on here some out of neccesity.... Remember its the journey that counts but do not lose sight of the end goal, Ebay is full of unfinished prodject kit cars where enthusiasm has drained.... Regards and good luck Tony.
 |
Senna:
I finally got around to watching this on DVD yesterday and it was an amazing film.
I'd forgot some parts of the story, but still remember watching his final race live on TV.
It was the absolute sinking feeling that comes from knowing how serious the crash looked.
That and the fact they simply re-started the race as if nothing had happened & the show must go on.
Hard to believe it was almost 20 years ago (May '94)!
Next Steps:
I've got a few domestic issues to deal with this week.
But, weather permitting, I hope to start fitting the lowering block to the rear suspension.
Or at least patch the hole in the boot floor of the rear arches.
( A job which may be easier to do logistically if the weather doesn't improve much. )
Until then, take care, Paul.
Replies:
christinedmc - I also get the impression this would be a very expensive solution.
|
17th September 2013, 15:02
|
|
Senior Member
|
|
Join Date: Feb 2012
Location: Wembley, London
Posts: 5,058
|
|
Car Cover Repairs:
I'd repaired my car cover once before after a windy night & the wind struck again.
It pulled away the tape I had on both sides holding the cover together.
It also put a new rip in the same area.
So this time, I thought I'd try to do a better job on the repair.
I started by putting some new tape on the underside of the cover as before.
But this time I used a needle & thread to cross stitch either side of the split.
I used big stitches so that the tape will hold in place (in theory).
I also had to do small sections at a time working from the edges back to the middle.


This took over two hours due to a break when the heavens opened on top of me.
( I was outside as the sky was dark & I could keep most of the car covered while I worked. )
At least it was a chance to adjust to the somewhat colder working temperatures outside.
I had to wait until the top side had dried out overnight before I could add some tape.

Cheers, Paul.
|
17th September 2013, 16:51
|
|
Senior Member
|
|
Join Date: Mar 2012
Posts: 159
|
|
if I ever have surgery, I know who to call for stitching me up!
|
17th September 2013, 16:59
|
 |
Senior Member
|
|
Join Date: Jul 2011
Posts: 5,328
|
|
Nice bit of invisible mending on the cover there Paul.
As you've raised the subject, I thought I'd share my experience of using a similar cover at Goodwood last weekend.
As you may be aware, I had King's Lynn trimmers Brockwell Brothers make me a zip up the middle tonneau cover, but as I'd never left my car out in the rain before I was worried that it wouldn't be completely watertight, so I also bought a silver indoor/outdoor waterproof breathable cover off ebay for about a tenner.
First day at the hotel and rain was forecast overnight, so I fitted the car cover over the top of the tonneau. In the morning I found that the rain had either gone through or underneath the cover and had pooled in the tonneau on the passenger side.
I removed the outer cover and sponged the 1/2" deep puddle off the tonneau before removing it. I was expecting the interior to be soaked but not a drop of water had got into the cockpit.
The second night, heavy rain and high winds were forecast, and I was worried that the outer cover would blow away, so I decided to leave it off and hope for the best. In the morning there was a puddle on the tonneau, but once again the interior was completely dry!
I can't praise Brockwell brothers' work highly enough. They are traditional craftsmen who do top quality work at a very reasonable price. My tonneau is mohair, cost £140 all in and took them half a day to make and fit. Bargain.
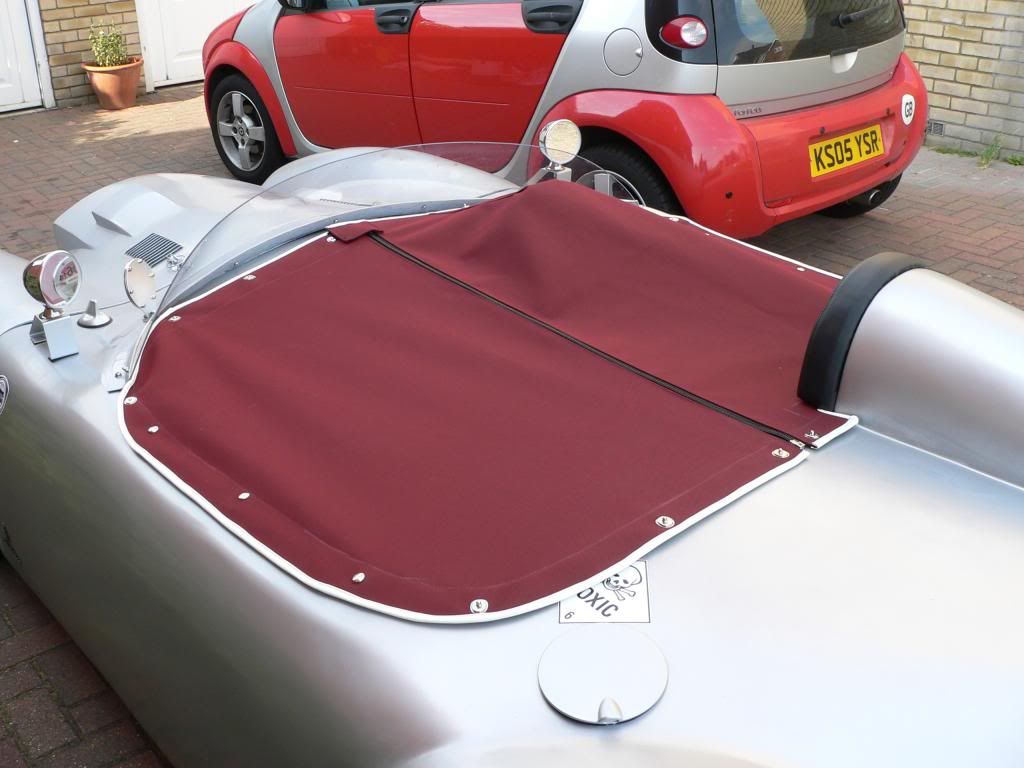
They can be found at Milton House, 44a Tennyson Avenue, King's Lynn, Norfolk, PE30 2QJ tel.01553 764582.
|
24th September 2013, 16:31
|
|
Senior Member
|
|
Join Date: Feb 2012
Location: Wembley, London
Posts: 5,058
|
|
Replies:
christinedmc - Lets hope you never need surgery!
Mr T - Thanks for the really helpful feedback on your tonneau cover.
Do they put the fittings on the car for you too?
- - - - - - - - - - - - - - - - - - - - - - - - - - - - - - -
Well I finally managed to get some time on the car today...
Rear Suspension Lowering Block - Part 1:
Seeing Mister Towed remove his rear spring the other day inspired me.
The lowering block was one of the first things I bought for the project.
But when AndyP57 built his first Cordite/Nagivator without one I wasn't sure.
However, after various test fittings, it is clear that the block is a good idea.
So here is before...

Unfortunately the rear framework is still in my rear garden after the welding/painting.
So the body shell has nothing to hold it off the tyres...

So I put a couple of axle stands under the back of the body work...

And this gave me enough clearance over the tyres to carry on...

The big advantage of this was I could leave the rest of the car covered...
( It was foggy when I started and I just don't trust the weather! )

However, when I wheeled my trolley jack into position I didn't have much room...

After spending some time with the pruning shears, it looked like this...

With the chassis supported on another pair of axle stands I could remove the wheels...

The jack was then used to support the hubs so I could remove the bolts...


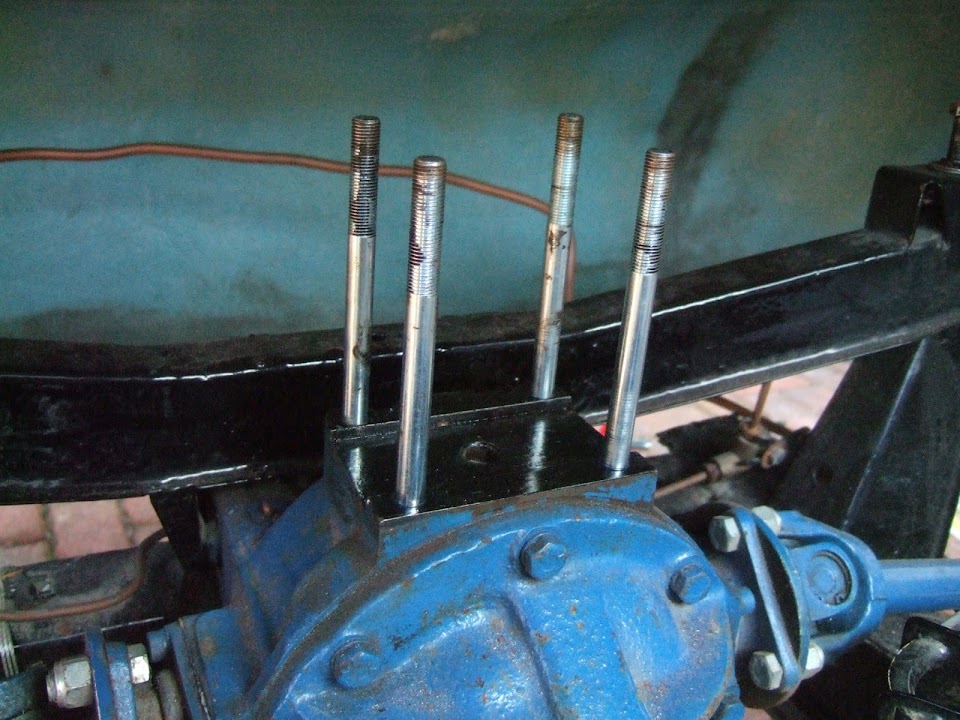
Then it was time to remove the nuts and studs from the differential.
Two nuts came out with no problem and two took the studs with them...

I half remembered the two nuts trick to remove the remaining studs.
( But forgot to use normal nuts, not the original nyloc ones. )
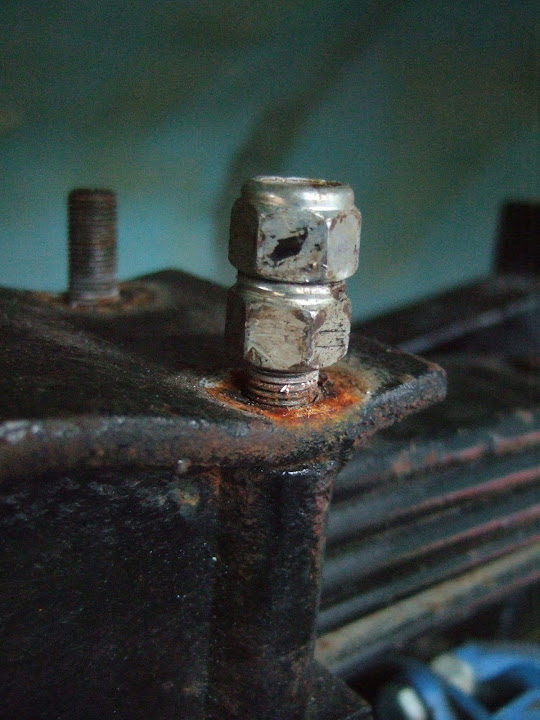
But to my amazement, that was it and before I knew it the rear spring was out...

There was some surface rust on the top of the Diff...

This seems like a good excuse to get my tin of blue Hammerite paint out.
But first I had to tidy everything from the drive into the porch...

Then I could then lock the porch door and go look for the paint at the end of the garden.
But no matter where I looked I couldn't find the very small tin I bought a while back. 
Having wasted more that enough time on the search, I decided to use black paint instead.
This surface will never be seen and I will touch up the blue paint another day.
I did manage to find a couple of "normal" nuts that I could use to fit the new longer studs.
It didn't take long to clear up the diff. and get a coat of paint on it.


Back in a minute with the next part as I am including too many photos...
|
24th September 2013, 16:34
|
|
Senior Member
|
|
Join Date: Feb 2012
Location: Wembley, London
Posts: 5,058
|
|
Rear Suspension Lowering Block - Part 2:
Another small job required was the nuts & bolts on the two inner spring clips.

These were not tight and had rusted into their current positions.
This needed nothing more that a soak in WD40 and they could be done up.
Before:
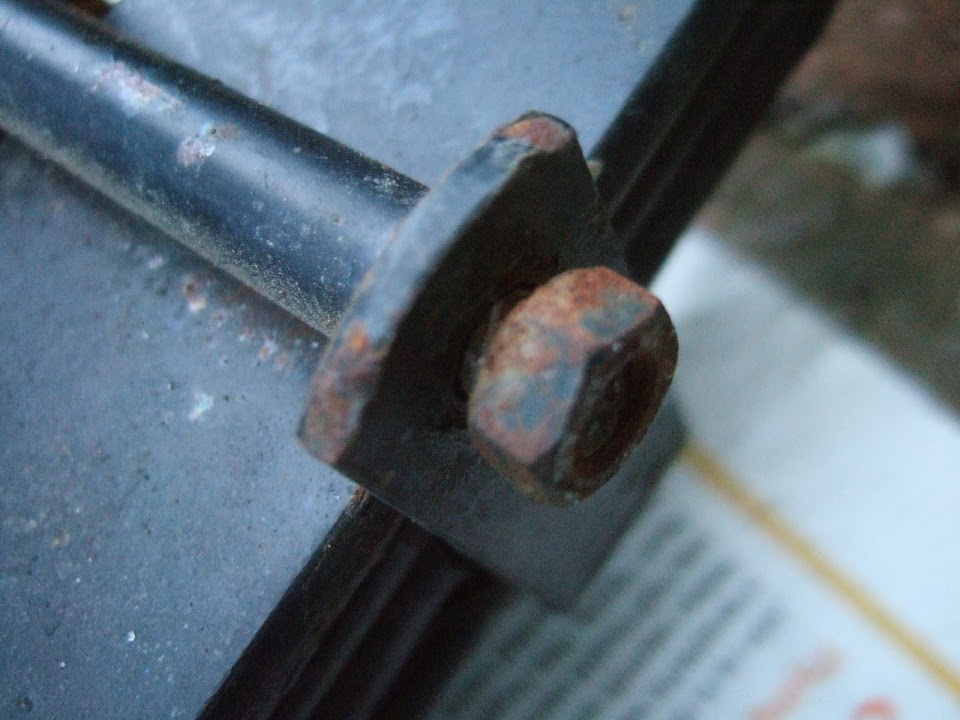
After:

I put the new longer studs in by hand just to help locate the lowering block...

These worked as a good guide and the block went in with no problems...

Unfortunately, the same could not be said for the rear spring which would not play ball.
Turns out that the locating pin on the spring would not fit into the hole in the block.
The locating pin itself then came out which at least made it easier to see the problem...

After a bit of work with an assortment of metal files, the pin finally fitted the hole...

It took a little bit of fiddling to get the retaining nut inside the spring back into position...

I put some Loctite on the pin's threads and tightened it back up...

I then fitted the block to the spring just to be sure it was all OK...

Then I put some Loctite on the new studs and using the two nuts trick I tightened them up.
Then it was simply a case of putting the spring and block back on & tightening up new nyloc nuts.

I really thought getting the hubs bolts back in place would be a tricky job.
But it was too easy for words and I could even push one bolt in by hand.
( As everything lined up without the need to support it separately. )
Then it was back on with the wheels and lower the car back to the ground...

Obviously until i have the frame work back in place it is hard to see the difference.
But for a job that I was really dreading, it turned out not too difficult after all.
Until next time, take care, Paul.
|
24th September 2013, 18:07
|
|
Senior Member
|
|
Join Date: Apr 2012
Posts: 1,163
|
|
I'm jealous Paul, haven't seen the workshop in weeks but am back this weekend so am hoping to make some progress myself, nice choice on wheels BTW. Keep up the good work and remember that every job done one less to do!
Mac
|
25th September 2013, 07:36
|
|
Senior Member
|
|
Join Date: Jul 2011
Posts: 5,328
|
|
Nice work Paul.
Brockwells did everything. I left the car with them first thing and it was ready for collection early afternoon with the tonneau and all fixtures fitted to the car. They did a great job and it's made the car completely weatherproof when it's parked outside. The materials are top quality with workmanship to match and I can't recommend them highly enough |
25th September 2013, 18:52
|
|
Senior Member
|
|
Join Date: Feb 2012
Location: Wembley, London
Posts: 5,058
|
|
In order to regain some momentum on my build I need to grab time when I can.
Chipping Away...
Previously I had posted this photo of the boot floor of my Spitfire rear arches...
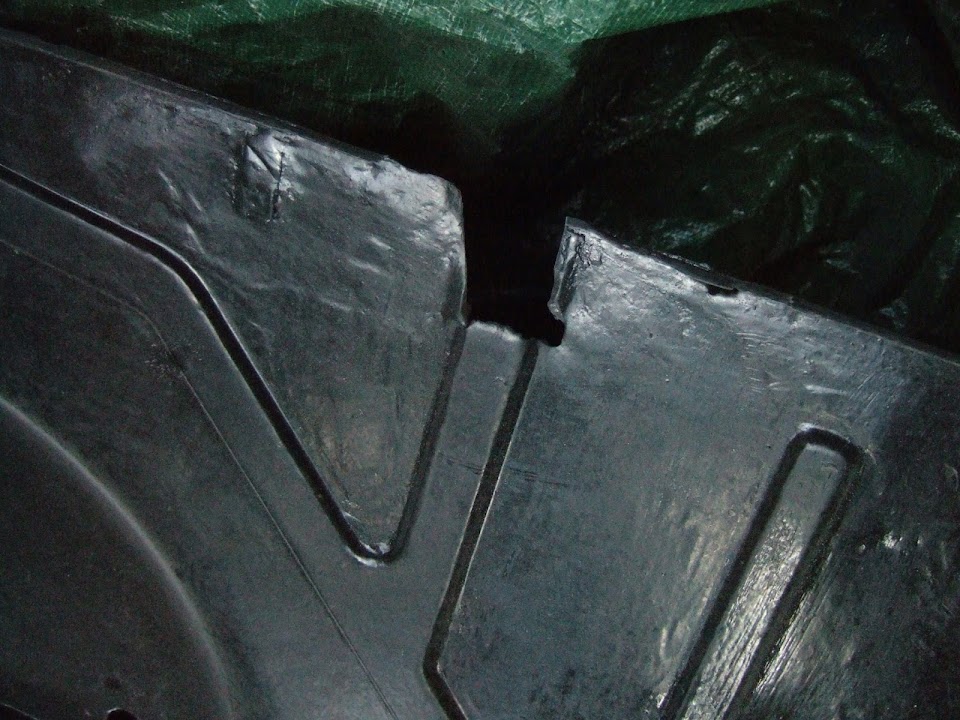
I want to use this repair to test some welding options before I start on the bulkhead.
So I made an oversize cardboard template and found a suitable section of old Spitfire bodywork...

( The reasons for the green "dots" will hopefully become clear when I do the repair. )
This piece is ideal as it already has an edge I can use...

Note:
I might end up cutting this edge off the entire boot floor, but I'll worry about that another day.
It didn't take the angle grinder long to cut the shape I needed out...

Or to remove the paint from both sides...

Hopefully I will get a chance to clean up the boot area around the repair and start welding in the next few days.
Cheers, Paul.
Replies:
Mac - Cheers and as you can see above I am trying to do any job I can squeeze in.
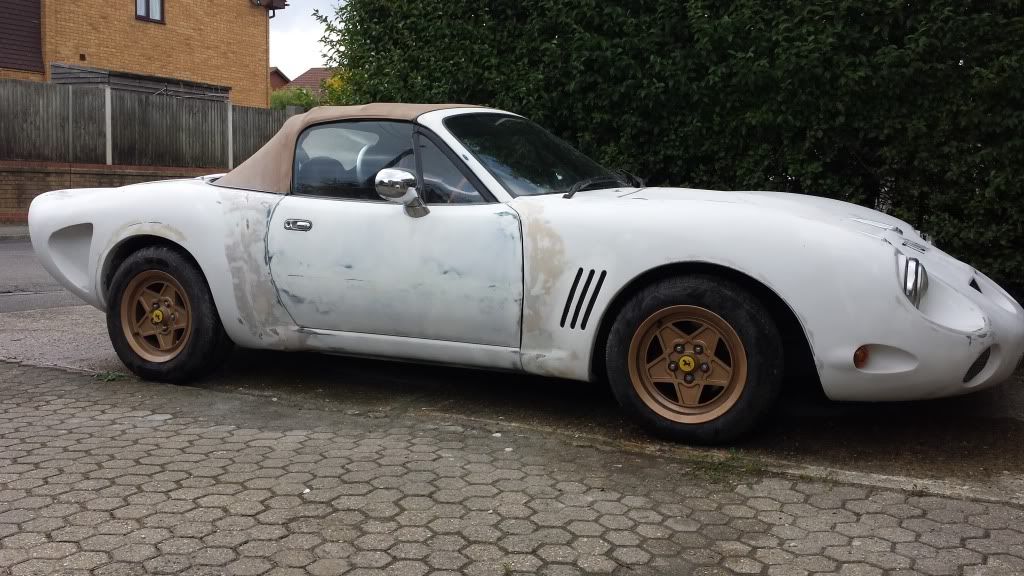
The fact my donor car had new wheels & tyres was another reason I ended up buying it in the first place.
I've seen a couple of finished Sammio Spyders with these wheels and they do look nice.
( Although I must admit that wire wheels do look better. )
Mr T - Thanks again.
|
25th September 2013, 19:04
|
|
Senior Member
|
|
Join Date: Apr 2012
Posts: 1,163
|
|
Trying your hand at plug welding then im guessing?
|
26th September 2013, 15:38
|
|
Senior Member
|
|
Join Date: Feb 2012
Location: Wembley, London
Posts: 5,058
|
|
Mac - You know me and technical terms.
But if "plug welding" is how to describe what I did below, then yes.
- - - - - - - - - - - - - - - - - - - - - - - - - - - - - - -
Boot Floor Repair:
The twin silencers on my donor car were mounted where the hole in my boot was.
As weight would be hanging down, I didn't want to risk a "fill in the hole" type repair.
So the piece I made yesterday was intended to overlap the hole from above.
That way the weight of the silencer would be properly supported.
In order to test what I hoped to do it was time to tidy up my scrap "workings".

The plan was to weld into the drilled holes from above to see if that would make a good join.
I clamped the two sections together with the holes "sunny side" up.

Then welded into the holes, and for a change I actually had some nice welds...

They had even penetrated through to the other side of the second section of metal.

So I went back to the boot floor and drilled some holes & cleaned up the metal...

After a small bit of trimming and bending, the piece I cut out yesterday was good to go...

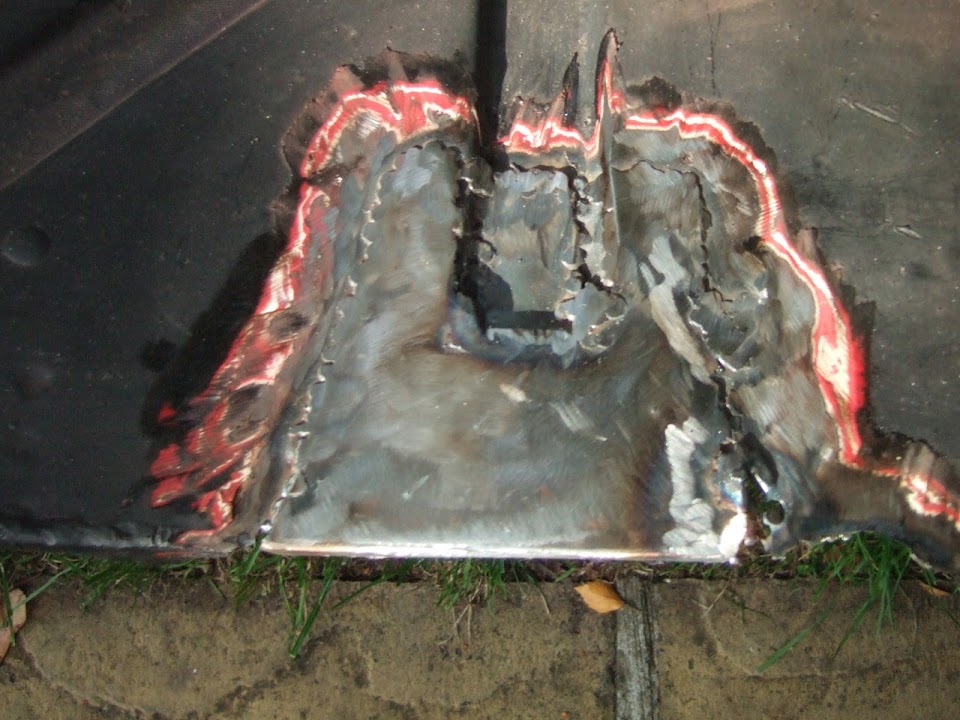
I then turned the rear arches upside down & clamped the repair piece in place...

After welding all the holes it looked like this...
( Excuse the poor photo, my old camera is still playing up. )

Although penetration through the other side wasn't consistent...

Then the arches were turned back over so I could weld the repair piece's edges to the boot floor.
Unfortunately I managed to blow a few holes in the metal while welding it in place.
I could weld some of the holes closed, but others I just made worse.
So I leave the missing section from the boot edge (bottom right of repair) for now.
Then this will be fixed when the whole floor in fibre glassed to the body shell.
This is what the boot floor looks like after the repair...
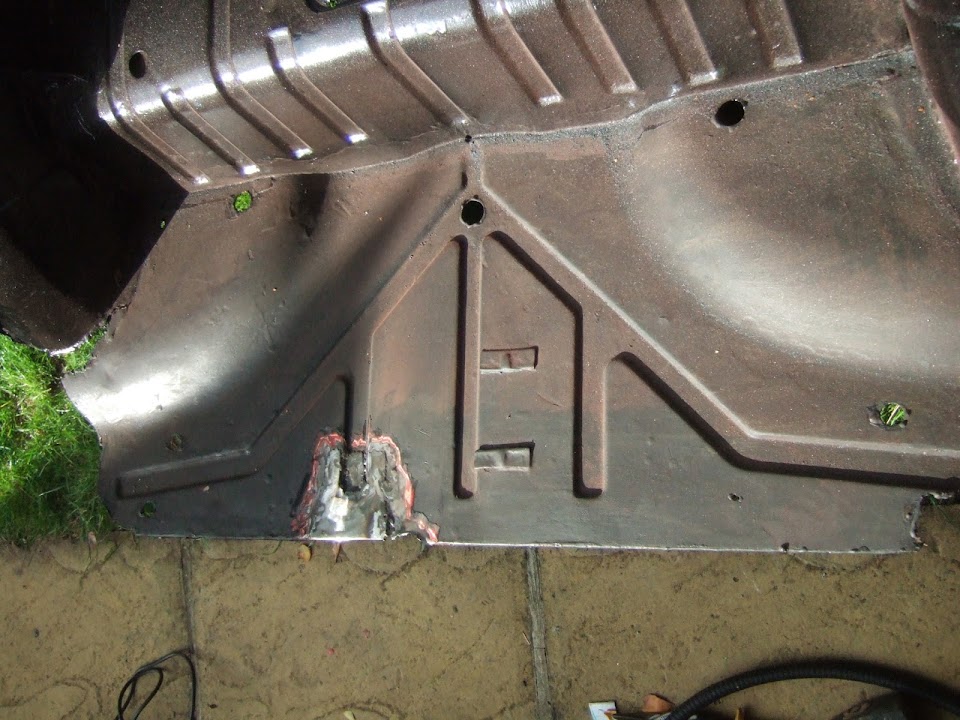
The final job was to apply some Kurust in preparation for painting tomorrow (weather permitting).

Whilst my welding is still a bit hit and miss, this repair is definitely not going anywhere.
Until next time, take care, Paul.
|
26th September 2013, 15:52
|
|
Senior Member
|
|
Join Date: Jun 2011
Location: birchington, kent
Posts: 1,769
|
|
Beautiful welds. did you spiral out or just aim for the centre?
|
26th September 2013, 16:29
|
|
Senior Member
|
|
Join Date: Mar 2012
Posts: 159
|
|
This man doesn't need a donor car. Just give him some sheet metal and a welding device!
|
27th September 2013, 15:26
|
|
Senior Member
|
|
Join Date: Feb 2012
Location: Wembley, London
Posts: 5,058
|
|
Replies:
Gary H - I started at the centre & then made a small circle around it.
christinedmc - You are too kind Michiel, as I am still a long way from "real" fabrication work.
- - - - - - - - - - - - - - - - - - - - - - - - - - - - - - -
Tidying Up Boot Floor Repair:
I didn't want to risk blowing holes by welding the edge of the boot floor to the repair piece.
( Which is why I welded through the drilled holes, away from the edges, in the first place. )
Instead, I put a layer layer of body filler over the underside of the repair...
( Sorry photo is a bit blurred. )

While I was waiting for that to dry, I turned the wheel arched over and painted the top side.
I also put a second coat on the "cut outs" at the front of the arches I made to fit around the frame.

The repair was never going to be seamless, but at least the paint improves the look of it...

The good news was the top side was touch dry when I went to turn it over to sand down the filler.
The bad news is that painting outside in autumn on windy day has covered the fresh paint in leaves & "bits".

Still, it is not a part of the car that needs a show finish, so I'll sort that out another day.
I couldn't get a decent photo to show the filler after I had tidied it up a bit...

It is slightly easier to see after I had painted the underside of the boot floor...


So now the rear wheel arches & rear frame work are ready to be test fitted to the chassis.
I am sure that I will need to modify the rear frame mounting points to fit.
( As they will need to align with the corresponding holes in the wheel arches. )
But the only way to find out will be to start the fitting process and see what happens.
Until then, take care, Paul.
|
27th September 2013, 18:30
|
|
Senior Member
|
|
Join Date: Apr 2012
Posts: 1,163
|
|
Keep going Paul, looking forward to starting on my frame tomorrow.
Just a small point but for tidying up repairs such as the last one you may be better using P40 or equiv as normal body filler will absorb water if the paint get scratched, the P40 stuff is much more hard wearing and less hygroscopic ( big word of the week) :-)
|
28th September 2013, 06:21
|
 |
Senior Member
|
|
Join Date: Oct 2011
Location: Surrey
Posts: 363
|
|
P40
Quote:
Originally Posted by Viatron
Keep going Paul, looking forward to starting on my frame tomorrow.
Just a small point but for tidying up repairs such as the last one you may be better using P40 or equiv as normal body filler will absorb water if the paint get scratched, the P40 stuff is much more hard wearing and less hygroscopic ( big word of the week) :-)
|
Only just introduced to P40 from the Trbute thread, what great gear for bridging holes in fibreglass, filling low spots and bonding, however quite expensive but wish I had found it earlier in our build. |
|
Currently Active Users Viewing This Thread: 4 (0 members and 4 guests)
|
|
|
 Posting Rules
|
You may not post new threads
You may not post replies
You may not post attachments
You may not edit your posts
HTML code is Off
|
|
|
All times are GMT +0. The time now is 21:03.
|


 Linear Mode

