|
|
| Vintage and Classic Roadster Kit Car Builds For Vintage and Classic era kit cars. Post your build reports, problems and progress here |

9th June 2015, 15:06
|
 |
Senior Member
Enthusiast
|
|
Join Date: Sep 2004
Posts: 1,898
|
|
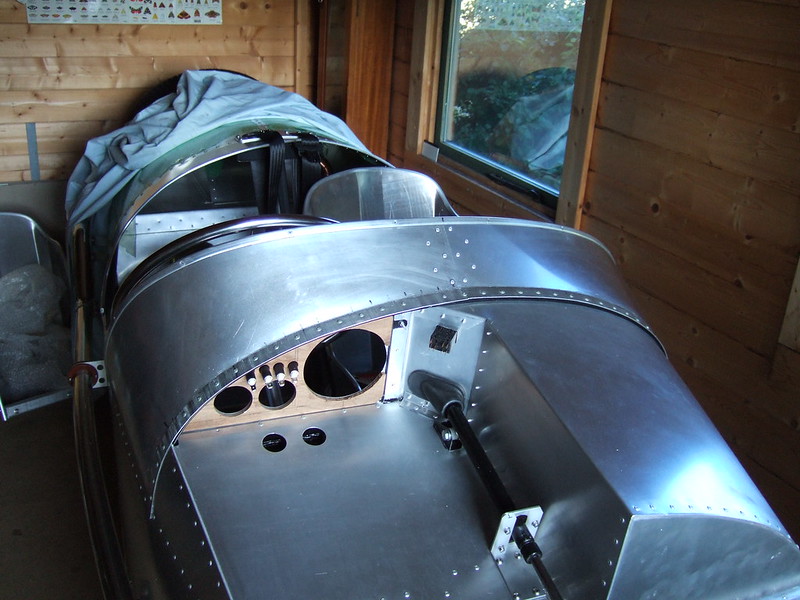
Well the rear is now pretty much complete. Just need to add the lights and then that's it. As you can probably see there were hundreds of rivets to set and, just to make it even more interesting, the rear top panel is also bonded with epoxy resin. The result is very strong!
That just leaves (bodywork wise) the dash top and bonnet to do. Light at the end of the tunnel at last.
Cheers, Robin
 DSCF2009 DSCF2009 by Robin Martin, on Flickr
 DSCF2006 DSCF2006 by Robin Martin, on Flickr
 DSCF2004 DSCF2004 by Robin Martin, on Flickr
And some experiments in proper metal forming (needed for the dash top)
 DSCF2010 DSCF2010 by Robin Martin, on Flickr |
9th June 2015, 15:31
|
|
Senior Member
|
|
Join Date: Jun 2011
Location: birchington, kent
Posts: 1,769
|
|
Lovely work, where did you get that edging? Are you painting the car or just polishing it?
|
9th June 2015, 15:45
|
|
Senior Member
Enthusiast
|
|
Join Date: Sep 2004
Posts: 1,898
|
|
I am hoping to polish it if I have the patience ;-).
The edging is the same as used on the Morgon 3 wheeler. Fellow Pembleton builders used to have a source but unfortunately it seems to have dried up....
Cheers, Robin
|
9th June 2015, 19:05
|
 |
Senior Member
Enthusiast
|
|
Join Date: Mar 2005
Posts: 3,081
|
|
Quote:
Originally Posted by MartinClan

Well the rear is now pretty much complete. Just need to add the lights and then that's it. As you can probably see there were hundreds of rivets to set and, just to make it even more interesting, the rear top panel is also bonded with epoxy resin. The result is very strong!
That just leaves (bodywork wise) the dash top and bonnet to do. Light at the end of the tunnel at last.
Cheers, Robin
DSCF2009 by Robin Martin, on Flickr
DSCF2006 by Robin Martin, on Flickr
DSCF2004 by Robin Martin, on Flickr
And some experiments in proper metal forming (needed for the dash top)
DSCF2010 by Robin Martin, on Flickr |
Looking very smart!
Is that very shiny thing the silencer?? |
9th June 2015, 19:29
|
|
Senior Member
Enthusiast
|
|
Join Date: Sep 2004
Posts: 1,898
|
|
Yes. 1 per cylinder. Good job it's not an m20 lol.
Robin
|
24th June 2015, 07:36
|
|
Senior Member
Enthusiast
|
|
Join Date: Sep 2004
Posts: 1,898
|
|

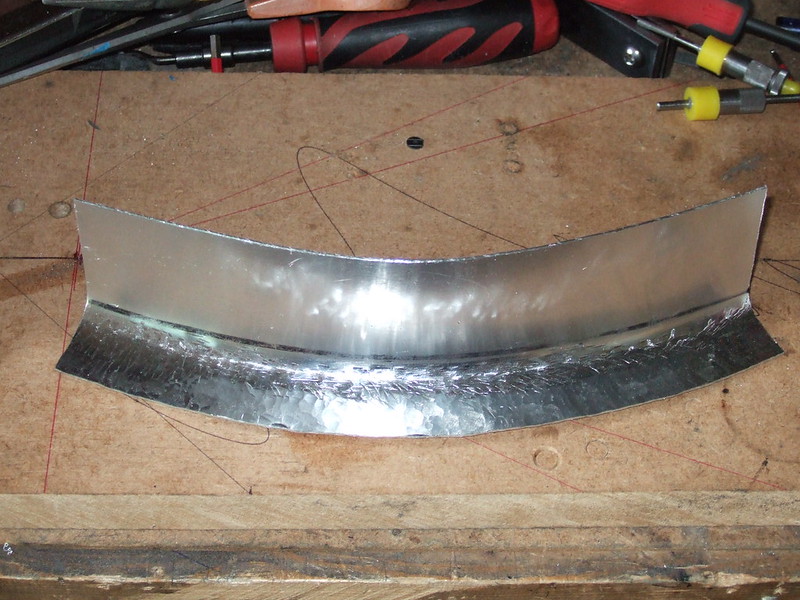
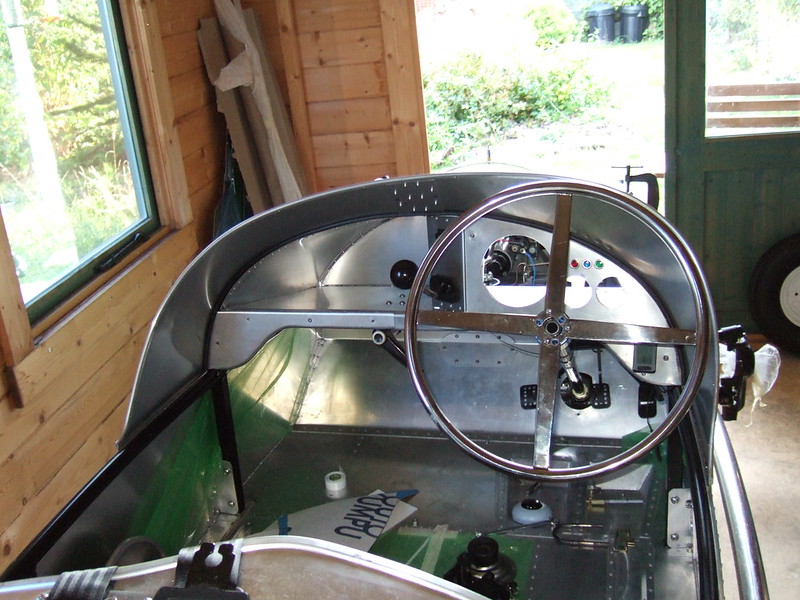
Some more progress despite the fact I have been also spending some time fault finding on the Sportster. I have made a prototype of the drivers side dash top, cowl - call it what you want. It's not bad for a first attempt although I will make it again now I have had some practice.
The flange that fits allong the dash hoop has to be stretched in order to get the shape. After evaluating various methods and tools I have used the old fashoined way of belting it with a hammer. Ok - so it's a special stretching hammer - but much cheaper than buying a proper shrinker/stretcher as used by some bodyshops. The marks left by the hammer will be hidden by the bonnet tape.
I have shaped the cowl in such a way that it covers the steering wheel thus hopefully preventing hands getting too cold. bending it in such a way means it is suprisingly strong. Even so I will be re-inforcing the edge with a U shapped ali trip strip.
Cheers, Robin
 DSCF2028 DSCF2028 by Robin Martin, on Flickr
 DSCF2026 DSCF2026 by Robin Martin, on Flickr

|
15th September 2015, 12:36
|
|
Senior Member
Enthusiast
|
|
Join Date: Sep 2004
Posts: 1,898
|
|
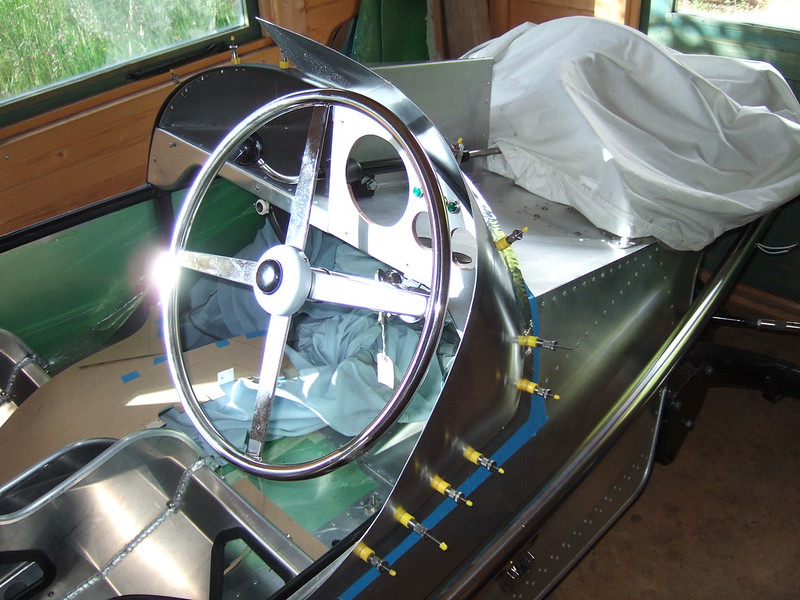
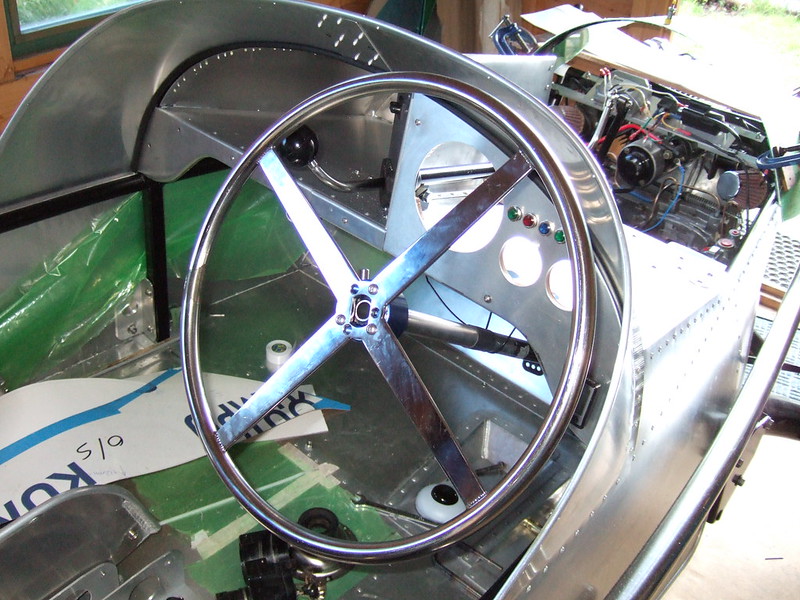
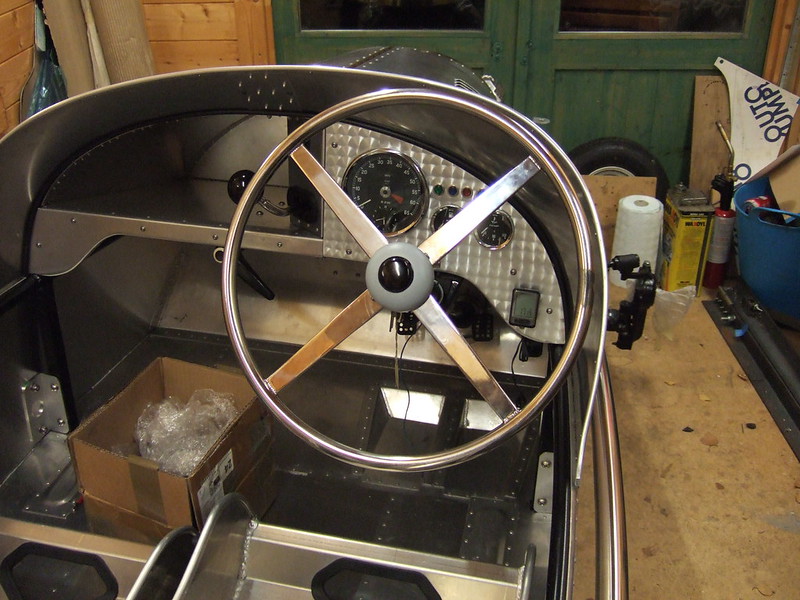
I have completed the scuttle top. In the end I gave in and bought a shrinker/stretcher to make the flange. And to answer my wife's question (lol) yes it is supposed to be asymetric! The offside has been modified to follow the outline of the steering wheel.
 DSCF2037 DSCF2037 by Robin Martin, on Flickr
 DSCF2050 DSCF2050 by Robin Martin, on Flickr
 DSCF2038 DSCF2038 by Robin Martin, on Flickr
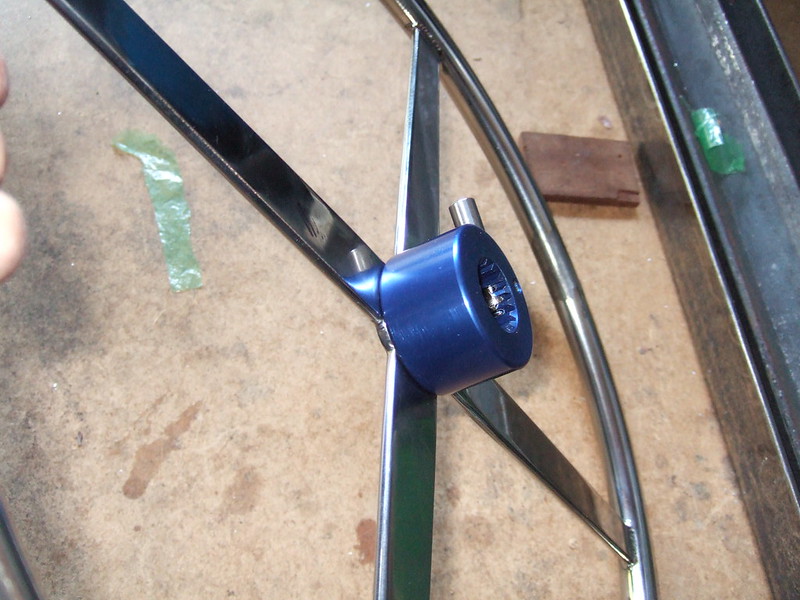
I have also added a quick release mechanism to the steering wheel as, with my chosen seats, getting in and out was proving a bit tricky!
 DSCF2055 DSCF2055 by Robin Martin, on Flickr
 DSCF2041 DSCF2041 by Robin Martin, on Flickr
 DSCF2043 DSCF2043 by Robin Martin, on Flickr
Just the bonnets to do now and that just about completes the bodywork. Light at the end of the tunnel!
Cheers, Robin |
16th October 2015, 15:51
|
|
Member
|
|
Join Date: Oct 2015
Posts: 83
|
|
Quote:
Originally Posted by MartinClan
I have been working towards getting the engine running. Lots of little jobs to do first.
New bracket for clutch cable. The original one that was welded to the chassis meant the clutch cable was poorly aligned and right at the end of the adjustment.
 DSCF1741
 by Robin J Martin, on Flickr
Robin |
Robin
Beautiful workmanship it will be a really stunner when finished.
Can I just ask , was this bracket made of aluminium ?
Not a kit car builder myself yet , however have done loads in the bicycle world and we gave up on aluminium for brackets as the weight saving is negligible and if something is going to break with load and vibration it will be the most awkwardly placed bracket.
regards Paul |
16th October 2015, 18:58
|
|
Senior Member
Enthusiast
|
|
Join Date: Sep 2004
Posts: 1,898
|
|
Thanks for the encouraging words Paul :-). No the bracket is made from a bit of galvanised steel I had hanging arround the workshop. Hence the funny colour!
Cheers Robin
|
2nd December 2015, 11:18
|
|
Senior Member
Enthusiast
|
|
Join Date: Jan 2007
Posts: 932
|
|
Robin
This is looking superb.............it will be really nice to see it on the road.
How far from IVA are you realistically?
Mike
|
2nd December 2015, 12:05
|
 |
Senior Member
Enthusiast
|
|
Join Date: Jun 2008
Location: Fareham, Hants
Posts: 161
|
|
Some nice panel work here Robin, a friend of mine at work has just made himself an English Wheel for forming petrol tanks and panels for the motorbikes he builds, we made him the top roller and he purchased a set of bottom rollers from the net and incorporated an old lathe tail stock to adjust the bottom roller, it works a treat, maybe one would have helped you out on your panel shaping, they don't leave hammer marks in the material.
|
2nd December 2015, 16:16
|
 |
Senior Member
Enthusiast
|
|
Join Date: Sep 2005
Location: Northampton, UK
Posts: 1,891
|
|
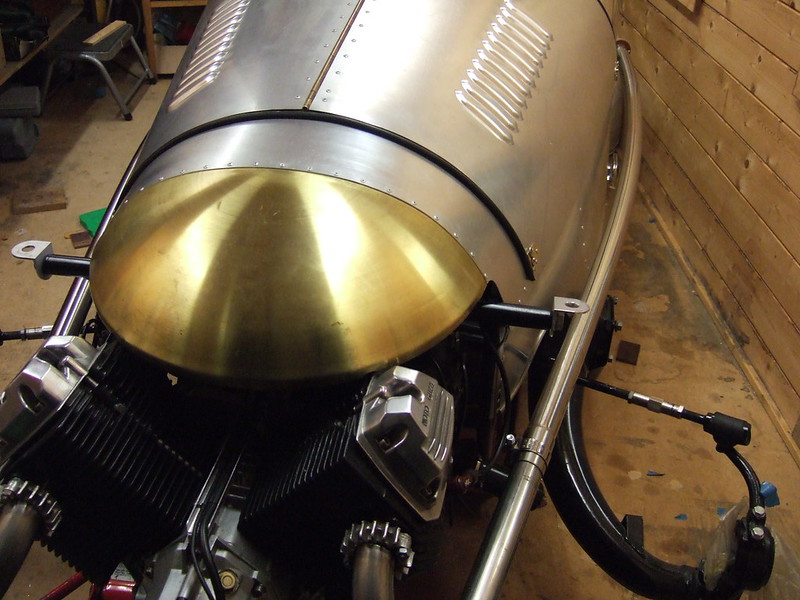
Great work Robin. Really like contrast between the aluminium body and the brass nose.  |
3rd December 2015, 08:38
|
|
Senior Member
Enthusiast
|
|
Join Date: Sep 2004
Posts: 1,898
|
|
Quote:
Originally Posted by Mike
Robin
This is looking superb.............it will be really nice to see it on the road.
How far from IVA are you realistically?
Mike
|
Thanks Mike.
Middle of next year I hope if I don't pontificate (fart arround) too much...
It actually requires an MSVA (Motorcycle Single Vehicle Approval) test as it qualifies as a heavy trike. Much less onerous, although it still has the infamous radius test, and far cheaper :-)
Cheers, Robin |
14th December 2015, 09:55
|
|
Senior Member
Enthusiast
|
|
Join Date: Sep 2004
Posts: 1,898
|
|
Fitted the wheels this weekend. Not quite so simple as it sounds as the wheels and hubs are combined. The wheels are made by Pembleton by machining down the 2cv hubs. Makes for a very low unsprung weight which should contribute towards the handling. Riding a bit high at the moment....
 DSCF2074 DSCF2074 by Robin Martin, on Flickr
Robin |
14th December 2015, 10:12
|
 |
Senior Member
Enthusiast
|
|
Join Date: Feb 2005
Location: Hampshire
Posts: 2,497
|
|
Looks awesome |
14th December 2015, 13:23
|
|
Senior Member
|
|
Join Date: Mar 2012
Posts: 1,152
|
|
Stunning.
|
14th December 2015, 18:57
|
|
Senior Member
Enthusiast
|
|
Join Date: Mar 2005
Posts: 3,081
|
|
Quote:
Originally Posted by MartinClan
Fitted the wheels this weekend. Not quite so simple as it sounds as the wheels and hubs are combined. The wheels are made by Pembleton by machining down the 2cv hubs. Makes for a very low unsprung weight which should contribute towards the handling. Riding a bit high at the moment....
DSCF2074 by Robin Martin, on Flickr
Robin |
Wow, that looks stunning!! |
20th December 2015, 16:50
|
|
Senior Member
Enthusiast
|
|
Join Date: Sep 2004
Posts: 1,898
|
|
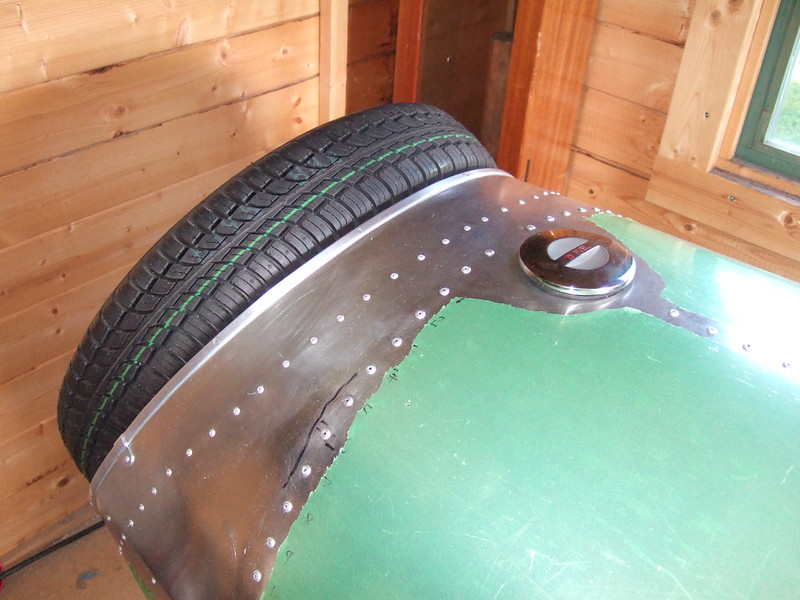
Mudguards
I am trying to do something clever to support the mudguards as they rotate. They are very light being made of aluminium - much lighter than the Marlin. Even so I want to design out the bouncing up and down I get on the Marlin.
So I have been doing some experimentation trying to find the rotation centre by extending the line of the king pin up to the top of the tyre..
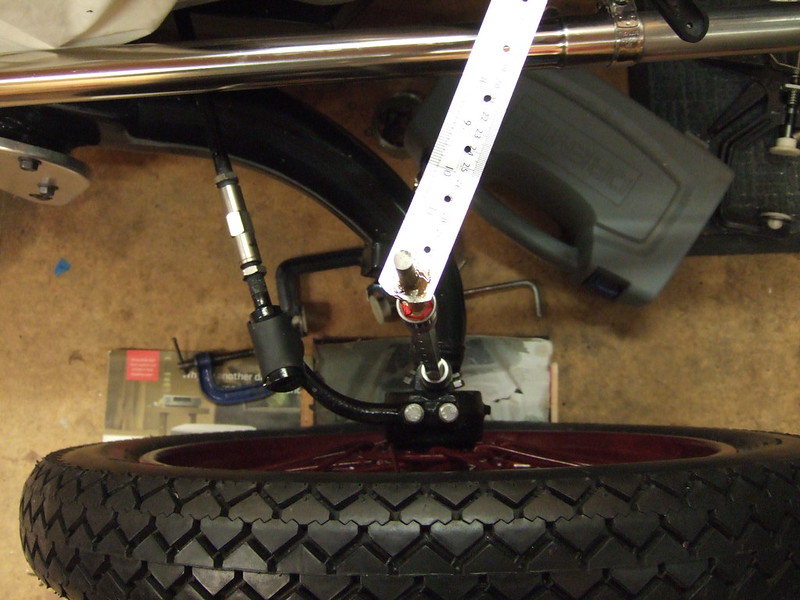 DSCF2078 DSCF2078 by Robin Martin, on Flickr
 Dscf2079 Dscf2079 by Robin Martin, on Flickr
Looks a bit Heath Robinson but I think it's done the trick.
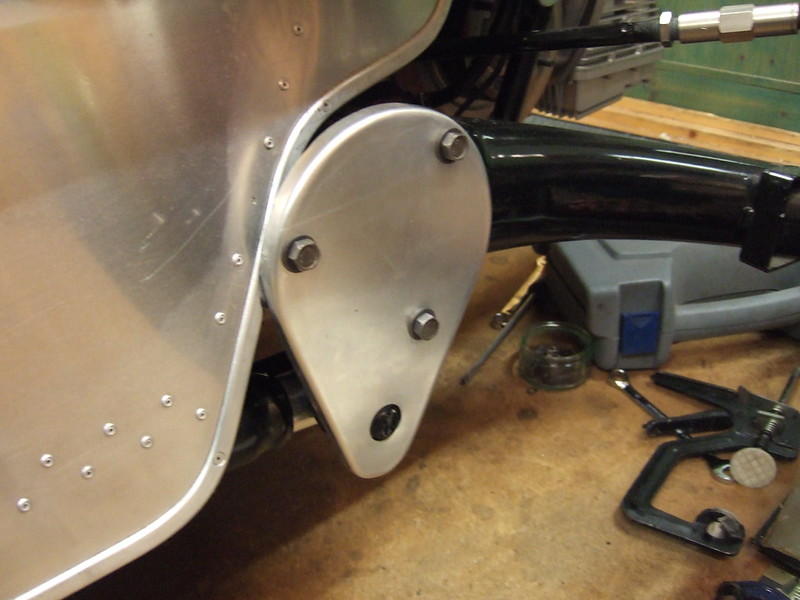
I also made some MSVA friendly covers for the ends of the suspension arms.
 DSCF2081 DSCF2081 by Robin Martin, on Flickr
They clear the bodywork by at least 2mm....
Robin |
9th January 2016, 07:48
|
|
Senior Member
|
|
Join Date: Apr 2014
Location: Birmingham, UK
Posts: 545
|
|
Nice
|
|
Currently Active Users Viewing This Thread: 1 (0 members and 1 guests)
|
|
|
 Posting Rules
|
You may not post new threads
You may not post replies
You may not post attachments
You may not edit your posts
HTML code is Off
|
|
|
All times are GMT +0. The time now is 06:09.
|


 Linear Mode

