|
|
| Sammio Builds and discussions Sammio bodied car builds and specials |

5th February 2014, 18:10
|
 |
Senior Member
|
|
Join Date: Jul 2011
Posts: 5,328
|
|
Quote:
Originally Posted by Scottie22

Surely trying to pass the jacket off as something it was not, would be against the law?
Who would possible advocate such a thing? :-)
|
Perhaps it could be marketed as a 'Tribute' then? |
5th February 2014, 19:44
|
|
Senior Member
|
|
Join Date: Jul 2011
Posts: 490
|
|
Quote:
Originally Posted by Paul L
[b]
It was a gift from the MZ factory when I used to races MZ250s for one of their main UK dealers.
|
You used to RACE MZ250's!?
Brave man! |
6th February 2014, 12:09
|
 |
Senior Member
|
|
Join Date: Feb 2012
Location: Wembley, London
Posts: 5,058
|
|

Mr T & Scottie - Perhaps I'd better not post the photo of my "new" car work jacket. 
( A rather fetching 20 year old purple ski jacket that has also seen better days. )
Nike55 - Cheers, see MZ photos below.
- - - - - - - - - - - - - - - - - - - - - - - - - - - - - - -
Took a chance...
Headed out quite earlier this morning hoping I might get something done before the rain came.
It was too early to use the grinder, so I peeled off a bit of the tarpaulin & mixed up some filler.


Then I left a couple of house bricks on the top of the dash so I could put the cover back on without it sticking to the filler.
But I had no sooner started cleaning up the filler I put on the battery box yesterday, when the rain started. 
You can just about make out the white filler dust on the paving slab.

So it was back on with tarpaulin.

I had just enough time to wipe down the battery box.

Before I had to run back up to the house as the heavens really opened.
Still, all jobs done count, even the little ones.
MZ Racing
I've posted two of these photos before, but Nike55's reply is a good excuse to scan a few more old photos in.
Back in 1989, I turned a mild mannered MZ TS250 road bike...

Into a mild mannered MZ 250 racing bike.

Note the upgraded disc brake fitted in the photo above.
This was as a direct result of discovering the limits of the original drum brake at Mallory Park's Hairpin.

After just one year as a "Privateer", I joined a "Works" team. 
( I'm the one in the middle, I even had some hair back then! )

However, the "works" element involved working for the motorbike shop. 
( Unpaid Saturdays, publicity, testing new parts to avoid customer disappointment. )
E.g. This exhaust pipe routing test made it very hard to get around left handers!

But I absolutely loved the years I spent racing MZs.

This is what my second racing bike looked like when I finally sold it.

Two points to note:
- Both the red and yellow paint jobs were my first (& only) attempts at paint spraying using a compressor.
- The rough & ready / "dented" racer look is something I have carried on into my current car build.
Until next time, take care, Paul. 

|
6th February 2014, 15:42
|
|
Senior Member
|
|
Join Date: May 2013
Posts: 2,161
|
|
Brilliant Paul!
Well done.
|
6th February 2014, 17:30
|
|
Senior Member
|
|
Join Date: Jul 2011
Posts: 490
|
|
Great stuff Paul. Love the photos and the concept of the racing MZ.
Last time I saw a TS 250 was in Cuba in 2011. Mostly solo bikes but I did see a couple with side cars - tried to take a snap but obscured by too much blue smoke!
|
9th February 2014, 15:26
|
|
Senior Member
|
|
Join Date: Feb 2012
Location: Wembley, London
Posts: 5,058
|
|
Scottie & Nigel - Cheers chaps.
- - - - - - - - - - - - - - - - - - - - - - - - - - - - - - -
Sunshine & Showers...
Just back from a family weekend away near Worcester, staying in a converted pigsty.

Where my daughters were keen to see what I would look like with long hair.


With children like these, who needs enemies?
Anyway, back to the build, as I headed outside after we got home.
I started by cleaning up the filler I had applied to various parts of the metal dash area the other day.
But just as I'd finished putting a coat of etch primer over the top the rain came.
Just enough time to take this photo before getting the tarpaulin back over the bulkhead.

Even though this is still a bit rough, it is miles better than what is was before.

Shortly after I had packed everything away and taken shelter from the rain, it stopped.
So I went back outside to carry on for a bit longer.
My new black plastic gearbox tunnel cover has arrived.

But I will need to spend some time making sure I can get a good fit all round with it.
I cleaned up the remaining bits of the battery box that I had to abandon when it started raining the other day.
Then I mixed up some more fibreglass filler and applied some to...
The inside, welded, corners of the heater control panel:

The final areas on the outside of the battery box:


Plus the de-mister vents:

The eagle eyed amongst you may have noticed rain drops on some of the parts above.
And that is because it started raining again, just as I was trying to use up the last bit of filler. 
So, once again, I needed to put something on the bulkhead to stop the tarpaulin sticking to it.

Obviously, no sooner had I finished packing up & getting out of the rain, when it stopped! 
But I simply just couldn't face unpacking everything again, so just called it a day.
Given the amount of serious flooding we saw over the weekend, I can't complain too much.
So until next time, take care, Paul.
|
10th February 2014, 15:29
|
|
Senior Member
|
|
Join Date: Feb 2012
Location: Wembley, London
Posts: 5,058
|
|
All dressed up and no where to go...
I managed to complete most of my chores for the day while it was still dry outside.
But by the time I got changed into my working clothes & reached the summer house, it started to rain.
So I needed a job that I could do while sheltering from the rain outside...
The original Spitfire dash has two warning lights that I will not be using.

( The other one is the seat belt warning light. )
Which leaves three holes to be filled for each light.

So I cut two small metal discs to "jam" into the main centre holes.
( The smaller holes do not go through the dash, they are just locating points. )
I then put some wood filler into the holes.

I then put filler in some of the cracks in the wood grain, which left the centre section looking like this.

I also filled in some of the cracks in the two outer sections while I was at it.

When this is all set, I will sand it all down and apply some wood stain & vanish over the top.
In the photo below you can see the dash mounting fitting I have removed on the left.
On the right is the numerous holes that previous owners have made trying to fit it.
I have filled all these in for now, so I can measure this properly and drill two new holes.

The final job on the dash was an attempt to correct the "bow" in the top of the centre section.

I have simply clamped this between some box section for now.

But hopefully the "blank" I am fitting into the old heater control hole will help this too.
By the time I'd finished messing about with the dash, the sun had come out again.
So I ran the grinder over the filler I applied to the de-mister vent repairs covering everything in dust.

Once that was cleaned up and a coat of etch primer applied it looked a lot better.

I then cleaned up the filler on the outside of the battery box & the inside of the new heater control panel.
Then I gave these a coat of primer too.


By which point the clouds had returned and it felt like rain again.
So another quick tidy up and it was back on with the covers as I called it a day.
Whilst this weather is really frustrating, I am still happy to be making any progress, no matter how small.
Cheers, Paul.
|
10th February 2014, 19:35
|
|
Senior Member
|
|
Join Date: May 2013
Posts: 2,161
|
|
If the bowed bit does not straighten out Paul, if you have access to a steam
cleaner you could try super heating it first, then when clamped and cooled down that may help?
|
12th February 2014, 10:31
|
|
Senior Member
|
|
Join Date: Feb 2012
Location: Wembley, London
Posts: 5,058
|
|
Scottie - Thanks & I think you'll like the build thread I've put a link to below.
- - - - - - - - - - - - - - - - - - - - - - - - - - - - - - -
I blame the weather...
So shortly after I updated the Sammio/Ribble/Miglia "sticky", this forum section gets split in two.
I am not prepared to add anything more to this "debate", other than re-state my usual position.
Both the Ribble Navigator & Miglia Speedster are better quality & easier to build kits than my Cordite.
I am happy to support Andy & Mike and wish them both all the best for the future.
Unfortunately, there is not much I can report on my own build as a mild distraction to the rows.
So I will add a couple of links to other build threads that you might enjoy more than the recent forum "biff".
Dash Board:
With yet more rain due, I looked for a quick job that didn't need too much unpacking/setting up.
So I sanded down the wood filler on the dash and wiped it clean with white spirits.

I quite like the way the filler has gone into the sunken cracks in the wood.


I had a tin of Ronseal wood stain lying around that I'd used on the posts for our clothes lines.
So in the spirit of recycling and making do, that was what I brushed onto the dash.

Whilst one coat has made a difference, I will give it at least a second coat.


Notes:
- If the brush marks are still visible when it dries, I will use some fine sandpaper on the dash.
- The centre dash is much straighter after clamping, but I might try the steam from a kettle another day based on Scottie's suggestion above.
Thanks all from me, but as promised there is a bit of additional light reading below, cheers, Paul.
- - - - - - - - - - - - - - - - - - - - - - - - - - - - - - -
Tribute Forum
I know most of the people who read this, also read the Tribute section, but just in case you missed it.
Chris has just bought an old 250 SWB buck...

Which reminded me of an amazing bloke in South Africa building another classic Ferrari buck from scratch.
http://www.rodsnsods.co.uk/forum/gar...-project-83285
Chris also took some photos in the place that sold him the buck.

Which reminded me of another great build thread where a guy is building a complete car from scratch.
He has been at it for years and there is still a long way to go, but he is also using this wire frame technique ( From Page 17 ).
http://www.rodsnsods.co.uk/forum/gar...uilt-car-49948
Scottie - I'll think you'll like the way he dealt with his front windscreen issues.
Mind you, the way he had dealt with everything, including headlights & doors are seriously impressive too.
|
12th February 2014, 18:07
|
|
Senior Member
|
|
Join Date: May 2013
Posts: 2,161
|
|
Dashboard
Hi Paul,
I think your dashboard is going to look really nice when its done, in a nice dark dye, the filler will look really like the wood grain.
I checked out the link you gave me. Took me ages to look through it all!
Really interesting.
Oh to have the luxury he had of choosing almost any full width screen!
As I said before, because Chris narrowed the D type shell by around 5 inches, almost all windscreens were just 5 or 6 inches too wide.
Hence the huge problem finding a compatible screen then forcing it to fit.
Anyhow, its done now, or most of the hard work is at least.
Good luck with your build Paul!
|
13th February 2014, 16:44
|
|
Senior Member
|
|
Join Date: Feb 2012
Location: Wembley, London
Posts: 5,058
|
|
Scottie - Cheers, it does seem like glass is a key limiting factor in what Chris @ Tribute can build.
Although, you have now blazed a windscreen trail for other A352 builders to follow.
- - - - - - - - - - - - - - - - - - - - - - - - - - - - - - -
What a difference a day makes...
I didn't do much yesterday as I knew yet another storm was coming and it really chucked it down at one point.

Still, it looked like I might get a decent dry spell today, before yet more rain tomorrow.
So I tried to get as many small jobs done as I could...
The front of the wooden dash sections got a second coat of wood stain.

Various dash related bits got their first coat of paint on one side.

The inside of the battery box got another round of filler.

Whilst the outside got a first coat of paint.

Note:
I know some of this paint will melt when I weld the box into position.
But it will still be easier to re-do these bits again, rather than paint the whole box inside the bulkhead.
By this time, the front of the dash was touch dry, so I flipped it over to do the back.
As I figured, without a roof, they is a very good chance that this is going to get wet one day.
I also put stuff underneath the dash panels to stop the front faces sticking to the newspaper below.
Before:

After:

I then unwrapped the bulkhead and brushed on some anti-rust treatment in a few areas.


At this point I had to go back in doors to warm up, as it was bloody cold working outside today.
So obviously, just as I stepped inside, the sun came out!

Unfortunately, I had some domestic chores to take care of before I could go back outside & missed the sunshine.
However, by the time I got back outside the Kurust was dry, so I sprayed on some etch primer.


The next job here will be to put some filler over the de-mister vents & some of the other areas I welded recently.
I also need to weld something at each end of the metal dash to give it a bit of extra support.
( Sorry both these photos are a bit blurred. )


My final task of the day was to use some of the wood stain on our clothes line posts.
( Which is why I had the tin in the first place to "top up" previous treatment. )

Right, I need to head back outside now to put these posts away & cover up the bulkhead ready for the next round of rain.
So until next time, take care, Paul.
|
15th February 2014, 14:22
|
|
Senior Member
|
|
Join Date: Feb 2012
Location: Wembley, London
Posts: 5,058
|
|
Still battling the elements...
The good news is that our new loft conversion is still attached to the rest of the house.
Although there were several times last night where it felt like it was going to be blown away!
At least this morning was dry, so I got a little bit done...
Second coat of wood stain on the rear of the dash panels.

First coat of black on the other side of the various dash brackets.

Second coat of black on these parts.

As I don't need to paint the rear of the "blanks" as they will be sealed in place from behind.
I also want to drill the mounting holes in the new heater control panel before that section gets a 2nd coat of paint.
I had just started putting a second coat of black on the battery box when the rain started.


So it was a mad run around trying to get everything under cover.
It did brighten up again shortly after this, so I went back outside & switched to fibreglass filler work...
Behind the dash repair & passenger vent join.

The patched de-mister hole on the passenger side.

The patch for the second heater pipe.

The de-mister vent on the driver's side.


Finally one of the joins for the vent panel on the driver's side.

That was as much as I could easily reach with the bulkhead set up like this.

So I will do the next bit of filler work when I have shifted the bulkhead into a different position.
Although I didn't take a photo, I also sprayed some etch primer behind the dash in a few areas I'd missed the other day.
The main reason for no photo was the fact it had started raining again, so I was busy getting the tarpaulin back on.
However, I had taken a few other photos before this...
The first was for another possible position for the battery cut off switch.
( Obviously the switch would be facing the other way when fitted. )

So I'll have another think about that and then make a final decision.
Whilst the rain was a pain, it was the force of the wind & the noise it was making that was the real worry.
We have a huge eucalyptus tree in our garden, planted by the previous house owner.
( My top tip, never put one of these in your own garden as it is a complete monster! )

The wind was having a field day with it just a few feet from where I was working! 

By the time I am writing this the rain had stopped again, but I've been on domestic chores up until now.
( My mum & sister are coming round shortly, so I'd better go. )
Until next time, take care, Paul.
|
15th February 2014, 17:28
|
|
Senior Member
|
|
Join Date: Apr 2012
Posts: 1,163
|
|
Busy busy busy Paul! When do you think you'll have it mounted to the chassis?
Mac
|
16th February 2014, 18:53
|
|
Senior Member
|
|
Join Date: Feb 2012
Location: Wembley, London
Posts: 5,058
|
|
Mac - Unfortunately, I have no real idea when the bulkhead will be back on the chassis.
My current plan is to just keep chipping away and eventually all the bulkhead jobs will be complete. 
The good news is that I have definitely broken the back of the work now and there is an end in sight.
- - - - - - - - - - - - - - - - - - - - - - - - - - - - - - -
Not much to show for my efforts...
Despite the good weather outside, I knew I would only get a short period of time outside today.
But my recent run of "little & often" sessions are really helping me to keep motivated through the winter months.
My first job of the day was to clean up all the pieces I painted & stained yesterday.
As the mad dash to get them out of the rain left some things stuck to the newspaper.
But with limited time available, I didn't want to start any more painting/staining today.
Instead I turned my attention to the ends of the metal dash board.


I made two small brackets to weld in & fix the ends of the dash in place.

I then welded in these brackets to the bottom edge, perpendicular to the dash board "face".
I was also able to put a bit of extra welding in a few places to help add strength.


Then it was time to apply some Kurust on all the bare metal.


Next job will be to apply some fibre glass filler to tidy up the welding and seal off any gaps.
I also applied some more Kurust on the inside of the hollow created when I cut off & sealed the windscreen posts.
I did take some photos, but they look rubbish, hopefully I will get some better ones next time.
The only other thing I managed to do today was to start refurbishing my mate's welder.
It was rusty on the outside when I got it, but I figured the least I could do was re-paint it as a small thank you.
Before:

Unfortunately, I started to have rusty bulkhead flashbacks as soon as I touched the flakey blue paint.
So this is going to take me a bit longer to sort out, as obviously I am going to do the best job I can.
This is as far as I managed to get with the cleaning stage today.


Once I have got all the paint off, I will apply some Kurust & etch primer ASAP.
Until next time, take care, Paul.
|
16th February 2014, 20:02
|
|
Senior Member
|
|
Join Date: Apr 2012
Posts: 1,163
|
|
Good luck with getting those cleaned up mate, I think there is a fair chance it's powdercoat not paint, it can be a real pain to remove, you can try using a blow torch and a wire brush me be?
|
17th February 2014, 16:50
|
|
Senior Member
|
|
Join Date: Feb 2012
Location: Wembley, London
Posts: 5,058
|
|
Mac - Cheers. What ever the blue paint was, it has let rush have a field day underneath it.
- - - - - - - - - - - - - - - - - - - - - - - - - - - - - - -
A little progress...
With the Kurust dry, I could get some etch primer on the corners of the dash that I welded yesterday.


When this primer has fully dried I will apply some fibreglass filler to tidy it all up a bit.
I also had another go at taking photos of the ends of the windscreen posts, which I also primed.


This was another area that I was considering using some expanding foam to "back fill" the hollow.
As always, I will take advice from those who know more about these things than I do.
The edge of my metal dash repair slightly overlapped one of the mounting points.

Nothing a few minutes with a small file couldn't fix.

I then added 4 new clips to mount the centre wooden dash section.

Glad I could finally use something from one of my Ebay "bargains".

At this point things started to unravel a bit as my progress seemed to go backwards.
I drilled a locating hole & mounted the first bracket to join an outer dash section to the centre.

I can't fix the bottom bracket until I have mounted the "blank" for the cigarette lighter.
( And I can't do that until I paint over the rain damage from the other day. )
I was when I came to fix the brackets for the other side that I realised that I'm made a small error...

The bottom bracket runs along the old hole for the choke lever, which I'd forgotten to fill.
So I cut out another small circle of metal and shoved that into the hole.

Then I put a layer off wood filler over the top.

Now I just need to go back and apply some coats of wood stain to this area when it the filler had set.
However, the choke cable came back to bite me again, as I had forgotten something else.
My engine has an oil pressure fitted in the engine bay (although it is actually broken).
Don't ask me what good it would do you sitting in there when you are driving along.
So I keep meaning to ask if people think fitting an oil pressure gauge on the dash is a good idea.
I think I would choose an electric version and there are two approaches I could take:
Get a "Smiths" one that would match the rest of my Spitfire dials.

Or get something that stands out as a modern addition (a bit like the new micro heater controls).

Clearly a white face dial is going to stand out, but they are significantly cheaper than the Smiths one.
I guess either style works with the restored "old car" story.
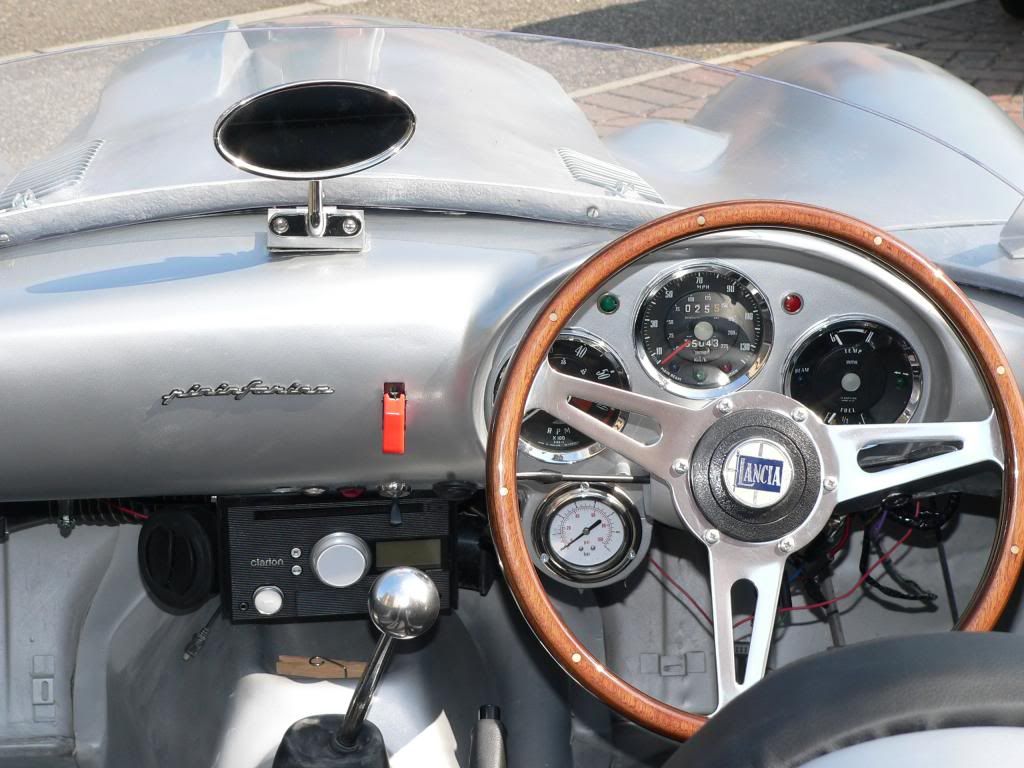
If I am going to fit an oil pressure gauge than the ideal spot would be to the right of the speedo/rev counter.
As there is a factory "hole" just sitting there in the metal work.

This is where the old fog light switch used to go & here is some cardboard the size of a standard 52mm dial.
( You can also just about see how the brackets will sit over the centre dash mounting holes. )

Now you may remember that I was going to use the old fog light hole in the dash as the new position for the choke cable.
So now I would need to find a new home for the choke level.
The wooden dash section "overlaps" the metal support so I could drill a new hole there.
In this photo the cardboard represents the metal and the nut would be where the choke cable could fit.

Whilst it is a pain to keep changing things around, I know it is better to sort this all out sooner rather than later.
The final dash layout will allow me to mock up the routes of cables & wires & seal off surplus bulkhead holes.
So the only good news is that I am slowing inching my way toward the end of this bulkhead phase.
As I said before, all feedback on my expanding foam & oil pressure gauge questions gratefully received.
Cheers, Paul.
|
17th February 2014, 17:25
|
|
Senior Member
|
|
Join Date: Apr 2012
Posts: 1,163
|
|
Paul,
Be aware that the senders for a decent electric oil pressure gauge can be quite costly, I would be tempted to go for a cheaper mechanical one, as long as your careful about where you run the tubing they are fine, just not to close to exhausts etc.
|
17th February 2014, 17:36
|
|
Senior Member
|
|
Join Date: Jul 2011
Posts: 5,328
|
|
Hmm, a white faced oil pressure gauge doesn't need to look modern or out of place imho. Mine was under a tenner from the bay of e, plus another twenty quid for a couple of adaptors and a feed pipe -
 |
17th February 2014, 21:56
|
 |
Senior Member
|
|
Join Date: Mar 2013
Location: Gloucester
Posts: 247
|
|
The Scimitar uses a mechanical gauge like this ( http://www.ebay.co.uk/itm/SMITHS-OIL...item43c59d998a) and a good braided hose is another £30 delivered. I may be in the workshop on Wednesday so I'll see if I have a spare gauge loafing? |
18th February 2014, 12:06
|
|
Senior Member
|
|
Join Date: Feb 2012
Location: Wembley, London
Posts: 5,058
|
|
Mac, Mr T & Jim - Cheers chaps, I really appreciate the replies.
I must confess the thought of fitting a mechanical gauge makes me nervous, as I prefer wires to pipes!
However, I was planning to visit a local(ish) Triumph specialist to discuss some engine work.
Fitting the oil pressure gauge's engine connection would be the sort of job I'd want them to do for me.
So I will bring forward that visit and then make a final decision.
Thanks again, Paul.
PS
This was the electrical version that I had seen on ebay, but have no idea if it is any good.
http://www.ebay.co.uk/itm/Tim-Electr...item3f19afd85d
|
|
Currently Active Users Viewing This Thread: 14 (0 members and 14 guests)
|
|
|
 Posting Rules
|
You may not post new threads
You may not post replies
You may not post attachments
You may not edit your posts
HTML code is Off
|
|
|
All times are GMT +0. The time now is 15:21.
|


 Linear Mode

