|
|
| Vintage and Classic Roadster Kit Car Builds For Vintage and Classic era kit cars. Post your build reports, problems and progress here |

11th November 2018, 13:05
|
|
Senior Member
|
|
Join Date: Nov 2012
Posts: 845
|
|
 Small Steps
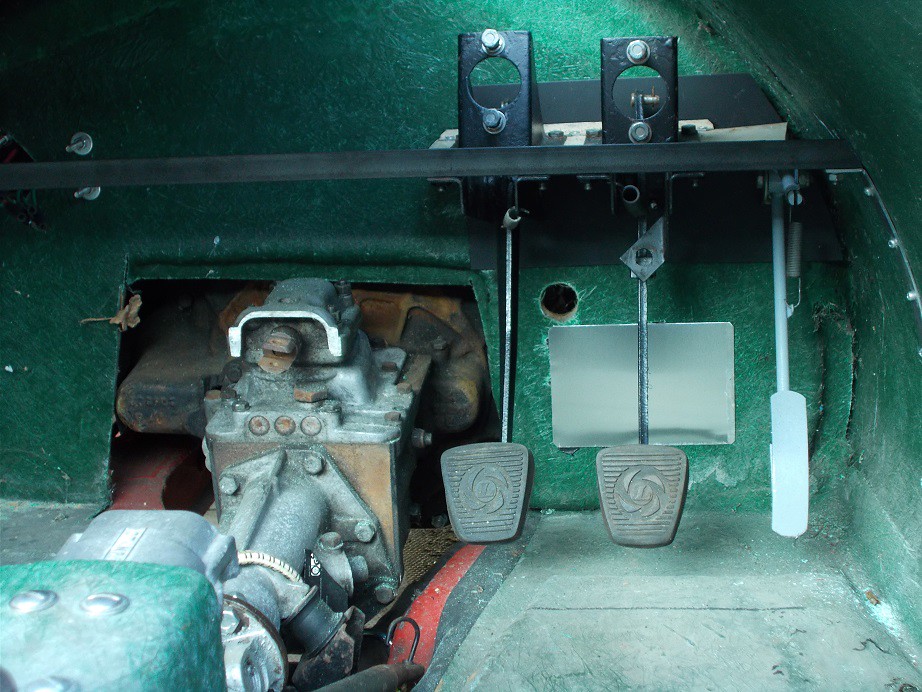
Yesterday morning I wandered down to the cave through the downpour with my newly delivered A2 M5 countersunk bolts, fully intending to trial fit the first aeroscreen (I'd ordered the second on Friday using the money I saved by not going to the Classic Car Show - a whopping £33 entrance + the train fare = 60 quid. In contrast, the Motorbike Show, same venue Monday week £15 entrance). Enthusiasm at a low ebb, due to the foul weather, I decided to limit myself to something simple. Blanking off the hole in the driver's side engine bulkhead seemed to fit the bill. I'd previously thought of filling it but, on reflection, simply fitting an ally plate each side would do as good a job. I cut two 15 x 10 ally rectangles, ran a bead of Sikaflex around one edge of each and, after roughing up the GRP and wiping with acetone, gently pressed each into position. Job done. Even worse photo' alert!

Today, enthusiasm was higher, and I set to fettling my demon aeroscreen pedestals. The above mentioned bolts needed cutting to length, and the 6mm holes, through which the pedestals themselves will be mounted to the body, drilling. I then trial assembled them. I think the supports are little more than pathetic, given the job they were so say 'designed' to do, definitely form over function. They wouldn't last five minutes on a Blower Bentley clocking the ton on the Brooklands banking! Anyway, I'm stuck with them so will have to press on regardless.

You can see from this marginally less rubbish photo' that the shape of the casting prevents the bolts from sitting right down. Hex or button heads would be even uglier  . .
After paying my 1100 respects, I decided to have yet another look at the wing supports. This was about the fourth time as they were clearly intended for a different chassis frame, and I'd feebly put them back in store each time after unsatisfactorily offering them up. This time, however, I was more decisive and decided to make them fit. Two of the four each side could be used, with a little imagination, as they were. One each for the front and rear wings. A third I cold set at both ends in the vice until it also was serviceable. The fourth, however, had to be cut and will need a new body end plate welding on. They're not really worth a photo' until they're in situ. Pleased with this unexpected outcome, I called it a day.
Regards, Mick

|
12th November 2018, 07:56
|
|
Senior Member
|
|
Join Date: Sep 2011
Location: Teesdale
Posts: 238
|
|
Quote:
Originally Posted by Mick O'Malley

You can see from this marginally less rubbish photo' that the shape of the casting prevents the bolts from sitting right down. Hex or button heads would be even uglier .
|
Hi Mick
Would countersunk bolts such as these fit?
https://www.ebay.co.uk/itm/M4-M5-M6-....c101006.m3226 |
13th November 2018, 06:04
|
|
Senior Member
|
|
Join Date: Nov 2012
Posts: 845
|
|
Quote:
Originally Posted by NeilF355
Hi Mick
Would countersunk bolts such as these fit?
|
Hi Neil
Thanks for that, but the problem is the profile of the casting, any M5 CSK would foul on one side long before it was fully home. If the casting were more substantial I'd consider relieving it, but it's so small that it would lose what little strength it has.
Regards, Mick |
17th November 2018, 17:25
|
|
Senior Member
|
|
Join Date: Nov 2012
Posts: 845
|
|
 Chipping Away
This week's progress has been bitty, with not a huge deal to show. I bought sundry fixings, including spring catches in black for the bonnet, plus black bolts for fixing them. This will be post-spraying, which doesn't seem that far away. I'll go and see my man next week to discuss. I whizzed over to see my welder on Thursday in the A352 and, fortunately, he wasn't busy and welded my last two wing brackets on the spot. Excellent!
On the way there the Turner I'd seen at a spring show passed the other way with a wave.
I made and fitted the two bottom radiator brackets, then turned my attention to the transverse support for the pedal box. I don't think it's really necessary, as the mounting to the bulkhead is extremely rigid, but, belt and braces, as ever. I roughly measured the length of ¾" angle that I would need across the top of the footwell and cut a length of batten oversize which I shortened by small increments until it sat perfectly in position - wood assisted design! Laying it on the steel, marking and cutting took moments. More careful measuring and drilling and the screws into the horizontal mounting points were in place. The ends I attached to the body with strip bolted to the angle and Dreadnought rivetted through the sides as I'd done elsewhere.
I was thrilled with how well it had all gone together until I noticed that I'd neglected to make allowance for the end mounting of the throttle cable outer. Another day!
This morning, body removal assistance yet again being unavailable, I measured my seats and ordered the black faux leather vinyl with which they'll be covered. I then decided to make the two front plates to tidy the holes hacked in the body sides to clear the front of the frame. Once again CAD came to the rescue and a careful hour with the tin snips had them made. These again won't be fitted until spraying and final bolting down of the body. I'll need to cut off a couple of the moulded in rivets, and use 4mm ones for attachment.

I deliberately made them rough side out, as I like the 'hasty mid-race paddock repair' look 
That was it.
Regards, Mick
|
18th November 2018, 06:14
|
 |
Senior Member
|
|
Join Date: Feb 2012
Location: Wembley, London
Posts: 5,056
|
|
Mick – Lots of good progress. 
This is not a great photo, but one of my Brooklands screen brackets broke and it really is a poor design.

Good luck, Paul.
|
18th November 2018, 10:41
|
|
Senior Member
|
|
Join Date: Nov 2012
Posts: 845
|
|
Quote:
Originally Posted by Paul L
Mick – Lots of good progress.
This is not a great photo, but one of my Brooklands screen brackets broke and it really is a poor design
|
Thanks Paul
I've imagined a scenario where the completed Monaco hits a speed bump or pot hole and I get the aeroscreen in the teeth. Not a happy prospect. I noticed at the foot of the instruction sheet (which one would have to be fairly stupid to need), that they're Made In China.
Nuff said.
Regards, Mick |
22nd November 2018, 05:04
|
|
Senior Member
|
|
Join Date: Nov 2012
Posts: 845
|
|
 And still they come........
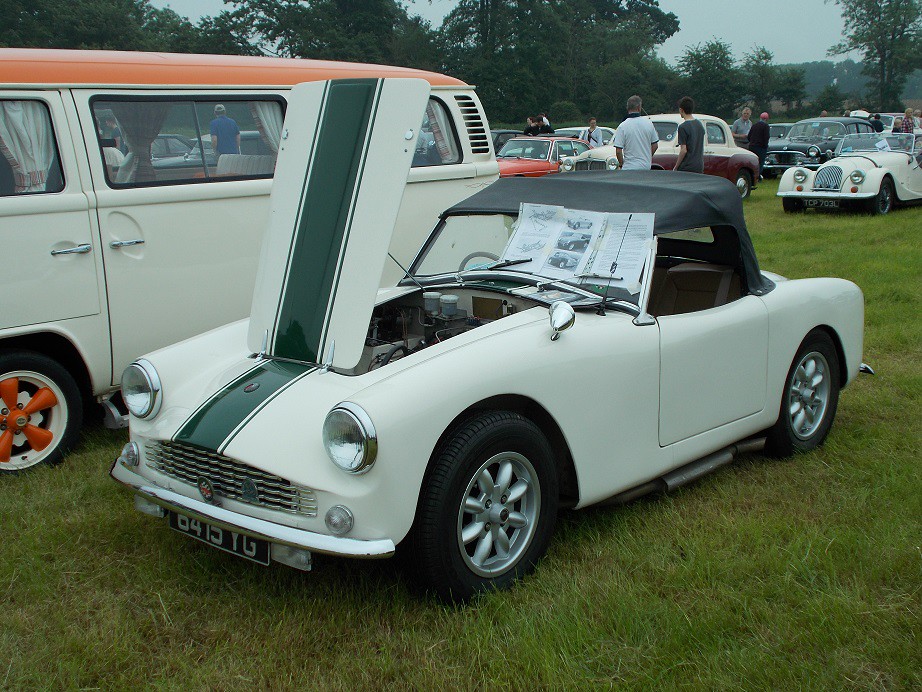
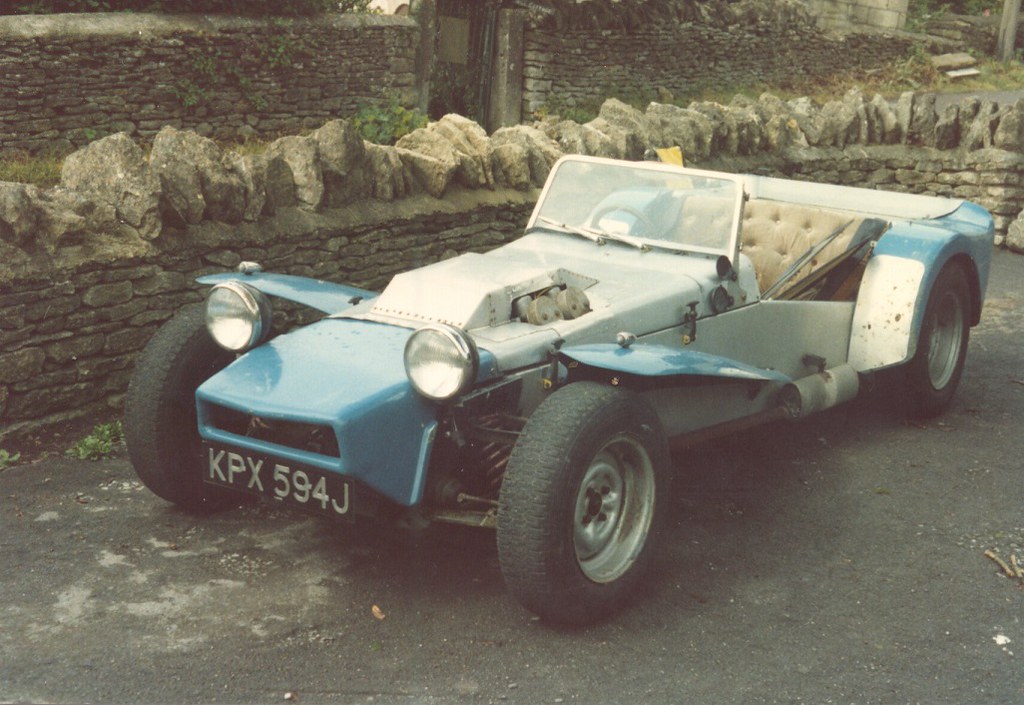
A link posted on the Moss Owners' FB page took me to this.
A barn find in a barn! How cool is that?
Regards, Mick
|
22nd November 2018, 20:53
|
|
Senior Member
|
|
Join Date: Apr 2011
Posts: 282
|
|
A lot of unkind things said by ignorant people on that site. I did love the Brookland screens on top of the windscreen. Tint them for sun visors. Yours is comming on a treat. How come you have hot weather in November?
|
23rd November 2018, 06:03
|
|
Senior Member
|
|
Join Date: Nov 2012
Posts: 845
|
|
 Nibbling away......
This past week I've been chipping away at some of the minor purchasing and fabricating tasks. After reversing the top seatbelt mountings, I've been unhappy with my seat back, so decided to make a replacement. As the body is far from symmetrical, I made it in two halves to sit inside the rear body lip, and was pleased with the outcome. I next cut the two squab bottoms which again were asymmetrical. I then bought the 3" thick hard foam which is coming today.
My 2mm thick steel plate for the wing stay backing plates having arrived, I disced it into eight and drilled the 8mm fixing holes. Fortunately, I'd checked the hole spacings on the wing stay flanges, which clearly hadn't been drilled on a jig, so I numbered everything in pairs. I'll trial mount the wings and post a picture when weather allows.
Yesterday I bit the bullet and decided to trial mount the aeroscreens. As they're quite heavy and unwieldy, I cut a strip of ply to get the spacing of the mounts right without chucking one of the screens on the floor in a moment of inattention  . .

Once the bolts were nipped up I substituted the real thing.
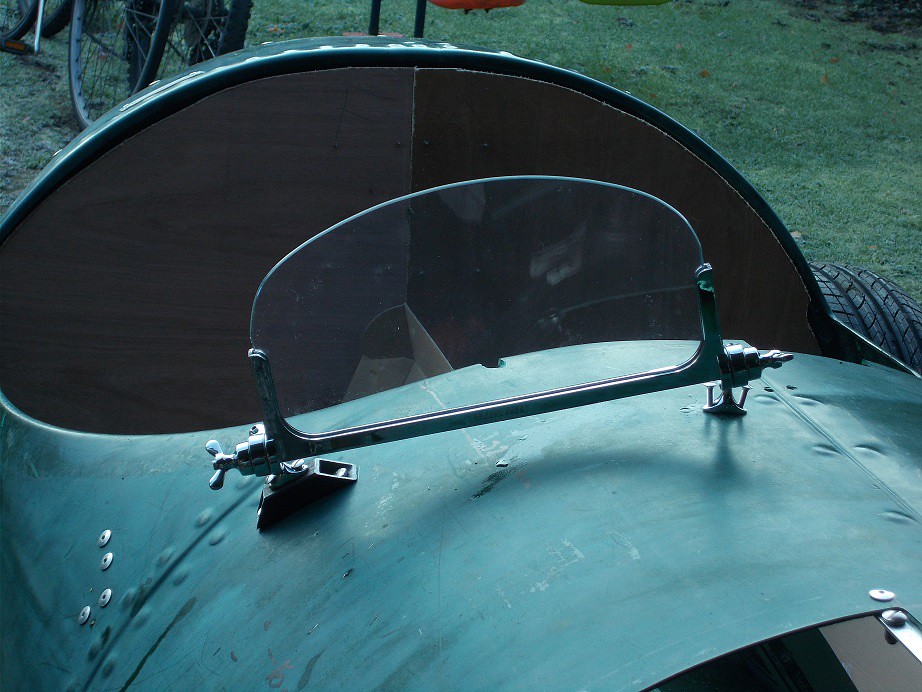
Happy with this, I did the passenger side.

I then cut the backing plates for their mountings and quit while I was ahead. Once back in the warm, I bought a Spitfire gear stick gaiter. I used them on both my Marlin and A352 as they have a retro look.
That was it for the day.
Regards, Mick
|
23rd November 2018, 10:01
|
|
Senior Member
|
|
Join Date: Apr 2014
Location: Birmingham, UK
Posts: 545
|
|
Probably too late now but in the future - for brooklands aeroscreens try this guy http://johnkimble.co.uk/ - I got mine from him |
24th November 2018, 08:02
|
|
Senior Member
|
|
Join Date: Nov 2012
Posts: 845
|
|
Winging it...
Yesterday I decided to make a start on the wings, once I'd drilled and trial fitted the backing plates for the aeroscreen supports. This didn't take long and the mountings are now very rigid. I'll cut the heads off the bolts at a suitable angle and Locktite them. Fingers crossed!
Car Photographer: John Kimble's website picture doesn't include the mounting plinths. Are they similar?
The rear nearside wheel was nearest to the bench, so I started there. Trying various combinations of wood blocks with the wing balanced on top, I hit on a visually satisfactory position. Substituting the first mounting bracket, stuck flush on the body with a loop of gaffa tape, enabled me to mark the necessary holes.

Bolting it in place with its backing plate inside, I re-balanced the wing, taking both side and down the garden views to ensure accurate positioning, and marked and drilled the fixing holes. It took about half a dozen small adjustments before I was happy with its alignment.

Offering up the second bracket I realised that it was overkill, as the first was more than capable of supporting the meagre weight, so decided to go down the Maggie Shapland route and have a locating bar at the very bottom, with the front end, which is only millimetres from the body, bolted thereto.

These will have to wait until after spraying, as they won't be easily removable. Pleased with progress, but with frozen feet, I called it a day.
This morning, browsing Kit Cars on Ebay, I came across this from our favourite comedian. You may recall that the guy who delivered my chassis was on his way to collect one he'd bought for £120......
Regards, Mick
Last edited by Mick O'Malley; 24th November 2018 at 08:20..
Reason: Typo.
|
24th November 2018, 16:23
|
|
Senior Member
|
|
Join Date: Nov 2012
Posts: 845
|
|
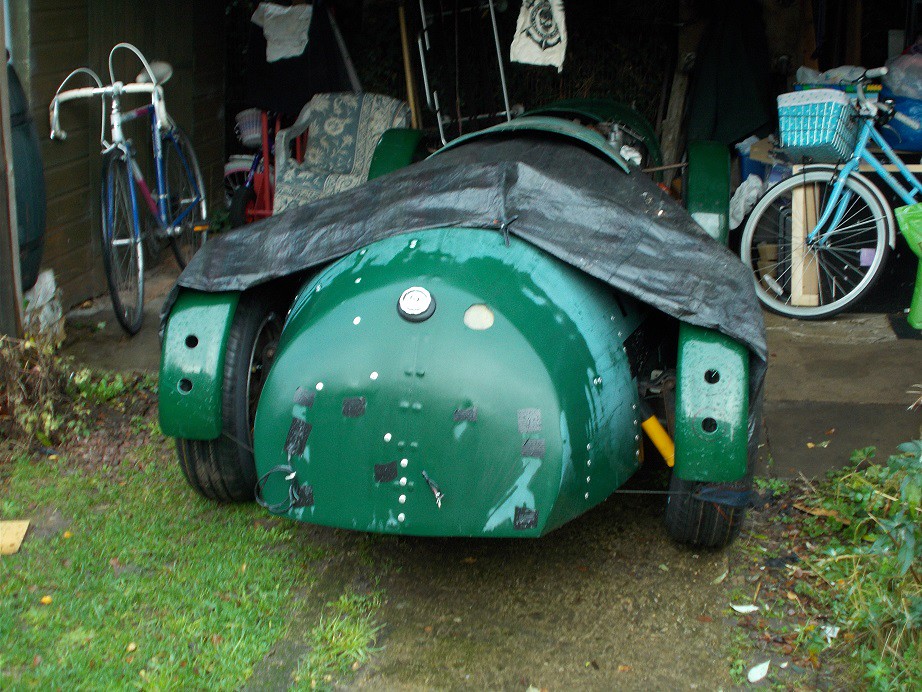
This morning I managed a quick session before the rain became too depressing. Using the same procedure as for the off side, I fitted the other rear wing, once again having to take it off and re-mount it a few times to get it to sit correctly. I'm even more happy than before that I fitted 15" wheels as 13" would be lost under those wings. It's apparent from the different angles of the supports just how asymmetrical the body is. Lurking on the chair may be seen the seat foam.
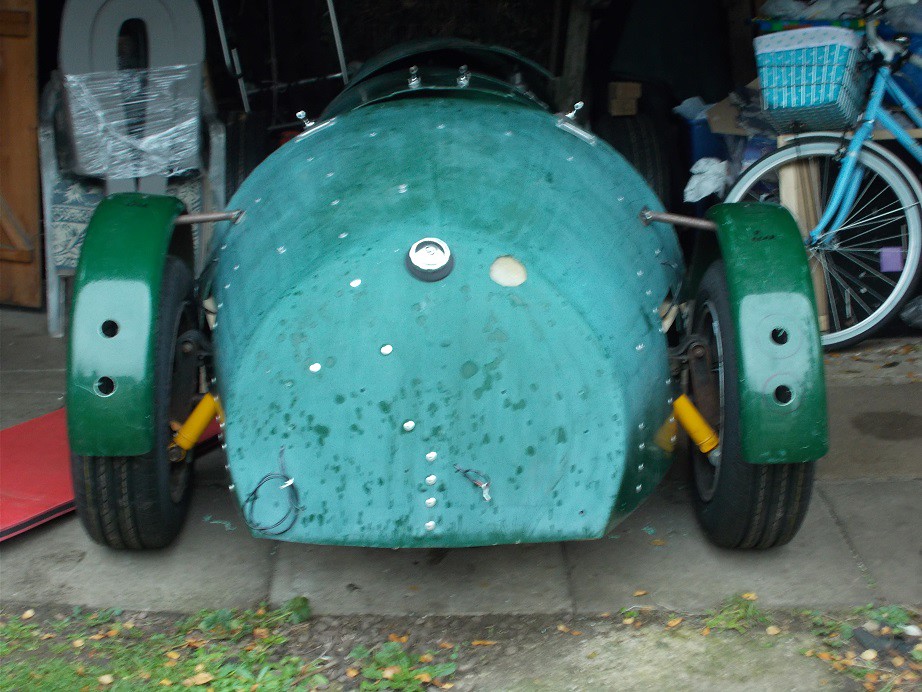
I ventured back out this afternoon once the rain had stopped and made a start on the front near side, but fading light put a stop to it after about an hour.
Regards, Mick
Last edited by Mick O'Malley; 25th November 2018 at 07:15..
Reason: Typo.
|
25th November 2018, 15:42
|
|
Senior Member
|
|
Join Date: Nov 2012
Posts: 845
|
|
Another few hours today saw the third wing in place, again after much to-ing and fro-ing to make ever smaller adjustments to the bends in the stays. Once happy with it I started on the last one, making sure that it sat symmetrically with its opposite number. I finished the front bracket and got part way through the last one when fading light stopped play.
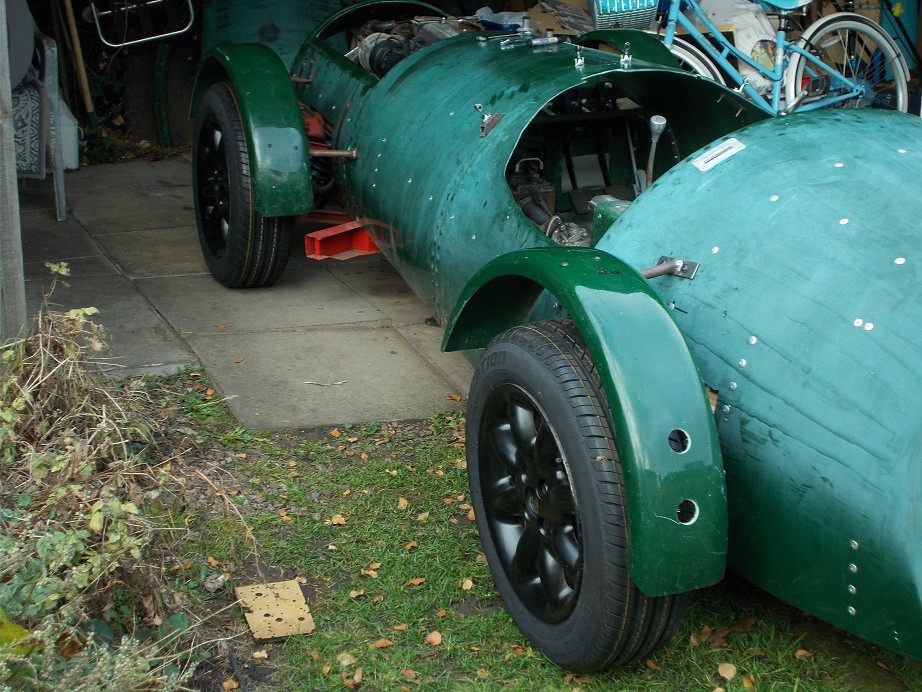
Tomorrow's forecast looks promising, so the wing saga should be completed AM: I can then move on to cutting and sticking the foam to the seats, and perhaps stapling on the vinyl.
Regards, Mick
|
27th November 2018, 06:59
|
|
Senior Member
|
|
Join Date: Nov 2012
Posts: 845
|
|
It's beginning to look like a car...
Quote:
Originally Posted by Althecate1
|
Thanks for that, but the shape of the casting precludes any stock fastening sitting nicely.
Yesterday, as planned, I finished off the front off-side mudguard mounting. It proved even fiddlier than the other three, but with plenty of swearing it eventually sat satisfactorily. Wheeling the beast, now looking the part, right out of the cave was confidence boosting. I had a brief daydream of a Christmas Day blast which reality soon popped. Maybe 2019?

The seats were next on the agenda. I used the plywood+foam+vinyl method on both my Pre-Lit Westie and Mk1 Marlin Roadster with acceptable (and inexpensive!) results. However, both those had square tops to the back which made neatly stapling the vinyl straightforward. I think I'll ask my seamstress friend, who made my A352 seat covers, for advice on a tidy solution to the curved top. I made the first rough cuts of the firm 3" foam, sat it all in place, and inserted myself. It's never going to have Rolls Royce comfort standards due to the cramped cockpit, but I found it acceptable. The newly cut foam looks very untidy but the vinyl smooths a multitude of sins.
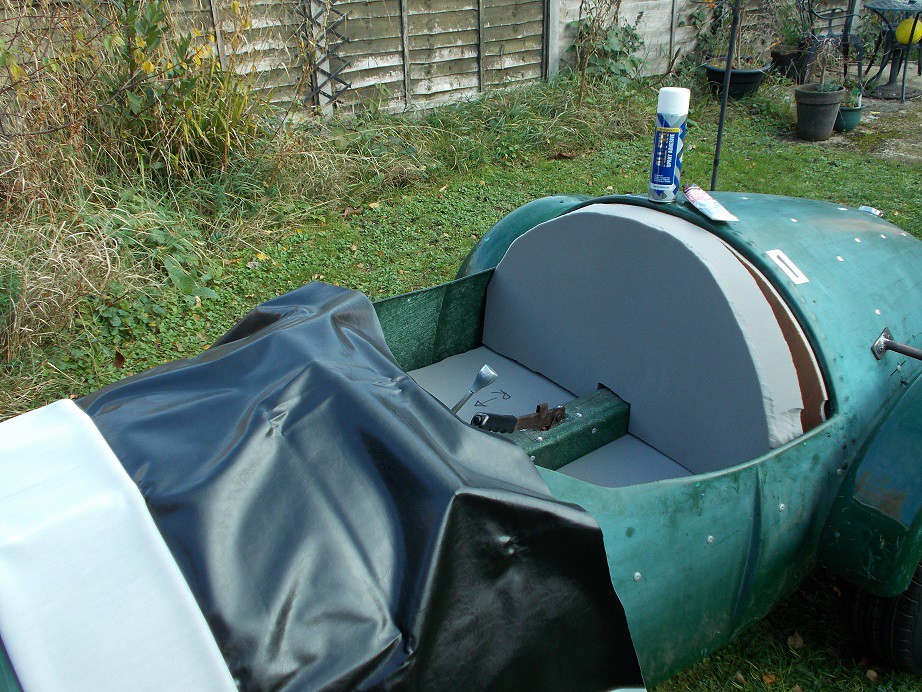
I dug out my roll of vinyl, spray adhesive and vinyl glue as well for a quick pose, then called it a day. Looking at the weather forecast for the rest of the week, I think operations will have to be suspended.
Regard, Mick
|
27th November 2018, 07:14
|
 |
Senior Member
|
|
Join Date: Jan 2014
Location: Egham, Surrey
Posts: 1,780
|
|
You can use a belt sander to smooth the foam. Very easy and quick to do and makes a big difference to the finished appearance.
|
4th December 2018, 08:25
|
|
Senior Member
|
|
Join Date: Nov 2012
Posts: 845
|
|
Tiny Steps...
After a break of a week, during which one of my sons came to stay (and the weather was awful!), I got back down the cave yesterday. The rain meant that the long awaited body-off session was impractical, so I decided to knock off the last wing-related tasks.
Shamelessly plagiarising Maggie Shapland's rear steady bars, I cut, drilled and bent two lengths of my much-used aluminium strips to suit. As attachment with Dreadnought rivets will be post-paint I stuck one on with gaffa tape loops to show the fitment.

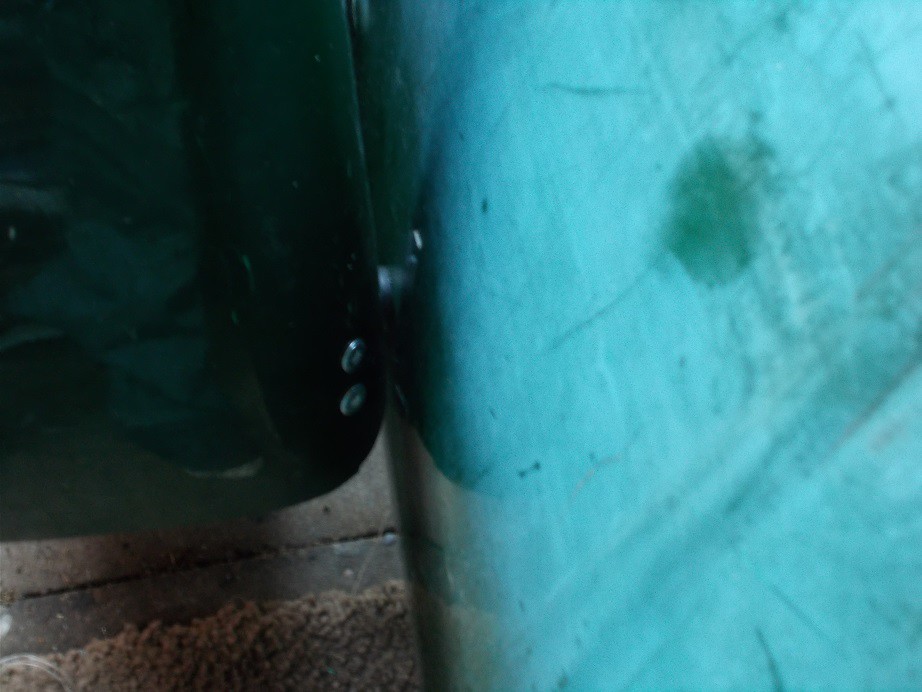
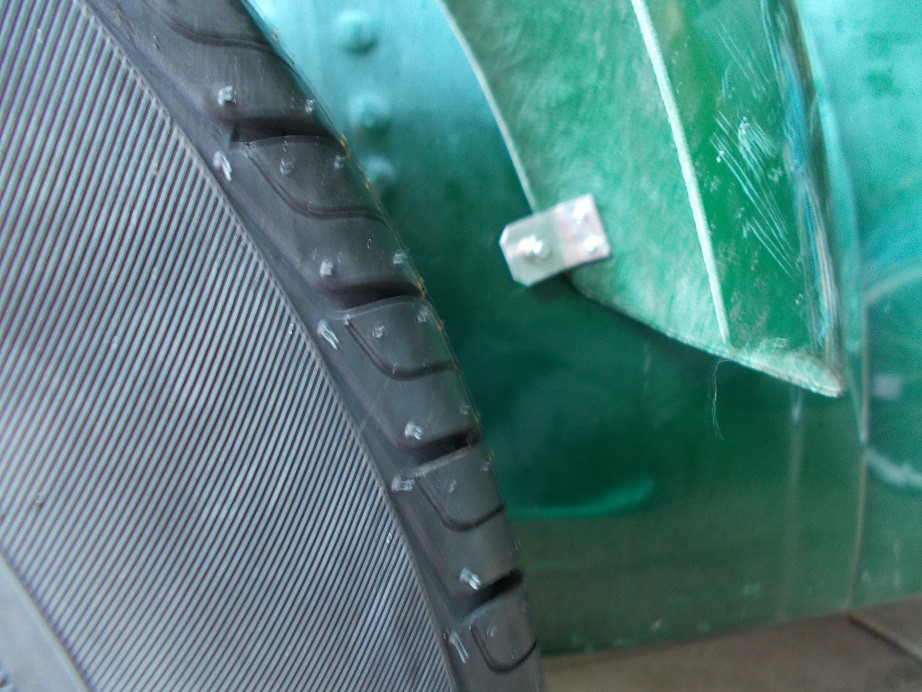
Turning my attention to the front ends of the rear 'guards, I decided to bolt them through the body sides using M6 button heads with rubber fuel hose spacer sleeves and small ally angle brackets 4mm rivetted to the wings. This again required a bit of removing and replacing but I was pleased with the result. Yet another crap photo' alert!
The depressing weather then had me scurrying indoors, happy to have nibbled away another tiny part of the build.
Regards, Mick
|
9th December 2018, 07:56
|
|
Senior Member
|
|
Join Date: Nov 2012
Posts: 845
|
|
 Rain Stops Play - Almost
Despite wandering down to the cave every morning since my last post, I've not achieved much, the sound of the rain beating on the corrugated iron roof being hardly inspirational. I did notice that, with the strong wind, water was finding its way into the back of the project through the holes and some even being blown into the cockpit. I first stuck small strips of gaffa tape over the holes, then bungeed a groundsheet over most of the back end.
As the dry front end was still accessible, I decided to address the problem of cutting the body and bonnet for the twin SUs and their filters. I'd replaced the chunk cut out by a previous owner to clear the DCOE which it came with, now sold. It was obvious that major surgery would be required, even if I had inlet trumpets rather than filters. I trawled through my collection of Monaco pictures, once again alighting on that of Maggie Shapland's, which is powered by an RS2000 engine with a DCD Weber, whose filter pokes neatly though the upper surface of the bonnet.
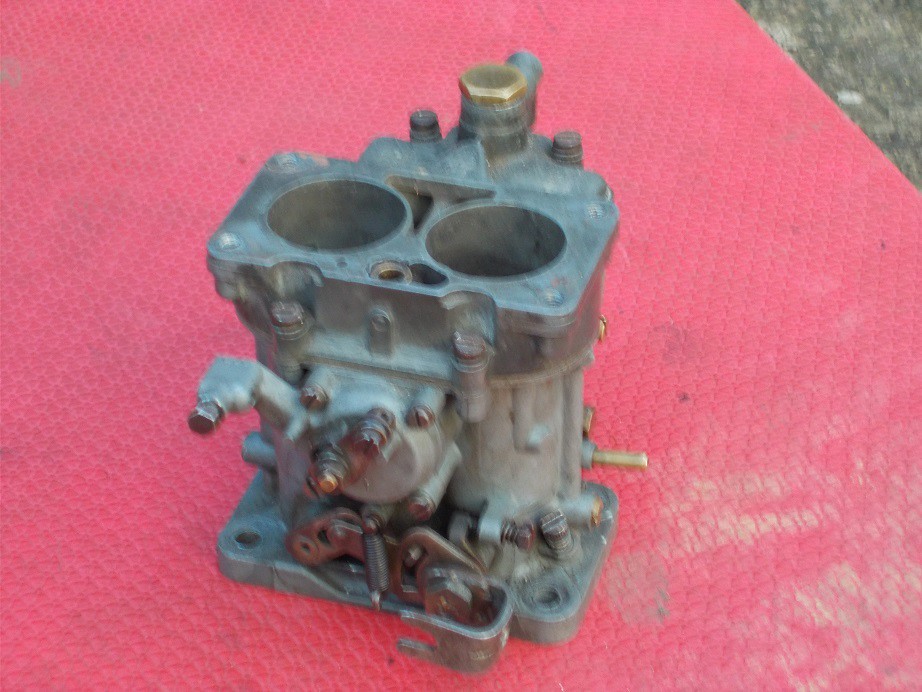
An internet search revealed that a suitable manifold is available . I e-mailed Moss, whose web site shows a picture of this installation, but, after waiting a frustrating week without reply, sourced and bought one from a Weber factors in California. Serendipity then came to the rescue yet again, in the shape of a 28/36 DCD jetted for a pre-crossflow 1500 Ford. No bids were placed, so I contacted the owner with an offer, which was accepted, and drove the 30 miles up to Worcester and collected it from another rabid geriatric petrol head. Crap photo' alert!
Remembering that I'd neglected to make provision for a throttle cable in my transverse pedal box support. I removed it after carefully marking where the cable hole was needed, and drilled it with a 2.5mm bit. The housing for the outer will have to be from a couple of thicknesses of ally rivetted to the top of the support. Once my Ebay cable arrives, and I've measured the ferrule, I can do this.
That was it for the week. With a decent forecast, albeit cold, for the next few days, I'm hopeful of more progress .
Regards, Mick
Last edited by Mick O'Malley; 9th December 2018 at 11:24..
|
9th December 2018, 12:19
|
|
Senior Member
|
|
Join Date: Nov 2012
Posts: 845
|
|
Why not, if the sun's out?
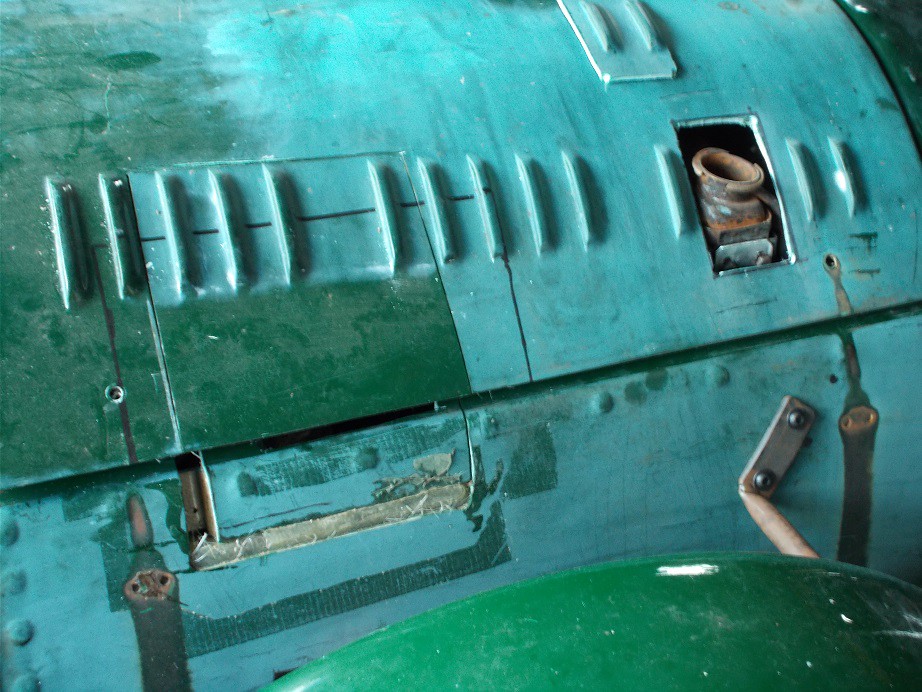
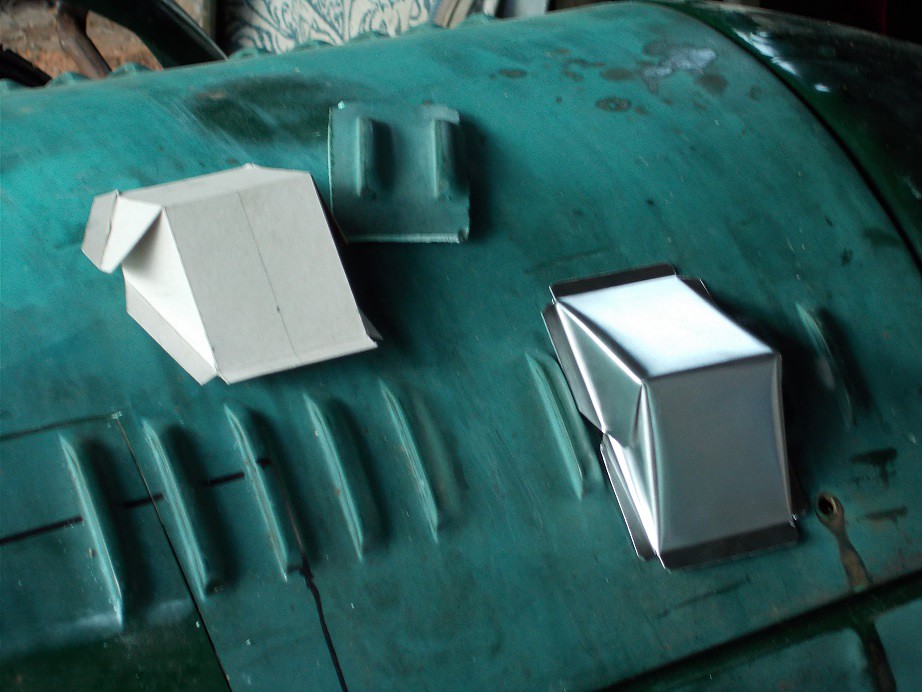
I hadn't planned on doing any work today, but the sight of the blue sky and sun lured me down to the cave. What to do? I'd removed the twin SUs in the week and, on replacing the bonnet, remembered that the radiator filler pipe and cap would also necessitate bonnet surgery. I 8mm drilled the corners of the hole outline, and jigsawed them together. Replacing the bonnet showed that my measurements hadn't been too bad. This picture also shows the partially repaired DCOE butchery.
I offered up the GRP air scoop which came with the kit - way too big - and briefly considered cutting it down before deciding to make an ally cover. I remembered doing similar in '91 to the bonnet of my Dutton P1, my third kit car.
I seem to have gone a bit mad with the rivets!
Using the tried and tested CAD method, I mocked up a cover, transferred the outline and marked the fold lines on an ally sheet offcut. Having cut it out, getting the folds right proved a bit of a challenge, but perseverance paid off. I then realised that I'd made it shiny side out, which I decided would have to do. I might distress it sometime, if the mood takes me. As it won't be rivetted together and in place until after painting, I put it in the shed with its other 'to be fitted later' ally brethren.
Happy to have achieved, I called it a day.
Regards, Mick
Last edited by Mick O'Malley; 9th December 2018 at 12:23..
|
15th December 2018, 08:42
|
|
Senior Member
|
|
Join Date: Nov 2012
Posts: 845
|
|
The list gets a little shorter.....
This last week or so I've nibbled away at the remaining tasks. I had help one day, removed the body and mounted the radius arm brackets at long last. The next day I spent a good while carefully measuring and re-measuring for the location of my handbrake multiplier bracket, and drilled its mounting holes. However, even with the car up on axle stands I couldn't fit it, access is just too limited - it'll have to wait until the body's off again. I neglected to take pictures of these operations.
Armed with a picture of a Monaco, I made the trip over to see the guys who'd sprayed the A352 and explained that I'd deliver it with the wings and bonnet etc. dismantled. We danced around a price and agreed 1st March as a start date. Cool!
I made a few on line purchases for my new Weber installation: manifold gasket; base gasket; air filter gasket. These have now all arrived, as has the throttle cable, whose locating hole in the transverse support I also drilled. Again no pictures.
On Thursday at about 0830 the nice lady from UPS delivered my manifold, posted in California on Tuesday. Amazing service! It's a beautiful casting, I'm absolutely thrilled with it .

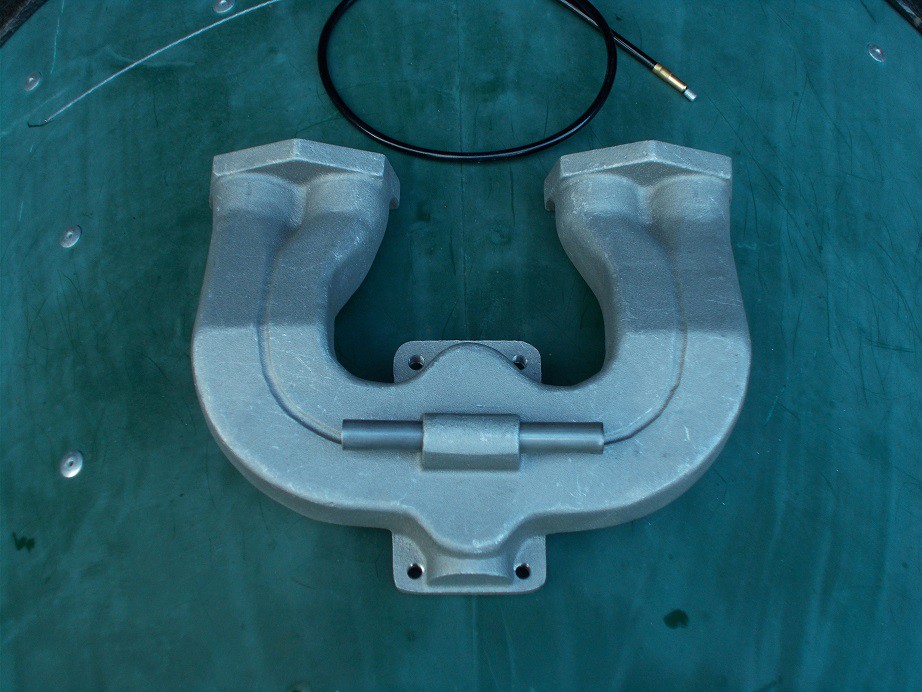
I now need an air filter so that I can trial fit it all for bonnet surgery. They're very expensive new so I'm hoping to get lucky on Ebay......
Regards, Mick
|
|
Currently Active Users Viewing This Thread: 9 (0 members and 9 guests)
|
|
|
 Posting Rules
|
You may not post new threads
You may not post replies
You may not post attachments
You may not edit your posts
HTML code is Off
|
|
|
All times are GMT +0. The time now is 03:17.
|


 Linear Mode

