|
|
| Marlin Sportster, Cabrio, Berlinetta and Roadster builds Enthused or Confused about your vintage Marlin build? Ask away here or show off your build. |

8th January 2008, 15:30
|
 |
Senior Member
Enthusiast
|
|
Join Date: Mar 2005
Posts: 3,079
|
|
Thanks, Terry.
It's been 4 years now since I started to dissmantle the BMW donor, but to be fair i've had a few whole 6 month blocks of no progress due to other DIY and family commitments.
I've learnt a huge amount about the Sportster and the BMW 3 series and this forum has been a great place to watch other builds and to share problems and solutions.
But we need to see some newer builders over here. Do encourage any new builders in the last 12 months to join us!
The Flickr site I use to post my pictures is dead easy to use, as I am no web expert and only costs about £12 a year.
Peter
|
8th January 2008, 17:15
|
|
Member
Enthusiast
|
|
Join Date: Apr 2004
Posts: 73
|
|
 re more new builder pics please
ok will do my best ;-)
|
8th January 2008, 21:32
|
 |
Senior Member
Enthusiast
|
|
Join Date: Feb 2005
Location: Hampshire
Posts: 2,497
|
|
Quote:
Originally Posted by 5EXi girl

Peter
I would like to congratulate you and all the other Sportster builders (inc Patrick and Richard) for keeping your web sites up to date with such detailed pictures and advise. It is a great help to others either building or thinking about building to know there are so many of you out there willing to advise and to also see what a great job you are doing. Of course it helps that you are building such a well engineered product ;-)
Well done
Terry
|
Thanks Terry  |
12th January 2008, 20:01
|
|
Senior Member
Enthusiast
|
|
Join Date: Mar 2005
Posts: 3,079
|
|
Little bit more progress....
Today, I cut and tested fitted the nearside top bonnet. I still have to drill the other 33 holes for the piano hinge.
After the top bonnets, I just have the front cycle wings to fit to complete the exterior bodywork.
A few pictures here..............(as usual)
http://www.flickr.com/photos/peters-bmwmarlin/
Peter |
13th January 2008, 19:20
|
 |
Senior Member
Enthusiast
|
|
Join Date: Sep 2004
Posts: 1,895
|
|
Peter
I am about to start the process of fitting the top bonnets and I was curious as to why you had to trim off the return on the lower edge?
Cheers
Robin
|
13th January 2008, 20:25
|
|
Senior Member
Enthusiast
|
|
Join Date: Mar 2005
Posts: 3,079
|
|
Quote:
Originally Posted by MartinClan
Peter
I am about to start the process of fitting the top bonnets and I was curious as to why you had to trim off the return on the lower edge?
Cheers
Robin
|
It's just trimed at the rear edge to clear the edge of the scuttle.
It will be obvious to you once you try to fit them. At the front you just take the corner off to clear the nose cone.
Peter |
21st January 2008, 17:19
|
|
Senior Member
Enthusiast
|
|
Join Date: Feb 2005
Location: Hampshire
Posts: 2,497
|
|
Looks nice, maybe its down to the new style wing carriers?
|
23rd January 2008, 21:54
|
|
Senior Member
Enthusiast
|
|
Join Date: Feb 2005
Location: Hampshire
Posts: 2,497
|
|
I can't wait to see those Borbet on your car with it sat on the road - will look awesome! Mine handles quite well with 205/60/R15 on 7x15J's so I'm not sure what I'm going to so. Probably stick with the current wheels at least until the tyres and worn through! |
27th January 2008, 21:20
|
|
Senior Member
Enthusiast
|
|
Join Date: Mar 2005
Posts: 3,079
|
|
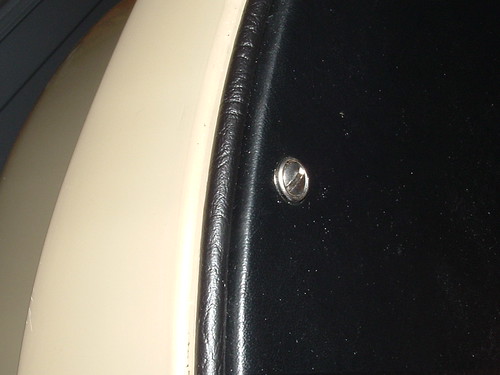
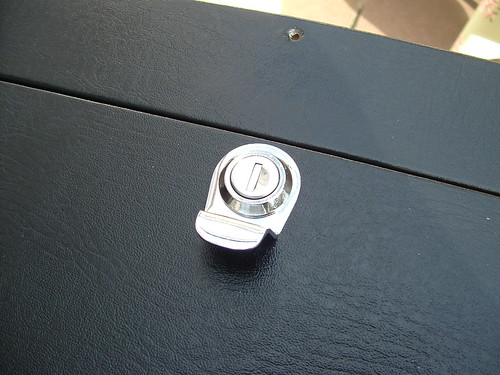
More wiring, horn relay and door straps fitted today.
http://www.flickr.com/photos/peters-bmwmarlin/
and......
Yesterday, I did a bit of experimental carpentary to make some curved infill panels to go behind the seats. The first one has come out pretty good. I need to make another one next week and then carefully cut them to fit round the chassis.
I can't decided whether to cover them in black vinyl leather cloth or carpet? I also need to decide whether to fix them with screws or velcro?
Any views?
cheers,
Peter |
28th January 2008, 07:39
|
|
Senior Member
Enthusiast
|
|
Join Date: Sep 2004
Posts: 1,895
|
|
Quote:
Originally Posted by peterux
More wiring, horn relay and door straps fitted today.
http://www.flickr.com/photos/peters-bmwmarlin/
and......
Yesterday, I did a bit of experimental carpentary to make some curved infill panels to go behind the seats. The first one has come out pretty good. I need to make another one next week and then carefully cut them to fit round the chassis.
I can't decided whether to cover them in black vinyl leather cloth or carpet? I also need to decide whether to fix them with screws or velcro?
Any views?
cheers,
Peter |
Looks like your B&Q plywood did the trick! Good quality vinyl would be my choice - I am not a big fan of to much carpet in an open topped car.
I would fit them using domed head wood screws (chrome on brass). It should look pretty good if you use the little shaped washer thingies (technical term) under the heads.
Robin
Cup washers - that's what I was trying to think of! |
28th January 2008, 07:43
|
 |
Senior Member
Enthusiast
|
|
Join Date: Sep 2005
Location: Northampton, UK
Posts: 1,891
|
|
Ah - that's what the formers where for - I thought you where building a boat - that or a Moggie! 
Looking good though. |
29th January 2008, 20:50
|
|
Senior Member
Enthusiast
|
|
Join Date: Mar 2005
Posts: 3,079
|
|
Quote:
Originally Posted by GreatOldOne
Ah - that's what the formers where for - I thought you where building a boat - that or a Moggie!
Looking good though. |
Yes, I was quite impressed with my own boat building abilities!
I can now sleep at night knowing that when Global warming kicks in and the sea level rises, i'll be building my Marlin Ark!
Hey John, new idea Mad-about-kit-arks |
27th January 2008, 21:24
|
|
Senior Member
Enthusiast
|
|
Join Date: Feb 2005
Location: Hampshire
Posts: 2,497
|
|
carpet is much easier to work with on a concave shape, in my experience you easily end up with wrinkles using vinyl. However its quite a gradual shape so it might be OK |
19th February 2008, 08:54
|
|
Senior Member
Enthusiast
|
|
Join Date: Feb 2005
Location: Hampshire
Posts: 2,497
|
|
Looking excellent!
Speaking of hoods, anyone heard if the new style Marlin one's are ready?
|
18th March 2008, 21:11
|
|
Senior Member
Enthusiast
|
|
Join Date: Feb 2005
Location: Hampshire
Posts: 2,497
|
|
Nice one Peter, the right tools for the job always make life easier. I don't want to know how much I spent on tools in the last 3 years! |
22nd March 2008, 20:23
|
|
Senior Member
Enthusiast
|
|
Join Date: Mar 2005
Posts: 3,079
|
|
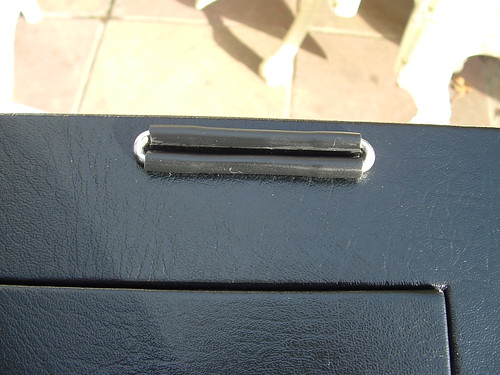
Not much progress today due to weather and other things to do, but I did make some progress on the rear trim yesterday.
and guess what this is made from?
answer and more pictures here.........
http://www.flickr.com/photos/peters-bmwmarlin/
cheers
Peter |
23rd March 2008, 18:56
|
|
Senior Member
Enthusiast
|
|
Join Date: Sep 2004
Posts: 1,895
|
|
Looking good Peter. I like the wing piping around edge of the trip panels - it finishes it off well.
So how did you persuade that plywood to fit around the radius of the tub?
Robin
|
24th March 2008, 07:46
|
|
Senior Member
Enthusiast
|
|
Join Date: Mar 2005
Posts: 3,079
|
|
Quote:
Originally Posted by MartinClan
Looking good Peter. I like the wing piping around edge of the trip panels - it finishes it off well.
So how did you persuade that plywood to fit around the radius of the tub?
Robin
|
Hi Robin,
yes, wing piping makes a great finish. The vinyl covered stuff looks very professional.
I formed two sheets of 4mm ply, glued together round a former. Take a look at my page 5 on my flicker site...........
http://www.flickr.com/photos/peters-bmwmarlin/page5/
cheers
Peter |
24th March 2008, 18:49
|
|
Senior Member
Enthusiast
|
|
Join Date: Sep 2004
Posts: 1,895
|
|
Quote:
Originally Posted by peterux
|
Very good! I hope you kept the former - you could rent it out!
You can't have much left to do now - you must be itching to get it on the road.
Robin |
20th August 2008, 12:30
|
|
Senior Member
Enthusiast
|
|
Join Date: Sep 2004
Posts: 1,895
|
|
Quote:
Originally Posted by peterux
I formed two sheets of 4mm ply, glued together round a former. Take a look at my page 5 on my flicker site..........
cheers
Peter
|
Hi Peter
I have been using your former but have been unable to bend the plywood (3mm) without cracking the surface layer. Do you have any tips? Was there anything special about the ply you used?
Cheers
Robin |
|
Currently Active Users Viewing This Thread: 1 (0 members and 1 guests)
|
|
|
 Posting Rules
|
You may not post new threads
You may not post replies
You may not post attachments
You may not edit your posts
HTML code is Off
|
|
|
All times are GMT +0. The time now is 08:11.
|


 Hybrid Mode
