|
|
| Tribute Automotive Builds Discuss your Tribute kit build |

19th October 2013, 20:01
|
 |
Senior Member
|
|
Join Date: Oct 2010
Posts: 1,622
|
|
Welcome to the Forum Scottie. Your detailing is something I am really looking forward to. Keep on posting those pictures.
|
20th October 2013, 12:43
|
|
Senior Member
|
|
Join Date: May 2013
Posts: 2,161
|
|

While I was waiting for my body shell, I had time to work out what I wanted to achieve and how I was going to do that.
Replicas are by definition frauds, and a lot of so called kit cars fall into this category also.
If a Jaguar based XKSS is a fraud, how fraudulent must a Triumph Spitfire based one
Be?? An incredibly naughty fraud I think!
Fraud it may be, but to be half believable, it must be a damned good one, so attention to detail becomes very important.
An XKSS is an iconic car, and a replica must have all of the salient features that make the car unique. After I finished the wheels to as good a standard as I could on my limited budget, I decide to tackle the very obvious side exhaust.
On the original car, the exhaust is on the left because the XK engine has the manifold that side. Unfortunately the Spitfire has the exhaust manifold on the right, which meant having to get the gasses under the car floor and out to the left side.
Because the finished car will be as low as I can get it, I could not use a large bore pipe
To go under the floor, for obvious reasons, then it occurred to me that I could , if I squashed it almost flat.
I worked out the surface area of the original pipe, squashed a much larger one, which when “flat” would give me a little more area than the original pipe and the problem was solved. All I had to do now was make it.
The whole thing including the silencer box was to be made of stainless steel.
I have tried to show the results in the pictures to follow, its not finished yet, but most of the hard work and problems have been sorted out.
The system is made from discarded stainless steel bits and bobs from my local scrapyard at peanut prices. The most expensive buy was the argon gas needed to weld it all up.

|
16th October 2013, 20:13
|
|
Senior Member
|
|
Join Date: May 2013
Posts: 2,161
|
|
Wheels
 [/IMG] |
16th October 2013, 20:14
|
|
Senior Member
|
|
Join Date: May 2013
Posts: 2,161
|
|
[IMG] 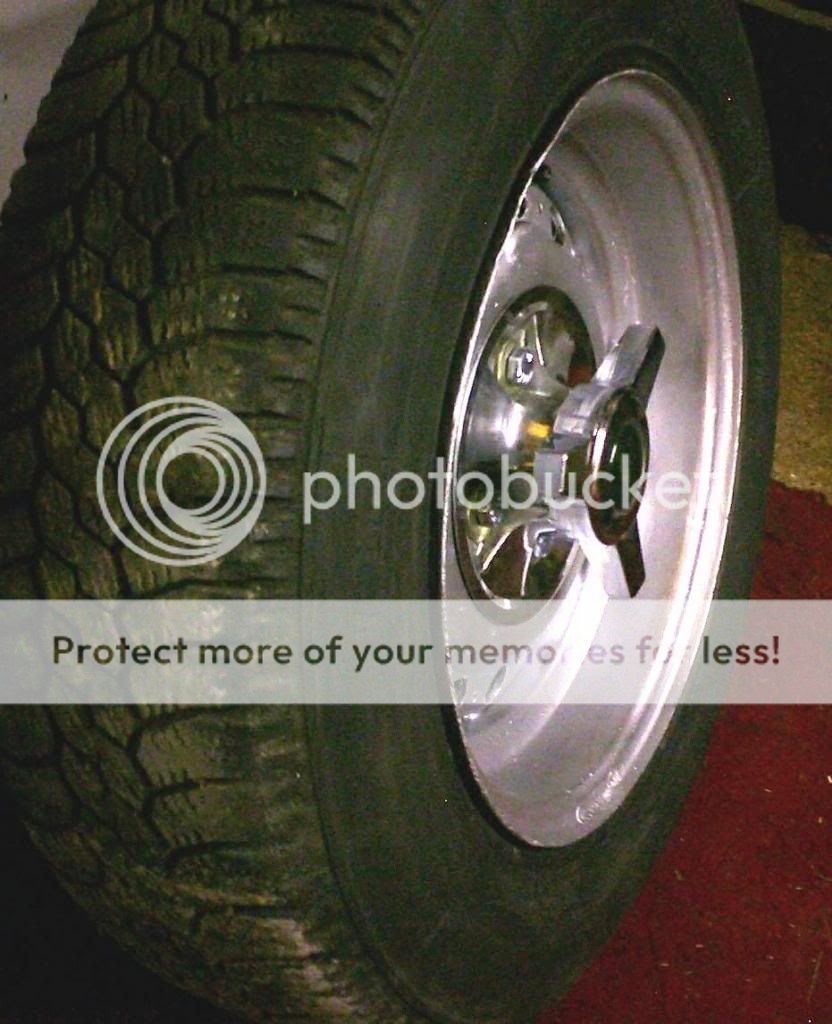 [/IMG] |
16th October 2013, 20:15
|
|
Senior Member
|
|
Join Date: May 2013
Posts: 2,161
|
|
[IMG]  [/IMG] |
16th October 2013, 20:17
|
|
Senior Member
|
|
Join Date: May 2013
Posts: 2,161
|
|
[IMG] 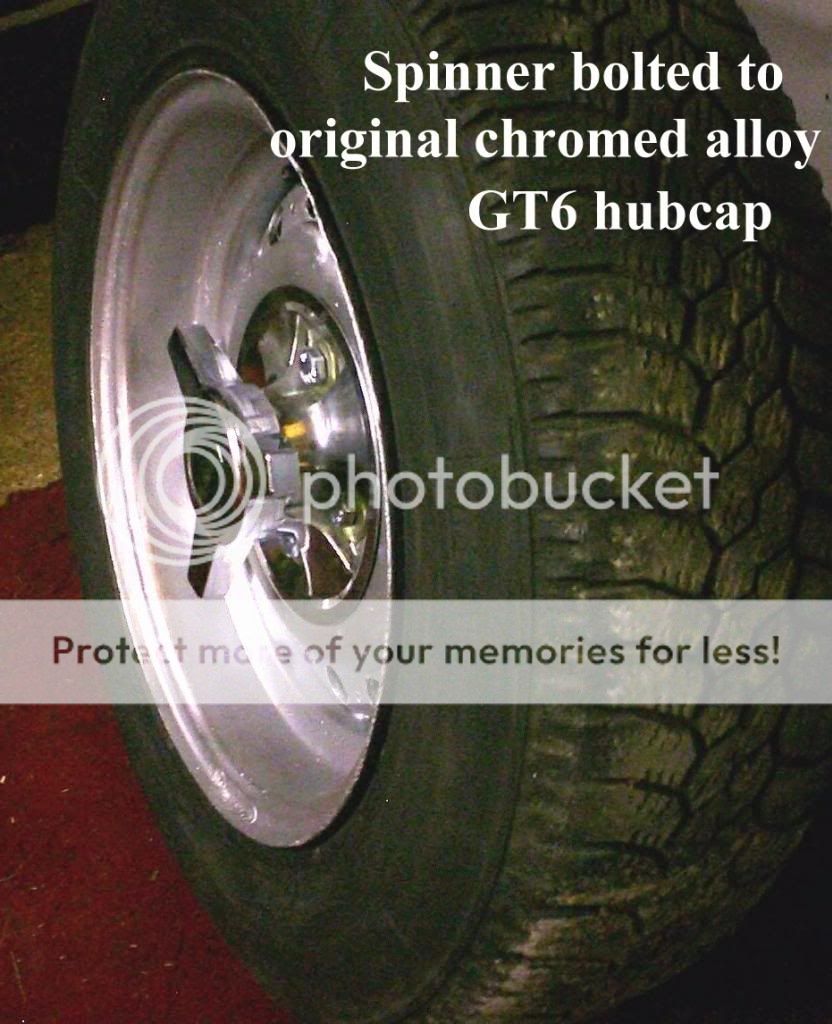 [/IMG] |
20th October 2013, 12:45
|
|
Senior Member
|
|
Join Date: May 2013
Posts: 2,161
|
|
|
20th October 2013, 12:50
|
|
Senior Member
|
|
Join Date: May 2013
Posts: 2,161
|
|
|
20th October 2013, 12:52
|
|
Senior Member
|
|
Join Date: May 2013
Posts: 2,161
|
|
[IMG] 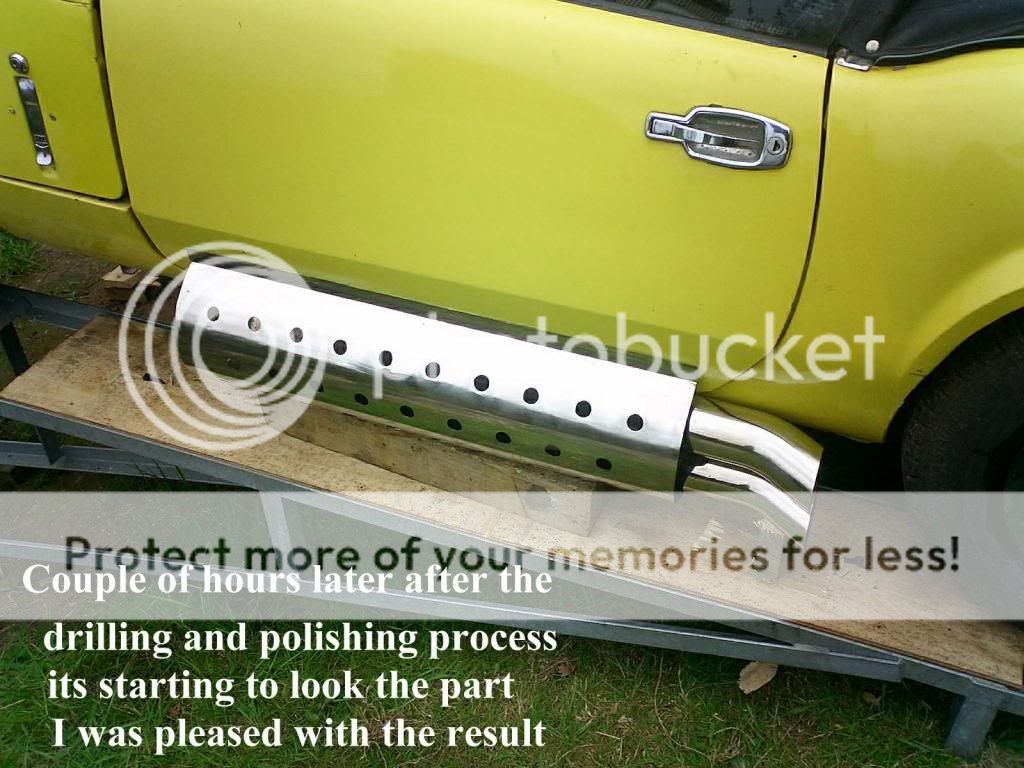 [/IMG] |
20th October 2013, 12:55
|
|
Senior Member
|
|
Join Date: May 2013
Posts: 2,161
|
|
[IMG] 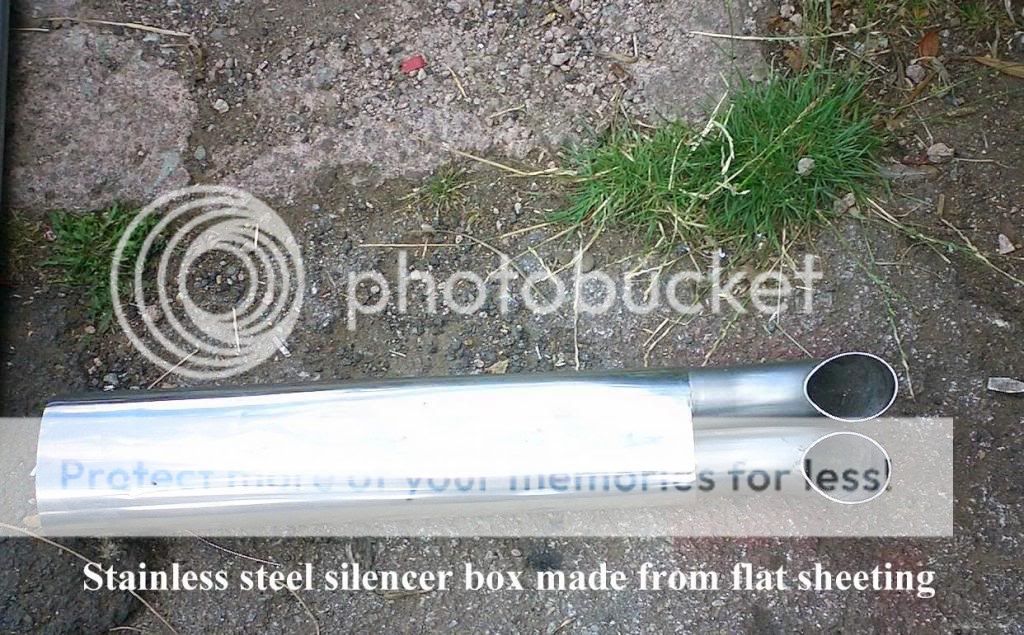 [/IMG] |
20th October 2013, 12:56
|
|
Senior Member
|
|
Join Date: May 2013
Posts: 2,161
|
|
[IMG] 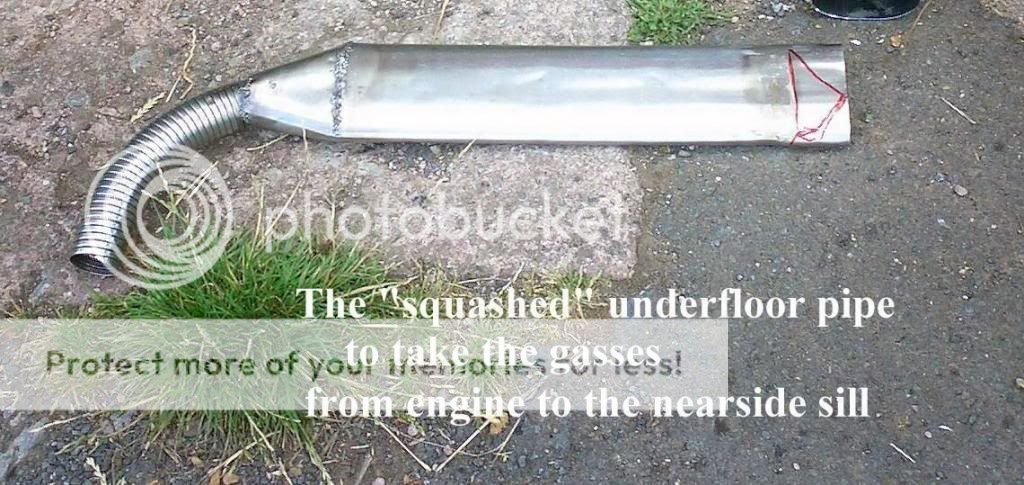 [/IMG] |
20th October 2013, 15:32
|
|
Senior Member
|
|
Join Date: May 2013
Posts: 2,161
|
|
[IMG] 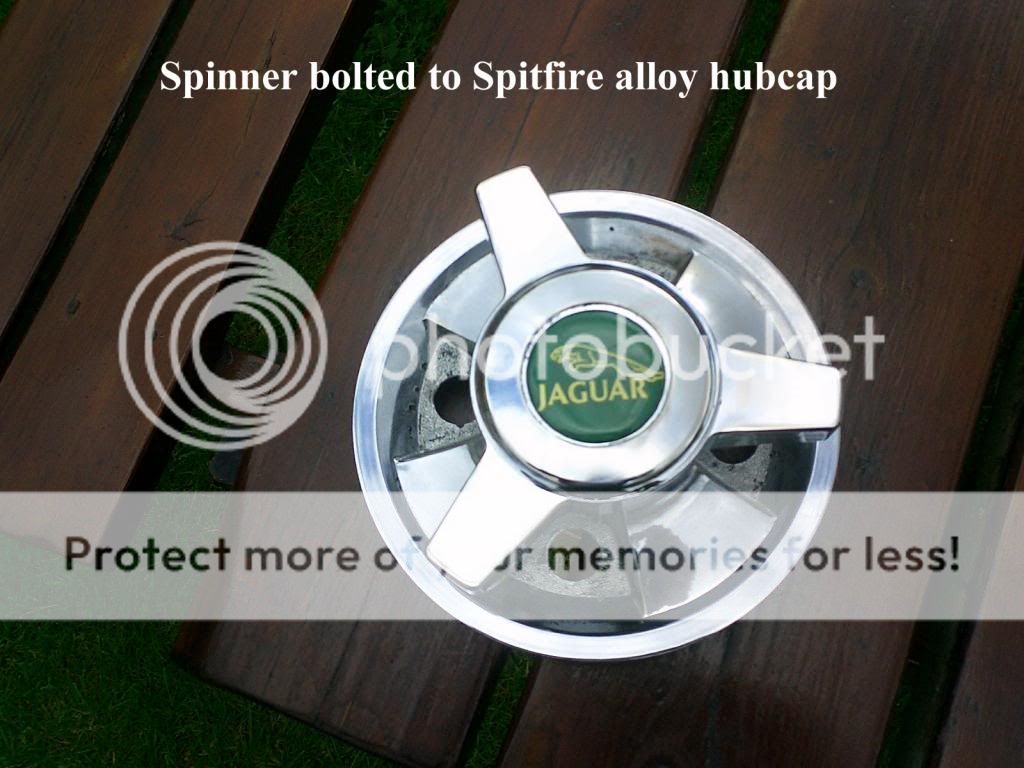 [/IMG] |
20th October 2013, 15:33
|
|
Senior Member
|
|
Join Date: May 2013
Posts: 2,161
|
|
[IMG] 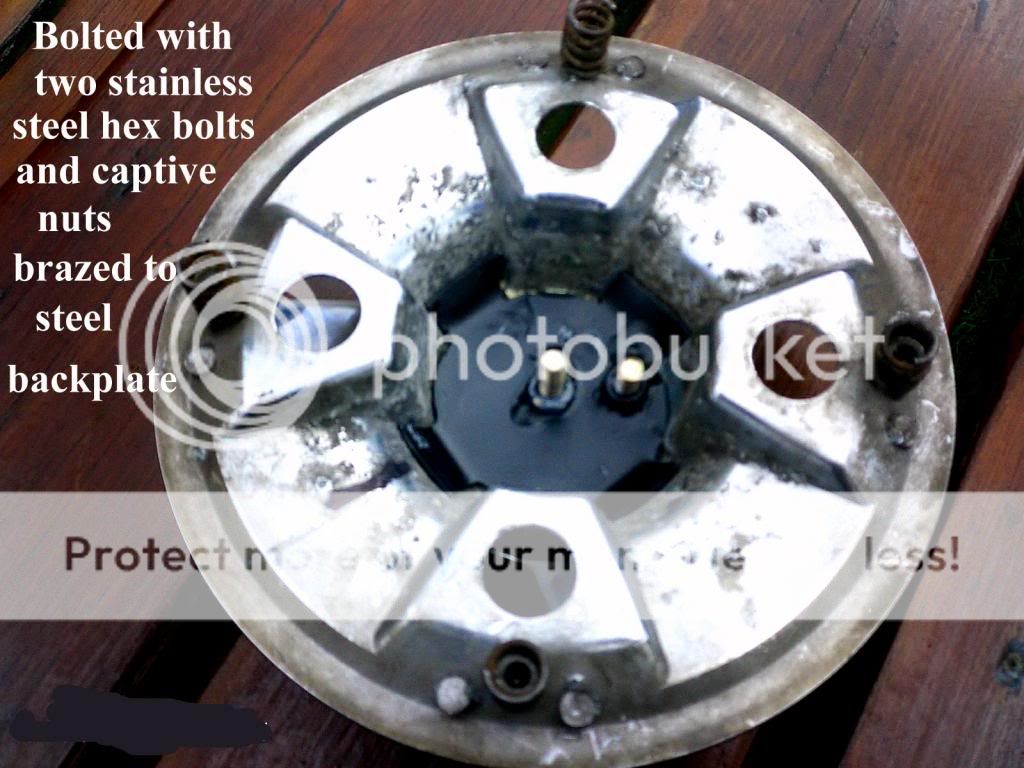 [/IMG] |
20th October 2013, 17:05
|
|
Senior Member
|
|
Join Date: Oct 2013
Location: norfolk
Posts: 691
|
|
Going well - I like you approach to the exhaust...... If there's a way, you'll find it!
Now I'm betting you wrecked the drill bit doing all those holes in the stainless!
Nasty old stuff compared with mild steel (to drill).
|
20th October 2013, 17:37
|
|
Senior Member
|
|
Join Date: May 2013
Posts: 2,161
|
|
Someone else said I must have wrecked the drill bits and hole cutters, but they are still in good nick considering what they've been through!
I take your point about stainless steel though, I don't even like welding it!
|
25th October 2013, 20:16
|
|
Senior Member
|
|
Join Date: May 2013
Posts: 2,161
|
|
The body
The body finally arrived, and one of the first things I wanted to do was put aluminium louvres in the bonnet.
The original car had I think 6 or 7 inch louvres, but because I chose a non flip front end, it came with an ordinary opening type bonnet, which due to the position and width, the full size louvres would not fit/be practical.
I went to B nQ and they had some cheap ally ones about 4 inches wide which I decided to fit.
The XKSS had more louvres on the nearside as that is where all the heat from the exhaust manifold needed to be vented, so mine had to be similar
to look the part.
[IMG] 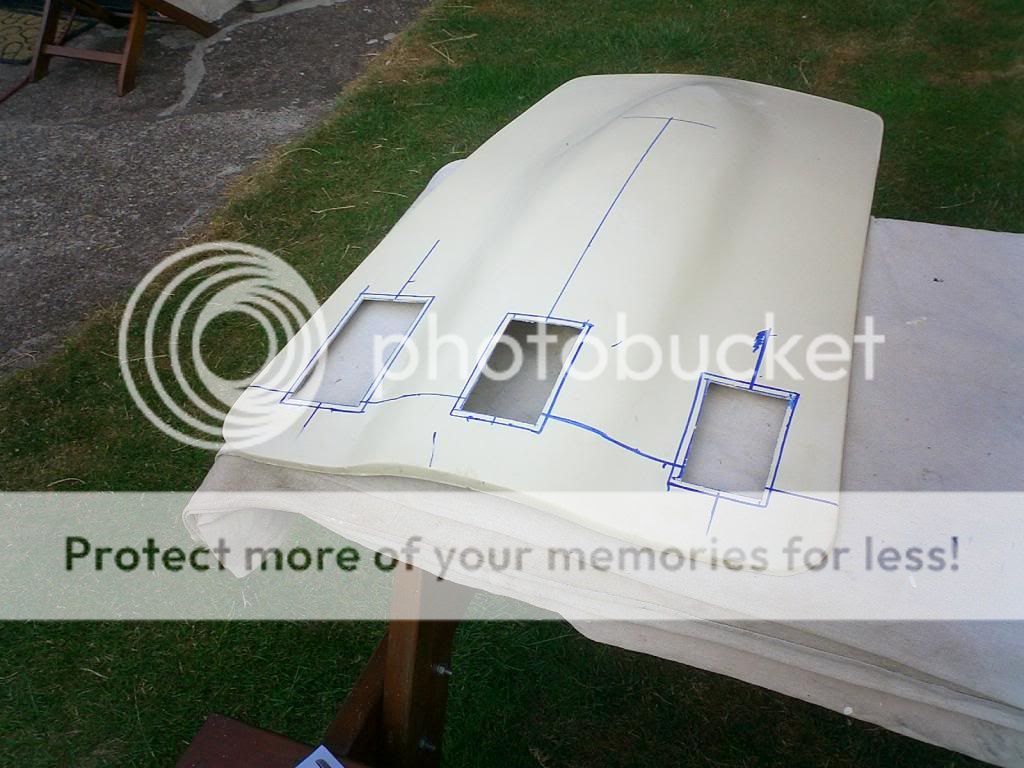 [/IMG] |
25th October 2013, 20:21
|
|
Senior Member
|
|
Join Date: May 2013
Posts: 2,161
|
|
[IMG] 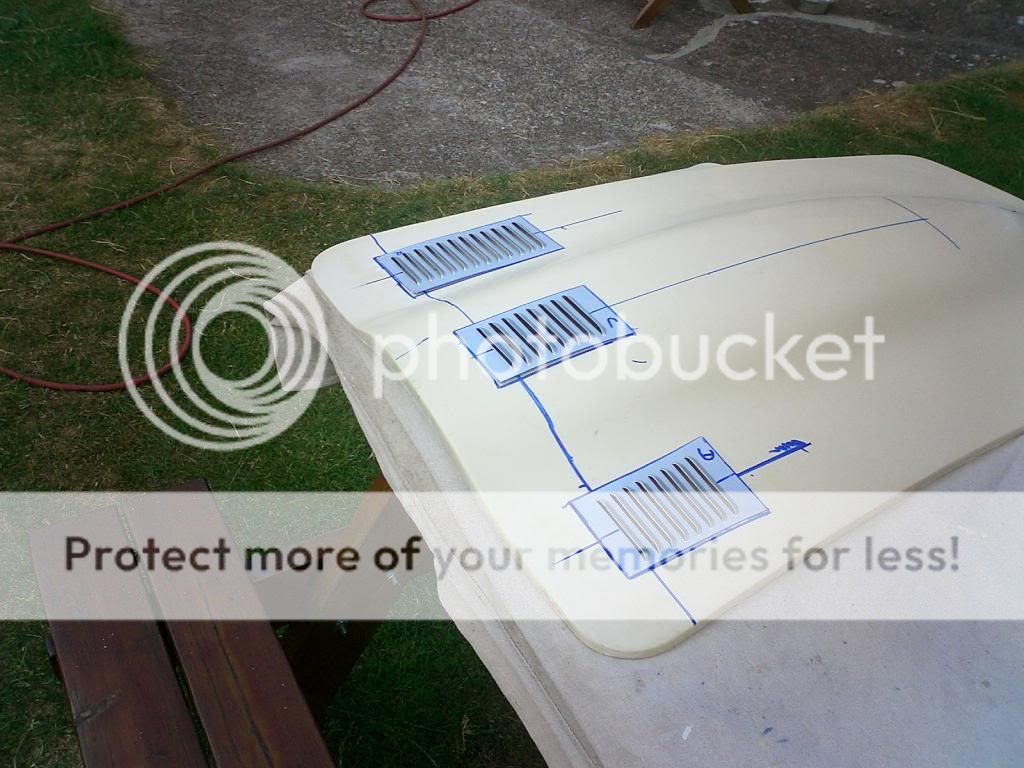 [/IMG]
[IMG] 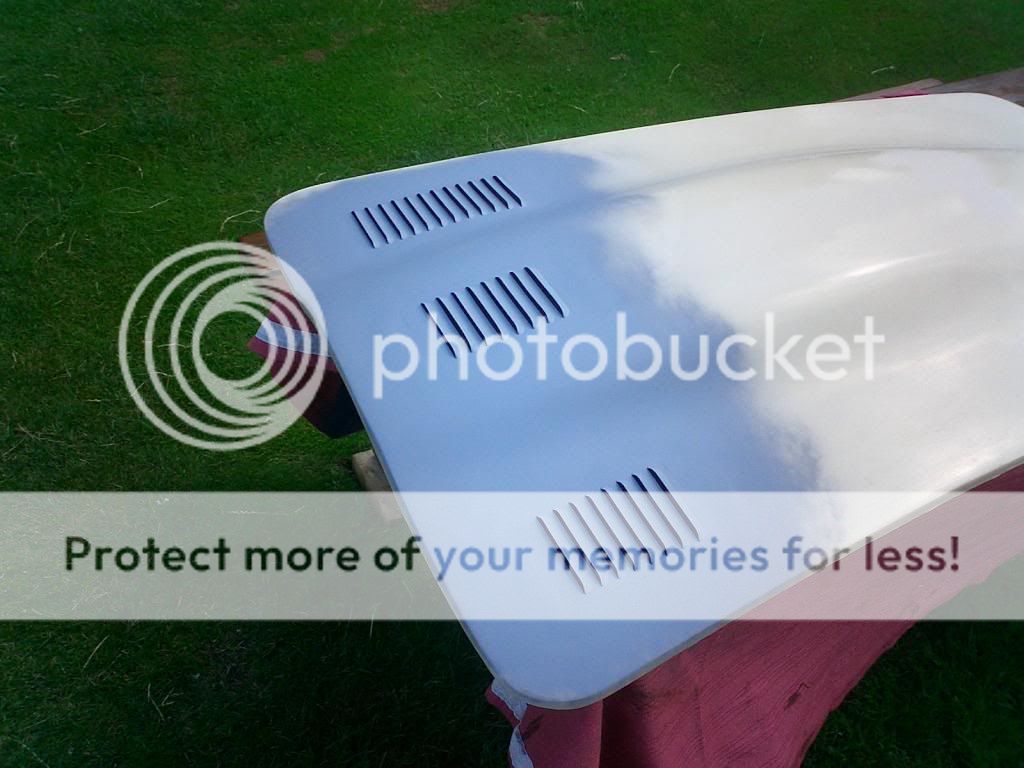 [/IMG]
I cut the holes, routered the edges out about half a mil so the alloy would sit almost flush, stuk them in with epoxy resin, filled and sanded. although there will vbe a lot of rubbing down to be done yet to get a perfect finish for a top coat! |
25th October 2013, 20:26
|
|
Senior Member
|
|
Join Date: May 2013
Posts: 2,161
|
|
Louvres
[IMG] 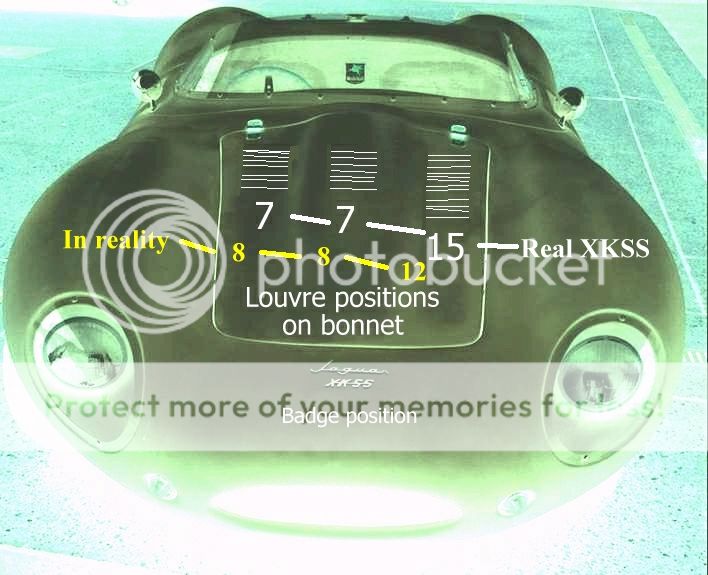 [/IMG]
[IMG] 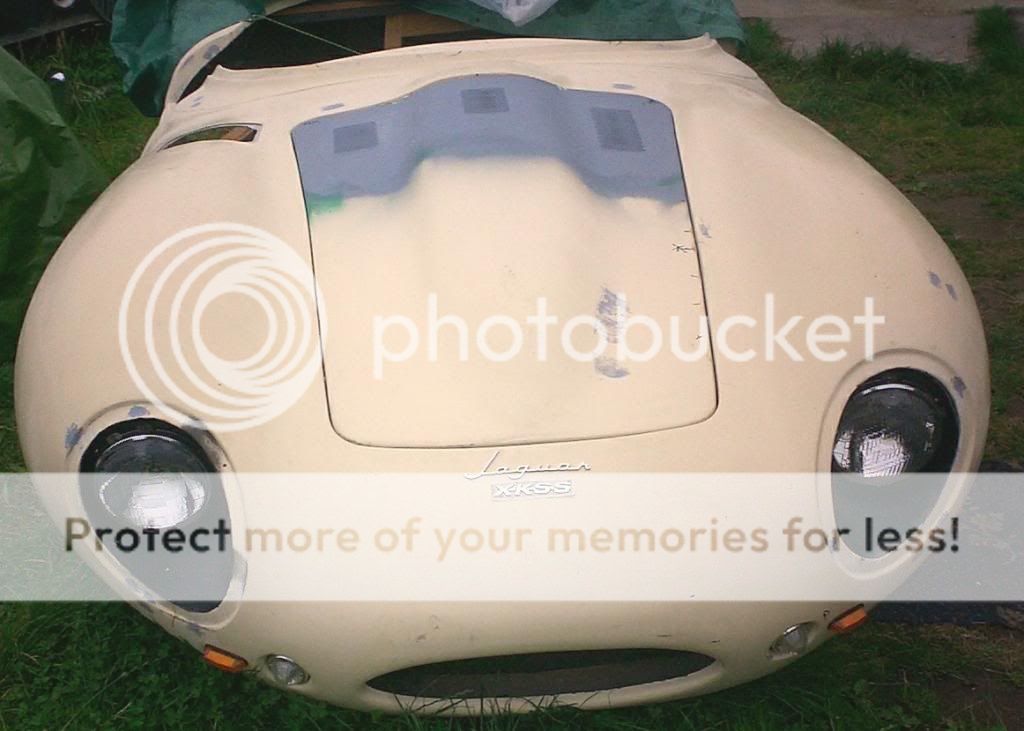 [/IMG] |
25th October 2013, 20:37
|
|
Senior Member
|
|
Join Date: May 2013
Posts: 2,161
|
|
Access panel
Because I chose a non flip front, there were certain things under the bonnet that could not be accessed once the body was permanently bonded to the chassis / tub, Or it would be incredibly difficult to carry out repairs to master cylinders windscreen wiper motors etc.
So I decided to make an access panel.
When it came time to actually do the cutting, I was crapping myself as I have always been useless with a jigsaw!
But in the event it turned out not too bad.
[IMG] 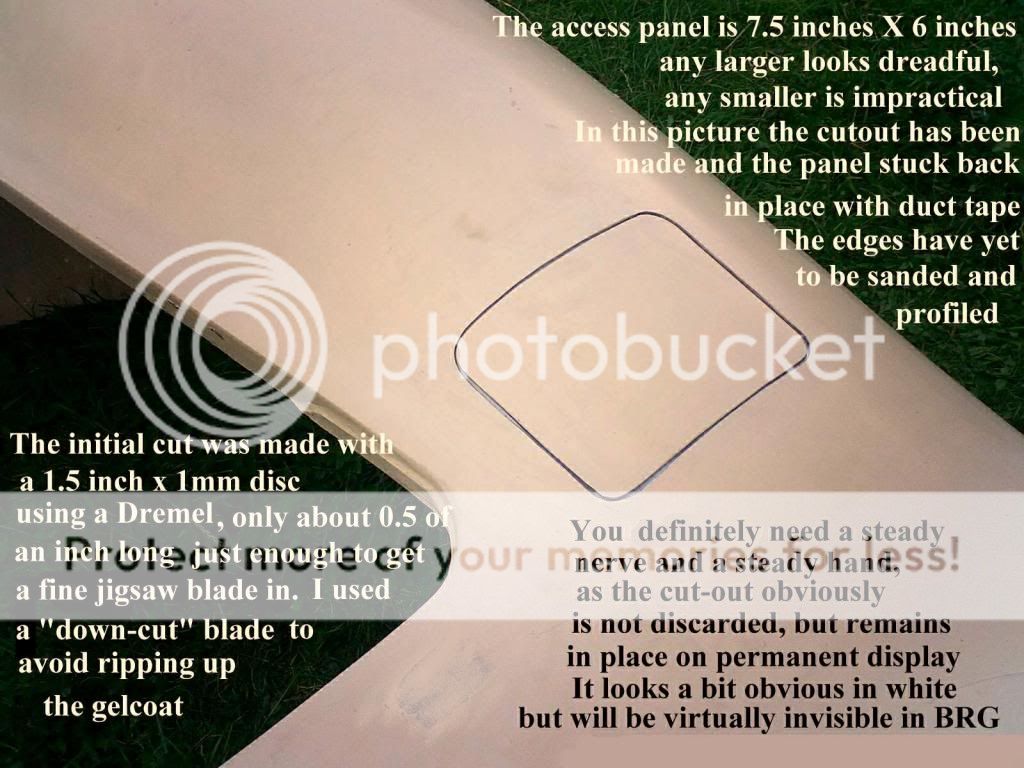 [/IMG]
[IMG] 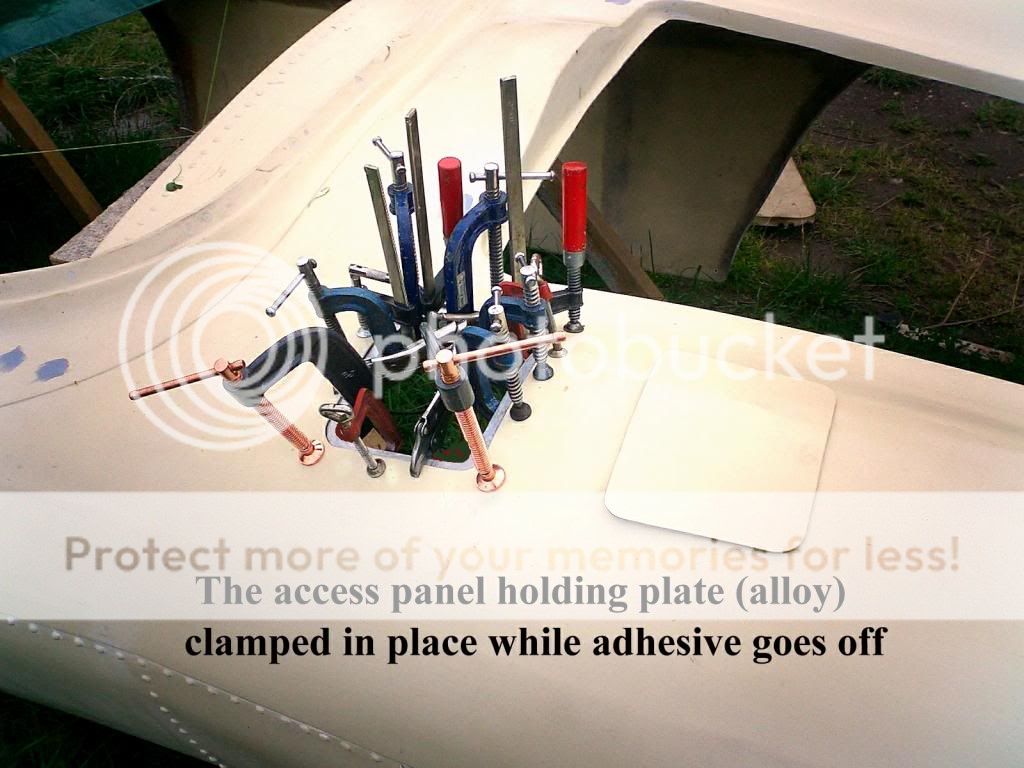 [/IMG] |
29th October 2013, 06:45
|
 |
Senior Member
|
|
Join Date: Sep 2011
Posts: 1,446
|
|
Quote:
Originally Posted by Scottie22

[IMG] [/IMG] |
I'm impressed you had that many clamps |
|
Currently Active Users Viewing This Thread: 17 (0 members and 17 guests)
|
|
|
 Posting Rules
|
You may not post new threads
You may not post replies
You may not post attachments
You may not edit your posts
HTML code is Off
|
|
|
All times are GMT +0. The time now is 08:52.
|


 Hybrid Mode
