|
|
| Vintage and Classic Roadster Kit Car Builds For Vintage and Classic era kit cars. Post your build reports, problems and progress here |

6th December 2017, 15:32
|
 |
Senior Member
Enthusiast
|
|
Join Date: Sep 2004
Posts: 1,895
|
|
As I discovered to my cost, the "core" of a threaded bolt is actually a lot less than the actual bolt size by the time you take into account how deep the thread is. As I recall, for M6, it is less than 5mm. Considering that the strength is related to the area, and that is related to the square of the radius, the thread reduces the strength considerably.
A bit of a rambling explanation but you get the gist...
Cheers, Robin
|
6th December 2017, 19:16
|
 |
Senior Member
Enthusiast
|
|
Join Date: Mar 2005
Posts: 3,079
|
|
John - yes, it was a very lucky escape!!
Robin - many thanks for the explanation 
|
20th December 2017, 21:30
|
|
Senior Member
Enthusiast
|
|
Join Date: Mar 2005
Posts: 3,079
|
|
 Every little helps.....
With a combination of the very cold weather and the Christmas preparations now in full swing, I've had little time to do any major work on the Sabre.
Grabbing the odd 1/2 hour here and there, I decide to dig out the Sabre's wiring loom and started to check it over and label it properly. The original builder's hand written labels on masking tape (that is now over 22 years old!) are all but unreadable. The wiring section of the build manual has the cable's colour codes so its a case of identifying which cable is which and then sticking a label on it.
I'm still a long way off installing the loom but it is a job that I can do as and when time allows. It should make the installation of the loom much faster when the time comes.
The Sabre's main loom has a number of subsections separated by large multi plugs.
I started with the dashboard subsection....
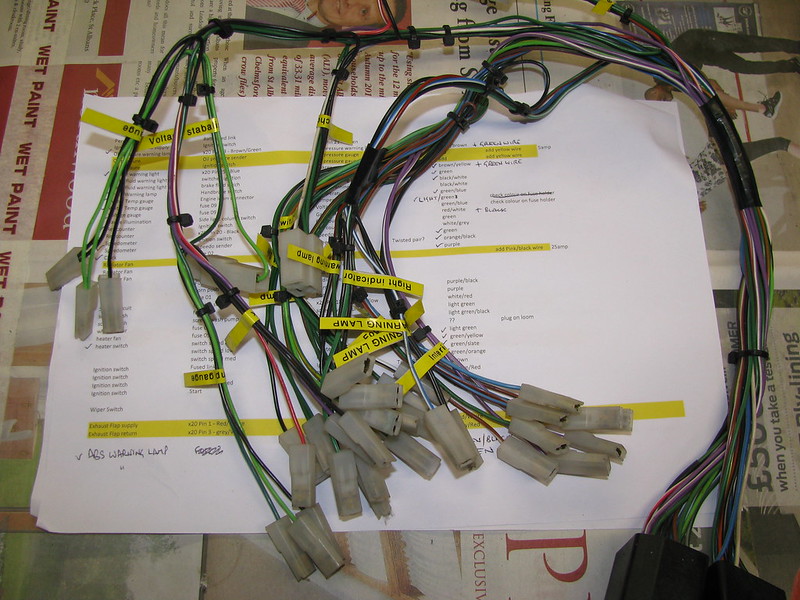 Dashboard wiring loom Dashboard wiring loom by Sabrebuilder, on Flickr
I have a small Brother labelling machine that works really well and is highly recommended.
Next up will be the sub-loom that goes to the back of the car for lights and fuel pump, etc.
....peter

|
13th January 2018, 18:55
|
|
Senior Member
Enthusiast
|
|
Join Date: Mar 2005
Posts: 3,079
|
|
Just a few small updates...
The winter loom labelling exercise is now complete so it's all ready to go in once I reach that stage of the re-build.
Rear loom to rear lights and fuel tank all labelled up.
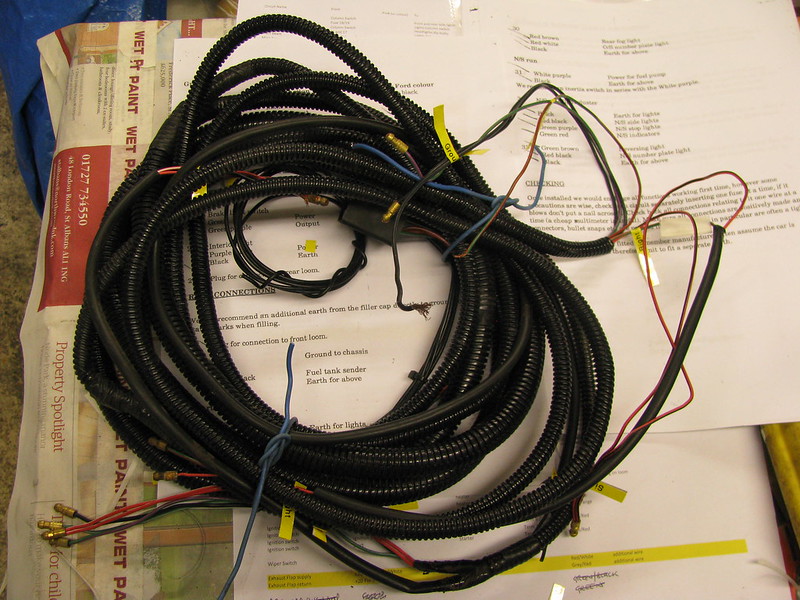 Rear Loom Rear Loom by Sabrebuilder, on Flickr
Main loom checked and labelled. Wiring for Intermittent wipers is an unexpected but useful feature!
 Main Loom Main Loom by Sabrebuilder, on Flickr
I seem to have collected quite a few stalk switches but Sierra parts are becoming somewhat harder to find so it's good to have a spare.
 Lights and wiper stalks Lights and wiper stalks by Sabrebuilder, on Flickr
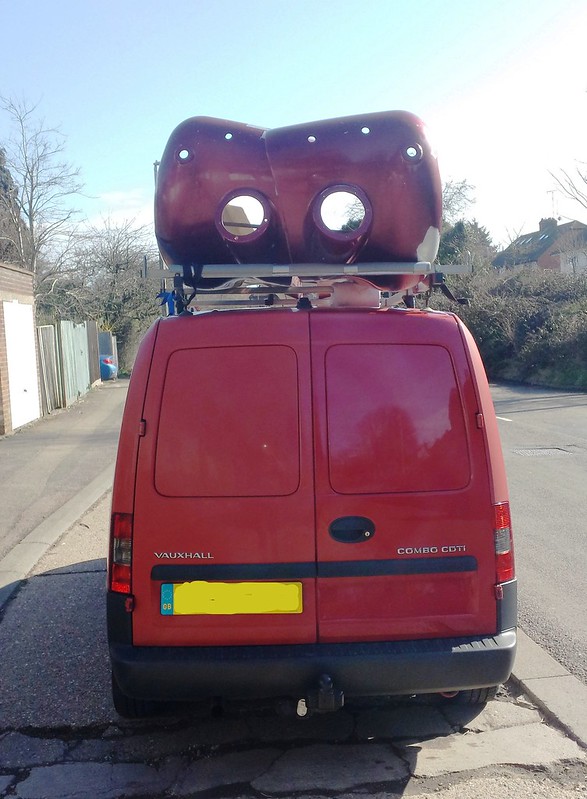
I've also been working outside to keep warm....
So I've built a frame on the tent trailer base. This is for transporting the Sabre's body tub.
 Trailer frame Trailer frame by Sabrebuilder, on Flickr
......peter |
16th January 2018, 21:52
|
 |
Senior Member
Enthusiast
|
|
Join Date: Feb 2005
Location: Hampshire
Posts: 2,497
|
|
I like the 'torque wrench' nice work  |
17th January 2018, 09:15
|
|
Member
|
|
Join Date: Jul 2014
Location: Ealing London
Posts: 54
|
|
Your improvisation is second to none. Good on you Peter.
|
20th January 2018, 17:53
|
|
Senior Member
Enthusiast
|
|
Join Date: Mar 2005
Posts: 3,079
|
|
Quote:
Originally Posted by Patrick

I like the 'torque wrench' nice work |
Quote:
Originally Posted by Amir Manzoori
Your improvisation is second to none. Good on you Peter.
|
Thanks, chaps. With hindsight (which is always a wonderful thing!) I could have made it more accurate by using a small ring spanner as I didn't take into account the weight of the adjustable but its done now. |
20th January 2018, 18:45
|
|
Senior Member
Enthusiast
|
|
Join Date: Mar 2005
Posts: 3,079
|
|
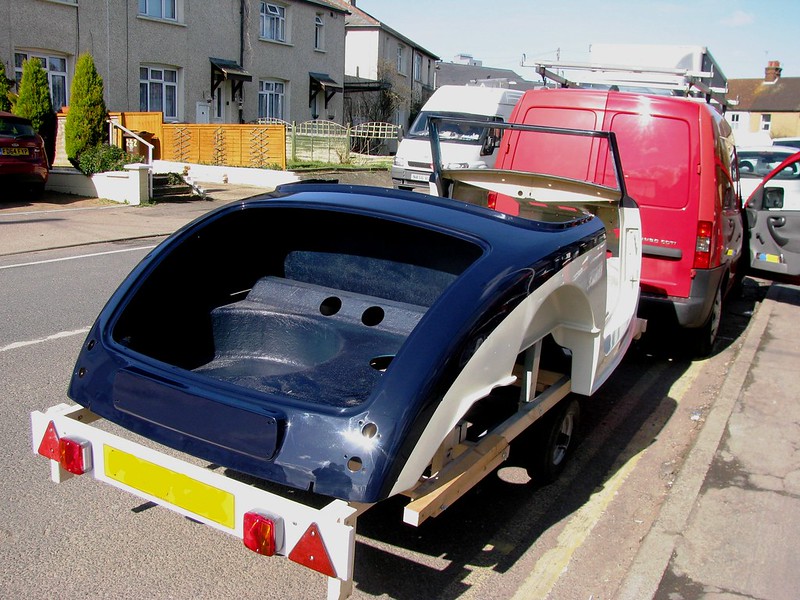
Despite the cold weather, I've removed the body tub (again!!) which is now mounted on the trailer. I can now finish off the gearbox tunnel mods and prep the body tub before painting.
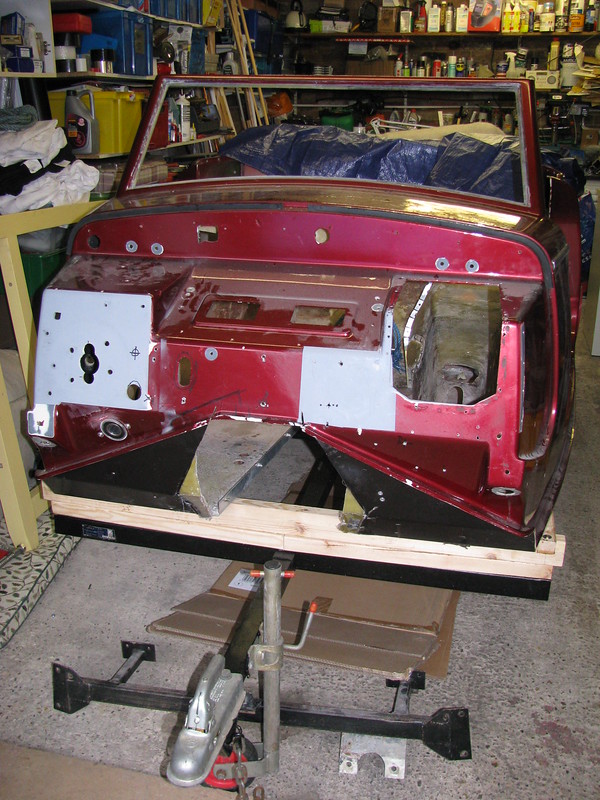 Gearbox tunnel Gearbox tunnel by Sabrebuilder, on Flickr
I need to keep the body tub dry in the garage as it's prep'ed for paint so the chassis will have to live outside for a while.
 Chassis under tarp Chassis under tarp by Sabrebuilder, on Flickr
( Note to self: a trip to the dump is overdue  )
Gearbox tunnel mods need to be bonded on this side and finished.
 Gearbox tunnel Gearbox tunnel by Sabrebuilder, on Flickr
More next week....
...peter |
27th January 2018, 20:15
|
|
Senior Member
Enthusiast
|
|
Join Date: Mar 2005
Posts: 3,079
|
|
Getting my body into shape....
This weeks report is a miscellany of updates but all with the same aim of getting the body tub in shape for the paint bodyshop.
Following on from last weeks update I've done some more work on the gearbox tunnel reshaping.
I reinforced the gearbox tunnel mods by first grinding back the gelcoat on the surrounding bodywork and then bonding on a layer of chopped strand mat followed by a layer of tissue. I then sanded back, smoothed out with a skim of P38 filler and then sanded smooth. It will be finished off by the bodyshop.
 Gearbox tunnel mods Gearbox tunnel mods by Sabrebuilder, on Flickr
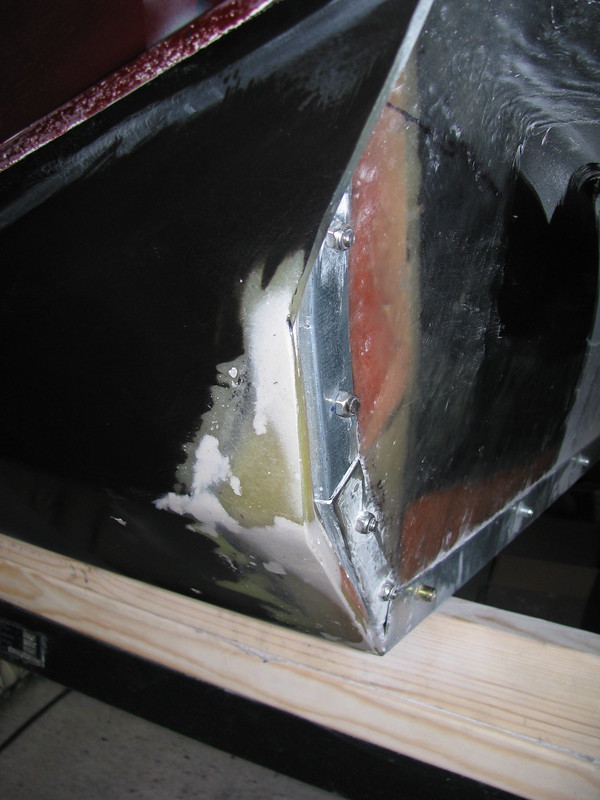
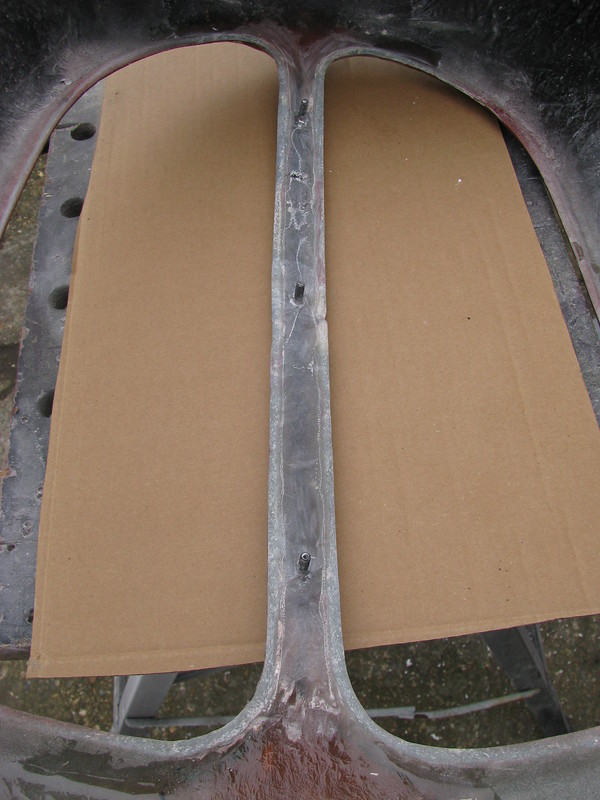
The modified gearbox tunnel jointing angle doesn't quite fit flush to the body. My original idea was to fill this gap with a closed cell foam strip but I wasn't happy about the size of the gap. So I covered the angle in parcel tape and filled the gap with body filler. When I finally fit the gearbox tunnel it will only need a thin smear of mastic sealant.
 Gearbox tunnel mods Gearbox tunnel mods by Sabrebuilder, on Flickr
Another small job was to enlarge the heater hose hole to take this rubber grommet.
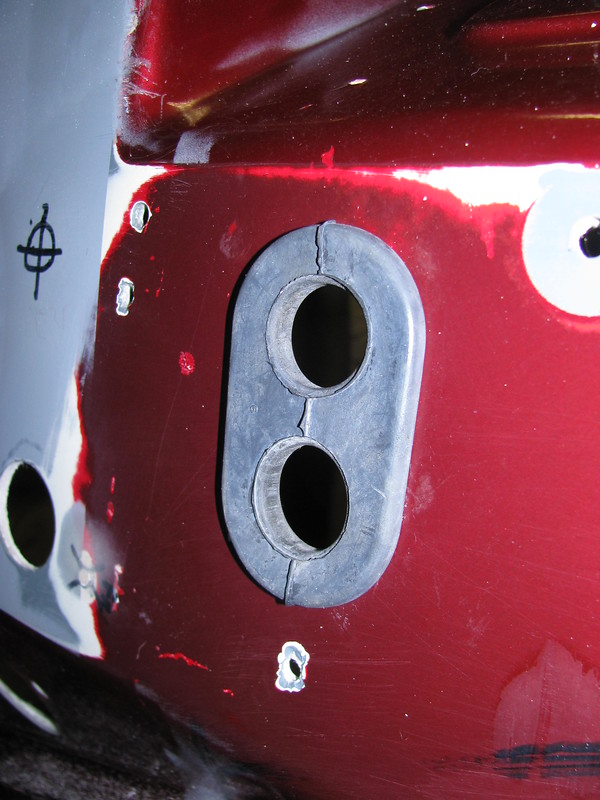 Heater Hose grommet Heater Hose grommet by Sabrebuilder, on Flickr
And the bulkhead had this rather ugly hole where the OB had cut a hole for the loom connector.
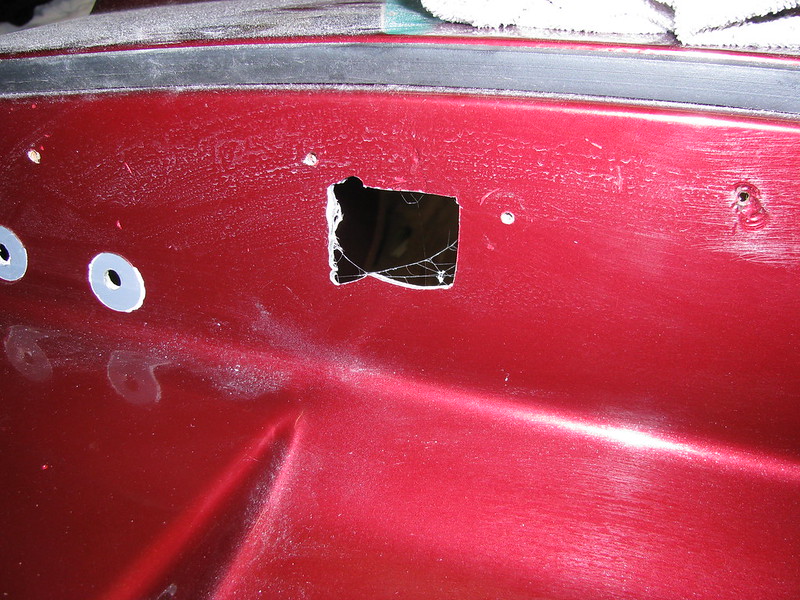 Body mods Body mods by Sabrebuilder, on Flickr
I have tidied up the hole by cutting a circular hole with a hole saw. An off-cut of MDF was screwed to the bulkhead to support the hole saw's central drill bit. The mounting holes will be filled and I'll fit a suitable grommet after the tub is painted.
 Body mods Body mods by Sabrebuilder, on Flickr
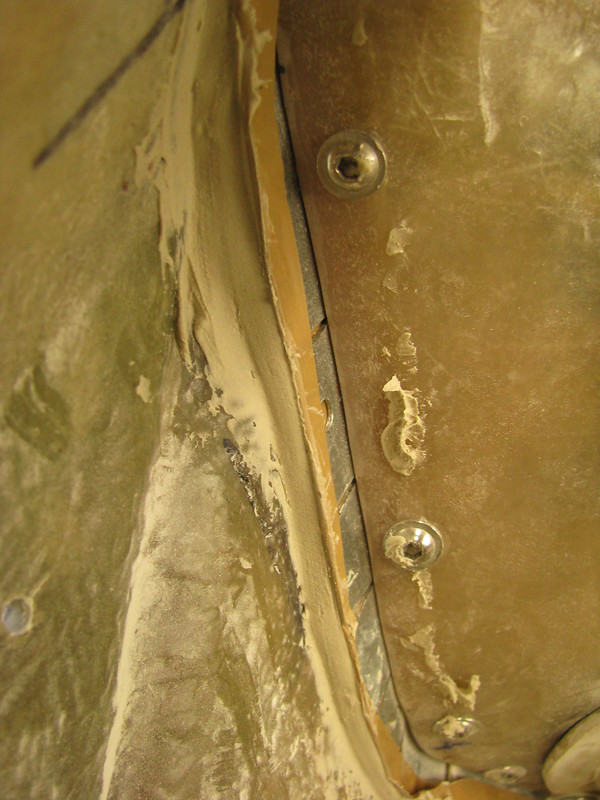
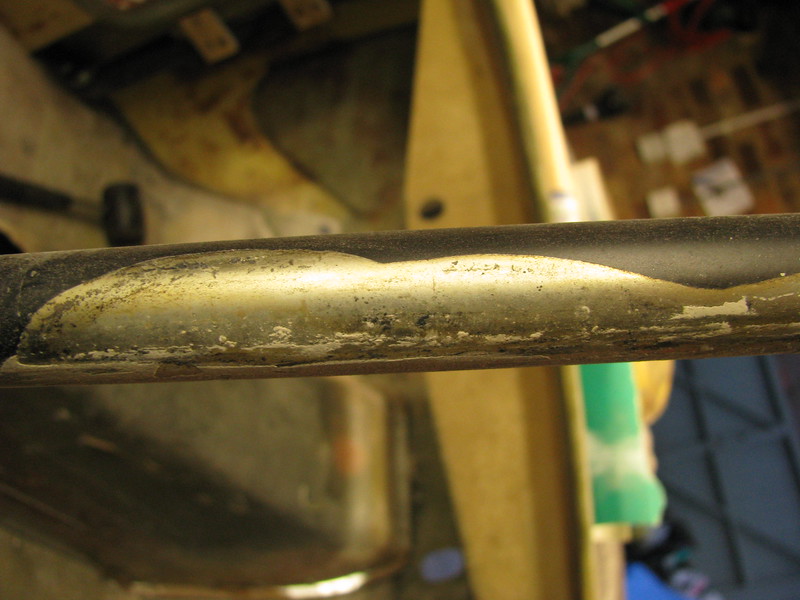
I then turned my attention to the windscreen surround sides which are supported by steel inserts. According to the Royale build manual these should be painted and then bonded to the GRP frame with body filler. On my car the filler has cracked and I wanted to see if the supports were still bonded securely.
 'A' Post steel 'A' Post steel by Sabrebuilder, on Flickr
Close up of the cracks.
 'A' Post steel 'A' Post steel by Sabrebuilder, on Flickr
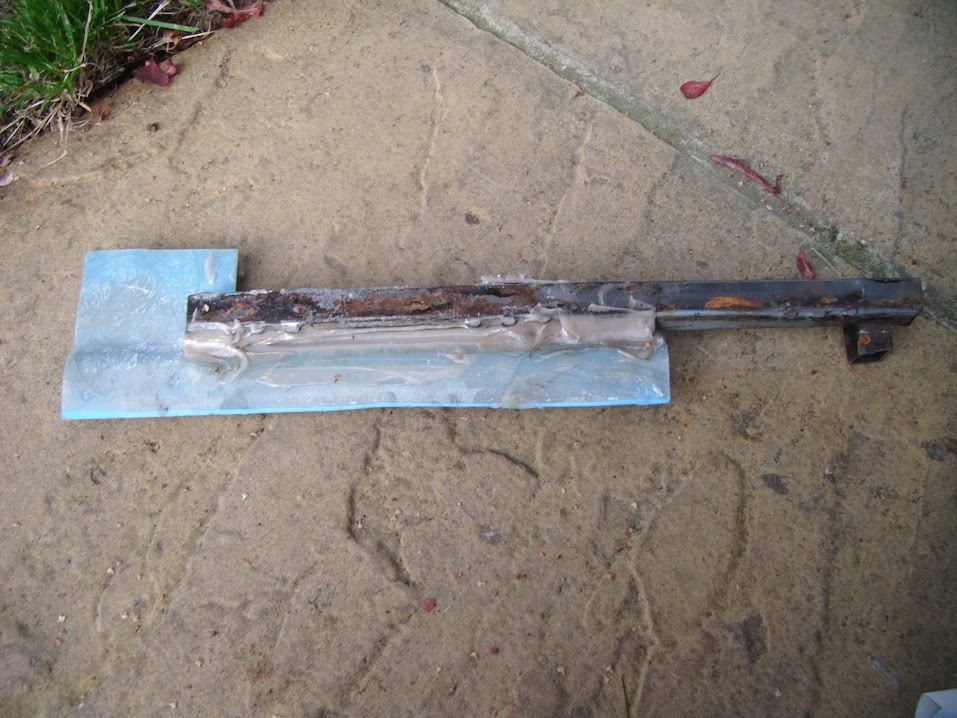
On the drivers side I had already removed the door hinge, so I cut out the filler with a plunge cutter multi-tool. The filler was really soft and came away easily. When I finished cutting out the filler, which only took about 5 minutes, the steel support fell out.
The bond between the steel and GRP had completely failed!!!!!!
 'A' Post steel 'A' Post steel by Sabrebuilder, on Flickr
Here you can see the very little bonding used by the OB.
 'A' Post steel 'A' Post steel by Sabrebuilder, on Flickr
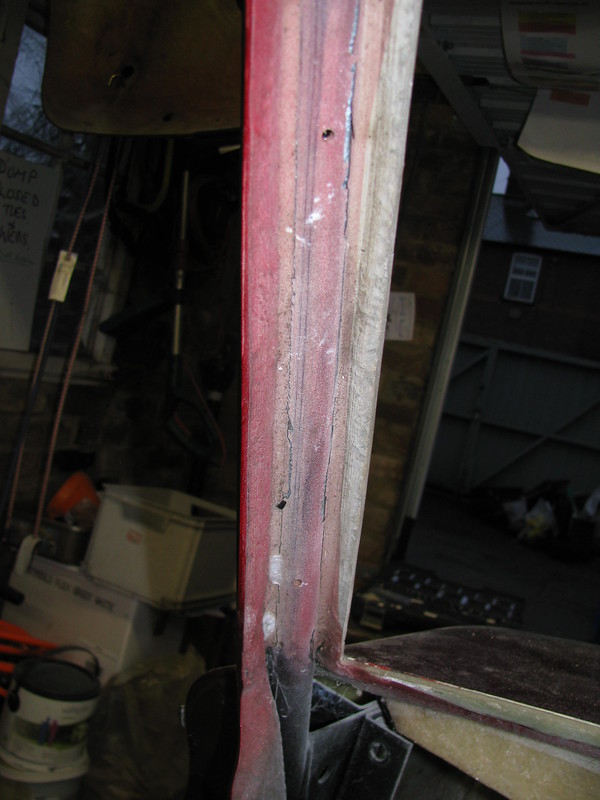
And the bond between the 'A' post steel and the back of the hinge box had also failed.
 'A' Post steel 'A' Post steel by Sabrebuilder, on Flickr
This photo shows where the windscreen surround steel bonding has failed.
 'A' Post steel 'A' Post steel by Sabrebuilder, on Flickr
I'm thinking of using something like Tiger Seal to re-bond the 'A' post and windscreen surround but I'm open to expert advice 
Hopefully more updates next week....
....peter
|
28th January 2018, 15:28
|
 |
Senior Member
|
|
Join Date: Feb 2012
Location: Wembley, London
Posts: 5,058
|
|
peterux – Hi Peter,
I’m certainly no expert, but based on the advice of others on here, I bought some bonding paste from Glasplies.

This works with a catalyst, in a similar way to fibreglass resin.
This was a test piece I did to stick metal to fibreglass and it was rock solid.
I used the bonding paste to join my bodyshell to the inner framework.
But I also used Tiger Seal to close any small gaps that were left.
Hope that helps, Paul.
PS
Not really sure why I haven’t posted on your thread before?
As it is a very meticulous build with great attention to detail and problem solving. 
Good luck.
|
14th March 2018, 06:29
|
|
Member
|
|
Join Date: Jul 2014
Location: Ealing London
Posts: 54
|
|
Enjoying every one of your post, it shows how meticulous you are and I can visualise how perfect the finish product is going to look like. Well done.
|
14th March 2018, 19:20
|
|
Senior Member
Enthusiast
|
|
Join Date: Mar 2005
Posts: 3,079
|
|
Exciting update!!!!!!!!1
Quote:
Originally Posted by Amir Manzoori
Enjoying every one of your post, it shows how meticulous you are and I can visualise how perfect the finish product is going to look like. Well done.
|
I hope I can meet your expectations!!
------------------------------------------------------------------------------------
I was surprised to get a call today from Dave at the bodyshop.
He said 'bring your camera' ....so I did...........
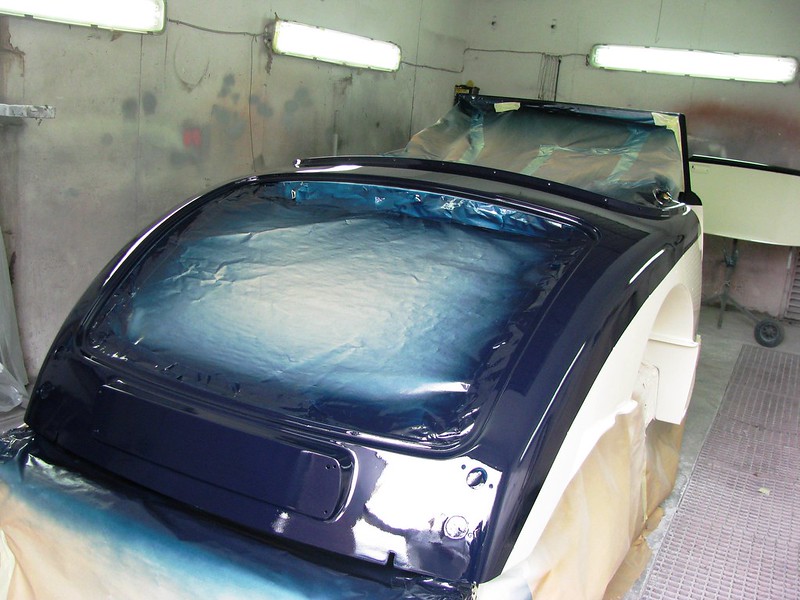 Painting Painting by Sabrebuilder, on Flickr
 Painting Painting by Sabrebuilder, on Flickr
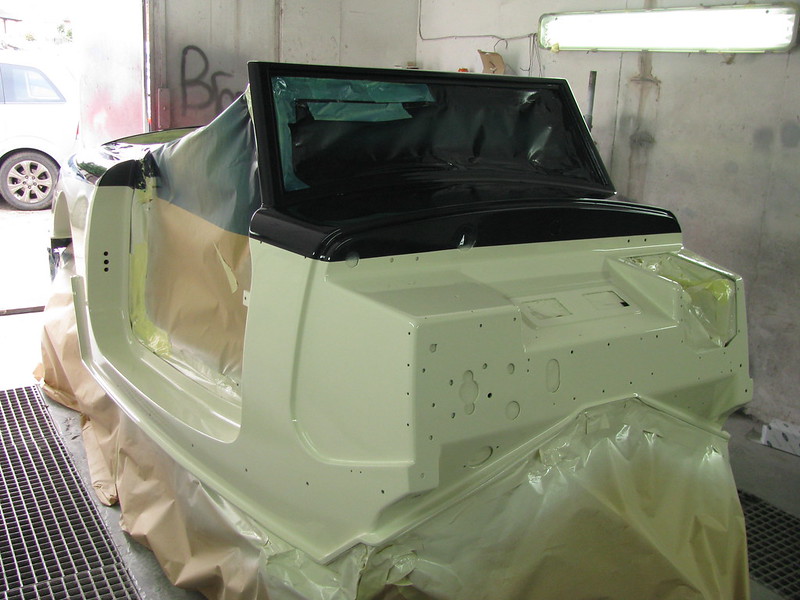 Painting Painting by Sabrebuilder, on Flickr
Still a long way to go but a very significant milestone!!!!  |
15th March 2018, 06:32
|
 |
Senior Member
Big Cheese
|
|
Join Date: Sep 2002
Posts: 1,080
|
|
It's going to look amazing |
15th March 2018, 06:40
|
 |
Senior Member
|
|
Join Date: Apr 2016
Location: Camberley
Posts: 972
|
|
Wasn't the original demo car that colour? Looks great.
|
18th March 2018, 12:57
|
|
Senior Member
|
|
Join Date: Feb 2012
Location: Wembley, London
Posts: 5,058
|
|
It must be exciting seeing the bodywork in paint.
Good luck, Paul. |
18th March 2018, 13:48
|
|
Senior Member
|
|
Join Date: Mar 2017
Posts: 127
|
|
WOW looks good!!
Sweet choice of colours.
|
22nd March 2018, 21:07
|
|
Senior Member
Enthusiast
|
|
Join Date: Mar 2005
Posts: 3,079
|
|
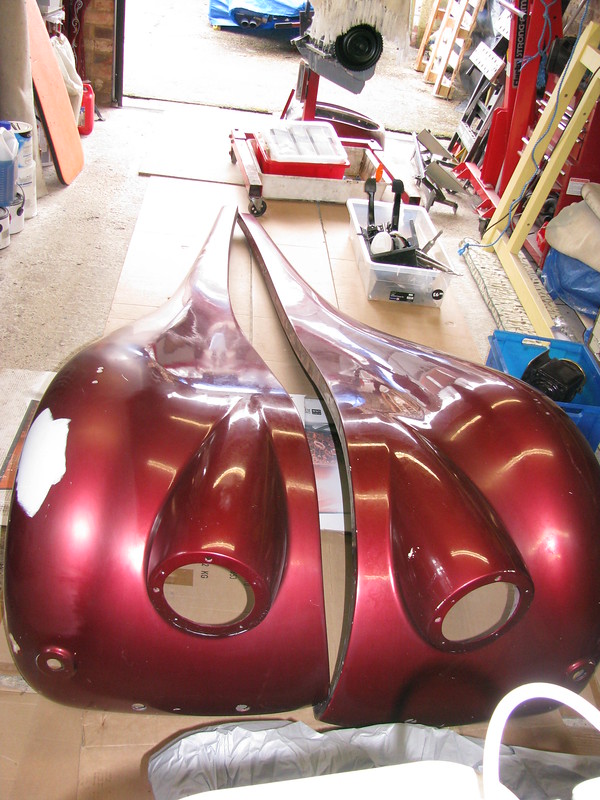
Painting update...
Thanks for all the feedback, it's a little nerve wracking entrusting this kind of work to someone you don't really know but Dave has exceeded my expectations and is doing a superb job. IIRC the original John Barlow demonstrator was all blue but that is based on adverts I've seen in old mags.
-------------------------------------------------------------------------
Earlier this week I popped over to the bodyshop to drop of more panels. I delivered the rear wings, bonnets and wheels. The steel wheels are going off to 'Dave's mate' to be shot blasted before being painted.
Things are coming along nicely......
Following flatting back Dave decided to apply another clear coat.
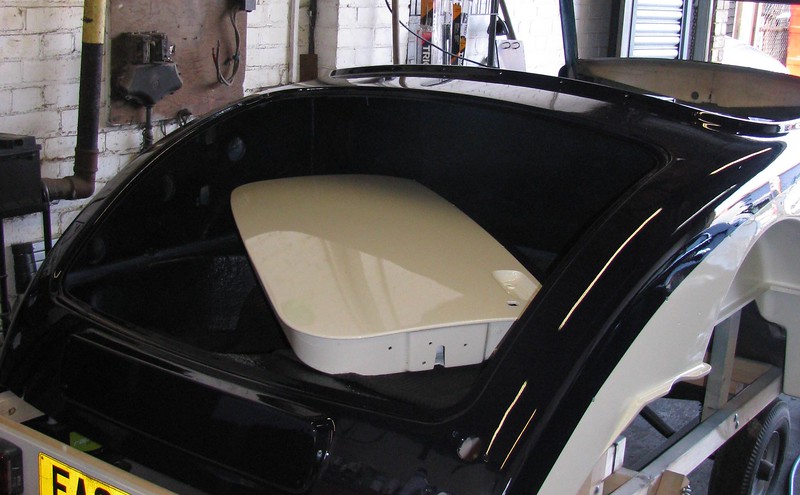 Painting Painting by Sabrebuilder, on Flickr
Body tub after second coat of lacquer. Wheels delivered awaiting shot blasting and paint.
 Painting Painting by Sabrebuilder, on Flickr
Gearbox tunnel has now been Schutz underseal coated.
 Painting Painting by Sabrebuilder, on Flickr
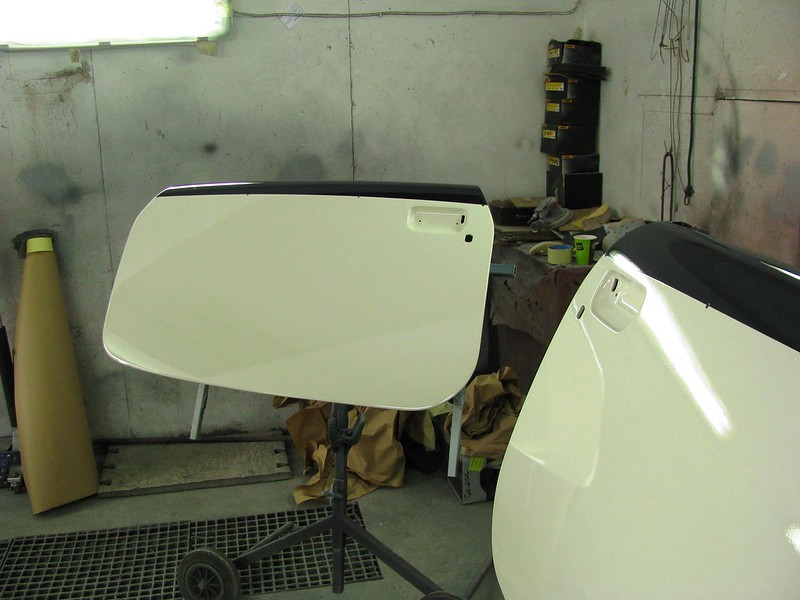
Passenger door before machine polishing. The boot inside has been colour coded.
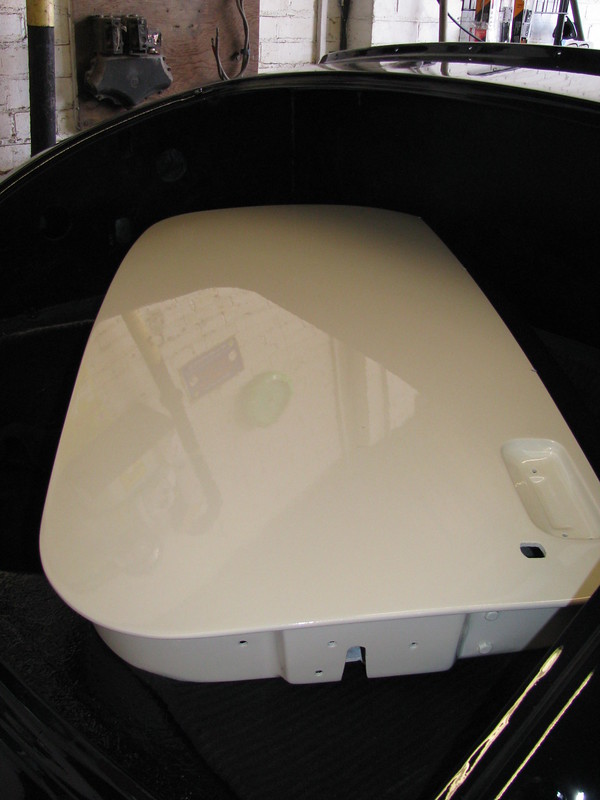 Painting Painting by Sabrebuilder, on Flickr
The body tub should be ready for collection early next week so fingers crossed for dry weather for the journey back 
.....peter
P.S. the 'Midnight blue' looks black in these shots but it is painted blue 
|
26th March 2018, 20:31
|
|
Senior Member
Enthusiast
|
|
Join Date: Mar 2005
Posts: 3,079
|
|
My baby is back at home.....
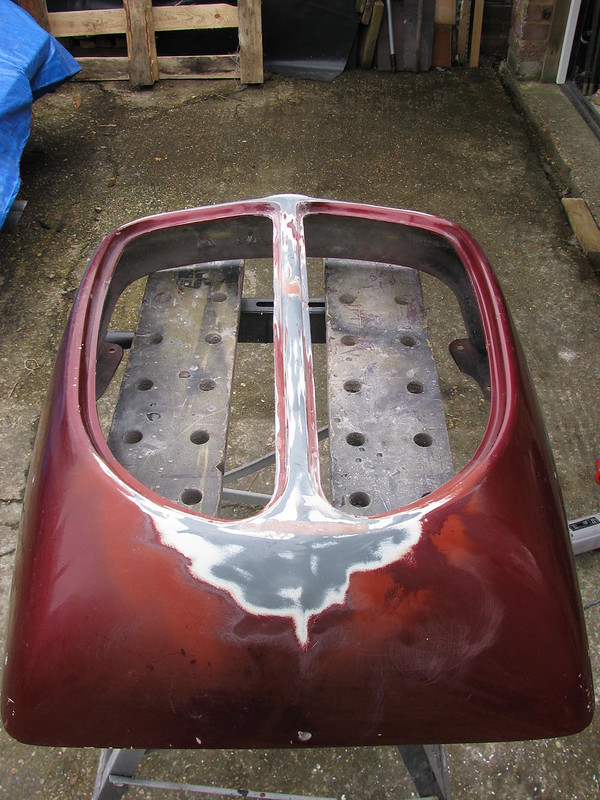
Over the weekend I found time to complete the repairs to the radiator cowl.
I finished re-enforcing the back of the cowl with glass mating and resin and then ground it flat with a flap disk in my angle grinder.
 Painting Painting by Sabrebuilder, on Flickr
After I sanded down the front I found the damage was much worse than I first thought. It had already been repaired before being broken again. I dug out all the cracked gelcoat and filled it with GRP filler.
 Painting Painting by Sabrebuilder, on Flickr
I also created a raised 'plinth' for the badge....
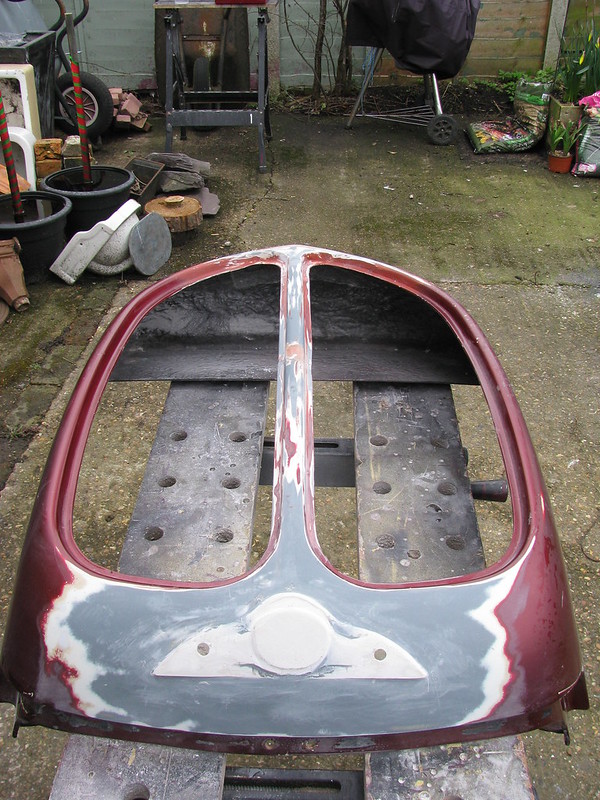 Painting Painting by Sabrebuilder, on Flickr
I then retrieved the front wings that have been hanging from the garage rafters for the last few years. They were covered in dust and spiders poo so I gave them a quick wash.
 Painting Painting by Sabrebuilder, on Flickr
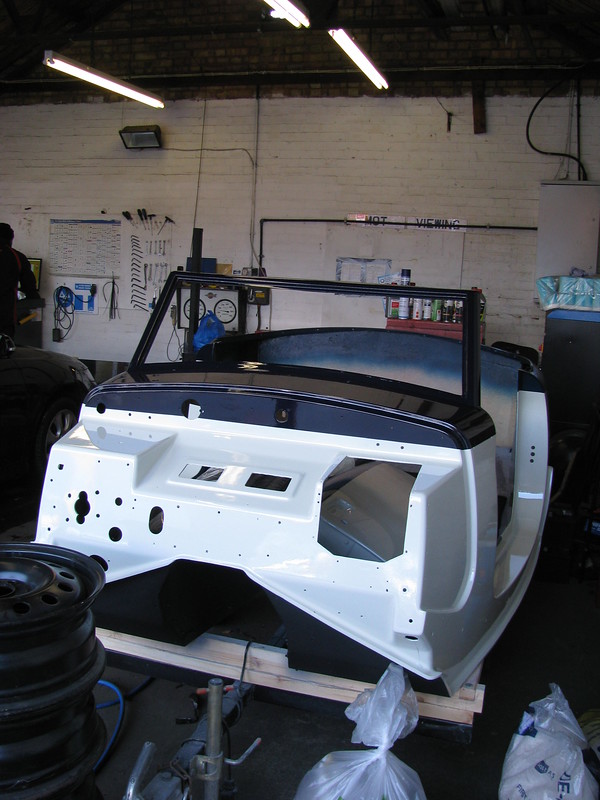
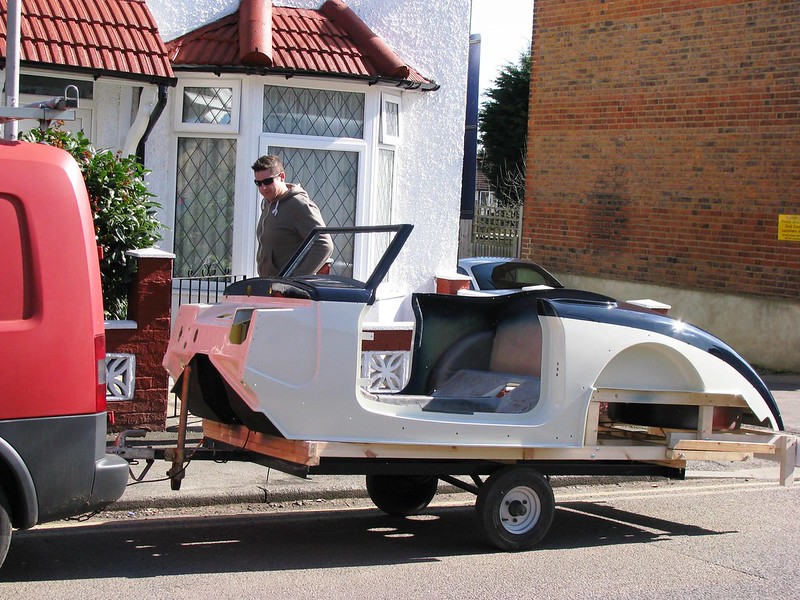
Today, we collected the body tub and doors from the painters, but first we loaded up the front wings.
 Painting Painting by Sabrebuilder, on Flickr
And then the trailer was hitched up for the journey back home.
 Painting Painting by Sabrebuilder, on Flickr
 Painting Painting by Sabrebuilder, on Flickr
And it's now tucked up safely back in my garage at home.
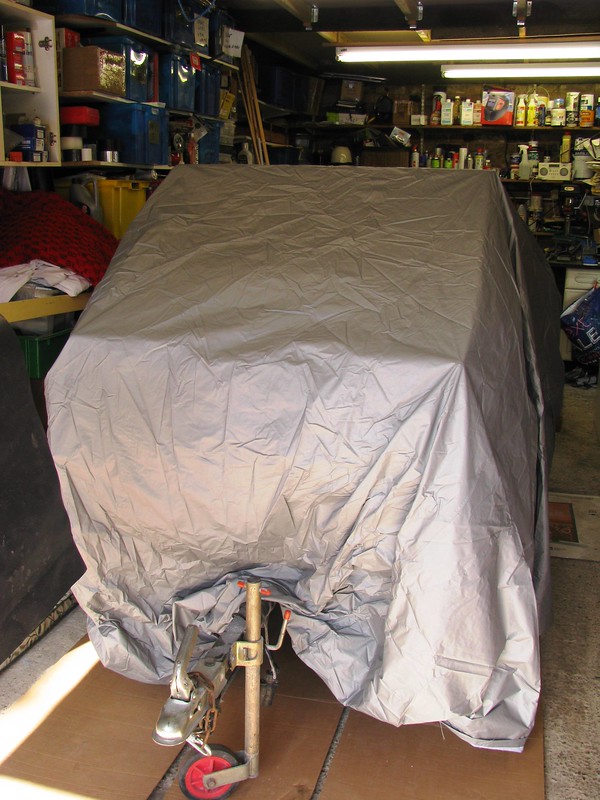 Painting Painting by Sabrebuilder, on Flickr
Happy days 
....peter
|
4th April 2018, 19:33
|
|
Senior Member
Enthusiast
|
|
Join Date: Mar 2005
Posts: 3,079
|
|
Fuel level sender mods
A few weeks back I mentioned that I will give an update on the Fuel level sender modifications I've been working on.
This is the Ford combined 'lifter pump' and fuel level sender that fits the Granada fuel tank installed in the Sabre. But the Ford sender's resistance is not compatible with the ETB Fuel gauge that I have bought.
 Fuel Level Sender Fuel Level Sender by Sabrebuilder, on Flickr
(sorry about the poor quality photo's)
This is the ETB fuel level sender. Luckily, the full range from Empty to Full is covered by a 90 degree sweep which is the same as the Ford sender. Also, the RTB sender's variable resistance part is easily unbolted.
 Fuel Level Sender Fuel Level Sender by Sabrebuilder, on Flickr
Before dismantling the Ford sender I marked the Full and Empty positions. It was easy to remove the Ford variable resistor by just bending back a couple of tabs.
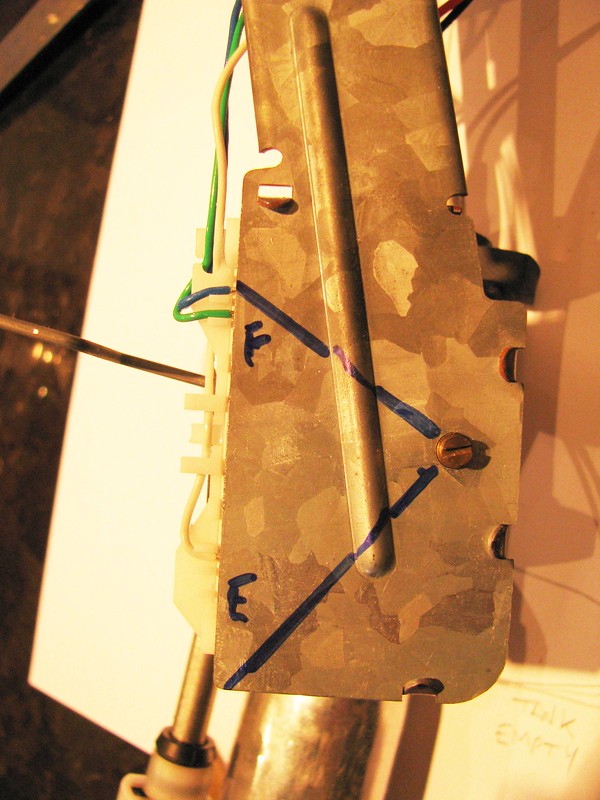 Fuel Level Sender Fuel Level Sender by Sabrebuilder, on Flickr
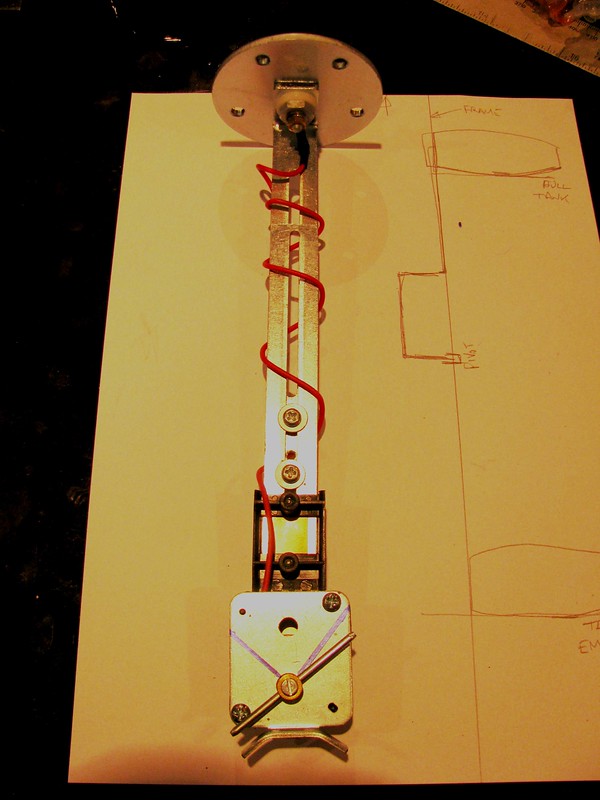
I then mounted the ETB rheostat to the Ford support leg using M6 screws and some aluminium tube spacers. A very fiddly job!!
 Fuel Level Sender Fuel Level Sender by Sabrebuilder, on Flickr
And here is a side view of ETB sender mounted on Ford fuel tank unit. In the Full position.
 Fuel Level Sender Fuel Level Sender by Sabrebuilder, on Flickr
It seems to work OK so just need to wire it up and make sure the gauge reads correctly; and then make sure it fits OK in the tank.
Another little job ticked off the plan
.....peter
|
5th May 2018, 19:12
|
|
Senior Member
Enthusiast
|
|
Join Date: Mar 2005
Posts: 3,079
|
|
Nearly done....
Well the final three body panels are being prepped for paint. The front wings and boot lid have been stripped of the old paint and primed ready for flatting.
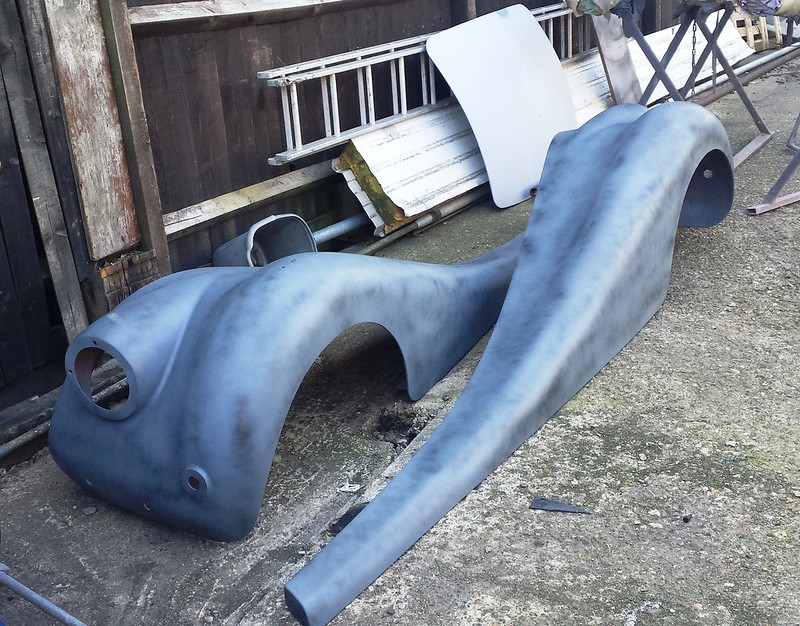 Front wings and bootlid Front wings and bootlid by Sabrebuilder, on Flickr
Should be finished next week.
I then just need to find the time to start the re-assembly 
...peter |
|
Currently Active Users Viewing This Thread: 2447 (0 members and 2447 guests)
|
|
|
 Posting Rules
|
You may not post new threads
You may not post replies
You may not post attachments
You may not edit your posts
HTML code is Off
|
|
|
All times are GMT +0. The time now is 17:20.
|


 Hybrid Mode
