|
|
| Sammio Builds and discussions Sammio bodied car builds and specials |

20th February 2013, 15:22
|
|
Senior Member
|
|
Join Date: Jul 2011
Posts: 490
|
|
Quote:
Originally Posted by davecymru

Hummmmm side exit exhausts are really pretty! I'd just be paranoid about setting the bodywork on fire  |
Well at least the smoke will exit via those lovely Pininfarina vents.. |
20th February 2013, 17:15
|
 |
Senior Member
|
|
Join Date: Feb 2012
Location: Wembley, London
Posts: 5,058
|
|

Viatron - Thanks for the welding guide, there were a few more tips in there I will try at the weekend. *
I also watched my recording of Mark Evan's "A 4x4 Is Born" which had a short guide to MIG welding in it too.
* Time and weather permitting.
GaryH - Sorry, my mistake, I saw "tube" & thought of the rubber seal at the back of the indicator. 
The tube solution is possible as I'm no longer planning to sculpt the mount to mimic the bonnet's curves.
Mister Towed & Nike55 - [TongueFirmlyInCheek] A Lancia D24 you say? It's alright I suppose… if you like that sort of thing.
But it's hardly going to compare to my fibre glass rear end with Land Rover lights stuck on, now is it?
[/TongueFirmlyInCheek]
DaveCymru - Forget side exhausts, I'm just hoping my twin rear pipes don't melt my number plate!
( I do have some exhaust heat wrap that will cover most of the pipes up to the final section of silencer. )
- - - - - - - - - - - - - - - - - - - - - - - - -
Tidy Up:
My eldest daughter has some of friends coming round tomorrow, so once again I need to tidy up tonight.
Which is only fair as I now have stuff associated with the car in the dining room, utility room & bedroom.
Whereas, if I had a garage to play in, all I'd have to do would be shut the door & any mess there would be fine.
Next Steps:
Looks like family stuff may occupy a large chuck of this weekend, so I will just see how it goes.
The good news is that the days are definitely getting brighter which will only increase my build opportunities.
You have no idea how much I am hoping for a run of half decent weather this Spring & Summer. 
Cheers, Paul.

|
23rd February 2013, 17:11
|
|
Senior Member
|
|
Join Date: Feb 2012
Location: Wembley, London
Posts: 5,058
|
|
Not much to report as this was always going to be a weekend for other stuff...
Welding Machine Repairs:
I decided to sort out the earth lead on my mate's MIG before I had another go doing any welding.
This was before…

I cut the cable back, opened up the cable clamps & then re-joined the freshly cut cable end.
I even remembered to fit the rubber clamp cover over the cable before I re-joined it!


It also occurred to me that welding at the bottom of the garden might be a small part of my problem too.
My first welding attempts were done on the patio using an extension lead plugged into the kitchen.
Since then, I've use an extension lead plugged in Summer House, which itself takes power from the house.
Would the 100 odd foot of armoured cable in the ground, before I add an extension lead have an impact?
Battery Box:
I'd ordered a pair of heavy duty "D" handles for the battery retaining strap I'm planning to use…
Clearly I had forgotten to take account just how much space they would take up on the bulk head.

At least with the handles roughly in place I could measure the distance over the top of the battery.
This gives me the length of luggage strap I need, so now I can get that ordered as well.
( See masking tape in photo. )
I might just trim one side of the hinges off, as two bolts on each side should more that do it.

And If not, I'll just move the whole battery box a little to the left (as you view the photo).
Harry Potter:
I have a long tradition of blaming the weather for delaying my build, but there was something else involved.
Little did I know that the decision to read all the Harry Potter books to my girls would cause delays too.
What started out as reading a little bit each night evolved into epic 4 reading sessions a day at weekends.
But today, we have just finished all 7 books & 8 films, which will give me a bit more free time to work on my car.

The DVDs arrived on Christmas Day and the rule was simple, no film until corresponding book was read first.
At this point we had only read the first two books (on the left) & were in the middle of book three.
Since Christmas morning we have read & watched everything on the right in the photo, an epic quest.
Please Note:
Don't get me wrong, I wouldn't trade all the time I spent reading & watching for a quicker build, no way.
Until next time, take care, Paul.
|
23rd February 2013, 18:00
|
|
Senior Member
|
|
Join Date: Apr 2012
Posts: 1,163
|
|
That earth lead is seriously gone so hopefully fixing it may help. Don't think the voltage drop will affect the welder, is it a spur or a ring to the summer house?
|
23rd February 2013, 20:55
|
 |
Senior Member
|
|
Join Date: Jul 2011
Location: Marmande 47200
Posts: 501
|
|
Harry Potter:
I have a long tradition of blaming the weather for delaying my build, but there was something else involved.
Little did I know that the decision to read all the Harry Potter books to my girls would cause delays too.
What started out as reading a little bit each night evolved into epic 4 reading sessions a day at weekends.
But today, we have just finished all 7 books & 8 films, which will give me a bit more free time to work on my car.
The DVDs arrived on Christmas Day and the rule was simple, no film until corresponding book was read first.
At this point we had only read the first two books (on the left) & were in the middle of book three.
Since Christmas morning we have read & watched everything on the right in the photo, an epic quest.
Please Note:
Don't get me wrong, I wouldn't trade all the time I spent reading & watching for a quicker build, no way.
Until next time, take care, Paul.
Probably the wisest words I ve read on this forum, it's all too easy to get tied up in these builds and lose sight of what's important, good on ya!
Pops
Last edited by Psycho pops; 23rd February 2013 at 20:59..
|
24th February 2013, 21:02
|
|
Senior Member
|
|
Join Date: Feb 2012
Location: Wembley, London
Posts: 5,058
|
|
Viatron - Cheers Mac, it was you mentioning possible earthing issues that convinced me it wasn't meant to look like this.
No chance to test the welder today, but hopefully next week.
The Summer House is effectively an extension from the power sockets in the dining room.
I'd previously wired up garden lights & a water feature to a circuit breaker I'd added inside the house.
But a qualified electrician replaced my handy work when we had the builders in a few years ago.
Pops - Thanks for the kind words.
Whilst I never expected this build to take so long, I am no longer under any deadline pressures.
Sure, I'd love to be finished before the end of the Summer, but not at the expense of family time.
So I take my inspiration for people like yourself & Mr T, who just keep chipping away.  Car Update:
Big family get together today, so no car work what so ever.
I did however, buy & eat a small tube of Pringles (all in the name of research you understand).
I will post a photo of just how well my front indicator sits on the tube during the week!
Cheers, Paul.
|
26th February 2013, 17:42
|
|
Senior Member
|
|
Join Date: Feb 2012
Location: Wembley, London
Posts: 5,058
|
|
Front Indicator Mounting:
Initially, I intended to mould these mounts to resemble the bonnet contours for the headlight & grill opening.
However, my last plasticine test fitting showed that it would be hard to make this approach look any good.
So I now plan to use a Pringles tube (as Mike previously suggested) which does seems a good fit…
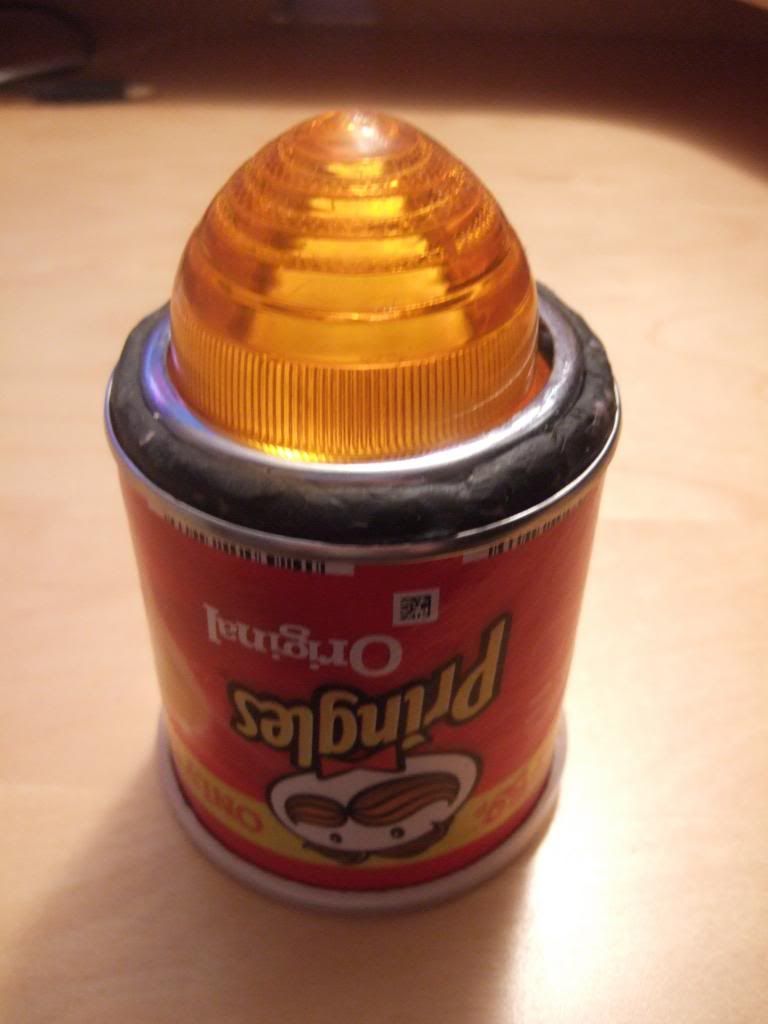
Then, as GaryH suggested, I'd cut a hole in the bonnet, trim tube to fit on the inside & fibre glass into place.
With (hopefully) just a light coat of filler on the ouside to smooth over the rough fibre glass surface.
Quite by chance I followed a link on another car forum to a folding caravan restoration project yesterday.
It actually had photos of fog lights being fitted using a very similar technique, although they used a lathe.
It also had a number of good general points on working with fibre glass and I found it well worth a read.
http://www.portafold.co.uk/forum/vie....php?f=3&t=450
I just need to wait until the temperature outside picks up a bit before I have my first go at fibre glass work.
Not so much for resin's operating temperature, although it's a factor, more so I can actually feel my hands!
I will also work on my fibre glass battery box at the same time, but I'll post more on that another day.
Until then, take care, Paul.
|
26th February 2013, 20:19
|
|
Senior Member
|
|
Join Date: Jun 2011
Location: birchington, kent
Posts: 1,769
|
|
I can see your getting on well with your build as usual and i looked at the caravan build, wasn't it good... i would like that van.
|
27th February 2013, 09:13
|
 |
Senior Member
|
|
Join Date: Jul 2011
Posts: 5,328
|
|
Superb link to the folding 'van restoration. Inspiring stuff and I loved the scatter cushions made out of old jeans. Brilliant!
|
28th February 2013, 17:52
|
|
Senior Member
|
|
Join Date: Feb 2012
Location: Wembley, London
Posts: 5,058
|
|
GaryH & Mr T - Glad you liked the link, I do like seeing skilled people at work.
One of these days I'll post a few links to some other great car builds I've followed.
- - - - - - - - - - - - - -
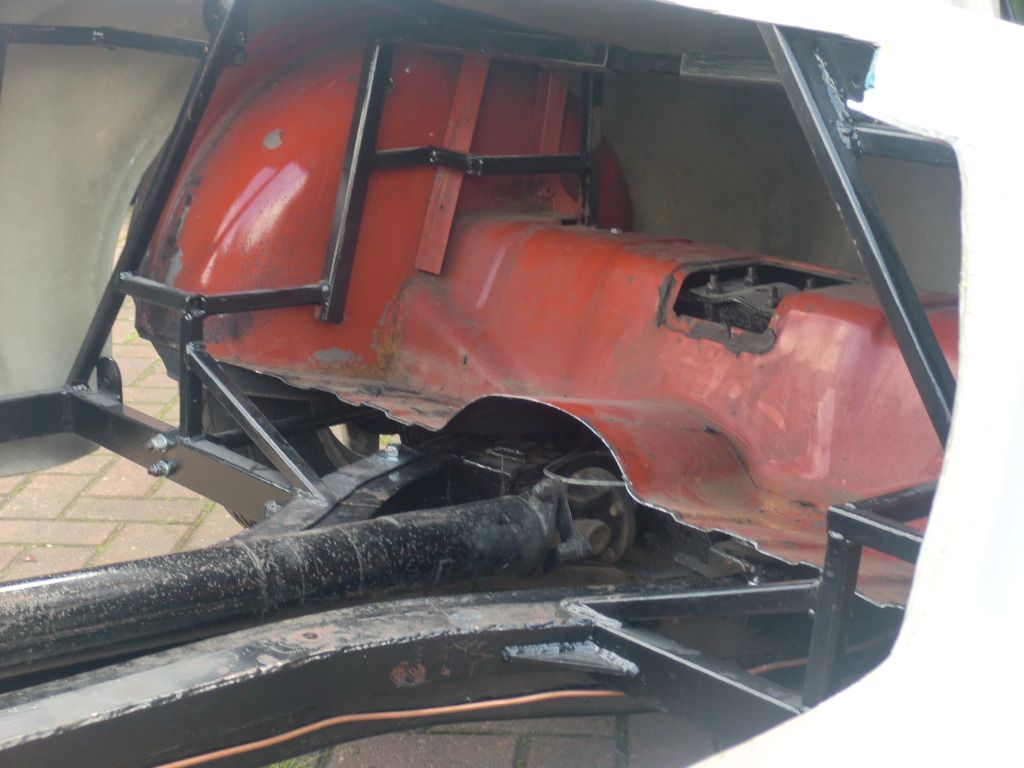
Gearbox Tunnel Thoughts:
Originally I was planning to simply re-use the white plastic tunnel that came with my donor…

However, on closer inspection, it is clear that there isn't anywhere to join the front "lip" to the bulk head.
This is because the body shell edges effectively end at a 90 degree angle relative to the front tunnel "face".
What is harder to see in this photo is the frame work around the tunnel isn't "square" either.
The horizontal frame rail that is shown going across the front of the top of the tunnel is fine.
But the two vertical frame rails either side of it are not directly connected to it as such.
( They are both set with different spacing and at different vertical angles. )
Obviously, I could build up a lip around the existing body shell to give me something to mount the tunnel to.
However, I think a simpler solution would be to move the front tunnel mounting to the "inside" of the horizontal rail.
So I intend to build a square sided "horseshoe" in plywood, which can be bolted to this horizontal frame rail.
This would form the inner most part of the bulk head & the rest of the body shell would be joined to this.
( As part of the traditional bonding / fibre glassing of body shell to frame work. )
Despite playing loose & free with scale & perspective, I hope this sketch will help explain the words above…

The top of the horseshoe would be higher than shown to match the hole in the body shell.
It also might be easier to build a new tunnel out of plywood / fibre glass, rather than modify the existing one.
But I'll have another long at that when everything else has been slotted into place.
Hope to get a chance to work outside on Sunday.
So until then, take care, Paul.
|
28th February 2013, 18:39
|
|
Senior Member
|
|
Join Date: Jul 2011
Posts: 5,328
|
|
I'd re-use the spitfire gearbox cover as it gives a factory look to the interior. To me nothing shouts 'kit car' louder than lots of square edges in the cockpit.  |
28th February 2013, 20:17
|
|
Senior Member
|
|
Join Date: Jun 2011
Location: birchington, kent
Posts: 1,769
|
|
Yes lose the sharp edges... look up some boat building techniques or ask Seanick on other forum.
|
28th February 2013, 21:03
|
|
Senior Member
|
|
Join Date: Feb 2012
Location: Wembley, London
Posts: 5,058
|
|
Thanks chaps.
OK, so "Plan B" will be to modified the original tunnel cover to join the new plywood 'horseshoe'.
( As modifying the bulk head needs to be done one way or the other. )
I guess I just need to take a section out near the lip/face at the front & rejoin it.
( And cutting & rejoining is definitely something they seem to do on a regular basis on the forum "next door". )
Just don't ask me to draw it as I can barely get straight lines to work!!
Cheers, Paul. |
1st March 2013, 18:49
|
|
Senior Member
|
|
Join Date: Feb 2012
Location: Wembley, London
Posts: 5,058
|
|
Shopping:
A weather proof activity, although that may not be such a good thing, as "Idle Hands" & all that.
I've got a few odds & ends for construction, braided flexible fuel line & the velcro straps for my battery…

I've been out bid on a few arc welders, although I'd like to see how the MIG works after fixing the earth lead.
Part of the problem is finding local(ish) ones, as most are for sale as "Collection Only" due to their weight.
I've also made a few "left field" purchases that may, or may not, work as nice finishing touches to the car.
However, I want do a bit of test fitting before I "confess" to these purchases & then I'll post some pictures. 
Although here is one finishing touch that I really like, even if I am still not 100% sure if I will actually use it…
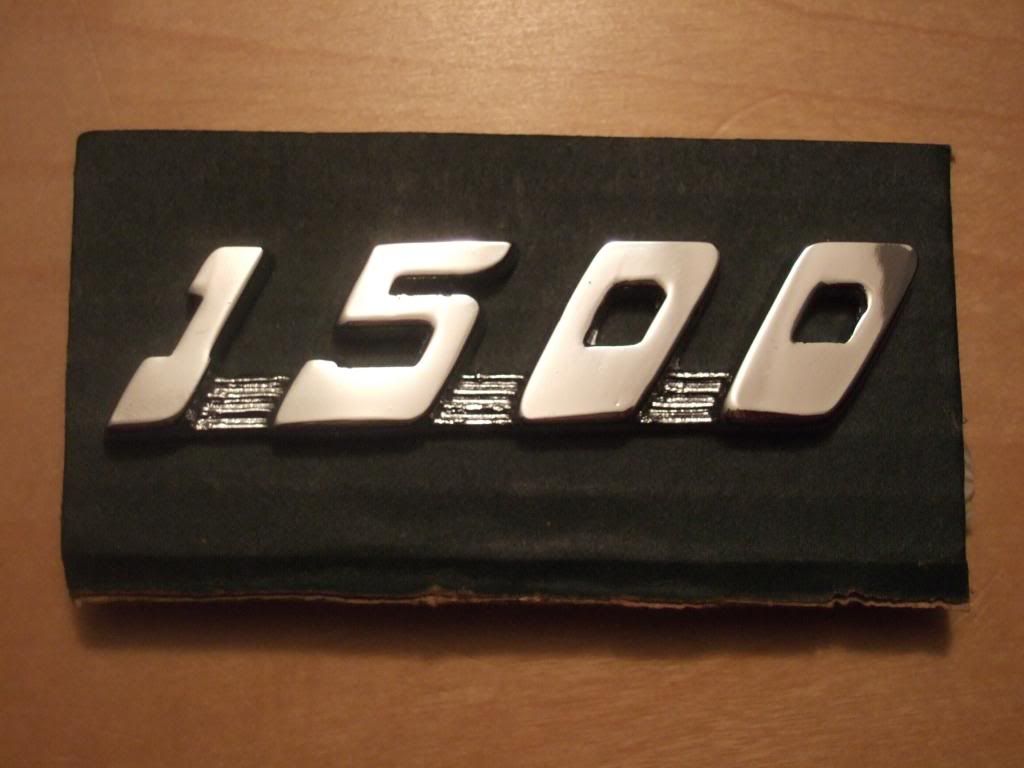
I think this could work either on the back of the car, or on the face of the passenger side of the dashboard.
It might even be worth look at the cost of getting the car's name spelt out in a matching style for the back.
( This badge is for a Wolseley, which puts the styling in the 1950/60s era. )
Off to the Harry Potter Studio Tour tomorrow, may be car stuff on Sunday.
Cheers, Paul.
|
3rd March 2013, 20:25
|
|
Senior Member
|
|
Join Date: Feb 2012
Location: Wembley, London
Posts: 5,058
|
|
Unfortunately, life just got in the way today & the sun was fading as I finally got a chance to go outside.
More Welding Practise…
After fixing the earth lead, I tried welding at the bottom of the garden again, just to see if it would be OK.
As dragging everything up & down the garden to set up, weld, then pack up & store would be a major pain.
Viatron's MIG guide talked about moving the torch in either a "zig-zag", or circulating, movement.
Also, from what I'd seen & read I was now convinced I was moving the torch too quickly while welding.
The other thing I changed was the angle I face the weld at, to hopefully involve my line of sight.
The earth lead fix has transformed the welder and I now have to re-calibrate the previous settings.
I was able to make some welds with good penetration, both on the sheet metal & box section.
Not easy to see clearly as my test piece is now covered in welds & joins, this is some box section...

This is the top of the sheet metal and the bottom two welds were done today.
The weld on the right actually went through too deep, a first for me.

As you can see when I turn it over (which of course now means the blob on the left).

This is good news for me, as I didn’t want to modify the frame until happier with my welds.
I will still get some more practise in before I start working on the frame for real.
And talking of mods, here are some of my ideas for sorting out the area behind the dash board...
 Doors - A Start:
I'm starting with the passenger side door to see what I am up against, before tackling the driver's side door.
And the first job was to remove the inner door structure from the outer door skin.
This inner section was already coming apart in places, but I didn't want to use any real force to separate it.
( In my nightmare scenario, I would break the outer skin while leaving the inner section unmarked! )
However, I needn't have worried as it only took gentle pressure with a screwdriver to separate everything.
I still need to clear off the old bolding material from the outer skin, but by now it was pretty dark out.
Outer Door Skin:
Inner Door Section:
Bonding & Fibre Glass is all new to me, but I assume the bonding stuff should go all the way out to the edge?
To me, there appears to be nothing holding the outside edges of the two sections together?
( Which I guess explains why it was so easy to prise them apart. )

I also noticed TriTone posted a picture of one of the Speedster's doors...
This is the first time I've seen how Mike has build his doors and clearly they fit.
They have significantly deeper inner sections than mine & the inner sections match the door cut out.
So, still a lot of work to do on this door, but I have made that first step.
Certainly no where near the amount of work I was hoping to do today, but better than nothing.
Cheers, Paul.
Last edited by Paul L; 4th March 2013 at 18:23..
Reason: Fixing photo link
|
4th March 2013, 15:37
|
|
Senior Member
|
|
Join Date: Jul 2011
Posts: 5,328
|
|
I know doors are a pretty emotive subject - those that want them really want them - but to save a lot of time and effort have you considered just fitting a driver's door and fixing the passenger one in place? That'd match the Lancia D24 racer that only had the one door after all.
|
4th March 2013, 18:26
|
|
Senior Member
|
|
Join Date: Feb 2012
Location: Wembley, London
Posts: 5,058
|
|
Mister Towed: - I did like your idea of a single driver's door and that is still an option.
If my attempts to fit the passenger side door are a disaster, then I will simply seal it shut & make good.
Then I will still have another chance to make a door work on the driver's side.
- - - - - - - - - - - - - - - - - - - - - -
Just a few odds & ends to cover today....
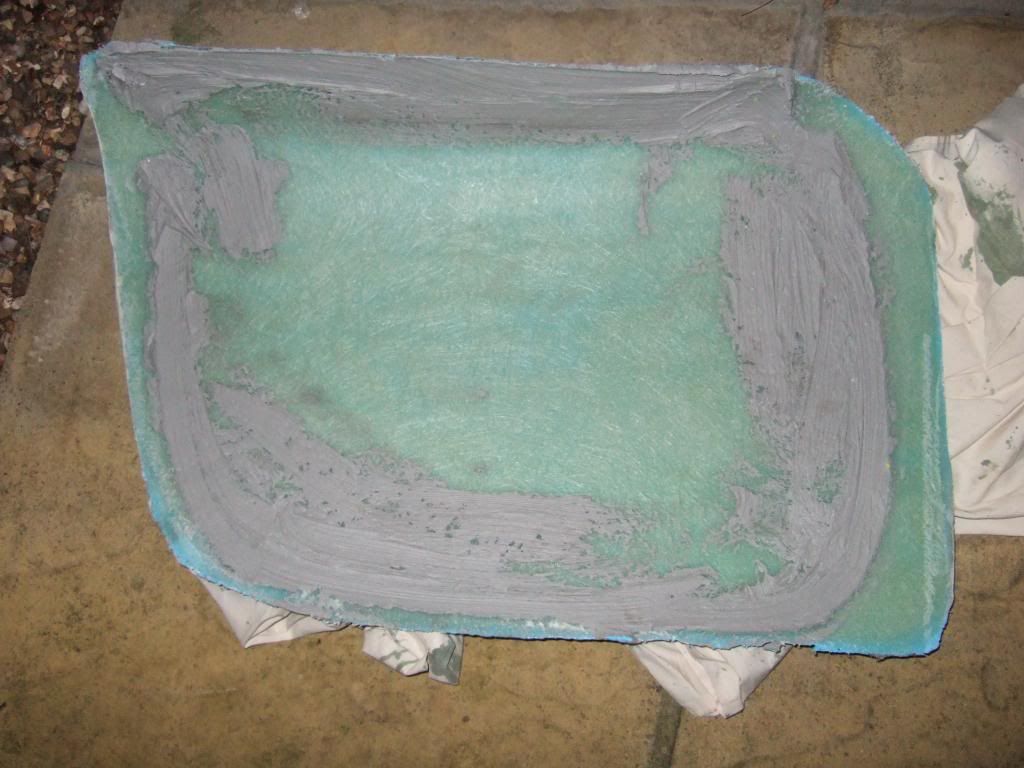
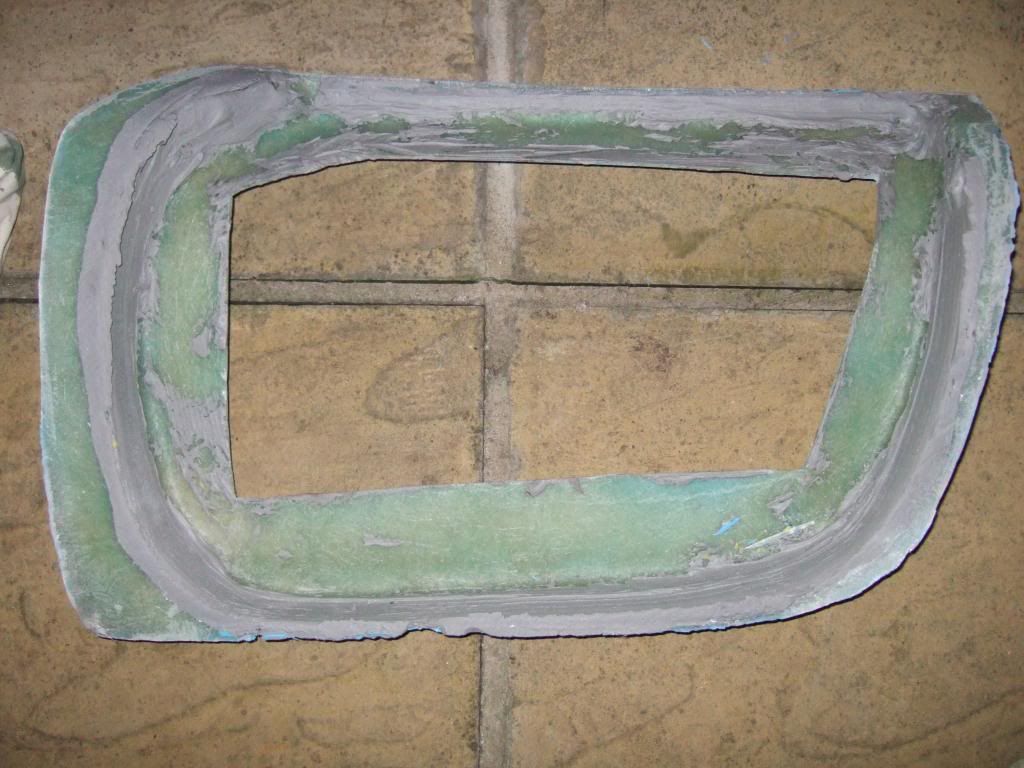
Battery Box:
I am going to use the wooden box I made as the mould for a fibre glass one, so I need to work in "reverse".
I want to "lift" the battery off the bottom, where there will be water drainage channels & a drain pipe.
When making a box out of wood, this was easy to do, just put three thin ply rectangles in the middle.
( The drainage channels were effectively created by the space around these blocks. )
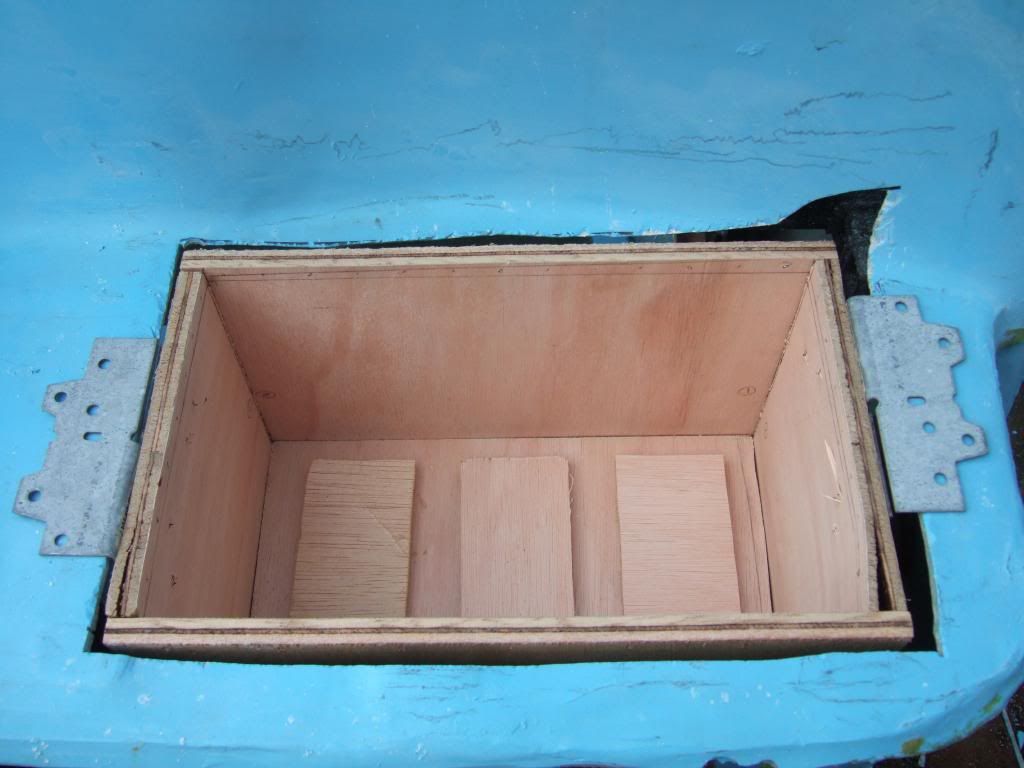
However, when it comes to making a mould, I need to build the drainage channels, not the raised sections.
So I bought a length of pine "beading" & cut it to fit together at the bottom of the box to form these channels.
( Which allows the spaces in between these strips to become the raised sections at the bottom of the box. )

Similarly, the drainage pipe must be the highest point of the mould, to become the lowest point of the box.
Once again I found myself drawn to a Blue Peter solution involving plasticine & an old Bic pen tube…

Or I could replace the Bic pen tube with some "normal" plastic tube instead.

The next thing I need to do is make sure the mould is effectively "tapered" bottom to top like a sand castle.
( This should allow the fibre glass battery box to be pushed off the wooden mould below when it has set. )
But I'll have to sort that out another day.
Door Gaps:
My next job will be to trim the outer skin to fit inside the door cut out section of the body work.
Mikmiglia's Speedster's doors have a 5 mm gap all round & my Mondeo's doors have a similar gap.
So I will aim for a 4 mm gap, as making the gap bigger later would be easier than making it smaller!
I was about to start making 4 mm cardboard spacers from an old cereal box, when I remembered "washers".
My donor came with lots of bits & pieces including a large stash of washers & 2 together are approx. 4 mm.
So by the time I've taped them into position along the inside edge of the door cut out, I will have my target gap.
 Circus Tent:
Saw an ad on Ebay for an ex-display Gazebo, collection only & it turned out to be a couple of miles away.
I took that to be a sign that I should forget about a beach wind break and get a Circus tent to weld in.
( Now the MIG welder is going so well, it would be a shame for the wind to spoil my fun. )
So I now have a big bag that looks like this...

Which will become a 3m x 4.5m one of these...

This will be fine in the back garden for welding the frame work.
I might be able to set it up on the drive for the odd job, not a permanent feature.
Until next time, take care, Paul.
|
4th March 2013, 18:48
|
 |
Senior Member
|
|
Join Date: Jan 2012
Location: Poole, Dorset
Posts: 615
|
|
Paul, welcome to the circus tent appreciation society - mine was a godsend for keeping the dust down when prepping on the drive and for doubling up as a spray booth! Did make the neighbours giggle though!
|
5th March 2013, 21:10
|
|
Senior Member
|
|
Join Date: Feb 2012
Location: Wembley, London
Posts: 5,058
|
|
TriTone - I thought you'd like it, after all, it is yet another idea I've stolen from your 1st build.
By the looks of it, your 2nd kit has a lot of features that will save you time / grief when putting it together.
- - - - - - - - - - - - - - - - - -
More Shopping:
I've ordered the upgraded single line Brake Master Cylinder (see previous posts for details) as per Mr T.
The supplier has now got some compatible push rod ends, which allows me to sell my tandem M/C "whole".
I've also ordered all the brake pipe fittings needed to allow my tandem system to take a single line feed.
There are still a few things I need to buy, but the list is getting smaller.
Until next time, cheers, Paul.
|
9th March 2013, 05:46
|
|
Senior Member
|
|
Join Date: Feb 2012
Location: Wembley, London
Posts: 5,058
|
|
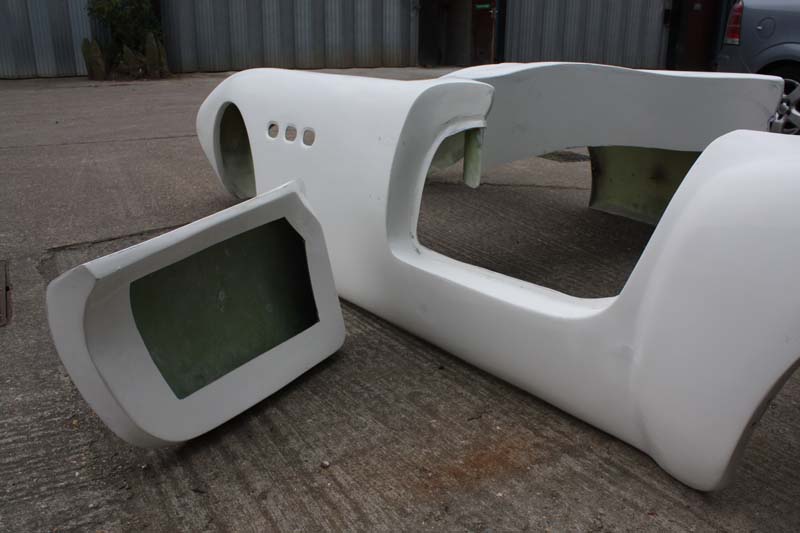
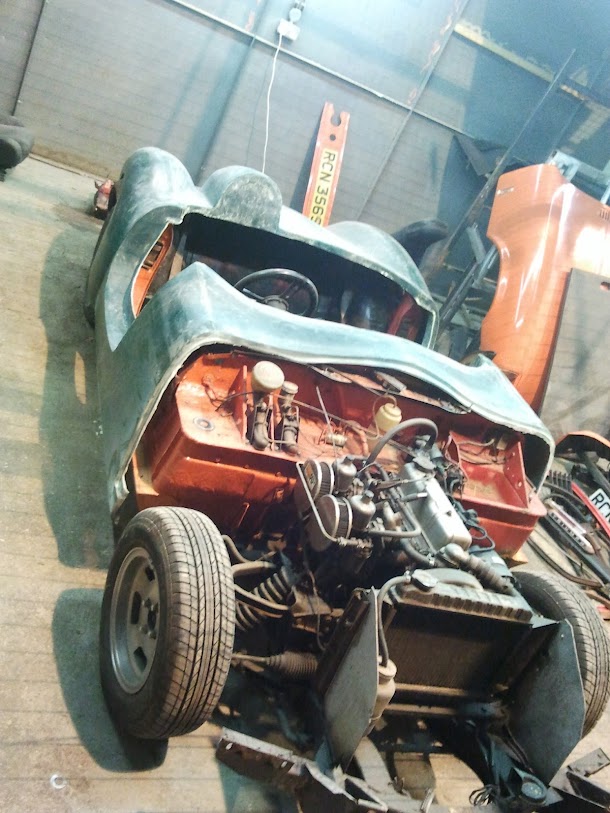
Rear Body Work Quest...
My attempts to secure a section of body work similar to DonnySoutherner (below) are failing miserably.
It's got so bad, I'd even started considering buying another Spifire "project" in order to get a complete tub.
That would also have given me the option of taking the new "fast build" Tribute / Ribble approach…
But the cold reality of arranging transportation + stripping & selling surplus bits on Ebay was just too much.
As, realistically, I've barely got enough room to work on this car & store all the parts needed as it is.
Although looking at the photo above I can see all my frame / bulk head problems simply going away.
Still, Spitfire Graveyard have promised to let me know if something suitable turns up.
But until then, I will have another look at my original idea of boxing the rear section in with plywood.
( Which would then be given a resin / fibre glass coating to strengthen / seal it. )
I think I would need to aim for a very crude bit of "boxing in" to make it both easier to make and fit.

Not sure if the weather will be dry enough for me to do any checking / measuring today.
And with tomorrow being Mother's Day, I don't expect to play with the car at all.
( As it is, I will need to spend a bit of time today tidying up for Sunday! )
Deliveries:
I've got a card from the Post Office which I hope is my brake master cylinder, so I'll collect that later on.
Cheers, Paul.
|
|
Currently Active Users Viewing This Thread: 7 (0 members and 7 guests)
|
|
|
 Posting Rules
|
You may not post new threads
You may not post replies
You may not post attachments
You may not edit your posts
HTML code is Off
|
|
|
All times are GMT +0. The time now is 21:31.
|


 Linear Mode

