Are you madabout kit cars      
 "We've Got Kit Cars Covered" Information about Madabout-Kitcars.com Contact Madabout-Kitcars.com         Home of UK kit cars - madabout-kitcars.com Various kit car write ups All the latest kit car news Kit car related and general discussion

Search
Manufacturers
Kit Cars
Kit Car Data sheets
Picture Gallery
SVA Knowledgebase
Clubs & Communities
Build cost estimator
Kit cars for sale
Knowledge Base 
KitcarUSA.com
Classic-Kitcars.com
 

Go Back   Madabout Kitcars Forum > Mad Build Area > Sammio Builds and discussions

Sammio Builds and discussions Sammio bodied car builds and specials

Reply
 
Thread Tools Display Modes
  #241  
Old 19th October 2013, 16:11
Viatron Viatron is offline
Senior Member
 
Join Date: Apr 2012
Posts: 1,163
Viatron is on a distinguished road
Default

Frame is now fully welded and the lip for the floor support is in place, pic below shows the floor edge support in place, had to use some flat bar in the end as my stock of angle was more reduced than I thought.


All tube ends have been capped so hopefully the frame will not rust too much from the inside.


Managed to get 2 coats of paint on it which will hopefully be dried by Monday so I can flip it over and give the underneath a couple of coats.


Also managed to start painting the pedal box, have decided that I will paint rather than powder coat but stick to my plan of keeping them blue grey.


Hopefully Monday or Tuesday will end with the frame permanently fitted and maybe even the floors in and pedal box fitted. fingers Crossed
Reply With Quote
  #242  
Old 19th October 2013, 16:41
Paul L's Avatar
Paul L Paul L is offline
Senior Member
 
Join Date: Feb 2012
Location: Wembley, London
Posts: 5,056
Paul L is on a distinguished road
Default

Mac - Looks like lots of good progress being made.

I forgot to mention last time that your suicide doors will be interesting to see too.

Good luck, Paul.
Reply With Quote
  #243  
Old 22nd October 2013, 15:43
Viatron Viatron is offline
Senior Member
 
Join Date: Apr 2012
Posts: 1,163
Viatron is on a distinguished road
Default

So the frame is finally on!!!
I had to re-drill the 2 rear mounting holes as my chassis had been used by Ribble as a chassis mule and they had drilled 2 mounting holes, unfortunately they turned out to be in the wrong place! The purchase of a brand new drill bit paid dividends as drilling steel and galv can be a bit tiresome.
Borrowed next doors lathe, mine is still waiting for me to get round to dropping the motor off for a rewind, and turned up some spacers out of bar stock as I didn't have any tube the right size.


The hole in the top of the chassis has been opened out using a Christmas tree bit so that the tube drops in, the tube has been trimmed to sit fractionally below the top of the chassis to allow a little bit of pull down.


One disadvantage of having the chassis galvanised is that the 2 plates the rear is supposed to bolt into have been locked in place by the zinc, no amount of hammering will move them and they are way off centre so in the end was left with no option but to weld the rear mounts to the chassis.


End result though is that the frame is now permanently mounted to the chassis, just in time for me to disappear for the next 10 days as I have a contract that includes the next 2 weekends...rats!


also got to paint the stripped down pedal box but forgot to take pics.
Reply With Quote
  #244  
Old 22nd October 2013, 17:13
christinedmc christinedmc is offline
Senior Member
 
Join Date: Mar 2012
Posts: 159
christinedmc is on a distinguished road
Default

Hella Mac,

It look pretty good. I reckon The benefits of a galvanished chassis lay in the future!
Michiel
Reply With Quote
  #245  
Old 23rd October 2013, 16:32
Paul L's Avatar
Paul L Paul L is offline
Senior Member
 
Join Date: Feb 2012
Location: Wembley, London
Posts: 5,056
Paul L is on a distinguished road
Default

Mac - Thanks for the photo of the chassis spacer/crush tube fitted.

Can I just check if you left it like it is in the photo, or did you weld it in place?

Cheers, Paul.
Reply With Quote
  #246  
Old 23rd October 2013, 19:57
Viatron Viatron is offline
Senior Member
 
Join Date: Apr 2012
Posts: 1,163
Viatron is on a distinguished road
Default

Left it as is, being about a millimetre below the chassis level meant it all nipped up tight and the underneath of the plate came down flush with the top of the chassis
HTH
Mac
Reply With Quote
  #247  
Old 5th November 2013, 10:08
Viatron Viatron is offline
Senior Member
 
Join Date: Apr 2012
Posts: 1,163
Viatron is on a distinguished road
Default

Finally got some time back in the workshop but wont be much progress for the next day or so as we have decided to reorganise a bit as the workshop is a tip and its getting both Dave and myself down, we also have to make room for our new scissor lift and my new 542 tool box, anyone interested in a Snap on roll cab and top box?
Whilst I have been working though Sean next door has beefed up the sides of the inside of my body with another 3 layers of fibreglass. The plan is to cut the door apertures and use the cut out parts as the door skins and I was worried that unless reinforced they may not retain their shape.

Sean has also now finished the moulds for the humps and I have the first 2 out of the mould.


Very pleased with the fit, will get them trimmed up this week so will post more pics.
On the way home tonight I will be dropping off the Ribble supplied floors to have them used as templates for new floors in 3mm Ali which should be done by the end of the week.

Well I cant put it off any longer need to start tidying the workshop.

TTFN
Mac
Reply With Quote
  #248  
Old 5th November 2013, 13:18
froggyman's Avatar
froggyman froggyman is offline
Senior Member
 
Join Date: Dec 2011
Location: Devon
Posts: 550
froggyman is on a distinguished road
Default

What a fantastic looking body you have !!!!!! No pain no gain. lol.
Reply With Quote
  #249  
Old 5th November 2013, 13:24
Viatron Viatron is offline
Senior Member
 
Join Date: Apr 2012
Posts: 1,163
Viatron is on a distinguished road
Default

The wife says the same thing...........
Reply With Quote
  #250  
Old 5th November 2013, 13:37
Mister Towed's Avatar
Mister Towed Mister Towed is offline
Senior Member
 
Join Date: Jul 2011
Posts: 5,328
Mister Towed is on a distinguished road
Default

That bulkhead to body join does look seamless. Keep up the good work and good luck with the doors.
Reply With Quote
  #251  
Old 5th November 2013, 15:28
Paul L's Avatar
Paul L Paul L is offline
Senior Member
 
Join Date: Feb 2012
Location: Wembley, London
Posts: 5,056
Paul L is on a distinguished road
Default

Mac - It looks like the body is coming together nicely.

Good luck, Paul.
Reply With Quote
  #252  
Old 9th November 2013, 13:45
Viatron Viatron is offline
Senior Member
 
Join Date: Apr 2012
Posts: 1,163
Viatron is on a distinguished road
Default

Been busy with the tidy up, 4 bin liners and counting and 2 empty toolboxes decanted into the beast but couldn't spend the rest of the day without making some progress on the Navigator, picked up by 4mm Ali floors last night so got them fitted, bit of trimming hear and there but on the whole they fit really well.


The rear floors drop down nicely so they are pretty much flush with the chassis so as low as I can go and the front ones sit on top of the chassis, with the floor mounted pedal box this should give a pretty good driving position whilst being as low as is practical. Just need to fab up the curved angle for the inside edge up against the chassis and they can go in. I will be using bed liner on them as its a tough finish but looks quite period as well.
TTFN back to the tidying up.
Reply With Quote
  #253  
Old 9th November 2013, 13:51
phil9 phil9 is offline
Senior Member
 
Join Date: Mar 2012
Posts: 745
phil9 is on a distinguished road
Default

looking very nice ..
Reply With Quote
  #254  
Old 9th November 2013, 13:54
Viatron Viatron is offline
Senior Member
 
Join Date: Apr 2012
Posts: 1,163
Viatron is on a distinguished road
Default

Even though they are 4mm Ali they are as strong as the steel floors but lighter. I plan to tig weld 2 19mm boxes across the width of the rear floor to ensure they cant sag and also to mount the seat runners to but cant do that until the runners arrived.
Reply With Quote
  #255  
Old 10th November 2013, 16:42
Paul L's Avatar
Paul L Paul L is offline
Senior Member
 
Join Date: Feb 2012
Location: Wembley, London
Posts: 5,056
Paul L is on a distinguished road
Default

Floors look good.

I do like the way you have worked around the main chassis rail to give a full size lowered section for the seats.

Good luck, Paul.

PS
Your "mega" tool chest is something else.
Reply With Quote
  #256  
Old 16th November 2013, 17:25
Viatron Viatron is offline
Senior Member
 
Join Date: Apr 2012
Posts: 1,163
Viatron is on a distinguished road
Default

Well the clear up is finally done! With Daves help we even got the scissor lift in. Just a couple of boxes of tat to sort through Monday and it will all be done and i can get back onto the Ribble, look for an update monday night.


Reply With Quote
  #257  
Old 20th November 2013, 14:49
Viatron Viatron is offline
Senior Member
 
Join Date: Apr 2012
Posts: 1,163
Viatron is on a distinguished road
Default

Well Monday and Tuesday ended up being taken up by a last minute training job in Poole but finally managed to make it back to the workshop today. Want to get the body on ASAP so I can figure out where my seat rail supports need to go on the floors so the next 3 jobs will be the running of the fuel and brake lines, building up of the pedal box and fitting of the fuel tank.
I have a couple of tanks here and both are by no means new so have spent the last hour going over both and selected what I think is the best one. I have just ordered the Frost Deluxe Tank Sealing Kit and decided to strip the exterior of its paint so I can do a proper inspection before throwing £67 quids worth of stuff into a colander!
Just using some old paint stripper I found during the tidy up, don't know how effective it will be because I think its a bout 3 years old but I will leave it overnight then use the steam cleaner to give it a good blast both inside and out.


Reply With Quote
  #258  
Old 22nd November 2013, 18:45
Viatron Viatron is offline
Senior Member
 
Join Date: Apr 2012
Posts: 1,163
Viatron is on a distinguished road
Default

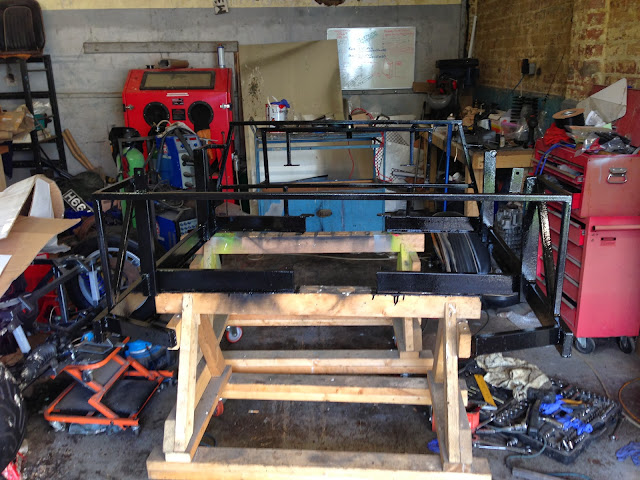
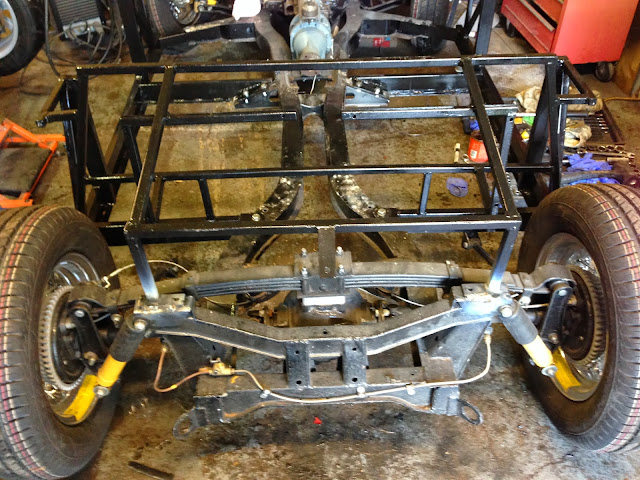
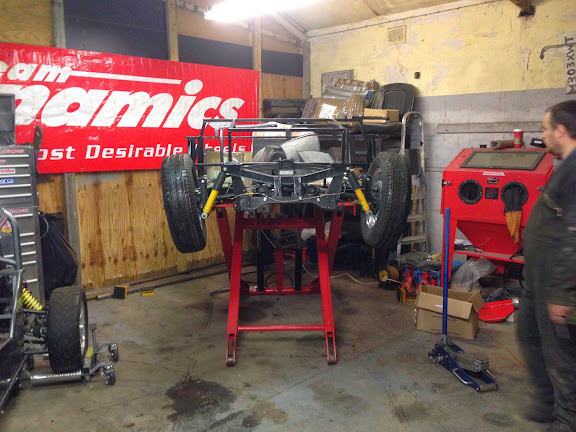
Made some good progress today
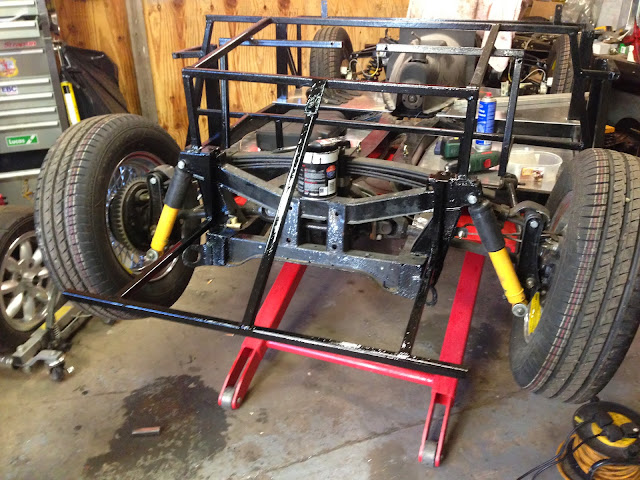
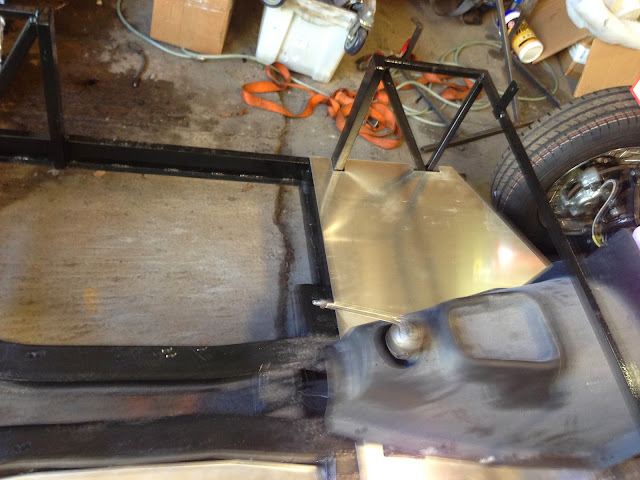
A. Install rear frame addition for hanging exhaust from


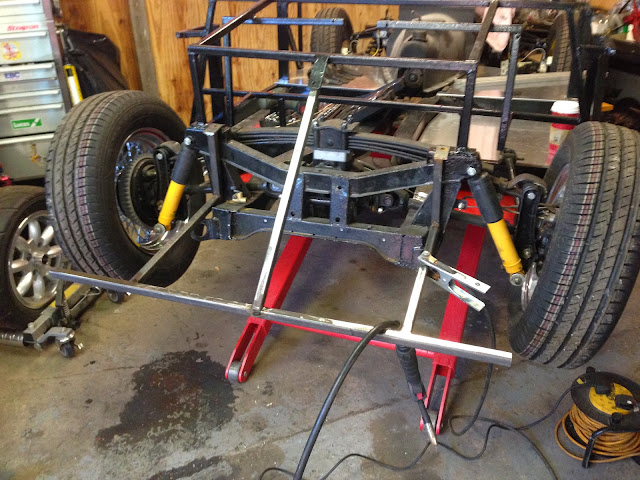
At least it fits! All the joints need re welding though as the pigeons have had a field day on it....
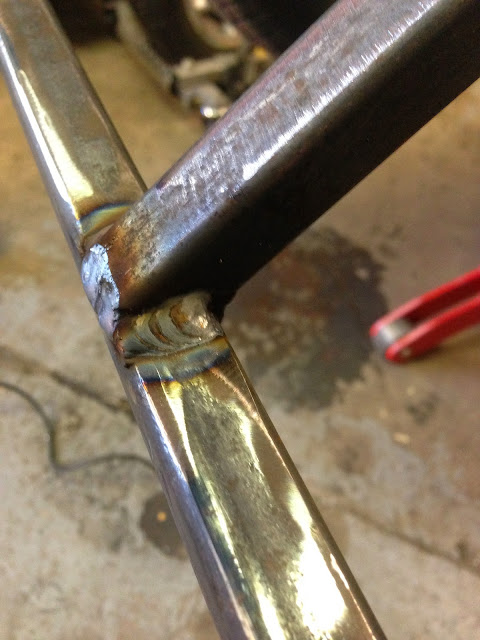
Grounds the welds back
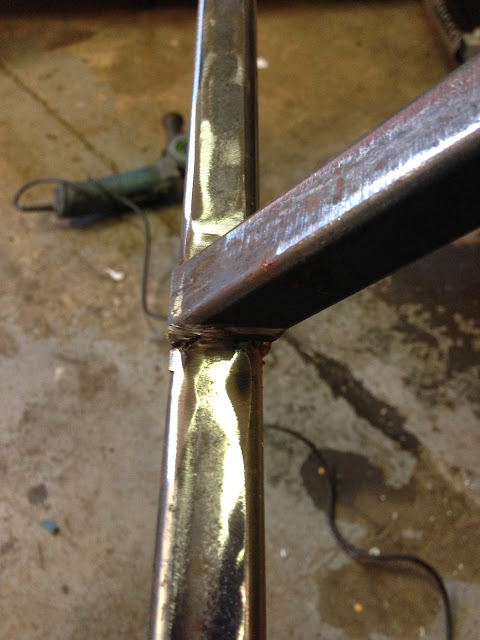

And rewelded

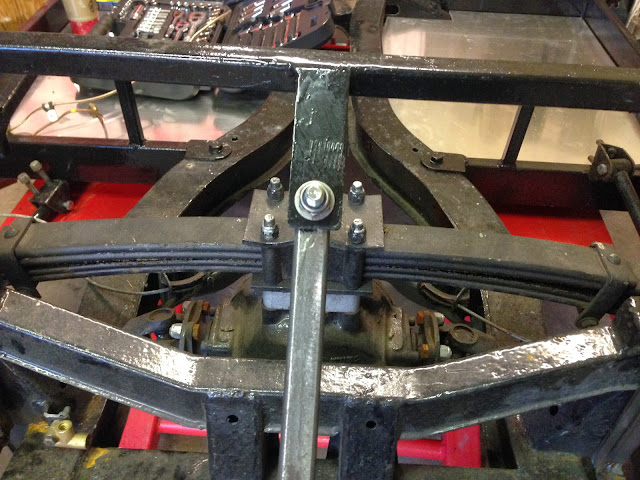
Had to weld the 2 feet on as i don't have a bolt-able mounting point thanks to the galvanising locking the sliding plates in the top way off centre, drilled the centre mount and bolted it up,

Couple of coats of chassis paint later and its done


B. Seatbelt mounts
Spent a very frustrating hours cleaning out as much of the zinc in the seatbelt mounting holes in chassis as possible with a needle file so i didn't wreck the threads, ran all three taps through though and its all good so popped in the belt eyes.


Then turned my thoughts to how and where to mount the outer lap belt mounts, i ordered some belt mount plates from Rally Design this is what i came up with


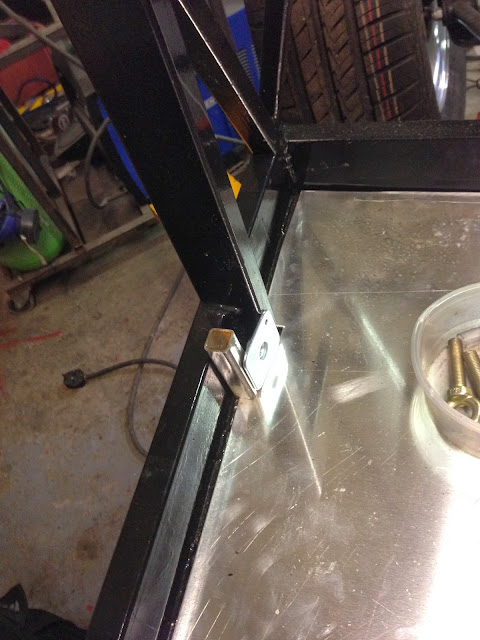
Just trimmed about 10mm off one side of the purchased mounting plates

The piece of box needed the end capping up so decided to do it before welding the box to the frame.


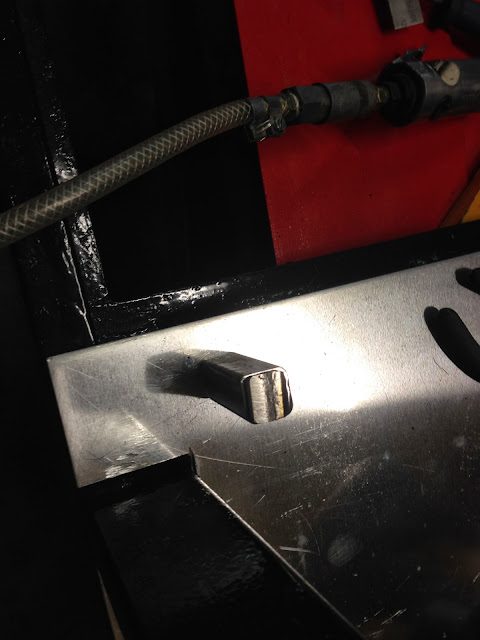
A little fine welding around the edges


Quick clean up with a flap wheel later


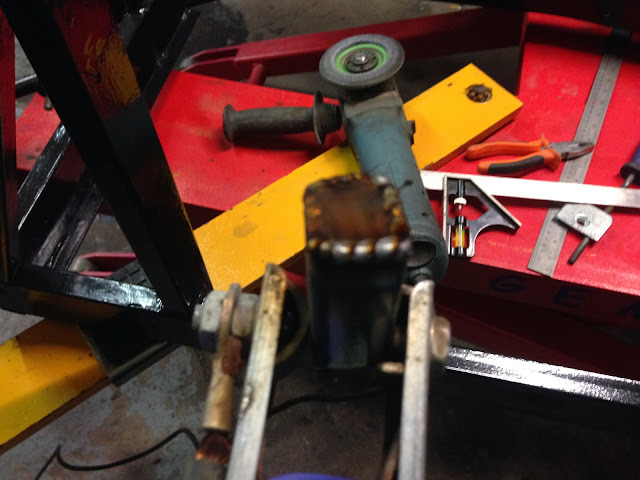
Clamped it up and welded it in, not my prettiest welding but it was in a very awkward place , thats my excuse and I'm sticking to it!


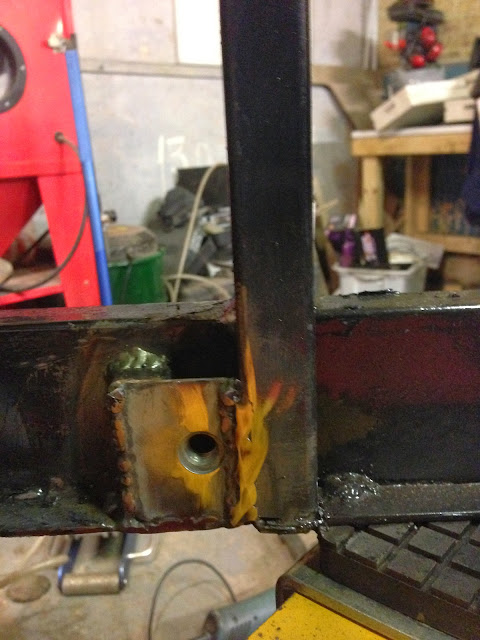
Couple of coats of paint later and the eye bolt installed, had to trim the thread back about 10mm as it was bottoming out against the frame


Then did the other side


C. Clean up the fuel tank
Borrowed next doors steam cleaner and gave it a good going over inside and out


Pleasantly surprised at how clean the inside is


Back at it tomorrow and will have Dave's help so should be more progress to report tomorrow.

Mac
Reply With Quote
  #259  
Old 23rd November 2013, 16:54
Paul L's Avatar
Paul L Paul L is offline
Senior Member
 
Join Date: Feb 2012
Location: Wembley, London
Posts: 5,056
Paul L is on a distinguished road
Default

Mac - I'm sure you are glad to be car building again after all that cleaning up.

I am thinking about adding some extra support at the back of my frame too.

So it is good to see how you have approached this.

Hope you had a productive today as well.

Good luck, Paul.
Reply With Quote
  #260  
Old 23rd November 2013, 19:31
Viatron Viatron is offline
Senior Member
 
Join Date: Apr 2012
Posts: 1,163
Viatron is on a distinguished road
Default

Just spent the last 30 minutes posting a progress update only to have it all dissapear in a brawser crash....arse! So if it looks a bit fragmented i apologies but im taking no chances

Refitted the rear brake link pipe that had to be removed to fit the Ribble supplied rear frame extension
Reply With Quote
Reply


Currently Active Users Viewing This Thread: 3 (0 members and 3 guests)
 

Posting Rules
You may not post new threads
You may not post replies
You may not post attachments
You may not edit your posts

BB code is On
Smilies are On
[IMG] code is On
HTML code is Off

Forum Jump


All times are GMT +0. The time now is 00:31.

copyright © madabout-kitcars.com 2000-2024
terms and conditions | privacy policy