|
|
| Sammio Builds and discussions Sammio bodied car builds and specials |

30th July 2012, 15:56
|
|
Member
|
|
Join Date: Apr 2012
Posts: 45
|
|
Are these split rivets?
|
30th July 2012, 16:04
|
|
Senior Member
|
|
Join Date: Jun 2011
Location: birchington, kent
Posts: 1,769
|
|
No, just domed head that will need suplerglueing on place.
|
30th July 2012, 16:06
|
|
Member
|
|
Join Date: Apr 2012
Posts: 45
|
|
Look good Gary, do you still have the ebay link?
|
30th July 2012, 16:22
|
|
Senior Member
|
|
Join Date: Jun 2011
Location: birchington, kent
Posts: 1,769
|
|
320931297328
I think they are all gone. Also not sure if they are a fraction small? but once painted, i think they will look bigger... but still subtle.
|
30th July 2012, 18:58
|
 |
Senior Member
|
|
Join Date: May 2009
Location: POOLE , DORSET
Posts: 2,200
|
|
CARMINE RED IT WAS !!
Nice period Jag colour , E-types , Morse's Jag and the like !
I have spaced Jennettes rivets 25mm apart around the cockpit and head fairing , 50 mm apart along the cills , back panel and screen and 75mm apart along the wing tops .......just making it up really , if it looked ok , I drilled the hole !
mine are 3/16 .....so a shade bigger , about 4mm ....3mm will work just fine ....remember , no rules here ! if you like it , then thats the way to do it !!
|
31st July 2012, 08:10
|
|
Senior Member
|
|
Join Date: Jun 2011
Location: birchington, kent
Posts: 1,769
|
|
Maybe we should use their logo? I like the hole in the boot, lots of ideas from this car. I may paint it Ruby Red which is a bit darker, more like the Lancia and will be hand painted as will the rounders and numbers.
|
31st July 2012, 08:28
|
 |
Senior Member
|
|
Join Date: Oct 2011
Location: Surrey
Posts: 363
|
|
Quote:
Originally Posted by lancelot link

CARMINE RED IT WAS !!
Nice period Jag colour , E-types , Morse's Jag and the like !
I have spaced Jennettes rivets 25mm apart around the cockpit and head fairing , 50 mm apart along the cills , back panel and screen and 75mm apart along the wing tops .......just making it up really , if it looked ok , I drilled the hole !
mine are 3/16 .....so a shade bigger , about 4mm ....3mm will work just fine ....remember , no rules here ! if you like it , then thats the way to do it !!
|
"no rules here! if you like it, then that's the way to do it" Could not agree more! well said Gary |
31st July 2012, 08:50
|
 |
Senior Member
|
|
Join Date: Jul 2011
Posts: 5,328
|
|
Quote:
Originally Posted by garyh
Maybe we should use their logo? I like the hole in the boot, lots of ideas from this car. I may paint it Ruby Red which is a bit darker, more like the Lancia and will be hand painted as will the rounders and numbers.
|
When you say 'hand painted' do you mean roller and tip?
I took delivery of my pure silver metallic cellulose gloss yesterday and I'll be spraying mine myself (never tried that before) although the roller method did look quite tempting. The way I understand it though, whichever method of paint application you choose it's the preparation of the body, getting it completely smooth beforehand, that determines the finished look. I have a feeling some big roundels will hide a multitude of sins though... |
31st July 2012, 09:29
|
|
Senior Member
|
|
Join Date: Jun 2011
Location: birchington, kent
Posts: 1,769
|
|
Brush, techaloid paint which contains linseed oil, and like you say plenty of prep... when you look at these old cars especially the Lancia it doesn't look like a mirror finish, i want it to have a patina (age) not necessarily the RAT look.
|
31st July 2012, 10:21
|
 |
Senior Member
|
|
Join Date: May 2011
Location: Somerset
Posts: 1,671
|
|

Quote:
Originally Posted by Mister Towed
The way I understand it though, whichever method of paint application you choose it's the preparation of the body, getting it completely smooth beforehand, that determines the finished look. I have a feeling some big roundels will hide a multitude of sins though...
|
I couldn't agree more!
I was in the same position as you and from the lessons i learnt I'd say the most ones are:
- Get a separate pressure regulator/water trap on your air line and don't just rely on the one on the compressor.
- Buy lots of the correct grades of sandpaper
- A small palm/hand sander is essential for the curves on the Spyder (my B&D Mouse did a sterling job and then blew up right at the end
 ) )
- Buy a few cheap painters overalls and face masks!
- No matter how well you cover things, dust will get EVERYWHERE
- Take your time.
Even after all of that, my shell still has marks and minor cracks (ignoring the big one on the bonnet which will be repaired) which initially i was very self conscious about and wanted to repair, but the more i meet other kit/classic car people the more i agree with what GaryH says and that they are just part of the 'character' of the car 

|
31st July 2012, 11:59
|
|
Senior Member
|
|
Join Date: Jul 2011
Posts: 5,328
|
|
Quote:
Originally Posted by davecymru
I couldn't agree more!
I was in the same position as you and from the lessons i learnt I'd say the most ones are:
- Get a separate pressure regulator/water trap on your air line and don't just rely on the one on the compressor.
- Buy lots of the correct grades of sandpaper
- A small palm/hand sander is essential for the curves on the Spyder (my B&D Mouse did a sterling job and then blew up right at the end )
- Buy a few cheap painters overalls and face masks!
- No matter how well you cover things, dust will get EVERYWHERE
- Take your time.
Even after all of that, my shell still has marks and minor cracks (ignoring the big one on the bonnet which will be repaired) which initially i was very self conscious about and wanted to repair, but the more i meet other kit/classic car people the more i agree with what GaryH says and that they are just part of the 'character' of the car |
Thanks for the tips DC.
1/ Water trap is ordered.
2/ Will buy sandpaper shortly. I'm looking at 80, 400 and 600 grade, and will be using it dry as the internet research I've conduced suggests that a bare fibreglass shell that isn't gel coated it will absorb water if the paper's used wet, which will lead to problems with the paint later (feel free to discuss/disagree).
3/ Bought a B&D sanding mouse about two weeks ago, it's awsome!
4/ Will order a pack of disposable overalls before starting and I already have a couple of decent painter's masks.
5/ Dust already is everywhere and I've barely started the sanding.
6/ It's already taken me over a year to get my car to the stage I have so taking my time should be a breeze!
I'm not looking to achieve a mirror finish on mine - I'm just hoping it won't look like a chimp painted it. 
|
31st July 2012, 13:37
|
|
Senior Member
|
|
Join Date: Jun 2011
Location: birchington, kent
Posts: 1,769
|
|
I'm not looking to achieve a mirror finish on mine - I'm just hoping it won't look like a chimp painted it...
WHAT YA SAYING, T...  |
31st July 2012, 14:18
|
|
Senior Member
|
|
Join Date: Jun 2011
Location: birchington, kent
Posts: 1,769
|
|
just thinking about the rivets. Once painted i don't even mind the paint being polished of a bit!
|
31st August 2012, 19:57
|
|
Senior Member
|
|
Join Date: Jun 2011
Location: birchington, kent
Posts: 1,769
|
|
 And i still have Saturday and Sunday
Oh well, i've finally done a bit more on the chassis and i am even putting new bits back on!

It was easier to take the wishbone brackets off as i was rebuilding the complete side rail. These ones should help with the height of car.
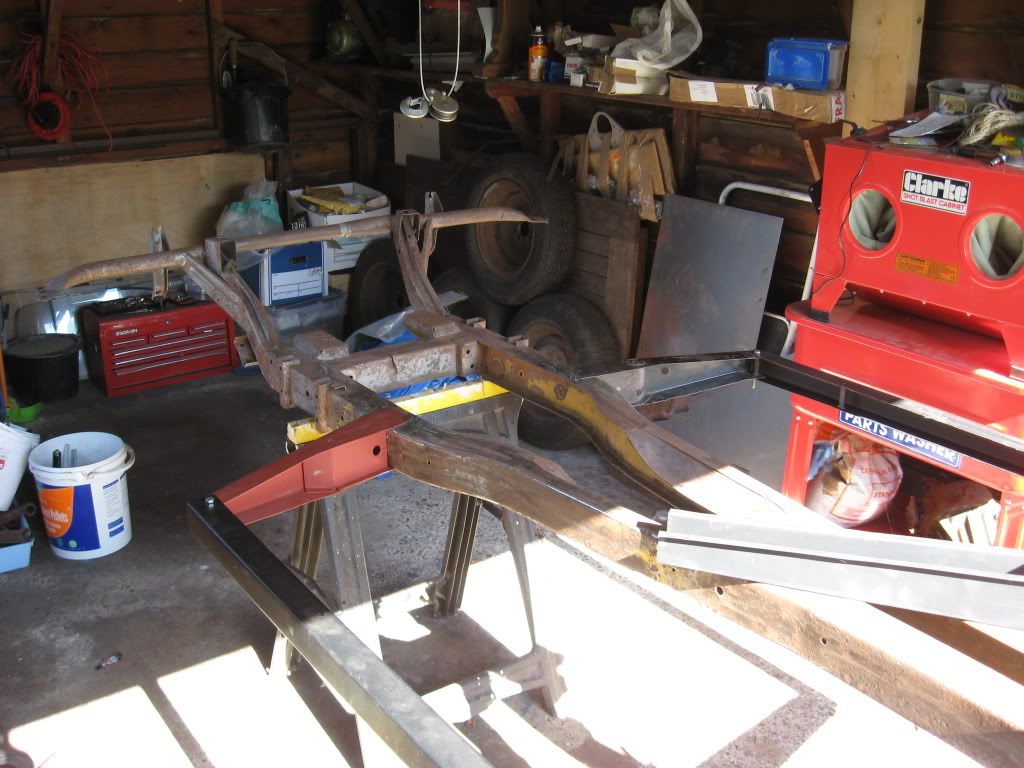
Tomorrow should see all the outriggers back on, then a bit more welding...
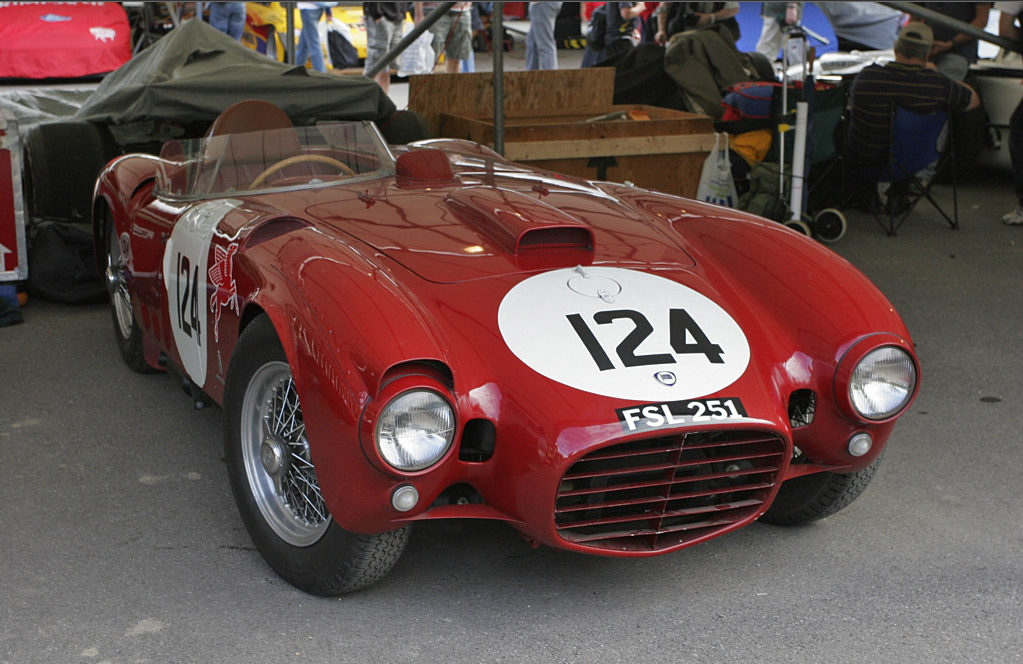
Photo for inspiration.  |
1st September 2012, 19:41
|
|
Senior Member
|
|
Join Date: Jun 2011
Location: birchington, kent
Posts: 1,769
|
|
3 more holes to patch and i'm done...
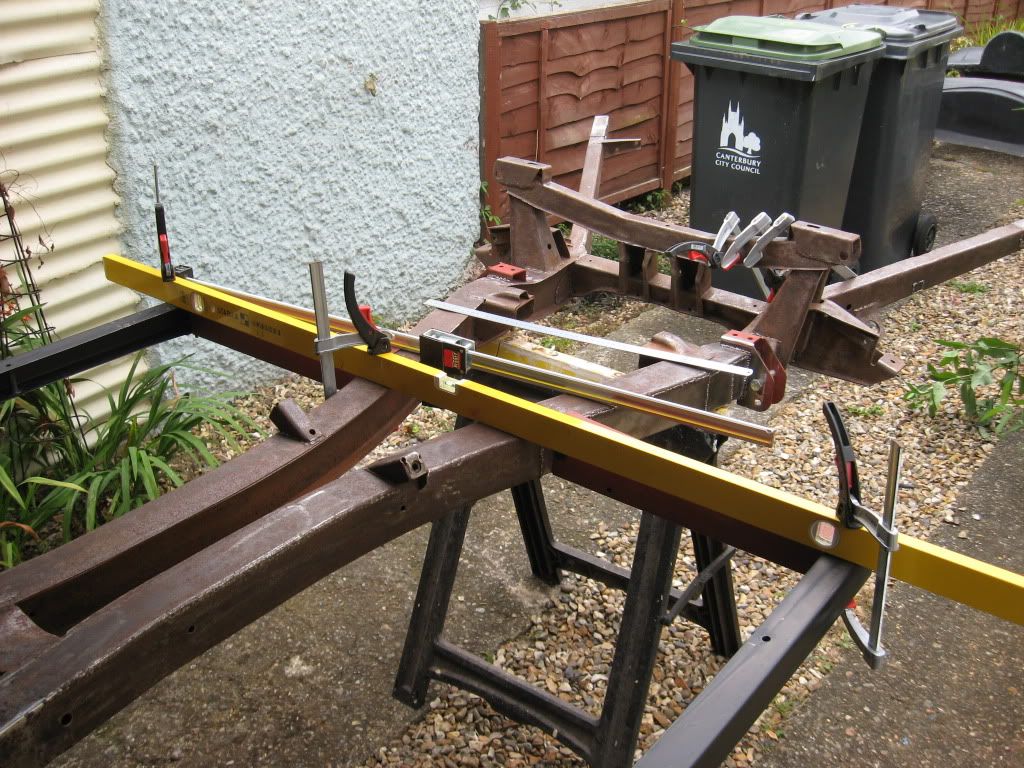
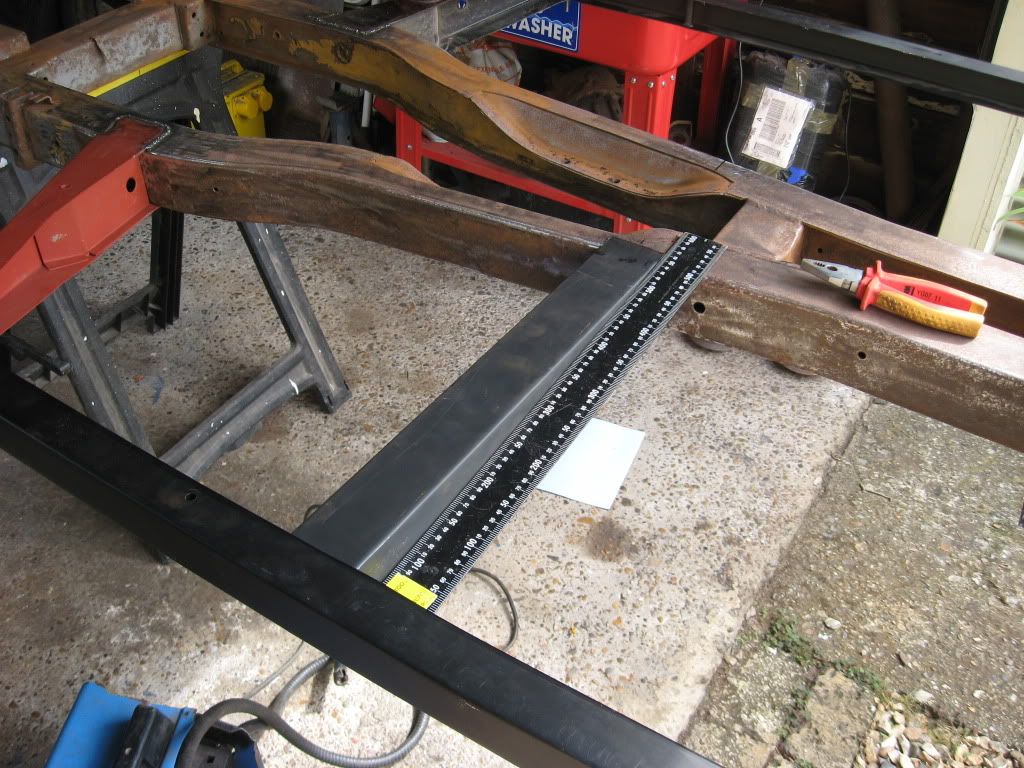
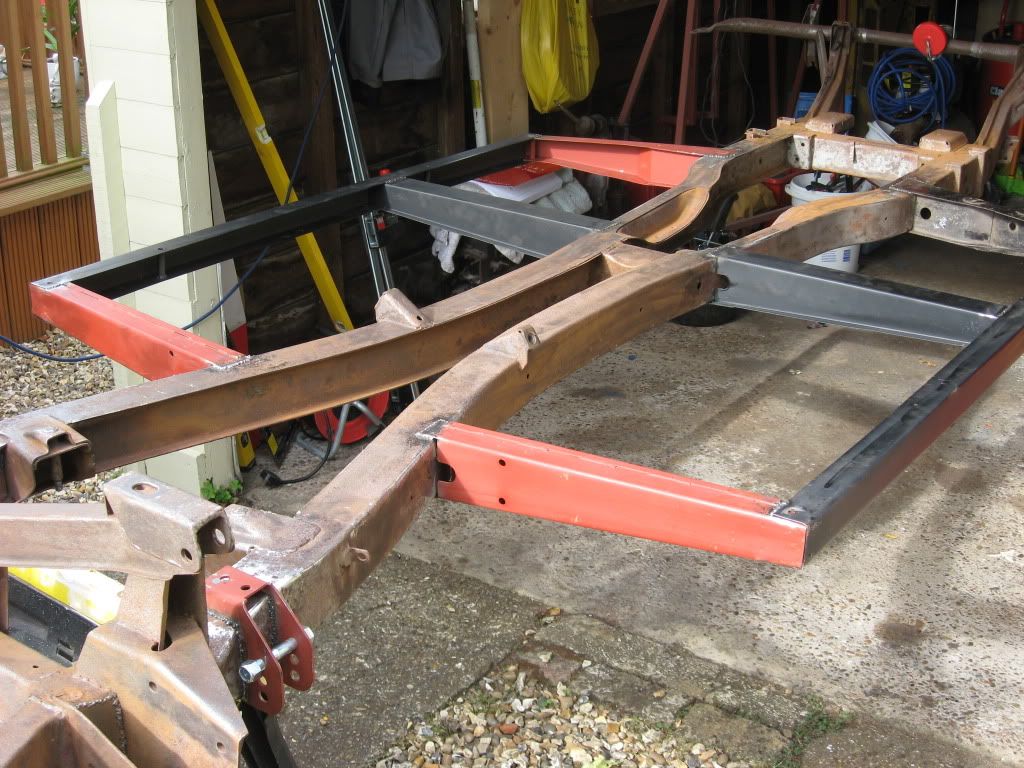
Chassis now getting quite heavy to move around, nearly time to put some new parts on...
Last edited by garyh; 1st September 2012 at 19:43..
Reason: added text
|
1st September 2012, 20:01
|
|
Senior Member
|
|
Join Date: Jul 2011
Posts: 5,328
|
|
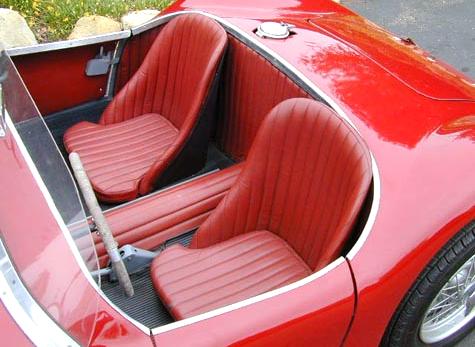
It's looking great and I love your picture of the D24. Is that one you took yourself?
|
1st September 2012, 20:06
|
|
Senior Member
|
|
Join Date: Jun 2011
Location: birchington, kent
Posts: 1,769
|
|
I think it was from the Goodwood site? I have never seen one in the flesh. I stood on chassis and nothing moved, I know thats how Pat checked his welding... It really has been a big job, and a nuisance travelling to garage, but i will get there?
http://garyssammiospyderbuild.blogspot.co.uk/
Last edited by garyh; 1st September 2012 at 20:07..
Reason: felt like adding blog address
|
2nd September 2012, 09:11
|
|
Senior Member
|
|
Join Date: Apr 2012
Posts: 1,163
|
|
just curious but wont those adjustable rear suspension brackets count as a chassis mod and therefore make the VOSA rebody check an issue?
|
2nd September 2012, 15:20
|
|
Senior Member
|
|
Join Date: Jun 2011
Location: birchington, kent
Posts: 1,769
|
|
Do you think anyone will notice? I needed new ones and to my surprise arrived with two more pairs of holes...
|
|
Currently Active Users Viewing This Thread: 1 (0 members and 1 guests)
|
|
|
 Posting Rules
|
You may not post new threads
You may not post replies
You may not post attachments
You may not edit your posts
HTML code is Off
|
|
|
All times are GMT +0. The time now is 15:24.
|


 Linear Mode

