|
|
| Sammio Builds and discussions Sammio bodied car builds and specials |

18th February 2015, 18:34
|
 |
Senior Member
|
|
Join Date: Jul 2011
Posts: 5,328
|
|
Quote:
Originally Posted by jones

I did up an MGB and when I bought it NONE of the wires made it from point to point without a change in colour and some bodged soldering.
|
's funny, I don't remember ever wiring up an MGB... |
19th February 2015, 12:02
|
 |
Senior Member
|
|
Join Date: Feb 2012
Location: Wembley, London
Posts: 5,056
|
|

Ian - My donor's wiring loom came with a few "interesting" modifications that I hope I have now fixed. < Touch Wood >
I have also documented any wires that change colour, so I can draw up a very specific wiring diagram for this build.
I must confess my heart really sank when none of the indicators on the driver's side worked. 
As I really didn't want to work my way through the whole loom trying to track the fault down.
So the fact the problems turned out to be with the lights themselves was a HUGE relief.
- - - - - - - - - - - - - - - - - - - - - - - - - - - - - - - -
Mr T - Talking of wiring...
I've just started on a new roll of PVC wrapping tape, so I can send you what is left over (FOC) for your car. 
Your Spyder remains my favourite Sammio build of all time and I dream of getting my car to look as good as yours.

In fact, there is only one very small area where I want my car to be better than yours, and that is the wiring loom.
Because even though I am holding my tongue firmly in my cheek, a bit of black tape would work wonders on this...

All jokes aside, if I had the choice of driving your car, or wrapping some wires, I know which one I would pick. 
- - - - - - - - - - - - - - - - - - - - - - - - - - - - - - - -
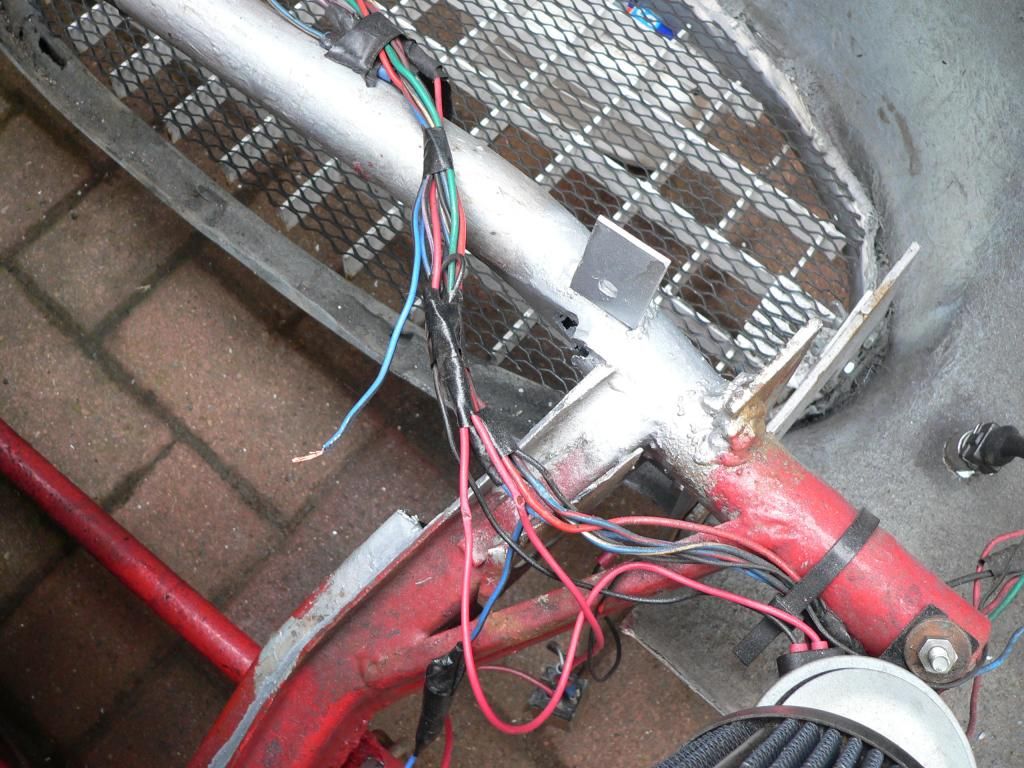
That's A Wrap:
Well after abusing Mister Towed above, the least I could do this morning was a bit more wrapping up of my own loom. 
So here is the section for the front lighting & car horns.

The rear lighting section.

The point where the rear loom joins the main dash board loom.

At this point I have left the wires between the last two photo unwrapped.
That is because I need to work out the route for these fuel gauge wires.

Unfortunately, I can only do that when I next remove the body shell.
( As the rear loom will be clipped along the internal framework. )
By this point, my daughters were just thinking about getting out of bed, so I carried on for a little bit longer.
There was rain promised for late morning, so I had to be quick if I wanted to tidy up after all this wiring work.
I brought all of this stuff down from the loft bedroom and that wasn't even everything! 

So while it was dry, I carried this down to the bottom of the garden & put it away in the Summer House.
I must say I am really looking forward to the day when every car part I have in a box is actually fitted to the car!
Then I just had a little time left to play outside, so I made a cardboard template to test an exhaust tip shield design.

Note:
The little "feet" at the bottom will be bent around the bottom edge of the body shell.
I wanted to make the metal surround slightly wider than the petrol cap base.

But it still sits quite nicely around the exhaust cut out in the body shell like so.
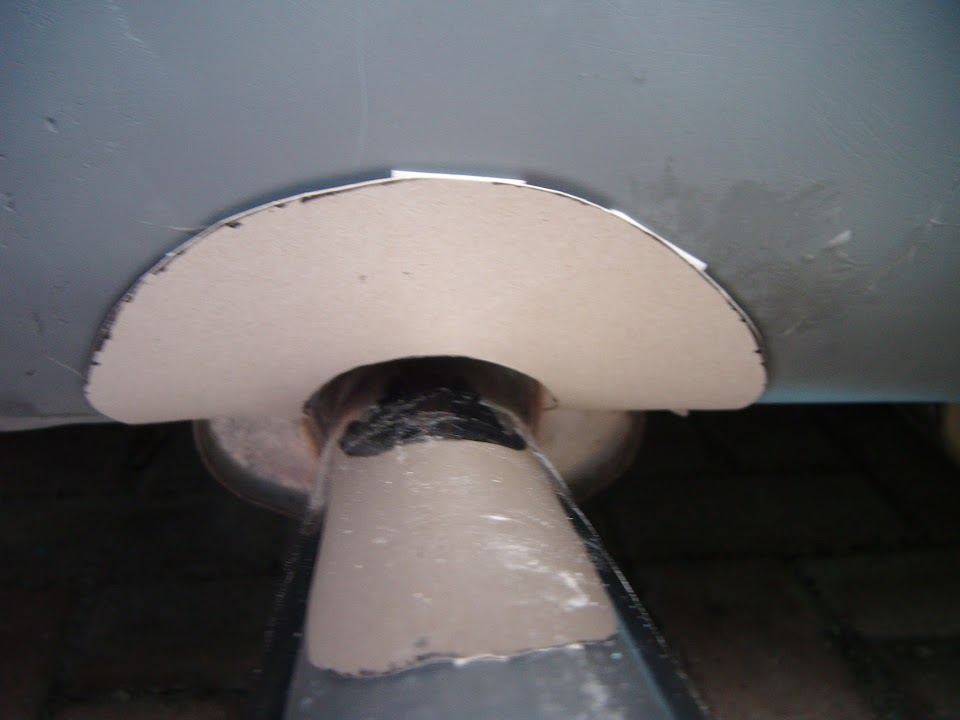
Unfortunately, a hedge prevents me taking a decent rear view photo, so this is the best I could do.

And it took so many attempts to get this photo, that the masking tape holding the cardboard in place came loose.
Now I just need the chance to cut this shape out of metal and drill a few rivet holes in it.
Anyway, I've got to go now, so until next time, take care, Paul. 

|
19th February 2015, 13:04
|
|
Senior Member
|
|
Join Date: Jun 2011
Location: birchington, kent
Posts: 1,769
|
|
can't believe you diss'd Mr T...
|
19th February 2015, 15:07
|
|
Senior Member
|
|
Join Date: Feb 2012
Location: Wembley, London
Posts: 5,056
|
|
Gary - What!?
I'd never "diss" Mr T, he has been the biggest contributor to my build thread.
Although I have to admit that I was technically "dissing" his beautiful car's ugly wiring.
Last edited by Paul L; 19th February 2015 at 15:10..
Reason: Typo
|
19th February 2015, 16:27
|
|
Senior Member
|
|
Join Date: Jul 2011
Posts: 5,328
|
|
None taken...
Actually, I have to admit my under bonnet wiring is a bit of a crow's nest fest.
Thing is, although I was taught how to construct a loom during my RAF apprenticeship, a proper loom held together with loom thread rather than sticky tape mind, and I had every intention of finishing the wiring to a high standard, there came a point in my build where I just wanted to get it on the road.
To expedite that day I did cut a few corners, with the wiring being one such angle that got severed.
One day I shall probably give my car a bit of a refurb and it shall then have a shiny new loom grafted in under the bonnet to replace the hotch-potch of random coloured bundles of electric string it's currently running with.
The nub of the matter really is time: when you're building your dream car, it's nice to use all the skills you have to the full - I for one would've liked to drill and lock-wire all the fasteners, for example - but it's also nice to get it finished and on the road before you die of old age.
Anyway, nice to see you're still plugging away Paul, I note that April will see your build reach another birthday, its third I think. No offence meant of course...
|
19th February 2015, 20:33
|
|
Senior Member
|
|
Join Date: Feb 2012
Location: Wembley, London
Posts: 5,056
|
|
Mr T - Funnily enough, my build's rapidly approaching 3rd Birthday has actually been on my mind recently.
Part of the reason I have been messing about with my wiring is that I can't tackle the big jobs I need to do to get the body shell bonded on at the moment.
However, at some point I want to draw up a list of "must haves" to get on the road vs. "nice to haves" which I can come back to later.
The truth is I just can't face another winter trying to get this car on the road.
But I'll write a proper post about this another day, cheers, Paul.
|
20th February 2015, 09:50
|
|
Senior Member
|
|
Join Date: Feb 2012
Location: Wembley, London
Posts: 5,056
|
|
In amongst the leg pulling and banter of the last few posts, there is a serious point about actually getting the car built.
This is something I have been thinking a lot about lately and, as I said, I will post some more thoughts about it another day.
The key thing for me it to keep sticking to KISS principles where ever possible.
Which ties in nicely with something I quickly managed to do this morning...
Bonnet Nose Colour:
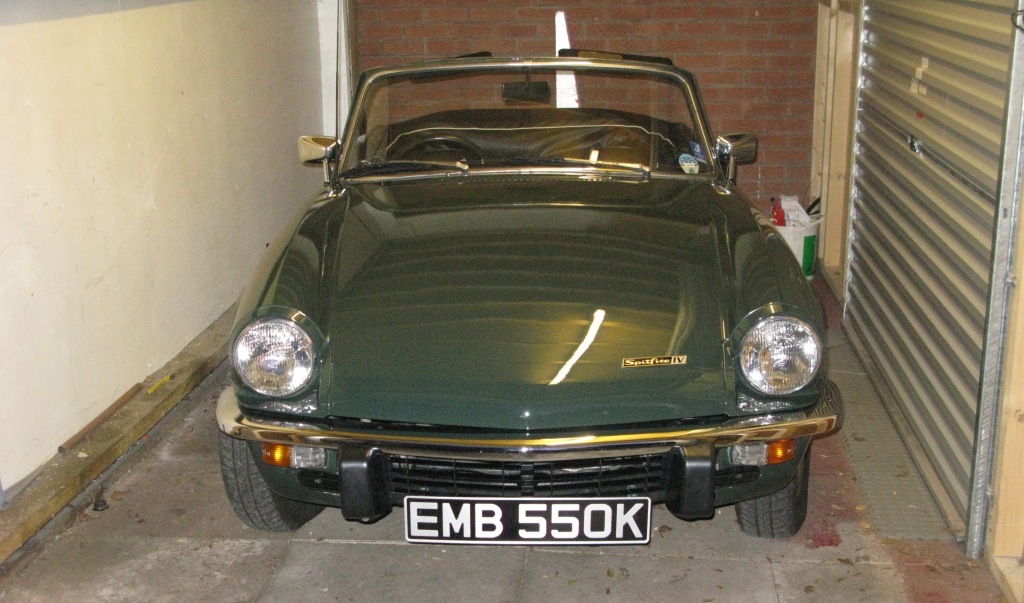
Over on Scottie's XKSS build, Mick O'Malley posted a link to this D Type replica on Ebay.
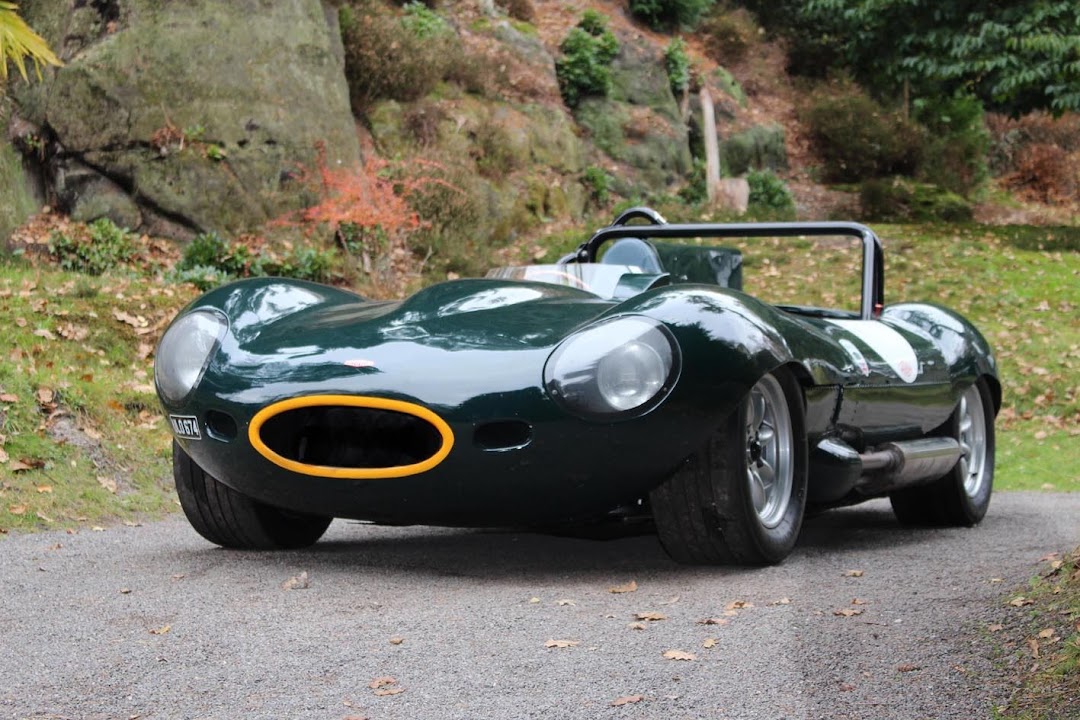
Which is another variation on my own thoughts about painting a yellow band around my bonnet nose opening.

I was also considering painting the whole grille yellow for maximum impact and in honour of the Le Mans Spitfires.

But the KISS answer is to leave the grille in bare metal and fix it into position, rather than make it removable.
That would give me a BRG bonnet, signal yellow nose band and "metal" grille.
Whilst I still think a yellow, or even BRG, grille would look better, hopefully this combination should still look OK. 
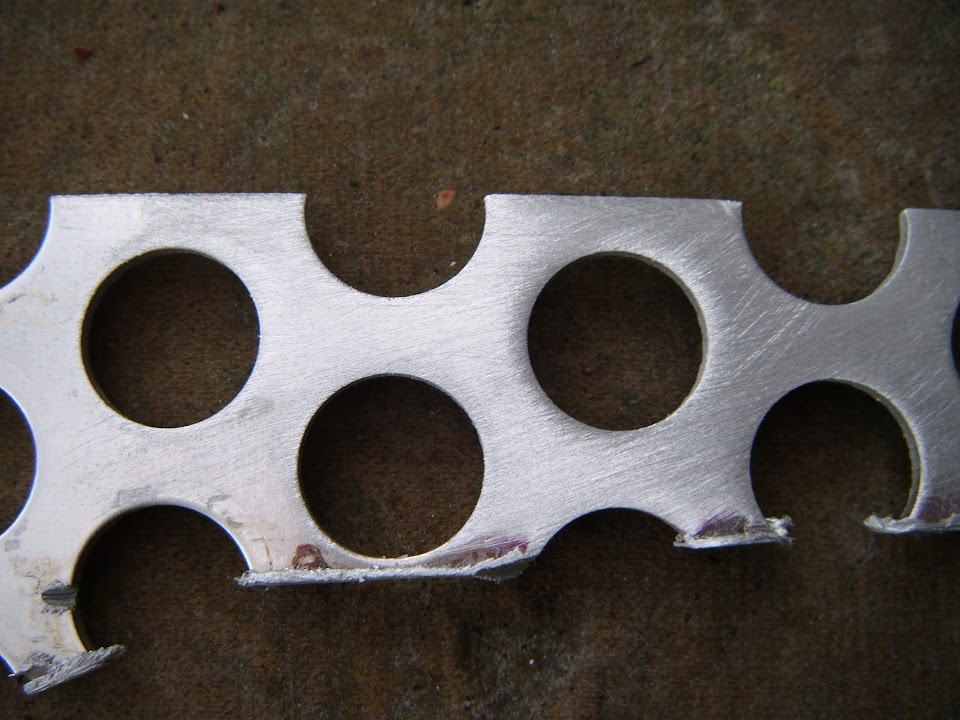
So I dug out this off cut from the sheet I cut the grille out of.

Not easy to see in this next photo, but I also roughly sanded the top surface of one small section.
( This is to represent the top surface if it gets scratched after fitting. )
I have now left this out in the open so see how it stands up to the rain.

I only wish I had thought about doing this earlier, as I could have left this section out over the whole winter.
Cheers, Paul.
|
20th February 2015, 10:17
|
|
Senior Member
|
|
Join Date: Mar 2012
Posts: 1,152
|
|
Spray it occasionally with salty water; that will make-up for a missed winter.
Bury another piece under a light coating of soil and loosely cover it with something impermeable to retain the moisture.
You'll soon get an idea of how it will look after a short while on the car.
|
20th February 2015, 12:18
|
 |
Senior Member
|
|
Join Date: Dec 2013
Posts: 839
|
|
Paul if you want a shiney steel colour then you need stainless steel if its a rusty look then mild steel will go rusty in no time you could go for ally but this will need a coating for example anodized to prevent it looking naff.
Good luck with the experiment.
Last edited by swifty; 20th February 2015 at 12:43..
|
20th February 2015, 12:31
|
 |
Senior Member
|
|
Join Date: May 2011
Location: Somerset
Posts: 1,671
|
|
Ohhh, i'm looking forward to seeing how this turns out |
20th February 2015, 15:42
|
|
Senior Member
|
|
Join Date: Feb 2012
Location: Wembley, London
Posts: 5,056
|
|
Thanks for all the replies chaps.
Unfortunately, I am still on Half Term duty, so I need to be quick...
While I was thinking about the risk of rust on an untreated "metal" grille.
Previously I didn't think too hard about what kind of metal it actually was.
So a bit of searching on Google and I have the following:
The grille is definitely not mild steel, as a magnet doesn't stick to it.
When I ran my grinder over this section, there were no sparks at all, which suggests it isn't stainless steel.

Therefore I think it is aluminium, as it is light and it was very easy to bend/break off a small section with just my fingers.
The piece I removed came off the area near the top of the grinder in the photo above so I could "plant" it in the veg. patch.

So if I have understood it right, it is oxidation I need to worry about, not rust.
Which leads me to Swifty's point about anodising which I have no experience of whatsoever.
It seems there is both a hard & semi-hard process and the possibility of adding colour, in which case black would be great.
I will look into places that do this work round here, but if anyone can give me a ball park price it would be a big help.
The grille is 74 cm at the widest point and 37 cm at the deepest point.

Cheers, Paul.
|
20th February 2015, 16:46
|
|
Senior Member
|
|
Join Date: Dec 2013
Posts: 839
|
|
Paul Can you easily cut the metal with hand snips and scratch quiet a deep line in to the surface with a scribe if so then it is ally plus the light weight is a give away, another point i can see in your photo's is the burred edge where it looks like you have used a cutting disc which happens to ally when cut with a disc plus the disc becomes clogged with the molten ally where as with stainless the disc cutting edge wears away quickly with no clogging.
Just thought i would give you my two peneth in case you have by chance bought stainless steel.
I am in the process of looking for a local company who does anodizing and so far they all charge a minimum price of £50 so it may be economical to have a few bits done for the min price.
Last edited by swifty; 20th February 2015 at 16:58..
|
21st February 2015, 18:12
|
|
Senior Member
|
|
Join Date: Feb 2012
Location: Wembley, London
Posts: 5,056
|
|
Swifty - All advice gratefully received.
I've found a couple of anodising places not too far from here and I will bring the grille along to see what they think.
Depending on the price, I think that opting for a black grille could turn out to be a key element in the look of the car.
- - - - - - - - - - - - - - - - - - - - - - - - - - - - - - - -
Reality Check:
Over the last few days I've been slowly putting together a post I was going to call "I hope I drive before I get old".
As I am rapidly heading towards my build's 3rd birthday and, to be frank, there is absolutely no end date in sight.
Part of me wants to justify the length of time it has taken me to get to the stage I am at the moment.
Another part of me would love to come up with a realistic finishing date taking into account all the outstanding jobs.
( I even had another flick through Mister Towed's build to remind myself of what lies ahead. )
However, despite typing up the major work completed & the scary amount of work still to do, I've decided not to post it after all.
I can't deny that the thought of me still chipping away at this build through a 4th Winter is seriously depressing.
But if I try to force the pace of this build, I know I will be put myself under a level of stress that I really don't need.
The good news is that the more I thought about a dead line, the more I realised I should not care about setting one.
I did no work on the car today, as I was out with my family instead, including a visit inside the Tower of London.
( We wanted to do this after seeing the poppies there last year. )

This was just the reality check I needed, as whilst this car project means a lot to me, my family means more.
I guess the recent run of wet weather has got to me a bit, making me think my building prospects are worse than they are.
As the other reality is that I have actually made significant progress this Winter and can actually see my way to the finish line.
Which has to be a good thing, because there was a time when I really didn't think I would be able to fix all the problems I faced.
So whilst there is still a lot of work to do, I now know I am technically capable of doing each and every job required.
Even though it is hard to keep motivated at times, the simple fact is that I will get this car on the road eventually if I can just keep chipping away.
So I'll end on that more up beat note, take care, Paul.
|
21st February 2015, 19:39
|
|
Senior Member
|
|
Join Date: Jan 2015
Posts: 168
|
|
Keep up the good work Paul.............
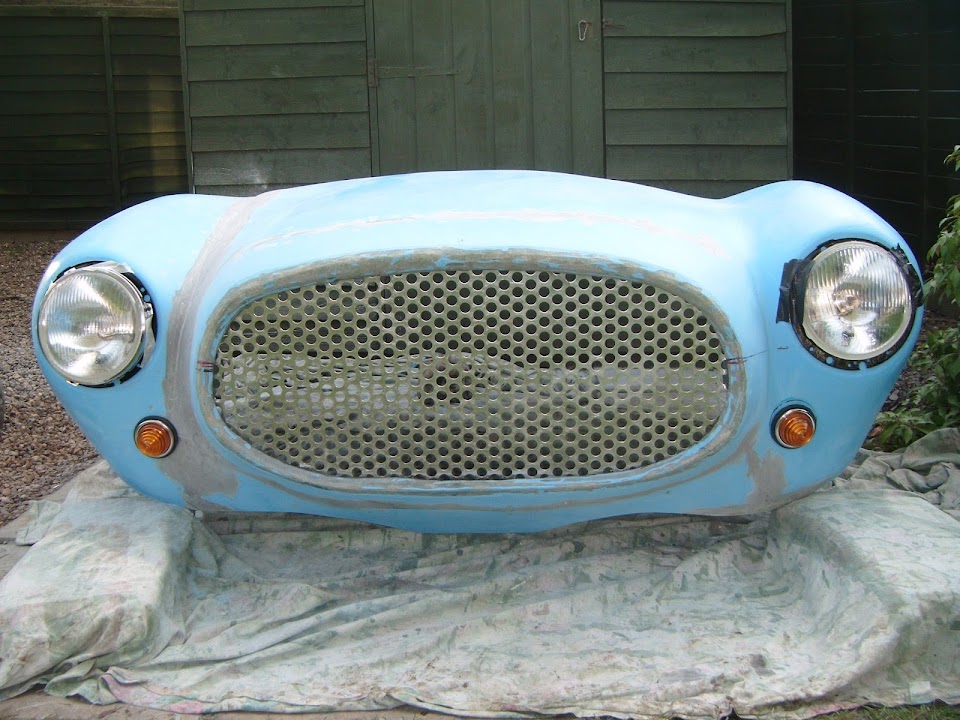
About the grill,seeing it i am afraid there is not enough airflow tru the grill for cooling.
Percentwise i'll guess there is only 35-40% of the surface cut away with the holes.
In the past i used to race 50cc motorbikes which i build myself,one time i build one with the radiator in front of the fairing using as a guard ally sheet drilled with 10mm holes very close together,later i was forced to use wire mesh to solve cooling problems.
Take a piece of left-over material,tape it at the end of a plastic 4inch pipe an tape some strips of light paper on it,then blow with a hairdryer into the pipe to see the airflow.
After doing this do the same with some wire mesh and spot the difference..........
.............or not.........your car............ 
René |
21st February 2015, 22:01
|
|
Senior Member
|
|
Join Date: Feb 2012
Location: Wembley, London
Posts: 5,056
|
|
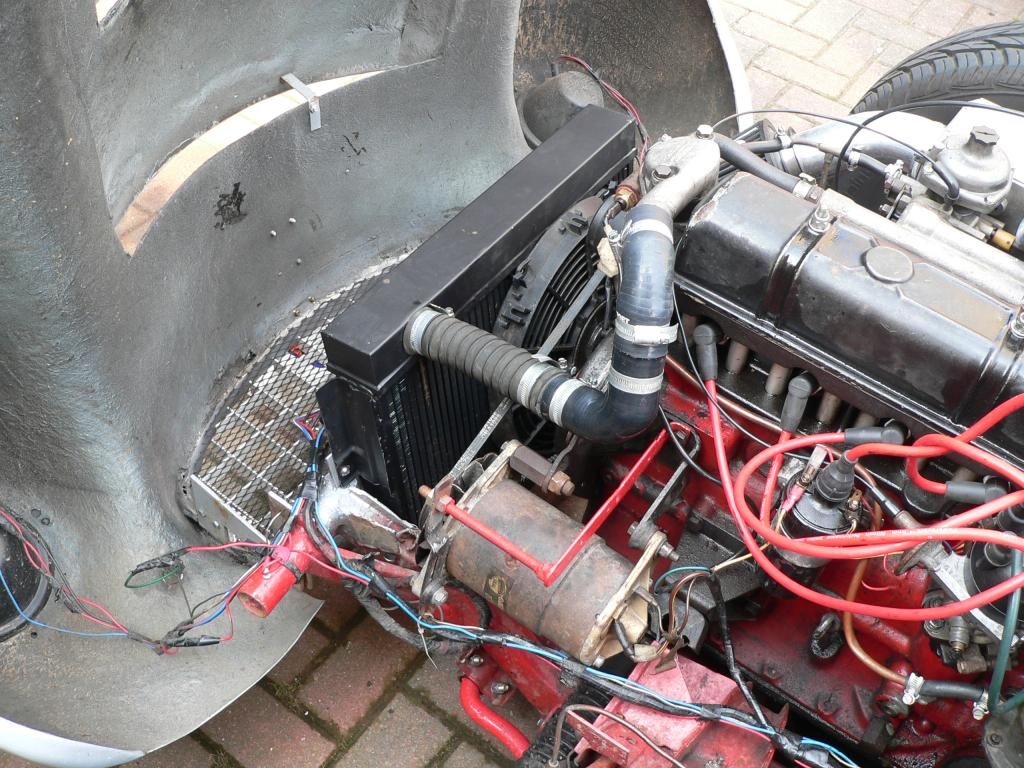
Rene - Welcome to my build thread and feedback is always helpful.
I'm off to bed now, but I've just done a little bit of digging around for some photos.
The original bonnet grille from my donor Spitfire 1500 is at the bottom of this photo.

This vent was usually covered by the front number plate.
( Sorry I don't have a photo from my donor that I can use. )

So I really hope that the "holes" in this grille will provide at least a match, if not more air flow.
I will also be fitting a wider radiator than standard too.

I am certainly not an expert, so I'd rather know if I was making a mistake now.
Especially if I am going to spend some money to get the grille anodised.
Cheers, Paul.
|
21st February 2015, 22:04
|
|
Senior Member
|
|
Join Date: May 2013
Posts: 2,161
|
|
Hi Paul, I've been so busy lately on my own build, I have not read up a lot on your's!
I agree with Reneanglia about the airflow, before I made that grill in my VW front panel, I did a lot of research on grilles and stuff, and it is surprising what one finds out.
Good companies selling different grille material will advertise the amount of gap/solid and give a percentage airflow figure. If they can't, they are not professional enough, and you could have overheating problems.
I personally would not use what you intend to, for those reasons. I would go for a good stainless woven mesh, and that way you will have no trouble with airflow or metal denegration. Check it out online.
|
21st February 2015, 22:09
|
|
Senior Member
|
|
Join Date: Jan 2015
Posts: 168
|
|
Paul a bigger rad needs also cool air..........
If you take measurements of the stock grille open area and the open area of your grille i think you will be in for a surprise...........
Ofcourse i could be wrong but if i was you i want to be sure before spending money on it.
Oops,scottie beat me................must typ quicker
Last edited by reneanglia; 21st February 2015 at 22:11..
|
22nd February 2015, 06:41
|
|
Senior Member
|
|
Join Date: Feb 2012
Location: Wembley, London
Posts: 5,056
|
|
Scottie & Rene - Thanks again for the feedback, as this is all new to me.
I've done a quick bit of research this morning, but still have a bit more to do.
Although my daughters have their friends coming round for an end of half term treat later today.
So my first priority is some domestic chores to prepare the house for that.
But if I only get one "car" chore done today, it will be work out the number of the holes in the grille!
Then I can do some maths to work out the "open" area & draw that as a simple rectangle.
Then I can compare that rectangle to the area of the original Spitfire opening.
From what I have read this morning, it seems that people lower the number plate to improve air flow.
But that still looks like a small opening by comparison to the gaping hole in my bonnet.
Which is why I need to calculate how much of my grille is actually open.
As clearly my eyes are playing tricks on me if I don't take account of the solid part of the grille.
Building some "deflector boards" has always been on my "To Do" list, as my donor didn't have any.
( These are also recommended as a good way of keeping the engine cool. )
Other tips were switching from a mechanical fan to an electric one.
( Which is something many builders on here have done. )
Some people have also fitted oil coolers to their 1500 engines.
So clearly I need to do some more thinking, or simply admit defeat and change the grille.
Cheers, Paul.
|
22nd February 2015, 06:56
|
|
Senior Member
|
|
Join Date: Jul 2011
Posts: 5,328
|
|
|
22nd February 2015, 07:10
|
|
Senior Member
|
|
Join Date: Dec 2013
Location: Sunny Cumbria
Posts: 470
|
|
Paul, it isn't simply the cross sectional area of the holes.
Aerodynamics come into this, the large relative area of the plate will act as a dam, when the flow of the air ahead of the car hits what it sees as a plate with holes in it, the air will be compressed and spread sideways looking for the easiest way out, that will be sideways in this case. Some air will find it's way through the holes but not proportional to the cross sectional area of the holes because of the laminar and shear effect of the airflow. What you need is to do is either enlarge the holes until they are much greater than the area of the plate, taper and radius the edges of the holes to provide an easy 'slippery' entry, or revert to an alternative design. Think of the trumpets on Amal Carb...

You have to make it inviting for the air to pass through the grill, that usually means round wire or edge on slats (egg box grill?). Bulldozers do have grills similar to your design but they have massive fans to cool the engine and quite large holes, like inch?.
|
|
Currently Active Users Viewing This Thread: 5 (0 members and 5 guests)
|
|
|
 Posting Rules
|
You may not post new threads
You may not post replies
You may not post attachments
You may not edit your posts
HTML code is Off
|
|
|
All times are GMT +0. The time now is 10:20.
|


 Linear Mode

