|
|
| Vintage and Classic Roadster Kit Car Builds For Vintage and Classic era kit cars. Post your build reports, problems and progress here |

25th April 2017, 21:53
|
 |
Senior Member
|
|
Join Date: May 2009
Location: POOLE , DORSET
Posts: 2,200
|
|
That'll be Steve then ...I use him as well ...
|
26th April 2017, 06:39
|
|
Senior Member
|
|
Join Date: Nov 2012
Posts: 845
|
|
 Radius Arms
Quote:
Originally Posted by lancelot link

That'll be Steve then ...I use him as well ...
|
Correctamundo! He supplied the engines, gearboxes and lots of other bits for both my Marlin Roadster and A352. Top bloke!
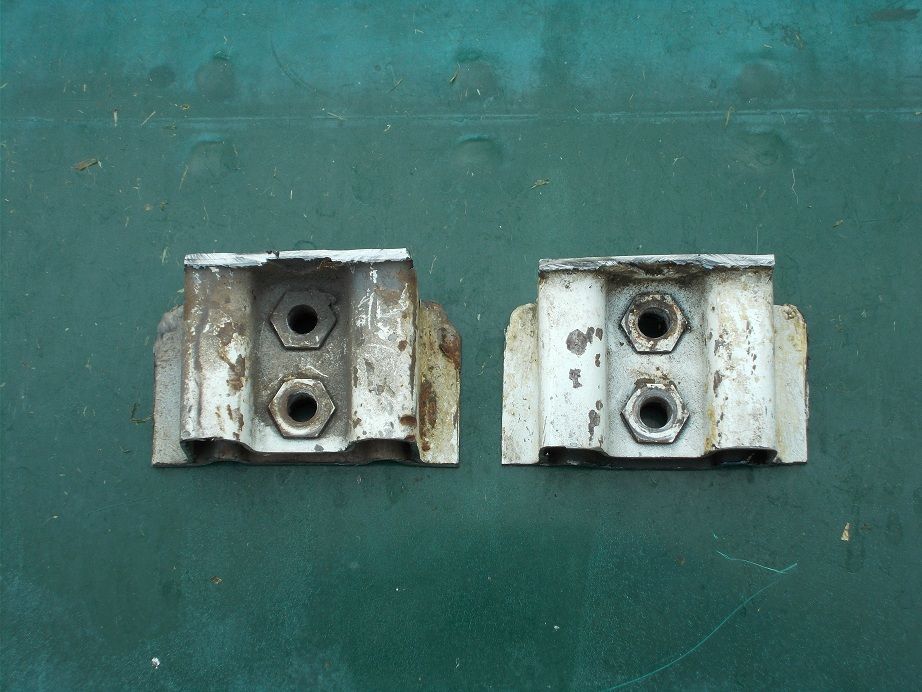
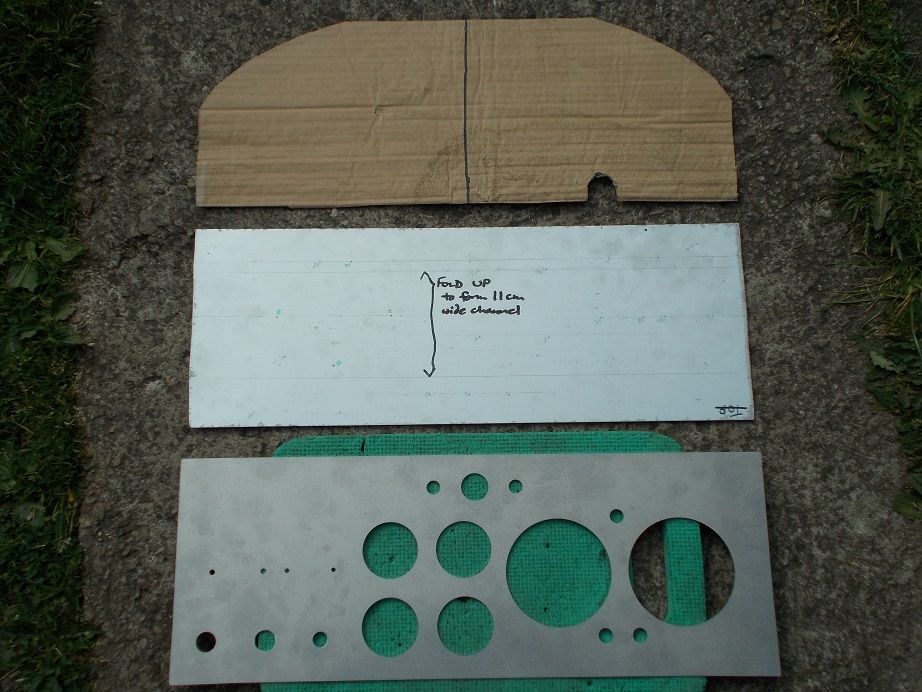
Monday and yesterday I tackled how I'm going to locate the forward ends of the radius arms. I originally intended to extend them forward to the centre outriggers as Micky1Mo did. However, these items popped up on Ebay so I bought them to see if they could be somehow adapted.
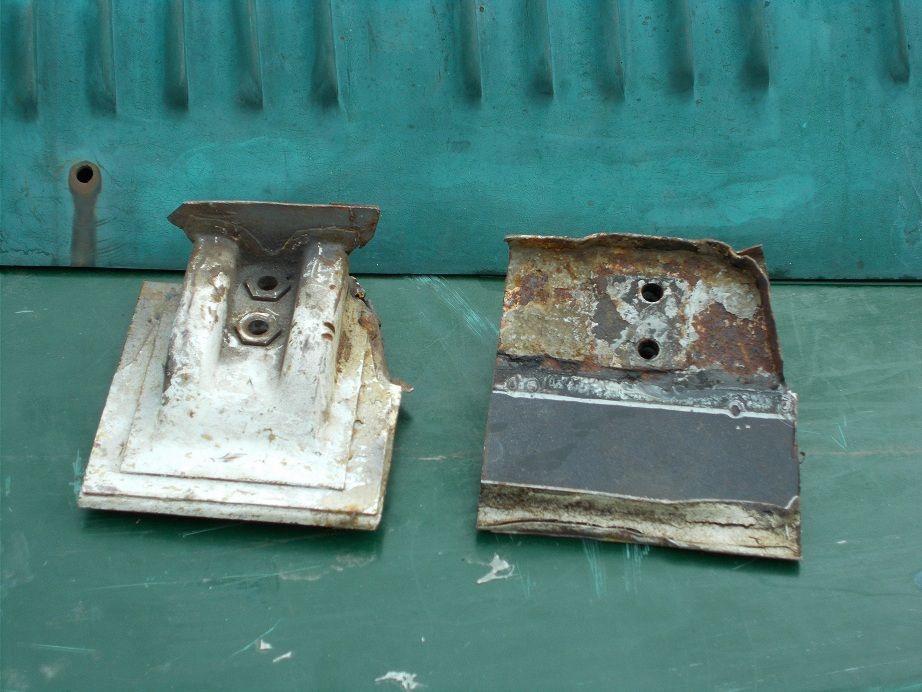
After a bit of head scratching I decided that adaption was possible and cut them down ready for base plates to be welded on. These will be bolted through the wood and GRP floor with a steel sandwich plate inside to minimise the possibility of their working the holes.
I made a cardboard template of the mounting plate - the triangular ears will be folded up before welding to provide resistance to the twisting moment. I might supplement this with a metal strap leading forward - belt and braces!
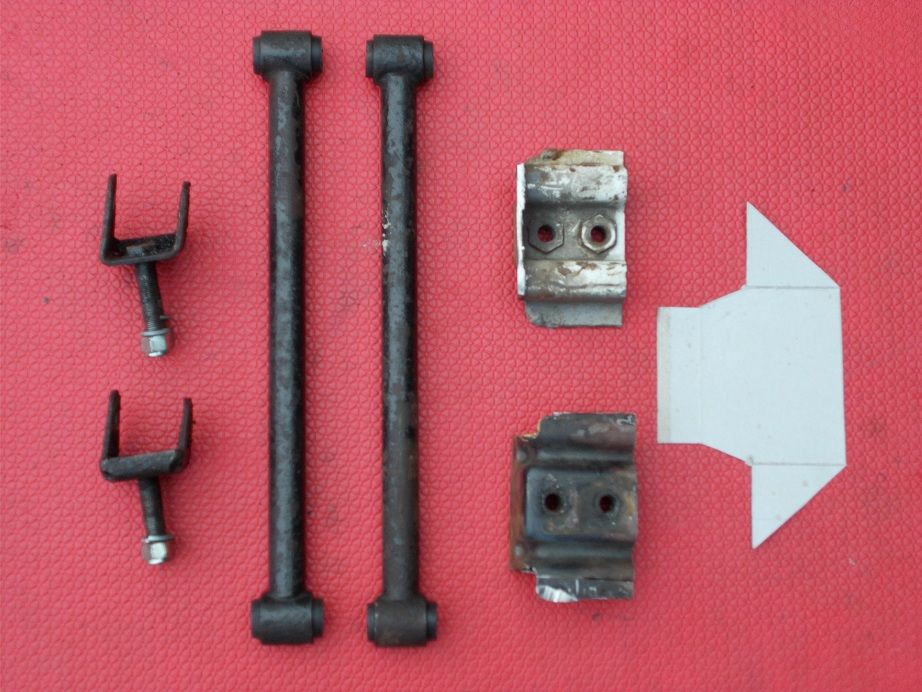
I dug out the radius arms and set to with replacing what looked like the original bushes. The bolts through the mounting brackets had to be cut out as they were rusted solid into the bush sleeves. I drove the old bushes out and the new ones in using the vice, bolt and socket method, after cleaning their housings with emery cloth and using plenty of dismantling fluid before assembly.
That was it for Tuesday. Once my demon welder 'phones to let me know my tank's ready I can whiz over and raid his skip for suitable bits of scrap for the above. Happy Days!
Regards, Mick

|
26th April 2017, 15:58
|
|
Senior Member
|
|
Join Date: Nov 2012
Posts: 845
|
|
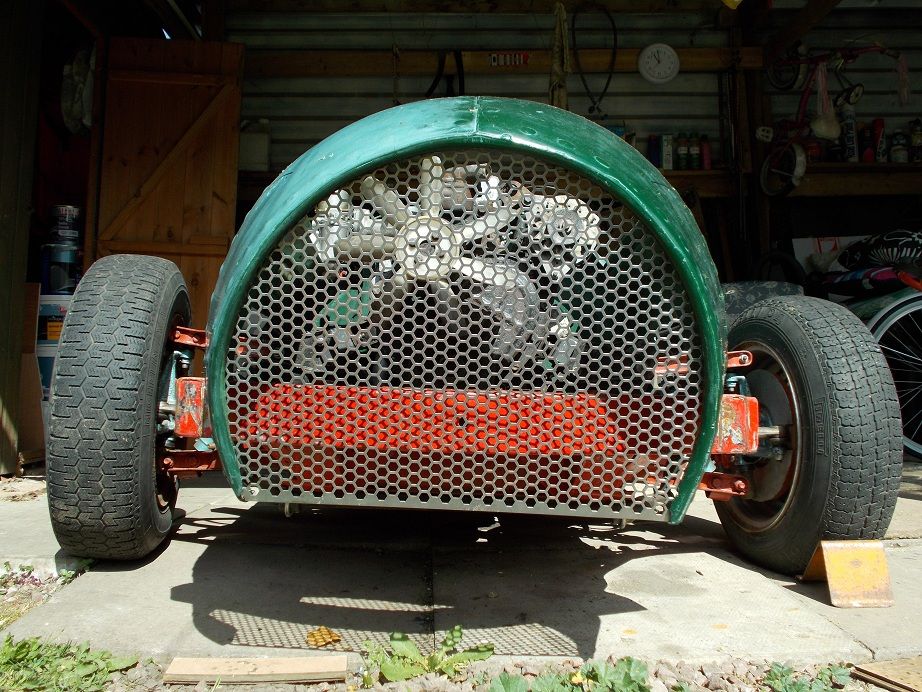
 Grille Manufacture
Today I had other tasks to complete, so there was only a small time window for the Monaco. I decided to cut the grille out of the 50cm square sheet of mesh I bought what seems an age ago!
Using the trusted cardboard assisted design method I fashioned a template which only needed a couple of small adjustments before it sat perfectly in the nose. I lay the mesh over it and marked the snip line with a black felt tip pen, including three flanges which may assist fixing.
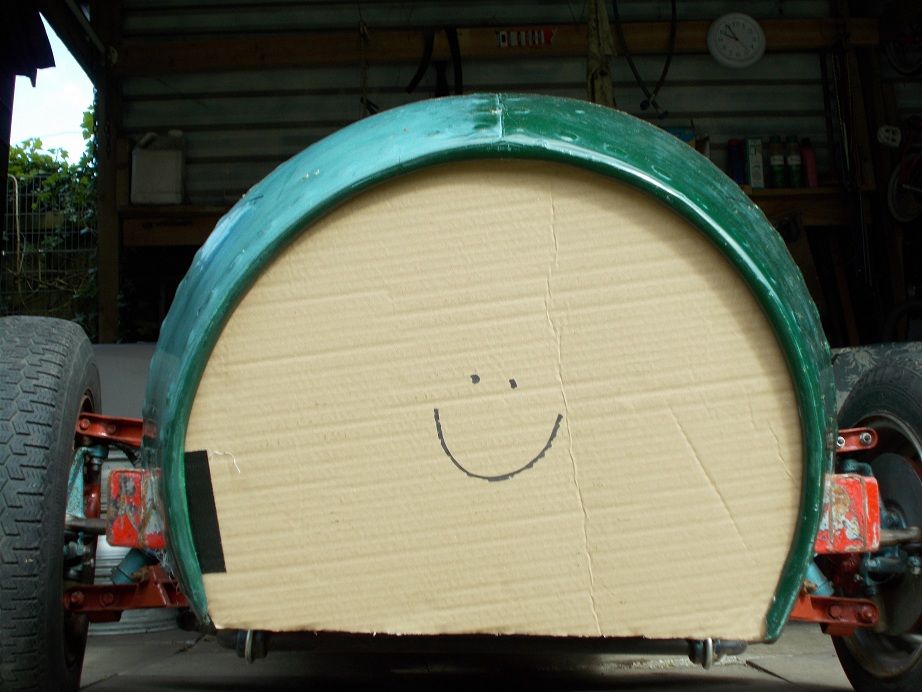
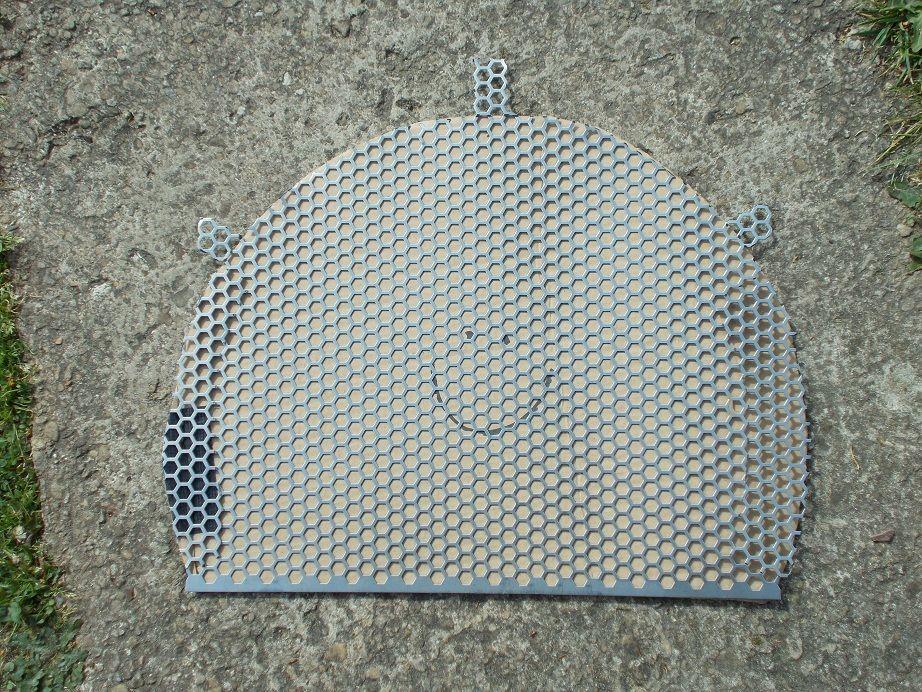
Ten minutes with my Machine Mart aircraft quality left hand curve tin snips had the job done. It sat in place under its own weight exactly. It's now hanging in the corner of the shed awaiting the distant day it'll be sprayed black and fitted.
Regards, Mick
|
28th April 2017, 16:47
|
 |
Senior Member
|
|
Join Date: Feb 2012
Location: Wembley, London
Posts: 5,058
|
|
Mick - Great progress as always. 
Daft as it sounds, but the smiley face on the cardboard grille brought a smile to my own face. 
Good luck, Paul. 
|
29th April 2017, 07:34
|
|
Senior Member
|
|
Join Date: Nov 2012
Posts: 845
|
|
Quote:
Originally Posted by Paul L
Mick Daft as it sounds, but the smiley face on the cardboard grille brought a smile to my own face.
|
Growing old is unavoidable, growing up, however......................
Regards, Mick |
29th April 2017, 18:25
|
 |
Senior Member
|
|
Join Date: Jan 2014
Location: Egham, Surrey
Posts: 1,780
|
|
So that's where Mr Towed's bonnet bulge went!
|
30th April 2017, 06:56
|
|
Senior Member
|
|
Join Date: Nov 2012
Posts: 845
|
|
 Another French Monaco
The other day I received a Facebook message from a fellow member of the Moss group to tell me her husband has built her a Monaco. I sent her a link to this thread and this morning she sent me a picture of her 'Premiers tours de roue ce matin...'.
Trés cool!
Regards, Mick
|
30th April 2017, 09:43
|
|
Senior Member
|
|
Join Date: May 2009
Location: POOLE , DORSET
Posts: 2,200
|
|
looks like a nicely finished example ...
I was asked to price up restoring one of these years ago ...a guy up near Calne , from memory ....I suspect , there is a few sat around unloved ..I really like the old open wheeled GP style cars ......shame thats not a few more about really ...
|
4th May 2017, 10:08
|
|
Senior Member
|
|
Join Date: Nov 2012
Posts: 845
|
|
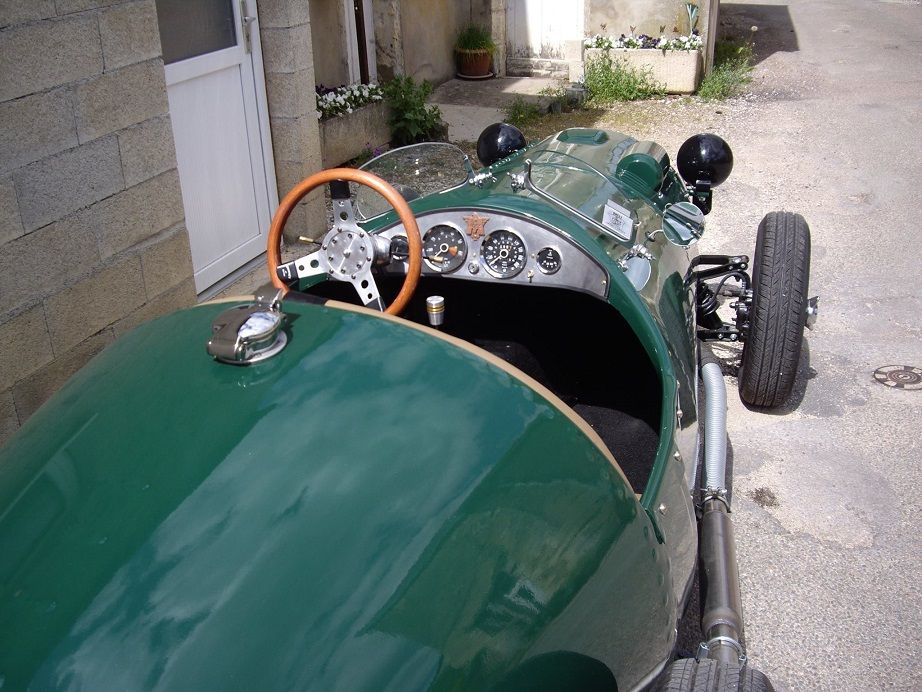
Column-Dash-Screen
Life got in the way of the build for a few days but yesterday I managed a couple of hours play
I decided to address the problem of the top steering column mounting which I knew would impact on the position of the dash. My first job was to suspend the column from a roof beam of the cave with paracord, having manoeuvred the car into a suitable position. I'd tried wedging it from below but this made sitting in too difficult. Once I was happy that it sat perfectly, I made a rough cardboard screen as the top edge of my ally dash will need to be trimmed to match it. This I cut down whilst sitting in to ensure a decent sight line for driving.
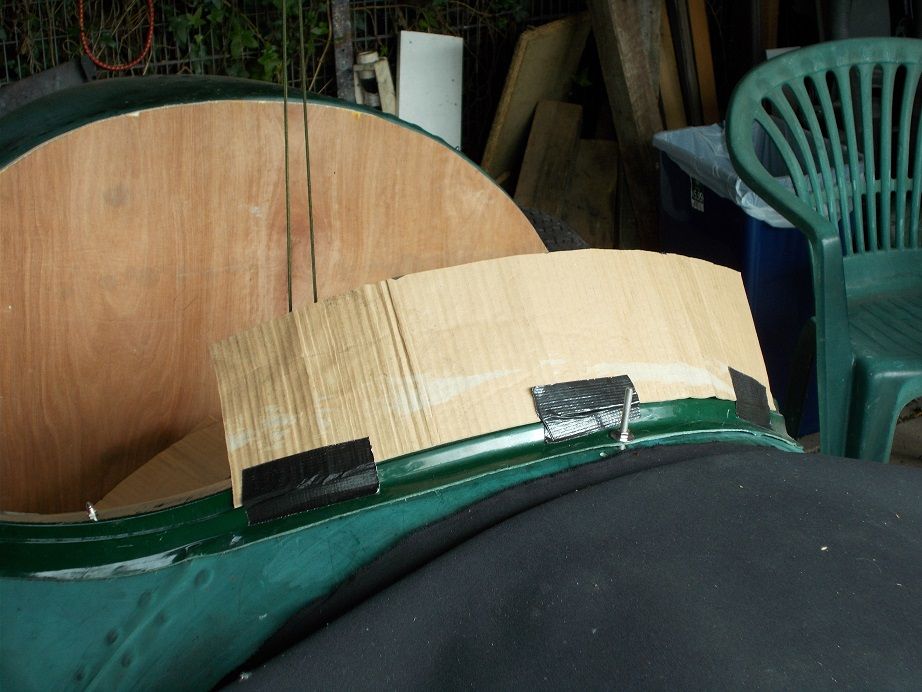
I then made a cardboard dash blank and marked and cut out the area which mates with the column. After a bit of jiggling and snipping I was able to get it into a semblance of its final position. When the real thing is fitted the back of the dash, which I will set out a little, will be visible through the screen. Tidy wiring will be essential!
The outer column has a handy welded on bracket at right angles, i.e. across the footwell, with two mounting holes. Pondering how to attach it, and discarding the idea of a full car width bar, I hit on the idea of a scuttle brace, as in the donor. By joining the bottom of the dash to the tunnel, and supporting the LH end of the column brace, which will run to the RH skin, it will provide the necessary rigidity. Scratching around in my metal pile I found an early 3mm thick dash blank which, when adapted, will be perfect. It will be a broad U section with ears each side of the very sturdy Monaco transmission tunnel (which has been manufactured strong enough to take both the handbrake and remote gear levers). I bend thinner ally and narrow strips myself but making a tidy 'in full view' job of this I baulked at. My welding friend has an hydraulic folder (he did the A352 tunnel for me) so I marked it out ready for taking to him when I collect the modified fuel tank. Once it's been formed I can cut the bottom to sit astride the tunnel and the top to underlap the dash slightly.
That was it for the day
Regards, Mick
Last edited by Mick O'Malley; 4th May 2017 at 10:11..
|
11th May 2017, 06:23
|
|
Senior Member
|
|
Join Date: Nov 2012
Posts: 845
|
|
 Last tank lap, hopefully.
On Tuesday I'd whizzed over to my welder friend's place and collected my modified tank. Whilst there I successfully raided his scrap metal skip for the flat steel I need for my radius arm mountings.
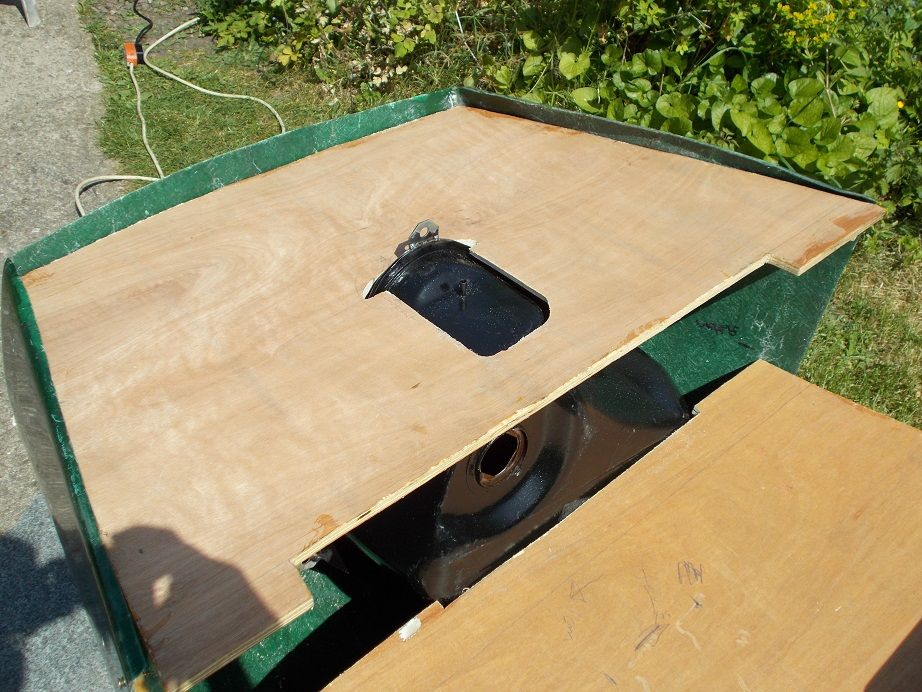
Yesterday provided an opportunity to offer up the tank, having first glassed over the wrong side of my first, very ugly, filler neck hole. After a bit of jiggling I discovered it didn't sit quite right, the reason being that one of the tank's many bulges had been sitting in that hole. Aargh! The solution will be dressing said bulge with a block of wood and a lump hammer.
The floor sat over it in a satisfactory manner with the lower of the two new lugs ready for its locating bracket. I know it looks to be very low and vulnerable but it's in fact masked by the diff. in situ. Today's task will be rivetting the floor's locating straps to the body, prior to fashioning and fitting the tank's upper locating brackets. I'd had to relieve the other floor section as well to get a snug fit. This part of the build has been a little tedious and time consuming but, once it's completed, the body will be ready for mounting onto the chassis, which will first need some handbrake and brake line related fettling. Happy Days!
Regards, Mick
|
12th May 2017, 06:49
|
|
Senior Member
|
|
Join Date: Nov 2012
Posts: 845
|
|
 Last tank lap, hopefully, part II
Yesterday, between showers, I finally managed to get my tank floor supports rivetted to the body sides. To make sure they were plane I fitted the rear one first, next the two front ones, drilled their M8 bolt holes in the floor and temporarily fitted same. I could then accurately mark the correct positions of the other two. After attaching them another temporary floor fitting gave me the last two M8 hole locations. It was very satisfying when all five bolts dropped through the floor into their respective brackets under gravity, my anally retentive approach vindicated!

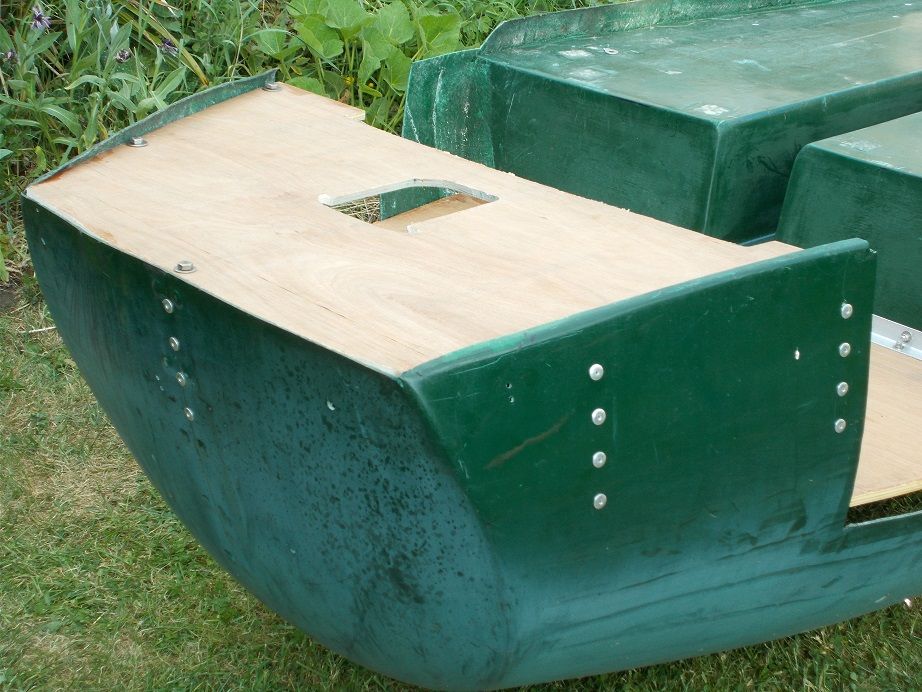
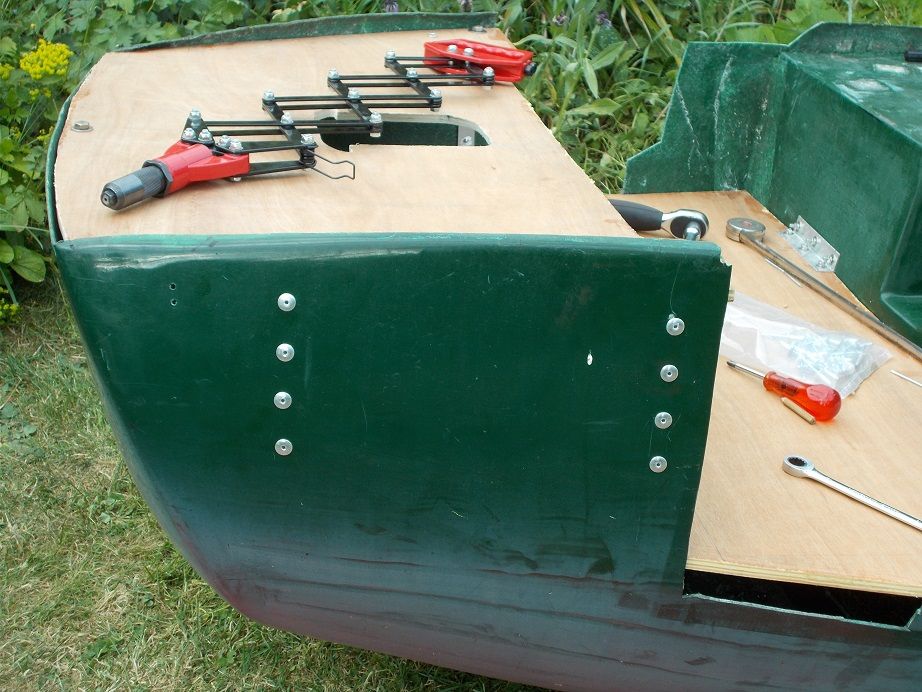
Looking afresh at that last picture shows just how pissed the body is, possibly partly from being shunted from pillar to post for three decades. I tell myself it's all part of its retro charm  . A bit of caulking is going to be needed along the edges, especially the rear one. . A bit of caulking is going to be needed along the edges, especially the rear one.
I'm pleased with the look of the big head rivets, they passably match the moulded in 'Dreadnought' ones. I think more of them will be pressed into service when body fitting time comes around . The lazy tongs rivet gun certainly made things easy, a sound investment.
Regards, Mick
Last edited by Mick O'Malley; 14th May 2017 at 06:56..
|
13th May 2017, 16:35
|
|
Senior Member
|
|
Join Date: Feb 2012
Location: Wembley, London
Posts: 5,058
|
|
Mick - I think the big rivets suit the car & I love the look of your extendable rivet tool.
I think I could use "Retro Charm" to describe quite a few areas of my build too. 
Good luck, Paul.
|
16th July 2017, 16:46
|
|
Senior Member
|
|
Join Date: Apr 2014
Location: Birmingham, UK
Posts: 545
|
|
for flikr you click on the 'share arrow' near the image and then I select the 'BB code' - copy that and paste into here - seems to work fine for me
 1-screengrab 1-screengrab by paul ward, on Flickr
Last edited by Car photographer; 16th July 2017 at 16:56..
|
16th July 2017, 17:04
|
|
Senior Member
|
|
Join Date: Nov 2012
Posts: 845
|
|
Quote:
|
Originally Posted by Car photographer
|
I can't find a screen like that one, must be doing something wrong?
Regards, Mick
Nope, nothing like that available. Bizarre!
Last edited by Mick O'Malley; 16th July 2017 at 17:11..
|
16th July 2017, 16:57
|
|
Senior Member
|
|
Join Date: Apr 2014
Location: Birmingham, UK
Posts: 545
|
|
click on the image itself first - and it should open up the page with that as an option
it's not letting me share it but I'm presuming that's because it's not my image (could be wrong though)
|
16th July 2017, 17:19
|
|
Senior Member
|
|
Join Date: Nov 2012
Posts: 845
|
|
Quote:
Originally Posted by Car photographer
click on the image itself first - and it should open up the page with that as an option
it's not letting me share it but I'm presuming that's because it's not my image (could be wrong though)
|
I've found the hoops they need me to jump through, at last. Pictures now in original post.
Many thanks!
Regards, Mick
|
16th July 2017, 18:00
|
|
Senior Member
|
|
Join Date: Apr 2014
Location: Birmingham, UK
Posts: 545
|
|
cool
|
10th September 2017, 08:52
|
|
Senior Member
|
|
Join Date: Jan 2014
Location: Egham, Surrey
Posts: 1,780
|
|
Any updates on the Moss?
|
11th September 2017, 07:21
|
|
Senior Member
|
|
Join Date: Nov 2012
Posts: 845
|
|
Not a lot............
Quote:
Originally Posted by Jaguartvr
Any updates on the Moss?
|
Not a huge deal of progress made over the summer months. There was a long wait for my latest batch of welding jobs to be done by my contact of almost 40 years as he has had staffing problems at a very busy time: his real work takes precedence! I've been driving the A352 'D' quite a bit and have had a holiday so the months seem to have flown by.
Anyway, at last my extended gear change remote, hand brake lever mounting plate and multiplier lever mounting bracket are ready for installation. I've now realised that final bolting of the body to the chassis will be almost the last job of all as being able to pop it off facilitates so many of the building tasks.
I've run the battery cables from the 'boot', through the transmission tunnel, to the starter solenoid and cranking motor mounting bolt respectively, with an isolation switch in the +ve. Working out how to crimp the terminal eyes caused a bit of head scratching until I hit on using my water pump pliers with inch box over the arms to multiply the effort. This worked a treat .
Careful measuring of the limited space for the handbrake effort multiplier lever showed that it could be used, slightly modified, as the manufacturer intended, rather than by my previous idea. The problem of shortening the primary cable was overcome by substituting a length of angle cut from some scrap box section. I've angled the mounting hole in the top of the tunnel to align said rod with the business end of the multiplier lever. As soon as a dry day comes I'll bolt the handbrake bits and gear lever in position with the body off. End of part one.
|
|
Currently Active Users Viewing This Thread: 349 (0 members and 349 guests)
|
|
|
 Posting Rules
|
You may not post new threads
You may not post replies
You may not post attachments
You may not edit your posts
HTML code is Off
|
|
|
All times are GMT +0. The time now is 07:04.
|


 Hybrid Mode
